Como usar o pacote de gelo seco em segurança em 2025?
Se você precisar de desempenho congelado sem energia, learning Como usar o pacote de gelo seco the right way is the fastest win. O gelo seco fica a -78,5°C (−109,3°F), tão desabafando, dimensionamento correto (≈5–10 lb/24h), e o manuseio seguro transformam as suposições em uma rotina de 24 a 72 horas. Aqui está um manual testado em campo que você pode aplicar hoje mesmo, em casa, em trânsito, ou no trabalho.
-
How to use dry ice pack in coolers for 24–72 h without temperature abuse.
-
Como usar bolsa de gelo seco em voos (2.5 Limite de passageiros de kg/5,5 lb, ventilação, marcação).
-
Como usar bolsa de gelo seco para comércio eletrônico e laboratórios (UN1845, AQUI ESTÁ PI954, marcas de massa líquida).
-
Dimensionando segredos: quanto comprar, onde colocá-lo, blocos vs pelotas.
-
Pacotes híbridos: usando gel/PCM e isolamento VIP para reduzir risco e peso.
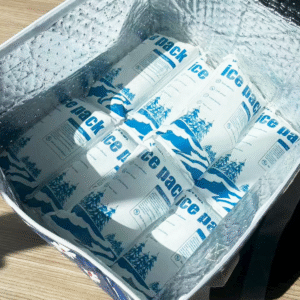
Como usar bolsa de gelo seco em um refrigerador por 24 a 72 horas?
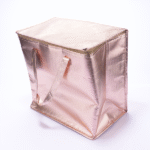
Resposta principal: Coloque blocos embrulhados sobre uma barreira no topo, embalar bem, and vent—then verify at ≤40 °F (refrigerado) or ≤0 °F (congelado). This arrangement exploits sinking cold air for the longest hold while protecting liners and products. Start with 5–10 lb per 24 h and add 25% in high heat or frequent openings.
Por que isso funciona para você: Dry ice sublimates to CO₂ gas that sinks. Top placement bathes contents in colder air, barriers prevent “freezer burn,” and pre‑chilling the cooler avoids “wasting” pounds on cooling the container itself. Use hard, dry‑ice‑approved coolers; most soft coolers aren’t rated. Keep containers vented—never airtight.
Principais vs.. bottom vs. side—how to use dry ice pack layouts
Details you can apply:
-
Pacote superior (best hold): Barrier → wrapped blocks → lid.
-
Pacote inferior (more access): Barrier → wrapped blocks → barrier → items.
-
Side‑pack (two zones): Blocks along a wall to separate “frozen” and “drinks.”
Pre‑chill contents (“sacrificial ice” works), use blocks as base load, and fill voids to limit warm air pockets.
| Cooler Layout | Quando usar | What to prepare | O que isso significa para você |
|---|---|---|---|
| Pacote superior | Maior espera | Cardboard/rack + wrapped blocks | Max run time with fewer pounds |
| Pacote inferior | Acesso frequente | Two barriers + wrapped blocks | Easy grabs; slightly shorter hold |
| Side‑pack | Cargas mistas | Spacer panel + blocks on side | Zona congelada + chilled zone |
Practical tips that save hours of cold
-
Pré -Chill the cooler and items to stop early melt.
-
Wrap blocks in paper to slow loss and protect liners.
-
Vent smart: crack a drain/vent path; nunca hermeticamente.
-
Monitor with a probe thermometer on arrival.
Caso real: A pre‑chilled 65 qt cooler with ~40 lb of wrapped blocks maintained frozen temps for ~48 h in >90 °F ambient with limited openings. Results vary by cooler and handling.
Como usar bolsa de gelo seco em voos (what rules apply)?
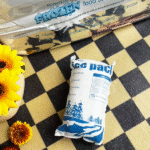
Resposta direta: You may carry up to 2.5 kg (5.5 Libra) por passageiro com aprovação da companhia aérea, em um ventilado package marked “Dry ice/Carbon dioxide, sólido,” showing net quantity. This applies to carry‑on and checked baggage; nunca use recipientes herméticos.
Pro checklist (5‑step pass at the counter):
-
Confirm airline approval.
-
Use a vented hard cooler/shipper.
-
Marca Gelo seco e peso líquido.
-
Keep documents handy.
-
Pair small dry ice with gel packs to bridge delays.
How much do you need—and how to use dry ice pack sizing math?
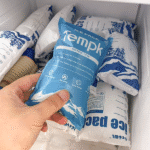
Regra rápida: Plano 5–10lb por 24h in quality hard coolers; scale for size, aquecer, e aberturas de tampa. Use blocks (perda mais lenta) as your base; pellets preenchem lacunas.
| Mais frio (Qt) | ~ 24h | ~ 48h | ~ 72h | O que isso significa |
|---|---|---|---|---|
| 25–35 | 10–15lb | 18–25lb | 28–35 lb | Fim de semana a dois; aberturas mínimas |
| 45–65 | 15–25lb | 25–40 libras | 38–55 lb | Viagens em família; +25% no calor |
| 75–110 | 25–40 libras | 40–65 lb | 60–90 lb | Long hauls; aberto raramente |
| Comece aqui, then adjust to your cooler, ambiente, and access needs. |
How to use dry ice pack with gel or PCM (embalagens híbridas)?
Melhores práticas: Stack the cold like layers: dry ice on top for deep‑freeze, −21 °C PCM mid‑layer hugging sensitive items, and 0 °C gel where you need frequent access. This cushions door‑open spikes and trims total pounds. VIP insulation further reduces refrigerant mass with longer time‑in‑range.
When hybrids shine (use these patterns)
-
Last‑mile with frequent openings: Dry ice up top + −21 °C PCM bubble + gel near the lid.
-
Flights limited to 2.5 kg dry ice: Add gel/PCM to cover the last leg after sublimation.
-
Products that must not freeze: Ignorar gelo seco; use tuned PCM/gel for 2–8 °C only.
What safety rules matter most when you use a dry ice pack?
Non‑negotiables:
-
Ventilação: nunca hermeticamente; pressure and CO₂ can build.
-
EPI: luvas isoladas + Proteção para os olhos; nitrile alone isn’t enough.
-
Segurança alimentar: verify ≤40 °F (refrigerado) and ≤0 °F (congelado) na chegada.
-
Disposição: let remaining dry ice sublimate in a ventilated area.
-
Exposição co₂: know limits (Twa 5.000ppm; STEL 30.000ppm).
Hands‑on “ready check” (score yourself)
-
Vented container ready?
-
Sized at 5–10 lb/24 h (+heat factor)?
-
PPE packed (luvas/proteção para os olhos)?
-
Flight markings/2.5 kg confirmed (if flying)?
-
Probe thermometer for arrival check?
5/5 = ready; 3–4/5 = review SOP; ≤2/5 = fix before you go.
2025 trends shaping how to use dry ice pack
O que há de novo este ano: CO₂ supply security is evolving as carbon‑capture projects scale; Northern Lights injected its first CO₂ and targets capacity growth by 2028. VIP shippers and tuned PCMs keep improving, meaning less refrigerant for the same run time. Plan ahead for seasonal tightness and secure supply early for holidays/heat waves.
Último progresso em um olhar
-
CCS goes live: Early European storage adds resilience to regional CO₂ networks.
-
Vigilância de abastecimento: Expect pockets of tightness; procurement timing matters.
-
Embalagem mais inteligente: VIP + PCM lets you use smaller dry‑ice loads with equal outcomes.
Insight de mercado: If your SLA is strict, design with a PCM backup and log temperatures; it reduces excursion risk and refrigerant spend.
Perguntas frequentes
Q1: Can I put a dry ice pack in my suitcase?
Sim - até 2.5 kg (5.5 Libra) por passageiro, em um ventilado package marked with quantidade líquida. Get airline approval first.
Q2: How long will it last in a cooler?
Plano 5–10lb por 24h em um cooler rígido de qualidade; add more for high heat and frequent openings.
Q3: Can I store dry ice in my freezer?
Não. CO₂ and extreme cold can damage controls and trap gas—don’t do it.
Q4: Is it safe to add dry ice to drinks?
Don’t ingest or place it in drinks you’ll consume. Let it fully sublimate before service.
Q5: What PPE should I use?
Insulated gloves and eye protection; handle only in ventilated spaces.
Resumo & Recomendações
Takeaways -chave: To master Como usar o pacote de gelo seco, ventilação, enrolar, and verify. Usar blocks over barriers, tamanho 5–10lb/24h (add heat factor), seguir 2.5 kg flight limits, e log arrival temps (≤40 °F/≤0 °F). Hybridize with PCM/gel e considere VIP to cut weight and risk.
PRÓXIMOS PASSOS (CTA):
-
Use o 30‑second sizing above for your next packout.
-
Adicione a probe logger and a −21 °C Camada PCM if doors open often.
-
Need a route‑specific SOP? Fale com a Temk—we’ll design, right‑size, and validate your packout.
Sobre Tempk
Ajudamos as equipes a movimentar mercadorias sensíveis à temperatura com segurança e simplicidade. Nossos transportadores reutilizáveis, pacotes PCM ajustados (-21 ° C., 2–8 ° C., CRT), and connected data loggers boost time‑in‑range while reducing refrigerant weight. Customers report fewer excursions and faster packouts using standard kits validated in our thermal lab.
Let’s optimize your lane: Request a dry‑ice SOP and quick‑calc worksheet.