Cómo empacar con hielo seco de forma segura 2025?
Si necesitas una clara, método probado para cómo empacar usando hielo seco, esta guía le brinda los pasos exactos, reglas de dimensionamiento, y controles de cumplimiento en los que puede confiar. Aprenderás rápido, paquetes seguros, una fórmula de tamaño fácil, y 2025 Requisitos de líneas aéreas y envíos terrestres., para que tus productos congelados y refrigerados lleguen intactos y a tiempo.
-
Cómo empacar usando hielo seco con un simple, flujo de trabajo paso a paso
-
Cómo dimensionar el hielo seco durante 24 a 72 horas con una calculadora rápida
-
Cómo empacar con hielo seco para vuelos y envíos terrestres UN1845
-
Cómo combinar hielo seco con gel/hielo normal sin dañar la mercancía
-
Cómo reducir el riesgo (quemaduras, Acumulación de co₂) con controles de seguridad rápidos
Por qué elegir hielo seco y cómo empacar usando hielo seco para su producto?
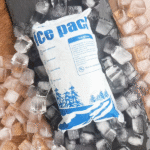
El hielo seco le brinda poder de congelación sin agua derretida, pero su paquete debe ventilar el CO₂ y proteger los artículos del contacto directo. En la práctica, Construirás capas que controlan el flujo de aire y la temperatura mientras evitas la acumulación de presión.. Utilice un rígido, recipiente apto para hielo seco y mantenga el paquete ventilado—nunca estanco al gas.
Desde su punto de vista: Comience con el objetivo de su producto.. Si debes conservar artículos congelado, use bloques más grandes y relleno más apretado. si solo necesitas enfriado temperaturas, use menos hielo seco y tampón con paquetes de gel. De cualquier manera, elija un contenedor clasificado para hielo seco y planifique aberturas mínimas de la tapa durante el tránsito.
Congelado vs.. enfriado: ¿Dónde colocas el hielo seco??
Para bodegas congeladas: colocar bloques arriba y/o abajo la carga con un separador (cartón/rejilla) para evitar el contacto directo; La ubicación superior aprovecha el hundimiento del aire frío., la ubicación inferior estabiliza la base; muchos paquetes usan ambos.
Para un enfriamiento suave: limite un bloque pequeño a una esquina debajo de un separador y confíe en paquetes de gel para moderar el choque de frío.
| Objetivo de embalaje | Colocación | Tipo de hielo | Lo que significa para ti |
|---|---|---|---|
| Sólido congelado | Arriba + abajo (con separadores) | Bloques (durar más) | Desplegable más rápido, mayor tiempo de ejecución, incluso temperaturas |
| Carga mixta | Fondo de hielo seco + capa intermedia de gel | Bloques + gel | Zona congelada + zona refrigerada en una sola caja |
| Sólo frío | Pequeño bloque de “esquina” + muchos geles | bloque pequeño + geles | Evita la congelación de artículos sensibles. |
Cómo empacar usando hielo seco: la lista de verificación paso a paso
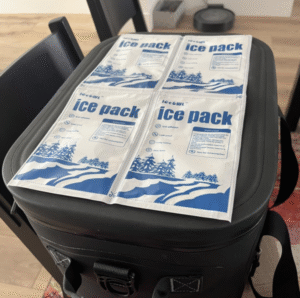
secuencia central: guantes puestos → preenfriamiento → crear base → colocar bloques → agregar separador → cargar producto → llenar huecos → ventilar → monitorear. Siga este orden para proteger el contenedor., evitar quemaduras por frio, y mantener temperaturas estables.
Paso (copiar/pegar listo):
-
Confirmar compatibilidad. Utilice un rígido, Enfriador/transportador apto para hielo seco; la mayoría de los refrigeradores blandos no están clasificados.
-
Pre -chill. Enfríe el contenedor y el contenido antes de cargarlo..
-
Use EPP. Guantes aislados; protección para los ojos si se cortan bloques.
-
crear una base. Cartón corrugado o una rejilla para levantar el producto de los bloques..
-
Colocar hielo seco. Preferir bloques para la longevidad; envolver en papel para ralentizar la sublimación.
-
Agregar un separador. Cesta de cartón/toalla/alambre entre el hielo y el producto.
-
Empacar bien. Llene los huecos con toallas o paquetes de gel.; Fregaderos de aire frío.
-
Permitir ventilación. Nunca selle herméticamente; rompa un pestillo o use un drenaje ventilado.
-
Monitor. Utilice una sonda o un termómetro de mín/máx dentro de la carga..
Dimensionamiento rápido: cómo empacar usando hielo seco durante 24 a 72 horas
Reglas generales:
-
Espera congelada: ~10 a 15 libras por 25 cantidad por 24 h
-
Mantener enfriado: ~ 5–10 lb por 25 cantidad por 24 h
Los bloques duran más que los pellets; El clima cálido y las aperturas frecuentes aumentan las necesidades..
Estimador listo para hoja de cálculo (pasta & adaptar):
-
factor objetivo: 1.0–1,5 (enfriado) o 2,0–2,5 (congelado)
-
CondicionesFactor: 0.8 (frío/sombra), 1.0 (normal), 1.3–1,5 (caluroso/soleado)
| Tamaño más frío & Meta | 24 h | 48 h | Lo que significa para ti |
|---|---|---|---|
| 25 QT (congelado) | 10–15 lb | 20–25 libras | Rendimiento de congelación de fin de semana |
| 50 QT (congelado) | 20–30 lb | 40–50 libras | Familia/carne |
| 25–50 cuartos (enfriado) | 5–10 lb | 10–20 lb | Bebidas/lácteos ≤40°F |
Para la punta: Divida los artículos de acceso frecuente en una segunda hielera de “uso diurno” para proteger la reserva principal de congelados..
Cómo empacar con hielo seco para vuelos y viajes?
Puedes volar con hielo seco bajo límites estrictos: ≤2,5 kilogramos (5.5 lb) por pasajero y por paquete, aprobación del operador, envasado ventilado, y marcas (“Hielo seco / Dióxido de carbono, sólido," UN1845, masa neta). Confirme siempre la política de su aerolínea antes de viajar.
Lista de verificación de equipaje en el aeropuerto:
-
Usar un refrigerador duro ventilado (sin tapas de poliestireno selladas).
-
Etiqueta: “Hielo seco / Dióxido de carbono, sólido," UN1845, masa neta (kilos).
-
Mantenga la tapa cerrada pero no estanco al gas; mantener la ventilación.
-
Lleve los detalles de aprobación de la aerolínea con su bolso..
Caso del mundo real: Una panadería enviaba croissants congelados a través del país con 20 lb en 40 QT refrigerador más un estante de alambre. Después 30 horas en 84–95°F ambiente, Las temperaturas internas del producto se mantuvieron por debajo 15°F, confirmando una cadena congelada intacta.
Cómo empacar con hielo seco para envíos terrestres (UN1845)?
Para paquetes por carretera en EE. UU., El hielo seco es “dióxido de carbono., sólido,"UN1845, Clase 9. Los paquetes deben Viento de co₂ y ser marcado con la masa neta de hielo seco; utilizar cajas exteriores rígidas. Cuando los segmentos aéreos son posibles, pequeñas cantidades ≤2,5 kilogramos por paquete con las marcas requeridas están exceptuados de muchos otros requisitos.
Comprobación rápida de cumplimiento (imprimible):
-
Marca UN1845, nombre de envío adecuado, y masa neta
-
Usar ventilado embalaje; nunca estanco al gas
-
Usar un exterior rígido caja; agregue absorbente si hay líquidos presentes
-
Incluya una descripción de contenido simple según la política del operador.
Cómo empacar usando hielo seco con bolsas de gel o hielo normal?
Mezclar funciona y, a menudo, funciona mejor. poner hielo seco debajo de un separador enfriar desde abajo, entonces paquetes de gel en la parte superior para almacenar elementos que no deberían congelarse. Esto crea zonas congeladas y refrigeradas en un contenedor y extiende el tiempo de ejecución de modo significativo.
Configuraciones prácticas (victorias rápidas)
-
Todo congelado: bloques en la parte superior y abajo, separadores entre capas
-
Congelado + enfriado: fondo de hielo seco → separador → producto → geles en la parte superior
-
Sólo frío: pequeño bloque de “esquina” + muchos geles para un resfriado suave
Seguridad ante todo: cómo empacar usando hielo seco sin riesgo?
Dos peligros dominan: frío extremo y acumulación de CO₂. Tener puesto guantes aislados, calarse ventilado áreas, y nunca hacer paquetes herméticos. Mantenga los alimentos refrigerados ≤40°F (4°C) y utilice un termómetro o un registrador de datos para verificar el rendimiento. No deje atrapado un refrigerador con ventilación en el maletero de un automóvil sellado.
Consejos de usuario que puedes aplicar hoy
-
Cargando en casa: Utilice un termómetro de sonda y registre los mínimos y máximos después de la llegada..
-
Ruta de verano: Sombree la hielera y limite la apertura de la tapa.; Los picos de calor son acumulativos..
-
traspaso de equipo: Agregue una instrucción de una página sobre "volver a congelar o no" con la masa neta marcada.
Ejemplo de campo: Una hielera rotomoldeada de 50 cuartos con 25 lb de bloques sostenidos debajo 10°F para ~40 horas en un 92°F día con 8 a 10 aperturas de tapa, subiendo a ~28°F por hora ~52. Los resultados varían según el aislamiento y el sol..
2025 Novedades y tendencias en cómo envasar con hielo seco.
Instantánea de tendencia (2025): La demanda de hielo seco sigue siendo alta en todos los alimentos, farmacéutico, y comercio electrónico, mientras Volatilidad del suministro de CO₂ crea picos de precios estacionales. Transportadores reutilizables y sistemas PCM están escalando para carriles de 2–8°C y –20°C, reducir la dependencia del hielo seco donde no se requiere congelación. Los peletizadores in situ están creciendo para reducir el riesgo del suministro.
Último progreso de un vistazo
-
Claridad en los viajes aéreos: La guía PackSafe de la FAA refuerza la 2.5 kilos límites y reglas de marcado claras; la mayoría de las aerolíneas lo reflejan.
-
Resúmenes de PHMSA: Reenfocarse en desfogue y masa neta marcado para paquetes UN1845.
-
Señal de seguridad alimentaria: Las agencias reiteran la ≤40°F umbral de mantenimiento en frío; utilizar termómetros para electrodomésticos.
Insight del mercado: Espere un crecimiento continuo a través de 2032 como voladura, farmacéutico, y los perecederos se expanden; el suministro sigue siendo regional: planifique abastecimiento local y contingencias.
Preguntas frecuentes
¿Cuánto hielo seco necesito al día??
Plan ~10 a 15 libras por 25 QT por 24 h para congelados, ~ 5–10 lb para refrigerados. Amplíelo en climas cálidos o cuando la tapa se abre con frecuencia.
¿Puedo volar con él??
Sí-≤2,5 kilogramos (5.5 lb) por pasajero y por paquete, aprobación de la aerolínea, envasado ventilado, y marcas adecuadas.
¿Damilará el hielo seco mi enfriador??
Sólo si no está clasificado. Muchos refrigeradores duros permiten usar hielo seco.; Los refrigeradores blandos a menudo no lo hacen; consulte las instrucciones del fabricante..
¿Debo colocar hielo seco arriba o abajo??
Usar arriba para aprovechar el aire frío que se hunde; usar abajo Con un separador para proteger los artículos y estabilizar la base.. Las ubicaciones mixtas son comunes para temperaturas uniformes..
¿Cuál es el umbral de frío seguro para los alimentos??
Mantenga los alimentos refrigerados ≤40°F (4°C); verificar con un termómetro o registrador dentro de la carga.
Resumen & recomendaciones
Puntos clave: Cómo empacar usando hielo seco se reduce a contenedores clasificados, bloques + separador + relleno apretado + desfogue, y tamaño realista. Verifique las reglas de la aerolínea/PHMSA cuando viaje o realice envíos, y mantener los alimentos refrigerados ≤40°F con sonda interna. Para cargas mixtas, combine paquetes de hielo seco y gel para crear zonas congeladas y refrigeradas.
Siguientes pasos (plan de acción):
-
Confirma que tu contenedor está clasificado para hielo seco.
-
Usar el estimador Para dimensionar bloques para tu ruta..
-
Empaque en capas con separadores; llenar los vacíos con fuerza.
-
Respiradero en todo momento y añadir un termómetro/registrador.
-
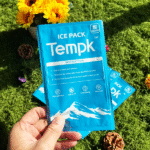
Para rutas complejas, solicitar un paquete validado desde Tempk.
Acerca de Tempk
Combinamos ingeniería de cadena de frío con pruebas de ruta para diseñar paquetes basados en datos y calculadoras para alimentos perecederos, biofarmacéutica, y productos especiales. Nuestro equipo realiza un seguimiento de las actualizaciones de la FAA/PHMSA y de la orientación sobre contenedores específicos de cada marca para que usted obtenga actual, práctico Instrucciones que reducen el riesgo de deterioro y cumplimiento.. Hablar con nosotros para un plan personalizado.