Melhor saco de gelo seco para refrigerador: O que você deve usar?
Se você estiver embalando vacinas, refeições congeladas, ou uma viagem de fim de semana, escolhendo o certo saco de gelo seco para refrigerador determines safety, Tempo de espera, e qualidade do produto. Dry ice sits at −78.5°C and becomes CO₂ gas, so your bag must insulate, resist punctures, e allow safe venting. This guide compares bag types, shows you how to pack step‑by‑step, and shares a 2‑minute selector to make the right choice fast.
-
Qual bag type keeps dry ice longest while staying safe (forro isolado, HDPE/LDPE, EPS/VIP options)
-
How to pack a dry ice bag for a cooler in five steps to avoid pressure build‑up
-
Quanto gelo seco você precisa for 24–72 hours with simple rules of thumb
-
O que não to do (airtight seals, soft coolers without vent paths, direct food contact)
-
2025 cold‑chain tendências that improve sustainability and monitoring
Which dry ice bag for a cooler keeps cold the longest?
Resposta curta: An insulated, vent‑enabled liner inside a rigid hard cooler delivers the best mix of hold time, durabilidade, e segurança. Use a heavy‑duty HDPE/LDPE liner only as an inner sleeve—not as your primary insulator—so CO₂ can escape while the cooler provides structure.
Por que funciona: Dry ice sublimates faster when exposed to warm air. A closed‑cell insulated liner slows heat gain, while a rigid cooler protects against puncture. Add a controlled vent path (cracked drain, gasket gap) so CO₂ can exit. This combination is reliable for food and pharma, and it’s simple to repeat for consistent results.
HDPE/LDPE liners vs. insulated dry ice bags—how should you choose?
Go insulated when you need long hold times or frequent lid openings; use HDPE/LDPE liners for clean handling inside a hard cooler when trips are short and budget matters. If you’re shipping multiple days, add a foam board or EPS lid layer above the dry ice to trim sublimation and shield contents from direct contact.
| Opção de resfriamento (2025) | Isolamento | Caminho de ventilação | O que isso significa para você |
|---|---|---|---|
| Insulated dry ice liner (closed‑cell) | Alto | Use cooler drain/cracked lid | Best hold time; reutilizável; safer for multi‑day trips |
| Heavy‑duty HDPE/LDPE bag (forro grosso) | Low‑Medium | Fazer não Seal hermético | Manuseio mais limpo; fine for short hauls inside a hard cooler |
| EPS (isopor) insert or lid board | Alto (frágil) | Vent via outer cooler | Strong insulation, budget‑friendly; add as a topper |
| Reusable soft insulated tote (ventilado) | Médio | Must provide vent gap | Conveniente; use for short‑to‑mid trips if manufacturer approves dry ice |
Dicas práticas que você pode aplicar hoje
-
Pre‑chill the cooler for 30–60 minutes with sacrificial ice packs.
-
Layer up: dry ice at the bottom → thin cardboard/foam sheet → product → insulation topper.
-
Fill dead air: empty space accelerates sublimation—add towels or frozen gel packs to reduce voids.
Caso do mundo real: A regional meal‑kit shipper cut spoilage by shifting to insulated liners plus a vented drain plug. The same routes kept meals frozen through 48 hours with fewer re‑ice interventions.
How do you pack a dry ice bag for a cooler safely?
Etapas principais (follow in order):
-
Use luvas isoladas e proteção para os olhos. Treat dry ice like a power tool.
-
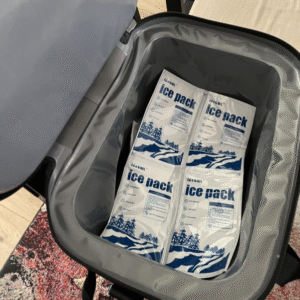
Pre‑line the cooler com um insulated dry ice bag or heavy‑duty HDPE/LDPE liner (fazer não selo).
-
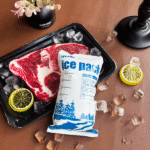
Coloque gelo seco no fundo. Use blocks/pellets wrapped in kraft paper to limit direct contact.
-
Add a separator layer (cardboard or foam sheet), then load product. Finish with an insulation topper.
-
Create a vent path. Crack the drain plug or lid latch slightly so CO₂ can escape. Never use airtight seals.
What about a soft cooler?
If the soft cooler is hermeticamente, don’t pair it with dry ice. Pressure can build. If the soft cooler is manufacturer‑approved for dry ice and you can create a controlled vent gap, it’s fine for short runs. Em caso de dúvida, use a rigid hard cooler with a known vent path.
Quanto saco de gelo seco para refrigerador você realmente precisa?
Quick‑start rule of thumb (conservative):
-
24 horas: ~ 10–20 libras (4.5–9 kg) for a ~40‑qt hard cooler at room temperature
-
48–72 horas: Scale linearly, then add 20–30% if you’ll open the lid often or run in hot weather
-
Short local runs: A few pounds in an insulated liner may suffice if the load is already frozen
These numbers vary by cooler build, temperatura ambiente, massa do produto, and lid‑open frequency. Comece conservador, then optimize after one test run with a probe logger.
2‑minute selector (miniferramenta copiar e colar)
What should you não do with a dry ice bag for a cooler?
-
Do not seal dry ice in an airtight bag, jar, or cooler. Gas needs a way out.
-
Do not use direct contact between dry ice and delicate foods—add a separator sheet.
-
Do not pack in glass or thin brittle plastics.
-
Do not use unapproved soft coolers with airtight zippers.
-
Do not transport in unventilated spaces. Janelas de crack; avoid confined trunks.
2025 developments and trends for your dry ice bag for a cooler
O que há de novo este ano: Reusable insulated shippers are growing fast as brands tackle waste and cost. ISO 23412 keeps shaping last‑mile processes for temperature‑controlled parcels. More operators add sensores inteligentes for temperature/CO₂ monitoring. Expect broader adoption of forros recicláveis and EPS‑light designs that still deliver multi‑day performance.
What’s changing at a glance
-
Aumento de sistemas reutilizáveis: Lower total cost over repeated lanes; fewer disposables.
-
Sensor‑enabled trips: Low‑cost loggers and CO₂ monitors reduce surprises in transit.
-
Design for recycling: Mono‑material liners and simpler separates boost recovery rates.
Insight de mercado: Analysts project the cold‑chain packaging market to expand through the decade, com reusable solutions and smart packaging leading growth as e‑grocery and biologics volumes climb.
Perguntas frequentes
Can I use a zip‑seal plastic bag as my primary dry ice bag for a cooler?
Não. Zip‑seal bags can trap gas and burst. Use an unsealed HDPE/LDPE liner dentro a rigid cooler and maintain a vent path.
Can I put dry ice in a soft cooler?
Only if the manufacturer explicitly allows dry ice e you can vent it. Airtight soft coolers can build dangerous pressure.
Where should the dry ice sit in the cooler?
At the bottom, then a thin separator sheet, então seu produto. Add an insulation topper to slow warm air.
How do I dispose of leftover dry ice safely?
Let it sublimate in a well‑ventilated outdoor area away from kids and pets. Never down a sink or toilet.
What gloves should I use?
Insulated or cryogenic‑rated gloves. Avoid cotton alone; it can freeze and stick to skin.
Resumo & PRÓXIMOS PASSOS
Takeaways -chave: Use um isolado, vent‑enabled liner inside a hard cooler as your primary saco de gelo seco para refrigerador. Mantenha um Caminho de ventilação, adicionar separator sheets, e fill dead air para retardar a sublimação. Start with conservative dry ice amounts, log one trial, then tune.
Faça isso a seguir:
-
Choose an insulated liner + rigid cooler combo.
-
Pack using the 5‑step method and crack the drain for venting.
-
Test once with a probe logger, then apply the estimator above to right‑size your dry ice for future runs.
Sobre Tempk
We build practical cold‑chain content and tools for teams shipping temperature‑sensitive goods. Our recommendations focus on repetibilidade e segurança—from insulated liners to pack‑outs you can train in minutes. We prioritize reusable, vent‑safe solutions that balance cost with product protection.
Precisar de ajuda? Book a 15‑minute pack‑out review with our team.