Comment emballer en utilisant de la glace carbonique en toute sécurité 2025?
Si vous avez besoin d'un clair, méthode éprouvée pour comment emballer avec de la neige carbonique, ce guide vous donne les étapes exactes, règles de dimensionnement, et des contrôles de conformité auxquels vous pouvez faire confiance. Vous apprendrez vite, emballages sécurisés, une formule de dimensionnement facile, et 2025 exigences en matière de transport aérien et terrestre, pour que vos produits surgelés et réfrigérés arrivent intacts et à temps.
-
Comment emballer avec de la glace sèche avec un simple, flux de travail étape par étape
-
Comment dimensionner la neige carbonique pendant 24 à 72 heures avec une calculatrice rapide
-
Comment emballer avec de la neige carbonique pour les vols et les expéditions terrestres UN1845
-
Comment combiner de la neige carbonique avec du gel/de la glace ordinaire sans endommager les marchandises
-
Comment réduire les risques (brûlures, Accumulation de co₂) avec des contrôles de sécurité rapides
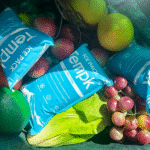
Pourquoi choisir la glace carbonique et comment emballer votre produit avec de la glace carbonique?
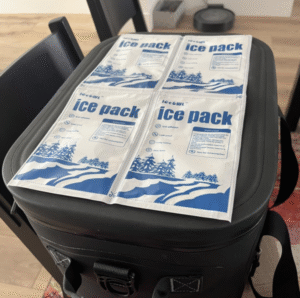
La glace carbonique vous offre une puissance de surgélation sans eau de fonte, mais votre emballage doit évacuer le CO₂ et protéger les articles du contact direct. En pratique, vous construirez des couches qui contrôlent le flux d’air et la température tout en empêchant l’accumulation de pression. Utilisez un rigide, récipient classé pour glace carbonique et conservez l'emballage ventilé—jamais étanche au gaz.
De votre point de vue: commencez par votre objectif produit. Si vous devez conserver des objets congelé, utilisez des blocs plus gros et un remplissage plus serré. Si tu as seulement besoin glacé températures, utilisez moins de glace carbonique et tamponnez avec des packs de gel. De toute façon, choisissez un contenant adapté à la glace carbonique et prévoyez des ouvertures minimales du couvercle pendant le transport..
Gelé contre. glacé: où placez-vous la neige carbonique?
Pour les prises gelées: placer des blocs au-dessus et/ou en dessous la charge avec un séparateur (carton/grille) pour éviter tout contact direct; le placement supérieur exploite la descente de l'air froid, le placement inférieur stabilise la base - de nombreux packouts utilisent les deux.
Pour un refroidissement doux: confiner un petit bloc dans un coin sous un séparateur et compter sur des packs de gel pour modérer le choc dû au froid.
| Objectif d'emballage | Placement | Type de glace | Ce que cela signifie pour vous |
|---|---|---|---|
| Solide congelé | Haut + bas (avec séparateurs) | Blocs (durer plus longtemps) | Déroulement plus rapide, durée d'exécution plus longue, même les températures |
| Charge mixte | Fond de glace carbonique + couche intermédiaire en gel | Blocs + gel | Zone gelée + zone réfrigérée dans une boîte |
| Réfrigéré uniquement | Petit bloc « coin » + beaucoup de gels | Petit bloc + gels | Empêche le gel des objets sensibles |
Comment emballer avec de la neige carbonique: la liste de contrôle étape par étape
Séquence de base: mettre des gants → pré-refroidir → créer une base → placer des blocs → ajouter un séparateur → charger le produit → remplir les vides → évacuer → surveiller. Suivez cet ordre pour protéger le conteneur, éviter les brûlures par le froid, et maintenir des températures stables.
Étape par étape (copier/coller prêt):
-
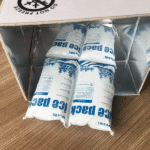
Confirmer la compatibilité. Utilisez un rigide, refroidisseur/expéditeur de glace carbonique; la plupart des glacières souples ne sont pas classées.
-
Préchauffeur. Refroidir le conteneur et son contenu avant de le charger.
-
Portez un EPI. Gants isolés; protection oculaire si vous coupez des blocs.
-
Créer une base. Carton ondulé ou support pour soulever le produit des blocs.
-
Placer de la glace carbonique. Préférer blocs pour la longévité; envelopper dans du papier pour ralentir la sublimation.
-
Ajouter un séparateur. Carton/serviette/panier métallique entre la glace et le produit.
-
Emballez bien. Remplissez les vides avec des serviettes ou des packs de gel; puits d'air froid.
-
Autoriser la ventilation. Ne jamais sceller de manière étanche au gaz; casser un loquet ou utiliser un drain ventilé.
-
Moniteur. Utiliser une sonde ou un thermomètre min/max à l'intérieur de la charge.
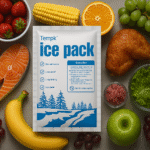
Dimensionnement rapide: comment emballer avec de la neige carbonique pendant 24 à 72 heures
Règles empiriques:
-
Cale gelée: ~10 à 15 lb par 25 quantité par 24 h
-
Prise au frais: ~ 5–10 lb par 25 quantité par 24 h
Les blocs durent plus longtemps que les pastilles; le temps chaud et les ouvertures fréquentes augmentent les besoins.
Estimateur prêt pour une feuille de calcul (coller & adapter):
-
Facteur d'objectif: 1.0–1,5 (glacé) ou 2,0-2,5 (congelé)
-
Conditionsfactor: 0.8 (froid / ombre), 1.0 (normale), 1.3–1,5 (chaud / ensoleillé)
| Taille plus froide & But | 24 h | 48 h | Ce que cela signifie pour vous |
|---|---|---|---|
| 25 QT (congelé) | 10–15 lb | 20–25 lb | Performances de gel du week-end |
| 50 QT (congelé) | 20–30 livres | 40–50 livres | Course familiale/viande |
| 25–50 pintes (glacé) | 5–10 lb | 10–20 lb | Boissons/produits laitiers ≤40°F |
Pour la pointe: Divisez les articles à accès fréquent dans une deuxième glacière « à usage quotidien » pour protéger la réserve congelée principale..
Comment emballer avec de la neige carbonique pour les vols et les voyages?
Vous pouvez voler avec de la neige carbonique dans des limites strictes: ≤ 2,5 kg (5.5 kg) par passager et par forfait, approbation de l'opérateur, emballage ventilé, et marques (« Glace carbonique / Dioxyde de carbone, solide,» UN1845, masse nette). Confirmez toujours la politique de votre compagnie aérienne avant de voyager.
Liste de contrôle pour les colis à l'aéroport:
-
Utiliser un refroidisseur dur ventilé (pas de couvercles en polystyrène scellés).
-
Étiquette: « Glace carbonique / Dioxyde de carbone, solide,» UN1845, masse nette (kg).
-
Gardez le couvercle verrouillé mais pas étanche aux gaz; maintenir la ventilation.
-
Emportez les détails de l'approbation de la compagnie aérienne avec votre sac.
Cas réel: Une boulangerie expédiait des croissants surgelés à travers le pays avec 20 kg dans un 40 QT glacière et grille métallique. Après 30 heures dans 84–95°F ambiant, les températures internes du produit sont restées inférieures 15°F, confirmer une chaîne gelée intacte.
Comment emballer avec de la neige carbonique pour l'expédition terrestre (UN1845)?
Pour les colis routiers aux États-Unis, la glace carbonique est du « dioxyde de carbone, solide,»Un1845, Classe 9. Les colis doivent vent CO₂ et être marqué de la masse nette de glace sèche; utiliser des boîtes extérieures rigides. Quand les segments aériens sont possibles, petites quantités ≤ 2,5 kg par colis avec les marquages requis sont exclus de nombreuses autres exigences.
Vérification rapide de la conformité (imprimable):
-
Marque UN1845, Nom d'expédition approprié, et masse nette
-
Utiliser ventilé conditionnement; jamais étanche au gaz
-
Utiliser un extérieur rigide boîte; ajouter un absorbant si des liquides sont présents
-
Inclure une description simple du contenu par politique de l'opérateur
Comment emballer avec de la neige carbonique avec des packs de gel ou de la glace ordinaire?
Le mixage fonctionne – et fonctionne souvent mieux. Mettez de la glace carbonique sous un séparateur se détendre d'en bas, alors packs de gel sur le dessus pour mettre en mémoire tampon les éléments qui ne devraient pas geler. Cela crée des zones congelées et réfrigérées dans un seul conteneur et prolonge la durée d'exécution de manière significative.
Configurations pratiques (victoires rapides)
-
Tout congelé: blocs en haut et bas, séparateurs entre couches
-
Congelé + glacé: fond de glace carbonique → séparateur → produit → gels sur le dessus
-
Réfrigéré uniquement: petit bloc « coin » + de nombreux gels pour un rhume doux
La sécurité avant tout: comment emballer avec de la neige carbonique sans risque?
Deux dangers dominent: Construction extrême et co₂. Porter gants isolés, travailler dans ventilé zones, et jamais rendre les colis hermétiques. Conservez les aliments au frais ≤40 ° F (4°C) et utilisez un thermomètre ou un enregistreur de données pour vérifier les performances. Ne coincez pas un refroidisseur de ventilation dans un coffre de voiture scellé.
Conseils d'utilisation que vous pouvez appliquer dès aujourd'hui
-
Chargement à la maison: Utilisez un thermomètre à sonde et enregistrez les min/max après votre arrivée.
-
Itinéraire d'été: Ombrez la glacière et le couvercle limite s'ouvre; les pics de chaleur se cumulent.
-
Transfert d'équipe: Ajouter une instruction d'une page « reglacer ou non » avec la masse nette marquée.
Exemple de terrain: Une glacière rotomoulée de 50 pintes avec 25 kg de blocs détenus en dessous 10°F pour ~40 heures sur un 92°F jour avec 8 à 10 ouvertures du couvercle, montant à ~28°F par heure ~52. Les résultats varient selon l'isolation et le soleil.
2025 évolutions et tendances dans la façon d'emballer avec de la neige carbonique
Instantané de la tendance (2025): La demande de glace carbonique reste élevée dans l’alimentation, Pharma, et le commerce électronique, alors que Volatilité de l’offre de CO₂ crée des hausses de prix saisonnières. Expéditeurs réutilisables et Systèmes PCM s'adaptent aux voies de 2 à 8 °C et de –20 °C, réduisant le recours à la glace carbonique là où la surgélation n'est pas nécessaire. Les granulateurs sur site se multiplient, ce qui menace l'approvisionnement.
Dernier progrès en un coup d'œil
-
Clarté du voyage aérien: Les directives PackSafe de la FAA renforcent 2.5 kg limites et règles de marquage claires; la plupart des compagnies aériennes le reflètent.
-
Résumés PHMSA: Se recentrer sur ventilation et masse nette marquage pour les colis UN1845.
-
Signal de sécurité alimentaire: Les agences réitèrent ≤40 ° F seuil de maintien au froid; utiliser des thermomètres pour appareils électroménagers.
Perspicacité du marché: Attendez-vous à une croissance continue grâce à 2032 comme dynamitage, Pharma, et les denrées périssables se développent; l’offre reste régionale – plan approvisionnement local et imprévus.
FAQ
De quelle quantité de neige carbonique ai-je besoin par jour?
Plan ~10 à 15 lb par 25 QT par 24 h pour congelé, ~5 à 10 livres pour réfrigéré. Augmentez la taille par temps chaud ou avec des ouvertures fréquentes du couvercle.
Puis-je voler avec?
Oui-≤ 2,5 kg (5.5 kg) par passager et par forfait, approbation des compagnies aériennes, emballage ventilé, et des marquages appropriés.
La glace sèche endommagera-t-elle ma glacière?
Seulement s'il n'est pas noté. De nombreux refroidisseurs durs autorisent la glace carbonique; les refroidisseurs souples ne le font souvent pas : vérifiez les instructions du fabricant.
Dois-je placer de la neige carbonique en haut ou en bas?
Utiliser haut pour tirer parti de la descente par air froid; utiliser bas avec un séparateur pour protéger les objets et stabiliser la base. Les placements mixtes sont courants même pour les intérimaires.
Quel est le seuil de froid alimentaire?
Conservez les aliments au frais ≤40 ° F (4°C); vérifier avec un thermomètre ou un enregistreur à l'intérieur de la charge.
Résumé & recommandations
Points clés: Comment emballer avec de la neige carbonique se résume aux conteneurs classés, blocs + séparateur + remplissage serré + ventilation, et dimensionnement réaliste. Vérifiez les règles de la compagnie aérienne/PHMSA lorsque vous voyagez ou expédiez, et conserver les aliments au frais ≤40 ° F avec une sonde interne. Pour les charges mixtes, combinez de la glace carbonique et des packs de gel pour créer des zones congelées et réfrigérées.
Étapes suivantes (plan d'action):
-
Confirmez que votre conteneur est homologué glace carbonique.
-
Utiliser le estimateur dimensionner les blocs de votre itinéraire.
-
Emballez en couches avec séparateurs; remplir hermétiquement les vides.
-
Secouer à tout moment et ajoutez un thermomètre/enregistreur.
-
Pour les itinéraires complexes, demander un emballage validé De tempk.
À propos du tempk
Nous combinons l'ingénierie de la chaîne du froid avec les tests d'itinéraire jusqu'à la conception packouts basés sur les données et calculatrices pour denrées périssables, biopharma, et marchandises spécialisées. Notre équipe suit les mises à jour FAA/PHMSA et les conseils sur les conteneurs spécifiques à la marque afin que vous obteniez actuel, pratique des instructions qui réduisent les risques de détérioration et de non-conformité. Parler avec nous pour un plan sur mesure.