Comment utiliser un pack de glace sec en toute sécurité dans 2025?
Si vous avez besoin de performances congelées sans électricité, learning comment utiliser le pack de glace sèche the right way is the fastest win. Dry ice sits at −78.5 °C (−109,3 ° F), so venting, dimensionnement correct (≈5–10 lb/24 h), and safe handling turn 24–72 h holds from guesswork into a routine. Here’s a field‑tested playbook you can apply today—at home, in transit, or at work.
-
How to use dry ice pack in coolers for 24–72 h without temperature abuse.
-
How to use dry ice pack on flights (2.5 kg/5.5 lb passenger limit, ventilation, marquage).
-
How to use dry ice pack for ecommerce and labs (UN1845, Voici pi954, net‑mass marks).
-
Sizing secrets: how much to buy, where to place it, Blocs vs Pellets.
-
Emballages hybrides: using gel/PCM and VIP insulation to cut risk and weight.
How to use dry ice pack in a cooler for 24–72 hours?
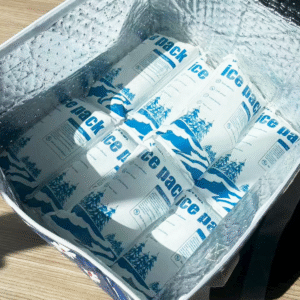
Réponse de base: Place wrapped blocks over a barrier on top, emballage, and vent—then verify at ≤40 °F (glacé) or ≤0 °F (congelé). This arrangement exploits sinking cold air for the longest hold while protecting liners and products. Start with 5–10 lb per 24 h and add 25% in high heat or frequent openings.
Why this works for you: Dry ice sublimates to CO₂ gas that sinks. Top placement bathes contents in colder air, barriers prevent “freezer burn,” and pre‑chilling the cooler avoids “wasting” pounds on cooling the container itself. Use hard, dry‑ice‑approved coolers; most soft coolers aren’t rated. Keep containers vented—never airtight.
Top vs. bottom vs. side—how to use dry ice pack layouts
Details you can apply:
-
Top‑pack (best hold): Barrier → wrapped blocks → lid.
-
Bottom‑pack (more access): Barrier → wrapped blocks → barrier → items.
-
Side‑pack (two zones): Blocks along a wall to separate “frozen” and “drinks.”
Pre‑chill contents (“sacrificial ice” works), use blocks as base load, and fill voids to limit warm air pockets.
| Cooler Layout | When to use | What to prepare | Ce que cela signifie pour vous |
|---|---|---|---|
| Top‑pack | La plus longue | Cardboard/rack + wrapped blocks | Max run time with fewer pounds |
| Bottom‑pack | Frequent access | Two barriers + wrapped blocks | Easy grabs; slightly shorter hold |
| Side‑pack | Charges mixtes | Spacer panel + blocks on side | Zone gelée + chilled zone |
Practical tips that save hours of cold
-
Préchauffeur the cooler and items to stop early melt.
-
Wrap blocks in paper to slow loss and protect liners.
-
Vent smart: crack a drain/vent path; Jamais hermétique.
-
Moniteur with a probe thermometer on arrival.
Vraie cas: A pre‑chilled 65 qt cooler with ~40 lb of wrapped blocks maintained frozen temps for ~48 h in >90 °F ambient with limited openings. Results vary by cooler and handling.
How to use dry ice pack on flights (what rules apply)?
Réponse directe: You may carry up to 2.5 kg (5.5 kg) par passager avec approbation des compagnies aériennes, dans un ventilé package marked “Dry ice/Carbon dioxide, solide,” showing net quantity. This applies to carry‑on and checked baggage; N'utilisez jamais de conteneurs hermétiques.
Pro checklist (5‑step pass at the counter):
-
Confirm airline approval.
-
Use a vented hard cooler/shipper.
-
Marque Glace sèche et poids net.
-
Keep documents handy.
-
Pair small dry ice with gel packs to bridge delays.
How much do you need—and how to use dry ice pack sizing math?
Règle rapide: Plan 5–10 lb par 24h in quality hard coolers; scale for size, chaleur, et ouvertures du couvercle. Use blocks (slower loss) as your base; Les granulés comblent les lacunes.
| Glacière (QT) | ~ 24h | ~ 48h | ~ 72h | What this means |
|---|---|---|---|---|
| 25–35 | 10–15 lb | 18–25 lb | 28–35 lb | Weekend for two; minimal openings |
| 45–65 | 15–25 lb | 25–40 lb | 38–55 lb | Voyages en famille; +25% in heat |
| 75–110 | 25–40 lb | 40–65 lb | 60–90 lb | Long hauls; ouvert rarement |
| Commencez ici, then adjust to your cooler, ambiant, and access needs. |
How to use dry ice pack with gel or PCM (emballages hybrides)?
Best practice: Stack the cold like layers: dry ice on top for deep‑freeze, −21 °C PCM mid‑layer hugging sensitive items, and 0 °C gel where you need frequent access. This cushions door‑open spikes and trims total pounds. VIP insulation further reduces refrigerant mass with longer time‑in‑range.
When hybrids shine (use these patterns)
-
Last‑mile with frequent openings: Dry ice up top + −21 °C PCM bubble + gel near the lid.
-
Flights limited to 2.5 kg dry ice: Add gel/PCM to cover the last leg after sublimation.
-
Products that must not freeze: Skip dry ice; use tuned PCM/gel for 2–8 °C only.
What safety rules matter most when you use a dry ice pack?
Non-négotibles:
-
Ventilation: Jamais hermétique; pressure and CO₂ can build.
-
EPP: gants isolés + protection des yeux; nitrile alone isn’t enough.
-
Sécurité alimentaire: verify ≤40 °F (glacé) and ≤0 °F (congelé) on arrival.
-
Élimination: let remaining dry ice sublimate in a ventilated area.
-
Exposition au coré: know limits (TWA 5 000 ppm; Stel 30 000 ppm).
Hands‑on “ready check” (score yourself)
-
Vented container ready?
-
Sized at 5–10 lb/24 h (+heat factor)?
-
PPE packed (gloves/eye protection)?
-
Flight markings/2.5 kg confirmed (if flying)?
-
Probe thermometer for arrival check?
5/5 = ready; 3–4/5 = review SOP; ≤2/5 = fix before you go.
2025 trends shaping how to use dry ice pack
Quoi de neuf cette année: CO₂ supply security is evolving as carbon‑capture projects scale; Northern Lights injected its first CO₂ and targets capacity growth by 2028. VIP shippers and tuned PCMs keep improving, meaning less refrigerant for the same run time. Plan ahead for seasonal tightness and secure supply early for holidays/heat waves.
Dernier progrès en un coup d'œil
-
CCS goes live: Early European storage adds resilience to regional CO₂ networks.
-
Surveillance de l'offre: Expect pockets of tightness; procurement timing matters.
-
Smarter packaging: VIP + PCM lets you use smaller dry‑ice loads with equal outcomes.
Perspicacité du marché: If your SLA is strict, design with a PCM backup and log temperatures; it reduces excursion risk and refrigerant spend.
FAQ
Q1: Can I put a dry ice pack in my suitcase?
Yes—up to 2.5 kg (5.5 kg) par passager, dans un ventilé package marked with net quantity. Get airline approval first.
Q2: How long will it last in a cooler?
Plan 5–10 lb par 24h dans une glacière dure de qualité; add more for high heat and frequent openings.
Q3: Puis-je stocker de la glace sèche dans mon congélateur?
Non. CO₂ and extreme cold can damage controls and trap gas—don’t do it.
Q4: Is it safe to add dry ice to drinks?
Don’t ingest or place it in drinks you’ll consume. Let it fully sublimate before service.
Q5: What PPE should I use?
Gants isolés et protection des yeux; handle only in ventilated spaces.
Résumé & recommandations
Principaux à retenir: To master comment utiliser le pack de glace sèche, secouer, envelopper, and verify. Utiliser blocks over barriers, taille 5–10 lb / 24h (add heat factor), suivre 2.5 kg flight limits, et log arrival temps (≤40 °F/≤0 °F). Hybridize with PCM / GEL and consider VIP to cut weight and risk.
Étapes suivantes (CTA):
-
Utiliser le 30‑second sizing above for your next packout.
-
Ajouter un probe logger and a −21 °C PCM layer if doors open often.
-
Need a route‑specific SOP? Parler à tempk—we’ll design, right‑size, and validate your packout.
À propos du tempk
Nous aidons les équipes à déplacer des marchandises sensibles à la température en toute sécurité et simplement. Nos expéditeurs réutilisables, packs PCM optimisés (−21 ° C, 2–8 ° C, CRT), and connected data loggers boost time‑in‑range while reducing refrigerant weight. Customers report fewer excursions and faster packouts using standard kits validated in our thermal lab.
Let’s optimize your lane: Request a dry‑ice SOP and quick‑calc worksheet.