Camping Dry Ice Pack Sheet: Which One Should You Use?
You came to choose a camping dry ice pack sheet that keeps food safe and drinks cold without the chaos of loose pellets. This guide shows how to size sheets for 24–72 hours, pack your cooler correctly, and avoid CO₂ hazards at camp. You’ll get simple rules of thumb, tables you can use, and a quick calculator for your cooler volume.
-
Which camping dry ice pack sheet format fits day trips vs long weekends?
-
How many sheets do you need for 24, 48, and 72 hours?
-
How do you pack a cooler so corners don’t turn lukewarm at noon?
-
What safety rules matter when using dry ice outdoors?
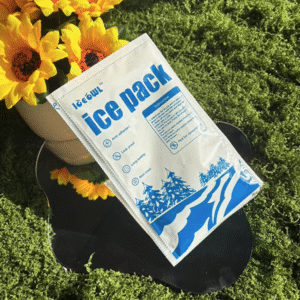
What is a camping dry ice pack sheet and how does it work?
Short answer: A camping dry ice pack sheet is a flexible panel that slows dry ice loss, spreads cold more evenly, and protects food from direct contact. It lines the cooler walls, creates a “cold perimeter,” and vents CO₂ safely.
Why it helps: Loose pellets flash off fast in warm air. Blocks leave hot corners. A camping dry ice pack sheet offers stable release with fewer hot spots. It also reduces lid-open penalties because the perimeter recovers quicker after you grab items.
How does a camping dry ice pack sheet manage sublimation?
Dry ice cools by sublimating—going straight from solid to gas. A camping dry ice pack sheet adds a thin insulative barrier that cuts airflow over the dry ice, reducing rapid loss. Micro-vents let CO₂ escape so the cooler doesn’t swell. Think of it as a breathable jacket: slows heat in, lets gas out.
| Mechanism | What happens | Why it matters | For you |
|---|---|---|---|
| Convection control | Less warm air touches dry ice | Slower sublimation | Longer hold with less ice |
| Radiant buffering | Reflective outer face reduces heat gain | Cooler walls stay colder | Fewer warm corners |
| Contact control | Sheet separates payload from ice | No freezer burn | Safer milk, greens, meat |
Practical wins you’ll notice
-
Even cooling: The wall-lined camping dry ice pack sheet keeps corners closer to center temperature.
-
Cleaner pack-outs: No pellets stuck to cans, no messy shards.
-
Faster training: One-page SOP with three photos is enough for the whole group.
Trail story: A family on a 48‑hour summer trip lined a 45‑qt cooler with a reflective camping dry ice pack sheet and added a thin pellet pad on top. Lunch meat stayed firm through two hot afternoons, and they used about 15% less dry ice than last year.
How many camping dry ice pack sheet panels do you need?
Short answer: Use a simple rule, then adjust for heat and how often you open the lid.
Baseline rule: For typical summer camping (daytime 20–30 °C), plan ~1.0 kg of dry ice per 10 L of cooler space per 24 hours. A full perimeter of camping dry ice pack sheet often reduces required mass by 10–20% because it slows losses and protects edges.
Five-step sizing you can reuse:
-
Find your cooler’s usable volume in liters.
-
Pick your target: 24, 48, or 72 hours.
-
Baseline dry ice mass = Volume/10 × Days × 1.0 kg.
-
Apply sheet efficiency (subtract 10–20% if you fully wall-line).
-
Convert to sheet count using per-sheet weight (e.g., 0.75 kg each). Add a thin pellet top layer if daytime peaks exceed 30 °C or you open the lid a lot.
Two-minute calculator (paste into your trip notes)
| Cooler (internal L) | Hours | Baseline (kg) | With sheet (−15%) | Open-lid factor (+10%) | If sheet = 0.75 kg | You’ll pack |
|---|---|---|---|---|---|---|
| 28 L day cooler | 24 | 2.8 | 2.38 | 2.62 | 3.49 | 3–4 sheets |
| 45 L weekend | 48 | 9.0 | 7.65 | 8.42 | 11.23 | 11–12 sheets |
| 60 L group trip | 72 | 18.0 | 15.30 | 16.83 | 22.44 | 22–23 sheets |
These are starting points. If nights drop under 15 °C, you can trim by ~5–10%. If days push past 35 °C, add 10–15%.
Use‑case quick picks
-
Day hikes with a small cooler: 2–3 camping dry ice pack sheet panels, no pellets, pre-chill beverages.
-
Two‑night family trip: Wall-line with sheets, add a thin pellet pad on top, keep milk in the center.
-
Three‑night basecamp: Full perimeter, reflective lid liner, pellets on top, daily “cold swap” of dinner to the center.
Which camping dry ice pack sheet materials last longest?
Short answer: Choose a durable outer film with a thin, closed‑cell core and micro‑venting. If you camp in hot sun, use reflective facing.
Material guide you can trust:
-
Outer film: Tough PE or co‑extruded films resist cracking at low temps and rough handling.
-
Insulative core: Thin closed‑cell foam reduces airflow without adding bulk.
-
Micro‑vents: CO₂ escapes steadily, so the cooler doesn’t swell or force a gap.
-
Edge binding: Reinforced edges prevent fray and keep fibers out of food.
Vacuum‑sealed vs quilted vs reflective
-
Vacuum‑sealed: Smooth, wipeable, and low lint—great near open produce or dairy.
-
Quilted/stitched: Bends well around corners, ideal for tight coolers.
-
Reflective‑faced: Cuts radiant heat; helpful on tailgates or open campsites.
| Format | Durability | Thermal steadiness | Flex around corners | Best for |
|---|---|---|---|---|
| Vacuum‑sealed camping dry ice pack sheet | High | High | Medium | Clean pack-outs, dairy-heavy coolers |
| Quilted/stitched camping dry ice pack sheet | Medium‑High | Medium‑High | High | E‑comm coolers, mixed shapes |
| Reflective‑faced camping dry ice pack sheet | Medium | High in sun | Medium | Hot, sunny camps and tailgates |
Field test tip
Bring a spare panel. If someone over‑packs the top with cans, slide one camping dry ice pack sheet between the payload and lid to buffer radiant heat during lunch.
How to pack a cooler with a camping dry ice pack sheet?
Short answer: Build a cold perimeter, shield food from direct contact, and keep a vent path for CO₂.
Standard camping pack‑out:
-
Pre‑chill the cooler in a cool room or with a sacrificial ice bag.
-
Line all four walls with a camping dry ice pack sheet.
-
Add a corrugated spacer or +5 °C PCM panel between the liner and food.
-
Place raw meat lowest, dairy in the center, drinks on the sides.
-
Add a thin pellet pad or a fifth sheet on top for long days.
-
Close the lid and check that the gasket is not fully airtight—CO₂ must vent.
Camping dry ice pack sheet for car‑camping vs backpacking
Backpacking with dry ice is uncommon due to weight and venting risks in soft packs. For car‑camping, a rigid cooler plus camping dry ice pack sheet is simple and safe when you keep the box outside the tent and crack the drain for gas escape.
| Scenario | Cooler type | Sheet setup | For you |
|---|---|---|---|
| Car‑camping weekend | 45–55 L rigid | Wall‑line + top pad | Stable temps with simple SOP |
| Hot tailgate | 60 L rigid, reflective lid liner | Reflective sheets + pellet top | Fewer warm sodas at 2–4 PM |
| Fishing day trip | 28–35 L rigid | Two side sheets + bottom pad | Cleaner fillet storage |
Do’s and don’ts at camp
-
Do keep the cooler in shade and raise it off hot truck beds.
-
Do pre‑chill drinks the night before.
-
Don’t store dry ice in a sealed tent or car.
-
Don’t place fresh greens directly on a camping dry ice pack sheet—use a spacer.
Camp example: Two couples used a 60‑L cooler, reflective camping dry ice pack sheet, and a top pellet pad. They opened the lid hourly at a lakeside camp. Milk stayed cold and lettuce crisp after 50 hours in 30 °C afternoons.
Is a camping dry ice pack sheet safe and compliant outdoors?
Short answer: Respect CO₂ gas, protect skin, and keep ventilation. The camping dry ice pack sheet helps by separating food from direct contact and by reducing rapid sublimation.
Safety checklist you can print:
-
Ventilation: Never store the cooler in a closed tent or trunk overnight.
-
PPE: Use insulated gloves when handling the camping dry ice pack sheet or pellets.
-
Contact: Keep a spacer between sheet and fresh produce.
-
Kids & pets: Keep them away during pack‑out and unloading.
-
Disposal: Let the remainder sublimate outside, away from curious hands.
Common mistakes (and fixes)
| Mistake | Why it hurts | Fast fix | Your benefit |
|---|---|---|---|
| Sealing the lid airtight | CO₂ pressure + warmer temps | Leave a micro‑vent path | Safer, steadier temps |
| Sheet only on lid | Warm corners remain | Wall‑line with camping dry ice pack sheet | Even cooling |
| Pellets buried under food | Food freezes or blocks gas | Pellets on top or bottom pad | Controlled cooling |
| Overfilling | Wasted mass, slower packing | Use the calculator and round up one sheet | Saves money and time |
How to reduce cost and waste with a camping dry ice pack sheet?
Short answer: Better placement beats more dry ice. A camping dry ice pack sheet reduces overfill and food waste by stabilizing corner temps.
Savings sources:
-
Right‑sized fill: Typically 10–20% less dry ice with full wall‑lining.
-
Fewer throw‑aways: Eggs, greens, and dairy survive the afternoon rush.
-
Reusable: Many sheets handle multiple weekend trips if wiped and dried.
Fast ROI check
| Metric | Pellets only | With camping dry ice pack sheet | Meaning |
|---|---|---|---|
| Dry ice mass for 48 h, 45 L | ~9.0 kg | ~7.5–8.4 kg | 10–20% reduction |
| Warm-corner incidents | Higher | Lower | Less food waste |
| Cleanup time | Longer | Shorter | Fewer shards, less water |
2025 trends in camping dry ice pack sheet designs
Trend overview: In 2025, camping dry ice pack sheet makers focus on reflective skins for radiant control, cleaner films that wipe fast, and micro‑vent patterns that keep CO₂ flowing without swelling. Fold‑line modular panels let one size fit multiple cooler models.
Latest advances at a glance
-
Reflective outer facings: Lower heat gain on open sites.
-
Sensor pockets: Slide in a compact logger to check temps on test trips.
-
Fold lines & snaps: Resize one camping dry ice pack sheet for 28–60 L coolers.
-
Low‑lint surfaces: Better for produce and dairy.
-
Hybrid packs (sheet + PCM): Smooth 2–8 °C for sensitive foods.
Market insight: Car‑campers choose predictability over the cheapest per‑kg price. Clear instructions plus a reliable camping dry ice pack sheet beat a mystery bag of pellets every time.
Camping dry ice pack sheet—interactive self‑assessment
Answer three quick questions to pick your starting setup.
-
How hot will afternoons get?
-
Under 25 °C → Efficiency factor 0.9
-
25–32 °C → Efficiency factor 0.85
-
Over 32 °C → Efficiency factor 0.8
-
-
How often will you open the lid?
-
Few times/day → Opening factor 1.0
-
Hourly or more → 1.1
-
-
What’s your cooler volume?
-
Check spec sheet, subtract 10–20% for baskets.
-
Multiply the factors using the calculator above to estimate sheet count.
Camping dry ice pack sheet FAQs
Q1: Can I place food directly against a camping dry ice pack sheet?
Use a corrugated spacer or a +5 °C PCM pad. The camping dry ice pack sheet cools best when it breathes and your food avoids cold shock.
Q2: Is a camping dry ice pack sheet better than block dry ice?
Often yes for mixed loads. Blocks make cold zones but leave warm corners. A camping dry ice pack sheet evens things out.
Q3: How do I store a sheet between trips?
Wipe, dry fully, and hang flat. Avoid sharp folds. Your camping dry ice pack sheet should last multiple weekends.
Q4: Will a sheet make my cooler lid pop open?
Not when it’s micro‑vented and you leave a vent path. Never hermetically seal around dry ice.
Q5: Can I sleep with the cooler in the tent?
No. CO₂ is heavier than air. Keep the camping dry ice pack sheet and cooler outside or in a ventilated area.
Q6: What if I only camp one day?
Two to three camping dry ice pack sheet panels often cover a 28–35 L cooler with minimal pellets.
Summary and next steps
Key points: A camping dry ice pack sheet builds a cold perimeter, keeps corners cold, and reduces overfill. Start with 1.0 kg per 10 L per day, subtract 10–20% for full wall‑lining, then adjust for heat and lid‑open habits. Use a spacer for produce and dairy, keep ventilation, and test once before a big trip.
Action plan:
-
Measure cooler volume and pick trip hours.
-
Run the calculator and round up one camping dry ice pack sheet for safety.
-
Wall‑line, add a spacer, then finish with a top pad or pellets.
-
After the trip, note what lasted longest and update your SOP for next time.
About Tempk
We design practical cold‑chain gear for food, pharma, and outdoor use. Our camping dry ice pack sheet line focuses on predictable cooling, cleanable surfaces, and clear one‑page SOPs. Two advantages you’ll notice: reinforced edges that resist fray and reflective options that fight midday heat.
Ready for a tailored setup? Share your cooler size, trip hours, and expected highs—our team will return a right‑sized camping dry ice pack sheet configuration and a printable pack‑out sheet.


