Insulated Grocery Bags With Zipper: 2025 Guide
Insulated Grocery Bags With Zipper: 2025 Guide
Insulated Grocery Bags With Zipper: 2025 Guide
If you’re buying insulated grocery bags with zipper, you want fewer melted items, fewer leaks, and less “food regret.” A zipper seems small, but it reduces warm-air mixing that speeds up warming. Think of it like a cooler lid: it doesn’t create cold, it protects it. In 2025, the best results come from the right bag plus repeatable packing habits.
This article will help you:
-
Pick insulated grocery bags with zipper by size, insulation, and liner type
-
Compare zipper seal, structure, and carry comfort without jargon
-
Pack frozen, chilled, produce, and hot foods to reduce temperature drift
-
Use a 60-second decision tool to match bags to your route
-
Clean and dry bags fast so odors and mold don’t win
-
Estimate ROI so your setup pays for itself
Why do insulated grocery bags with zipper outperform open-top totes?
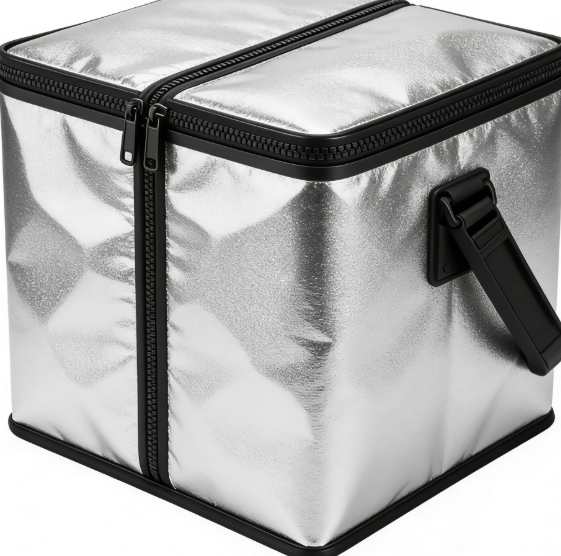
Insulated grocery bags with zipper hold temperature longer because they reduce air exchange at the opening. Open tops leak cold air every time the bag moves. Warm car air replaces that cold air quickly. A zipper also improves spill control and makes stacking easier.
Zippers help you in three practical ways:
-
Less temperature swing: fewer warm spikes during loading and stops
-
Less mess: leaks stay contained instead of soaking your trunk
-
Less chaos: bags keep their shape when you stack multiple orders
Zipper vs open-top vs hard cooler
| Bag style | Heat control | Spill control | Best for you when… |
|---|---|---|---|
| Open-top insulated tote | Medium | Low–Medium | You do short trips and carry low-risk items |
| Zippered insulated bag | High | High | You want repeatable “close-and-go” performance |
| Hard cooler | Very high | High | You need maximum hold but accept less convenience |
Practical tips and suggestions
-
Short trips (<30 min): zipper mostly boosts organization and spill control.
-
Long trips (60+ min): zipper becomes a real temperature tool.
-
Trunk in summer: keep the bag shaded and zipped until unloading.
Practical example: People often fix “soft edges” on ice cream by switching from open totes to a fully zipped cold bag.
Which features matter most when buying insulated grocery bags with zipper?
Focus on five things first: insulation continuity, zipper seal, liner cleanability, structure, and handles. If any one fails, you’ll stop using the bag. That’s the real “quality test.”
Feature checklist you can use in-store
-
Insulation: thick and even, with no big gaps at seams
-
Zipper: closes fully at corners, reinforced end stops, smooth glide
-
Liner: wipeable, leak-resistant, low-odor material
-
Structure: stands up on its own; firm bottom panel
-
Handles: wide straps, reinforced stitching, balanced carry
| Feature | “Good” looks like | “Bad” looks like | What it means for you |
|---|---|---|---|
| Insulation | Thick, even panels | Thin padding only | Faster warming on hot days |
| Zipper | No gaps, reinforced ends | Corner gaps, weak tape | Leaks air and spills |
| Liner | Smooth wipe-clean | Fabric absorbs spills | Odors and mold risk |
| Base | Firm bottom | Sagging base | Crushed eggs and berries |
| Handles | Wide + reinforced | Thin + loose stitching | Painful carry, strap failure |
Practical tips and suggestions
-
Raw meat/seafood: prioritize liner + seam reinforcement first.
-
You hate cleaning: avoid fabric interiors that hold smells.
-
You carry heavy loads: handles matter more than extra pockets.
Practical example: A perfect-size bag with a hard-to-clean liner usually becomes a “closet bag.”
What size insulated grocery bags with zipper should you buy?
Buy the size that fits your typical trip, not your holiday max. Oversized bags waste space and trap more warm air. Two medium bags often outperform one giant bag.
A simple size method: “basket equivalents”
-
Small: quick grab (milk, eggs, fruit, a few frozen items)
-
Medium: weekly top-up (most households’ sweet spot)
-
Large: bulk shopping (only if handles and base are reinforced)
| Your shopping pattern | Best size | Why it fits | What it means for you |
|---|---|---|---|
| Daily small trips | Small or Medium | Packs tight | Less air space = better hold |
| Weekly planned trip | Medium | Easier sorting | Fewer bags, less chaos |
| Bulk club shopping | Large + reinforced | Heavy loads | Prevents strap failure |
Practical tips and suggestions
-
Buy two medium before one huge. You’ll lift easier and pack tighter.
-
Tall bags tip more. Use a firm base layer to stabilize.
-
Flat trays (pizza/meal kits): choose a wide rectangular bag.
Practical example: Many shoppers cut car-to-kitchen trips by using two medium bags instead of one oversized tote.
Are insulated grocery bags with zipper worth it for frozen foods?
Yes—frozen foods are the most sensitive to warm spikes, and zippers reduce those spikes. The biggest risk is not your total drive time. It’s the small gaps: checkout delays, loading time, and “one quick stop.”
Frozen packing table (simple and practical)
| Frozen item | Packing priority | Extra help | What it means for you |
|---|---|---|---|
| Ice cream | Highest | Gel pack + tight pack | Prevents melt/refreeze texture damage |
| Frozen seafood/meat | High | Separate sealed bag | Reduces cross-contact mess |
| Frozen veggies | Medium | Pack tight | Keeps quality stable |
| Frozen meals | Medium | Flat orientation | Prevents crushing and leaks |
Practical tips and suggestions
-
If your store is far: keep 1–2 gel packs frozen all week.
-
If it’s hot out: keep the cold bag in the cabin, not the trunk.
-
If you do multiple stops: zip fully and don’t reopen “to check.”
Practical example: A family stopped “mystery melted” items by using one dedicated zipped bag for frozen only.
How do insulated grocery bags with zipper protect fresh produce?
They reduce heat exposure, but you must avoid “wet damage.” Produce usually needs cool air, not pooled condensation. Your goal is “cool and dry,” not “cold and wet.”
Produce packing table
| Produce type | Best placement | Avoid | What it means for you |
|---|---|---|---|
| Leafy greens | Top, away from packs | Pooled moisture | Stays crisp longer |
| Berries | Center, stable | Crushing | Fewer leaks and mold |
| Herbs | Side zone | Wet liner contact | Better aroma and texture |
| Root vegetables | Bottom | None major | Handles weight well |
Practical tips and suggestions
-
Add a small dry towel to absorb condensation.
-
Keep produce separate from raw meat/seafood, even if everything is cold.
-
Don’t overfill. Crushed produce creates more moisture and smell.
Practical example: A towel barrier often saves berries from “sweaty squish” on summer grocery days.
What’s the best way to carry hot food in insulated grocery bags with zipper?
Use a “two-bag system”: one hot bag and one cold bag. Hot and cold in one space fight each other. It’s like putting a heater next to butter.
Hot-food packing table
| Hot item | Main risk | Best move | What it means for you |
|---|---|---|---|
| Fried foods | Steam sogginess | Vent briefly 5–10 minutes | Better texture |
| Soups | Spills | Upright + towel stabilizer | Less mess |
| Pizza/flat trays | Condensation | Flat bag + brief vent | Better crust |
Practical tips and suggestions
-
Vent steamy items briefly before fully sealing.
-
Keep the hot bag upright to prevent grease spills.
-
Clean after hot foods. Grease becomes odor fast.
Practical example: Delivery drivers use a strict HOT/COLD split because mixed temps ruin both.
Decision tool: Which insulated grocery bags with zipper fit your route?
Step 1: Score your “grocery route risk” (0–12)
-
Trip time (store → fridge)
-
0 = under 10 min
-
2 = 10–25 min
-
4 = 25–45 min
-
6 = 45+ min
-
Heat exposure
-
0 = mild / mostly indoors
-
2 = mixed weather
-
4 = hot climate or summer trunk exposure
-
Extra stops
-
0 = direct home
-
1 = one quick stop
-
2 = multiple stops
Total score: ____ / 12
Step 2: Match the setup
| Score | Best bag type | Must-have features | Why it works for you |
|---|---|---|---|
| 0–3 | Lightweight zipper bag | Wipe-clean liner | Low risk, easy habit |
| 4–7 | Structured insulation bag | Reinforced zipper + thicker walls | Reduces drift on typical trips |
| 8–12 | High-performance setup | Strong structure + gel pack space | Handles long routes and heat spikes |
Step 3: Pick one habit upgrade (choose one)
-
Keep one gel pack frozen all week
-
Store bags in the car so you always use them
-
Pack frozen items last and zip immediately
How should you pack insulated grocery bags with zipper for max performance?
Pack tight, cluster by temperature, and seal fast. A premium bag packed poorly performs like a cheap bag. Air gaps warm quickly and make performance inconsistent.
“Bag zoning” you can teach anyone
| Zone inside bag | Put this there | Keep out | What it means for you |
|---|---|---|---|
| Center core | Dairy, seafood, frozen | Hot items | Longest-lasting cold |
| Edge zones | Stable chilled items | Delicate berries | Less crushing |
| Top zone | Fragile items | Heavy items | Fewer breaks and leaks |
Practical tips and suggestions
-
Wrap gel packs in a thin cloth to avoid cold shock on delicate foods.
-
Use a flat “base layer” in tall bags to reduce tipping.
-
Designate one bag as cold-only so the habit sticks.
Practical example: Families who “zone pack” stop reopening the bag to reorganize.
How do you clean insulated grocery bags with zipper without ruining them?
Wipe after each trip and dry fully with the zipper open. Moisture trapped in a closed bag creates the “mystery smell.” Cleaning is what makes the bag a long-term habit.
Cleaning table (fast and realistic)
| Situation | What to do | Drying rule | What it means for you |
|---|---|---|---|
| Normal use | Wipe with mild soap | Dry with zipper open | Prevents odor |
| Sticky spill | Wash liner gently | Air dry overnight | Protects liner |
| Raw juice leak | Clean + food-safe sanitize | Complete dry | Reduces contamination risk |
Practical tips and suggestions
-
Never store the bag zipped while damp.
-
Clean zipper seams where residue hides.
-
If odor appears, air out and dry longer before storage.
Practical example: Storing bags slightly open prevents repeat odors better than any spray.
What mistakes make insulated grocery bags with zipper feel “useless”?
Most failures come from habits, not the product.
Common mistakes:
-
Leaving the bag unzipped because it’s “almost full”
-
Spreading frozen items across multiple bags
-
Packing hot takeout with dairy
-
Storing the bag closed while damp
-
Ignoring a damaged zipper that no longer seals
Quick fixes:
-
If it won’t zip, buy one more medium bag and pack tighter.
-
If zippers fail, choose reinforced zipper tape and stronger stitching.
-
If condensation is constant, add a small absorbent towel.
2025 developments and trends for insulated grocery bags with zipper
In 2025, “home cold chain” habits are more normal for savings and food quality. People want gear that supports repeatable routines. The biggest upgrade is not a gadget. It’s a bag design that stays easy to use and clean.
Latest progress snapshot
-
More structured box shapes for better trunk stacking and less tipping
-
Improved zipper durability with smoother tracks and stronger end stops
-
More leak resistance through reinforced corners and better liners
-
More delivery-ready layouts with stable bases and longer carry options
Common questions (FAQ)
Q1: Do insulated grocery bags with zipper really keep food cold?
They slow warming, especially when packed tight and fully zipped. Add gel packs for long trips.
Q2: How many insulated grocery bags with zipper should I own?
Most homes do well with 2–4 medium bags. Two medium usually beat one oversized.
Q3: Can I put raw meat in an insulated grocery bag?
Yes, but use a secondary sealed bag and clean thoroughly after any leak.
Q4: Rectangular or tall—what’s better?
Rectangular bags pack tighter and stack easier. Tall bags fit cartons upright but tip more.
Q5: How do I stop odors in insulated grocery bags with zipper?
Wipe after use and dry fully with the zipper open. Odor usually comes from trapped moisture.
Summary and recommendations
Insulated grocery bags with zipper work best when you pair the right bag with repeatable packing. Choose strong insulation, a full-seal zipper, and a wipe-clean liner. Buy sizes that match your typical trip and pack by temperature zones. Keep a cold-only bag for frozen and dairy, and a separate hot bag for meals. Clean quickly and dry fully so the habit lasts.
Action plan (CTA)
For the next 7 days:
-
Keep 1–2 gel packs frozen at all times.
-
Use one zipped bag for frozen/chilled only.
-
Wipe and dry bags after every trip (zipper open overnight).
About Tempk
At Tempk, we apply cold chain thinking to everyday and commercial use cases. We focus on practical insulation design, easy-clean liners, and repeatable routines. Our goal is simple: reduce temperature swings, reduce mess, and protect food quality.
Next step: Share your typical trip time (minutes), climate (mild/hot), and top pain point (melting, leaks, odors, or carrying comfort). We’ll suggest a bag size mix and a packing layout you can standardize immediately.
Insulated Grocery Bag Zipper: What to Buy in 2025?

An insulated grocery bag zipper is the “door” that decides whether your bag stays cold—or slowly leaks warm air during the drive home. In real errands, the zipper often matters more than extra-thick insulation because heat sneaks in through gaps first. If you want fewer melted items, fewer leaks, and less odor, your zipper choice and routine will do most of the work.
This article will help you:
-
Choose an insulated grocery bag zipper that seals well under real load
-
Run a simple two cold sources pack-out that keeps groceries colder, longer
-
Prevent spills with a leakproof insulated tote routine
-
Clean and dry the zipper area so your bag stays odor-free
-
Decide when an insulated grocery bag zipper vs hard cooler makes more sense
Why does an insulated grocery bag zipper matter so much?
Core answer: A strong insulated grocery bag zipper reduces warm-air exchange and keeps cold air from escaping, especially at corners where most “invisible gaps” happen. Insulation slows heat transfer through the walls, but the zipper controls the opening—so if the top isn’t sealed, the cold “budget” drains fast.
Think of it like a winter jacket. Thick padding helps, but if the front stays open, you still lose warmth. Your grocery bag is the same idea—just reversed.
The 3 jobs of a good zipper (simple)
| Zipper job | What it protects | What fails first | What it means for you |
|---|---|---|---|
| Seal | Temperature stability | Corner gaps | Faster warming |
| Strength | Bag structure | Slider + stitching | Shorter bag life |
| Cleanability | Hygiene + odor control | Grit in teeth | Stuck zipper, smells |
Practical tips you can use today
-
Zip fully every time. A “half-zip” acts like a cracked fridge door.
-
Avoid overstuffing. Overstuffing bends the zipper line and makes teeth separate.
-
Check corners first. Most seal failures start at corners.
Practical case: A shopper reduced soft ice cream complaints by switching to a fully zippered bag and keeping it sealed from checkout to home.
Which insulated grocery bag zipper design fits your routine?
Core answer: The best insulated grocery bag zipper layout depends on how you load the bag and how often you open it. Some layouts open wider (easier loading) but add more zipper track (more cleaning and wear).
Common zipper layouts you’ll see
| Layout | Best for | Weak spot | What it means for you |
|---|---|---|---|
| Straight top zip | Quick grocery runs | Corner gapping | Pack snug, keep top flat |
| U-shaped zip | Bulk loading | Long-track wear | Needs more cleaning |
| 3-sided lid | Large items | Corner stress | Don’t overload the lid |
| Dual sliders (meet-in-middle) | Heavy loads | More moving parts | Often lasts longer if quality |
Practical tips you can use today
-
If you carry heavy bottles or bulk frozen, choose dual sliders or reinforced ends.
-
If you want fast packing, a U-zip can save time at checkout.
-
If you hate cleaning, avoid designs that trap crumbs along a long zipper path.
Practical case: A delivery driver reduced zipper failures after switching to dual sliders that spread stress under heavy loads.
Coil vs molded teeth: which insulated grocery bag zipper lasts longer?
Core answer: For an insulated grocery bag zipper, tooth style changes how the zipper handles grit, moisture, and daily strain. You don’t need “engineering specs”—you need a zipper that stays smooth when the bag is full.
Tooth style comparison (plain language)
| Tooth style | What it feels like | Handles grit? | What it means for you |
|---|---|---|---|
| Coil zipper | Flexible, smooth | Medium | Great for daily open/close |
| Molded plastic teeth | Chunky, tough | High | Better for heavy use |
| Water-resistant coated zipper | Stiffer, sheds water | Medium | Helpful for condensation, needs care |
Practical tips you can use today
-
If you do farmers markets, beach days, or messy loads, pick grit-tolerant teeth.
-
If you carry heavy frozen boxes, prioritize toughness over “fashion.”
-
If easy cleaning matters, choose bigger teeth that rinse out faster.
How do you test if an insulated grocery bag zipper really seals?
Core answer: Test your insulated grocery bag zipper when the bag is loaded. Many bags look sealed when empty, then open small gaps under weight—especially at corners.
60-second seal test
-
Load a few heavy items (like bottles).
-
Zip normally.
-
Pinch-check both corners for openings.
-
Lift by handles and re-check the zipper line.
-
Watch for “zipper creep” (slider slowly backing off).
| What you see | What it means | Choose / fix | Benefit to you |
|---|---|---|---|
| Corner gap | Track not supported | Reinforced corners | Better cooling |
| Slider backs off | Weak slider tension | Higher quality slider | Less frustration |
| Teeth separate | Overload or weak tape | Stronger zipper tape | Longer life |
Practical tips you can use today
-
Look for a stiffer top edge that keeps the zipper line straight.
-
Choose reinforced zipper ends (common failure point).
-
Don’t trust an empty-bag test—always test under load.
Best way to pack an insulated grocery bag zipper with ice packs
Core answer: The best results come from a simple system: two cold sources + tight packing + fully closed insulated grocery bag zipper. One cold source cools one side; two cold sources protect the whole volume.
The “two cold sources” pack-out (easy to repeat)
| Pack-out pattern | What you place | Why it helps | What it means for you |
|---|---|---|---|
| Bottom cold source | Gel pack or frozen bottle | Blocks heat from below | Fewer warm corners |
| Food in the middle | Dairy, meat, seafood, deli | More stable center zone | Better control |
| Top cold source | Second pack | Protects when opened | Safer during quick stops |
Step-by-step (HowTo)
-
Pre-chill: Put cold packs in the bag for 5 minutes before loading.
-
Add a barrier: Thin towel/cardboard to prevent freeze spots on delicate items.
-
Load cold core: Place dairy and proteins in the center.
-
Side-pack if needed: Add packs along the sides for longer trips.
-
Top-cap ice: Place one pack on top.
-
Zip fully: Check corners—this is where gaps hide.
Practical tips you can use today
-
Use flat ice packs to reduce crushing.
-
Keep the zipper line straight by avoiding tall items above the zipper track.
-
Split one huge load into two zippered bags instead of forcing one zipper.
Practical case: A commuter improved arrival quality on a 75-minute return trip by tight packing plus two cold sources and keeping the insulated grocery bag zipper closed between stops.
How do you prevent leaks and odors with an insulated grocery bag zipper?
Core answer: The insulated grocery bag zipper helps contain leaks, but leaks usually start inside the bag. Your goal is to keep liquids off the zipper tape and remove moisture after use.
Leak-proof routine (simple and repeatable)
-
Put meat/seafood in sealed secondary bags
-
Use an absorbent pad for high-risk items
-
Keep wet items bottom + upright
-
Dry the bag open after use
| Problem | Cause | Zipper-safe fix | What it means for you |
|---|---|---|---|
| Zipper sticks | Crumbs + moisture | Wipe track, dry | Longer zipper life |
| Odor lingers | Wet seams | Air-dry fully | Fresher bag |
| Mold spots | Stored closed while wet | Store unzipped | Less replacement cost |
Practical tips you can use today
-
Wipe the zipper line, not just the inside walls.
-
Store the bag unzipped overnight so moisture can escape.
-
Keep one dedicated “protein bag” to reduce smell and cross-contact.
Insulated grocery bag zipper for delivery: a 10-minute SOP
Core answer: Delivery fails when bags get opened too often. Every unzip swaps cold air for warm air. The fix is a simple routine that reduces openings and keeps categories separated.
Delivery SOP (teach it fast)
-
Pre-chill all bags before the first pickup
-
Use a two-bag method: cold bag + dry pantry bag
-
One-open rule: open only at drop-off
-
Route with cold-first delivery
-
End-of-shift wipe + full dry, store unzipped
Self-assessment (interactive)
Give yourself 1 point for each “yes”:
-
I use cold packs for every cold order.
-
I keep the insulated grocery bag zipper closed between stops.
-
I separate cold items from pantry items.
-
I can fully dry bags after the shift.
-
I replace worn ice packs regularly.
Score guide
-
0–2: High risk—fix routine before buying more gear
-
3–4: Workable with stricter timing and separation
-
5: Strong setup for consistent results
Insulated grocery bag zipper vs hard cooler for road trips
Core answer: An insulated grocery bag zipper wins on portability and daily convenience. A hard cooler wins on multi-hour hold time, high heat exposure, and long stops.
| Your use case | Better choice | Why | What it means for you |
|---|---|---|---|
| Weekly grocery trips | Insulated grocery bag zipper | Easy carry | Simple daily win |
| Multiple errands in heat | Hard cooler | Stronger hold time | Fewer warm surprises |
| Apartment stairs | Insulated grocery bag zipper | Lighter | Less strain |
| Long road trip + stops | Hard cooler | Stable over hours | Bigger safety margin |
Practical tips you can use today
-
Hybrid approach: use an insulated grocery bag zipper inside a cooler for organization.
-
Keep cold items in the cabin, not a heat-soaked trunk.
-
If you regularly exceed 2 hours, upgrade to a hard cooler.
2025 latest trends in insulated grocery bag zipper design
In 2025, buyers care less about “looks” and more about repeatable performance. The biggest shift is usability: bigger pull tabs, smoother corner tracks, more dual sliders, and more wipe-clean liners. These features reduce user mistakes—so you actually zip the bag every time and clean it often enough to keep it fresh.
Latest developments snapshot
-
More dual-slider zippers for faster workflows and fewer jams
-
More structured bases to prevent tipping and crushing
-
More wipe-clean liners to reduce odor buildup
-
Smarter fits that reduce dead-air space for steadier cooling
Common questions (FAQ)
Q1: Is a zipper better than Velcro for an insulated grocery bag?
Usually yes. A zipper is more repeatable and reduces air gaps along the top edge.
Q2: How long does an insulated grocery bag zipper keep food cold?
It depends on heat, trip time, and cold packs. Tight packing plus two cold sources increases your safe window.
Q3: Why does my insulated grocery bag zipper separate while zipping?
Most often: overstuffing, a bent zipper line, or debris in the teeth. Reduce load height, straighten the top edge, and wipe the track.
Q4: How do I stop odor in a zippered insulated bag?
Remove residue and remove moisture. Wipe the liner and zipper line, then air-dry unzipped overnight.
Q5: Should I buy a water-resistant zipper?
Buy it if condensation and wet environments are common. For internal spills, a wipeable liner and routine matter more.
Summary and recommendations
A reliable insulated grocery bag zipper is a practical upgrade because it reduces warm-air leaks, improves spill control, and supports repeatable routines. Choose a zipper layout that matches your load style, test the seal under real weight, and pack using two cold sources for steadier results. For leaks and odor, your best defense is secondary containment plus full drying with the bag unzipped.
Your next-step action plan (CTA)
-
Pick one “standard pack-out” and use it for your next three trips.
-
Keep two cold packs ready in your freezer at all times.
-
Assign one bag as a protein-only bag to reduce smell and mess risk.
-
If you routinely exceed 2 hours in heat, pilot a hard cooler upgrade.
About Tempk
At Tempk, we help cold chain teams and everyday users turn “best effort” cooling into repeatable performance. We focus on the details that actually change results—seal integrity, leak containment, and simple routines you can follow on busy days—so your insulated grocery bag zipper system stays reliable, clean, and easy to use.
Next step: Share your typical trip time, climate risk (hot/mild), and what you carry most (frozen, dairy, meat/seafood). We’ll recommend a zipper setup and pack-out routine that fits your real-world use.
Expanded Polypropylene Box Exporter Guide 2025

How to Choose an Expanded Polypropylene Box Exporter?
If you’re sourcing cold chain packaging, choosing the right expanded polypropylene box exporter is one of the fastest ways to reduce damage, prevent temperature drift, and stabilize landed cost. EPP (expanded polypropylene) is a springy, closed-cell foam that insulates while resisting knocks and repeat handling. But the real result depends on process control, lid fit, density consistency, and export paperwork quality. This guide gives you simple checks you can run today.
This article will answer for you:
-
How an expanded polypropylene box exporter impacts real cold chain outcomes (damage, excursions, delays)
-
A practical expanded polypropylene box exporter quality checklist you can reuse
-
What specs to send so quotes are truly comparable (MOQ, tooling, density, tolerances)
-
How to read a thermal test report without getting lost in charts
-
Which Incoterms reduce arguments when something goes wrong
-
A decision tool + self-test to spot weak exporters early
Why does your expanded polypropylene box exporter matter?
Because EPP performance depends on how it’s made, not just what it’s called. Two boxes can look identical and still behave differently if density drifts, walls vary, or lids warp after cooling. When your expanded polypropylene box exporter controls the process tightly, you get repeatable insulation behavior, consistent stacking, and fewer surprises at receiving.
In plain terms, EPP should feel like “helmet foam for logistics.” It absorbs bumps and rebounds. But if molding is unstable, you’ll see crumbly edges, wobbly stacks, and lids that close differently box to box. Those small problems become big problems once you scale.
| What you care about | What the exporter controls | What changes for you |
|---|---|---|
| Temperature stability | Density, wall thickness, lid seal | Fewer excursions and rejects |
| Damage rate | Bead fusion, corner geometry | Fewer claims and returns |
| Warehouse speed | Stack footprint, label zones | Faster scanning and handling |
| Landed cost | Nesting plan, cartons, lead time | Fewer containers, fewer fees |
What “good” looks like at receiving
A reliable expanded polypropylene box exporter delivers boxes that stack without wobble, close with the same resistance every time, and arrive with clean cartons and consistent labeling. Your team should not need “extra tape,” rework, or sorting to make them usable.
Practical tips you can use
-
Ask for production-run samples, not prototypes. Prototypes hide real variation.
-
Measure what matters most: lid fit, key dimensions, and unit weight consistency.
-
Treat “looks fine” as a warning. Small gaps can cause large temperature drift over time.
Real example: One buyer reduced temperature drift by switching to an exporter with tighter lid tolerances. Complaints dropped without changing coolant.
How to audit an expanded polypropylene box exporter in 2025?
Audit for repeatability, not promises. A strong expanded polypropylene box exporter can show stable batch records, clear tolerances, and simple inspection routines. You do not need a deep engineering background to spot weak control.
Use this “3-layer” audit so you move fast without missing the basics.
-
Manufacturing proof: batch weight spread, key dimensions, lot traceability
-
Fit/function proof: lid fit, loaded stacking, handling simulation
-
Export readiness: invoice consistency, packing method, change control discipline
Factory capability checklist (fast audit)
| Audit focus | Ask for | What to look for | Why it matters to you |
|---|---|---|---|
| Tooling control | mold list + IDs | clear labeling and storage | prevents “silent redesigns” |
| Process control | work instructions | simple, repeat steps | reduces drift across lots |
| Inspection records | recent QC sheets | real numbers, not marketing | faster root cause during claims |
| Capacity planning | monthly output + lead times | realistic peak plans | fewer late shipments |
| Traceability | lot/date coding | consistent codes on cartons | easier investigations |
Expanded polypropylene box exporter sample checklist
Order samples like you plan to buy, not like you plan to admire.
-
Quantity: at least 10 units per size, not 1–2
-
Timing: ideally 2–3 production dates
-
Matching: lid + base from the same run
-
Packaging: include the exact export carton method they will use
| Sample test | What to record | Pass signal | Meaning for you |
|---|---|---|---|
| Weight consistency | weight per unit | tight spread | stable density control |
| Lid fit feel | close/open effort | consistent | predictable insulation |
| Loaded stack test | real payload, 4-high | no tilt/collapse | safer transport |
| Surface integrity | edges and corners | no crumbling | longer reuse life |
Practical tips you can use
-
Use the “3-sample rule”: three samples from different days reveal drift fast.
-
If they can’t talk tolerances, they can’t control tolerances.
-
Demand change control: no material, density, or tooling changes without written approval.
Real example: A buyer avoided a bad supplier after seeing no batch records and inconsistent lid fit across three production dates.
What specs should you send your expanded polypropylene box exporter?
A quote is only as accurate as your inputs. If you say “I need an EPP box for seafood,” you will get vague offers and surprise costs. A clear one-page spec makes the expanded polypropylene box exporter faster, cheaper, and more accurate.
Think of your spec like a recipe. Missing ingredients create unpredictable results.
One-page spec template (copy/paste)
| Spec item | Example | Why it matters |
|---|---|---|
| Payload | 8 kg seafood | sets strength and usable volume |
| Target range | 2–8°C (chilled) or -20°C (frozen) | drives insulation design |
| Hold time | 48 hours | sets wall + coolant space needs |
| Shipping mode | air / road / sea | defines handling and cartons |
| Footprint | pallet-friendly outer size | reduces wasted freight space |
| Lid style | flat or tongue-and-groove | controls leaks + heat ingress |
| Reuse plan | 10+ cycles target | sets cleaning + spares strategy |
| Label zone | 1 large flat area | improves scan speed |
Must-pass acceptance criteria (keep it simple)
-
Lid fit: closes consistently, no visible gap
-
Stacking: 4-high loaded for 24 hours with minimal permanent deformation
-
Weight tolerance: agreed target and allowed range per unit
-
Surface: no crumble at edges after normal handling
Practical tips you can use
-
Include one sketch. Even a simple drawing prevents wrong assumptions.
-
Define pass/fail in plain language. “No leak after 30 minutes upside-down.”
-
Specify the outer carton requirements if retail appearance or parcel handling matters.
Real example: A biotech shipper cut redesign cycles in half by sending a one-page spec with hold time, payload geometry, and label zone needs.
How does your exporter prove thermal performance?
Thermal performance is evidence, not adjectives. A reliable expanded polypropylene box exporter can provide test results that match your lane stages and your coolant configuration. If the report lacks details, the chart can be misleading.
You want tests that explain: ambient profile, payload simulation, coolant placement, and logger locations.
Read a thermal report in 60 seconds
| Report element | What “good” looks like | Common trick | Your takeaway |
|---|---|---|---|
| Ambient profile | worst-case hot/cold | gentle room temp | request extremes |
| Payload | realistic mass | empty box | empty always wins |
| Coolant plan | clearly shown | hidden placement | replicate in SOP |
| Logger points | multiple positions | one “best spot” | request top/side/core |
| Pass criteria | clear window + time | no pass/fail | insist on targets |
Simple 3-test acceptance plan (in-house)
| Test | How to run it | Pass signal | What it means for you |
|---|---|---|---|
| Drop test | typical handling height | no cracks, lid still seals | fewer transit breaks |
| Compression test | loaded stack for 24h | low permanent set | stable stacking |
| Temp-hold check | your coolant + data logger | meets target window | fewer excursions |
Practical tips you can use
-
Run a lane-mimic test: warehouse → truck → airport → delivery stages.
-
Ask for repeat runs, not one lucky chart.
-
Add buffer time for delays, missed flights, or customs holds.
Real example: A frozen exporter reduced summer rejects by adding a 6-hour buffer and changing gel pack placement.
Which Incoterms reduce risk with an expanded polypropylene box exporter?
Pick Incoterms based on who actually controls freight, insurance, and export steps. Incoterms are not “shipping preferences.” They decide who pays, who carries risk, and who fixes problems at each handoff.
Incoterms snapshot (practical)
| Incoterm (example) | Who controls main freight | Who handles export | Best for you when… |
|---|---|---|---|
| EXW | you | often you (risk-heavy) | you have strong trade ops |
| FCA | you or exporter | exporter supports handover | you want cleaner pickup |
| CIP | exporter | exporter | you want insurance included |
| DAP | exporter | exporter | you want delivery to named place |
| DDP | exporter | exporter | you want “simplest buyer” setup |
Incoterms decision tool (answer quickly)
-
Do you want carrier choice control?
-
Do you already have a broker and import process?
-
Do you want the exporter to arrange insurance?
-
Do you want delivery to your warehouse dock?
-
Do you ship enough volume to negotiate freight yourself?
Practical tips you can use
-
Always write the named place clearly (city + terminal + address).
-
Match term to capability. If you can’t manage freight, avoid “buyer does everything.”
-
Define inspection timing at receipt to reduce damage disputes.
Real example: A buyer used EXW without experience and lost time at export. Switching to FCA stabilized pickups and reduced delays.
How to compare pricing, MOQ, and tooling quotes?
Compare total landed value, not unit price. A professional expanded polypropylene box exporter itemizes tooling, unit price by volume, packaging method, QC plan, and lead time. A one-line quote usually hides the true levers.
The 8 numbers you must collect (RFQ mini-template)
-
Outer dimensions (L×W×H)
-
Inner usable volume
-
Box weight (and lid weight separately)
-
Target density + tolerance
-
MOQ per part (box / lid / insert)
-
Tooling cost + sampling timeline
-
Nesting ratio (empty return efficiency)
-
QC sampling frequency + criteria
Cost drivers you should negotiate
| Cost driver | What it is | What to negotiate | What changes for you |
|---|---|---|---|
| Tooling | mold ownership | ownership + maintenance | long-term control |
| MOQ | min run quantity | step-down MOQs | safer ramp-up |
| Density spec | mass per volume | tolerance + method | consistent strength |
| Packing method | how boxes ship | nesting + pallet plan | lower freight cost |
| Spares | lids/inserts | spares plan | longer lifecycle |
Quote transparency score (interactive)
Score each item 0–2 (0 = missing, 2 = clear). Total 0–10.
-
Tooling separated from unit price
-
MOQ listed per part
-
Packing plan (cartons/pallet, pallet size)
-
QC sampling plan documented
-
Incoterm + named place clearly stated
0–4: high risk of hidden costs
5–7: acceptable—compare 2 more quotes
8–10: strong—now evaluate performance and service
Real example: A retailer cut freight cost by choosing a slightly shorter box that fit more units per pallet.
How to ship EPP boxes globally without paying to move “air”?
Freight is a geometry game. Your expanded polypropylene box exporter should optimize nesting, pallet patterns, and carton protection so boxes arrive undeformed and you maximize container utilization.
Cube-utilization worksheet (fill before production)
-
Boxes per nested stack: ____
-
Stacks per carton: ____
-
Cartons per pallet: ____
-
Pallets per container: ____
-
Deformation rate after transit (target): ____%
| Packing decision | Lower cost approach | Higher risk approach | Meaning for you |
|---|---|---|---|
| Nesting | deep nesting + separators | loose nesting | more deformation |
| Pallet wrap | consistent wrap + corner guards | minimal wrap | more movement |
| Carton strength | right corrugate grade | thin cartons | crushed corners |
Practical tips you can use
-
Demand a pilot pallet. One test shipment reveals the truth.
-
Protect corners. Corner damage often becomes lid-fit failure later.
-
Plan for sea humidity with liners or bagging when needed.
Real example: A buyer reduced container count by switching to nested shipping plus a stronger pallet plan. Boxes arrived cleaner and more consistent.
Compliance and documentation your exporter should support
Your documentation bundle should match your use case. For food-adjacent use, align with your market’s food-contact expectations. For pharma air shipments, align your handling and documentation discipline with temperature-controlled logistics expectations (often referenced through IATA guidance).
Treat compliance as a repeatable bundle, not a last-minute scramble.
Export documentation bundle (use in your RFQ)
| Document | When you need it | Why it matters |
|---|---|---|
| Material declaration | before first order | confirms what you’re buying |
| Lot/traceability info | every shipment | speeds investigations |
| Packing list + invoice | every shipment | prevents customs delays |
| Food-contact support docs (if applicable) | before launch | reduces compliance risk |
| HS classification support (descriptions) | before shipping | fewer holds and rework |
HS codes and customs (keep it practical)
Many plastic transport and packing articles are commonly classified under HS heading families used for “packing/conveyance” goods, but classification depends on intended use and how the product is described. The safest approach is simple: keep invoice descriptions consistent and confirm classification with your customs broker.
Practical tips you can use
-
Be specific: “food-grade” is not a plan—define contact type and temperature.
-
Require document consistency across every shipment, not just the first.
-
Lock change control: any material grade change triggers updated documents.
Real example: An importer avoided a delay by standardizing invoice descriptions and requiring the same document pack every shipment.
Reuse, hygiene, and sustainability: what changes in 2025?
In 2025, buyers want measurable reuse, not vague green claims. A strong expanded polypropylene box exporter helps you design a system: return loop, cleaning steps, inspection rules, and spares. Reuse fails when cleaning is hard or replacement parts don’t exist.
Reuse readiness self-check (interactive)
Give yourself 1 point for every “Yes.”
-
You can reliably get boxes back (return loop works).
-
You can clean and dry boxes consistently (a process exists).
-
You ship often enough to reuse quickly (low idle time).
-
Your product value is high enough to justify control.
-
Your box design will stay stable for months.
0–2: start with a limited pilot
3–4: reuse is likely cost-effective
5: build a full program with cycle tracking
| Reuse factor | Low readiness | High readiness | Meaning for you |
|---|---|---|---|
| Return rate | <50% | >80% | missing boxes kills ROI |
| Cleaning | ad hoc | scheduled + documented | consistent hygiene |
| Spares | none | lids/inserts available | longer lifecycle |
| Tracking | none | lot + cycle counting | faster fixes |
Practical tips you can use
-
Design for cleaning: smoother corners and fewer crevices reduce labor.
-
Design for repair: replace parts, don’t scrap whole boxes.
-
Add simple tracking: stickers or QR labels for cycle counting.
Real example: A meal kit brand extended life by using replaceable inserts instead of scrapping full boxes.
2025 latest developments and trends
In 2025, sourcing decisions are increasingly driven by proof-based buying, traceability, and right-sizing. Teams are moving budget from “new materials” to “better systems” like audits, SOPs, and acceptance tests. That shift reduces rework and makes performance more predictable.
Latest progress you should notice
-
More proof required: repeatable test runs beat “best-case charts.”
-
Right-size pressure: smaller footprints reduce freight and emissions together.
-
Traceability baseline: lot coding and document bundles are no longer optional.
Market insight you can act on
The best expanded polypropylene box exporter in 2025 is the one that makes your operation calmer: fewer exceptions, fewer claims, smoother receiving, and stable replenishment.
Frequently Asked Questions
Q1: What should I ask first when choosing an expanded polypropylene box exporter?
Ask for production-run samples, density targets, and a written batch inspection plan. Then test lid fit and loaded stacking.
Q2: Is EPP suitable for reusable cold chain packaging?
Often yes, if you have a return loop and a cleaning SOP. Reuse works best with spares, tracking, and cleaning-friendly geometry.
Q3: How do I compare two exporter quotes fairly?
Use the same spec sheet and coolant plan. Compare tooling, MOQ per part, packing method, QC plan, and nesting efficiency.
Q4: Which Incoterms are common with an expanded polypropylene box exporter?
EXW, FCA, CIP, DAP, and DDP are common. Choose based on who controls freight, insurance, and the work your team can handle.
Q5: What test evidence should an exporter provide?
At minimum: fit/stack evidence and thermal test details that match your lane stages. One “pretty chart” without conditions is not enough.
Q6: How do I prevent odor or hygiene issues in reusable EPP boxes?
Use a consistent wash/dry SOP and choose designs with smooth surfaces. Retire boxes that fail inspection instead of forcing reuse.
Summary and recommendations
A reliable expanded polypropylene box exporter helps you protect product quality, reduce damage, and stabilize total landed cost. Focus on what you can verify: production-run consistency, lid fit, loaded stacking, density control, export packaging, and a repeatable documentation bundle. When you combine clear specs with simple acceptance tests, you stop buying “foam boxes” and start buying predictable outcomes.
Your next steps (clear action plan)
-
Write a one-page spec (payload, temperature range, hold time, footprint).
-
Order production-run samples (10+ units per size, multiple production dates).
-
Run the 3 tests: drop, compression, and temp-hold with your coolant plan.
-
Choose Incoterms intentionally and write the named place precisely.
-
Lock change control and spares terms before scaling.
About Tempk
At Tempk, we support cold chain teams that need packaging to perform in real workflows, not only in photos. We help you translate lane realities into clear specs, acceptance tests, and validation plans. Our focus is repeatability: consistent fit, stable density, and export-ready packing and documentation—so your shipments arrive as expected.
Call to action: Share your lane, target temperature, and hold time. We’ll provide a practical RFQ checklist and acceptance template you can reuse.
Lightweight EPP Transport Box Distributor Checklist

Lightweight EPP Transport Box Distributor Checklist
A lightweight EPP transport box distributor can stabilize your cold chain—or quietly create chaos. In the first 30 days, you’ll usually see the truth: lid fit drift, batch inconsistency, stock surprises, and slow replacements. This guide merges your three drafts into one practical buyer playbook, built to help you pick a lightweight EPP transport box distributor based on repeatability, proof, and process.
You’ll also get ready-to-use tools: a lane brief worksheet, a 0–20 distributor score, a pilot checklist, and a cost-per-successful-trip calculator.
This article will help you answer:
-
How to choose a lightweight EPP transport box distributor without guesswork
-
Which distributor model fits your lanes (stocked, warehouse, or factory-direct)
-
What to verify in specs, QC, and documentation before scaling
-
How to run a tough-lane pilot and score results in plain language
-
How to compare price using cost per successful trip, not unit price
What does a lightweight EPP transport box distributor really do?
A lightweight EPP transport box distributor is not just a “box seller.” The best ones connect your operation to a repeatable packaging system: stable SKUs, predictable replenishment, and clear quality signals.
A reliable lightweight EPP transport box distributor helps you:
-
Match box size and structure to your lane risks
-
Standardize 2–3 sizes so packing stays fast
-
Keep supply stable with lead-time rules and safety stock options
-
Control batch variation with simple incoming checks
-
Support pilots, pack-out guidance, and scaling decisions
Think of it like a kitchen supplier: if ingredients vary every week, your output fails—even with a perfect recipe.
Distributor vs manufacturer vs integrator (why this matters)
| Role | What they provide | What you should expect | What it means for you |
|---|---|---|---|
| Manufacturer | Makes molded parts | Stable geometry and specs | Consistency starts here |
| Distributor | Selects, stocks, supports | Lane fit + accountability | Fewer wrong buys |
| Integrator (sometimes) | Inserts + tracking + SOPs | Program-level rollout | Faster scaling |
Practical tip: If your goal is smooth daily operations, your “best price” is useless without distributor-level support.
Which distributor model fits your lightweight EPP transport box distributor needs?
Most lightweight EPP transport box distributor options fall into three models. Your choice should match how fast you need boxes and how stable your lanes are.
| Model | Strength | Typical risk | Best for you when |
|---|---|---|---|
| Local stock distributor | Fastest availability | Limited SKUs | Urgent pilots, quick scaling |
| Regional warehouse distributor | Balanced stock + options | Needs forecasting | Weekly volume, multi-lane ops |
| Factory-direct supply model | Best customization | Longer lead time, higher MOQs | High volume, stable lanes |
How to choose the right model without overpaying
-
If you need boxes next week, local stock usually wins.
-
If you need stable supply across lanes, regional warehouses win.
-
If you need custom size or inserts, factory-direct can win—if you can plan.
Quick rule: If your demand is unpredictable, avoid locking yourself into high MOQ + long lead time too early.
What specs should you confirm with a lightweight EPP transport box distributor?
A lightweight EPP transport box distributor should speak in operational specs, not vague marketing terms. You don’t need complex engineering language. You need a short spec sheet that prevents “mystery substitutions.”
Ask your lightweight EPP transport box distributor to confirm:
-
Usable internal dimensions (not just outer size)
-
Wall thickness (and tolerance)
-
Foam density option or durability target (how “lightweight” is defined)
-
Lid design and closure behavior (seal is a common failure point)
-
Stacking stability (realistic stack height for your workflow)
-
Cleaning compatibility (what your team can realistically do daily)
The “three specs” that predict success
If you only confirm three things with a lightweight EPP transport box distributor, confirm these:
-
Usable internal size (fits your common order without wasted space)
-
Lid seal behavior (stays tight after repeated cycles)
-
Durability expectation (how many trips before deformation breaks function)
| Spec area | What to request | Why it matters | Your practical benefit |
|---|---|---|---|
| Internal size | Usable L×W×H | Packing efficiency | Less “shipping air” |
| Wall thickness | Range + tolerance | Insulation + strength | Fewer failures |
| Lid design | Fit + closure type | Leak control | More stable temps |
| Stack rating | Guidance by load | Warehouse safety | Less damage |
| Surface finish | Cleaning behavior | Reuse speed | Lower labor cost |
Practical tips you can apply this week
-
If costs are rising: your box may be oversized for typical orders.
-
If temp control drifts: lid seal + wall thickness matter most.
-
If reuse is your plan: cleaning speed becomes a hidden cost driver.
How to choose a lightweight EPP transport box distributor for your lanes?
The fastest way to choose a lightweight EPP transport box distributor is to start with lanes, not catalogs. Lanes define heat exposure, dwell time, stacking, and handling risk.
Interactive tool: 7-point lane brief worksheet (copy and fill)
-
Payload type: food / meal kits / dairy / pharma / lab / other
-
Payload size & weight: L×W×H, kg
-
Temperature band: chilled / controlled / frozen
-
Lane duration (door-to-door): ______ hours
-
Handling profile: courier / pallet / mixed handoffs
-
Reuse plan: one-way / closed loop / pooled returns
-
Failure cost per shipment: $______ (refunds + remake + brand risk)
If a lightweight EPP transport box distributor can’t recommend a clear setup after this brief, they’re selling boxes—not solutions.
Interactive decision tool: Distributor Fit Score (0–20)
Score each statement 0–2 (0 = no, 2 = yes):
-
The lightweight EPP transport box distributor provides clear spec sheets per SKU.
-
They ask about payload size and lane risk early.
-
They support modular inserts/dividers (if needed).
-
They have clear MOQ and lead time rules.
-
They can provide samples quickly for a pilot.
-
They explain cleaning and reuse limits in plain language.
-
They offer spare parts (lids/closures).
-
They support labeling zones or simple tracking options.
-
They can validate a “worst-case delay” scenario.
-
They discuss return flow and replacement planning.
Score meaning:
-
0–8: High risk distributor
-
9–14: Pilot-ready for simple lanes
-
15–20: Strong lightweight EPP transport box distributor for scale
How can you test a lightweight EPP transport box distributor before committing?
You don’t need a huge trial. You need a smart pilot that tests what usually fails: lid fit over cycles, stacking deformation, and toughest-lane outcomes.
A strong lightweight EPP transport box distributor will welcome this, because good pilots prevent bad rollouts.
The 30-day pilot plan (simple and realistic)
-
Week 1: Sample inspection + short bench tests
-
Weeks 2–3: Route test on your toughest lane
-
Week 4: Review exceptions, lock specs, define reorder rules
Interactive: 10-point pilot checklist (Pass/Fail)
-
Dimensions match the promised spec
-
Lid closes easily and consistently
-
Lid stays tight after 10 open/close cycles
-
Box stacks cleanly without wobble
-
No visible cracking after normal handling
-
Surface cleans quickly using your real process
-
Labels adhere without peeling in condensation
-
Pack-out time stays stable across staff
-
Delivery arrives in acceptable condition
-
Boxes return without deformation breaking lid fit
How to interpret results:
-
8–10 Pass: Strong candidate to scale
-
5–7 Pass: Usable with constraints/spec changes
-
0–4 Pass: High risk—do not scale
| Pilot focus | What you learn | What to change if it fails | Your benefit |
|---|---|---|---|
| Lid fit | Temp stability | Tolerance/lid design | Fewer excursions |
| Deformation | Reuse reality | Density/thickness | Longer lifespan |
| Cleaning | Labor cost | Surface/shape | Faster turnaround |
Real-world pattern: The lowest quote often fails at lid-fit consistency. Your pilot catches that before rollout.
What quality signals should a lightweight EPP transport box distributor provide?
A scalable lightweight EPP transport box distributor can show simple proof that batch variation is controlled. You don’t need a 60-page report. You need clear “yes/no” evidence.
Look for:
-
Stable SKU naming (no surprise substitutions)
-
Basic tolerance awareness (dimensions + lid fit)
-
Batch traceability (so problems don’t repeat)
-
Documented incoming inspection (even simple checks)
Red flags that often lead to cold chain failures
-
“We changed the foam, but it’s basically the same.”
-
“We don’t track batches.”
-
“Lid fit varies, that’s normal.”
-
“We can’t commit to lead times.”
| Red flag | What it usually means | Why it matters | What you should do |
|---|---|---|---|
| No batch tracking | No accountability | Defects repeat | Avoid scaling |
| Substitutions | Inconsistent material | Performance drift | Require fixed SKUs |
| Unclear lead time | Weak planning | Stockouts | Choose stocked model |
| Lid fit “normal” | Poor tolerance control | Temp leakage | Demand a pilot |
What proof and documentation should you demand in 2025?
In 2025, buyers expect a proof pack—not just “we’ve shipped this before.” A capable lightweight EPP transport box distributor should provide a simple documentation set you can store in your SOPs.
Proof pack checklist (what to request)
-
Spec sheet per SKU: usable internal dimensions, wall thickness, closure design
-
Material/density statement: how “lightweight” is defined for that SKU
-
Thermal validation approach: lane-relevant hold-time evidence (especially for parcel lanes)
-
Drop/handling test approach: simple protocol that matches your handoffs
-
Cleaning + drying guidance: written steps your team can execute
-
Change control: what triggers a revision and how you’ll be notified
Plain-English rule: If they can’t show how they control changes, you’ll be re-testing forever.
How do MOQ and lead time shape your lightweight EPP transport box distributor choice?
MOQ and lead time are where many lightweight EPP transport box distributor relationships fail operationally. Samples arrive fast, then scaling stalls.
Key terms you should lock early:
-
Lead time: order to delivery
-
MOQ: minimum order quantity
-
Safety stock: inventory buffer to prevent stockouts
The “stockout cost” reality check
When boxes run out, teams improvise with weaker packaging. That usually raises damage, claims, and rework.
Ask your lightweight EPP transport box distributor:
-
Lead time by SKU (stock vs production)
-
MOQ by SKU and by customization option
-
Can they hold safety stock or stage deliveries?
-
Do they reserve production slots for repeat customers?
| Supply factor | Good outcome | Bad outcome | What it means for you |
|---|---|---|---|
| Lead time | Predictable | Sudden delays | Ops disruption |
| MOQ | Manageable | Forced overbuy | Storage cost rises |
| Safety stock | Available | None | Peak-season risk |
Practical tip: If storage is tight, negotiate staged deliveries before you negotiate unit price.
How do you compare quotes using cost per successful trip?
Unit price comparisons fail because they ignore replacement, loss, labor, and failure cost. You should compare cost per successful trip.
Your real cost includes:
-
Box + lid cost
-
Insert/accessory cost
-
Cleaning and handling labor
-
Loss rate (not returned)
-
Replacement rate (damage/deformation)
-
Failure cost (claims, reships, reputation)
Interactive calculator: Cost per successful trip
Fill your numbers:
-
Box + lid cost: $______
-
Inserts/accessories: $______
-
Expected successful trips: ______
-
Cleaning + labor per trip: $______
-
Return logistics per trip: $______
-
Loss allowance: ______%
Cost per trip = (Box + Inserts) ÷ Trips + Cleaning + Return + Loss allowance
| Comparison factor | Why it matters | What to measure | Your benefit |
|---|---|---|---|
| Cycles achieved | Durability | Avg trips/box | Lower replacement spend |
| Return rate | System health | % returned | Stable inventory |
| Pack time | Labor cost | Minutes/order | Higher throughput |
| Failure rate | Brand risk | Claims/refunds | Higher trust |
Practical tip: A higher-priced box can be cheaper if it doubles reuse cycles or cuts packing time daily.
When should you use lightweight EPP transport box distributor customization options?
Customization should improve outcomes, not just appearance. The best lightweight EPP transport box distributor customization options reduce damage, speed packing, and stabilize temperature.
Think in three layers:
-
Geometry: right-size the box to reduce empty space
-
Accessories: inserts/dividers/coolant pockets (often the biggest win)
-
Identity: label zones, color coding, simple tracking for returns
Interactive tool: “Should you customize now?” (Yes/No)
Answer Yes/No:
-
Are you losing money from damage or temperature claims today?
-
Do you ship the same SKU mix every week?
-
Are your lanes stable and predictable?
-
Will you reuse boxes at least 10 cycles?
Results:
-
Yes to 3–4: Customize inserts + label zones now
-
Yes to 0–2: Start standard, learn lanes, then customize
| Custom option | Best for | Risk to watch | Practical meaning |
|---|---|---|---|
| Divider grid | Multi-SKU kits | Slower packing | Fewer collisions |
| Coolant pockets | Chilled shipments | Freezing risk | More stable temps |
| Cradle insert | Fragile goods | Fit mismatch | Less breakage |
| Label panel | Scan accuracy | Poor adhesion area | Fewer mix-ups |
How do you build a reuse and cleaning program that works?
Reuse only works if the loop works. A lightweight EPP transport box distributor is “good” when they support the full lifecycle: deliver → return → clean → inspect → replenish.
Simple reuse program blueprint
-
Assign ownership: who ensures return
-
Define return timing: daily/weekly/per route
-
Define cleaning: quick clean vs deep clean
-
Inspect and grade: pass / repair / retire
-
Replenish spares: keep a buffer pool and spare lids
| Reuse step | What can break | Simple control | Why it helps you |
|---|---|---|---|
| Return | Boxes don’t come back | Deposit or accountability rule | Higher return rate |
| Clean | Odor builds | Dry fully with airflow | Longer life |
| Inspect | Damaged boxes circulate | Pass/fail tagging | Fewer failures |
| Track | Inventory becomes unknown | Simple scan/label | Fewer missing assets |
| Replenish | No spares | Reorder triggers | Stable operations |
Practical tip: Drying is often the true hygiene bottleneck. Design your workflow for drying, not just washing.
2025 trends affecting lightweight EPP transport box distributor decisions
In 2025, the “best” lightweight EPP transport box distributor is judged on operational support, not just product supply.
Latest developments you can use immediately
-
Standardization is winning: fewer SKUs, clearer pack-out layouts
-
Return systems matter more: reverse logistics is a core KPI
-
Proof beats promises: pilots and documentation are expected
-
Lane-based packaging is growing: short/medium/high-risk lane families
-
Data expectations are rising: buyers want measurable reuse outcomes
Market insight: You scale faster when your distributor reduces operational friction, not when they add options.
Common questions (FAQ)
1) What should I ask a lightweight EPP transport box distributor first?
Ask about stock availability, lead time, and SKU stability. Then confirm lid fit and usable internal dimensions.
2) Is factory-direct always cheaper than a distributor?
Not always. Longer lead times and higher MOQs can raise total cost if demand fluctuates.
3) How do I know if “lightweight” is too light?
Pilot your toughest lane. If lids loosen, walls deform, or stacking wobbles, it’s too light for your handling.
4) How many sizes should I standardize?
Most operations do best with 2–3 sizes. It reduces packing errors and simplifies inventory.
5) What is the biggest hidden cost in reusable EPP programs?
Return rate and cleaning time. A great box becomes expensive if it doesn’t come back quickly.
6) What spare parts matter most?
Lids and closures. Stock spares so you don’t retire boxes early.
7) What’s the fastest way to choose between two distributors?
Use the Distributor Fit Score, then run the 30-day pilot on your toughest lane.
Summary and recommendations
A lightweight EPP transport box distributor should help you buy repeatability, not surprises. Focus on lid fit, usable internal size, wall thickness, and durability expectation first. Then validate supply reliability: lead time, MOQ, and safety stock options. Finally, compare quotes using cost per successful trip and lock a standard 2–3 size plan.
Your next step (CTA): Shortlist two distributors, request a proof pack, run a 30-day toughest-lane pilot, and standardize one box shell with modular inserts before expanding SKUs.
About Tempk
At Tempk, we support cold chain teams with practical reusable packaging selection frameworks that prioritize repeatability. We focus on what actually drives outcomes: lid fit, durability, cleaning workflow, lane alignment, and proof-based pilots. We help you standardize a small, scalable packaging set so your operation grows without exceptions.
Call to action: If you want a distributor scorecard template and a lane-based 30-day pilot SOP for a lightweight EPP transport box distributor, contact us for a practical framework your team can run immediately.
Shock Resistant EPP Insulation Box Guide (2025)

Last updated: December 23, 2025.
A shock resistant EPP insulation box helps you solve two costly problems in one shipment: temperature drift and damage claims. It works because EPP can absorb impacts and recover, while its closed-cell structure slows heat transfer. EPP is also produced in a wide density range (often cited around 15–200 g/L, molded up to 18–260 g/L), so you can tune strength and cushioning to your lane.
This guide will help you:
-
Choose a shock resistant EPP insulation box by lane risk, product fragility, and handling intensity.
Shock Resistant EPP Insulation …
-
Build a repeatable pack-out that reduces breakage, bruising, and temperature drift using the No-Rattle Rule and lid checks.
Shock Resistant EPP Insulation …
-
Use simple decision tools (risk scores + checklists) your team can follow in one shift.
Shock Resistant EPP Insulation …
-
Validate performance with ISTA-style shock and thermal testing concepts, instead of guessing.
Shock Resistant EPP Insulation …
-
Set up cleaning, inspection, and return-loop basics so reuse can actually pay back.
Shock Resistant EPP Insulation …
Why do shipments fail even when your temperature plan looks “fine”?
Most cold-chain failures are combined failures, not “temperature-only” failures. Product movement creates impacts. Impacts crush corners. Crushed corners create small gaps. Gaps accelerate heat gain and increase complaints.
Teach your team one simple model: two enemies.
-
Heat: slow it down.
-
Motion: stop it.
A shock resistant EPP insulation box matters because it addresses both enemies as one system, not two separate problems.
Shock Resistant EPP Insulation …
What is a shock resistant EPP insulation box, in plain English?
A shock resistant EPP insulation box is a reusable insulated container made from molded expanded polypropylene (EPP). Think of it like a helmet plus a sweater: the “helmet” absorbs bumps, and the “sweater” slows temperature change.
What makes it practical in 2025 is not just the material. It is the operational simplicity: you can standardize pack-outs, reduce filler improvisation, and cut repeat failures with quick checks.
Shock Resistant EPP Insulation …
The material facts that actually matter
You do not need a chemistry lesson. You need decision-ready facts:
-
Density tuning: EPP is cited across a wide density range (about 15–200 g/L, molded up to 18–260 g/L). This lets you match stiffness and durability to your lane.
Shock Resistant EPP Insulation …
-
Insulation tuning: typical EPP thermal conductivity is often listed around λ 0.035–0.041 W/m·K in insulation contexts. That buys time during handoffs.
Shock Resistant EPP Insulation …
-
System tuning: corners, lid overlap, and inserts decide whether the box stays sealed and “no-rattle” in real handling.
Shock Resistant EPP Insulation …
How do you choose a shock resistant EPP insulation box for your lane?
Start with what your product “hates” most: impact, vibration, temperature drift, or leaks. Then match lane risk to box strength, insert design, and coolant strategy.
A quick product risk score (60 seconds)
Score each factor 0–2:
-
Fragile (breaks easily)
-
Sensitive to vibration (quality drops when shaken)
-
Temperature sensitive (small drift matters)
-
High value per shipment (returns are expensive)
-
Unpredictable handling (parcel hubs, many handoffs)
8–10: you need a robust shock resistant EPP insulation box system.
5–7: EPP helps, but right-sizing and inserts matter as much.
0–4: use EPP selectively by lane, not everywhere.
Density + geometry: the buying mistake most teams make
Many buyers chase “more insulation” first. But if your corners crush or your lid pops open, you still fail.
Use this rule: Fix corner geometry and insert fit before you add more coolant.
Shock Resistant EPP Insulation …
| Design feature | What it improves | What it prevents | What it means for you |
|---|---|---|---|
| Reinforced corners | Impact distribution | Corner crush, cracks | Fewer breakage claims
Shock Resistant EPP Insulation … |
| Ribbed walls | Compression strength | Wall buckling | Safer stacking
Shock Resistant EPP Insulation … |
| Lid overlap | Seal + structural lock | Lid pop-open | Fewer spills/excursions
Shock Resistant EPP Insulation … |
| Custom inserts | Immobilization | Payload collisions | Less internal damage
Shock Resistant EPP Insulation … |
| Anti-slip base | Stability | Sliding in vans | Fewer tip-overs
Shock Resistant EPP Insulation … |
Shock resistant EPP insulation box pack-out SOP that reduces breakage
A shock resistant EPP insulation box still fails if the payload moves. Shock protection is strongest when motion is minimized.
The No-Rattle Rule (2 seconds)
-
Close the box.
-
Gently shake it for two seconds.
-
If you feel movement or hear rattling, fix the pack-out.
This “small habit” is one of the fastest ways to reduce damage without buying new packaging.
Shock Resistant EPP Insulation …
The 3-layer motion lock (easy to train)
-
Primary restraint: tray, divider, or molded holder
-
Secondary restraint: side blocks that stop sliding
-
Void control: thin fitted pads (avoid loose filler)
| Motion lock layer | Tool | What it prevents | What it means for you |
|---|---|---|---|
| Primary restraint | Molded insert | Direct impacts | Fewer breaks |
| Secondary restraint | Side blocks | Sliding | Fewer leaks |
| Void control | Fitted pads | Bounce | Fewer reworks |
The 5-minute training loop that sticks
-
Show the correct insert layout
-
Do the No-Rattle Rule
-
Do the lid flatness check
-
Show coolant placement (if used)
-
Repeat once with a real shipment
This turns your shock resistant EPP insulation box into a process, not a purchase.
Shock Resistant EPP Insulation …
How does a shock resistant EPP insulation box help temperature stability?
Temperature failures often start as damage failures. When a box gets crushed, small lid gaps form. Those gaps behave like open windows.
“The seal is your thermostat” mindset
If your lid fit is inconsistent, your temperature will be inconsistent. Teach this line:
“A loose lid is like leaving a fridge door open.”
Shock Resistant EPP Insulation …
Simple lid discipline for a shock resistant EPP insulation box:
-
Press corners after closing
-
Confirm the lid sits flat
-
Avoid forcing closure (it can deform inserts)
These checks are fast, but they prevent many “mystery” excursions.
Shock Resistant EPP Insulation …
Do you need coolant inside a shock resistant EPP insulation box?
Sometimes yes, sometimes no. Use a lane-based rule:
-
Short, controlled lanes: EPP alone may be enough
-
Hot weather or long dwell: add coolant buffers
-
Multi-day or uncertain handoffs: stronger buffers + monitoring
This approach prevents the expensive mistake of treating every shipment like worst-case.
Shock Resistant EPP Insulation …
Coolant placement rules that reduce damage and waste
-
Place coolant around, not directly on top of fragile items
-
Keep coolant off direct product contact when sweating is a risk
-
Use a thin barrier to limit moisture migration
| Coolant strategy | Best for | Main risk | What it means for you |
|---|---|---|---|
| No coolant | Short lanes | Heat spikes | Simplest workflow
Shock Resistant EPP Insulation … |
| Mild buffer | Warm days | Condensation | Better stability
Shock Resistant EPP Insulation … |
| Heavy buffer | Uncertain lanes | Cost + wet labels | Use selectively
Shock Resistant EPP Insulation … |
Interactive decision tool: Which shock resistant EPP insulation box setup fits your lane?
Pick one option in each step:
Step 1: Route type
-
Local same-day
-
Regional next-day
-
Parcel / multi-day
Step 2: Handling intensity
-
Low (direct courier)
-
Medium (mixed handling)
-
High (parcel network)
Step 3: Product sensitivity
-
Low (durable)
-
Medium (bruise-prone or seal-sensitive)
-
High (fragile, high value, temperature sensitive)
Recommended matches
-
Local + low handling + medium sensitivity: EPP + basic inserts + No-Rattle Rule
-
Next-day + medium handling + high sensitivity: EPP + fixed inserts + mild buffer + lid discipline
-
Multi-day + high handling + high sensitivity: EPP + reinforced inserts + buffer + monitoring
Shock Resistant EPP Insulation …
How to validate a shock resistant EPP insulation box in 2025
Testing stops guessing. It also stops overpacking. When you validate and pass, you can standardize.
The “combined test” mindset (shock + thermal)
Run a simple sequence:
-
Vibration test with the normal pack-out
-
Drop sequence (edge/corner/flat)
-
Thermal profile that matches your lane
-
Post-test inspection: lid fit, insert shift, and temperature curve
ISTA Procedure 3A is designed for parcel delivery shipments and is appropriate for packages 150 lb (70 kg) or less, which fits many cold-chain parcels.
Shock Resistant EPP Insulation …
For thermal realism in parcel networks, ISTA also describes STD-7E concepts as parcel-relevant thermal profiles.
Shock Resistant EPP Insulation …
| Test element | What it proves | What “fail” looks like | What you fix |
|---|---|---|---|
| Vibration | Insert stability | Movement, scuffing | Tighter cradle
Shock Resistant EPP Insulation … |
| Drops | Corner strength + closure | Cracked corners, lid pop | Corners, latch, lid overlap
Shock Resistant EPP Insulation … |
| Thermal profile | Hold time | Out-of-limit curve | Air gaps, coolant map
Shock Resistant EPP Insulation … |
| Inspection | System integrity | Deformed lid seam | Update SOP + retire rule
Shock Resistant EPP Insulation … |
Field validation (cheap proof you can collect)
-
Place one logger or shock indicator in the same spot every run
-
Photograph the pack-out and arrival condition
-
Track failures by route, not “random”
Shock Resistant EPP Insulation …
Cleaning and reuse: making a shock resistant EPP insulation box pay back
Reuse is not automatic. It is a system: tracking, cleaning, inspection, and return incentives.
A simple cleaning SOP (fast and realistic)
-
Dry wipe debris
-
Warm wash with mild detergent
-
Rinse thoroughly
-
Sanitize per your internal policy
-
Air dry fully before stacking
Critical habit: never store wet and closed. Moisture becomes odor and mold.
Shock Resistant EPP Insulation …
The return-loop decision check (7–14 day reality)
Ask:
-
Can you recover boxes reliably within 7–14 days?
-
Do you have stable routes (B2B or recurring customers)?
-
Can customers return without hassle?
If you answer “yes” to two, prioritize reuse. If not, focus on right-sizing and failure reduction first.
Shock Resistant EPP Insulation …
Interactive: Return-loop ROI quick check
Give yourself 1 point for each “yes”:
-
Repeat lanes + repeat customers
-
Scan boxes out and back in
-
Cleaning area can dry boxes fully
-
Return incentive exists (deposit, pickup, drop point)
-
You have a retire rule for damaged boxes
0–2: pilot only
3–4: run one-lane reuse loop
5: scale a reusable shock resistant EPP insulation box program
2025–2026 developments and trends you should plan for
In 2025, the biggest trend is system packaging, not “box packaging.” That means lane-based pack-outs, SKU-specific inserts, monitoring, and SOPs that reduce variability.
Shock Resistant EPP Insulation …
A second trend is proof plus circularity: buyers want evidence that packaging protects product, and many markets are pushing waste reduction and recyclability targets toward 2030.
Shock Resistant EPP Insulation …
Latest progress at a glance
-
Lane-based packaging recipes: standard pack-outs by route and handling intensity.
-
Insert-first optimization: reduce movement before adding coolant weight and cost.
-
Validation culture: quicker ISTA-style pass/fail loops for repeatable performance.
Common questions (FAQ)
Q1: What makes a shock resistant EPP insulation box truly “shock resistant”?
It is a system: corners + lid closure + inserts. If the payload can move, it can break.
Shock Resistant EPP Insulation …
Q2: How do I choose shock resistant EPP insulation box density?
Use lane risk and stacking load to choose density, then tune cushioning with inserts. EPP is often cited across 15–200 g/L (molded 18–260 g/L).
Shock Resistant EPP Insulation …
Q3: Can a shock resistant EPP insulation box support 2–8°C shipping?
Yes—if you pair it with a consistent coolant kit and a fixed placement map. Aim for stability, not “maximum cold.”
Shock Resistant EPP Insulation …
Q4: Does a shock resistant EPP insulation box always need coolant?
No. Short, controlled lanes may work without coolant. Add buffers when heat plus dwell or uncertain handoffs raise risk.
Shock Resistant EPP Insulation …
Q5: What tests should I run to validate a shock resistant EPP insulation box?
Use vibration + drops + a lane-matched thermal profile. ISTA 3A is commonly used for parcel shipments ≤150 lb.
Shock Resistant EPP Insulation …
Q6: What is the biggest packing mistake?
Leaving air gaps and allowing movement. Use the No-Rattle Rule and fully seated inserts.
Shock Resistant EPP Insulation …
Q7: How do I know if reuse will work?
If you can recover boxes within 7–14 days and keep cleaning/inspection consistent, reuse is much more likely to pay back.
Shock Resistant EPP Insulation …
Summary and recommendations
A shock resistant EPP insulation box performs best when you treat it as a repeatable system: rugged walls, fitted inserts that stop movement, and two quick checks (No-Rattle Rule + lid flatness). Lane-based standardization is the 2025 play: use stronger recipes for rough multi-handoff lanes, and simpler setups for controlled same-day routes.
Action plan (do this next)
-
Split shipments into local, next-day, and multi-day lanes.
-
Choose 2–3 box sizes and one insert system per product family.
-
Train two checks: No-Rattle Rule + lid flatness.
-
Add coolant only when risk triggers are present (heat + dwell, or heat + uncertain handoff).
-
Track weekly: damage claims, reships, and average packing time.
About Tempk
At Tempk, we help teams build reliable cold chain packaging systems that are easy to repeat at scale. For a shock resistant EPP insulation box program, we focus on rugged designs, insert strategies that prevent movement, and lane-based pack-out routines that reduce damage and temperature drift.
Shock Resistant EPP Insulation …
Next step: Tell us your payload type (fragile, bruise-prone, liquid, temperature sensitive) and your lane (local, next-day, multi-day). We’ll map a shock resistant EPP insulation box setup that fits real shipping conditions.
EPP Foam Box Laboratory Samples Shipping Guide
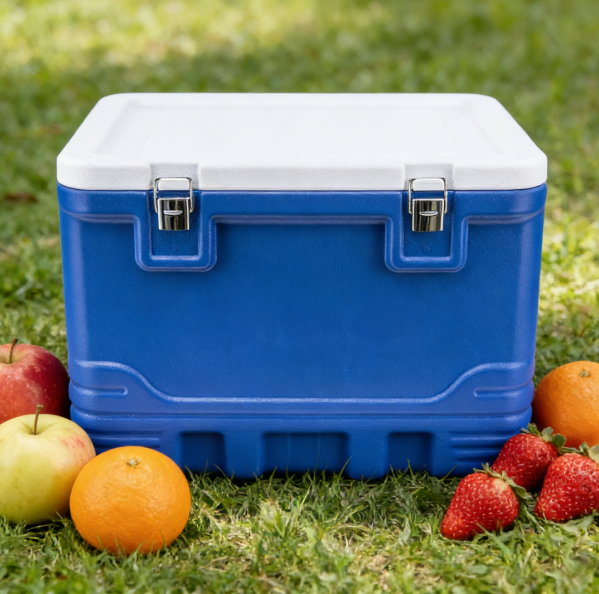
EPP Foam Box Laboratory Samples: Ship Safely?
Last updated: December 23, 2025
Shipping EPP foam box laboratory samples is simple to describe and easy to get wrong. Your job is to keep samples stable through bumps, delays, and temperature swings. If you ship as UN3373 Category B, the outer mark is often 50 mm wide, and key text is commonly treated as 6 mm minimum. If you use dry ice, you also need UN1845 handling discipline. This guide shows a repeatable packout, clear labels, and a validation plan your team will actually follow.
This guide will help you:
-
Build EPP foam box laboratory samples packaging that prevents leaks and breakage
-
Pack EPP foam box laboratory samples with gel packs for 2–8°C without freezing risk
-
Handle EPP foam box laboratory samples with dry ice (UN1845) safely and consistently
-
Apply triple packaging in plain English, with a copy-paste checklist
-
Place temperature loggers where data is reliable, not misleading
-
Validate one lane in one week, then scale with confidence
Why are EPP foam box laboratory samples shippers a smart default?
EPP foam box laboratory samples shippers work well because they behave like a thermos and a helmet at the same time. They slow heat flow, and they absorb impacts from drops and vibration. That matters when you have multiple handoffs and last-mile uncertainty.
Consistency is the hidden win. When the shipper holds shape, your lid seals better. When the lid seals better, your cooling plan behaves the same every time.
| Material | Insulation stability | Drop resistance | Reuse potential | What it means for you |
|---|---|---|---|---|
| EPP foam box | High | High | High | Best for repeatable packouts and frequent handling |
| EPS foam box | Medium–High | Low–Medium | Low | Good insulation, but chips and cracks after reuse |
| PU panel box | High | Medium | Medium | Strong insulation, often heavier and higher cost |
Practical tips you can use today
-
Right-size the box: less empty air usually means steadier temperatures.
-
Standardize inserts: fixed positions beat loose void fill every time.
-
Treat lid fit as a quality item: a small gap can erase your “extra coolant.”
Practical example: A clinic-to-lab route reduced redraws after switching to a rigid EPP layout that stopped tubes from rattling.
What temperature profile do EPP foam box laboratory samples really need?
Your EPP foam box laboratory samples plan must match the sample’s stability window, not your packing habit. The most common failure is “stronger cooling than needed.” That mistake can freeze samples that must not freeze.
Think in bands, not in vibes. You are not shipping “blood.” You are shipping “blood that must stay at 2–8°C.”
| Sample category (examples) | Typical temperature intent | Biggest risk | Packaging focus |
|---|---|---|---|
| Serum/plasma (routine) | 2–8°C | Accidental freezing near coolant | Buffers + controlled cold mass |
| Whole blood tubes | Often 2–8°C | Hemolysis from shock + overcooling | Shock control + gentle cooling |
| Tissue biopsy | 2–8°C or frozen | Dehydration + drift | Sealed barrier + lane-based hold time |
| PCR swabs / VTM | 2–8°C | Warm drift in last mile | Strong insulation + receiving speed |
| Enzymes/reagents | 2–8°C or frozen | Potency loss | Validation + monitoring discipline |
| Mixed research payload | Mixed | Cross-contamination of profiles | Separate shipper per profile |
Practical tips you can use today
-
Build only three SOPs: refrigerated, frozen, dry ice. Most labs need nothing else.
-
Add a hard rule for refrigerated: no direct contact between frozen coolant and payload.
-
Separate mixed profiles. One box with mixed ranges creates avoidable risk.
How do you build compliant triple packaging for EPP foam box laboratory samples?
EPP foam box laboratory samples shipments often need a triple packaging system. The idea is simple: one layer stops leaks, one layer contains failures, and one layer protects everything.
The triple packaging build (plain English)
-
Primary receptacle: leakproof tube or vial, sealed and labeled.
-
Secondary packaging: leak-resistant bag or rigid canister, plus absorbent for liquids.
-
Rigid outer packaging: the EPP foam box, with cushioning and movement control.
| Layer | What it must do | What to check before sealing | What it means for you |
|---|---|---|---|
| Primary | Hold specimen without leaking | Cap tight, label readable | Prevents contamination and rework |
| Secondary | Contain leaks + protect IDs | Absorbent present, seal intact | Stops “wet paperwork” failures |
| Outer (EPP) | Resist crush + insulate | Insert fitted, lid closes flat | Protects integrity and temperature |
Practical tips and suggestions
-
Always add absorbent for liquid specimens. It is cheap insurance.
-
Immobilize the secondary. Movement causes breakage and thermal spikes.
-
Keep paperwork out of the leak path in a sealed pouch.
Practical example: Leakage incidents dropped after switching to rigid secondaries plus absorbent inside the EPP shipper.
How do you pack EPP foam box laboratory samples for 2–8°C without freezing them?
EPP foam box laboratory samples with gel packs succeed when you aim for even cooling, not maximum cold. Overcooling is a silent failure. A “perfectly cold” wall can still freeze a tube.
Step-by-step 2–8°C packout (repeatable SOP)
-
Start with a dry, room-stable shipper. Avoid sun-heated boxes.
-
Confirm the band: 2–8°C, and note any “Do Not Freeze” items.
-
Build a buffer floor: thin foam sheet or corrugate spacer.
-
Place coolant consistently: same count, same position, every shipment.
-
Keep coolant outside the secondary: never inside with the specimen.
-
Immobilize payload: racks, partitions, or cutouts prevent rattling.
-
Add a top buffer: reduces cold spots and improves lid seal.
-
Close fully, seal consistently, document the packout ID.
Coolant choice for EPP foam box laboratory samples
| Coolant option | Best for | Strength | Watch-out | Practical meaning |
|---|---|---|---|---|
| Gel packs | Most 2–8°C lanes | Familiar and low cost | Freeze risk near contact | Always use buffer layers |
| PCM packs | Tight 2–8°C control | More stable temperature band | Higher cost, needs correct melt point | Better repeatability on long lanes |
| Frozen bricks | Frozen shipments | Strong cold | Overkill for refrigerated | Keep a separate SOP |
| Dry ice | Ultra-cold | Long hold at very low temps | Venting + safety | Use only with dedicated protocol |
Practical tips and suggestions
-
Condition gel packs when shipping 2–8°C. Rock-solid frozen packs cause cold spots.
-
Fill headspace with structured inserts, not loose paper that shifts.
-
Use a two-person check for high-value samples: pack + verify.
Practical example: “Too cold” failures stopped after switching from fully frozen packs to conditioned packs plus a thin buffer layer.
How do you ship EPP foam box laboratory samples with dry ice safely?
EPP foam box laboratory samples with dry ice is a different system, not a small variation. Dry ice is extremely cold and turns into CO₂ gas. Your packout must prevent direct contact damage and allow safe gas management.
Dry ice layout (simple and repeatable)
-
Dry ice zone: placed in a dedicated compartment or one side.
-
Separation layer: rigid barrier between dry ice and payload cavity.
-
Payload core: samples centered, immobilized, and protected.
-
Document protection: waterproof pouch, away from condensation.
-
Receiving card: “Open, verify, move to storage fast.”
| Risk | What causes it | Control | What it means for you |
|---|---|---|---|
| Container cracking | Direct ultra-cold contact | Rigid separator layer | Fewer broken vials |
| Label loss | Frost and condensation | Sleeves + protected label zone | Traceability stays intact |
| Payload overcooling | Too much dry ice too close | Distance + buffer | Prevents unintended damage |
| Paperwork failure | Moisture exposure | Sealed pouch | Fewer documentation gaps |
Practical tips and suggestions
-
Keep paperwork outside the cold cavity in a sealed pouch.
-
Standardize dry ice weight by box size for repeatability.
-
Add a receiving instruction card to cut warm exposure time.
Practical example: Cracked cryovials dropped after moving dry ice into a side compartment plus a rigid separator.
What labels and documents stop rejections for EPP foam box laboratory samples?
Even perfect packaging can fail operationally if labels are wrong. Your goal is fast identification, safe handling, and traceability.
For many Category B shipments, the outside needs the UN3373 mark and the proper shipping name. If dry ice is used, the package also needs dry ice markings and the net weight where required by your transport mode.
Copy-paste label and document checklist
| Item | Refrigerated | Frozen | Dry ice | What it means for you |
|---|---|---|---|---|
| Temperature statement | Yes | Yes | Yes | Reduces mishandling |
| UN3373 marking (if applicable) | Yes | Yes | Yes | Avoids acceptance delays |
| Dry ice mark + net weight (if applicable) | No | No | Yes | Prevents transport rejection |
| Sender/receiver contact | Yes | Yes | Yes | Faster routing |
| Case ID (large + scannable) | Yes | Yes | Yes | Traceability |
| Chain-of-custody form | Yes | Yes | Yes | Investigation readiness |
| “Open protocol” card | Yes | Yes | Yes | Faster receiving |
Practical tips and suggestions
-
Use moisture-resistant labels or sleeves on condensing routes.
-
Keep tape off critical marks so they stay readable when handled.
-
If you re-pack, carry the identity forward to avoid “mystery samples.”
Practical example: “Lost specimen” events decreased after adding a large case ID that matched chain-of-custody forms.
Where should you place temperature loggers in EPP foam box laboratory samples?
Logger placement decides whether your data is useful or misleading. The wall can look cold while the core drifts warm. Your default should be: measure where the payload experiences risk.
| Logger placement | What it tells you | What it can hide | Best use |
|---|---|---|---|
| Next to coolant | Best-case cold | Warm corners | Only as a secondary sensor |
| Payload center | Average condition | Edge warming | Baseline verification |
| Near outer wall (buffered) | Worst-case trend | None if standardized | Great for risk detection |
| Under lid zone | Lid leakage and warm air | Center stability | Many handoffs and stops |
Practical tips and suggestions
-
Place sensors buffered, never touching coolant.
-
Use one placement photo so teams stay consistent.
-
Consider lane sampling: 100% logging for exceptions or high-value lanes.
How do you validate EPP foam box laboratory samples performance in one week?
You do not need a perfect lab to start. You need repeatable tests that match your real lane. Validation is how EPP foam box laboratory samples becomes a system, not a guess.
DQ / OQ / PQ in plain English
-
DQ (Design Qualification): Does the packout match the requirement on paper?
-
OQ (Operational Qualification): Does it hold range in controlled hot/cold tests?
-
PQ (Performance Qualification): Does it work on real routes with real handoffs?
| Test | What you do | What you measure | Pass/fail idea | What it means for you |
|---|---|---|---|---|
| Thermal hold | Simulate route duration | Time in target | No sustained drift | Predictable quality |
| Handling | Drop/shake simulation | Breaks, leaks, movement | No damage | Fewer redraws |
| Opening simulation | Open at each stop | Drift per opening | Acceptable change | Route readiness |
| Seasonal snapshot | Summer + winter | Peaks and lows | No freeze/overheat | Fewer surprises |
The “3-run rule” (fast confidence)
Run 3 tests for a new lane:
-
One normal day
-
One warm assumption
-
One delay assumption (longer hold)
If results swing wildly, the problem is usually process variability, not insulation.
Decision tool: Which EPP foam box laboratory samples setup should you use?
Use this tool for every new lane, new season, or new carrier. It prevents expensive “we thought it would be fine” surprises.
Step 1: Score your lane risk (0–20)
Add points:
-
Transit time risk:
-
≤12 hours = 0
-
12–24 hours = 2
-
24–48 hours = 4
-
48 hours = 6
-
-
Handoffs: 0–1 = 0, 2–3 = 2, 4+ = 4
-
Ambient exposure: mild = 0, seasonal extremes = 2, extreme heat/cold = 4
-
Payload fragility/value: low = 0, medium = 2, high = 4
-
Compliance sensitivity (UN marking / audits): low = 0, medium = 2, high = 2
Step 2: Choose a configuration
| Risk score | Recommended setup | What you standardize |
|---|---|---|
| 0–6 | EPP shipper + insert + clear documents | Pack photo + receiving card |
| 7–13 | EPP shipper + insert + conditioned gel packs | Buffer rules + logger sampling |
| 14–20 | EPP shipper + engineered insert + validated coolant plan | Full DQ/OQ/PQ + change control |
Step 3: Add a delay buffer
-
Same-city courier: +2 hours
-
Domestic overnight: +12 hours
-
Cross-border: +24–48 hours
If that buffer feels “too conservative,” it usually means you have been lucky.
How do you control cost with reusable EPP foam box laboratory samples?
A reusable program saves money only when you control cleaning, inspection, and returns. The best metric is total cost per successful shipment, not box price.
Your per-shipment cost includes box cycles, cleaning labor, return flow, loss rate, and failure cost. A single redraw can erase many “saved” boxes.
| Cost lever | What you change | Risk if done wrong | Safer approach | What it means for you |
|---|---|---|---|---|
| Right-size boxes | Reduce empty volume | Payload compression | Add structured inserts | Lower freight cost |
| Standardize packouts | Fewer variations | Wrong config used | Photo SOP + packout ID | Fewer errors |
| Reuse with inspection | More cycles per box | Hygiene failures | Clean + inspect checklist | Lower TCO |
| Lane-based deployment | Use stronger configs only where needed | Under-protection | Risk scoring tool | Spend where it matters |
Practical tips and suggestions
-
Set a return rule like “return within X days.” Assets vanish without it.
-
Add a 30-second inspection gate: lid fit, cracks, odor, residue.
-
Track loss and damage by lane. Fix the worst lanes first.
2025 latest developments and trends in lab sample shipping
In 2025, the trend is less improvisation and more repeatability. Teams are moving to two or three validated packouts per temperature band. Many programs now use summer and winter versions instead of “one universal pack.”
Operationally, there is also more demand for proof. Customers want packout photos, clearer chain-of-custody notes, and faster deviation decisions. Reuse programs are growing, but only when reverse logistics is simple.
Latest progress snapshot
-
Better inserts and immobilization: fewer broken tubes and fewer redraws
-
Smarter monitoring: lane sampling plus exception escalation
-
Faster receiving protocols: “open, verify, store” cards reduce exposure time
-
Sustainability reporting: reuse cycles tracked like assets, not disposable items
Frequently Asked Questions
Q1: Can EPP foam box laboratory samples ship without gel packs?
Yes, if samples are ambient-stable and heat risk is low. Use snug inserts and protect paperwork from moisture.
Q2: How do I prevent freezing in EPP foam box laboratory samples 2–8°C shipping?
Condition gel packs and add buffer layers so coolant never touches tubes directly. Standardize placement and avoid “extra packs.”
Q3: Do I always need triple packaging for EPP foam box laboratory samples?
Many clinical specimens require it. When in doubt, follow your biosafety classification process and shipper SOP.
Q4: Where do I place gel packs or dry ice in EPP foam box laboratory samples?
Keep refrigerants outside the secondary packaging. Immobilize the secondary so it stays positioned during melting or sublimation.
Q5: Do I need a temperature logger in every shipment?
Not always. Many labs succeed with lane sampling plus 100% logging for exceptions and high-value lanes.
Q6: What is the biggest packing mistake?
Leaving headspace and allowing movement. Empty air changes temperature quickly, and movement breaks containers.
Q7: How do I keep labels readable when condensation happens?
Use moisture-resistant labels or sleeves. Place critical IDs on flat, protected surfaces, not edges.
Q8: What’s the fastest way to improve success rates this month?
Standardize one lane: one packout photo, one checklist, one coolant conditioning rule, and a short validation pilot.
Summary and recommendations
EPP foam box laboratory samples shipments succeed when you treat packaging as a controlled process. Standardize triple packaging, immobilize the payload, and use gentle cooling for 2–8°C. Keep dry ice shipments separate with rigid separation layers and clear handling instructions. Validate one lane with a simple DQ/OQ/PQ plan, then lock the winning version under change control.
Your next step (clear CTA)
Pick your highest-risk lane and run a 7-day pilot:
-
Choose one standard packout and assign a packout ID.
-
Use one consistent coolant placement photo and one checklist.
-
Sample temperature data on that lane and record receiving checks.
-
Fix one variable at a time until results are repeatable.
About Tempk
At Tempk, we help teams turn cold chain packaging into repeatable daily habits. We focus on EPP shipper selection, packout photo standards, lane-based validation, and monitoring plans that drive action. Our approach is practical and trainable, so your EPP foam box laboratory samples shipments stay consistent across seasons and handoffs.
Next step: Share your sample type, target temperature range, lane duration, and handoff count. We will outline a packout and validation checklist you can implement immediately.
Cold Chain Meat Prices: 2025 Cost Drivers & Calculator

Cold Chain Meat Prices: What Drives Costs in 2025?
updated 23 December 2025
Cold chain meat prices feel “messy” because the meat price is only part of the bill. Your real cost depends on refrigerated transport, cold storage time, packaging, monitoring, and the risk of refunds and rejects. When reefer rates move, your delivered price can change quickly. The goal is not perfection—it’s predictable, provable performance.
This article will answer for you:
-
What cold chain meat prices include beyond meat cost and why “$/mile” is not enough
-
The biggest 2025 drivers behind cold chain meat prices (freight, storage, shrink, proof)
-
A cold chain meat prices calculator to estimate delivered $/lb by lane
-
How to quote cold chain meat prices per mile without guessing
-
A decision tool + contract checklist to stabilize cold chain meat prices
What do cold chain meat prices actually mean?
Cold chain meat prices are the total cost of keeping meat within temperature and condition spec from storage to delivery. That includes packaging, refrigeration, transport, monitoring, handling, and shrink risk. It’s not one number per pound. It’s a bundle of services that protects quality and compliance.
Think of it as the total cost of keeping a promise. The meat arrives cold, clean, traceable, and sellable. If you price only “shipping,” you miss costs that show up later as credits and re-shipments. Those are still part of cold chain meat prices.
The 5 cost blocks inside cold chain meat prices
| Cost block | What it includes | Common surprise | What it means for you |
|---|---|---|---|
| Transport | Reefer rate, fuel, accessorials | Detention, re-delivery | Schedules and readiness matter |
| Cold storage | Storage + temp zone premium | In/out + pick fees | “Cheap storage” can get expensive |
| Handling | Load/unload, cross-dock | After-hours labor | Time windows drive cost |
| Packaging + monitoring | Insulation, coolant, proof | Overpacking waste | Testing beats guesswork |
| Risk | Shrink, claims, chargebacks | Weak documentation | “Proof” reduces disputes |
What are the biggest drivers of cold chain meat prices in 2025?
Cold chain meat prices move when uncertainty moves. Long transit times, hot weather, multi-stop delivery, and inconsistent dock behavior raise temperature risk. That forces stronger packaging, higher service levels, or more refunds. The result is a higher total delivered cost.
Use a practical “7-driver” view. It helps you separate market forces from execution choices. Then you can focus your effort where it pays back.
The 7 biggest drivers (simple, measurable)
-
Animal market pressure (base meat cost shifts)
-
Processing yield and rework (trim, purge, rework)
-
Cold storage cost inflation (labor, rent, power)
-
Reefer freight rates + accessorials (detention, extra stops)
-
Shrink and spoilage (temperature excursions, handling damage)
-
Monitoring and documentation (proof for disputes)
-
Retail and foodservice behavior (margin and service expectations)
Practical rule: You can’t control cattle cycles, but you can control shrink, dwell time, and lane discipline.
How do reefer rates translate into cold chain meat prices per pound?
Reefer freight is loud, but the per-pound impact is easy to estimate. If you know your $/mile and your loaded pounds, you can convert freight into $/lb in seconds. This gives you a clean baseline for cold chain meat prices. Then you add storage, packaging, monitoring, and risk.
Here is a simple example using a typical full-truckload weight assumption. Replace the numbers with your own lane data. The method stays the same.
Cold chain meat prices per pound: a fast freight conversion
| Distance | Rate used | Trip cost | Freight $/lb (example load) |
|---|---|---|---|
| 500 miles | $2.80/mile | $1,400 | $0.035/lb |
| 1,000 miles | $2.80/mile | $2,800 | $0.070/lb |
| 2,000 miles | $2.80/mile | $5,600 | $0.140/lb |
What usually spikes freight inside cold chain meat prices
-
Accessorial creep: detention, extra stops, liftgates, weekend handling
-
Multi-stop routes: more door-open time means more temperature swings
Practical tips you can use this week
-
If detention hits weekly: tighten appointments and receiving readiness first.
-
If multi-stop is unavoidable: deliver the most temperature-sensitive drops first.
-
If lanes are predictable: use contract pricing for core volume and spot for overflow.
Practical case: One distributor reduced total cost by rerouting to a nearer cross-dock and cutting miles per run.
How do cold storage and handling fees change cold chain meat prices?
Cold storage is the “silent multiplier” in cold chain meat prices. Storage compounds every day inventory sits. Fees also stack: storage, in/out, picks, and labor. If you ignore touch points, you underquote quickly.
The simplest way to manage this is to price “time and touches.” Count how long it sits and how many times it moves. Both show up directly in your bill.
Cold storage fees you should expect (and control)
| Fee type | What triggers it | How to control it | What it means for you |
|---|---|---|---|
| Storage | Inventory sits | Better forecasting | Lower “months on hand” |
| In/Out | Pallets move | Ship full pallets | Fewer touches |
| Picks | Partial-pallet orders | Consolidate orders | Less labor per order |
| Rework | Relabel/repack | Fix upstream quality | Fewer surprises |
| After-hours | Late/early requests | Schedule windows | Avoid premium labor |
Practical tips and recommendations
-
Measure “pallet-days” like money. Inventory time multiplies your cost.
-
Reduce touches. Every extra move adds labor and error risk.
-
Shift customers to fixed ship days when pick fees and after-hours charges creep up.
How do packaging, temperature bands, and monitoring affect cold chain meat prices?
Packaging and monitoring can either lower cold chain meat prices (fewer claims) or inflate them (overpacking). The goal is right-sized protection. That means matching packaging strength to lane risk. It also means validating your pack-out with tests, not assumptions.
A tier system keeps you consistent. Use Tier 1 for short lanes. Use Tier 2 for medium lanes. Use Tier 3 for high-risk or high-value lanes.
Chilled vs frozen: why cost and risk differ
Chilled meat often costs more to protect because you must keep it cold without freezing. Frozen meat can tolerate colder strategies. But thaw–refreeze risk rises on longer routes. Your best move is to treat chilled and frozen lanes as different products.
Packaging and monitoring choices that move cold chain meat prices
| Choice | Best for | Risk if wrong | What it means for you |
|---|---|---|---|
| Insulated liners | Case/pallet shipments | Tears/leaks | Cheaper than full shippers |
| Gel/PCM packs | Chilled lanes | Freezing edges | Use barriers + layout |
| Secondary containment | Leak-risk items | Ignored until a spill | Prevents cleanup + claims |
| Data loggers | Lane testing | Poor placement | Reveals “warm minutes” |
Monitoring: why it often saves money
Monitoring changes cold chain meat prices because it changes disputes. If a customer says “it arrived warm,” you either refund blindly or you show proof. A good rule is to monitor lanes, not every shipment. Use loggers for validation and real-time sensors for critical lanes.
Practical tips you can apply immediately
-
If claims repeat on one lane: run three logger tests before changing packaging.
-
If you see frozen edges: reduce direct pack contact and change layout.
-
If customers demand proof: price monitoring like an insurance premium, not an “extra.”
How do compliance and QA affect cold chain meat prices?
Compliance affects cold chain meat prices because records, sanitation, training, and exception handling require time. But strong compliance can lower total cost. It reduces disputes and repeat failures. It also helps you win business that requires audits.
Temperature targets should be written. Responsibilities should be clear. Exceptions should be handled the same way every time. That is what makes cold chain meat prices predictable.
Compliance Cost vs Benefit Table
| Compliance activity | Direct effort | Hidden benefit | What it means for you |
|---|---|---|---|
| Pack-out checklist | Small labor | Fewer mistakes | Lower claims |
| Cleaning logs | Small time | Lower contamination risk | Better acceptance |
| Exception reporting | Admin time | Faster root-cause fixes | Fewer repeat failures |
| Monitoring sampling | Device cost | Proof + improvement | Better stability |
Practical tips and recommendations
-
Make cleaning measurable: “done” means inspected, not assumed.
-
Standardize documents: one template beats ten emails.
-
Put responsibilities into the SLA so delays don’t become disputes.
Cold chain meat prices calculator: build your lane quote in 10 minutes
A cold chain meat prices calculator should estimate total cost per successful delivery—not just “shipping.” Start simple. Refine monthly. Your goal is a lane model that explains cost changes and guides fixes.
Direct formula (copy into your spreadsheet)
Cold chain meat prices (delivered $/lb) =
Base meat cost + Freight $/lb + Storage $/lb + Packaging/Handling $/lb + Monitoring/Admin $/lb + (Shrink% × Delivered subtotal)
Step-by-step (lane-based)
-
Transport cost: miles × $/mile + accessorials (detention, extra stops, liftgate)
-
Storage cost (if used): pallets × $/pallet/month × months held + in/out + pick labor
-
Packaging + monitoring: per-shipment packaging + monitored shipments × monitoring cost
-
Risk allowance: expected incident rate × average loss per incident
-
Divide by delivered pounds or cases to get $/lb or $/case
Calculator template (copy/paste)
| Line item | Formula | Your input | Total |
|---|---|---|---|
| Transport | miles × $/mile | ||
| Accessorials | detention + stops | ||
| Storage | pallets × $/pallet/mo | ||
| Handling | in/out + picks | ||
| Packaging | per shipment | ||
| Monitoring | monitored × cost | ||
| Risk allowance | incident rate × loss | ||
| Total | sum |
Decision tools to stabilize cold chain meat prices
Decision Tool 1: Service level + packaging (fast picker)
Step 1: Your product
-
A: Chilled fresh meat
-
B: Frozen meat
-
C: Mixed chilled + frozen
Step 2: Your route
1: Under 6 hours
2: 6–24 hours
3: 24–48 hours
4: Multi-stop (many door opens)
5: High heat exposure
Step 3: Your risk tolerance
-
Low: premium brand, strict expectations
-
Medium: standard retail
-
Higher: internal transfer with controlled receiving
Recommended direction
-
A + (4 or 5): tighten pack-out SOP and add monitoring sampling.
-
B + (3): focus on cooling capacity and reduce thaw–refreeze risk.
-
C (mixed): split shipments or use a compartment strategy. Mixed loads drive surprise cost.
Decision Tool 2: Cold chain meat prices contract checklist (score it)
Give yourself 1 point for each “yes”:
-
Temperature target and definition are written.
-
Quote includes distance, stops, and expected dwell time.
-
Accessorials are listed (not “surprise later”).
-
Monitoring proof format and timing are defined.
-
Claims process and timelines are written.
-
Seasonal retesting or review is included.
-
Shrink allowance or credit rule is agreed.
-
Storage and handling fees are clearly stated.
Score guide
-
0–3: expect disputes and unstable cold chain meat prices
-
4–6: workable, tighten proof and accessorials
-
7–8: strong foundation for predictable pricing
How to reduce cold chain meat prices without increasing spoilage
The cheapest shipment is the one you don’t have to resend. Cutting insulation blindly often raises indirect costs. A better approach is to cut waste: warm staging time, oversized boxes, too many handoffs, and repeat exceptions. This is how you lower total delivered cost without gambling on quality.
Practical cost-reduction moves that usually work
| Improvement | What it changes | Why it lowers cost | What it means for you |
|---|---|---|---|
| Right-size packaging | Less air space | Less drift + less coolant | Fewer claims |
| Standard pack-out | Faster sealing | Less warm exposure | More consistency |
| Route segmentation | Fewer door opens | Fewer spikes | Higher success rate |
| Reusable loop | Lower cost per trip | Less replacement | Better long-term ROI |
| Monitoring sampling | Finds root cause | Prevents repeat failures | Lower risk cost |
Shrink: the hidden “tax” you can control
Shrink is often bigger than your “rate savings.” If you cut $0.02/lb in freight but add $0.05/lb in shrink, you lose money. Track shrink by lane. Then fix the lane behaviors that create it.
Fast fix sequence
-
Fix docks first (doors and delays create many excursions).
-
Track shrink by lane, not by month.
-
Add monitoring + SOP fixes when shrink crosses your pain threshold.
2025 developments and trends shaping cold chain meat prices
In 2025, cold chain meat prices are increasingly shaped by reliability and proof, not only distance. Buyers want fewer surprises. They also want documentation that stands up during disputes. That pushes the industry toward more lane testing, clearer SLAs, and stronger exception processes.
Latest progress snapshot (what to plan around)
-
Greater demand for proof-based cold chain performance, especially on high-value lanes
-
More pressure to control storage time and touches, not just rates
-
More buyers asking for monitoring plans and standard documentation
-
Increased focus on shrink reduction as the fastest path to savings
Frequently asked questions
Q1: What do cold chain meat prices include beyond the meat itself?
Cold chain meat prices include storage, reefer transport, handling, packaging, monitoring, and shrink allowance. If you ignore the execution layer, you underprice lanes and pay later in credits.
Q2: How can I estimate cold chain meat prices per pound from reefer freight?
Multiply the reefer rate by miles, then divide by pounds carried. That gives freight $/lb. Then add storage, handling, packaging, monitoring, and shrink.
Q3: Why do cold chain meat prices stay high even when farm prices cool?
Because distribution costs still bite. Storage labor, rent, handling, and reefer service levels do not fall as fast. Those costs can keep delivered pricing firm.
Q4: What hidden costs should I watch for in cold chain meat prices?
Watch detention, extra stops, redelivery attempts, pick fees, packaging replacement, cleanup from leaks, and exception admin time. They repeat and compound.
Q5: Do compliance rules increase cold chain meat prices?
They can add work for sanitation checks, training, and records. But they also reduce disputes and repeat failures, which can lower total cost over time.
Q6: Do temperature monitoring programs change cold chain meat prices?
They add direct cost, but often reduce chargebacks and spoilage by providing proof. Use lane testing for learning and targeted real-time monitoring for critical lanes.
Summary and recommendations
Cold chain meat prices are the total cost of delivering meat within spec. They include transport, storage, handling, packaging, monitoring, and risk. Optimizing only freight can backfire if it increases shrink and claims. Your best 2025 approach is lane-based pricing plus disciplined execution and proof.
Action plan (simple next steps):
-
Classify lanes by chilled/frozen, time-in-transit, stops, and heat risk.
-
Build one spreadsheet using the calculator template and add a shrink reserve.
-
Run three logger tests on your highest-claim lane before changing packaging.
-
Tighten appointment discipline to cut detention and accessorial creep.
About Tempk
At Tempk, we help cold chain teams turn cost confusion into lane-level clarity. We support packaging strategy, monitoring plans, and practical SOP templates that reduce detention, prevent claims, and make records easy to retrieve. The goal is simple: help you control cold chain meat prices by cutting hidden costs caused by failures.
Call to action: Share your lane distance, shipment weight, storage days, and current shrink rate. We’ll help you map a defensible estimate and the top fixes to lower total delivered cost.
Cold Chain Meat Shipping: Protect Quality in 2025
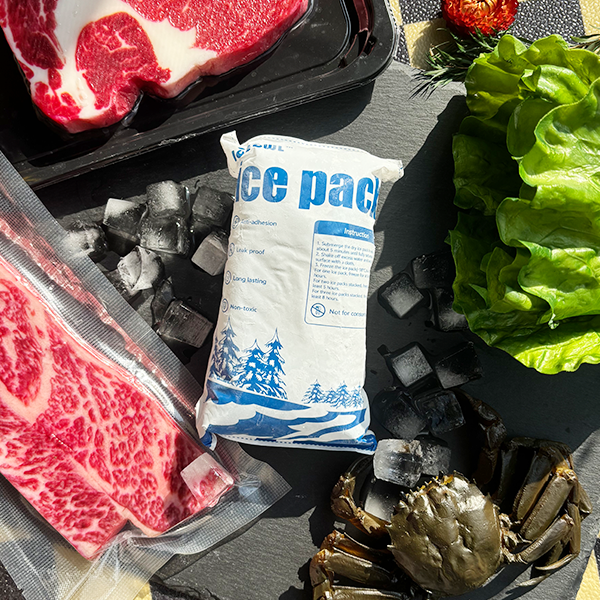
Cold chain meat shipping works when you control time, temperature, and proof as one system.
If chilled meat drifts above your safe limit or frozen meat partially thaws, you pay in refunds, chargebacks, and lost shelf life. Use a simple baseline many food-safety resources reference: keep refrigerated food at 40°F (4°C) or below and frozen food at 0°F (-18°C) or below, then design everything around avoiding “warm minutes.”
This article will help you:
-
Build a repeatable cold chain meat shipping SOP from pack-out to receiving
-
Set refrigerated meat shipping temperature requirements for chilled vs frozen lanes
-
Choose leakproof, handling-tough packaging that stays strong when wet
-
Run a last-mile cold chain meat delivery SOP that prevents doorstep warming
-
Use temperature monitoring for meat shipments without turning it into a tech project
Why does cold chain meat shipping fail most often?
Cold chain meat shipping fails when warm exposure stacks up during staging and handoffs.
cold chain meat shipping
Your trailer can be set correctly, yet your product still warms on the dock. The most expensive failures are usually “small” ones: a delayed pickup, doors held open, or slow put-away at receiving.
The 4 most common failure points you can fix fast
| Failure point | What you see | Why it happens | What it means for you |
|---|---|---|---|
| Warm staging | soft product, purge | dock congestion | shorter shelf life |
| Wet cartons | odor, collapse | leaks + condensation | damage claims rise |
| Handoff delays | warm spikes | missed windows | quality disputes |
| Missing proof | chargebacks | scattered records | lost revenue |
Practical tips you can use today
-
If your dock is busy: set a firm “time-out-of-cold” rule and enforce it.
-
If cartons get wet: fix leak control first, then review condensation drivers.
-
If disputes drag on: link temperature evidence to each shipment ID.
cold chain meat shipping
Real-world example: One shipper cut weekly claims by staging pallets only after the truck arrived and was pre-cooled. Less warm staging created more consistent arrivals.
What temperature targets should you use for cold chain meat shipping?
Cold chain meat shipping starts with one decision: chilled or frozen.
cold chain meat shipping
If you don’t choose a lane type per SKU, your packaging becomes guesswork. Your goal is not “cold sometimes.” Your goal is stable temperature with minimal warm minutes.
Chilled vs frozen targets (simple operational view)
| Lane type | Practical target | Biggest risk | What it means for you |
|---|---|---|---|
| Chilled meat | stay consistently cold (commonly ≤40°F / 4°C) | warm spikes | focus on dwell time |
| Frozen meat | stay solidly frozen (commonly ≤0°F / -18°C) | partial thaw/refreeze | focus on insulation + door discipline |
| Mixed loads | two targets in one load | drift + cross-contact | require separation and zoning |
Practical tips you can use today
-
Pick one target per SKU: fewer rules means fewer mistakes.
-
Add a time rule: define maximum minutes out of controlled cold zones.
-
Track “minutes above limit,” not averages: averages hide short spikes.
Real-world example: A distributor reduced “mystery thaw” complaints by pre-cooling trailers and tightening door-open discipline during loading.
How do you build leakproof packaging for cold chain meat shipping?
Meat cold chain packaging must do three jobs at once: hold temperature, prevent leaks, and survive handling. When leak control fails, cartons weaken fast and damage spreads across the pallet. If you fix one thing first, fix containment.
The 3-layer pack-out stack (easy to teach)
-
Primary containment: sealed inner bag, vacuum pack, or sealed tray
-
Secondary barrier + absorbency: second sealed bag plus absorbent pad/liner
-
Thermal shell: insulated liner + strong outer carton (and corner protection for pallets)
Packaging elements that drive outcomes
| Packaging element | What “good” looks like | What goes wrong | What it means for you |
|---|---|---|---|
| Inner seal | consistent, strong | micro-leaks | wet cartons |
| Absorbency | correctly sized | under-sized | odor + purge complaints |
| Carton strength | stays rigid when cold/wet | collapses when damp | crush claims |
| Pallet build | stable, protected corners | shifting, overhang | damage spreads quickly |
Practical tips and advice
-
Separate coolant from meat: direct contact can change texture and appearance.
-
Reduce air gaps: tight packing often beats adding more gel packs.
-
Protect corners: corner boards and good patterns stop “domino damage.”
Real-world example: A processor cut carton damage by upgrading carton grade and adding corner boards. The carrier stayed the same, but claims dropped.
Gel packs, phase-change, or dry ice for cold chain meat shipping?
Most cold chain meat shipping relies on refrigerated transport and insulation, not dry ice. Dry ice can be the right tool for frozen programs, but it adds training, marking, and package-venting requirements. Treat refrigerants like a controlled process, not a “warehouse hack.”
Cooling options in plain language
| Option | Best for | Watch-out | What it means for you |
|---|---|---|---|
| Reefer control | pallet freight | poor pre-cool | load warms early |
| Gel packs | parcels, short lanes | condensation/leaks | needs liners and layout |
| Phase-change packs | tight chilled band | wrong setpoint | requires SOP discipline |
| Dry ice | frozen delivery | marking/venting | strong freeze buffer with rules |
| Active containers | premium lanes | cost | use selectively |
Dry ice mini-checklist (keep it safe and audit-ready)
-
Venting: never seal dry ice in airtight packaging.
-
Marking: follow carrier/regulatory marking (often “Dry Ice / UN1845” + net weight).
-
Buffer planning: size for your timeline plus delay margin, then validate by testing.
-
Food contact control: keep dry ice from direct product contact to avoid quality damage.
Real-world example: A frozen program improved success by planning dry ice for an extra delay window, then validating on a pilot lane.
How do you control dwell time and handoffs in cold chain meat shipping?
Handoffs are where cold chain meat shipping breaks most often.
cold chain meat shipping
That’s when doors open and responsibility shifts between teams. Your strongest lever is a timed handoff plan with a named owner.
The “4-Clocks” method (turns chaos into data)
Track these clocks and set maximum minutes for each:
| Clock | What it measures | Why it matters | What it means for you |
|---|---|---|---|
| Pack-out clock | seal → pickup | warm starts drift | reduces early warming |
| Handoff clock | dock/terminal time | hidden exposure | prevents silent temp loss |
| Transit clock | travel time | sets buffer need | aligns promise to reality |
| Door clock | delivery attempt time | doorstep warming | lowers failed delivery losses |
A 10-minute dock SOP you can actually run
-
Pre-cool confirmation: truck arrived and is cold before staging.
-
Stage last, load fast: keep product in the cold room until loading starts.
-
Door discipline: reduce door-open time; close between pauses.
-
Receiving rule: prioritize cold-room put-away before paperwork.
Real-world example: A DC reduced warm events by stopping deliveries during shift change. Put-away speed improved immediately.
How do you monitor and prove cold chain meat shipping worked?
Proof turns cold chain meat shipping from “trust me” into “here’s the evidence.”
cold chain meat shipping
You don’t need maximum monitoring on every load. You need actionable monitoring tied to shipment IDs, especially on high-risk lanes.
Monitoring levels (pick one baseline, then upgrade selectively)
| Level | Best for | Limitation | What it means for you |
|---|---|---|---|
| Level 1: timestamps | all lanes | no temp curve | accountability improves fast |
| Level 2: data loggers | lane validation | post-trip | finds weak handoffs |
| Level 3: real-time | critical loads | needs response team | enables rescue actions |
| Level 4: integrated records | audits/recalls | setup effort | fastest investigations |
Build a simple “proof bundle” per shipment
Include:
-
photo of pallet condition at load
-
departure timestamp
-
logger ID + temperature summary linked to shipment ID
-
receiving timestamp + notes
KPI dashboard (simple, useful)
| KPI | How to measure | Good target | What it means for you |
|---|---|---|---|
| Warm exposure minutes | time outside control | trending down | better shelf-life consistency |
| On-time pickup | scan timestamps | high + stable | fewer warm starts |
| Temp compliance | logger sampling | stable in-range | stronger dispute defense |
| Leak rate | claims per 1,000 | near zero | fewer refunds |
| Rework/re-ice | ops logs | low | lower cost + fewer errors |
What compliance and labeling practices support cold chain meat shipping?
Sanitary transportation compliance for meat logistics is mostly about clean equipment, temperature control practices, training, and records. Keep it operational, not legalistic. Your goal is fewer rejections, fewer disputes, and faster corrective actions.
The “Clean, Separate, Control” rule
| Rule | What you do | Common miss | What it means for you |
|---|---|---|---|
| Clean | verify vehicle/tools | “looks clean” only | lowers contamination risk |
| Separate | raw vs ready-to-eat | mixed pallets | reduces cross-contact risk |
| Control | temperature + time | no dwell limits | prevents warm breaks |
Practical tips you can use today
-
Use one-page checklists with signatures: short beats perfect.
-
Record cleaning events: “we always clean” is not evidence.
-
Keep labels readable: smudged labels create receiving delays.
How do you price cold chain meat shipping without overspending?
Cold chain meat shipping feels expensive when you only track invoices. Track cost per successful delivery instead. When success rate rises, total cost often drops even if packaging costs slightly more.
Simple cost calculator (use in a spreadsheet today)
All-in cost per shipment =
Carrier fee + Packaging + Coolant + Labor + Expected claims
Cost per successful delivery =
All-in cost ÷ Success rate
| Input | Example | Why it matters | What it means for you |
|---|---|---|---|
| All-in cost | 18.00 | true spend per shipment | baseline for decisions |
| Success rate | 0.90 | in-range + on-time | reliability driver |
| Cost per success | 20.00 | real affordability metric | shows what failure costs |
Real-world example: One brand tightened delivery windows. Success rate rose, refunds fell, and total spend dropped.
2025 latest developments and trends in cold chain meat shipping
In 2025, cold chain meat shipping is shifting toward evidence-first operations. Companies measure dwell minutes, not just transit time.
cold chain meat shipping
They also tie temperature evidence to shipment IDs and lot IDs to speed disputes and recalls.
cold chain meat shipping
Latest progress snapshot (what you can apply now)
-
Exception-based monitoring: use loggers on high-risk lanes, not every load.
-
Dwell time as a KPI: docks are treated like the weakest refrigeration zone.
-
Better identifiers: 2D barcode readiness is rising as the GS1 “Sunrise 2027” push accelerates scanning upgrades.
cold chain meat shipping
Market insight (plain language)
-
Customers expect consistent shelf life, not “it was cold at pickup.”
-
Claims are more evidence-driven, so proof bundles matter more than opinions.
-
The best teams cut cost by fixing process first, not buying heavier packaging everywhere.
Frequently Asked Questions
1) What is the most important step in cold chain meat shipping?
Pre-cooling and dwell control matter most. If product warms during staging or receiving, shelf life drops quickly.
2) Do I need temperature monitoring for meat shipments on every load?
Not always. Start with lane validation and high-risk routes, then sample once performance stabilizes.
3) Why do boxes arrive wet in cold chain meat shipping?
Most wet arrivals come from small leaks or unmanaged condensation. Fix seals and absorbency before adding more coolant.
4) What causes “soft arrival” in chilled meat?
Usually warm staging, delayed handoffs, or long door-open time. Fix timing and discipline before switching carriers.
5) Can chilled and frozen meat ship together?
It can, but it’s risky. If you must mix, use zoning, physical separation, and a clear load plan.
Summary and recommendations
Cold chain meat shipping becomes reliable when you lock five basics: temperature targets, leakproof packaging, disciplined handoffs, usable proof, and simple exception rules.
cold chain meat shipping
Most failures come from warm minutes during staging and receiving, not from the road. If you standardize pack-out, control dwell time, and keep a proof bundle per shipment, you reduce spoilage, shorten disputes, and protect customer shelf life.
Action plan (clear CTA)
-
Today: set a firm “time-out-of-cold” limit and train the team.
-
Next shipment: require trailer pre-cooling and a fast load plan.
-
Within 14 days: create a proof bundle template (photos + timestamps + temp summary).
-
Within 30 days: review exceptions and fix the single worst warm point first.
About Tempk
At Tempk, we help teams make cold chain meat shipping repeatable under real warehouse pressure. We focus on temperature stability, leak control, and proof-ready routines that operators can follow without improvising. Our goal is simple: fewer warm breaks, fewer claims, and a program you can scale across seasons and lanes.
cold chain meat shipping
Next step: Share your shipment profile (chilled or frozen), typical transit time, and your top failure (wet cartons, soft arrivals, handoff delays). We’ll help you match packaging and monitoring to your lane risk and cost goals.
Cold Chain Fish Courses Solutions for 2025

Cold Chain Fish Courses Solutions for 2025?
Last updated: December 23, 2025. Cold cold chain fish courses solutions are practical training systems that teach your team how to keep fish safe and high-quality across real routes. In the first 50 words: cold chain fish courses solutions turn “keep it cold” into repeatable habits—time discipline, correct icing, tight packaging, and simple monitoring. Two anchor numbers help everyone learn fast: fresh fish aims near 0°C, and frozen targets -18°C or colder at the core.
This article will answer:
-
How a cold chain fish courses solutions curriculum checklist keeps training focused and fast
-
How dock dwell time control for fresh fish logistics cuts spoilage without new equipment
-
How cold chain fish courses solutions for drivers and warehouses reduce handoff mistakes
-
How to run a fish cold chain pack-out validation test before peak season
-
How a cold chain fish courses solutions KPI dashboard turns data into weekly actions
What are cold chain fish courses solutions, and who needs them?
Core answer: Cold chain fish courses solutions are training plus ready-to-use tools—SOPs, checklists, photos, and decision rules. They are not just classroom content. You need them if you touch fish at any point: receiving, packing, loading, transport, cross-dock, retail, or last-mile delivery. If quality failures feel “random,” it is usually missing repeatable steps.
Fish quality loss is rarely one dramatic mistake. It is small warm moments stacked together. A warm dock wait, a half-melted ice bed, or a leaky liner can trigger odor later. Training works when it stops those small losses early.
Cold chain fish courses solutions curriculum checklist: the minimum set
A starter curriculum should fit into one shift. Build depth later, after habits stick.
| Training block | What it teaches | Common gap | Practical meaning for you |
|---|---|---|---|
| Time discipline | staging limits + handoff timing | “just a minute” culture | fewer warm spikes |
| Temperature basics | where to measure + what to do | random checks | faster corrections |
| Pack-out discipline | sealing, barriers, absorbent, fit | “everyone packs differently” | fewer wet boxes |
| Receiving SOP | quick accept/reject checks | slow receiving | fewer disputes |
| Incident playbook | delay/excursion/leak actions | panic decisions | fewer costly reships |
Practical tips you can use today
-
Start with a failure map: list every handoff and how long it really takes.
-
Train the busiest step first: packing and loading usually drive most claims.
-
Use checklists, not memory: busy teams forget steps under pressure.
Real-world example: A seafood distributor cut complaints after adding a 2-minute loading checklist and a strict staging-time rule.
Which skills should cold chain fish courses solutions teach first?
Core answer: The fastest wins in cold chain fish courses solutions come from three skills: (1) fast chilling habits, (2) handoff time control, and (3) consistent pack-out. These three improve outcomes even before you buy new equipment. They also scale well across sites.
Think of fish freshness like a battery that drains faster when warm. Every warm minute spends quality budget. Training should make that “spend” visible and preventable.
The first 3 modules that usually deliver results
| Module | What “good” looks like | Field habit to teach | Practical meaning for you |
|---|---|---|---|
| Chilling and icing | fish stays near 0°C in practice | ice contact and layering | better smell and texture |
| Handoff timing | warm exposure stays inside limits | timer + signoff | fewer hidden spoilage events |
| Pack-out consistency | same pack every time | photo standard + seal check | fewer wet-box rejects |
Practical tips you can use today
-
Teach one habit per shift, not everything at once.
-
Post one pack-out photo per SKU above the packing station.
-
Make it visual: short posters beat long manuals every time.
Real-world example: A pack house improved consistency by posting one pack-out diagram and auditing it weekly.
How do cold chain fish courses solutions work by job role?
Core answer: Cold chain fish courses solutions succeed when training is role-based. Drivers need different skills than packers. Receivers need different checks than QA. Role-based training reduces confusion and stops “everyone guessing.” It also cuts training time because content feels relevant.
When you train by role, you also make ownership clear. Ownership is the fastest way to reduce repeat failures.
Cold chain fish courses solutions for drivers and warehouses: a role map
| Role | Biggest risk they control | What to train | Practical meaning for you |
|---|---|---|---|
| Receiving | warm dock time | fast checks + rapid put-away | fewer early failures |
| Picking/Packing | inconsistent pack-out | sealing + barrier + absorbent | fewer leaks |
| Loading | open-door time | fast loading standard | fewer spikes |
| Driver | stop sequence + door openings | “doors closed unless loading” | fewer last-mile issues |
| Customer support | delayed delivery handling | triage script + escalation | fewer unnecessary reships |
Practical tips you can use today
-
Give drivers a stop order: deliver highest-risk chilled items first.
-
Give receivers a five-minute rule: no “staged and forgotten” pallets.
-
Give packers photo cards: one image beats one page of text.
Real-world example: A seafood e-commerce team reduced refunds after giving drivers a two-page summer route guide.
Cold chain fish courses solutions: how do you keep fresh fish at 0–4°C in transit?
Core answer: Cold chain fish courses solutions should teach stable cold near 0°C while avoiding direct “hard-freeze contact” that can damage texture. Your goal is stable cold around the product, not extreme cold on one surface. Moisture control matters as much as temperature, because wet cartons trigger rejects and distrust.
Fresh fish ships best when you manage three zones: cold source, product stability, and moisture control. This helps packers understand why each layer exists.
How to keep fresh fish at 0–4°C: the “3-zone” pack-out
| Pack-out zone | What it does | Common mistake | Practical meaning for you |
|---|---|---|---|
| Cold source zone | absorbs incoming heat | coolant touches fish directly | uneven texture |
| Product stability zone | keeps fish in stable center | too much headspace | faster warming |
| Moisture zone | protects outer carton and labels | no liner or weak closure | wet-box claims |
Ice and coolant habits that teams remember
Ice is a “cold battery.” If contact is poor, the battery can’t reach the fish. Teach these habits using photos and quick drills.
-
Layer coolant and product so cold contact is spread, not top-only.
-
Use a barrier layer when needed to prevent direct freeze contact.
-
Plan for some cold capacity remaining at delivery, not “barely enough.”
Practical tips you can use today
-
Use a barrier layer: it reduces direct cold spots and texture damage.
-
Reduce headspace: empty air warms faster than fish mass.
-
Seal leaks twice: inner seal plus liner closure prevents messy failures.
Real-world example: A salmon shipper improved arrival quality after adding a barrier layer and better absorbent placement.
Cold chain fish courses solutions for frozen fish: what changes?
Core answer: In cold chain fish courses solutions, frozen fish training focuses on preventing thaw-and-refreeze events. These events can be invisible at delivery but show up later as drip loss and poor texture. Frozen training is mainly about insulation discipline, minimal openings, and lane-based timing control.
Frozen logistics is simpler to teach when you use one rule: protect the frozen state and avoid warm interruptions.
Frozen shipment risks and the training fixes
| Frozen risk | What causes it | Training fix | Practical meaning for you |
|---|---|---|---|
| Partial thaw | delays + weak insulation | lane-based pack-out rules | fewer hidden defects |
| Refreeze cycle | thaw then cold snap | do-not-open discipline | better texture |
| Carton collapse | moisture + rough handling | liner + stronger outer | fewer damages |
Practical tips you can use today
-
Load frozen last: keep it in cold storage until final moment.
-
Teach “one open equals one risk.” Openings are the biggest enemy.
-
Use lane tiers: short routes and long routes should not share one pack-out.
Real-world example: A frozen fish distributor reduced soft-edge complaints after standardizing long-lane pack-outs.
What temperature checkpoints should cold chain fish courses solutions include?
Core answer: Cold chain fish courses solutions should teach checkpoints, not random checks. A checkpoint is repeatable: same place, same method, same frequency. Repeatability turns measurements into trend control. Most operations only need three checkpoints to start: post-chill, dispatch, and receiving.
Checkpoints also protect you during claims. When you can show clean records, disputes shrink.
Checkpoint design that works under pressure
| Checkpoint | When to check | What to record | Practical meaning for you |
|---|---|---|---|
| Post-chill | before packing | time + quick temperature note | confirms starting quality |
| Dispatch | door close / before departure | temperature + timestamp | captures handoff risk |
| Receiving | on arrival | condition + photo + temp | faster claim resolution |
Practical tips you can use today
-
Record time out of cold room for every pallet or tote.
-
Use clear pass/fail triggers with one escalation step.
-
Avoid one-off checking: if it is not repeatable, it will not improve.
Real-world example: A 3PL reduced disputes after logging “door close time + temperature” on every seafood load.
How should cold chain fish courses solutions teach packaging and leak control?
Core answer: Cold chain fish courses solutions must treat packaging as a system: containment, barrier, absorbent, insulation, and closure. Most customer trust problems come from wet cartons and odor impressions. Packaging training prevents those issues even when temperatures are “fine.”
Your packaging module should also teach fit. Bad sizing creates dead air or crushed product. Both increase complaints.
Leak control for fresh fish: the 3-layer rule
| Packaging layer | What it does | Common mistake | Practical meaning for you |
|---|---|---|---|
| Primary containment | holds drip at the source | weak closure | mess spreads |
| Barrier liner | protects carton strength | liner left open | wet-box rejects |
| Absorbent placement | captures pooled liquid | too little or wrong spot | stains and odor |
Near-solution comparison: “good insulation” is not enough
| Approach | What you improve | What you still risk | Better combined approach |
|---|---|---|---|
| Insulation only | longer hold time | leaks and wet cartons | add liner + absorbent |
| Coolant only | colder start | direct contact damage | add barrier layer |
| Strong carton only | better handling | moisture failure | add containment system |
Practical tips you can use today
-
Standardize closure: one closure method reduces errors quickly.
-
Place absorbents in low points where liquid pools first.
-
Teach a 5-second seal check before closing the shipper.
Real-world example: A fish shipper reduced wet-box claims after improving liner closure discipline and moving pads to bottom corners.
Cold chain fish courses solutions monitoring: which KPIs matter?
Core answer: Monitoring in cold chain fish courses solutions should feel like coaching, not punishment. If people fear sensors, they hide problems. If people trust sensors, they fix root causes. Start with audits on high-risk lanes, then scale when you have clear actions.
You only need a few KPIs to start. More metrics often means less action.
Cold chain fish courses solutions KPI dashboard: the few numbers that matter
| KPI | What it measures | Why it matters | Practical meaning for you |
|---|---|---|---|
| Excursion rate | % shipments outside target | reveals lane risk | fewer surprises |
| Dock dwell minutes | staged time at dock | shows process gaps | faster operations |
| Wet-box rate | incidents per 1,000 | shows containment gaps | fewer claims |
| Damage rate | crushed/shifted units | shows handling issues | better yield |
| Record completeness | % lots with full logs | improves audit readiness | less disruption |
Practical tips you can use today
-
Tag claims by cause: warm, leak, crush, delay, or unknown.
-
Review weekly for 15 minutes with ops + QA + transport together.
-
Reward reporting: honest logs create your biggest improvements.
Real-world example: A seafood network cut losses after identifying one cross-dock as the main spike point.
Cold chain fish courses solutions incident response: what should your playbook look like?
Core answer: Cold chain fish courses solutions must include an incident playbook for delays, excursions, and leaks. Incidents are predictable. The best teams respond quickly and consistently. A short decision tree prevents expensive overreactions and unsafe underreactions.
Your playbook should be short enough to use during a crisis. If it needs a meeting, it is too long.
Incident decision tool (interactive)
Answer in order:
-
Was the shipment delayed beyond your lane buffer?
-
Did temperature exceed your limit longer than allowed?
-
Is packaging compromised (leaks, crushed corners, open seals)?
Then take the matching action:
| Incident type | First action | Second action | Practical meaning for you |
|---|---|---|---|
| Temperature excursion | quarantine | review trip story | prevents unsafe release |
| Leak / wet box | contain + isolate | re-pack if safe | protects brand trust |
| Crush damage | inspect + photo | adjust dunnage rule | reduces repeats |
| Delay without excursion | enhanced inspection | document and release | avoids unnecessary reships |
Practical tips you can use today
-
Teach “stop the bleed”: contain leaks before you debate fault.
-
Use one escalation channel: confusion causes slow response.
-
Log incidents by lane: lane fixes beat random fixes.
Real-world example: A wholesaler reduced repeat failures after adding a one-page incident tree to training.
A ready-to-use 30-day rollout plan for cold chain fish courses solutions
Core answer: The best cold chain fish courses solutions are short, practical, and repeatable. A 30-day rollout works because it builds habits, then locks them with proof. This plan uses micro-lessons, job aids, and simple audits. It also keeps training manageable during peak volume.
Week-by-week rollout
| Week | Focus | Deliverable | Practical meaning for you |
|---|---|---|---|
| Week 1 | Time discipline | timer rule + handoff checklist | fewer warm spikes |
| Week 2 | Pack-out + leak control | pack-out photos + seal check | fewer wet boxes |
| Week 3 | Temperature checkpoints | post-chill, dispatch, receiving logs | faster control |
| Week 4 | Monitoring + improvement | 10 audit trips + one fix | continuous gains |
Fish cold chain pack-out validation test: a 3-day sprint
Use this sprint before scaling a new pack-out. It is simple and repeatable.
-
Day 1 (Baseline): normal pack-out, normal route, inspect arrival.
-
Day 2 (Heat stress): simulate warm exposure window, inspect again.
-
Day 3 (Delay + handling): add dwell time and handling stress, inspect seals.
| Test day | What you measure | Pass signal | Practical meaning for you |
|---|---|---|---|
| Baseline | stable arrival condition | consistent quality | confidence on normal days |
| Heat stress | peak + duration | no extended excursion | fewer summer failures |
| Delay/handling | leaks + damage | carton stays clean | fewer “bad day” claims |
Practical tips you can use today
-
Keep sensor placement consistent by SKU type.
-
Photograph pack-out so training stays visual and repeatable.
-
Change one variable at a time to avoid confusing results.
Real-world example: A tuna shipper avoided a costly rollout after a sprint revealed a simple sealing flaw.
2025 latest developments and trends in cold chain fish courses solutions
Trend overview: In 2025, cold chain fish courses solutions are shifting from long classroom sessions to micro-training plus tools. Companies want job aids, photos, lane-based standards, and tighter proof. Buyers also push for better traceability habits and faster record retrieval. Training is becoming a competitive advantage, not a checkbox.
Latest developments you can use immediately
-
Microlearning: 5–8 minute lessons paired with on-station checklists
-
Lane-based standards: one pack-out per lane tier, not one universal method
-
Smarter monitoring: targeted audits on high-risk lanes with clear actions
-
Role-based refreshers: drivers, receivers, packers each get focused drills
-
Customer experience control: fewer wet boxes, cleaner unboxing, clearer handling notes
Market insight: Customers do not grade your effort. They grade the fish they receive. Cold chain fish courses solutions that reduce variability usually increase repeat purchases.
Common questions about cold chain fish courses solutions (FAQ)
Q1: What are cold chain fish courses solutions in simple terms?
They are training plus SOP tools that help your team keep fish cold, sealed, and protected across real lanes.
Q2: What is the biggest cause of fish quality loss during shipping?
Short warm exposure at handoffs. Timer rules and fast loading discipline reduce this risk quickly.
Q3: How do cold chain fish courses solutions reduce wet-box complaints fast?
Standardize secondary containment and absorbent placement. Add a 5-second seal check before closing.
Q4: Do I need expensive monitoring for cold chain fish courses solutions to work?
No. Start with process discipline and a few audit trips on high-risk lanes, then scale.
Q5: How often should I refresh cold chain fish courses solutions training?
Use weekly micro-refreshers in peak season. Use deeper refreshers quarterly or after incident patterns.
Summary and recommendations
Cold chain fish courses solutions work when they turn cold chain goals into repeatable habits. Start with time discipline, checkpoints, and consistent pack-out. Make training role-based, so each team learns what they control. Validate pack-outs before scaling, and track a few KPIs that drive weekly action. If you reduce warm minutes and wet boxes, you usually reduce complaints fast.
Next-step action plan (clear CTA)
-
Map your handoffs and measure dock dwell minutes for one week.
-
Launch Week 1–2 training: timer rule + pack-out photo standard.
-
Add three checkpoints and a one-page receiving SOP.
-
Run 10 audit trips on your highest-claim lane and fix one root cause.
-
Scale only the version your team can repeat on the busiest day.
About Tempk
At Tempk, we help seafood teams turn cold chain goals into daily routines people can follow under pressure. We support training design, pack-out standardization, and validation workflows that reduce warm minutes and wet-box failures. We focus on practical execution: simple SOPs, visual standards, and improvement loops that show progress.
Call to action: Share your product format (fresh or frozen), lane duration, handoff count, and top failure pattern. We can outline a pilot-ready cold chain fish courses solutions plan you can train and validate in 30 days.
Cold Chain Seafood QA Procedures (2025 Guide)
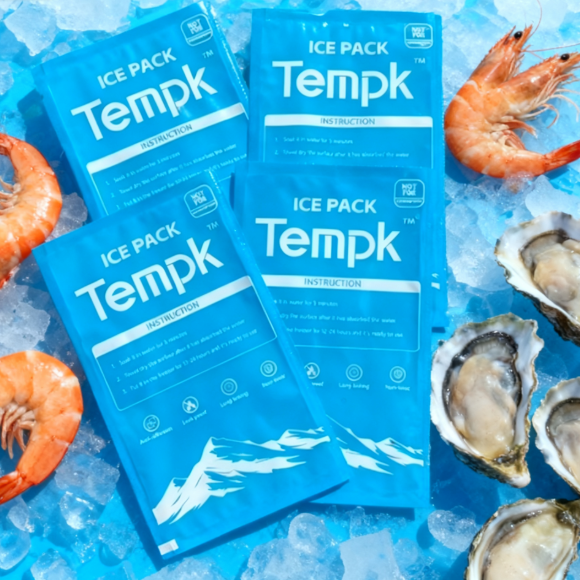
Cold Chain Seafood QA Procedures: What to Standardize?
If you want fewer rejects and calmer audits, you need cold chain seafood QA procedures that work on busy days. You are not chasing “perfect paperwork.” You are building predictable control from supplier to dock to cold room to shipment. In real programs, key HACCP functions must be handled by a trained (or otherwise qualified) individual under 21 CFR 123.10. And for shellfish traceability, common guidance explains keeping identification records for at least 90 days.
This article will help you:
- Build cold chain seafood ingredients quality assurance procedures your team can train and audit
- Standardize receiving checks using time/temperature/condition/docs
- Add shellfish controls (NSSP mindset + traceability discipline) without slowing operations
- Turn training into daily habits with cold chain shellfish equipment courses and drills
- Use simple decision tools to match procedure strength to your real risk

Why do cold chain seafood QA procedures fail in real life?
Cold chain seafood QA procedures fail when they live in binders, not in hands. Seafood moves fast, stays wet, and gets handled many times. That makes small slips add up.
Here are the usual “silent killers” you cannot see by looking:
- Dock minutes: product sits warm while people “get ready”
- Uneven cooling: air is cold, but the product core stays warmer
- Meltwater contact: ice helps, but meltwater can damage quality and spread contamination
- Weak traceability: missing lot codes or mixed lots create recall chaos
A simple metaphor that helps teams remember: your cold chain is like a seatbelt. You only notice it when you need it.
Which frameworks should cold chain seafood QA procedures align with?
Your cold chain seafood QA procedures should match references auditors and buyers recognize. You do not need to quote them in your SOPs. You need to follow their logic: hazards → controls → monitoring → records → corrective actions.
Use these anchors:
- FDA Fish and Fishery Products Hazards and Controls Guidance (hazards + appropriate controls; “current thinking”). (U.S. Food and Drug Administration)
- Seafood HACCP regulation (21 CFR Part 123) and training expectation (21 CFR 123.10).
- Codex Code of Practice for Fish and Fishery Products (handling, storage, distribution, and sale practices).
- National Shellfish Sanitation Program (NSSP) for bivalve molluscan shellfish sanitation and interstate commerce uniformity.
Practical takeaway: Choose one “house standard” and train to it. Then map buyer and state requirements onto the same workflow.
What is the 10-part blueprint for cold chain seafood QA procedures?
If you cover these ten areas, your system stays stable during peak weeks.
- Supplier approval and written specifications
- Pre-shipment requirements (temps, packaging, documents)
- Receiving inspection (time + temperature + condition + docs)
- Risk-based sampling and testing plan
- Storage zoning and rotation (FIFO)
- Sanitation + prerequisite programs (cleaning, allergen separation)
- Process controls during handling (time/temperature exposure)
- Pack-out rules (ice, insulation, staging limits)
- Monitoring and record review cadence
- Corrective actions and continuous improvement
Now let’s make each one usable.
How do cold chain seafood QA procedures start with supplier approval?
Supplier approval is the cheapest control you will ever buy. If your suppliers drift, you will inspect forever and still lose product.
Standardize supplier approval with specs, proof-of-control, and a scorecard. Your goal is simple: the supplier can keep product cold, protected, and documented—every time.
Supplier scorecard you can use
| Scorecard area | What you measure | Pass/Fail trigger | What it means for you |
|---|---|---|---|
| Temperature control | shipping temp evidence | repeated warm arrivals | fewer rejects |
| Packaging integrity | leaks, crushed cartons | frequent damage | better yield |
| Documentation | lot codes, dates, COA | missing key fields | faster audits |
| Responsiveness | corrective action speed | slow/no response | lower repeat risk |
| Consistency | lot-to-lot variation | high variation | easier planning |
Practical tips you can apply tomorrow
- If you buy high-risk species: tighten time/temperature expectations and documentation rules.
- If you buy frozen: watch for thaw/refreeze signs and weak case integrity.
- If you buy ready-to-eat (RTE): require stronger sanitation verification and handling controls.
Real-world example: One processor reduced weekly rejects by requiring a clear lot-code format and a shipping temperature record on every load. Missing record became a “hold” condition.
What should cold chain seafood QA procedures require at receiving?
Receiving is the heartbeat. If you catch problems here, you prevent downstream waste.
At receiving, check four things in this order: time, temperature, condition, documentation. Record the result, not just “OK.”
Receiving checklist (fast and repeatable)
- Time
- On-time arrival?
- How long staged at the dock before inspection?
- Temperature
- Measure using one standard method
- Record the number + location measured
- Condition
- Packaging intact?
- Leaks, odor, crushed corners, excessive drip?
- Documentation
- Lot code, dates, supplier name
- Shellfish identification paperwork when applicable (do not “file later”)
A receiving decision table (accept vs hold vs reject)
| Receiving finding | Accept | Hold for QA | Reject | What it means for you |
|---|---|---|---|---|
| Temp in spec | ✅ | — | — | normal flow |
| Slightly warm + short time | — | ✅ | — | test and decide fast |
| Warm + long delay | — | ✅ | ✅ | high spoilage risk |
| Leaks / meltwater damage | — | ✅ | ✅ | quality + contamination risk |
| Missing lot code / weak traceability | — | ✅ | ✅ | recall risk |
Practical receiving tips that save product
- Pre-stage tools: thermometer, wipes, labels, camera.
- Use a “receiving minute rule”: product should not sit “waiting for someone.”
- Train one measurement method so decisions stay consistent.
What temperature rules should cold chain seafood QA procedures train your team on?
Your team does not need to be scientists. They need repeatable habits.
Teach three temperature habits: move fast, measure consistently, and cool correctly when you cook. For cooked foods that require cooling, FDA educational materials describe a two-stage cooling path: 135°F to 70°F within 2 hours, then 70°F to 41°F or less within the next 4 hours.
Why this belongs in seafood ingredients QA
Because “ingredients” often include cooked or RTE components:
- cooked shrimp
- crab meat
- smoked seafood items
- prepared seafood mixes
If cooling is wrong, packaging cannot fix it later.
Shellfish note (plain-language)
Shellfish programs place heavy emphasis on time, temperature, and traceability, and the NSSP exists to support public health protection through uniform shellfish sanitation approaches. Your SOP should clearly define “dock-to-cold” minutes and your documentation routine.
| Situation | What you standardize | Why it matters to you |
|---|---|---|
| Busy dock | max staging minutes | prevents hidden warm periods |
| Cold holding | target range + alarm rule | reduces spoilage claims |
| Cooling cooked items | 2-stage cooling routine (U.S. Food and Drug Administration) | avoids growth risk |
| Shellfish handling | traceability discipline + rapid chilling | supports investigations |
How do cold chain seafood QA procedures design a risk-based sampling and testing plan?
Testing should verify control, not create bottlenecks.
Standardize three layers: sensory checks, temperature checks, and targeted lab testing for high-risk categories. Use your own trend data to adjust frequency.
Starter testing frequency table
| Ingredient type | Typical risk profile | Suggested verification | Practical meaning for you |
|---|---|---|---|
| Frozen raw blocks | moderate | receiving temp + package check | catches thaw/refreeze |
| Fresh chilled fillets | higher | temp + sensory + periodic micro | reduces spoilage disputes |
| Ready-to-eat seafood | high | tighter micro plan + sanitation verification | protects brand |
| Mixed seafood ingredients | variable | verify each component + mixing controls | avoids “weak link” failures |
Practical tip
Start tighter, then reduce only after you see stable trends for several cycles. Do not “relax” because you are busy.
How do cold chain seafood QA procedures control storage zones and FIFO?
Storage is where good receiving can be ruined by bad habits.
Zone by risk, protect airflow, and rotate inventory using FIFO (first in, first out). Most drift comes from door time, blocked fans, and mis-zoning.
Cold room zoning layout you can copy
| Zone | Put this here | Keep away from | What it means for you |
|---|---|---|---|
| Cold core zone | RTE / most sensitive | door area | best protection |
| Raw zone | raw fish/shellfish | RTE items | reduces cross-contact |
| Allergen/label zone | clearly identified allergen items | unlabeled items | fewer label errors |
| Quarantine zone | holds, suspect lots | production pick zone | prevents accidental use |
Practical storage tips
- Mark floor lanes so pallets do not block airflow.
- Use a “door discipline” rule: who opens, when, and how long.
- Put the oldest lot in the easiest-to-grab spot.

Which sanitation prerequisites make cold chain seafood QA procedures work?
You cannot HACCP your way out of poor sanitation.
Standardize cleaning schedules, verification, and tool separation. Keep it simple and visible.
Sanitation checklist (short and auditable)
- Clean and sanitize food-contact surfaces on a schedule
- Keep tools off the floor and stored dry
- Separate raw and RTE tools (color coding helps)
- Verify sanitizer concentration with simple test strips
- Document corrective actions when verification fails
If you use ATP testing, explain it to the team like this: “It’s a fast cleanliness check, not a magic shield.”
How do cold chain seafood QA procedures manage ice, insulation, and transfers?
If you move ingredients between sites or stage outside refrigeration, packaging becomes part of QA.
Standardize pack-out by lane: duration, ambient heat, and delay risk. Insulation slows change. It does not create cold.
Pack-out design table (simple)
| Transfer type | Insulation level | Coolant approach | What it means for you |
|---|---|---|---|
| <4 hours local | light | minimal ice + melt control | low cost, high discipline |
| 4–24 hours | medium | ice + barriers + drain control | stable day routes |
| 24–72 hours | high | higher insulation + monitoring | fewer long-lane claims |
Practical pack-out tips
- Keep product above meltwater (racks, trays, barriers).
- Prevent leaks with liner integrity checks.
- Seal fast and minimize open-lid time.
Which cold chain shellfish equipment courses make your QA stick?
Procedures fail when training is vague. Courses work when they build muscle memory.
If your operation performs key HACCP functions, regulations specify those functions must be done by a trained (or otherwise qualified) person under 21 CFR 123.10. (ecfr.gov) For bivalve shellfish, the NSSP framework supports consistent sanitation expectations across interstate commerce. (U.S. Food and Drug Administration)
Course-path planner (pick your lane)
| Your role lane | What you should learn | What changes for you |
|---|---|---|
| Operations | receiving, icing, staging, loading | fewer warm lots |
| Quality | monitoring, calibration, records | faster accept/hold calls |
| Compliance | HACCP basics, sanitation controls | calmer audits |
| Maintenance | refrigeration uptime, alarms, defrost | less downtime loss |
| Leadership | drills, reviews, corrective actions | fewer repeats |
“Proof of practice” drills (15 minutes each)
- Receiving drill: measure → log → decide (accept/hold/reject)
- Cooler loading drill: airflow-first stacking and door discipline
- Thermometer drill: verify one “gold standard” thermometer monthly
Practical case: Teams often stop excursions only after adding hands-on equipment drills. Slides alone do not change dock behavior.
How do cold chain seafood QA procedures stay audit-ready without paperwork overload?
Records should prove control, not punish people.
Use one-page logs that match work steps, then review weekly. If logs are not reviewed, they become dead paper.
Minimum record set (starter pack)
- Receiving log (time, temp, condition, lot code, decision)
- Storage temperature check (daily + exception notes)
- Sanitation verification log (what, when, verified by)
- Hold/release log (why held, what tests, who released)
- Corrective action log (what failed, what changed)
Practical tips
- Use checkboxes over long sentences.
- Add one “notes” line for exceptions only.
- Train supervisors to close loops weekly.
What corrective actions should cold chain seafood QA procedures pre-write?
Corrective actions are where QA becomes real. If you do not pre-write them, people improvise.
Pre-write corrective actions for your top failures: warm receiving, damaged packaging, missing documentation, and cooling deviations. Clear steps protect speed and consistency.
Corrective action table (copy/paste)
| Failure | Immediate action | Decision owner | Prevent recurrence |
|---|---|---|---|
| Warm at receiving | hold + test + shorten shelf life if needed | QA lead | update lane rules, supplier feedback |
| Leaking cartons | segregate + inspect cross-contact | Ops + QA | upgrade liner, retrain sealing |
| Missing lot code | hold until traceability fixed | QA | supplier requirement + reject policy |
| Cooling deviation | rapid chill + evaluate discard criteria | Food safety lead | retrain cooling, equipment check |
Interactive tools: Build your QA + training plan in 5 minutes
Tool 1: QA Procedure Strength Selector (score 0–12)
Ingredient sensitivity
- 0 = frozen stable
- 2 = chilled raw
- 4 = RTE or high-risk species
Process complexity
- 0 = receive/store only
- 2 = cutting/portioning
- 4 = cooking/cooling or mixing
Distribution exposure
- 0 = short, controlled
- 2 = mixed handling
- 4 = long routes or frequent delays
Total score: ____ / 12
Match your level
- 0–3 (Lean): strong receiving + FIFO + basic logs
- 4–7 (Standard): add risk-based testing + zoning + weekly trend review
- 8–12 (High-control): tighter verification + more frequent review + corrective action drills
Tool 2: Training Stack Roadmap (Yes/No)
Answer Yes/No:
- Do you perform HACCP plan work or record review? (ecfr.gov)
- Do you handle bivalve shellfish in regulated channels (NSSP mindset)? (U.S. Food and Drug Administration)
- Do you have repeat temperature incidents or unknown warm minutes?
- Are your thermometers verified on a schedule?
- Do new hires touch seafood within their first week?
If you answered Yes to 1–2: prioritize HACCP-aligned training + shellfish sanitation orientation. (ecfr.gov)
If you answered Yes to 3–4: add monitoring + equipment drills.
If you answered Yes to 5: build weekly micro-lessons and a 30-day onboarding path.
2025 trends shaping cold chain seafood QA procedures
In 2025, the winning systems focus on proof, not volume.
Latest developments snapshot
- More buyer pressure for “prove it” records: fewer forms, better decisions.
- More focus on hazards + controls clarity as described in FDA’s seafood hazards guidance. (U.S. Food and Drug Administration)
- More seasonal risk discipline for shellfish: Vibrio levels are higher in May through October, so summer SOPs matter.
- More standard cooling education: two-stage cooling remains a core operational skill.
Market insight (simple): Buyers do not ask, “Did you try?” They ask, “Can you show control?”
Frequently Asked Questions
Q1: What is the fastest starting point for cold chain seafood QA procedures?
Start with receiving: time, temperature, condition, and documentation. Make “hold vs accept” rules visible.
Q2: Do I need HACCP training to run seafood QA well?
If you perform key HACCP functions, 21 CFR 123.10 specifies trained or qualified individuals must perform them. (ecfr.gov)
Q3: Why do shellfish programs care so much about record retention?
FDA materials describe maintaining molluscan shellfish identification records for at least 90 days to support traceback. (U.S. Food and Drug Administration)
Q4: What temperature skill reduces the most disputes?
Consistent measurement technique. “Same spot, same depth, same timing” ends many arguments.
Q5: What’s different about May–October operations?
Vibrio levels are higher in May through October, so faster movement and tighter checks help.
Q6: How do I keep QA from slowing production?
Use one-page logs, checkboxes, and exception-only notes. Make QA steps match work steps.
Summary and recommendations
Strong cold chain seafood QA procedures come from predictable habits: approve suppliers, standardize receiving, store by zone with FIFO, verify sanitation prerequisites, and pre-write corrective actions. Align your logic to recognized guidance, but keep daily tools simple and fast. A weekly review beats a yearly scramble, because problems grow in the dark.
Action plan (7-day sprint)
- Day 1–2: finalize receiving checklist + one-page log
- Day 3–4: set cold room zones + FIFO labels
- Day 5: run a meltwater-control drill
- Day 6: write corrective actions for your top 3 failures
- Day 7: do a 10-minute weekly review and lock improvements
About Tempk
At Tempk, we help cold chain teams turn packaging, insulation, monitoring, and SOPs into repeatable QA systems. We focus on practical receiving discipline, airflow-first cold storage habits, and proof-of-control workflows that reduce rejects. We also support training-to-operations rollouts so your procedures survive turnover and peak season.
Next step: Share your ingredient types (fresh, frozen, RTE), route duration, and your top complaint (odor, leaks, temperature, documentation). We will suggest a procedure level, a drill plan, and the minimal records you need.