Cool Chain Creamery Top Transport: 2025 Playbook
Cool Chain Creamery Top Transport: 2025 Playbook

Cool Chain Creamery Top Transport: What Works in 2025?
Cool chain creamery top transport is not “buy a refrigerated truck and hope.” It is a system you can repeat every day: clear temperature lanes, the right transport mode, tight dock control, and proof you can export fast.
cool chain creamery top transpo…
If you run dairy, your targets must match product risk—think chilled bands like 0–4°C and frozen stability, plus stricter rules for raw milk and quick-frozen lanes in some regions.
This article will answer for you:
-
How cool chain creamery top transport works as a repeatable system (not a single truck)
cool chain creamery top transpo…
-
Which lane temperature targets are practical for raw, chilled, and frozen dairy
-
How to choose the best-fit mode: reefer, passive shipper, or hybrid
cool chain creamery top transpo…
-
How to cut dock dwell time (the hidden cause of most excursions)
cool chain creamery top transpo…
-
What “proof” to demand: logs, calibration, exception reports, and record retention
-
2025–2026 trends that change capacity, sustainability, and compliance expectations
What Is Cool Chain Creamery Top Transport, Really?
Cool chain creamery top transport means you pick the best transport method and operating routine to keep dairy stable from pack-out to receiving.
cool chain creamery top transpo…
It is a system made of four parts: temperature targets, thermal protection, process control, and proof.
cool chain creamery top transpo…
If you only buy equipment, you often overpay and still lose performance at handoffs.
Creamery products are fragile in two ways: flavor changes and texture damage. Small swings can create off-flavors, condensation, and melt–refreeze defects that customers notice immediately.
cool chain creamery top transpo…
That is why “stable cold” usually beats “extreme cold” with lots of door openings.
The 3 lanes you must separate in cool chain creamery top transport
Your biggest win is simple: do not average lanes. Raw milk, chilled finished goods, and frozen desserts have different failure modes.
cool chain creamery top transpo…
| Lane | Typical products | Simple target you can enforce | What breaks first |
|---|---|---|---|
| Raw intake | raw milk, cream | Cold chain + clean handling | Warm pickup + hygiene gaps
cool chain creamery top transpo… |
| Chilled finished | yogurt, fresh cheese, butter | Your spec (often 0–6°C) | Cross-dock door time
cool chain creamery top transpo… |
| Frozen desserts | ice cream, gelato | Stable frozen lane | Last-mile delays + melt–refreeze
cool chain creamery top transpo… |
Practical tips and advice
-
Label lanes everywhere: pallets, paperwork, and temperature reports.
cool chain creamery top transpo…
-
Do not “split the difference” on mixed loads: chilled and frozen compete unless separated.
cool chain creamery top transpo…
-
Make proof non-negotiable: if logs cannot be exported, disputes will drag on.
cool chain creamery top transpo…
Practical case: A gelato complaint often comes from last-mile warming, not from production changes.
cool chain creamery top transpo…
Cool Chain Creamery Top Transport: Which Temperature Targets Work?
Your targets should match the product and the rule set where you operate.
cool chain creamery top transpo…
For many chilled dairy operations, a practical starting band is ~0–4°C (32–39°F).
cool chain creamery top transpo…
For frozen desserts, the goal is “frozen and stable,” with many operations aiming for deep-frozen conditions to prevent softening.
cool chain creamery top transpo…
For raw milk in EU contexts, the hygiene rules commonly referenced include: cool immediately to ≤8°C for daily collection or ≤6°C if collection is not daily, and arrive ≤10°C at the destination establishment.
cool chain creamery top transpo…
For quick-frozen lanes in EU contexts, rules anchor at −18°C or lower and allow limited transport deviations up to 3°C.
cool chain creamery top transpo…
Why “stable cold” beats “colder is always better”
If product warms and cools repeatedly, you get condensation, texture damage, and inconsistent shelf life. A slightly warmer but stable lane can outperform a colder lane with frequent dwell and door opens.
cool chain creamery top transpo…
| Lane decision | Common mistake | Better rule | What it means for you |
|---|---|---|---|
| Chilled | one setpoint for everything | define a chilled band | fewer shelf-life surprises
cool chain creamery top transpo… |
| Frozen | “it feels frozen” checks | protect against melt–refreeze | better reviews + fewer refunds
cool chain creamery top transpo… |
| Raw milk | temperature only | temperature + hygiene logs | fewer borderline loads |
Practical tips and advice
-
Define a probe method: who measures, where, and with what device.
cool chain creamery top transpo…
-
Add a reject rule: if arrival exceeds your limit, decide the next step now.
cool chain creamery top transpo…
-
Treat cleaning logs like temperature logs: both protect you in audits.
cool chain creamery top transpo…
Practical case: If you only check temperature, hygiene failures can still reduce shelf life later.
cool chain creamery top transpo…
How Do You Choose the Best Mode for Cool Chain Creamery Top Transport?
The “top transport” choice depends on lane length, ambient heat, delivery density, and product type.
cool chain creamery top transpo…
Most operations use one of three setups: full reefer, passive insulated shipper, or hybrid.
cool chain creamery top transpo…
Mode comparison: reefer vs passive vs hybrid
| Mode | Best for | Watch-outs | What it means for you |
|---|---|---|---|
| Full reefer lane | high volume, multi-stop, mixed chilled loads
cool chain creamery top transpo… |
door openings + warm starts
cool chain creamery top transpo… |
active cooling, less packaging dependency
cool chain creamery top transpo… |
| Passive shipper lane | parcels, small orders, DTC frozen
cool chain creamery top transpo… |
needs correct pack-out + coolant sizing
cool chain creamery top transpo… |
unit-level protection even with messy handoffs
cool chain creamery top transpo… |
| Hybrid lane | premium frozen, hot climates, risky handoffs
cool chain creamery top transpo… |
more components; needs SOP discipline
cool chain creamery top transpo… |
“shock protection” at docks and doorsteps
cool chain creamery top transpo… |
Decision tool: Pick your cool chain creamery top transport (2 minutes)
Score each statement: 0 (no), 1 (sometimes), 2 (yes).
cool chain creamery top transpo…
-
Multiple stops with frequent door opens.
cool chain creamery top transpo…
-
Hot summer peaks on the route.
cool chain creamery top transpo…
-
Frozen desserts with premium texture expectations.
cool chain creamery top transpo…
-
Unattended receiving (porch, back door, dock queue).
cool chain creamery top transpo…
-
Mixed chilled + frozen in the same day.
cool chain creamery top transpo…
-
You can standardize pack-out and train staff consistently.
cool chain creamery top transpo…
Score guidance
-
0–4: Reefers alone may be enough; focus on pre-cooling + door discipline.
cool chain creamery top transpo…
-
5–8: Use a hybrid approach for peak heat and last-mile risk.
cool chain creamery top transpo…
-
9–12: High risk; design product-specific packaging + monitoring and tighten windows.
cool chain creamery top transpo…
Practical tips and advice
-
Use mixed-load separation: chilled and frozen compete without physical separation.
cool chain creamery top transpo…
-
Put sensitive SKUs in the least-opened zone: fewer warm peaks.
cool chain creamery top transpo…
-
Require a receiving SOP: cold chain should not end at the dock.
cool chain creamery top transpo…
Practical case: Positioning frozen pallets near the unit outlet and limiting stops can cut “soft ice cream” complaints.
cool chain creamery top transpo…
Cool Chain Creamery Top Transport at the Dock: How Do You Stop Spikes?
Most temperature abuse happens during “not driving.” Cool chain creamery top transport is won at dock staging, loading speed, door-open time, and delivery queue time.
cool chain creamery top transpo…
Your team only needs three rules to start seeing fewer excursions: pre-cool, load fast, and stage smart.
cool chain creamery top transpo…
Dock habits table (copy to your SOP)
| Dock moment | Bad habit | Better habit | What it means for you |
|---|---|---|---|
| Trailer arrival | load immediately | pre-cool to target first | fewer warm starts
cool chain creamery top transpo… |
| Pallet staging | warm zone staging | stage in chilled zone | steadier temps
cool chain creamery top transpo… |
| Door management | door propped open | open/close in bursts | less humidity + frost
cool chain creamery top transpo… |
| Load plan | random placement | coldest products deeper inside | better protection
cool chain creamery top transpo… |
Dwell Minute Audit (interactive)
If you reduce dwell by 20 minutes, you can beat an expensive packaging upgrade.
cool chain creamery top transpo…
Track three times for one week: arrival-to-door-open, door-open duration, door-close-to-departure.
cool chain creamery top transpo…
| Dwell metric | What it reveals | Typical fix | What it means for you |
|---|---|---|---|
| Queue time | scheduling gaps | appointment windows | fewer spikes
cool chain creamery top transpo… |
| Door-open time | slow handling | pre-sort pallets | steadier temps
cool chain creamery top transpo… |
| Paperwork time | admin delays | digital POD | faster exits
cool chain creamery top transpo… |
Practical case: Label pallets by stop order so drivers stop searching in an open box.
cool chain creamery top transpo…
What Packaging Works Best for Cool Chain Creamery Top Transport?
Packaging is your insurance policy—especially for the last mile. Even with reefers, packaging reduces temperature spikes during handoffs.
cool chain creamery top transpo…
Chilled packaging should minimize short exposures and reduce cross-contact risk. Frozen packaging should prevent melt–refreeze and reduce headspace (shipping “air” warms fast).
cool chain creamery top transpo…
Gel packs vs PCM vs dry ice: what fits your lane?
Pick cold sources based on lane risk, not habit.
cool chain creamery top transpo…
| Cold source | Best for | Watch-out | What it means for you |
|---|---|---|---|
| Gel packs | predictable short lanes
cool chain creamery top transpo… |
weak in high heat
cool chain creamery top transpo… |
strong daily baseline
cool chain creamery top transpo… |
| PCM | stable band control
cool chain creamery top transpo… |
needs correct conditioning
cool chain creamery top transpo… |
fewer temperature swings
cool chain creamery top transpo… |
| Dry ice | long, hot frozen lanes
cool chain creamery top transpo… |
labeling/handling rules
cool chain creamery top transpo… |
highest hold power
cool chain creamery top transpo… |
Practical tips and advice
-
Use seasonal designs: changing cold sources by season is smart operations, not inconsistency.
cool chain creamery top transpo…
-
Right-size insulation: avoid shipping “air” on frozen parcels.
cool chain creamery top transpo…
-
Add micro-packaging for the last 10–15 minutes: insulated totes protect handoffs.
cool chain creamery top transpo…
Practical case: A 12-stop route cut soft ice cream incidents with insulated totes, better stop sequencing, and shorter door-open time.
cool chain creamery top transpo…
What Monitoring Proof Do You Need Without Overcomplicating It?
Monitoring builds trust and reduces disputes. It also helps you improve packaging and routing with evidence, not opinions.
cool chain creamery top transpo…
A “minimum viable” setup is: timestamps, lane IDs, and temperature evidence scaled by lane value.
cool chain creamery top transpo…
Minimum viable monitoring checklist
-
Time stamps: pack-out, pickup, delivery
cool chain creamery top transpo…
-
Lane ID: route + stop count + season tag
cool chain creamery top transpo…
-
Temperature evidence: logger for high-value lanes; indicators for audits
cool chain creamery top transpo…
Monitoring stack (control vs proof)
For EU quick-frozen contexts, Regulation 37/2005 is often cited for frequent monitoring, EN 12830 compliance for instruments, and storing dated recordings for at least one year.
cool chain creamery top transpo…
Even if you are not in that corridor, the logic is excellent: control runs the truck; proof defends claims.
cool chain creamery top transpo…
| Layer | What it is | What it proves | When to use it |
|---|---|---|---|
| Truck telematics | setpoint + air temp | operational control | linehaul + last mile
cool chain creamery top transpo… |
| Independent recorder | EN 12830-class mindset | audit-ready logs | high-value lanes
cool chain creamery top transpo… |
| Probe checks | spot checks at handoff | acceptance decisions | pickup + delivery
cool chain creamery top transpo… |
Practical tips and advice
-
Define sensor placement: door-side sensors catch real risk better than “center only.”
cool chain creamery top transpo…
-
Use exception alerts: review trips with excursions and repeated alarms.
cool chain creamery top transpo…
-
Build a “proof stack”: when a customer says “warm,” answer with timestamps and in-range data.
cool chain creamery top transpo…
Practical case: Exportable traces end “warm product” debates in minutes, not weeks.
cool chain creamery top transpo…
How Do You Write SLAs for Cool Chain Creamery Top Transport That Carriers Respect?
An SLA turns “best effort” into measurable performance. Your SLA must define lane targets, excursion definitions, data access speed, and corrective action timelines.
If your SLA says “keep it cold,” you will argue forever. If it says “−18°C lane with defined deviation rules,” you can act.
cool chain creamery top transpo…
SLA checklist (simple and enforceable)
| SLA item | What to specify | Why it prevents disputes |
|---|---|---|
| Lane targets | chilled vs frozen targets | stops vague arguments
cool chain creamery top transpo… |
| Excursion definition | threshold + duration | defines failure clearly
cool chain creamery top transpo… |
| Data access | export within X hours | faster claim resolution
cool chain creamery top transpo… |
| Record retention | keep dated records | audit-ready proof
cool chain creamery top transpo… |
| Corrective action | RCA due date | prevents repeat failures
cool chain creamery top transpo… |
Carrier Scorecard (quick, practical)
If a carrier cannot show logs, cleaning records, and corrective actions before you sign, you will fight for them after.
cool chain creamery top transpo…
Use a scorecard that rewards evidence and response capability.
cool chain creamery top transpo…
Copy/paste RFQ questions (use the ones that match your lane):
-
How do you export trip temperature logs, and how long do you retain them?
cool chain creamery top transpo…
-
Which devices meet EN 12830-style expectations, and how are they verified?
cool chain creamery top transpo…
-
How do you prevent warm loading and long staging?
cool chain creamery top transpo…
-
What is your excursion definition and response timeline?
cool chain creamery top transpo…
-
For mixed loads, how do you separate zones physically?
cool chain creamery top transpo…
-
For raw milk lanes, how do you verify arrival temperature where required?
cool chain creamery top transpo…
-
For frozen lanes, how do you protect lane integrity and manage deviations?
cool chain creamery top transpo…
How Do You Reduce Excursions Fast When Something Goes Wrong?
Excursions usually come from loading time, door openings, or equipment drift. The fix is rarely “buy a colder truck.” It is process control.
cool chain creamery top transpo…
The 3-minute Excursion Root-Cause Test (interactive)
When an excursion happens, answer: product cold enough at loading, staging longer than limit, more stops than planned, alarm/defrost behavior, and sensor placement.
cool chain creamery top transpo…
-
If staging/stops caused it: fix routing and dock process first.
cool chain creamery top transpo…
-
If alarms/defrost caused it: fix maintenance and calibration next.
cool chain creamery top transpo…
-
If sensor placement is unknown: fix the sensor SOP before blaming anyone.
cool chain creamery top transpo…
Cost-of-excursion calculator (simple)
Estimate weekly cost: orders/week × claim rate × average refund + reship cost + lost customer value.
cool chain creamery top transpo…
Then compare it to the cost of better monitoring, better packaging, and tighter staging control.
cool chain creamery top transpo…
Practical tips and advice
-
Pre-cool the box: a warm trailer steals cold in minutes.
cool chain creamery top transpo…
-
Load cold-to-cold: avoid ambient staging whenever possible.
cool chain creamery top transpo…
-
Control last mile: multi-stop routes need stronger packaging and faster drops.
cool chain creamery top transpo…
Practical case: On a five-stop frozen route, the last stop is usually the problem.
cool chain creamery top transpo…
Cool Chain Creamery Top Transport Playbooks by Product
Frozen desserts: the “top transport” playbook
Frozen desserts are the hardest category because damage is visible. If a pint arrives soft, customers see it instantly.
cool chain creamery top transpo…
Use a repeatable playbook: pre-freeze hard, right-size insulation, strategic cold placement, minimize dwell, and validate summer/winter.
cool chain creamery top transpo…
| Risk | What causes it | What to do | Your benefit |
|---|---|---|---|
| Melt edges | porch time, sun exposure | shorter window + insulation | fewer refunds
cool chain creamery top transpo… |
| Icy texture | melt–refreeze cycles | stabilize temperature | better reviews
cool chain creamery top transpo… |
| Lid leakage | softening + movement | snug packing + absorb layer | cleaner deliveries
cool chain creamery top transpo… |
| Off flavor | warm exposure | faster handoff | repeat customers
cool chain creamery top transpo… |
Milk and cream: the chilled dairy playbook
Milk and cream are “quietly fragile.” They can look fine but lose quality quickly with weak handling.
cool chain creamery top transpo…
Keep chilled lanes simple, focus on sanitation, avoid warm starts, and use calibrated monitoring to prove the process.
cool chain creamery top transpo…
Cool Chain Creamery Top Transport for Refrigerated Parcels: What Does ISO 23412 Mean?
E-commerce changes cool chain creamery top transport because parcels can transfer between vehicles before delivery. ISO 23412 describes requirements for indirect refrigerated parcel delivery, including intermediate transfers and service communication.
cool chain creamery top transpo…
Top transport for parcels means a cold-capable network with disciplined handoffs, not a standard parcel lane plus extra ice.
cool chain creamery top transpo…
| Parcel factor | What you want | Why it matters |
|---|---|---|
| Network temperature control | refrigerated handling at hubs | reduces transfer warming
cool chain creamery top transpo… |
| Handoff discipline | fast transfers + closed doors | cuts heat spikes
cool chain creamery top transpo… |
| Communication | clear service promises | fewer disputes
cool chain creamery top transpo… |
Practical tips and advice
-
Do not over-promise: don’t promise “frozen for 48h” if the network is chilled.
cool chain creamery top transpo…
-
Use delivery windows: shorter windows often beat heavier packaging.
cool chain creamery top transpo…
-
Keep proof simple: one trace per lane per day can boost trust.
cool chain creamery top transpo…
2025 Latest Developments and Trends in Cool Chain Creamery Top Transport
In 2025, the market is pushing toward auditable cold chain performance: more continuous data, faster exception reporting, and better cross-border documentation—without wasting energy.
cool chain creamery top transpo…
Policy and sustainability pressure are also changing equipment and packaging decisions. EU refrigerant policy tightened with F-gas rules that started applying in March 2024.
cool chain creamery top transpo…
EU packaging rules also apply from August 12, 2026, pushing reuse and waste reduction systems.
cool chain creamery top transpo…
Latest progress snapshot (practical)
-
Proof-first contracts: data delivery time becomes a KPI.
cool chain creamery top transpo…
-
Exception dashboards: monthly root-cause trends replace one-off blame.
cool chain creamery top transpo…
-
Lane validation: summer and winter become separate specs.
cool chain creamery top transpo…
-
Operational sustainability: right-sized routing and reduced dwell lower energy use.
cool chain creamery top transpo…
Market insight (simple)
When capacity tightens, delays increase—and delays create temperature risk. That makes cool chain creamery top transport less about “best truck” and more about the best system: packaging + process + proof.
cool chain creamery top transpo…
Frequently Asked Questions
Q1: What is cool chain creamery top transport in one sentence?
It is dairy transport that stays in target lanes with proof, clean handling, and fast corrective action.
cool chain creamery top transpo…
Q2: What raw milk cooling targets should I reference in EU contexts?
A commonly cited framework is immediate cooling to ≤8°C (daily collection) or ≤6°C (not daily), and arrival ≤10°C.
cool chain creamery top transpo…
Q3: What temperature target is commonly used for quick-frozen lanes in EU contexts?
EU quick-frozen references anchor at −18°C or lower and allow limited deviations up to 3°C during transport.
cool chain creamery top transpo…
Q4: What proof should a “top transport” provider provide?
You want exportable trip logs, calibration evidence, and exception reporting with corrective actions.
Q5: What is the biggest hidden cause of dairy transport failures?
Dock dwell time. Doors open, queues grow, and spikes appear even with good equipment.
Q6: Do I always need a refrigerated truck for cool chain creamery top transport?
Not always. Some lanes can work with passive shippers or insulated totes, but longer and multi-stop lanes often benefit from reefers.
cool chain creamery top transpo…
Q7: How do I protect ice cream texture during delivery?
Prevent melt–refreeze using stable cold, right-sized insulation, strategic cold placement, and shorter last-mile dwell.
cool chain creamery top transpo…
Summary and Recommendations
Cool chain creamery top transport works when you treat it as a controlled system: set lane targets, control dwell time, demand continuous proof, and close root causes fast. Start by separating raw, chilled, and frozen lanes, then match each lane to the right mode (reefer, passive shipper, or hybrid).
cool chain creamery top transpo…
Win the small moments: pre-cool, load fast, reduce door-open time, and protect handoffs.
Action plan (clear CTA)
-
Map your lanes: time, stops, heat exposure, receiving behavior.
cool chain creamery top transpo…
-
Pick one high-risk lane and design a hybrid solution for handoffs.
cool chain creamery top transpo…
-
Add minimum monitoring: timestamps + lane IDs + evidence for key lanes.
cool chain creamery top transpo…
-
Run the Dwell Minute Audit for one week and fix the worst time first.
cool chain creamery top transpo…
-
Pilot for 2–4 weeks, then scale only after two clean weeks of performance.
About Tempk
At Tempk, we help cold chain teams make cool chain creamery top transport repeatable across routes, seasons, and carriers. We focus on practical systems you can run daily: lane specs, pack-out logic, monitoring proof, and SOPs that cut dwell minutes and stop repeat failures.
cool chain creamery top transpo…
Next step (CTA): Share your product mix (raw, chilled, frozen), route time, stop count, and peak summer temperature. We’ll outline a lane blueprint and a pilot checklist you can test immediately.
Affordable Temperature-Controlled Express Delivery Tips
Affordable Temperature-Controlled Express Delivery?
Affordable temperature-controlled express delivery is possible when you stop paying for “speed everywhere” and start paying for “control where it matters.” You cut cost by controlling packaging, lane design, doorstep time, and failures—not by hunting one lower courier fee. Updated December 19, 2025, this guide gives you a practical system you can repeat at scale.
This article will answer for you:
- How to define “affordable” using cost per successful delivery
- How to choose lane tiers that match your doorstep reality
- How to right-size packaging to cut cost and reduce temperature risk
- How to stop coolant overspend with a Two Buffers plan
- How to build SOPs, KPIs, and proof without turning it into a tech project
What does “affordable temperature-controlled express delivery” really mean?
Affordable temperature-controlled express delivery means the lowest total cost for an in-range, on-time outcome—not the lowest line-item shipping price. Your true cost includes packaging, labor, support tickets, and refunds that follow failures. When a “cheap” lane fails, you pay twice: once to ship, and again to fix it.
A helpful mindset is to treat affordability like a leaky bucket. If you only patch the “carrier rate” hole, money still leaks out through reships and complaints. You win when you make the process boring and repeatable.
Cost-per-successful-delivery (the truth metric)
Use this simple KPI to keep decisions honest:
| Metric | What you track | Why it matters | What it means for you |
|---|---|---|---|
| Cost per shipment | courier + packaging + labor | easy to budget | not the full truth |
| Success rate | % in-range and on-time | shows reliability | exposes weak lanes |
| Cost per successful delivery | total cost ÷ success rate | outcome-based | real affordability |
Real-world case: Teams often lower total spend by improving success rate first, then cutting waste second.
Practical tips and advice
- Fix success rate first: reliability gains often beat small material cuts.
- Cut waste second: right-size packaging once the lane is stable.
- Track weekly: affordability improves fastest when you watch it often.
How do you know if affordable temperature-controlled express delivery is realistic for you?
Affordable temperature-controlled express delivery is realistic when you can measure outcomes, tier your lanes, and control dwell time. If your last mile is chaotic, cost spikes and failures hide until refunds pile up. Some studies estimate last-mile cost can be a large share of total delivery/logistics spend, which is why it must be designed, not hoped for.
Use this quick self-test to see your current state. It’s short on purpose so you actually use it.
Interactive self-test: The Affordability Score (0–10)
Give each item 0 (no), 1 (partial), 2 (yes). Total 0–10.
- Do you know your cost per successful temperature-controlled delivery?
- Do you have service tiers for different risk levels?
- Do you validate packaging on real lanes (summer and winter)?
- Do you control last-mile dwell time (hub, van, doorstep)?
- Do you review exceptions weekly and change one process at a time?
How to interpret:
- 0–3: Build basics before you expand.
- 4–7: Pilot tiering and sampling to lower cost per success.
- 8–10: You’re ready to scale with data-led negotiations.
Practical tips and advice
- If you score 0–3, freeze expansion and standardize pack-out first.
- If you score 4–7, improve one lane at a time with a measured pilot.
- If you score 8–10, use your data to simplify tiers and reduce cost.
Real-world case: A program reduced refunds after switching from “fastest delivery” to “fastest safe lane” rules and tracking failures weekly.
How do you choose lane tiers for affordable temperature-controlled express delivery?
The cheapest option in affordable temperature-controlled express delivery is the one that survives your “doorstep reality.” Doorstep reality means the box may sit outside longer than you expect, and the recipient may not open the door immediately. When you plan for that, you stop overpaying for premium service where packaging can handle it.
A simple lane tier model keeps operations consistent. It also makes pricing easier because you are not inventing a new plan for every order.
Lane tier decision tool (fast, operational)
| Lane tier | Typical transit reality | Packaging approach | What it means for you |
|---|---|---|---|
| Short (local) | fewer touches | light insulation + right coolant | lowest cost path |
| Medium (regional) | more handling | standard insulation + lane coolant | stable repeatability |
| Long (far) | higher delay probability | stronger insulation + strict cutoffs | fewer failures and reships |
Practical tips and advice
- Map ZIPs to tiers: don’t let staff guess under pressure.
- Set cutoffs by pickup + traffic: late cutoffs create rushed packing.
- Don’t over-upgrade service level: upgrade only when the lane can’t be protected safely.
Real-world case: A shipper reduced premium express usage by applying a “short lane” rule set to nearby regions while keeping outcomes stable.
What packaging makes affordable temperature-controlled express delivery possible?
Packaging is the steering wheel of affordable temperature-controlled express delivery because it defines your buffer when delays happen. The goal is not “maximum cold.” The goal is “in range long enough,” with the lowest total cost and simplest rules.
Start with a small, repeatable menu. Too many box sizes and pack-outs create mistakes that look like “random” temperature problems. A small menu makes training faster and outcomes more predictable.
Right-sizing: the fastest cost + performance win
Right-sizing reduces billed volume and often reduces coolant need. It also improves thermal performance by reducing warm air trapped inside the shipper. Think of warm air as “free heat.”
| Right-sizing factor | Too large | Right-sized | What it means for you |
|---|---|---|---|
| Air gaps | warm air pockets | minimal void | slower warming |
| Coolant need | extra packs | fewer packs | lower weight and spend |
| Damage risk | shifting and crushing | stable load | fewer claims |
Practical tips and advice
- Local deliveries: use smaller cartons and reduce void fill first.
- Regional deliveries: keep a standard carton set and never “freestyle.”
- High-value items: add a closure check step (verified before release).
Real-world case: A shipper reduced excursions by moving from many carton sizes to a few standardized options with lane-specific coolant rules.
How do you reduce coolant cost in affordable temperature-controlled express delivery?
To keep affordable temperature-controlled express delivery affordable, coolant must match the lane—not your anxiety. Over-cooling adds weight and cost. Under-cooling adds refunds and reputation damage. A repeatable recipe stops both.
A practical way to standardize is to define coolant in “units” so your team stops guessing.
Lane-based coolant recipes (starter framework)
| Lane tier | Default coolant units | When to add 1 unit | What it means for you |
|---|---|---|---|
| Short | 1 | hot days, porch risk | keeps costs low |
| Medium | 2 | multi-stop routes, late pickup | adds stability |
| Long | 3 | peak congestion, high uncertainty | prevents expensive failures |
Practical tips and advice
- Post rules at the packing station: one page beats a long manual.
- Protect “touch time”: keep packs frozen until the last moment.
- Avoid direct contact: use a divider layer when freezing is harmful.
Real-world case: A brand reduced coolant spend by standardizing placement and reducing air gaps, not by taking bigger risks.
How do you stop “insurance overpacking” in affordable temperature-controlled express delivery?
The best way to stop overpacking in affordable temperature-controlled express delivery is to combine a packaging buffer with an operational rescue buffer. When you have rescue options, you don’t need to pack for disasters every time. That is how you reduce weight without raising failure rate.
This is the simplest model to teach your team because it explains why you are reducing coolant. It also gives customer support a clear playbook when things go wrong.
The “Two Buffers” approach
| Buffer type | What it covers | How you build it | What it means for you |
|---|---|---|---|
| Packaging buffer | small delays, door time | insulation + correct coolant layout | fewer normal-day excursions |
| Operational buffer | big delays, missed doors | reroute + redirect + swap options | fewer total losses and refunds |
Practical tips and advice
- Set a door rule: don’t leave cold shipments unattended for long.
- Use a staffed backup site: it prevents doorstep warming losses.
- Keep rescue kits ready: spare coolant and tape save money fast.
Real-world case: A business reduced pack-out weight after adding a backup pickup point and clear missed-door rules.
What SOPs keep affordable temperature-controlled express delivery consistent?
Affordable temperature-controlled express delivery becomes affordable when it becomes boring—repeatable steps, fewer choices, fewer mistakes. Your SOP should be short, visual, and enforced. If it cannot be followed during rush hours, it is not an SOP.
Start with a simple pack-out workflow and audit a small sample every shift. This reduces variation between staff and makes problems visible before they become refunds.
The 8-step packing SOP (simple, repeatable)
- Confirm lane tier and service level
- Pick the correct carton size
- Add insulation panels (if used)
- Place coolant according to recipe
- Load product and reduce air gaps
- Seal using a closure checklist
- Apply labels (orientation + “perishable”)
- Scan/record pack-out completion (time-stamped proof)
A 90-second audit that prevents expensive drift
| Audit item | Quick check | Common failure | What it means for you |
|---|---|---|---|
| Seal quality | fully closed | small gaps | faster warming |
| Coolant layout | matches photo | random placement | uneven cooling |
| Staging time | minimal waiting | long idle | warms before pickup |
| Label clarity | temp band visible | unclear handling | more mishandling |
(Tip: keep the audit short so it actually happens.)
How do you add proof without breaking affordability?
Proof in affordable temperature-controlled express delivery works best as a ladder: light proof for low-risk lanes, stronger proof only where it changes decisions. The most expensive monitoring is monitoring you cannot act on. If you collect data but don’t change process, you paid for decoration.
Start with sampling and tighten the loop weekly. When sampling shows stability, you reduce sampling. When conditions change, you temporarily increase it.
A simple sampling plan (starter)
- New lane: monitor 10–20% of shipments for 2 weeks
- Stable lane: monitor 2–5% monthly
- Hot season or changes: increase sampling temporarily
Practical tips and advice
- Place sensors where heat enters: near the wall and near the product core.
- Track minutes out of range: averages hide spikes.
- Close the loop weekly: monitoring without process change is wasted spend.
Real-world case: A shipper lowered sensor spend after proving lane stability and reducing sampling.
How do you stay compliant while keeping it affordable?
Compliance becomes affordable when your procedures are simple, used daily, and written down. For food shipments, U.S. sanitary transportation guidance under FSMA emphasizes preventing practices like failure to refrigerate during transport. Regulations also point to having written procedures for temperature control when required.
You do not need a 50-page manual. You need a one-page SOP that matches reality and includes an exception plan.
The 1-page SOP template (what to include)
- Product category and required temperature band
- Approved seasonal pack-out (summer/winter)
- Maximum allowed time outside cold storage during packing
- Delivery window rules and “no safe drop” triggers
- Exception plan (delay, damage, rejection, reship)
2025 latest developments and trends
In 2025, affordable temperature-controlled express delivery is moving toward tighter operational discipline and smarter reuse. Many teams are shifting from “single-use everything” toward controlled reuse programs, and they are narrowing delivery windows to reduce failed attempts. These changes improve temperature outcomes while lowering total cost.
Latest progress snapshot
- More tiered service menus: customers choose price vs certainty more clearly.
- Better workflow design: teams reduce dwell time using tighter handoff rules.
- Outcome measurement grows: cost per successful delivery is replacing cost per shipment.
Market insight: buyers increasingly judge performance by outcomes and evidence that does not add friction.
Frequently Asked Questions
Q1: What makes affordable temperature-controlled express delivery possible?
Repeatability. Tight lanes, right-sized packaging, and fewer failures reduce total cost more than rate shopping.
Q2: Should I always choose the cheapest packaging?
No. Cheap packaging that causes reships is expensive. Match packaging to lane time plus a realistic delay buffer.
Q3: How do I reduce coolant spend without raising risk?
Reduce air gaps and improve seals first, then standardize layout. Only then lower coolant safely.
Q4: Do I need real-time tracking for affordable temperature-controlled express delivery?
Not always. Start with sample loggers for lane validation and scale up only for critical, rescue-capable shipments.
Q5: What is the fastest operational fix for affordability?
Reduce dwell time. Shorter staging and faster handoffs often improve success rate without more materials.
Q6: How do I set pricing that customers accept?
Use tiers with clear promises. Offer an economy option for low-risk orders and a premium option for critical needs.
Summary and recommendations
Affordable temperature-controlled express delivery is a system, not a single trick. Measure cost per successful delivery, not just courier rates. Build lane tiers, right-size packaging, and use coolant recipes that match transit reality. Add proof through a monitoring ladder and improve one root cause each week.
Next step (CTA)
Pick one lane and run a 30-shipment review. Calculate cost per successful delivery, identify the top failure cause, and fix that first. Then right-size packaging to lock in savings and keep results stable.
About Tempk
At Tempk, we focus on practical cold chain packaging and workflows that support affordable temperature-controlled express delivery at scale. We design lane-based pack-out logic, simple SOPs, and proof plans that reduce waste and prevent costly failures.
Call to action: Write down your temperature band, typical and worst-day lane time, and current success rate. Then request a lane pilot plan targeting one improvement like reducing dwell time or right-sizing.
Temperature-Controlled Creamery Cheap Solutions
Temperature-Controlled Creamery Cheap Solutions in 2025?
If you need temperature-controlled creamery cheap solutions, you’re not asking for “the cheapest thing.” You’re asking for the fastest way to protect dairy quality while lowering waste, labor drag, and energy spikes. In most creameries, losses come from tiny habits repeated daily: doors left open, blocked airflow, dock staging “for a minute,” and unclear rotation. Fixing those is cheaper than new equipment—and often works faster.
This article will answer for you:
-
How temperature-controlled creamery cheap solutions reduce spoilage without major upgrades
-
The best low-cost cold room upgrades for creameries that pay back quickly
-
A budget dock-to-cooler SOP for dairy that prevents warm shocks on busy shifts
-
How to set up cheap temperature monitoring for dairy storage your staff will use
-
How affordable insulated shipping for creamery products cuts complaints by lane tier
-
A decision tool + self-test to choose your next best cheap upgrade
Why do temperature-controlled creamery cheap solutions beat “new equipment” first?
Direct answer: Temperature-controlled creamery cheap solutions usually beat new equipment because your biggest costs come from process leaks, not compressor horsepower. A new unit cannot fix pallets waiting on the dock or vents blocked by “temporary” storage.
Expanded explanation: Think of margin like a triangle. If any side is weak, profits leak out quietly. The best cheap wins improve at least one side immediately—and don’t require perfect staff behavior to succeed.
The “Cold Chain Profit Triangle” you should manage daily
| Profit triangle side | What it looks like | Cheap fix | What it means for you |
|---|---|---|---|
| Temperature stability | fewer warm spikes | door discipline + airflow rules | fewer quality claims |
| Time control | short staging time | staging timer rules | less spoilage risk |
| Handling control | fewer touches | zoning + clear lanes | lower labor cost |
Practical tips and recommendations
-
If your team is busy, choose fixes that remove decisions, not add steps.
-
If cash is tight, prioritize doors + airflow + staging before any “tech.”
-
If you’re scaling, standardize routines first—then invest with confidence.
Practical case example: One small creamery reduced weekly rework after adding a staging time rule and posting a pack-and-move checklist at the cold room door.
Temperature-controlled creamery cheap solutions: where should you start?
Direct answer: Start with a 15-minute walk-through audit using a timer and a notebook. Your first goal is to shorten “time out of cold” and stop warm air from entering cold rooms.
Expanded explanation: Most creameries have the same repeatable risk moments: receiving, staging, door openings, and airflow blockage. If you can measure and fix those moments, you can cut spoilage and energy waste without buying large equipment.
Low-cost cold room upgrades for creameries: the 15-minute audit
-
Where does warm air enter? (doors, dock interface, broken seals)
-
Where is cold air blocked? (pallets against fans, walls, or return vents)
-
Where does product wait too long? (dock staging, QA holds, pick queues)
| Audit target | What to look for | Why it matters | Your practical takeaway |
|---|---|---|---|
| Doors & seals | light gaps, torn gaskets | warm air steals cooling fast | replace gaskets before buying new fans |
| Air paths | pallets blocking vents | hot spots + slow pull-down | mark “no-block” zones on the floor |
| Frost patterns | heavy ice on coils | efficiency drop + cycling | fix airflow + cleaning schedule |
| Dock staging | untracked wait time | warm shocks + quality loss | add a visible “out-of-cold” timer |
Practical tips and recommendations
-
Use floor tape today. A taped “keep clear” zone beats a long memo.
-
Write one rule: “No pallet waits longer than X minutes on the dock.”
-
Keep the audit list short. Cheap solutions work best when they get finished.
Practical case example: A small creamery cut staging time in half using a timer and a “ready-to-store” lane.
What are the best temperature-controlled creamery cheap solutions for cold room stability?
Direct answer: The best temperature-controlled creamery cheap solutions for stability focus on the “big three”: airflow, doors, and setpoints.
Expanded explanation: Cold air behaves like traffic. If you block lanes, you create jams and hot spots. Doors are the fastest heat entry point. Setpoints matter, but stability matters more than constant tweaking.
1) Airflow discipline (the cheapest high-impact fix)
Common airflow mistakes:
-
stacking product too close to evaporator fans
-
pushing pallets tight to walls
-
storing tall loads that block return air
Cheap solution: mark “no-stack zones” and teach one simple rule: keep vents clear, always.
2) Door discipline (heat enters fastest through doors)
Cheap solution: batch moves and close the door between moves. Add a timer and a visible “door score” target per shift.
3) Setpoint sanity (too cold can be expensive)
Lowering setpoints “just to be safe” can increase frosting and energy load.
Cheap solution: define your setpoint range based on product needs and keep it stable.
| Cold room lever | Cheap action | Cost level | Your practical benefit |
|---|---|---|---|
| Airflow | floor tape lanes + “no-block” signs | Low | fewer hot spots |
| Doors | batch pick + timer + closer habits | Low | fewer temperature spikes |
| Setpoints | documented SOP range | Low | less drift and frosting |
Practical tips and recommendations
-
If you see uneven frost, check airflow blockage first.
-
If compressors run constantly, check doors and seals before buying anything.
-
If product warms near doors, move fast movers away from entrance zones.
Practical case example: One creamery improved temperature uniformity after moving tall pallets away from fan zones and repainting aisle boundaries.
How do temperature-controlled creamery cheap solutions reduce energy costs quickly?
Direct answer: They reduce energy cost by reducing heat entry and improving refrigeration efficiency with basic “energy hygiene.”
Expanded explanation: If warm air enters constantly, compressors fight a battle you don’t need to pay for. The fastest wins come from gaskets, coil cleanliness, and door-open behavior.
The “5-minute energy sweep” (weekly)
-
Inspect door gaskets for gaps and cracks
-
Check frost patterns for airflow problems
-
Confirm coils are clean (or scheduled)
-
Verify doors close fully without sticking
-
Confirm lights/fans run only when needed
| Energy leak source | What you see | Cheap fix | What it means for you |
|---|---|---|---|
| Worn gaskets | condensation, warm edges | replace gaskets | lower heat entry |
| Dirty coils | slow pull-down | cleaning schedule | lower compressor load |
| Door misuse | frequent warm spikes | batch movement | fewer recoveries |
Practical tips and recommendations
-
Hot seasons: tighten door discipline and reduce staging time.
-
High humidity: sealing matters even more to reduce frost load.
-
Older equipment: cleanliness and sealing often outperform upgrades.
Practical case example: A creamery cut monthly energy spikes after replacing gaskets and enforcing a “pre-stage before opening” loading rule.
Temperature-controlled creamery cheap solutions for labor efficiency: how do you reduce touches?
Direct answer: Reduce touches by redesigning flow with zones, ship-today lanes, and clear locations.
Expanded explanation: Every extra move costs labor and adds temperature exposure. If you remove just one touch from finished goods handling, you often see immediate labor relief and fewer excursions.
Use the “Touch Count” method
Count moves after packaging:
-
move to staging
-
move to cold room
-
move to pick zone
-
move to loading
Now remove one move with zoning and lane design.
| Labor waste | What causes it | Cheap fix | Practical meaning for you |
|---|---|---|---|
| Searching | unclear locations | zone labels + map | faster picks |
| Extra moves | poor layout | ship-date lanes | fewer touches |
| Rework | wrong pallets | visual staging | fewer errors |
Practical tips and recommendations
-
Small teams: labels + a whiteboard map beat complex software.
-
Many SKUs: separate A/B/C movers by velocity.
-
Mixed channels: separate wholesale vs retail zones.
Practical case example: A creamery reduced overtime after introducing “ship today” lanes and labeling fast movers at eye level.
Which temperature-controlled creamery cheap solutions protect dairy quality best?
Direct answer: Protect quality by minimizing temperature swings and reducing time out of controlled environments.
Expanded explanation: Most quality damage isn’t one big failure. It’s many small warm exposures that chip away at taste, texture, and shelf-life. Your cheapest quality protection tool is a strict time limit for staging and a repeatable dock routine.
The “Short Exposure Rule” for dairy
-
Stage only what you can move quickly
-
Avoid building orders in warm zones
-
Set and enforce a dock exposure time limit
Packaging and handling matter too
Even inside a cold room, you can damage quality when:
-
cartons absorb moisture
-
labels peel from condensation
-
containers are crushed or shifted
| Quality risk | How it happens | Cheap fix | Practical meaning for you |
|---|---|---|---|
| Texture issues | repeated warm spikes | staging limits | more consistent product |
| Packaging damage | weak pallet pattern | standard pattern | fewer returns |
| Condensation | wall contact | spacing + airflow | better labels |
Practical tips and recommendations
-
If labels peel, reduce condensation by improving seals and avoiding wall contact.
-
If cartons soften, improve airflow and reduce humidity entry via doors.
-
If complaints cluster, map which zone the product came from.
Practical case example: A creamery reduced “soft carton” incidents by changing pallet patterns and adding a simple spacing rule.
Temperature-controlled creamery cheap solutions for receiving: the budget dock-to-cooler SOP
Direct answer: Receiving needs one goal: shorten the time between truck and cold storage.
Expanded explanation: Receiving is where sunlight, warm air, and waiting time hit first. The cheapest improvement is a five-step SOP with lane markings so staff don’t pause to decide where pallets go.
Budget dock-to-cooler SOP you can run every shift
-
Pre-clear a storage slot before the truck arrives
-
Unload to a marked cold-first lane
-
Verify temperature and paperwork quickly
-
Move to cold storage within your time limit
-
Log exceptions (so you fix patterns, not one-offs)
| SOP step | What it controls | Low-cost tool | Your practical takeaway |
|---|---|---|---|
| Pre-clear slot | prevents waiting | slot board | decisions happen before unloading |
| Cold-first lane | keeps priorities clear | floor tape + signage | stops “temporary parking” |
| Time limit | reduces warm exposure | timer or wall clock | makes accountability real |
| Exception log | finds patterns | one-page checklist | fixes repeat failures |
Practical tips and recommendations
-
Assign a “dock captain” during peak hours to prevent bottlenecks.
-
Treat the timer as policy. One visible clock changes behavior.
-
Use a simple shade barrier if sunlight hits your receiving lane.
Practical case example: One team cut warm exposure by creating two lanes: “store now” and “hold for QA,” with different rules.
Cheap temperature monitoring for dairy storage: what should you measure first?
Direct answer: Start small: monitor the zones where product actually experiences risk—the warm corner, the door area, and the staging zone.
Expanded explanation: Monitoring fails when it creates dashboards nobody checks. Your best cheap monitoring system is one that produces one daily question: “Any excursions today?” Then it triggers a clear action.
Where to measure first (the high-risk places)
-
Warmest corner of the cold room
-
Loading door area
-
Staging-before-shipment zone
-
One “product core” test location during lane trials
| Monitoring method | Best for | Weakness | Your practical takeaway |
|---|---|---|---|
| Min/max thermometer | daily control | no history | good baseline |
| Standalone logger | pattern finding | manual downloads | perfect for testing |
| Wireless sensors | ongoing oversight | setup complexity | best after SOPs stabilize |
Practical tips and recommendations
-
Place sensors away from fans so readings reflect product zones.
-
Keep review weekly, not “someday.” Unreviewed data is wasted effort.
-
Create a response card: what to do when temps move.
Practical case example: A team found a daily warm spike at shift change and fixed it by changing door habits, not equipment.
Affordable insulated shipping for creamery products: how do you tier lanes cheaply?
Direct answer: Don’t ship everything the same way. Use lane tiers so you spend more only where risk is high.
Expanded explanation: Many shipping failures come from poor packout: too much empty space, ice packs in the wrong place, or slow loading delays. Tiering + packout photos are cheap, scalable fixes that reduce complaints fast.
Lane-based shipping tiers
| Lane tier | When to use | Low-cost packaging move | Your practical takeaway |
|---|---|---|---|
| Tier 1 (low risk) | short local routes | right-sized carton + 1 pack | control empty space first |
| Tier 2 (medium risk) | regional routes | add insulation liner + 2 packs | margin for delays |
| Tier 3 (high risk) | hot/long routes | stronger shipper + more packs | use only where needed |
Practical tips and recommendations
-
Pre-chill product before packing—don’t “cool with packs.”
-
Standardize packout photos so every shift packs the same way.
-
Keep packout time short and track it like a KPI.
-
Place packs above and beside dairy for better coverage.
Practical case example: A creamery reduced warm-month complaints after switching to lane tiers and standard packout photos.
Interactive self-test: find your best temperature-controlled creamery cheap solutions in 10 minutes
Score each item 0–2
0 = not true, 1 = partly true, 2 = consistently true
-
We have a staging time limit and follow it
-
We batch picks and reduce door-open time
-
Airflow lanes are marked and protected
-
Door seals are inspected monthly
-
Coils have a real cleaning schedule
-
Setpoints are stable and documented
-
We zone storage by ship date or SKU velocity
-
We use a standard pallet pattern per product type
-
We have a “delay rule” for late pickups
-
We review complaints monthly and adjust SOPs
Your total score (0–20):
-
0–7: Start with door discipline, staging limits, airflow lanes
-
8–14: Add zoning, standard pallet patterns, maintenance routine
-
15–20: Focus on monitoring, continuous improvement, training upgrades
HowTo: implement temperature-controlled creamery cheap solutions in 7 steps
-
Set a staging time limit and post it at the cold room door
-
Create a “ship today” lane and label it clearly
-
Mark airflow “no-stack” zones with floor tape
-
Batch picks and close doors between moves
-
Inspect and replace damaged gaskets
-
Schedule coil cleaning and log it
-
Review excursions/complaints monthly and change one variable at a time
The “one-variable rule” keeps improvements cheap
If you change five things at once, you never learn what worked. Change one variable, measure outcomes, then lock it in.
| Step | What you change | What you measure | Practical meaning for you |
|---|---|---|---|
| Staging limit | time outside cold | warm-event frequency | fewer failures |
| Door batching | door-open time | energy spikes | lower bills |
| Airflow zones | storage layout | hot spot reduction | better stability |
Practical case example: A creamery improved consistency after posting one “gold standard” pallet photo at the staging area.
2025 latest developments and trends in temperature-controlled creamery cheap solutions
In 2025, small and mid-sized dairy operators are leaning into “lean cold chain” practices. The focus is not fancy tech first. It’s predictable execution with simple proof.
Latest progress snapshot (2025)
-
Visual SOP boards: photos and diagrams replace long manuals
-
Sampling-based monitoring: a few sensors reveal most issues
-
Lane-tier shipping: spend more only where risk is high
-
Micro-audits: 15-minute weekly checks replace rare big audits
-
Habit-based training: door discipline and staging rules taught early
Market insight you can use
Customers don’t care how expensive your refrigeration is. They care about consistency. That’s why temperature-controlled creamery cheap solutions win: they reduce variability more than they reduce temperature.
Common questions (FAQ)
Q1: What are the fastest temperature-controlled creamery cheap solutions?
Start with door discipline, airflow lane protection, and a staging time limit. These reduce warm spikes without new equipment.
Q2: Can cheap solutions really reduce spoilage?
Yes. Spoilage risk often rises with repeated warm exposure and long staging. Shorter exposure plus better sealing reduces risk quickly.
Q3: What is the cheapest way to lower refrigeration energy cost?
Replace damaged gaskets, keep coils clean, and reduce door-open time. These reduce recovery cycles and run time.
Q4: How do I know if airflow is a problem?
Look for uneven frost, drift in one zone, or repeated issues from the same storage area. Then check for blocked return paths.
Q5: What should I track monthly in a creamery cold chain?
Track warm events, staging violations, door-open patterns, and complaints by SKU and zone. Patterns are where the savings live.
Summary and recommendations
Temperature-controlled creamery cheap solutions work because they attack the real causes of loss: heat entry through doors, blocked airflow, inconsistent staging, and avoidable rework. In 2025, the best low-cost improvements are disciplined and repeatable: airflow lanes, door batching, stable setpoints, gasket checks, FEFO rotation, and simple monitoring that triggers action.
Action plan (clear CTA)
Pick two upgrades to implement this week:
-
staging time limit + visible timer rule
-
airflow no-stack zones + photo SOP
Measure warm events and complaints for 30 days. If results improve, lock the process and move to the next fix.
About Tempk
At Tempk, we help cold chain operators improve performance with practical packaging and workflow systems. We focus on repeatable routines, stable temperature control, and training-friendly SOP design—so your team can execute consistently under real pressure. If you’re building temperature-controlled creamery cheap solutions, we help you prioritize upgrades that deliver ROI before you invest in bigger equipment.
Next step: Share your facility size, shipping frequency, and biggest pain point (energy, spoilage, labor, or compliance). We’ll map a low-cost improvement roadmap tailored to your operation.
Cold Chain Vegetables Temperature Monitoring 2025

Cold Chain Vegetables Temperature Monitoring in 2025?
Cold chain vegetables temperature monitoring helps you prove your produce stayed in the right temperature lane from pickup to delivery. It also helps you catch problems early, before they become shrink. In the U.S., FDA guidance for cut leafy greens points to 41°F (5°C) or less during cold storage and display, so your monitoring must be precise enough to verify that. Your biggest wins come from tracking the worst spot, not the average.
You’ll learn:
- How a cold chain vegetables temperature monitoring checklist keeps teams consistent
- Where temperature breaks really happen (and why docks matter most)
- How to do temperature monitoring for leafy greens shipments without noise
- How to set alarm thresholds for vegetable cold chain that people respect
- How temperature mapping for vegetable reefer trailers finds your real hot spots
- How to build an evidence pack for produce temperature disputes in minutes
Cold Chain Vegetables Temperature Monitoring: What Does “Good” Look Like?
Cold chain vegetables temperature monitoring is “good” when it gives you trusted alerts and fast proof, not endless charts. You should know the warmest spot in the load, when it crossed a limit, and who acted. That’s the standard your buyers and auditors care about.
Cold chain vegetables temperature monitoring should feel like a smoke alarm. You don’t stare at it all day. You trust it to warn you, then you follow a simple response plan. That mindset is why many teams are shifting to exception-first operations in 2025.
Cold chain vegetables temperature monitoring checklist: the “3-2-1 rule”
| Checklist element | Minimum standard | Common mistake | What it means for you |
|---|---|---|---|
| 3 points monitored | cold room + dock + in-transit | only in-transit | misses handoff risk |
| 2 risk zones measured | door zone + top tier | “safe middle” only | hidden spoilage |
| 1 action owner | one role per shift | “everyone owns it” | slow response |
Practical tips you can use today
- Start with the warmest zone. Cold chain vegetables temperature monitoring fails when you monitor the easiest zone.
- Name an owner by role. “Dock Lead” beats “someone.”
- Review exceptions daily, patterns weekly. That rhythm reduces repeats.
Practical case: One DC moved sensors from “middle of pallet” to door-side top tiers. Excursions finally matched real complaints.
Cold Chain Vegetables Temperature Monitoring: Where Do Temperature Breaks Really Happen?
Cold chain vegetables temperature monitoring matters most at transitions—staging, loading, cross-dock, and last-mile stops. Produce often stays stable in cold rooms. It breaks during movement and door time.
Think of transitions like “open wallet moments.” Every time you open the chain, you spend shelf life.
The highest-risk break zones (what to monitor)
| Stage | Why it breaks | What to monitor | What it means for you |
|---|---|---|---|
| Pre-cool delay | field heat stays trapped | product temp after pre-cool | shelf life protection |
| Dock staging | warm air exposure | staging minutes + zone temp | fewer wilt claims |
| Loading | doors open too long | door-open minutes | fewer spikes |
| Cross-dock | repeated handoffs | warm-zone sensors | fewer disputes |
| Receiving | slow unload | temp at handover | cleaner acceptance |
Practical tips and recommendations
- Measure “warm minutes,” not vibes. Warm minutes predict spoilage better than averages.
- Treat dock time like a KPI. Many operations focus there in 2025.
- Add door sensors on multi-stop routes. Stops often cause more warming than driving.
Practical case: A multi-stop route reduced excursions after door-zone sensors showed stops—not linehaul—caused most warming.
Cold Chain Vegetables Temperature Monitoring: Which Vegetables Need the Tightest Control?
Cold chain vegetables temperature monitoring should be strictest where quality drops fastest—and where “too cold” can also hurt you. Leafy greens lose crispness quickly. Fresh-cut produce needs tighter discipline and better records. And chill-sensitive items can suffer damage when they get over-chilled.
USDA transport guidance warns that settings that are too low can cause freezing or chilling injury, especially in top layers near discharge air. ()
Fast lane selector (interactive)
Answer these three questions:
- Is it fresh-cut or ready-to-eat? If yes → treat as tight control lane.
- Is it chill-sensitive? If yes → add a low-temperature guardrail.
- Is it near-freezing tolerant? If yes → focus on door time and hot spots.
Commodity lanes that keep operations simple
| Lane | Examples | Monitoring priority | Typical failure | Your practical win |
|---|---|---|---|---|
| Tight control | fresh-cut, salad kits | frequent logs + fast response | temp abuse + poor records | stronger buyer trust |
| Near-freezing tolerant | many leafy greens | door zone + staging control | warm minutes | longer shelf life |
| Chill-sensitive | cucumbers (often), some tropical items | low-temp alarms | over-chill damage | fewer confusing claims |
| Hardy | many roots | trend monitoring | slow drift | simpler ops |
Practical tips and recommendations
- Don’t force mixed loads into one temperature. Monitoring gets noisy and outcomes get inconsistent.
- Put the lane on the pick list. People pack better when the lane is visible.
- Set both “too warm” and “too cold” rules. Cold chain vegetables temperature monitoring must prevent both.
Practical case: A shipper reduced cucumber complaints after adding a low-temp guardrail and separating lanes.
Cold Chain Vegetables Temperature Monitoring: Where Should Sensors Go?
Cold chain vegetables temperature monitoring becomes trustworthy when sensors sit where the worst temperatures occur—not where it’s convenient. Measuring the “safe middle” is the most common mistake.
Codex guidance for refrigerated storage and transport stresses monitoring and recording, with devices placed to capture the maximum temperature accurately. (fao.org)
The “3-point minimum” sensor plan
USDA export guidance includes a practical placement idea: place recorders on top of the load, near a sidewall, about one-third in from the rear doors, and away from direct discharge air. ()
| Sensor point | What it tells you | Common mistake | What it means for you |
|---|---|---|---|
| Warm zone in load | worst-case exposure | direct discharge air | fewer false “all good” |
| Air context (return air) | reefer behavior trend | assuming air = product | better investigation |
| Receiving product check | handover reality | not recording probes | fewer disputes |
Practical tips and recommendations
- Place at least one sensor near the door-side top tier. That zone warms first.
- Standardize placement per lane. Consistency makes trends comparable.
- Record sensor ID on shipping paperwork. It speeds claim closure.
Practical case: A receiver’s probe disagreed with logger data. The probe later failed a quick accuracy check, and disputes dropped.
Cold Chain Vegetables Temperature Monitoring: How Many Sensors and Which Devices Do You Need?
Cold chain vegetables temperature monitoring improves by placing enough sensors in the right zones—not by adding unlimited devices. Start small, learn where breaks happen, and scale only when you need clarity.
Device selection tool (interactive)
- Do you need to act during the trip?
- Yes → choose connected monitoring or frequent check devices
- No → choose proof-focused loggers
- Do you run multi-stop routes?
- Yes → prioritize door-zone coverage and duration alarms
| Device type | Best use | Trade-off | What it means for you |
|---|---|---|---|
| Simple indicator | quick screening | low detail | fast checks |
| USB logger | post-trip proof | not live | dispute support |
| Bluetooth logger | dock/warehouse | range limits | staging control |
| Connected tracker | live exceptions | higher cost | faster prevention |
Practical tips and recommendations
- Standardize your “default kit.” Fewer device types means fewer training failures.
- Use risk-based coverage. High-risk lanes get priority.
- Keep placements consistent. “Random placement” creates bad conclusions.
Practical case: A distributor simplified from three logger formats to one. Compliance improved immediately.
Cold Chain Vegetables Temperature Monitoring: How Do You Set Alarm Thresholds That Teams Respect?
Cold chain vegetables temperature monitoring alarms should trigger action, not anxiety. Avoid “instant panic” alarms for short door openings. Alarm on duration or repeated events, especially for multi-stop routes.
FDA HACCP guidance defines monitoring as a planned sequence of observations or measurements that also produces an accurate record—so your alarm responses should be recorded, not improvised. ()
Alarm thresholds for vegetable cold chain (lane-based)
| Lane | Target idea | Alarm style | What it means for you |
|---|---|---|---|
| Leafy greens | tight chilled lane | duration-based | prevents wilt |
| Fresh-cut | strict chilled lane | faster escalation | protects margin |
| Hardy roots | stable cool lane | trend-based | fewer false alarms |
| Chill-sensitive | warmer lane | low-temp guard | avoids cold damage |
The “Alarm Builder” worksheet (copy/paste)
- Target range: ___ to ___
- Caution trigger: ___ minutes outside target
- Action trigger: ___ minutes outside target
- Owner (role, not name): ___
- Action steps: contain / reroute / re-ice / fast deliver
Practical tips and recommendations
- Alarm on time, not just temperature. Warm minutes predict spoilage better.
- Make ownership role-based. Alarms must not go to nobody.
- Tune alarm quality weekly. Noise kills response.
Practical case: A last-mile team switched to duration-based alerts. Drivers stopped ignoring alarms.
Cold Chain Vegetables Temperature Monitoring: How Do You Validate With Temperature Mapping?
Temperature mapping validates whether your cold chain vegetables temperature monitoring represents reality. Mapping means placing multiple sensors across a truck or cold room during normal operations to find hot spots and drift patterns.
You don’t need a complicated study. You need a repeatable plan: map in hot season, map after changes, and map your highest-risk lanes.
Temperature mapping for vegetable reefer trailers: an 8-sensor plan
| Sensor position | Purpose | Common finding | What it means for you |
|---|---|---|---|
| Door upper left | heat entry | repeated spikes | tighten loading SOP |
| Door upper right | heat entry | sun exposure | adjust parking/loading |
| Mid ceiling | heat rise | warm layer | improve airflow |
| Mid floor | cold bias | too cold zone | prevent chill damage |
| Front upper | reefer influence | cold bias | avoid overconfidence |
| Front lower | cold bias | freezing risk | adjust airflow/setpoint |
| Pallet center | penetration | slow chill | fix pre-cool |
| Pallet corner | edge heating | corner warming | add separators/lanes |
Practical tips and recommendations
- Map during peak stress. Hot day, high volume, multi-stop routes.
- Map after change. New packaging, new load pattern, new vehicle type.
- Turn findings into training. Show teams where heat actually enters.
Practical case: Mapping revealed a warm corner near doors. A load-pattern change eliminated repeat rejects.
Cold Chain Vegetables Temperature Monitoring: How Do You Keep Data Trustworthy?
Cold chain vegetables temperature monitoring is worthless if your team doesn’t trust it. You need a calibration routine, a device retirement rule, and consistent placement.
ISO/IEC 17025 is the international standard for testing and calibration labs, focused on competence, impartiality, and consistent operation. It supports trust in calibration results when you need formal proof. ()
Lightweight calibration and verification schedule
| Frequency | What you do | Owner | What it means for you |
|---|---|---|---|
| Monthly | quick device check | QA or Ops | catches drift early |
| Quarterly | compare probes to a reference | QA lead | fewer disputes |
| Annual / risk-based | formal calibration (if needed) | QA lead | audit-ready evidence |
Data credibility checklist
| Credibility factor | “Good” looks like | “Bad” looks like | Your practical meaning |
|---|---|---|---|
| Calibration | scheduled + recorded | “we think it’s fine” | stronger defense |
| Sensor ID control | IDs tied to loads | unknown history | faster investigations |
| Placement consistency | same spots per SOP | random placement | comparable trends |
| Time sync | clocks aligned | time drift | fewer false debates |
Practical tips and recommendations
- Treat calibration as insurance. It’s cheaper than repeated claims.
- Store calibration records with shipment evidence. One folder per lane is enough.
- If data and reality disagree, check placement first. Placement errors are common.
Cold Chain Vegetables Temperature Monitoring: What “Good Evidence” Looks Like
Cold chain vegetables temperature monitoring becomes commercial leverage when your proof is clear, time-stamped, and tied to shipment identity. Buyers move faster when uncertainty is low. That’s why “proof beats promises” is the 2025 reality.
The 1-page evidence pack (template)
| Evidence item | What it answers | Why it matters | What it means for you |
|---|---|---|---|
| Shipment ID + lot | what product it is | traceability | cleaner disputes |
| Placement notes | where sensor sat | credibility | stronger proof |
| Excursion summary | what went wrong | exception focus | faster decisions |
| Handoff times | when control risk occurred | root cause | prevents repeats |
| Corrective action | what you changed | accountability | audit readiness |
Practical tips and recommendations
- Keep retrieval under 2–3 minutes. If it takes longer, simplify.
- Write one line per deviation: what happened + what you did + who approved.
- Share the same format with partners. Fewer arguments, faster acceptance.
Practical case: A wholesaler reduced chargebacks after standardizing one evidence pack across DCs.
2025 Latest Developments and Trends in Cold Chain Vegetables Temperature Monitoring
Cold chain vegetables temperature monitoring in 2025 is shifting toward exception-first operations, with more attention on docks and staging where warm minutes accumulate. Lane-specific alarm design is also growing: leafy greens get tighter, time-based alerts, while chill-sensitive lanes add low-temperature guardrails.
Latest progress you can apply immediately
- Warm-minutes KPI: track time outside the lane, not just averages
- Lane-specific alarms: fewer false alarms, faster action
- Mapping after change: validate new packaging and load patterns quickly
- Asset discipline: labeling, calibration tracking, retirement rules
Market insight (plain language)
Customers pay for consistency. Cold chain vegetables temperature monitoring that is stable and provable reduces disputes and saves labor.
Frequently Asked Questions
Q1: What is cold chain vegetables temperature monitoring in one sentence?
Cold chain vegetables temperature monitoring measures the warmest risk zones across storage and delivery, then drives fast action on exceptions to protect shelf life.
Q2: Where should I place sensors for temperature monitoring for leafy greens shipments?
Start near the door-side top tier and another high-risk corner. Add a pallet-core sensor if you suspect slow pre-cooling or airflow problems.
Q3: Is truck air temperature enough for cold chain vegetables temperature monitoring?
No. Truck air can look stable while cartons warm inside. Product-zone placement plus a receiving check gives more defensible evidence.
Q4: How many sensors do I really need per shipment?
Start with one in the pallet core. Add one near the door for multi-stop routes. Add carton-level monitoring for high-risk leafy greens.
Q5: How do I know if a temperature break harmed shelf life?
Look at time out of range and peak temperature. Longer exposure and higher peaks usually reduce shelf life, especially for leafy greens.
Q6: What should I do when monitoring shows repeated spikes?
Fix one operational cause at a time—loading time, door discipline, staging location, or stacking airflow—then re-check the next shipment.
Summary and Recommendations
Cold chain vegetables temperature monitoring protects shelf life, reduces disputes, and prevents repeat failures when it is simple, trusted, and action-driven. Start with lane definitions, place sensors near doors and top tiers, and use duration-based alarms. Validate your approach with temperature mapping during peak stress, then standardize a one-page evidence pack for fast proof.
Your next steps (7-day action plan)
- Define 3–4 commodity lanes (tight control, near-freezing tolerant, chill-sensitive, hardy).
- Deploy the 3-point sensor plan (warm zone + air context + receiving check). (美国农业部市场服务)
- Set duration-based alarms with a named role owner.
- Run one temperature mapping exercise on your highest-risk lane.
- Build one evidence pack format and enforce 2–3 minute retrieval.
CTA: If you want fewer rejections and stronger customer confidence, make cold chain vegetables temperature monitoring a daily routine—not a reaction to problems.
About Tempk
At Tempk, we support cold chain teams with practical packaging and temperature-control expertise built for real operations. We help you stabilize transitions, place sensors where risk is highest, and build exception-first routines that reduce shrink and disputes.
Next step: Consult our specialists to map your vegetable routes, identify your highest-risk handovers, and design a cold chain vegetables temperature monitoring plan that fits your products and buyer expectations in 2025.
Cold Chain Vegetables IoT Solutions (2025)
How Do Cold Chain Vegetables IoT Solutions Work in 2025?
If you’re losing freshness, the problem is rarely “one bad truck.” It’s small mistakes you can’t see in time—warm minutes, door-open time, and staging delays. Cold chain vegetables IoT solutions make those invisible moments visible, so you can act fast. Fruits and vegetables also face the highest global food losses, rising to 25.4% in 2023, which makes visibility a direct profit lever. ()
This article will answer for you:
Which temperature and humidity sensors for vegetable cold chain are worth paying for
How LoRaWAN tracking for produce pallets compares with cellular and gateway models
How to build real-time cold chain alerts for leafy greens without alarm fatigue
How to design fresh-cut vegetables traceability IoT that scales across partners
How to structure EPCIS sensor data for food traceability into shareable event timelines
Why do cold chain vegetables IoT solutions matter so much?
Cold chain vegetables IoT solutions matter because vegetables can look fine at pickup and fail later. That damage often happens during staging, loading, or waiting—when nobody has data. When you measure the right points, shrink becomes controllable instead of “mysterious.”
Think of your cold chain like a phone battery. Tiny drains all day kill it early. Temperature spikes and humidity swings are those tiny drains.
The three questions your system must answer
Your best cold chain vegetables IoT solutions help you answer, fast: what happened, where it happened, and what to do next. If you can’t answer those three, you only collect data.
| Invisible failure | What IoT detects | What it prevents | What it means for you |
| Warm minutes | Temperature drift over time | Wilt and shelf-life loss | Fewer markdowns |
| Condensation cycles | Temp + humidity patterns | Mold/decay complaints | Better appearance |
| Door-open repeats | Swing patterns / light proxy | Route quality swings | Fewer disputes |
| Delay risk | Dwell time + timestamps | Missed windows | Better planning |
Practical tips you can use today
Start with one lane: pick your highest-claim route, not your easiest.
Measure handoffs first: responsibility changes hide problems.
Make data actionable: if nobody acts, sensors become decoration.
Practical example: One distributor found most exceptions happened during late-day cross-docking, not transit.
What should cold chain vegetables IoT solutions include?
A strong cold chain vegetables IoT solution has five layers: sensing, connectivity, platform, alerts, and workflow. If any layer is weak, you get missing data or noisy data nobody trusts.
The biggest surprise: the workflow layer is where ROI lives. If staff don’t know what to do after an alert, your system becomes a blame machine.
The 5-layer model (simple and practical)
Sensors: temperature, humidity, and optional shock/light
Connectivity: how data leaves the shipment
Platform: where data is stored and analyzed
Alerts: rules that tell you when to act
Workflow: what your team does after an alert
| Alert type | First action | Escalation | What it means for you |
| Mild drift | Check doors / airflow | Supervisor review | Prevent bigger issues |
| High temp event | Re-chill or hold | Quality decision | Reduce unsafe release |
| Repeated spikes | Route/process fix | Carrier review | Long-term improvement |
Which sensors are essential for cold chain vegetables IoT solutions?
Temperature is mandatory. Humidity is highly recommended for leafy greens, herbs, and high-respiration products. Shock and light are optional, but helpful when bruising or “door-open uncertainty” is common.
Your goal is not “more sensors.” Your goal is “the smallest sensor set that explains the loss.”
When humidity monitoring pays back quickly
Humidity is your “crispness insurance.” Too dry causes dehydration and wilting. Too wet plus temperature cycling increases condensation and decay risk.
| Symptom you see | Likely cause | Sensor that helps | What it means for you |
| Wilted greens | Dry + time | Humidity + temp | Better sell window |
| Water droplets | Temp cycling | Humidity + temp | Less decay |
| Bruising | Handling | Shock (optional) | Fewer complaints |
Practical tips and suggestions
Leafy greens and herbs: start with temperature + humidity.
Root vegetables: temperature alone may be enough at first.
Mixed loads: place at least one sensor near the most sensitive SKU.
How do you choose connectivity for cold chain vegetables IoT solutions?
Choose connectivity based on what you can do before delivery. If you can’t intervene mid-route, “proof later” often beats expensive real-time.
Also, don’t treat connectivity as a branding decision. It’s a route decision.
Connectivity options (plain language)
LoRaWAN: LPWA networking designed to connect battery-operated devices with bidirectional communication and end-to-end security. ()
LTE-M: LPWA technology with low device complexity and extended coverage, reusing existing LTE base stations. ()
NB-IoT: 3GPP-standardized LPWA option for many IoT devices and services. ()
BLE + gateway: low-power devices that depend on scans or gateways.
| Connectivity | Best for | Tradeoff | What it means for you |
| LoRaWAN | Farms, packhouses, yards | Needs gateways | Lower maintenance on fixed sites |
| LTE-M | Moving trucks, real-time rescue | SIM + subscription | Alerts while still fixable |
| NB-IoT | Periodic reporting | Not for high-rate streaming | Efficient compliance proof |
| BLE + gateway | Dense sensors in hubs | Gateway dependency | Cheap devices, heavier operations |
Decision tool: real-time vs “proof later” (interactive)
Answer two questions:
Can you intervene during the trip (reroute, fast-track receiving, re-chill)?
Do you have repeated high-cost failures on specific lanes?
If yes + yes: prioritize real-time alerts (cellular or gateway-enabled).
If no: start with checkpoint uploads and lane baselines.
How should you place sensors for cold chain vegetables IoT solutions?
Sensor placement matters more than sensor count. Poor placement creates false confidence.
Use the two-sensor method on mixed pallets: one in the load core, one near the door-side edge. That single change often reveals your real excursions.
The “two-sensor method” for mixed pallets
| Placement | What it reveals | Why it matters | What it means for you |
| Load core | True product exposure | Shelf life prediction | Better forecasting |
| Load edge | Heat gain events | Worst-case risk | Better prevention |
A measurement trap to avoid (simple explanation)
Air temperature changes fast when doors open. A buffered probe (thermal mass) tracks product-like temperature better. found loggers with probes in glycol matched reference measurements more closely than air-temperature loggers. ()
Practical tips and suggestions
Start with edge sensors on your worst lanes.
Standardize attachment so sensors don’t shift.
Photograph placement so results stay comparable.
What alerts should cold chain vegetables IoT solutions send?
Alerts should be rare, meaningful, and tied to decisions. The best alert strategy uses threshold + duration, not threshold alone.
Also, every alert needs a playbook. Otherwise you create noise, not improvement.
The 3 alert types that work
Immediate: big problem now (act now)
Warning: trending risk (act at next checkpoint)
Pattern: recurring issue (fix the process)
| Alert level | Trigger style | Owner | What it means for you |
| Watch | Slow warming trend | Dispatcher | Prevent a future failure |
| Act | Time-above-limit excursion | Ops lead | Reroute or speed receiving |
| Stop | Sustained out-of-range | QA + receiver | Quarantine and investigate |
Practical tips and suggestions
Use time + temperature together: one spike is not two hours warm.
Add context: lane, SKU, and last handoff point.
Close the loop: every “Act” alert must have a short note.
Practical example: One retailer cut alarms dramatically by switching from single-threshold alerts to “minutes above limit.”
How do cold chain vegetables IoT solutions support traceability and compliance?
Cold chain vegetables IoT solutions strengthen traceability by creating a time-stamped record of conditions. But traceability is not only software. It’s a process that links lot ID, sensor ID, route ID, and handoffs.
The 2025 timeline you should plan around (U.S.)
The FDA proposed extending the Food Traceability Rule compliance date by 30 months to July 20, 2028 and says Congress directed FDA not to enforce the rule before that date. () This is breathing room, not a reason to wait.
EPCIS-style events: why they scale better than “one big CSV”
describes EPCIS as a traceability event messaging standard that enables supply chain visibility by sharing event data using a common language. () That matters when farms, packhouses, carriers, and receivers all store data differently.
Minimum “proof pack” to capture:
Lot / batch ID
Time-stamped temperature profile
Handoff timestamps (received, staged, loaded, delivered)
Exception notes + corrective actions
| Traceability event | Key data | IoT adds | What it means for you |
| Cooling | Start time, method | Time-to-cool KPI | Fewer shelf-life surprises |
| Shipping | Trailer, route, seal | Conditions timeline | Better disputes defense |
| Receiving | Dock time, checks | Arrival-state proof | Faster accept/reject |
| Transformation | Cut/pack window | Tighter control points | Fewer fresh-cut issues |
How do you roll out cold chain vegetables IoT solutions without wasting money?
Rollout succeeds when you pilot narrowly, prove value, then scale. Don’t start by instrumenting everything.
The 2–4 week pilot plan (simple and repeatable)
Pick one pain lane (highest shrink or claims).
Define 3–5 success metrics (exceptions per trip, claims rate, markdown rate).
Choose sensor set (temperature, plus humidity if needed).
Set alert rules (threshold + duration) with clear actions.
Train with a one-page SOP (who responds, what to do).
Run 2–4 weeks, then simplify and scale.
Pilot scorecard (interactive)
Track weekly:
Exceptions per trip: ____
Average door-open minutes (estimate): ____
Claims rate: ____
Markdown rate: ____
Top 3 causes: ____ / ____ / ____
ROI tools for cold chain vegetables IoT solutions
The ROI comes from reducing shrink, reducing claims, and improving planning. You don’t need perfect math. You need honest baselines.
FAO also estimates 13.2% of food is lost after harvest and before retail, so even small improvements can matter. ()
Waste-to-savings calculator (interactive)
Fill in for one lane:
Weekly shipped value: $_____
Current loss rate: _____%
Target loss rate: _____%
Weekly savings = Value × (current loss − target loss)
Payback months = Monthly IoT cost ÷ Monthly savings
Where savings show up first
| Savings lever | What IoT reveals | What you change | What it means for you |
| Dwell time | Where product waits warm | Slot discipline | Less spoilage |
| Warm loading | Product shipped warm | Pre-cool enforcement | Better shelf life |
| Repeat offenders | Same lane issues | Targeted training | Faster improvement |
| Claims disputes | Missing evidence | Automated records | Less write-offs |
2025 latest developments and trends for cold chain vegetables IoT solutions
In 2025, cold chain vegetables IoT solutions are shifting from “more charts” to “smarter exceptions.” Three trends are driving that:
Higher-loss pressure in produce: fruits and vegetables remain the highest-loss group globally. ()
Traceability timelines got clearer: FDA discussed extending to July 20, 2028 and not enforcing before then. ()
Standards-based data sharing is rising: EPCIS supports common event language for visibility. ()
Market insight: the winners are not the teams with the most sensors. They are the teams with the cleanest workflows.
Frequently asked questions
Q1: What are cold chain vegetables IoT solutions?
Cold chain vegetables IoT solutions combine sensors, connectivity, alerts, and workflows to reduce waste and prove what happened on each lane.
Q2: Do I need real-time alerts for every shipment?
No. Start with baselining, then add real-time only where intervention can prevent losses.
Q3: Which sensors matter most for leafy greens?
Use temperature plus humidity. Humidity helps you spot dehydration and condensation patterns before quality collapses.
Q4: How do I avoid alarm fatigue?
Use threshold-plus-duration rules, notify one owner first, and attach a one-page playbook to every alert.
Q5: Why does probe placement matter so much?
Air temperature swings quickly with doors and fans. found buffered probes in glycol matched reference temperatures more closely than air loggers. ()
Q6: What temperature line should I treat as “high risk”?
For many food safety references, the “danger zone” is commonly described as starting around 41°F (5°C). () Use risk-based rules for your SKU and customer requirements.
Summary and recommendations
Cold chain vegetables IoT solutions work when they reduce waste, not when they add dashboards. Start with the five-layer model and treat workflow as the real ROI. Place sensors with a core-and-edge method, then use duration-based alerts to avoid noise. Finally, standardize lot-linked event timelines so disputes shrink and traceability gets easier.
Next step (CTA): pick one high-loss lane, run a 2–4 week baseline, and fix one repeat leak per week before scaling.
About Tempk
At Tempk, we build practical cold chain packaging and operational workflows that make temperature control easier to run every day. For cold chain vegetables IoT solutions, we focus on what drives results: sensor placement logic, simple exception workflows, and pack-out routines that reduce warm minutes and prevent avoidable quality loss.
Call to action: Share your route time, stop count, and top 3 vegetable SKUs. We’ll propose a lane-based cold chain vegetables IoT solutions rollout that reduces alarm noise while improving real outcomes.
Cold Chain Milk Chocolate Best Practices 2025
Cold Chain Milk Chocolate Best Practices for 2025?
Last updated: December 19, 2025
Cold chain milk chocolate best practices keep milk chocolate glossy, snappy, and clean-tasting from packout to doorstep. Your biggest enemies are temperature cycling and moisture shock, not just “full melt.” Milk chocolate can soften as temperatures approach 30–32°C (86–90°F), and customers may complain even without visible melting. Many operators aim for a stable cool band (often around 15–18°C) and lower humidity (often near ≤50% RH) to reduce sweating and bloom risk.
This article will answer for you:
-
How cold chain milk chocolate best practices prevent bloom, sweating, scuffs, and odor pickup
-
What a realistic milk chocolate cold chain temperature range looks like by stage
-
How to build a condensation control workflow your team will actually follow
-
How to write a milk chocolate shipping SOP that stays consistent in peak weeks
-
How to set up milk chocolate temperature monitoring without drowning in data
-
How to design a last-mile milk chocolate delivery SOP for porches and lockers
Why do cold chain milk chocolate best practices matter more than ever?
Cold chain milk chocolate best practices matter because milk chocolate fails in ways customers see immediately. Seafood can be slightly warm and still “look fine.” Milk chocolate can look “ruined” from a short mistake. A haze, dull patch, or sticky wrap triggers refunds fast.
Most returns are process returns, not recipe returns. You can ship the same chocolate and get opposite reviews. The difference is almost always handling discipline during transitions.
The three customer-visible failures you’re trying to prevent
Milk chocolate usually fails in predictable categories. When you name them clearly, your team stops guessing.
| Failure mode | What triggers it | What customers notice | What it means for you |
|---|---|---|---|
| Softening / smear | Heat spike or long warm hold | Warped shape, fused wrappers | “Melted” refunds |
| Bloom (haze/grey) | Repeated warm–cool cycling | “Looks old” appearance | Premium trust drops |
| Sweating / sticky wrap | Cold-to-warm jump in humid air | Damp cartons, sticky film | Complaints even if taste is fine |
| Scuffs / rub marks | Movement and vibration | Dull finish, scratches | Gift quality downgraded |
| Odor pickup | Mixed storage, weak barriers | “Off taste” reviews | Brand damage |
Practical tips and suggestions
-
Track time exposed to warm air during handling. It drives most defects.
-
Fix movement first if scuffs are common. Coolant cannot stop friction.
-
Treat odor control as part of cold chain milk chocolate best practices.
Practical example: One gifting brand discovered most “melt complaints” were scuffs from loose packing on multi-stop routes.
What temperature range supports cold chain milk chocolate best practices?
Cold chain milk chocolate best practices work best with a stable target band, not extreme cold. Many teams handle milk chocolate in a “cool room” range and avoid long holds above a simple action line. Your real goal is fewer peaks, fewer dips, and fewer fast transitions.
If you can’t control everything, control the moments that matter most. Staging, loading, and doorstep time decide outcomes.
A practical milk chocolate cold chain temperature range plan
Use a simple stage plan so every department speaks the same language.
| Stage | Practical target idea | Why it matters | What to watch | What it means for you |
|---|---|---|---|---|
| Storage | Stable cool, low humidity | Preserves finish and aroma | Door-open spikes | Fewer cosmetic defects |
| Packout | Same band as storage | Avoids temperature shock | Warm benches | More consistent arrivals |
| Transit | Slow change, fewer swings | Prevents softening | Heat soak in vehicles | Fewer deformed pieces |
| Delivery | Short exposure window | Biggest uncertainty | Porch time | Fewer refunds |
Why “too cold” can backfire
Cold is not automatically safe. Cold-to-warm in humid air creates condensation. Condensation is a surface event that leaves visible damage behind.
Plain-language rule: If chocolate is colder than the air, water wants to land on it. Cold chain milk chocolate best practices keep it sealed until temperatures equalize.
Practical tips and suggestions
-
Reduce swings before adding more insulation. Swings create more defects.
-
Use one action threshold with a clear response. Too many rules fail.
-
Add a staging timer. “Just five minutes” becomes forty-five fast.
Practical example: A warehouse improved outcomes by shortening warm staging time, not by changing materials.
How do you control humidity and prevent condensation in cold chain milk chocolate best practices?
Humidity control is the “silent win” inside cold chain milk chocolate best practices. Moisture drives sugar bloom and sticky wrappers. Moisture also raises hygiene risk if it lingers. You may not control outdoor humidity, but you can control how much humid air touches cold product.
Condensation happens most during transitions. That is why your workflow matters more than your insulation thickness.
How to prevent condensation on milk chocolate: the Seal–Wait–Open rule
Train one simple rule for staff and customers. It prevents a large share of complaints.
-
Seal: keep the inner barrier sealed at delivery
-
Wait: allow a short acclimation window (your SOP sets the time)
-
Open: open only when the package feels closer to room conditions
Condensation triggers and fixes (fast table)
| Trigger | What it looks like | What to change | Practical win for you |
|---|---|---|---|
| Warm dock delay | Damp cartons, foggy film | Shorten dock time | Fewer surface defects |
| Humid loading | “Sweating” packs | Use a controlled loading zone | Cleaner unboxing |
| Big temp step-up | Fog inside inner bag | Add buffering + sealed warm-up | Less sugar bloom risk |
| Poor barrier | Odor + moisture ingress | Upgrade inner seal | Fewer “box smell” reviews |
Practical tips and suggestions
-
Put warm-up instructions on top of the contents, not buried.
-
Keep cold packs off direct contact. Use a spacer layer.
-
Do not stage cartons in “swing zones” like hallways and open docks.
Practical example: A DTC shop reduced winter complaints by making “keep sealed before opening” unavoidable.
Which packaging model supports cold chain milk chocolate best practices?
The best packaging for cold chain milk chocolate best practices does three jobs: buffer temperature, block moisture/odors, and stop movement. You do not need complex designs. You need a design your team repeats the same way every day.
Think of packout like making a sandwich. If everyone builds it differently, customers feel it.
The “3-layer packaging” model (simple and scalable)
-
Buffer layer: insulation sized to lane risk
-
Barrier layer: sealed inner liner for moisture and odor control
-
Structure layer: inserts, trays, or dividers that prevent scuffs
The most overlooked packaging detail: air space
Empty air warms quickly and creates micro-condensation during swings. A puffy, half-empty shipper is often an expensive risk.
| Packaging choice | Good for | Risk if ignored | Your practical meaning |
|---|---|---|---|
| Tight inner seal | Odor + moisture control | Aroma pickup | Better taste consistency |
| Right-size shipper | Stable temperature | Fast warming | Fewer soft arrivals |
| Movement control | Presentation quality | Scuffs and dull finish | Better reviews for gifts |
| Moisture-resistant outer | Humid lanes | Wet cartons | Fewer “sticky wrapper” tickets |
Practical tips and suggestions
-
Use one packout diagram per SKU. Photos beat long documents.
-
Fill voids with structured inserts, not loose materials that shift.
-
Separate coolant from product with a rigid sheet or spacer.
Practical example: A chocolatier reduced “looks old” returns after switching from loose fill to fixed dividers.
How do you run a packout SOP for cold chain milk chocolate best practices?
Cold chain milk chocolate best practices succeed when packout is a routine, not a craft project. Your team needs one standard layout per lane type. They also need a few “do not improvise” rules.
Most packout failures are human: wrong placement, missed seal, or too much headspace.
Repeatable packout sequence (fast and reliable)
-
Pre-condition product and materials in the same stable zone
-
Seal the inner barrier fully (no corner gaps)
-
Immobilize product with trays or dividers
-
Place coolant in a consistent pattern (if used)
-
Close and check closure points (two-point check)
-
Label for last mile (one short instruction, not a novel)
Packout quality table you can train in 5 minutes
| Packout control | Pass condition | Common miss | Quick fix | What it means for you |
|---|---|---|---|---|
| Inner seal | Continuous seal, no gaps | Partial seal | Visual seal check | Less moisture entry |
| Movement control | No shifting on light shake | Loose voids | Add dividers | Fewer scuffs |
| Coolant placement | Same layout every time | Random placement | Photo standard | Predictable hold time |
| Closure check | Fully closed, flush edges | Half-close | Two-point check | Fewer heat leaks |
Practical tips and suggestions
-
Enforce a simple “door-open timer.” Pack and close quickly every time.
-
Create seasonal packouts. Summer and winter need different habits.
-
Train staff with real defect photos: bloom vs sweating vs scuffs.
Practical example: A team improved compliance after adding one rule: boxes must be sealed within 90 seconds of final placement.
Which cooling strategy fits cold chain milk chocolate best practices?
Cold chain milk chocolate best practices do not always mean “add more coolant.” Too much cooling can raise condensation risk at delivery. Too little cooling can allow softening. Choose cooling based on lane time, ambient risk, and delivery uncertainty.
Cooling should “steady” the environment, not shock it.
Gel packs vs PCM panels (operations-first comparison)
| Cooling option | Strength | Risk to watch | Best fit | Practical meaning for you |
|---|---|---|---|---|
| Gel packs | Familiar and flexible | Early overcooling | Short–medium lanes | Needs spacer discipline |
| PCM panels | Steadier buffering | Wrong PCM point | Medium–long lanes | Better stability when tuned |
| No coolant | Cheapest and fastest | Limited protection | Short, cool lanes | Works only with tight timing |
Practical tips and suggestions
-
Place cooling at the perimeter to promote even conditions.
-
Pilot before scaling. Test one lane for two weeks and adjust one variable.
-
Build a seasonal playbook. This prevents overpack and underpack cycles.
Practical example: A boutique chocolatier improved summer consistency after switching to a steadier buffering layout and reducing door-open time.
Monitoring for cold chain milk chocolate best practices: what should you measure?
Monitoring should answer one question: where did the risk happen? Cold chain milk chocolate best practices do not require sensors in every shipment. Start with lane sampling. Focus on hot weeks, new packouts, and high-value gifting lanes.
Monitoring also stops internal debates. Data replaces opinions.
Monitoring options (simple and scalable)
| Monitoring method | Best use | What it tells you | Weak spot | What it means for you |
|---|---|---|---|---|
| Spot checks | Packout and receiving | “Right now” condition | No history | Good for quick decisions |
| Logger sampling | Lane validation | Full time-temp profile | Needs review process | Best for root cause |
| Exception sampling | Complaints and delays | Why it failed | Reactive | Great learning tool |
| Facility sensors | Storage/staging zones | Chronic drift | No last-mile view | Prevents repeat mistakes |
What to track (the minimum set)
-
Peak temperature and time above action line
-
Number of swings (up-down cycles)
-
Staging time (packout to dispatch)
-
Door-open time per stop (estimated is fine)
-
Defect category at arrival (softening, bloom, sweating, scuff, odor)
Practical tips and suggestions
-
Standardize sensor placement away from direct coolant contact.
-
Review weekly, not yearly. Fast feedback creates fast improvement.
-
Link complaints to lane context (season, porch time, delays).
Practical example: A brand learned their worst spikes occurred during cross-docking, not transit.
Last-mile rules that make cold chain milk chocolate best practices succeed
Last mile is where cold chain milk chocolate best practices either protect your brand or expose it. A perfect packout can fail on a sunny porch. You can’t control every doorstep, but you can design rules that reduce exposure.
Last mile also includes unboxing behavior. Many “sticky wrapper” tickets start here.
Last-mile milk chocolate delivery SOP checklist
| Last-mile control | What you do | Why it works | Practical meaning for you |
|---|---|---|---|
| Delivery window | Deliver when someone is home | Less unattended exposure | Better arrival condition |
| Customer notice | “Receive now” message | Shortens porch time | Fewer disputes |
| Safe placement | Shade/indoors instruction | Limits heat soak | Better texture |
| Warm-up guidance | Seal–Wait–Open | Reduces condensation | Cleaner appearance |
| Delay rule | Defined trigger + action | Prevents guessing | Faster decisions |
Practical tips and suggestions
-
Offer “cool-hour delivery” in hot regions. Morning beats late afternoon.
-
Use signature requirements only for critical lanes. It can increase dwell.
-
Put the first instruction card on top of the contents.
Practical example: A gifting program reduced negative reviews after adding a simple top-of-box warm-up line.
Interactive tools for cold chain milk chocolate best practices
These tools improve user engagement and make your SOP easier to adopt.
Tool 1: Lane Risk Score (0–10) in 60 seconds
Give yourself 0, 1, or 2 points per line.
-
Transit time: under 6h (0) / 6–24h (1) / over 24h (2)
-
Handoffs: one (0) / two–three (1) / four+ (2)
-
Ambient exposure: rare (0) / sometimes (1) / frequent (2)
-
Customer dwell risk: low (0) / medium (1) / high (2)
-
Intervention ability: strong (0) / limited (1) / minimal (2)
Score meaning
-
0–3 Essentials: standard pack photo + staging limit
-
4–7 Controlled: seasonal packouts + logger sampling
-
8–10 Critical: strong buffering + strict exceptions + monitoring
Tool 2: 5-minute Self-Audit Scorecard (15 points)
Temperature discipline (0–6)
-
Stable target range is defined and trained
-
Temperature cycling is actively minimized
-
Product is pre-conditioned before packing
-
Dock time and staging limits are enforced
-
Packout time and receiving time are recorded
-
One clear exception rule exists
Moisture control (0–5)
-
Moisture barrier is used on risk lanes
-
Seal–Wait–Open guidance is used
-
Staff recognize “sweating cartons” quickly
-
Packaging resists moisture ingress
-
Chocolate is isolated from wet melt water
Packaging repeatability (0–4)
-
Standard pack patterns exist per SKU/lane
-
Shippers are right-sized to reduce headspace
-
Movement control is built-in (dividers/trays)
-
Seasonal test shipments are performed
Score
-
13–15 Strong: optimize cost and sustainability next
-
9–12 Medium: expect seasonal issues, fix transitions first
-
0–8 High risk: fix template + SOP before peak weeks
Temperature excursion response for chocolate: what do you do when things go wrong?
Cold chain milk chocolate best practices include an exception playbook, because exceptions happen. Delays, heat waves, and misroutes will occur. Mature teams don’t avoid exceptions. They handle them consistently.
Use a simple triage system so your team responds fast.
A simple exception triage tree
-
Classify symptom: softening, bloom, sweating, scuff, odor
-
Check lane context: season, delays, porch exposure, handoffs
-
Decide action: ship / hold / rework / replace / reject
-
Log one-sentence root cause
-
Apply one corrective action in the SOP
| Symptom | Likely cause | Quick check | Recommended action | What it means for you |
|---|---|---|---|---|
| Soft corners | Heat soak | Box warmth at arrival | Replace + tighten last mile | Protects brand trust |
| Dull haze | Cycling | Delay and handoff notes | Improve buffering + reduce opens | Cuts bloom risk |
| Sticky wrap | Condensation | Open timing | Seal–Wait–Open training | Fewer repeats |
| Scuffs | Movement | Divider presence | Update packout | Better gift appearance |
| Odor | Storage mix | Warehouse practices | Upgrade barrier + separation | Prevents bad reviews |
Practical example: A team cut repeat complaints by splitting “melt” into softening, scuffing, and surface moisture marks.
2025 trends in cold chain milk chocolate best practices
In 2025, cold chain milk chocolate best practices are becoming more lane-specific and more operations-driven. Teams are shifting from one universal packout to two or three validated packouts. Monitoring is also becoming more purposeful, with fewer devices and better sampling.
Sustainability is pushing smarter right-sizing and reuse. The best programs reduce waste by reducing rework and reshipments.
Latest progress snapshot (what’s changing now)
-
Lane scoring: season + route pattern selects packout level
-
Simpler SOP design: shorter checklists, more photo standards
-
Transition discipline: sealing and exposure steps built into training
-
Smarter sampling: monitoring focuses on high-risk lanes and new designs
-
Customer guidance: one-line unboxing instructions reduce sweating tickets
Market insight: customers don’t just want “not melted.” They want clean surfaces, no haze, stable shape, and consistent taste.
Frequently asked questions
Q1: What is a practical milk chocolate cold chain temperature range for shipping?
Many programs use a stable cool “comfort band” and avoid long holds above a simple action line. Stability beats extreme cold.
Q2: How do cold chain milk chocolate best practices prevent bloom during shipping?
They minimize warm–cool cycling by using buffering packouts and limiting staging and door-open time.
Q3: How to prevent condensation on milk chocolate at delivery?
Use a sealed inner barrier and a short sealed warm-up before opening. This reduces moisture landing on surfaces.
Q4: Should you refrigerate milk chocolate during shipping?
Not automatically. Cold-to-warm jumps can increase condensation risk. Focus on stable cool handling and barriers.
Q5: Gel packs or PCM panels—what fits cold chain milk chocolate best practices?
Gel packs suit short lanes but can overcool early. PCM panels can buffer more steadily on longer lanes when tuned.
Q6: Do you need monitoring for every shipment?
No. Start with sampling on high-risk lanes and peak weeks. Expand only where it drives decisions.
Q7: Why does milk chocolate arrive “melted” even without puddles?
Short heat exposure can soften edges and dull finish. Customers still perceive it as a quality failure.
Q8: What is the fastest improvement you can make this week?
Cut warm staging time and enforce one standard pack photo. Workflow fixes often beat new materials.
Summary and recommendations
Cold chain milk chocolate best practices protect milk chocolate by controlling heat spikes, humidity shocks, and rough handling. Set stable targets, reduce temperature cycling, and treat transitions as your highest-risk moments. Build packaging around buffer, barrier, and structure, then standardize packouts with photos. Add last-mile rules that match real doorstep exposure and include Seal–Wait–Open instructions to prevent sweating. Monitor high-risk lanes by sampling and improve one variable at a time.
Next-step action plan (CTA)
-
Define one clear temperature band and one action line for exceptions.
-
Publish one packout photo per lane type (low, medium, high risk).
-
Enforce staging and lid-open time limits during packout and delivery.
-
Run a two-week pilot on your top two risk lanes with sampling loggers.
-
Update SOPs monthly based on the worst 10% of events and top defect types.
About Tempk
At Tempk, we build practical cold chain systems for temperature-sensitive shipments, including milk chocolate. We focus on repeatable lane-based packouts, moisture-aware barriers, and SOPs teams can execute under peak volume. We also help you set up monitoring that leads to decisions, not dashboards. The goal is simple: fewer defects, fewer reships, and more “arrived boutique-perfect” unboxing moments.
Call to Action: Share your route duration, climate (humid or dry), product format (bars, assortments, filled items), and delivery model. We can outline a lane-based SOP aligned with cold chain milk chocolate best practices for your next pilot.
Cold Chain Milk Chocolate Quality Control (2025)

Cold Chain Milk Chocolate Quality Control Checklist?
Cold chain milk chocolate quality control keeps milk chocolate cool, dry, and stable from packing to delivery. Your biggest enemies are heat spikes and moisture events. Those two triggers can cause bloom, sticky wrappers, and soft texture. Many operators use a practical “cool band” around 18–21°C and target ~50% RH or lower when possible.
This article will answer for you:
- How ideal temperature and humidity for milk chocolate storage prevents silent damage
- How cold chain milk chocolate quality control stops bloom by reducing swings, not “over-chilling”
- What must pass in a shipping release gate, including the 29–30°C working check
- Which packaging strategy reduces risk fastest: insulation + barrier + smart coolant
- How to manage last-mile cold chain for milk chocolate without slowing drivers
Cold chain milk chocolate quality control: Why is milk chocolate so fragile?
Milk chocolate is fragile because small temperature swings can dull gloss, soften edges, and reduce “snap” fast. It often shows defects sooner than darker products. It can also pick up odors more easily in mixed storage areas, which turns your warehouse into a quality variable.
In cold chain milk chocolate quality control, the goal is stability. A slightly “warmer but steady” condition often beats a colder condition with frequent spikes. That’s why your workflow matters as much as your packaging.
Ideal temperature and humidity for milk chocolate storage
A practical target many teams use is 18–21°C with ~50% RH or lower when possible. The benefit is simple: fewer moisture events and fewer texture surprises.
| Storage factor | Practical target | Quick check | Your real-world benefit |
|---|---|---|---|
| Temperature | 18–21°C | Wall sensor + spot probe | Fewer soft bars and scuffs |
| Humidity | ≤50% RH (goal) | Simple RH meter | Lower sugar bloom risk |
| Odors | Neutral air zone | Walk-through smell test | Cleaner flavor notes |
Practical tips and suggestions
- Warm warehouse: focus on stability first, not deep cooling.
- Humidity swings: add a dry staging area for packing and labeling.
- Mixed goods storage: create an odor-free chocolate zone.
Practical case: Teams often reduce defects by moving pack-out away from docks and limiting warm exposure time.
Cold chain milk chocolate quality control: How do you prevent bloom during transport?
Bloom prevention works when you stop partial melting and re-solidifying in unstable ways. Bloom is often a symptom of temperature instability, not one single warm event. In cold chain milk chocolate quality control, treat bloom like a process problem: where did the swing happen, and why did it repeat?
Most real-world triggers are boring but predictable: warm loading zones, repeated van door opens, air gaps in pack-out, and moisture events. Fix the repeat trigger first, not the symptoms later.
How to prevent sugar bloom from condensation
Condensation is “water landing on your chocolate.” It often happens when product moves from a cooler zone into warm, humid air. If you answer “yes” to two or more questions below, you need stronger moisture discipline.
Condensation Risk Self-Test (30 seconds):
- Did chocolate move from a cool room into warmer air?
- Is the packing room humid or rainy-season humid?
- Will customers open the box immediately after delivery?
| Control | What it prevents | How to run it | What it means for you |
|---|---|---|---|
| Keep product sealed until warmed | Condensation-driven sugar bloom | Add a simple unboxing card | Fewer “dusty” returns |
| Humidity cap in pack-out zone | Surface moisture pickup | Hygrometer + alarm | More consistent finish |
| Limit door-open time | Humidity surges | “One person owns the door” | Less hidden variability |
Practical tips and suggestions
- Multi-stop delivery: keep chocolate grouped and use open/close discipline.
- Hot climate: add insulation before adding more “ice.”
- Mixed cargo: separate chocolate from high-moisture products.
Practical case: Teams often improve outcomes by reducing door-open seconds, not by adding extra coolant.
Cold chain milk chocolate quality control: What must pass before shipping?
A strong release gate prevents avoidable claims because no shipper can “save” poorly prepared chocolate. In cold chain milk chocolate quality control, release checks must be fast and measurable. Avoid vague rules like “looks okay.” Use repeatable checks: product temperature range, pack seal integrity, and lot traceability.
Also remember this: chocolate is low in water activity, but risks still exist in low-moisture foods. Keep hygiene strong, especially when milk-derived ingredients are present.
Milk chocolate tempering checks your team can teach
Many teams teach a simple working temperature checkpoint around ~29–30°C for milk chocolate during tempering workflows. You don’t need to teach the full science on day one. You need staff to recognize “in range” vs “out of range.”
| QC checkpoint | What “pass” looks like | Fast test | What it means for you |
|---|---|---|---|
| Temper state | Glossy surface + clean break | Visual + snap check | Lower bloom risk |
| Working temp | ~29–30°C | Quick thermometer check | More stable finish |
| Pack seal | Tight, no gaps | 10-second squeeze test | Less moisture entry |
| Lot code | Clear + consistent | Scan/verify | Faster investigations |
Practical tips and suggestions
- Release only cooled product: don’t pack chocolate that is still warm.
- No-open-box rule: once packed, don’t leave it open in humid air.
- Clear owner: one person must own shipping release decisions.
Practical case: Teams often reduce “dull finish” complaints by adding a release step that checks working temperature and seal consistency.
Cold chain milk chocolate quality control: Which packaging strategy reduces risk fastest?
The fastest risk reduction comes from a “stability-first” packing logic: insulation to slow change, barrier to block moisture, and coolant to maintain—not freeze. Over-aggressive cooling can increase condensation risk if used poorly.
Cold chain milk chocolate quality control packaging should deliver two protections:
- thermal protection (slows heat entry) and 2) moisture protection (reduces humidity contact).

18°C PCM for milk chocolate shipping decision tool
A controlled-ambient setpoint near 18°C often aligns with the “cool band” many teams target. It can reduce condensation risk versus near-freezing packs, especially in humid seasons.
Score your lane risk (0–16):
- Peak outdoor heat: mild=0 / warm=2 / hot=4
- Transit time: same day=0 / next day=2 / 2+ days=4
- Last-mile uncertainty: low=0 / medium=2 / high=4
- Product fragility: bars=1 / inclusions=2 / bonbons=4
Score → recommendation:
- 0–5: insulation only + stable pack-out
- 6–10: insulation + controlled coolant planning
- 11–16: insulation + 18°C PCM + monitoring + exception rules
| Packaging component | Best for | Common mistake | Practical meaning for you |
|---|---|---|---|
| Insulated shipper | Long routes | Ignoring lid leaks | More stable temperatures |
| Barrier liner | Humid environments | Skipping drying step | Less condensation |
| Dividers/void fill | Mixed items | Leaving air gaps | Less hot spotting |
Practical tips and suggestions
- Treat air gaps as risk: tight packing often beats “more packs.”
- Use photo pack-out maps: pictures beat memory during peak season.
- Validate once, then standardize: don’t redesign every week.
Practical case: Teams often stabilize summer deliveries by using one standard PCM kit for hot zones and lighter rules for mild zones.
Cold chain milk chocolate quality control: How do you control last-mile heat and door-open time?
Last mile is where most temperature swings happen, because doors open often and stops vary. Your goal is to make the “right behavior” the easiest behavior. Cold chain milk chocolate quality control improves quickly when drivers follow a simple SOP.
Milk chocolate last-mile delivery risk checklist
Use this as a driver-friendly card, not a long manual.
| Last-mile problem | Simple driver rule | What it prevents | Value to you |
|---|---|---|---|
| Too many opens | “One open per stop” | Warm spikes | Fewer complaints |
| Hot cabin transfer | Keep boxes shaded | Heat shock | Better appearance |
| Delay events | Protect + record + escalate | Unclear blame | Faster dispute resolution |
Practical tips and suggestions
- High stop density: zone the route so chocolate is quick to access.
- Summer heat: teach a “shade-first” habit at every stop.
- Proof culture: record delays quickly, not perfectly.
Practical case: Teams often reduce issues by changing loading order so chocolate moves less and sits away from open doors.
Cold chain milk chocolate quality control: How do you catch problems before customers do?
Early warning beats refunds. Great cold chain milk chocolate quality control does not require a lab for daily detection. You need simple signals that catch patterns early: damp cartons, frequent door openings, soft edges, and sudden “looks old” complaints.
10-minute spot test routine (3 cartons per shift)
Pick 3 cartons per shift and log results in a short record. This creates proof and helps you find “warm corners” in storage.
| Spot test item | What “OK” looks like | What “risk” looks like | What it means for you |
|---|---|---|---|
| Carton dryness | Dry surface | Damp patches | Bloom risk |
| Wrapper feel | Clean, dry | Sticky | Condensation risk |
| Chocolate feel | Firm | Soft edges | Heat exposure |
Practical tips and suggestions
- Claims rising: do spot tests at receiving and dispatch for two weeks.
- New route: run a short pilot with extra checks before scaling.
- Busy season: increase sampling frequency, not checklist length.
Practical case: Teams often find a single airflow or door pattern that creates a “warm corner,” then fix it quickly.
Interactive tool: Is your cold chain milk chocolate quality control “stable enough”?
Score each statement: 0 (no), 1 (sometimes), 2 (always). Total score = 0–20.
- We keep chocolate in a stable cool zone with minimal swings.
- We control humidity and prevent condensation during transitions.
- Receiving includes a consistent temperature and condition record.
- Dispatch packing follows one standard diagram.
- We avoid direct coolant contact with product packaging.
- We limit staging time outside controlled areas.
- Drivers follow a door-open discipline rule.
- We have a clear delay response plan.
- We perform quick spot tests weekly.
- We review exceptions and coach improvements monthly.
Score interpretation:
- 0–7: High risk → fix staging + dispatch + door-open discipline first
- 8–14: Moderate → tighten humidity control + spot tests
- 15–20: Strong → optimize ROI and reduce packaging cost safely
2025 latest developments and trends in cold chain milk chocolate quality control
In 2025, chocolate logistics is becoming more “experience-driven.” Customers expect premium appearance and texture, not just safe arrival. That pushes teams to invest in stability, training, and better packaging discipline—especially in last mile.
Latest progress snapshot (2025)
- Stability-focused packaging: more teams prioritize insulation and seal quality over excessive coolant.
- Short training routines: micro-training for pack-out and door discipline beats long manuals.
- More proof habits: simple records and exception logs improve consistency and disputes.
Market insight: Treating quality as a customer experience (shine, snap, clean wrapper) drives tighter process control—not just stronger packaging.
Frequently asked questions
Q1: What causes bloom the fastest during delivery?
Rapid swings and warm spikes trigger bloom faster than steady cool conditions. Focus on stability and short door-open time.
Q2: Should you freeze milk chocolate for shipping?
Freezing can increase condensation risk when it warms again. Many operations use stable cool conditions instead.
Q3: What is the best first step in cold chain milk chocolate quality control?
Standardize dispatch pack-out and reduce staging time. These changes often cut defects quickly.
Q4: How do you prevent condensation when moving chocolate?
Reduce sudden transitions and use moisture barriers. Let product acclimate before opening.
Q5: How do you control last-mile risk with many stops?
Use route zoning, minimize door-open time, and keep chocolate grouped. Behavior rules beat extra coolant.
Summary and recommendations
Cold chain milk chocolate quality control works when you design for stability: cool temperatures, low humidity exposure, minimal swings, and disciplined handling. Bloom and texture loss often come from warm spikes, long staging, and inconsistent pack-out. Standardize one packing diagram, shorten exposure time, and coach driver habits weekly.
Next steps (CTA):
- Audit your top 3 risk points: staging, dispatch pack-out, and last-mile door openings.
- Deploy one visual packing standard and a short closure check routine.
- Add a 2-week spot test program to detect hidden drift.
- Review exceptions weekly and coach one improvement at a time.
About Tempk
At Tempk, we help cold chain operators protect sensitive products where quality is visible and reputation matters—like milk chocolate. We focus on practical packaging solutions, repeatable pack-out standards, and routines that reduce temperature swings and condensation risk.
Call to action: If you want a rollout plan for cold chain milk chocolate quality control (pack-out diagrams, staging rules, and last-mile door discipline), reach out for an operational blueprint you can implement right away.
Insulated Children’s Lunch Bags: 2025 Buying Guide
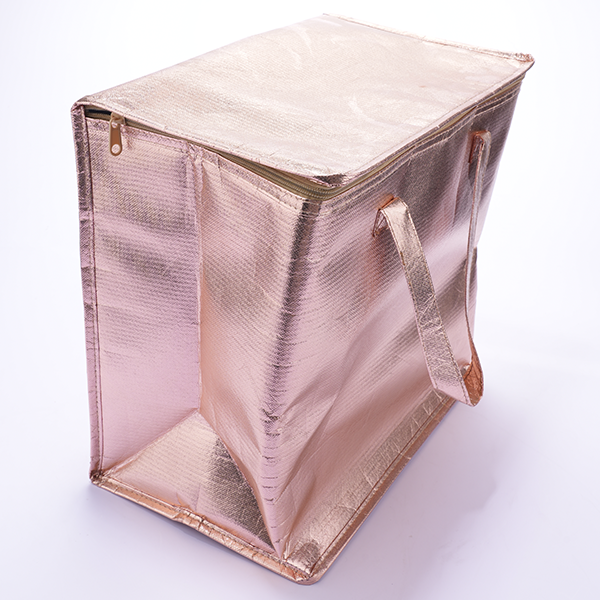
Insulated Children’s Lunch Bags: What to Buy in 2025?
If you’re shopping for insulated children’s lunch bags, your real goal is simple: your child opens lunch at noon, and the food still looks and smells right. You also want fewer spills and fewer “mystery smells.” In everyday U.S. food safety messaging, the “danger zone” is commonly described as 40°F–140°F, and perishables shouldn’t sit out too long—often summarized as 2 hours (or 1 hour when it’s very hot).
This guide turns that into a practical system you can actually follow on busy school mornings.
This article will answer for you:
-
How insulated children’s lunch bags support safe temperature rules for kids packed lunches
-
When you need an ice pack (and when you don’t) with an insulated children’s lunch bags ice pack planner
-
How to choose size and structure by age, schedule, and backpack space
-
How to reduce leaks, odors, and “crushed lunch” problems
-
A simple packing routine (plus a quick at-home test) to avoid surprises
-
2025 trends: easier cleaning, more structure, and more material transparency
Why do insulated children’s lunch bags matter for daily food safety?
Direct answer: Insulated children’s lunch bags slow temperature change. That buys time so cold foods warm up more slowly and hot foods cool down more slowly.
Expanded explanation: Think of insulation like a jacket. A jacket doesn’t create heat, but it slows heat loss. The same rule applies here: insulated children’s lunch bags help you hold the starting temperature, not magically make lunch cold. If you pack dairy, meat, eggs, cut fruit, or leftovers, your safest move is to treat them as “needs cold support,” especially when lunch sits for hours.
insulated children’s lunch bags
The “Lunch Lane” method (fast and practical)
Pick one lane each morning. This reduces decision fatigue.
-
Shelf-stable lane: whole fruit, crackers, sealed snacks
-
Chilled-perishable lane: yogurt, cheese, deli meat, cut fruit
-
Hot lane: soup, pasta, rice (in a proper insulated jar)
| Lunch lane | Typical foods | What you add | What it means for you |
|---|---|---|---|
| Shelf-stable | crackers + whole fruit | optional small pack | freshness + fewer crumbs |
| Chilled-perishable | yogurt + berries | 2 cold sources | better safety margin and taste |
| Hot | soup + pasta | insulated food jar | fewer “lukewarm lunch” complaints |
Real-life example: A parent stopped “warm yogurt” complaints by switching to a structured bag and adding a second cold source.
insulated children’s lunch bags
Do insulated children’s lunch bags work without ice packs?
Direct answer: Yes—but usually only for short windows or shelf-stable lunches. For chilled perishables, insulation works best with cold sources.
insulated children’s lunch bags
Expanded explanation: If your child eats lunch 4–6 hours after you pack it, most chilled perishables need help. A common best practice in lunch-safety guidance is using two cold sources (for example, a gel pack plus a frozen drink) in insulated children’s lunch bags when packing perishables.
insulated children’s lunch bags
Insulated children’s lunch bags ice pack planner (60 seconds)
Match your plan to the time before lunch and the weather.
| School day reality | Ice plan | Placement | What it means for you |
|---|---|---|---|
| ≤4 hours to lunch | 1 cold source | on top of perishables | usually enough on mild days |
| 4–6 hours to lunch | 2 cold sources | top + side (or bottom) | more consistent chill |
| 6+ hours, bus rides, hot pickup | 2 cold sources + tighter fit | “cold sandwich” layout | fewer risky warm-ups |
Practical tips
-
Start cold: chill food overnight; don’t rely on the bag to cool it down.
-
Go two-sided: cold source → container → cold source.
-
Reduce air gaps: extra air warms faster than packed space.
How to choose insulated children’s lunch bags by age and school routine?
Direct answer: The best insulated children’s lunch bags fit your containers, fit the backpack, and are easy for your child to open—without crushing food.
Expanded explanation: Buying “too big” creates empty air space and sliding containers. Buying “too small” creates smashed sandwiches and stress. Choose based on how long lunch sits, how rough your child is with zippers, and whether the bag must fit a tight backpack.
2-minute fit test for insulated children’s lunch bags
Give 1 point for each “yes”:
-
My child can open the zipper alone.
-
A main container fits flat, not tilted.
-
There’s room for two cold sources without crushing food.
-
The liner wipes clean in under 30 seconds.
-
The bag stands upright on a desk or shelf.
Score
-
0–2: frustration risk (spills, tears, wasted food)
-
3–4: solid daily choice
-
5: “school-ready” setup
| School stage | Typical needs | Best bag style | What it means for you |
|---|---|---|---|
| Preschool (3–5) | simple lunch + small snack | compact, wide opening | less zipper struggle |
| Elementary (6–10) | lunch + snack + drink | medium, structured | fewer crushed items |
| Middle school (11+) | bigger portions + extras | larger capacity + tougher strap | better durability |
Real-life example: Switching to a structured base stopped fruit getting crushed in a crowded backpack.
What features matter most in insulated children’s lunch bags?
Direct answer: Prioritize insulation + wipe-clean liner + strong zippers + structure. Cute design is a bonus.
Expanded explanation: Kids drag, drop, and stuff lunch bags. Your “must-have” features are the ones that reduce daily maintenance: fewer leaks, fewer odors, fewer broken zippers.
Feature checklist that prevents 80% of complaints
| Feature | What to look for | What it prevents | What it means for you |
|---|---|---|---|
| Insulation | padded feel, snug seams | fast warming | better taste by lunch |
| Liner | wipeable, smooth, fewer seams | odor buildup | faster cleanup |
| Zippers | oversized pulls, smooth track | broken closure | longer bag life |
| Structure | semi-rigid walls + stable base | crushed food | happier kid |
| Simple pockets | not “maze-like” | lost utensils | faster packing |
Practical tips
-
Choose fewer inside seams (crumbs hide in seams).
-
For younger kids: avoid complicated compartments.
-
Pick a bag that can stand up on its own.
How do you prevent leaks in insulated children’s lunch bags?
Direct answer: Leak prevention is mostly containers + packing order. The lunch bag is your last line of defense.
Expanded explanation: Even premium insulated children’s lunch bags can’t save a snap-lid soup cup in a backpack. Your goal is simple: keep liquids sealed, upright, and buffered from dry foods.
Leak-proof packing system you can copy
-
Use screw-top containers for liquids.
-
Pack liquids upright in the center.
-
Put a small towel/napkin under liquids (drip catcher).
-
Separate bread and dry snacks into a pouch.
Practical tips
-
Do the 10-second shake test at home (water inside, shake, check).
-
Add a small secondary bag around cut fruit.
-
Keep wet items away from paper wrappers.
Real-life example: A family ended lunchtime spills by switching to screw-top containers and center-packing liquids with a small towel underneath.
Can insulated children’s lunch bags help with hot lunches?
Direct answer: Somewhat—but the container matters more than the bag. Use a pre-warmed insulated food jar inside insulated children’s lunch bags for the best result.
insulated children’s lunch bags
Expanded explanation: Hot foods cool over hours. A tight, insulated jar holds heat far better than a soft bag alone. If your school lunch period is late, a jar is the difference between “comforting” and “lukewarm.”
Hot lunch setup that actually works
-
Preheat the food jar with hot water for 5 minutes.
-
Fill with hot food and seal tightly.
-
Put the jar in the center of the bag with a small towel to prevent tipping.
Practical tips
-
Don’t pack hot and cold items touching each other.
-
Choose heat-friendly foods (soups and pasta hold heat best).
-
Teach careful opening to prevent spills.
How to pack insulated children’s lunch bags safely (a simple HowTo)
Direct answer: Pack like a “three-layer stack” so food stays cold, uncrushed, and easy to find.
Expanded explanation: Many lunch failures happen from squeezing—not temperature. A good layout protects both.
Crush-safe layout for insulated children’s lunch bags
-
Base layer: heaviest container (stable foundation)
-
Middle layer: main meal container (snug fit)
-
Top layer: soft items + cold source on top for chilled lane
| Item | Best container | Best position | What it means for you |
|---|---|---|---|
| Sandwich | rigid sandwich box | middle | keeps shape |
| Berries | hard cup with lid | top | fewer bruises |
| Crackers | small hard container | side/top | less “crumb dust” |
| Yogurt | leakproof cup | between cold sources | better chill |
Practical tips
-
Bananas go along the side wall, not underneath containers.
-
Chips belong in a hard container, not a thin bag.
-
If using two cold sources: go top + side to stabilize.
Cleaning SOP for insulated children’s lunch bags (odor-proof routine)
Direct answer: Wipe daily, dry fully, deep clean weekly. Drying is the biggest odor reducer.
insulated children’s lunch bags
Expanded explanation: Most odors come from moisture trapped overnight. If you close the bag while damp, the smell returns fast.
5-minute daily cleaning SOP for insulated children’s lunch bags
-
Empty crumbs and remove packs/containers.
-
Wipe liner with mild soap + warm water.
-
Wipe corners and zipper seams (crumb traps).
-
Wipe again with clean water.
-
Air-dry fully with the zipper open.
| Step | Time | Tool | What it means for you |
|---|---|---|---|
| Crumb removal | 30 sec | cloth/mini brush | fewer odors and pests |
| Liner wipe | 2 min | soapy cloth | removes sticky residue |
| Corner + zipper wipe | 1 min | cloth | stops “mystery smells” |
| Full air-dry | passive | open bag | biggest odor reducer |
Real-life example: A family ended recurring smells by adopting a rule: “bag open on the counter after school.”
insulated children’s lunch bags
Insulated children’s lunch bags vs hard lunch box: what should you choose?
Direct answer: If lunch gets warm, upgrade insulated children’s lunch bags and cold sources. If lunch gets crushed, add a hard inner box—or use both.
Expanded explanation: Many families end up with the best hybrid: hard inner box for structure inside insulated children’s lunch bags for temperature control.
| Your main problem | Best move | Why it works | What it means for you |
|---|---|---|---|
| Warm dairy | insulated bag + two cold sources | better chill stability | fewer “off taste” complaints |
| Crushed lunch | hard inner box | structure protection | better presentation |
| Leaks | better containers + center packing | containers matter most | less laundry |
| Heavy backpack | soft structured bag | lighter carry | easier daily use |
How to test insulated children’s lunch bags at home before school starts
Direct answer: One thermometer + one trial day can prevent weeks of wasted lunches.
insulated children’s lunch bags
Expanded explanation: Testing turns guesswork into a repeatable routine.
Simple temperature test (no lab needed)
-
Pack a normal chilled lunch (yogurt + cheese + fruit).
-
Add two cold sources in your planned layout.
insulated children’s lunch bags
-
Leave the bag closed for the same number of hours as a school morning.
-
Check the center of the most perishable item at “lunchtime.”
-
If it trends warm: add cold mass, reduce air gaps, or switch lunch lanes.
2025 developments and trends in insulated children’s lunch bags
Trend overview: In 2025, parents are buying less “cute-first” and more routine-first. That means lunch bags designed for quick wipe-downs, stand-up packing, and real container fit. You also see more demand for clear material statements and kid-appropriate durability.
insulated children’s lunch bags
Latest progress snapshot
-
More structured designs: fewer crushed lunches in tight backpacks
-
More wipe-clean, seam-smart liners: faster cleanup and fewer lingering smells
-
More “system thinking”: bag + cold sources + containers + routine
-
More material transparency: families want clearer safety documentation expectations
insulated children’s lunch bags
Market insight you can use: The best insulated children’s lunch bags are the ones your child can use independently—open, pack, close, carry, and clean with minimal help.
Common questions (FAQ)
Q1: Do insulated children’s lunch bags keep food cold all day?
They can slow warming, but chilled perishables usually need cold sources. For longer school mornings, two cold sources are more reliable than one.
Q2: How many ice packs should I use in insulated children’s lunch bags?
Use one cold source for short days and two cold sources for standard or long days—especially for dairy and cut fruit.
Q3: How do I stop insulated children’s lunch bags from smelling?
Wipe the liner the same day, then dry the bag fully open. Drying is the biggest odor reducer.
Q4: What size is best for elementary school?
A medium structured bag that fits a flat main container plus two cold sources without squeezing is usually the sweet spot.
Q5: Can insulated children’s lunch bags work for hot food?
Yes, but hot food should go in an insulated jar. The jar holds heat; the bag mainly protects and stabilizes.
Q6: What’s the fastest way to avoid buying the “wrong” lunch bag?
Run the 2-minute fit test and do one at-home temperature trial before the school year starts.
Summary and recommendations
If you want fewer wasted lunches, treat insulated children’s lunch bags as a system: the right bag, the right cold sources, sealed containers, smart packing order, and a simple cleaning routine. Your best “2025-proof” setup is a structured bag that fits your containers snugly, supports two cold sources for perishables, and wipes clean fast.
What to do next (simple CTA)
-
Choose your child’s lunch lane for most school days.
-
Standardize one container set that fits your bag cleanly.
-
Use the ice pack planner and lock in a top + side placement.
-
Adopt the daily rule: wipe + fully air-dry.
-
Run one at-home test day—and then repeat the winning routine all semester.
About Tempk
At Tempk, we apply practical cold-chain thinking to everyday temperature control: reduce heat gain, reduce warm “dwell time,” and build routines people actually follow. That same mindset helps families choose insulated children’s lunch bags that keep lunches fresher, cleaner, and easier to manage—without adding complexity to your morning.
Action: If you want a standardized school-lunch SOP (by drop-off time, lunch time, and climate), we can help you turn your schedule into a simple packing routine.
Small Insulated Bag: 2025 Buyer & Use Guide
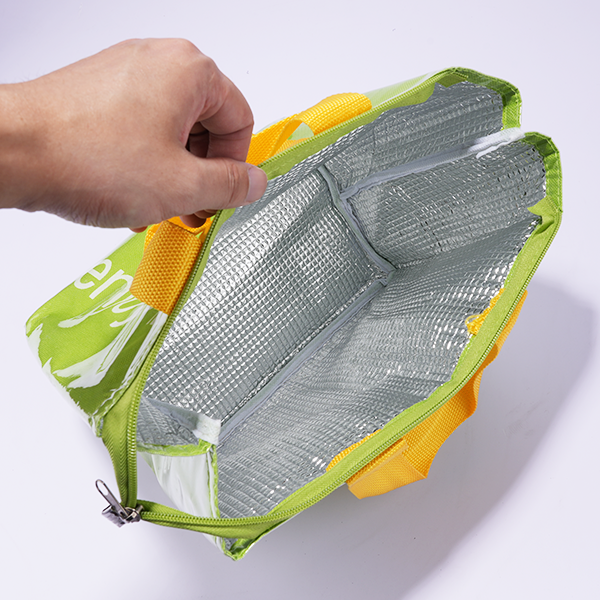
Small Insulated Bag: How Do You Choose One?
A small insulated bag is only “good” if it buys you safe, predictable time outside cold storage. Food-safety guidance often uses the 2-hour rule for perishables, and 1 hour when it’s above 90°F (32°C).
Updated December 18, 2025, this guide helps you choose, pack, and validate a small insulated bag so your items arrive tasting right and handled more safely.
This guide will help you:
-
Choose a small insulated lunch bag that fits real containers (no bulging zippers)
small insulated bag
-
Compare a leakproof small insulated bag without falling for marketing words
small insulated bag
-
Pack a small insulated bag to stay cold longer using the “Cold Sandwich” method
small insulated bag
-
Pick cold sources (gel vs phase-change vs ice) without freezing sensitive items
small insulated bag
-
Validate a small insulated bag for delivery with a simple 3-run temperature test
small insulated bag
How does a small insulated bag keep food cold or warm?
A small insulated bag works when it blocks heat flow, limits air exchange, and reduces “empty air” inside the bag. If the zipper leaks, warm air sneaks in and your cooling disappears fast. If the bag is half empty, air moves around like a fan and speeds warming. Your goal is simple: tight, sealed, and well-packed—that’s where real hold time comes from.
small insulated bag
In plain terms, insulation is like a winter jacket. But air gaps are like leaving the jacket unzipped. When you treat your small insulated bag like a sealed container, it performs better on the same route. When you treat it like a tote you keep opening, it loses quickly.
small insulated bag
What matters more: zipper seal or insulation in a small insulated bag?
Zippers and seams are the weak points in almost every small insulated bag. Even thick insulation fails if the closure leaks air. A smooth zipper also stops “half-closed” mistakes during busy days.
small insulated bag
| Performance factor | What to check | 10-second test | What it means for you |
|---|---|---|---|
| Zipper seal | Closes flat, no gaps | Close and press: feel air movement | Better real-world hold time |
| Wall insulation | Even thickness at corners | Pinch corners vs flat panels | Fewer hot spots at edges |
| Liner | Smooth and wipeable | Wipe with damp tissue | Less odor, faster cleaning |
| Shape | Holds structure | Set it down empty | Fewer air pockets and spills |
Practical tips you can use right now
-
Don’t overstuff: overstuffing creates zipper gaps and shortens bag life.
small insulated bag
-
Check corners first: corners are common leak points for heat and liquid.
small insulated bag
-
One-hand zip rule: if it snags, you will leave it partly open during real use.
small insulated bag
Real-world case: A parent switched to a smoother zipper track and stopped accidental “half-closed” commutes.
small insulated bag
What size small insulated bag fits your real containers?
The right small insulated bag is the smallest one that fits your items with minimal empty space. Empty space is not “extra room.” It is warm air you carry for free, and it speeds temperature change.
small insulated bag
If you go too small, you crush items or block the zipper. If you go too large, you carry heat inside the bag.
small insulated bag
Most “small” options commonly land in practical ranges like ~5–15 L, which usually covers one to two meals or compact errands.
small insulated bag
The secret is matching shape to your containers, not chasing liters. A tall bag fits bottles. A wide bag fits flat meal boxes.
small insulated bag
The 60-second “Fit + Seal” test for a small insulated bag
This decision tool prevents the most common mistake: buying a bag that almost closes.
| Step | What you do | Pass condition | What it means for you |
|---|---|---|---|
| 1 | List your top 3 use cases | You know your “daily load” | Less wrong-size risk |
| 2 | Layout items on a table | Items match real packing | Fewer surprises |
| 3 | Add your cold source | Pack-out is realistic | Better hold time planning |
| 4 | Close the bag | Closes flat, no bulge | Fewer zipper gaps |
If it closes flat and tight, you picked a high-efficiency small insulated bag size.
small insulated bag
Practical tips for sizing (without overthinking)
-
Bring your real container: it’s the fastest way to avoid a wrong-size bag.
small insulated bag
-
Avoid too many pockets: extra seams can become heat paths and reduce insulation.
small insulated bag
-
Pick shape first: tall for bottles, wide for flat boxes, structured for delivery.
small insulated bag
Real-world case: A courier reduced complaints by switching to an upright structured small insulated bag that prevented tipping and kept the zipper fully closed.
small insulated bag
Which materials make a leakproof small insulated bag easier to clean?
A leakproof small insulated bag is a 3-layer system: durable outside, insulating middle, wipe-clean inside. If any layer fails, performance drops or cleaning becomes a daily headache.
small insulated bag
In 2025, the most reliable builds focus on stable insulation, wipe-clean liners, and durable shells.
small insulated bag
Think of it like this: the outer shell is armor, the middle layer is a temperature shield, and the liner is your cleanup layer. When the liner wipes in one pass, you keep using the bag daily. When it traps stains, you stop trusting it.
small insulated bag
Quick lining checklist for a leakproof small insulated bag
| Material area | Strong choice | Risky choice | What it means for you |
|---|---|---|---|
| Inner liner | Smooth, sealed, wipeable | Fabric liner with seams | Faster cleaning, less odor |
| Base | Reinforced, firm | Soft-only bottom | Fewer spills and tipping |
| Stitching | Protected seams | Exposed needle holes | Less leaking over time |
small insulated bag
Practical tips that prevent leaks and smells
-
Seafood or meat: pick a liner that wipes clean in one pass.
small insulated bag
-
Soups and sauces: prioritize a stable base and a zipper that closes without snagging.
small insulated bag
-
Odor control: choose simple interiors with fewer folds that trap moisture.
small insulated bag
Real-world case: A meal-prep user switched to a reinforced-base, leak-resistant style and stopped seeing “mystery dampness.”
small insulated bag
How do you pack a small insulated bag for maximum hold time?
Packing is the hidden performance multiplier for a small insulated bag. Even premium insulation struggles if the bag is half empty or repeatedly opened. Your goal is a tight, layered stack that reduces air and protects the cold source from melting too fast.
small insulated bag
Use a repeatable pack-out recipe. Don’t improvise every morning. When you pack the same way, your results become predictable. That predictability is what reduces waste, refunds, and “why is this warm?” arguments.
The “Cold Sandwich” method for a small insulated bag
| Packing step | What you do | Why it works | What it means for you |
|---|---|---|---|
| Pre-chill | Cool bag + contents 10–15 min | Less “startup warming” | Longer hold with same ice |
| Tight pack | Reduce air gaps | Air speeds warming | Better real-world results |
| Top pack | Add a pack above items | Heat often enters from top | More stable temperature |
small insulated bag
Cold source choices (gel vs phase-change vs ice)
A thin, well-placed cold source can beat a large one placed poorly. Gel packs are routine and predictable. Phase-change packs hold closer to a target temperature, which helps when “too cold” is a problem. Ice cools strongly but needs a leakproof liner.
small insulated bag
Mini “Hold-Time” estimator (simple, practical)
Use this rule-of-thumb to set expectations. Start with 60 minutes for a packed, sealed small insulated bag with one frozen gel pack. Add +30 minutes if you pre-chill and fill gaps. Subtract -30 minutes if you open the bag more than twice. Subtract -30 minutes if the bag sits in a hot car.
small insulated bag
Hot food tip: prevent soggy quality without losing heat
Hot food success is staying hot while managing steam. Some food safety guidance recommends holding hot food around 140°F (60°C) or above if it won’t be served soon.
small insulated bag
Keep food sealed to prevent spills, then create a tiny vent path so steam doesn’t destroy texture. An absorbent pad also helps control condensation and smell.
small insulated bag
Real-world case: A restaurant improved ratings after adding a simple “vent rule” and absorbent pads inside each small insulated bag.
small insulated bag
How do you validate a small insulated bag for delivery or medicine?
Validation means you stop guessing and start predicting performance. You do not need a lab. You need consistent steps, basic measurement, and three real scenarios. That’s how you decide whether a small insulated bag can handle your route and weather.
small insulated bag
If you scale delivery, validation protects your brand. If you carry sensitive items, validation protects trust. Either way, you want a simple plan your team will actually do.
A simple 3-run validation plan for a small insulated bag
Run the same pack-out each time.
| Test | Duration | What to record | What it means for you |
|---|---|---|---|
| Indoor baseline | 60 min | Start / mid / end temp | Shows best-case hold |
| Warm stress | 30–60 min | Peak temp | Shows worst-case risk |
| Real route | 60–120 min | Time + temp | Shows true performance |
small insulated bag
Practical tips that make validation useful
-
Test your worst day: summer afternoon is your truth test.
small insulated bag
-
Change one variable: don’t change bag and packs at the same time.
small insulated bag
-
Save results: your notes become a simple SOP for staff and repeat use.
small insulated bag
Real-world case: A small grocer improved consistency after testing three pack-outs and standardizing one summer setup.
small insulated bag
Medicine and vaccines: use a small insulated bag carefully
For medicine, follow product instructions and use qualified temperature control. For vaccines, guidance commonly emphasizes qualified containers, temperature monitoring devices, and limited transport windows.
small insulated bag
Treat a small insulated bag as a temporary transport tool, not a refrigerator.
small insulated bag
How do you keep a small insulated bag clean and odor-free?
Cleaning is performance maintenance for a small insulated bag. Odor and moisture usually come from tiny leaks and trapped condensation. If you handle it quickly, the bag stays fresh and lasts longer. A simple routine beats harsh chemicals.
small insulated bag
Always dry fully with the bag open. Trapped moisture creates odor faster than food does. That one habit protects both hygiene and lifespan.
small insulated bag
The 3-minute reset routine (daily hygiene)
-
Wipe immediately after use, even if it looks clean.
-
Dry fully with the zipper open.
-
Weekly deep clean: mild soap wipe, rinse wipe, full dry.
small insulated bag
| Problem | Quick fix | Prevention | What it means for you |
|---|---|---|---|
| Food smell | Wipe + air dry | Clean same day | Bag stays pleasant daily |
| Stains | Mild soap wipe | Use sealed containers | Less discoloration |
| Moisture | Dry open + towel corners | Store open | Prevents musty odor |
small insulated bag
Interactive tool: Small Insulated Bag Fit Score (0–20)
Score each item 0–2 (0 = no, 2 = yes). Add your total.
small insulated bag
-
Your container fits with room to zip easily
-
Bag stands upright when filled
-
Liner wipes clean in under 30 seconds
-
Zipper closes smoothly with one hand
-
Base is stable and not floppy
-
Insulation feels even at corners
-
Practical place for ice packs
-
Handles leaks without soaking outer fabric
-
Carry comfort matches your commute
-
Dries quickly after cleaning
Score guide:
-
16–20: strong match for daily use
-
10–15: good, but test packing and cleaning before scaling
-
0–9: keep looking (it will frustrate you)
small insulated bag
2025 latest small insulated bag developments and trends
In 2025, small insulated bag design is becoming more workflow-friendly. People want bags that clean fast, hold shape, and pack without effort. Reuse and repeatability matter more than decorative pockets.
small insulated bag
Latest progress snapshot
-
Better shape retention: more bags stand upright and pack faster.
small insulated bag
-
Easier cleaning: liners trend toward faster wipe and quicker drying.
small insulated bag
-
Validation-first buying: teams test before scaling delivery routes.
small insulated bag
-
More monitoring for sensitive items: small loggers are becoming normal in higher-risk use.
small insulated bag
Market insight: the best small insulated bag is the one you can use correctly every day, under pressure.
small insulated bag
Frequently Asked Questions
Q1: How long does a small insulated bag keep food safe?
It depends on heat, air space, and packs. Many teams follow the 2-hour rule, and 1 hour above 90°F (32°C).
small insulated bag
Q2: What size is considered a small insulated bag?
Many practical “small” setups sit around 5–15 L, sized for meals or compact groceries.
small insulated bag
Q3: What makes a leakproof small insulated bag truly leakproof?
A wipeable liner, protected seams, and a firm base reduce soaking, odor, and slow leaks.
small insulated bag
Q4: Why does my small insulated bag make hot food soggy?
Steam is trapped. Keep containers sealed, add a tiny vent path, and use an absorbent pad.
small insulated bag
Q5: What’s the easiest way to test a small insulated bag at home?
Run three tests—indoor baseline, warm stress, and real route—then record start/mid/end temperatures.
small insulated bag
Q6: Can I use a small insulated bag for medicine?
It can help for short transport, but follow product instructions and avoid treating it like a refrigerator.
small insulated bag
Summary and recommendations
A small insulated bag performs best when it fits your containers snugly, seals tightly, and packs with minimal air space. Zipper quality and wipe-clean liners often matter more than extra pockets. Use the Cold Sandwich method, pick the right cold source, and minimize openings to protect hold time. Validate with a simple 3-run test if you plan to deliver or scale.
Next step (CTA)
Pick one use case (work lunch, groceries, delivery, or medicine). Do the Fit + Seal test, then run the 3-run validation plan on your hottest realistic day. Save the best configuration as your “summer pack-out,” and your future self will thank you.
small insulated bag
About Tempk
At Tempk, we build practical temperature-control packaging systems for daily use and last-mile workflows. We focus on repeatable pack-outs, durable materials, and easy-clean interiors because those details decide outcomes after hundreds of cycles. We also help teams validate real routes with simple tests, so decisions are based on results, not guesswork. If you want to standardize a small insulated bag program, we’ll help you match container sizes, route time, and cleaning SOPs to a setup your team can run consistently.
Call to action: Share your container sizes, route time, and “worst-day” weather scenario. We’ll outline a simple bag spec and a pack-out SOP you can pilot quickly.
Lunch Bag Insulated: How Do You Keep Food Safe?
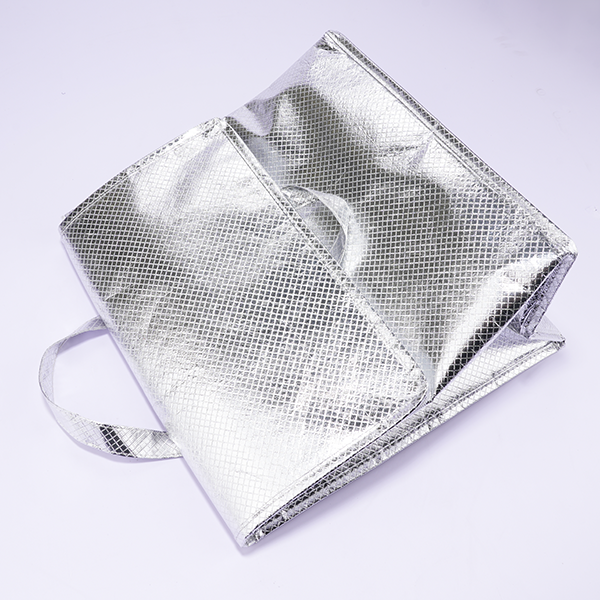
Lunch Bag Insulated: How Do You Keep Food Safe?
A lunch bag insulated setup keeps your food colder longer, protects taste, and reduces leaks—but only if the seal, liner, and pack-out are right. Small details like zipper gaps and liner seams often decide whether lunch stays fresh for 2 hours or 6+ hours.
Most people see 3–6 hours of reliable cooling when they start with cold food and add at least one ice pack.
This article will answer for you:
-
How a lunch bag insulated design slows warming (plain language)
lunch bag insulated
-
How long a lunch bag insulated can keep food cold in real routines
lunch bag insulated
-
Which lunch bag insulated size fits your containers without wasted space
lunch bag insulated
-
The best ice pack layout for even cooling and fewer warm spots
lunch bag insulated
-
How to pack a lunch bag insulated without leaks using simple zones
lunch bag insulated
-
2025 trends: better liners, smarter layouts, and durable reusability
lunch bag insulated
What Does a Lunch Bag Insulated Design Actually Do?
A lunch bag insulated bag slows heat transfer between outside air and your food.
lunch bag insulated
Think of it like a jacket for an ice cube. The jacket helps, but a half-open zipper ruins the effect.
A strong lunch bag insulated system works when three things happen together: insulation slows heat, a cold source absorbs heat, and the bag seals so warm air stops swapping in.
lunch bag insulated
If the seal is weak, a thick bag can still warm fast.
lunch bag insulated
Lunch bag insulated “mini checklist” (30 seconds)
-
Cold source: gel pack, frozen bottle, or fridge-cold food
-
Seal: zipper closes fully, corners don’t gape
-
Fit: less empty air space inside
| What decides performance? | Strong choice | Weak choice | What it means for you |
|---|---|---|---|
| Seal quality | tight zipper, minimal gaps | zipper corner gaps | warm air sneaks in fast
lunch bag insulated |
| Cold source | 1–2 gel packs | none | hours of difference
lunch bag insulated |
| Empty space | mostly full | lots of air | air warms faster than food
lunch bag insulated |
Practical tips and advice
-
If you commute: prioritize zipper seal over “extra thickness.”
lunch bag insulated
-
If you carry messy foods: choose a wipe-clean liner with sealed seams.
lunch bag insulated
-
If you want fewer disappointments: keep the bag closed until you eat.
lunch bag insulated
Practical example: If your bag looks thick but warms quickly, the usual culprit is a zipper corner gap—not “not enough padding.”
lunch bag insulated
How Long Can a Lunch Bag Insulated Keep Food Cold?
In real life, many people get 3–6 hours when they combine a lunch bag insulated bag with properly chilled food and at least one ice pack.
lunch bag insulated
Without ice packs, warming happens much faster, especially in summer or hot cars.
lunch bag insulated
Your hold time depends on outside heat, how often you open the zipper, how full the bag is, and ice pack placement.
lunch bag insulated
Lunch Safety Risk Score (interactive)
Give yourself 1 point for each “Yes”:
-
I pack dairy, meat, seafood, or leftovers.
-
My bag sits near sun or in a warm car.
-
I open the bag more than once before lunch.
-
I use only one small ice pack (or none).
-
I often leave extra empty space inside.
Score meaning
-
0–1: low risk (basic pack-out usually works)
-
2–3: medium risk (upgrade cold sources + reduce openings)
-
4–5: high risk (two cold sources + stricter routine)
| Factor | Strong choice | Weak choice | What it means for you |
|---|---|---|---|
| Openings | open once at lunch | snack browsing | warm air refills repeatedly |
| Storage | shade / cool spot | direct sun / hot car | temperature spikes happen fast
lunch bag insulated |
| Fill level | snug and full | half-empty | extra air warms quickly
lunch bag insulated |
Practical tips and advice
-
For 3–6 hours: use one medium or two slim packs.
lunch bag insulated
-
For long days: add a second pack and avoid sun exposure.
lunch bag insulated
-
For best results: keep it closed and shaded.
lunch bag insulated
Practical example: A tighter, better-sealed lunch bag insulated often beats a larger bag with more empty air space.
lunch bag insulated
Which Lunch Bag Insulated Size Should You Choose?
The best lunch bag insulated size is the smallest one that fits your usual meal plus ice packs. Bigger bags create extra air space, and extra air warms quickly.
lunch bag insulated
Container-first sizing saves money. Measure your most-used container before you buy.
lunch bag insulated
Lunch Bag Insulated Fit Calculator (interactive)
Answer these:
-
How many containers? 1 / 2 / 3+
-
Need a drink inside? yes / no
-
Ice packs? 1 / 2 / 3+
lunch bag insulated
-
Need upright carrying? yes / no
lunch bag insulated
Quick result
-
1 container + 1 pack: compact lunch bag insulated
lunch bag insulated
-
2 containers + 2 packs: medium lunch bag insulated
lunch bag insulated
-
3+ containers + drink: tall/box-style lunch bag insulated
lunch bag insulated
| What you pack | Bag shape that works | Why | What it means for you |
|---|---|---|---|
| Bento / flat meal prep | wide + shallow | easy stacking | less crushing
lunch bag insulated |
| Tall salad jars | tall + structured | upright stability | fewer leaks
lunch bag insulated |
| Many small snacks | box-style | separation | better texture
lunch bag insulated |
Practical tips and advice
-
If you carry glass: choose structured walls so the bag doesn’t collapse.
lunch bag insulated
-
If you pack sandwiches: flatter shapes reduce squish.
lunch bag insulated
-
If you bike or commute: slimmer bags carry easier and spill less.
lunch bag insulated
Practical example: Oversized bags “fit everything,” but lunch can warm faster due to extra air space.
lunch bag insulated
Lunch Bag Insulated Features That Decide Real Performance
Most people over-focus on thickness and under-focus on sealing. A thick wall with a leaky zipper corner loses the advantage.
lunch bag insulated
Here’s what matters most for daily use: zipper track, reinforced base, wipe-clean liner, and fewer seam leak points.
lunch bag insulated
Feature checklist for a lunch bag insulated purchase
-
Zipper closes smoothly and fully
-
Corners don’t leave gaps
-
Base is flat and stable
-
Liner is wipeable and seam-sealed
| Feature | Looks impressive | Actually matters | What it means for you |
|---|---|---|---|
| Extra thickness | yes | sometimes | helps, but not alone
lunch bag insulated |
| Strong zipper track | not flashy | yes | keeps warm air out
lunch bag insulated |
| Seam-sealed liner | hidden detail | yes | stops odor after spills
lunch bag insulated |
Practical tips and advice
-
If you open the bag often: choose easier zippers and simpler layouts.
-
If spills happen: pick fewer stitched seams inside.
lunch bag insulated
-
If you want durability: inspect handles, base reinforcement, and corners.
Practical example: A bag that’s easy to clean gets used more. A hard-to-clean bag gets abandoned.
lunch bag insulated
How to Pack a Lunch Bag Insulated Without Leaks
Leaks and soggy food are usually packing problems, not insulation problems.
lunch bag insulated
A clean pack-out uses three zones: cold zone, dry zone, and a secure zone for liquids.
lunch bag insulated
The simplest method is the 3-layer pack: bottom (ice + stable base), middle (perishables), top (dry foods + top ice).
lunch bag insulated
Lunch bag insulated “3-zone” layout
| Zone | What goes here | Placement | What it means for you |
|---|---|---|---|
| Cold zone | dairy, protein, cut fruit | center | stays cold longest |
| Dry zone | bread, chips, crackers | top or separate pocket | avoids sogginess |
| Secure zone | soup, sauces | corner, upright | fewer disasters |
Practical tips and advice
-
Leak test containers: flip them upside down once at home.
lunch bag insulated
-
Don’t pack warm food and hope: cool it first, then pack.
lunch bag insulated
-
Use napkins as buffers: they reduce rattling and small leaks.
lunch bag insulated
Practical example: Soup next to crackers fails fast. A corner “liquid zone” and snug fit prevents repeats.
lunch bag insulated
Best Ice Packs for a Lunch Bag Insulated Routine
Ice pack layout often matters more than ice pack brand. A flat gel pack that matches your bag shape wastes less space.
lunch bag insulated
A simple rule works: cold on top + cold on the side for more even cooling.
lunch bag insulated
Then reduce empty space so warm air can’t “float around.”
lunch bag insulated
Ice pack placement that actually works
| Goal | Placement | Works best for | What you’ll notice |
|---|---|---|---|
| Even cooling | top + side | mixed lunches | fewer warm spots
lunch bag insulated |
| Protect delicate food | side near salad | greens, fruit | less sogginess |
| Longer days | top + side + tighter fill | 6+ hours | more consistent temps
lunch bag insulated |
Practical tips and advice
-
Short day: 1 small/medium gel pack.
-
Normal day: 1 medium or 2 slim packs.
lunch bag insulated
-
Long day: 2 packs + strong seal + shade.
lunch bag insulated
Practical example: If your top zone warms first, add a top pack before buying a new bag.
lunch bag insulated
Lunch Bag Insulated for Hot Food: Safe Holding Tips
Yes, a lunch bag insulated bag can slow cooling of hot foods.
lunch bag insulated
But hot food success depends more on the container than the bag. Moisture and steam can also create odor if you don’t clean the liner.
lunch bag insulated
The no-guess hot lunch routine
-
Use a sealed hot container (thermal jar works best).
-
Preheat the container with hot water for a few minutes.
-
Add piping hot food and seal tight.
-
Put it in your lunch bag insulated mainly for stability.
| Method | Best for | Weak point | What it means for you |
|---|---|---|---|
| Thermal jar + lunch bag insulated | soups, chili | needs preheat | strongest hot hold |
| Hot food in regular container | short window | cools fast | risky for long gaps |
Practical tips and advice
-
Avoid “lukewarm” lunch plans: they disappoint and create risk.
-
Use a towel under the container: it catches condensation.
lunch bag insulated
-
Clean the bag the same day: steam residue becomes odor.
Practical example: If you carry hot food daily, choose a wide opening so corners wipe easily.
lunch bag insulated
How to Clean a Lunch Bag Insulated Bag (Fast)
Cleaning is what makes a lunch bag insulated system sustainable. A bag that dries fast and wipes clean gets used.
lunch bag insulated
A bag that stays damp gets smelly.
The “2-minute daily reset”
-
Empty crumbs and wrappers.
-
Wipe the liner with mild soap and warm water.
-
Dry fully with the bag open.
-
Never store it zipped when wet.
| Cleaning issue | What causes it | Fix | What it means for you |
|---|---|---|---|
| Odor | trapped moisture | dry fully open | fresher bag |
| Mold spots | wet seams | wipe + airflow | longer life |
| Sticky liner | sugary spills | same-day wipe | easier maintenance |
Practical tips and advice
-
Baking soda overnight helps for mild odors.
-
Corner wipe habit prevents “mystery smells.”
-
Leakproof containers reduce cleaning work more than any spray.
lunch bag insulated
Practical example: Odor usually comes from a small spill that reached a corner seam.
lunch bag insulated
Lunch Bag Insulated by Scenario: Kids, Work, Travel
The “best” lunch bag insulated setup changes with your day. Kids open bags more. Workers face heat and rough handling. Travel days include delays.
Scenario chooser (interactive)
Pick your main use:
-
Kids school lunch: easy zipper + slim packs + simple layout
-
Office work: structured shape + two-pack layout + fast cleaning
-
Outdoor work: reinforced base + tougher fabric + shade routine
-
Travel day: extra cold sources + compact air space + fewer perishables
| Scenario | Biggest risk | Best feature | What it means for you |
|---|---|---|---|
| School | frequent opening | simple layout | better compliance |
| Office | long hold time | seal + 2 packs | stable lunch |
| Outdoor | heat exposure | capacity + shade | safer routine |
| Travel | delays | extra packs | fewer surprises |
Practical tips and advice
-
Split snacks: reduce how often you open the main compartment.
-
Store in shade: even the best insulation hates direct sun.
lunch bag insulated
-
Use a one-week test: adjust pack placement before replacing the bag.
lunch bag insulated
Practical example: Repeated “snack opens” can wreck performance. A separate pocket fixes it fast.
2025 Latest Developments and Trends in Lunch Bag Insulated Design
In 2025, lunch bag insulated products are improving in ways you actually feel: better leak resistance, smarter internal layouts, comfort-focused carry, and more durable reusability.
lunch bag insulated
The trend is less about “puffy insulation” and more about repeatable routines.
Latest progress snapshot
-
Smarter layouts: dividers, bottle sleeves, utensil pockets
lunch bag insulated
-
Better liners: easier-clean surfaces that resist stains and odor
lunch bag insulated
-
Compact performance: less bulk for similar hold time
lunch bag insulated
Market insight: people buy fewer “cheap replacements” and choose fewer, better items that last.
lunch bag insulated
That’s good for your budget and your routine.
Frequently Asked Questions
Q1: How long can a lunch bag insulated keep food cold?
Many people get about 3–6 hours with chilled food plus at least one ice pack.
lunch bag insulated
For longer days, use two packs and keep it shaded.
lunch bag insulated
Q2: How many ice packs do I need in a lunch bag insulated?
For 3–6 hours, one medium or two slim packs often works well.
lunch bag insulated
For hot weather or long shifts, add another cold source.
Q3: Why does my lunch bag insulated warm up quickly?
Common causes are zipper gaps, too much empty space, warm food going in, or weak ice placement.
lunch bag insulated
Tight sealing and smarter placement fix most cases.
Q4: What’s the best lunch bag insulated size for everyday work?
A medium size that fits one main container + snacks + at least one pack is usually ideal. Use the smallest size that closes easily.
lunch bag insulated
Q5: How do I pack a lunch bag insulated without leaks?
Use three zones (cold, dry, secure), and keep liquids in a corner zone.
lunch bag insulated
Always leak-test containers once.
lunch bag insulated
Q6: Can a lunch bag insulated work for hot foods?
Yes, but use a sealed hot container and clean the bag the same day to avoid odor.
lunch bag insulated
Summary and Recommendations
A lunch bag insulated bag works best when it matches your real routine: your containers, your time to lunch, and your heat exposure. Focus on seal quality, right sizing, and an easy-clean liner first.
lunch bag insulated
Then upgrade performance with smart ice placement and less empty air space.
lunch bag insulated
Action plan (clear CTA)
-
Measure your main container and pick the smallest lunch bag insulated that closes cleanly.
lunch bag insulated
-
Add one slim ice pack on top and one on the side for longer days.
lunch bag insulated
-
Keep it closed and shaded until you eat.
lunch bag insulated
-
Do a 3-day test before you buy anything new.
About Tempk
At Tempk, we apply temperature-control thinking to real-world handling—where small details decide outcomes.
lunch bag insulated
We focus on practical, repeatable systems: right-sized insulation, reliable cold sources, and packing steps that reduce daily mistakes.
lunch bag insulated
Our goal is to help you build a lunch bag insulated routine that performs on your busiest days, not just in perfect conditions.
Next step (CTA): Tell us your schedule (hours until lunch), environment (office, school, outdoor), and container size—we’ll recommend a lunch bag insulated configuration and pack-out layout you can follow every day.