Insulated Lunch Bags Women: 2025 Smart Guide
Insulated Lunch Bags Women: 2025 Smart Guide
Insulated Lunch Bags Women: How to Choose in 2025?
If you’re shopping insulated lunch bags women actually use in real life, you’re not just buying a cute accessory. You’re buying a daily system to keep food fresher, prevent spills, and make your day feel more organized. The best insulated lunch bags women options are the ones you’ll use every day because they are easy to pack, easy to wipe clean, and comfortable to carry.
Here’s the simple truth: insulation helps, but your routine decides results. A bag with a tight zipper, a wipe-clean liner, and a repeatable cold setup will beat a “thicker” bag that leaks air or traps smells.
This article will answer for you:
-
How to choose insulated lunch bags women can carry comfortably all day
-
Which size and shape fits your containers (so you stop crushing food)
-
How to avoid mess with a leakproof insulated lunch bag women can trust
-
When an insulated lunch bag for women with compartments is truly worth it
-
A fast decision tool for best insulated lunch bags women for travel
-
2025 trends: lighter materials, smarter compartments, cleaner liners
Insulated lunch bags women: What should you prioritize first?
For insulated lunch bags women, three priorities matter before anything else: cold control, cleanability, and carry comfort. If one fails, you stop using the bag. And if you stop using it, the “best features” don’t matter.
Think of your lunch bag like a mini fridge you carry. It needs to slow warming, contain moisture, and stay comfortable while you move.
The “3C Rule” for insulated lunch bags women
-
Cold control: insulation + zipper quality + good sealing
-
Cleanability: wipeable liner + fewer seams + odor control
-
Carry comfort: balanced shape + sturdy handle + strap that doesn’t dig
| Priority | What to check | Common problem | What it means for you |
|---|---|---|---|
| Cold control | thick insulation + tight closure | food warms early | wasted meals |
| Cleanability | smooth liner + minimal seams | stains + smells | you stop using it |
| Carry comfort | padded strap + stable base | shoulder fatigue | daily annoyance |
Practical tips and recommendations
-
If your day is 6+ hours, prioritize cold control over extra pockets.
-
If you pack liquids, prioritize leak control over “fashion details.”
-
If you commute, choose a shape that fits your tote or backpack.
Practical case example: A commuter switched from a wide “bucket” style to a slim structured bag and stopped crushing salads inside her work tote.
Insulated lunch bags women: Which size actually works?
Sizing is the fastest win for insulated lunch bags women. Too small and your containers don’t fit. Too large and you carry empty air, which makes cooling less stable and packing more chaotic. A snug fit usually holds temperature better because there’s less warm air inside.
A quick sizing guide you can use today
| Your routine | Best size | Why | Practical meaning for you |
|---|---|---|---|
| Office lunch + drink | Medium | fits one meal set | most versatile |
| Teacher / nurse shift | Large | long hours + snacks | fewer vending runs |
| Gym + lunch combo | Medium–Large | room for protein + ice | better routine |
| Errands + personal lunch | Medium | flexible + stable | less mess |
Practical tips and recommendations
-
Measure your main container footprint before buying.
-
If you carry a bottle daily, look for a bottle pocket or vertical space.
-
Avoid narrow bags that squish fruit and produce.
Practical case example: A user who measured her container before shopping avoided the classic “zipper won’t close” problem.
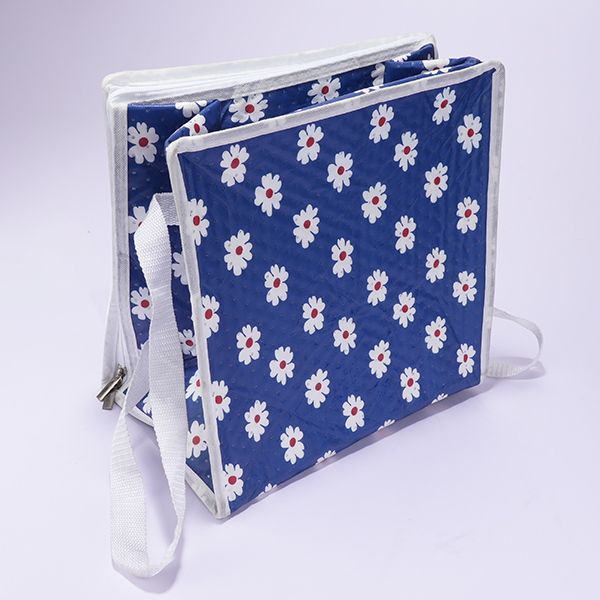
Insulated lunch bags women: Which shape fits real life best?
Many insulated lunch bags women fail because shape is ignored. Shape controls what you can pack, how the bag sits in your tote, and whether it tips and spills during walking.
Shapes that work in daily use
-
Slim vertical: fits in totes/backpacks, stacks containers well
-
Boxy rectangular: best for bento and meal prep boxes, stable base
-
Structured tote style: looks office-friendly, but must have a firm base
-
Round bucket: holds volume, but organization can be frustrating
| Shape | Best for | Risk | Practical meaning for you |
|---|---|---|---|
| Slim vertical | commuting | limited wide containers | neat and portable |
| Boxy rectangular | meal prep | slightly bulky | easiest packing |
| Structured tote | style + light meals | crushed food if soft | needs structure |
| Round bucket | snacks + drinks | tipping | more spills |
Practical tips and recommendations
-
If you carry salads, choose boxy rectangular with a flat base.
-
If you carry stacked rice bowls, choose vertical with height.
-
If you carry pastries, avoid soft tote styles that compress.
Practical case example: A bakery lover switched to a structured rectangular bag and stopped crushing croissants on the train.
Insulated lunch bags women: What insulation types matter most?
For insulated lunch bags women, insulation matters, but sealing often matters more. Insulation slows heat movement. Sealing prevents warm air from constantly entering. You need both.
Common insulation constructions you’ll see
-
Foam insulation + wipeable liner: common, practical, easy to maintain
-
Foam + reflective layer: reflects heat, quality varies a lot
-
Multi-layer panels: better hold time, slightly bulkier
-
Hard-panel structure: stable shape, often longer hold time, heavier feel
| Design element | Helps with | Fails when | Practical meaning for you |
|---|---|---|---|
| Thick insulation | longer cool time | zipper leaks air | limited improvement |
| Tight zipper seal | reduces warm air | liner cracks | leaks + odors |
| Structured walls | prevents crushing | too heavy | less daily use |
Practical tips and recommendations
-
If your bag sits in a warm car (even briefly), choose stronger insulation and a tight seal.
-
If you dislike bulky bags, choose medium insulation but high zipper quality.
-
If you pack dairy often, sealing and consistent insulation matter more than extra pockets.
Practical case example: A stronger zipper reduced “warm by lunch” complaints more than adding a second thin insulation layer.
Leakproof insulated lunch bag women trust: How do you prevent leaks and odors?
A leakproof insulated lunch bag women trust is built around two things: a wipe-clean liner and spill-resistant seams. Most lunch bag problems come from tiny spills in corners, condensation pooling, and sauce leaks from lids.
What causes most lunch bag “mystery smell”?
-
micro-spills in corners
-
condensation from cold items
-
sauce leaks from lids
-
crumbs trapped in stitching
Features that actually reduce mess
| Feature | What it does | What to avoid | Practical meaning for you |
|---|---|---|---|
| Seam-reduced liner | stops seep-through | heavy interior stitching | fewer smell issues |
| Flat wipeable liner | fast cleaning | fabric-only interiors | stains + odors |
| Reinforced bottom | prevents tipping | sagging base | fewer spills |
Practical tips and recommendations
-
If you pack soups, add a small absorbent wipe inside the bag.
-
If you pack yogurt or milk, use a secondary pouch as backup.
-
Always air-dry fully—moisture is what feeds odor.
Practical case example: A user eliminated odor buildup by leaving the bag open overnight after wiping, instead of zipping it closed while damp.
Insulated lunch bag for women with compartments: Helpful or hype?
An insulated lunch bag for women with compartments is worth it when it reduces chaos and protects food. But too many compartments can steal space and make cleaning harder. The best layout is simple and fast.
The compartment layout that works for most days
-
Main insulated zone: meal + ice packs
-
Dry pocket: keys, napkins, cards (so food doesn’t touch everything)
-
Bottle pocket: prevents crushing and condensation mess
| Compartment | What to store | Why it helps | Practical meaning for you |
|---|---|---|---|
| Main cold area | containers + ice | stable temperature | consistent performance |
| Dry pocket | keys, cards, utensils | stays clean and dry | less “sauce on my phone” |
| Bottle pocket | water bottle | prevents crushing | protects food |
Practical tips and recommendations
-
If you carry tech or cosmetics, a dry pocket is not optional.
-
If you pack fragile snacks, use a top compartment or separate zone.
-
If you prefer minimalism, choose fewer pockets but larger ones.
Practical case example: A user separated snacks from ice packs and stopped having soggy crackers by afternoon.
Interactive decision tool: Which insulated lunch bags women should buy?
Use this quick tool to choose insulated lunch bags women actually stick with after the first week.
Step 1: Choose your daily scenario
-
Office or hybrid work
-
Long shift (healthcare, teaching, retail)
-
Travel and errands
-
Fitness + work combo
-
School runs + personal lunch
Step 2: Score your “temperature risk” (0–6)
Add 1 point for each “yes”:
-
Lunch sits out longer than 5 hours
-
You live in a hot climate
-
You commute without reliable AC
-
You pack dairy, seafood dishes, or mayo-based foods
-
You pack a cold drink inside
-
Your bag sometimes stays in the car
Score interpretation
-
0–2: medium insulation is usually enough
-
3–4: stronger insulation + better zipper sealing is essential
-
5–6: prioritize structure + higher-performance insulation + an ice-pack routine
Step 3: Pick your best bag style
-
Need organization → two-compartment design
-
Need simplicity → boxy rectangular
-
Need portability → slim vertical
-
Want style-first → structured tote (not floppy)
How do you pack insulated lunch bags women for maximum chill?
Your packout routine is what makes insulated lunch bags women work reliably. Treat it like a repeatable checklist. The goal is stable cooling, fewer openings, and less warm air inside.
HowTo: Pack an insulated lunch bag for a full day
-
Chill your food first (don’t pack warm leftovers).
-
Place one cold source at the bottom or side.
-
Put the main container in the center (avoid wall contact).
-
Add a second cold source on top for higher-risk days.
-
Separate dry snacks in a pocket or top compartment.
-
Zip fully closed and limit “open time.”
-
After use, wipe the liner and air-dry open.
| Packing choice | Why it works | What to avoid | Practical meaning for you |
|---|---|---|---|
| Cold source bottom + top | more even cooling | top-only cooling | fewer warm corners |
| Center container | stable core temp | container against wall | slower warming |
| Separate dry snacks | keeps crisp | snacks next to ice | less sogginess |
Practical tips and recommendations
-
For salads: keep dressing separate until eating.
-
For fruit: use a small container to prevent bruising.
-
For hot meals: don’t trap steam—let food cool slightly before packing to reduce condensation.
Practical case example: A user added a second slim cold pack during summer days and stopped buying takeout because her lunch stayed enjoyable.
Best insulated lunch bags women for travel: What changes on travel days?
Travel adds longer time windows, more movement, and more opening/closing. The best insulated lunch bags women for travel usually have more structure and easier access.
Travel-friendly features that matter
-
Wide opening: fast access, less digging
-
Flat structured base: prevents tipping and crushing
-
Clip loop or luggage-friendly handling: easier movement
-
Simple pockets: organize without stealing space
| Travel feature | Why it helps | Who benefits | Practical meaning for you |
|---|---|---|---|
| Wide opening | fast access | airports, train commutes | fewer spills |
| Structured base | stable containers | busy walking days | less tipping |
| Simple compartments | quick organization | frequent travelers | less chaos |
Practical tips and recommendations
-
Use slim ice packs so you don’t lose container space.
-
Keep snacks in a dry pocket so you don’t open the main cold zone repeatedly.
-
Choose medium structured bags that fit under seats.
Practical case example: A traveler moved snacks to a dry pocket and stopped opening the main compartment. Cooling performance improved noticeably.
How do you clean insulated lunch bags women and avoid smells?
Cleaning decides whether your insulated lunch bags women last two months or two years. The most important rule is simple: dry it fully while open.
The simple cleaning routine
-
Wipe liner with mild soap and water
-
Rinse wipe with a damp cloth
-
Air-dry open (this prevents smell)
-
Spot clean straps and exterior
-
Wash removable sleeves regularly if included
| Habit | Best practice | Bad practice | Practical meaning for you |
|---|---|---|---|
| Daily cleaning | quick wipe | “later” | fewer stains |
| Drying | open overnight | zipped while damp | odor buildup |
| Exterior care | spot clean | harsh machine wash | preserves shape |
Practical case example: A user eliminated lingering smells by switching from “wipe and zip” to “wipe and dry open.”
2025 trends in insulated lunch bags women
In 2025, insulated lunch bags women are becoming more lifestyle-focused and less “utility-only.” Buyers still want performance, but they also demand office-friendly shapes, easier cleaning, and lighter weight.
Latest progress you’ll notice in 2025
-
More structured, tote-like silhouettes that look work-appropriate
-
Cleaner liners designed for faster wipe-down and fewer odors
-
Better strap ergonomics and stitching (comfort matters more now)
-
Smarter compartments that separate wet and dry items
-
More “kit thinking”: bag + containers + slim cold packs as one system
Market insight you can use
The best bag is the one you can clean in under a minute and carry without thinking. That convenience is what keeps your routine consistent.
Frequently asked questions
Q1: How long do insulated lunch bags women keep food cold?
It depends on insulation, zipper seal, and cold packs. For long days, use at least one cold pack and keep the bag closed.
Q2: Are insulated lunch bags women with compartments worth it?
Yes when compartments prevent crushing and keep dry items separate. Skip overly complex pocket layouts that are hard to clean.
Q3: What’s the most important feature to check before buying?
A smooth wipe-clean liner and a zipper that closes fully with no gaps. These prevent most daily frustration.
Q4: How do I stop my insulated lunch bags women from smelling?
Wipe spills quickly and always air-dry fully while open. Smell issues usually come from trapped moisture.
Q5: What carry style is easiest for commuting?
If you walk a lot, backpack or crossbody can reduce fatigue. For short distances, a structured tote is usually enough.
Q6: Why does my lunch bag get wet inside?
Condensation from cold items is normal. A good liner should contain it and wipe clean quickly.
Summary and recommendations
The best insulated lunch bags women in 2025 are built for real routines: solid insulation, a tight zipper seal, a wipe-clean liner, and comfortable carrying. Start with the 3C rule—cold control, cleanability, carry comfort—then choose a size that fits your containers and a shape that doesn’t tip. If you want more consistent cooling, standardize one packout routine and use at least one cold pack daily for perishable foods.
Your next steps (CTA)
-
Measure your container footprint and choose the right size.
-
Pick a shape that matches your commute (vertical for totes, boxy for meal prep).
-
Prioritize leakproof liner + structured base + tight zipper.
-
Use a repeatable cold packout (bottom + center + top).
-
Clean fast and air-dry open every day.
If you want fewer “sad lunches” starting next week, choose insulated lunch bags women you can clean in under one minute—and commit to one cold pack routine you can repeat.
About Tempk
At Tempk, we design temperature-control packaging systems built around the same basics that make insulated lunch bags women work: stable insulation, smart layout, and repeatable routines. We focus on durable materials, easy maintenance, and user-friendly guidance so people actually follow the system. If you’re building a branded lunch kit program or product line, we can help you define a performance-first feature set that fits daily life.
Next step: Share your audience’s typical day length, container size, and carry preference (tote, backpack, crossbody). We’ll help you map a practical bag + cold-pack routine that’s easy to adopt.
Shock Resistant EPP Foam Box: 2025 Buying Guide
Shock Resistant EPP Foam Box: 2025 Guide?
A shock resistant EPP foam box helps you ship fragile or temperature-sensitive products with fewer “surprise breaks.” It absorbs drops, calms vibration, and resists crushing—while staying light and reusable. In molded EPP parts, thermal conductivity is often reported around 0.036–0.046 W/(m·K), and water absorption is commonly described as very low (often <1 vol-%), which matters when condensation is real.
This article will answer for you:
-
How a shock resistant EPP foam box prevents damage in real handling
-
Which EPP foam box density and wall thickness choices matter most
-
How to run a shock resistant EPP foam box drop test plan you can repeat
-
When a shock resistant EPP foam box for cold chain delivery makes sense
-
How to manage reuse cycles without performance drifting
-
How to estimate total cost per trip (not just box price)
What Is a Shock Resistant EPP Foam Box?
A shock resistant EPP foam box is a molded container made from expanded polypropylene (EPP) that cushions impacts and keeps its shape after repeated hits. If you want the simplest picture, it’s a springy helmet for your product: it compresses on impact, spreads the force, and rebounds.
shock resistant EPP foam box
Your biggest win is not “thicker foam.” Your biggest win is stable fit—the box holds the payload still, so it can’t rattle itself into failure.
Why “Fit First” is the fastest upgrade
If your payload can move, it will move—especially during vibration. A snug cavity plus the right insert often beats adding more thickness.
| Fit decision | What happens in transit | What you see later | What it means for you |
|---|---|---|---|
| Loose cavity | payload “walks” | cracked corners, scuffs | higher return rate |
| Snug cavity | movement stays low | fewer DOA complaints | steadier quality |
| Snug + insert | corners protected | fewer “mystery breaks” | fewer claims |
Practical tips and recommendations
-
Shake test: if it rattles, your cavity is too loose—add inserts or adjust the design.
shock resistant EPP foam box
-
Corner focus: corners take the first hit on real routes.
-
Lid discipline: a great box fails if the lid shifts.
How Does a Shock Resistant EPP Foam Box Prevent Damage?
A shock resistant EPP foam box protects against three everyday hazards: drops, vibration, and compression. Most teams plan for one drop. Real networks deliver many small hits plus occasional big ones.
Think “egg in a helmet.” The helmet spreads the hit so the egg doesn’t crack.
| Impact type | What causes it | How a shock resistant EPP foam box helps | Your practical benefit |
|---|---|---|---|
| Drop | handling, last mile | absorbs peak force | fewer cracks |
| Vibration | long transport | dampens movement | less fatigue damage |
| Compression | stacking loads | holds structure | fewer crushed corners |
Thickness vs density: which matters more?
Thickness helps, but density often decides whether foam bottoms out. Too soft and you hit the “floor.” Too stiff and the shock transmits through.
| Design lever | If it’s too low | If it’s too high | The balance you want |
|---|---|---|---|
| Density | bottoms out on hard drops | transmits shock | firm-but-springy |
| Wall thickness | dents, heat leaks | wasted space/weight | route-matched |
| Corner geometry | corners crack first | heavy/overbuilt | reinforced corners |
Practical scenario guidance
-
Fragile + light: prioritize softer inserts and snug fit.
-
Heavy payload: prioritize a stronger base and ribs.
-
Pallet shipping: prioritize corner reinforcement and stacking stability.
Practical case pattern: Many breakage reductions come from tighter cavity fit plus separators, not thicker walls.
shock resistant EPP foam box
How Do You Choose Shock Resistant EPP Foam Box Density and Wall Thickness?
Choosing a shock resistant EPP foam box is a balancing act between cushioning and support. Density influences stiffness. Thickness adds both impact travel distance and thermal buffer.
The goal is simple: protect the payload without over-designing.
A quick density-and-thickness starting point
Use this as a starting logic, then confirm with testing.
| Payload + lane | Density direction | Wall direction | What it means for you |
|---|---|---|---|
| Light + fragile (electronics) | lower-to-mid | moderate | lower peak shock |
| Heavy + durable (parts) | mid-to-higher | thicker + ribs | prevent sag/crush |
| Cold chain + fragile | mixed (box + insert) | thicker | protect temp + impact |
| High reuse program | mid + reinforced geometry | stable | consistent performance |
A 90-second decision tool (score 0–10)
Give yourself 1 point for each “Yes”:
-
Your packages go through parcel networks with many transfers.
-
You already see corner crush or lid pop-offs.
-
Your product is fragile or calibration-sensitive.
-
Weight is concentrated in a small area.
-
You ship in hot weather or long routes.
-
Multi-stop delivery is common.
-
Stacking pressure happens during storage or transit.
-
Your claim cost is high (replacement + labor).
-
You want to reuse packaging.
-
You need both insulation and shock control.
Score meaning
-
0–3: Basic shock resistant EPP foam box may work; focus on fit and closure.
-
4–7: Add inserts, stronger corners, and validation testing.
-
8–10: Treat the shock resistant EPP foam box as an engineered system.
How Do You Test a Shock Resistant EPP Foam Box for Shipping?
A shock resistant EPP foam box is only “proven” when you test the full system: box + insert + payload + closure + packing method. That is where most failures hide.
For parcel-style lanes, ISTA 3A is commonly used. For broader distribution simulation, many teams use ASTM D4169 schedules. ISO also provides methods like ISO 2248 for vertical impact (drop) tests. ASTM D4169 also saw a notable update in 2024 (often referenced as D4169-23e1), so align on the current version before validating.
shock resistant EPP foam box
Fast test plan template you can copy
-
Define the lane: parcel, LTL, air, export, warehouse stacking.
-
Pick the test family: ISTA 3A (parcel) or ASTM D4169 (broader cycles).
-
Set pass/fail rules: function, leaks, cosmetic limits, closure integrity.
-
Test multiple samples: 2–5 units if fragile or high value.
-
Document “as packed”: photos, insert placement, closure method, logger location.
shock resistant EPP foam box
| Test | What it reveals | Where a shock resistant EPP foam box fails | What you improve |
|---|---|---|---|
| Drop | corner/edge weakness | cracked corners, lid shift | stronger corners, better closure |
| Vibration | loose fit | payload “walks” | tighter insert, anti-slip |
| Compression | stacking collapse | wall buckling | ribs, stronger base |
Practical tips and recommendations
-
Test corners first. Corners fail before flat faces.
-
Repeat drops. One drop can be luck; repeats show durability.
-
Test after reuse. Dents and wear change performance.
shock resistant EPP foam box
Practical case pattern: It’s common to “pass drops” but fail vibration because the payload migrates.
shock resistant EPP foam box
Can a Shock Resistant EPP Foam Box Support Cold Chain Delivery?
Yes. A shock resistant EPP foam box can work well for cold chain because EPP is insulating and stays stable after impacts. But insulation is not magic. Hold time depends on lid seal quality, air gaps, wall thickness, coolant type (gel packs, PCM, dry ice), ambient conditions, and trip duration.
shock resistant EPP foam box
If your lid fit is loose, seal beats thickness—fix closure before adding material.
shock resistant EPP foam box
Cold chain packing layout that protects impact and temperature
| Payload type | Coolant placement | Insert strategy | What it means for you |
|---|---|---|---|
| Chilled foods | top + sides | corner bumpers | fewer bruises/leaks |
| Frozen items | surround + base | firm base support | less thaw at corners |
| Lab/pharma samples | balanced packs | precision insert | stable temp + shock |
Moisture management rules (simple and effective)
-
Dry boxes before storage. Trapped moisture becomes odor.
-
Avoid tape residue on foam surfaces; it traps dirt.
-
Use removable liners for “leak risk” lanes to cut cleaning time.
shock resistant EPP foam box
How Many Reuse Cycles Can a Shock Resistant EPP Foam Box Handle?
A shock resistant EPP foam box is built for reuse, but real life sets the limit. Reuse cycles depend on handling intensity, cleaning method, and corner impacts.
shock resistant EPP foam box
Treat the box like an asset. Track it, inspect it, and retire it when it fails.
Simple inspection rules for reuse programs
| Check point | What you look for | Pass standard | What it means for you |
|---|---|---|---|
| Corners | crushed, torn foam | rebounds + holds shape | drop protection remains |
| Lid fit | loose engagement | closes tight | fewer spills + heat leaks |
| Interior | deep gouges | wipe-clean surface | easier sanitation |
| Base | warping | flat stability | safe stacking |
A fast “Green / Yellow / Red” grading system
-
Green: ready for next trip.
-
Yellow: use for lower-risk lanes; monitor closely.
-
Red: retire or repair (do not ship).
Operational tip: Add a 10-second corner-and-lid check at receiving to prevent next-trip failures.
Is a Shock Resistant EPP Foam Box Worth the Cost?
A shock resistant EPP foam box often wins on cost per successful delivery, not purchase price. If it reduces damage and lasts many cycles, total cost can drop.
Mini calculator: cost per trip (interactive)
Fill in your numbers:
-
Box price: ___
-
Expected trips: ___
-
Cleaning/repair per trip: ___
-
Cost per trip = (price ÷ trips) + cleaning/repair = ___
-
Current damage rate: ___%
-
Cost per damaged shipment: ___
-
Expected damage reduction: ___%
Rule of thumb: If avoided damage cost per month is higher than your packaging cost increase, the switch pays back.
| Scenario | Why a shock resistant EPP foam box helps | When it pays back fastest |
|---|---|---|
| Fragile electronics | fewer DOA returns | high claim cost |
| Cold chain foods | fewer leaks + rejects | frequent re-deliveries |
| Heavy parts | less crush damage | rough handling lanes |
How Do You Choose a Shock Resistant EPP Foam Box Supplier?
Your supplier should help you build repeatable performance, not just a good-looking sample. Ask how they control density consistency, dimensional stability, lid fit, and insert precision.
Supplier evaluation checklist
| Capability | What to ask | What “good” looks like | What it means for you |
|---|---|---|---|
| Material control | density tolerances | consistent batches | predictable protection |
| Tooling | insert + lid precision | tight fit, low wobble | fewer failures |
| Testing support | drop/vibration plans | clear reports | faster approval |
| Scale readiness | stable lead times | repeatable output | fewer supply shocks |
Practical buying tips
-
Test multiple production samples, not one “perfect” prototype.
-
Specify the insert geometry in writing—insert drift changes results.
-
Agree on your evidence pack: packing photos + criteria + results.
2025 Latest Trends in Shock Resistant EPP Foam Box Design
In 2025, shock resistant EPP foam box programs are moving toward proof-first packaging and simpler reuse operations. Teams want fewer packaging SKUs that cover more lanes, plus faster validation.
shock resistant EPP foam box
Latest progress you’ll see more often
-
Modular insert families: one outer box, many payload fits
-
Better lid interfaces: less shifting under vibration
-
Stronger evidence packs: photos + test results + lane assumptions
-
More sensor-backed shipments: shock + temperature logs for root-cause clarity
shock resistant EPP foam box
Market insight (plain language)
Reliability wins. When the shock resistant EPP foam box behaves predictably, you spend less time re-shipping and arguing.
Frequently Asked Questions
Q1: How do I choose a shock resistant EPP foam box for fragile electronics?
Pick a shock resistant EPP foam box with a precision insert that prevents movement. Validate with repeated corner drops and vibration.
Q2: Does thicker foam always mean better protection?
No. If it is too soft, it bottoms out. Balanced density plus good corner geometry protects better.
Q3: Can a shock resistant EPP foam box work for cold chain delivery?
Yes, but you still need a consistent coolant layout and a tight lid seal. Packing design controls hold time.
Q4: How do I know if my payload fit is correct?
If it rattles when you gently shake the packed box, the cavity is too loose. Add inserts or adjust the design.
shock resistant EPP foam box
Q5: How do I increase reuse cycles for a shock resistant EPP foam box?
Inspect corners and lids, dry fully after cleaning, and retire worn boxes early to protect performance.
Summary and Recommendations
A shock resistant EPP foam box works best when you treat it as a system: correct density, stable inserts, tight closure, and repeatable testing. Start with your lane hazards—drops, vibration, stacking, and temperature exposure. Then design for corners, lock down fit, and validate “as packed.” If you reuse, add inspection and cycle tracking so performance stays steady over time.
Your next step: pilot one SKU group on one lane, run a repeatable drop/vibration plan, and compare damage and labor to your baseline.
About Tempk
At Tempk, we design packaging systems that hold up under real logistics pressure. We focus on stable insulation layouts, dependable impact protection, and reuse workflows that stay clean and consistent. If you want a lane-specific recommendation for a shock resistant EPP foam box—size, density direction, insert strategy, and a simple test plan—we can help you build a practical packaging review and proof pack.
Customizable Lightweight EPP Foam Box (2025)

How to Choose a Customizable Lightweight EPP Foam Box
Last updated: December 18, 2025.
A customizable lightweight EPP foam box is a practical way to ship temperature-sensitive or fragile products with fewer breakages and fewer “summer surprise” failures.
You’ll get the best results when you treat the customizable lightweight EPP foam box as a system: box + inserts + packing SOP + validation + reuse tracking.
This article will answer for you:
-
How a customizable lightweight EPP foam box reduces damage and temperature swings
-
What to spec for EPP foam box thermal insulation performance (without guessing)
-
How to build a customizable EPP foam box with inserts that stops movement
-
How to validate a customizable lightweight EPP foam box for real lanes (not lab fantasies)
-
How to clean, reuse, and track EPP foam boxes in daily operations
Why does a customizable lightweight EPP foam box beat one-size packaging?
Core answer: A customizable lightweight EPP foam box wins because it turns uncertainty into a repeatable system. When the box fits your product and route, you stop overpacking “just in case.”
You use less void fill, you reduce rattling, and you get steadier temperature behavior.
Think in three levers you can actually control: fit, protection, and reuse. Fit reduces empty air, protection reduces shocks, and reuse spreads cost over more trips.
The “fit–protect–reuse” reality check
| What you optimize | One-size box outcome | Custom outcome | What it means for you |
|---|---|---|---|
| Product fit | Voids + shifting | Stable positioning | Fewer leaks and breakage |
| Coolant use | “More is safer” | Right-sized pack-out | Lower cost per shipment |
| Labor time | Extra stuffing | Quick load-and-go | Faster fulfillment |
| Returns | Higher damage risk | Higher survivability | More successful reuses |
Practical tips you can use today
-
If damage is the pain point: stop movement first with inserts, before thickening walls.
-
If temperature is the pain point: treat lid seal and air gaps as “first-class” design targets.
-
If cost is the pain point: standardize one outer shell, then swap inserts by SKU.
Practical example: A last-mile operator improved outcomes with one simple rule: “lid closed after packing, no reopening.”
What should you spec for a customizable lightweight EPP foam box?
Core answer: Specify a customizable lightweight EPP foam box like a tool, not a gift box. You want measurable targets that match your route and handling reality.
When specs are clear, you avoid redesign loops and hidden costs.
Start with these six spec items. They cover 80% of success, without an engineering degree.
The minimum spec checklist (copy/paste)
-
Payload size + weight (including inner packaging)
-
Density options (and where density is used)
-
Wall thickness range + tolerance
-
Drop/impact pass–fail rule (test method + threshold)
-
Thermal hold-time target (hours at defined ambient)
-
Cleaning + reuse target (approved method + cycles)
Buyer-friendly spec table
| Spec item | What you provide | Why it matters | What it means for you |
|---|---|---|---|
| Lane time | ___ hours | Sets hold-time target | Fewer temperature claims |
| Ambient range | ___ to ___ | Defines worst-case load | Fewer “summer failures” |
| Handling intensity | low / med / high | Drives insert + structure | Lower damage rate |
| Reuse target | ___ trips | Enables ROI | Predictable cost per trip |
Practical tips and suggestions
-
Design for the worst day: longest delay + hottest ambient, not the average.
-
Ask for pass/fail language: “no damage after X drops” beats “strong.”
-
Don’t ignore comfort range: many suppliers describe EPP working roughly -40°C to +110°C (type dependent).
How do inserts upgrade a customizable lightweight EPP foam box?
Core answer: Inserts are the fastest way to improve a customizable lightweight EPP foam box. If your payload rattles, density alone will not fix it. Inserts will.
A good insert set also speeds packing, because the “right way” becomes obvious.
You can think of inserts as “seatbelts” inside the customizable lightweight EPP foam box. They prevent shifting, isolate cold spots, and protect corners.
Customizable EPP foam box with inserts: 4 insert archetypes
| Insert style | Best for | Main risk | What it means for you |
|---|---|---|---|
| Cradle insert | fragile, premium items | wrong fit tolerance | Less breakage if sized well |
| Grid insert | multi-item kits | slow packing | Faster when slots are labeled |
| Coolant pocket insert | temp-sensitive goods | cold spots | Prevents direct “freeze burn” |
| Hybrid insert | long routes | complexity | Best for premium service levels |
(Archetypes summarized from the uploaded drafts.)
Practical tips and suggestions
-
If you ship mixed SKUs: keep one shell, swap inserts (less SKU chaos).
-
If freezing is a risk: add a buffer layer between coolant and product.
-
If training time is high: use keyed inserts that only fit one way.
Practical example: A meal-kit operator reduced refunds by switching from loose packs to a fitted insert that locked product and coolant.
How do you choose density for a customizable lightweight EPP foam box?
Core answer: Choose density for load paths, not for ego. Higher density helps in corners, rims, and base load paths, while lower density can keep walls lighter.
This gives your customizable lightweight EPP foam box strength where impacts concentrate, without paying for extra weight everywhere.
A simple rule: pick density based on payload weight + handling roughness. Then validate with a pilot.
When density is not your main lever
| Failure you see | What usually fixes it | Why | What it means for you |
|---|---|---|---|
| Rattling damage | Better insert fit | Stops movement | Less breakage |
| Corner crush | Ribbing + density zoning | Adds structure | Longer life |
| Temperature drift | Lid seal + fill voids | Less air exchange | More stability |
Practical tips and suggestions
-
Pilot two options: test two densities or two lid styles before scaling.
-
Don’t overbuild: too dense can add cost without real gains.
-
Track “damage per 100 trips”: it makes improvements visible to finance.
How does a customizable lightweight EPP foam box improve insulation performance?
Core answer: Your lid and air gaps can matter as much as wall thickness. Insulation slows heat flow, but air exchange and empty space can destroy hold time fast.
That’s why a customizable lightweight EPP foam box must be designed as a “geometry system,” not just thicker foam.
Many references cite EPP thermal conductivity around λ 0.035–0.041 W/mK (lower is better insulation).
Use that as context, but trust your lane test more than any single number.
Lid seal geometry: your hidden insulation upgrade
| Lid design | Air exchange risk | Ease of use | What it means for you |
|---|---|---|---|
| Loose sit-on lid | Higher | Easy | Shorter hold time |
| Nested groove lid | Lower | Easy | More stable |
| Gasketed lid | Lowest | Medium | Best for long lanes |
Practical tips and suggestions
-
Fill void space: dividers or inserts reduce internal air movement.
-
Minimize opens: batch checks and handoffs, then close and move on.
-
Pre-condition: pre-chill the box for cold shipments before packing.
Practical example: A seafood shipper improved summer performance by tightening lid seating and reducing air gaps, not by making the box thicker.
How do you validate a customizable lightweight EPP foam box for your lane?
Core answer: A customizable lightweight EPP foam box must earn trust through lane-like testing. The test should mirror your ambient conditions, dwell time, openings, and payload mass.
Run at least three cycles so you measure variability, not one lucky run.
This keeps you out of the “it worked last week” trap. It also creates audit-ready evidence for customers.
Lane test plan table (simple and repeatable)
| Test item | What you measure | Simple pass rule | What it means for you |
|---|---|---|---|
| Hold time | Hours in target band | Meets lane duration + buffer | Fewer excursions |
| Lid hot spot | Max temp near lid | No spikes at handoffs | Protects top layer |
| Pack repeatability | Packing time | Under your labor limit | Predictable cost |
| Reuse drift | After wash cycles | Similar performance | Reuse confidence |
Practical tips and suggestions
-
Test the worst day first: hot ambient + long dwell + a delay event.
customizable lightweight EPP fo…
-
Place sensors in the payload zone: not only near the lid.
customizable lightweight EPP fo…
-
Standardize coolant placement: molded pockets reduce human variability.
customizable lightweight EPP fo…
How do you clean and reuse EPP foam boxes safely?
Core answer: Closed-cell materials help, but your SOP does the real work. Reuse succeeds when you can clean, inspect, dry, and retire boxes consistently.
If you skip drying or inspection, hygiene problems and odors show up fast.
customizable lightweight EPP fo…
Treat your customizable lightweight EPP foam box like a reusable tool: clean it the same way, every time.
customizable lightweight EPP fo…
Cleaning SOP (5 steps you can run daily)
-
Pre-inspect: remove inserts; check cracks and deep gouges.
-
Pre-rinse: remove debris; avoid grinding dirt into surfaces.
-
Wash: approved detergent; controlled contact time.
-
Rinse + dry: dry fully with lids open before repacking.
-
Post-inspect: odor check; label readability; retire failures.
(Aligned with the “clean–inspect–retire” logic emphasized in the drafts.)
Practical tips and suggestions
-
If odor keeps returning: drying is usually the missing step.
customizable lightweight EPP fo…
-
If labels peel: add a smooth label plate zone and standard placement.
customizable lightweight EPP fo…
-
If returns are messy: set a simple return rule and enforce it weekly.
customizable lightweight EPP fo…
How do you calculate ROI for a customizable lightweight EPP foam box program?
Core answer: Calculate “cost per successful delivery,” not box unit price. A reusable system wins when rotations are real and losses are controlled.
customizable lightweight EPP fo…
Use this cost-per-trip calculator. It’s intentionally simple so ops teams will actually use it.
customizable lightweight EPP fo…
Cost-per-trip calculator (interactive)
Fill in:
-
Box price (one-time): $____
-
Insert set price (one-time): $____
-
Average trips before retirement: ____ trips
-
Cleaning + handling per trip: $____
-
Return cost per trip (if any): $____
-
Loss rate (unreturned/damaged): ____ %
Cost per trip = (Box + Inserts) ÷ Trips + Cleaning + Return + Loss allowance
A quick example (so you can sanity-check)
-
Box + inserts = $48
-
Trips = 20 → $48 ÷ 20 = $2.40 per trip
-
Cleaning = $0.60
-
Return = $0.50
-
Loss allowance = $0.30
Total cost per trip ≈ $3.80
If your one-way packaging costs $6.00 per shipment, you have room to fund reuse, tracking, and better inserts.
How do 2025 sustainability rules change customizable lightweight EPP foam box decisions?
Core answer: In 2025, buyers increasingly want evidence, not claims. A strong sustainability answer sounds like: validated hold-time, reuse cycle target, cleaning SOP, and end-of-life sorting plan.
customizable lightweight EPP fo…
EU packaging policy updates are also pushing recyclability and better packaging design expectations. The uploaded drafts note the PPWR entered into force on 11 February 2025 and points toward recyclability goals by 2030.
customizable lightweight EPP fo…
Sustainability readiness score (0–10)
Give yourself 1 point for each “yes”:
-
I have a reuse cycle target.
customizable lightweight EPP fo…
-
I have a written cleaning SOP.
customizable lightweight EPP fo…
-
I can retire damaged boxes fast.
customizable lightweight EPP fo…
-
I track hold-time validation results.
customizable lightweight EPP fo…
-
I have an end-of-life sorting plan.
customizable lightweight EPP fo…
Score meaning:
-
0–3: start with SOPs and simple tracking.
-
4–7: add lane validation and rotation tracking.
-
8–10: you’re ready for procurement-heavy customers.
customizable lightweight EPP fo…
Decision tool: pick your first customizable lightweight EPP foam box in 90 seconds
Core answer: Choose based on lane time + handling intensity + temperature sensitivity. This avoids “buying blind” and helps you prioritize the right design levers.
The 90-second selection tool (interactive)
-
Lane time:
-
A) < 6 hours
-
B) 6–24 hours
-
C) > 24 hours
-
Handling intensity:
-
A) Low (few touches)
-
B) Medium (cross-dock, multi-stop)
-
C) High (parcel-like handling, returns)
-
Temperature sensitivity:
-
A) Low (ambient tolerant)
-
B) Medium (chilled)
-
C) High (tight band)
Results shortcut:
-
If you chose C handling: prioritize inserts + reinforced edges + stack features.
-
If you chose C temperature: prioritize lid seal + void reduction + standardized coolant pockets.
customizable lightweight EPP fo…
-
If you chose C lane time: prioritize full system validation and SOP discipline.
customizable lightweight EPP fo…
Recommendation matrix
| Your profile | Design focus | Why it works | What it means for you |
|---|---|---|---|
| Short + low handling | simple shell + quick lid | speed | lower cost |
| Medium + medium | better inserts + nested lid | stability | fewer claims |
| Long + high sensitivity | seal focus + void control | thermal buffer | higher reliability |
| High handling (any lane) | reinforced edges + stacking | durability | longer life |
2025 latest developments and trends for customizable lightweight EPP foam box programs
In 2025, the story is shifting from “insulation only” to systems that prove outcomes.
Three trends matter most:
-
Regulatory pressure: packaging recyclability expectations are increasing (notably, PPWR timing and 2030 direction).
customizable lightweight EPP fo…
-
More reuse programs: buyers expect cleaning, inspection, and retirement routines that work daily.
customizable lightweight EPP fo…
-
More functional customization: density zoning and special-grade options expand what you can design for.
customizable lightweight EPP fo…
Market insight: your best “sustainability” answer is proof: validated hold-time, reuse target, cleaning SOP, and end-of-life plan.
customizable lightweight EPP fo…
Common questions about customizable lightweight EPP foam box
Q1: What is a customizable lightweight EPP foam box in plain terms?
It’s a reusable insulated container made from expanded polypropylene foam that you tailor to your product and route.
customizable lightweight EPP fo…
Q2: How cold or hot can a customizable lightweight EPP foam box handle?
Many suppliers describe functionality across a wide range, roughly -40°C to +110°C, depending on type.
customizable lightweight EPP fo…
Q3: What’s the biggest mistake when designing a customizable EPP foam box with inserts?
Leaving too much empty air and letting the payload move. Movement drives damage and faster warming.
customizable lightweight EPP fo…
Q4: Does higher density always mean better protection?
Not always. If the payload rattles, density won’t fix it. Inserts will.
customizable lightweight EPP fo…
Q5: How do I prove EPP foam box thermal insulation performance?
Run a hold-time test with real payload and coolant under worst-case ambient, then document pass/fail.
customizable lightweight EPP fo…
Q6: What’s the fastest way to improve temperature stability?
Improve lid seating and reduce internal air gaps before making the box bigger.
customizable lightweight EPP fo…
Summary and recommendations
A customizable lightweight EPP foam box performs best when you design for your lane, not for a brochure.
The highest-impact moves are simple:
-
Stop movement with a customizable EPP foam box with inserts.
-
Prioritize lid seal geometry and void reduction for stability.
-
Validate with a lane-like test before scaling.
-
Launch one packing SOP and one cleaning SOP, then track exceptions weekly.
Action plan (next 10 days): document your worst-case lane, pilot two designs, track damage and temperature exceptions, then scale the design that reduces total cost per successful delivery.
About Tempk
At Tempk, we design temperature-control packaging and pack-out workflows that work under real operational pressure. We focus on practical performance: insert design that prevents movement, lid concepts that reduce air exchange, and lane-based validation so results stay consistent across seasons.
Call to action: Share your payload dimensions/weight, lane time, and your top two failure modes (damage, temperature drift, or slow packing). We’ll recommend a customizable lightweight EPP foam box direction—size, insert style, and closure concept—so you can pilot quickly without unnecessary complexity
EPP Cooler Box Large: Choose Right in 2025

EPP Cooler Box Large: How Do You Choose in 2025?
Last updated: December 18, 2025
An EPP cooler box large is one of the fastest ways to stabilize cold-chain deliveries when routes have delays, multiple stops, or warm doorsteps. It works like a thick jacket that also protects against impacts. Many chilled programs work around 0–4°C, while many frozen programs aim for ≤−18°C. The right EPP cooler box large helps you stay closer to those targets by slowing temperature drift and reducing handling damage.
This article will answer:
-
How to know if an EPP cooler box large is worth it for your route risk
-
How EPP cooler box large capacity planning prevents warm corners and wasted coolant
-
How to build pack-outs for chilled, frozen, and mixed loads without guesswork
-
What makes a stackable EPP cooler box large easy for drivers and packers
-
How to run an EPP cooler box large thermal performance test before scaling
-
How to clean, reuse, and track ROI like a real fleet asset in 2025
Do you need an EPP cooler box large for your routes?
You need an EPP cooler box large when time is unpredictable and product risk is high. If your deliveries often run past 2 hours, involve frequent door openings, or sit at a doorstep, your cold buffer gets tested. A rigid EPP cooler box large adds insulation and reduces crush damage, which soft bags often struggle with during stacking.
Many cold chain failures happen at the “messy edges” of the journey—handoffs, loading docks, and last mile. If those edges are common in your operation, a large reusable box becomes a practical upgrade, not a luxury.
Large EPP cooler box for food delivery: the 2–6 hour rule
If your route regularly falls into a 2–6 hour window with multiple stops, you’re in the “grey zone” where refrigeration isn’t guaranteed, but exposure is long enough to cause drift. In that zone, a large rigid box helps most when you pair it with a repeatable pack-out layout and minimal lid-open time.
The simple idea: your EPP cooler box large buys time, but only if your workflow doesn’t “spend” that time by leaving the lid open.
| Route reality | What usually fails first | What to do with your box | Practical meaning for you |
|---|---|---|---|
| Many stops | Lid-open heat gain | Route loading map + quick grabs | Fewer warm spikes |
| Hot docks | Staging time | “Pack fast, close faster” SOP | More stable arrivals |
| Rough handling | Corners + lids | Rigid box + stable stacking | Fewer crushed goods |
Practical tips and suggestions
-
If you do 10+ stops: treat your EPP cooler box large like a vault—open, grab, close.
-
If you get crush claims: prioritize rigid structure and interlocking lids over “extra volume.”
-
If you ship mixed SKUs: use dividers so heavy items do not crush light items.
Practical example: A multi-stop meal program reduced “arrived warm” complaints after switching from soft bags to an EPP cooler box large and training a faster close routine.
How do you size an EPP cooler box large without wasted space?
Sizing an EPP cooler box large is about usable volume, not advertised liters. Usable volume is what remains after you add coolant, dividers, and protective layers. If you oversize, you create headspace. Headspace is “warm air storage,” and it warms fast when the lid opens.
A good rule: the best EPP cooler box large stays comfortably full on most routes. Not stuffed. Not half-empty. Comfortably full.
EPP cooler box large capacity planning in 90 seconds
Use this quick method to avoid overbuying:
-
List your top 5 container footprints (trays, tubs, cartons).
-
Build your peak load stack (busy day, not average day).
-
Reserve space for coolant and a separator layer.
-
Add 10–20% buffer for fast packing and safe closure.
-
Choose the smallest EPP cooler box large that closes without bending lids.
| Quick check | What to measure | “Good” signal | What it means for you |
|---|---|---|---|
| Headspace | Empty volume after packing | <25–30% | Better temp stability |
| Weight | Packed weight per box | Comfortable carry | Fewer drops and injuries |
| Fit | Lid closure effort | One smooth motion | Less “lid not sealed” risk |
Why oversizing hurts temperature (simple explanation)
A half-empty box behaves like a half-empty cup of coffee. It changes temperature faster. More air inside means more air exchange each time you open. That’s why downsizing one lane can outperform “bigger for safety.”
Practical tips and suggestions
-
Standardize two sizes of EPP cooler box large (regular large + extra large). Avoid “one size for everything.”
-
Train one stacking pattern with a photo. Pack-outs become consistent overnight.
-
Use void blocks or inserts when order size is smaller than your box size.
Practical example: A seafood seller improved summer performance by downsizing to a tighter EPP cooler box large and adding a simple divider.
How does an EPP cooler box large keep chilled goods stable?
An EPP cooler box large keeps chilled goods stable by slowing heat transfer and protecting the load from repeated handling shocks. EPP foam traps air, and trapped air slows heat flow. But the box does not “create cold.” Your chilled performance depends on three things: insulation, coolant strategy, and how much empty air you allow.
If chilled targets matter to you, treat your box as a system. The system starts with pre-chilled product, then a stable coolant layout, then a fast close.
The 3-part temperature stability formula
To get reliable chilled results from an EPP cooler box large, balance:
-
Insulation: consistent walls and a real lid seal
-
Cold source: gel packs, ice packs, or PCM panels
-
Packing layout: reduce air pockets and prevent shifting
EPP cooler box large with PCM panels: when it helps
PCM panels can hold closer to a chosen temperature point and reduce sharp swings. They often feel “calmer” than gel packs on longer lanes. The key is placement and separation. You want buffering, not direct product contact.
| Coolant option | Best for | Watch-out | Practical meaning for you |
|---|---|---|---|
| Gel packs | short–medium lanes | early cold shock | simple starter |
| PCM panels | medium–long lanes | wrong PCM choice | steadier profiles |
| Ice packs | quick local routes | water mess | low-cost chill |
| No coolant | low-risk routes | doorstep delays | lowest cost, highest risk |
Practical tips and suggestions
-
Build cold walls: place coolant on sides (and top if needed), not only at the bottom.
-
Add a separator layer so coolant never presses directly on sensitive cartons.
-
Close the EPP cooler box large quickly. “Open time” is your biggest leak.
Practical example: A dairy route reduced temperature swings after switching to side-wall buffering in an EPP cooler box large and standardizing placement photos.
How do you pack an EPP cooler box large for frozen food shipping?
For frozen food, an EPP cooler box large works when you prevent thaw-and-refreeze cycles. Frozen quality can drop when edges soften and refreeze. Your goal is consistent frozen conditions, not “almost frozen.” That means pre-conditioning, stable pack-out, and fewer openings.
Frozen shipping also creates practical problems: condensation, frost, and label readability. Your process should include sealing rules and a quick receiving check.
EPP cooler box large for frozen food shipping: what to control
Control these three variables first:
-
Start condition: product must be fully frozen before packing
-
Ambient exposure: reduce staging time at room temperature
-
Open frequency: fewer lid opens, shorter open time
| Frozen risk | What you may see | What to change | Practical win |
|---|---|---|---|
| Slow thaw | damp packaging, soft edges | reduce headspace + add buffering | better texture |
| Repeated openings | gradual drift | route loading map | fewer excursions |
| Thaw/refreeze | ice crystals, quality loss | tighter lane rules | fewer claims |
Mixed chilled and frozen in one EPP cooler box large (use zoning)
Mixing temperatures in one box is possible, but risky without a plan. Zoning is the safe approach.
-
Frozen items closer to the cold source
-
Chilled items in a protected middle zone
-
Divider between zones
-
Lid closed as much as possible
| Mixed-load method | What you do | What to avoid | Practical meaning for you |
|---|---|---|---|
| Two-zone divider | frozen one side, chilled other | no divider | less cross-impact |
| Thermal sandwich | cold source–divider–product | direct contact | less condensation |
| Two boxes | separate temp classes | “one box always” | simplest reliability |
Practical tips and suggestions
-
Pre-chill the EPP cooler box large if stored in a warm area.
-
Use inserts to prevent shifting and “warm corners.”
-
Add a simple “max staging time” rule for frozen pack-outs.
Practical example: A frozen seafood lane improved after adopting a rule: the EPP cooler box large stays closed until the final handoff scan.
Which features matter most in a stackable EPP cooler box large?
A stackable EPP cooler box large is only as good as its lid seal, stacking geometry, and daily ergonomics. Thick walls do not help if the lid rocks. Great insulation fails if drivers hate opening it and leave it ajar. Your best box design reduces human error by making the “right way” the easiest way.
The lid and seal checklist (the make-or-break feature)
A weak lid is like a fridge door slightly open. Check these:
-
Lid sits flush on all sides
-
Closure feels smooth and repeatable
-
Lid supports stacking without sliding
-
Rim design discourages gaps
The one-hand close test (real operations)
If packers need two hands, extra tape, or repeated adjustments, they will rush. A good EPP cooler box large should close correctly in one confident motion.
| Feature | Good sign | Bad sign | Practical meaning for you |
|---|---|---|---|
| Lid fit | no rocking | rocking corners | heat leaks |
| Stack design | interlocking | flat-on-flat slip | tip-overs |
| Handles | comfortable cutouts | glove pinch | slower handling |
| Label zone | visible when stacked | hidden zone | traceability errors |
| Base grip | anti-slip | smooth slide | safer vans |
Practical tips and suggestions
-
If you stack high, require interlocking lid geometry.
-
If you label lots, demand a dedicated label panel visible when stacked.
-
If you run wet operations, test closure with wet gloves.
Practical example: A warehouse reduced “lid not closed” incidents after choosing an EPP cooler box large with a clearer seating groove.
How to clean an EPP cooler box large so it stays odor-free?
How to clean an EPP cooler box large is a daily discipline, not a quarterly task. Odor problems usually come from moisture trapped inside a closed box. Residue hides in corners and lid grooves. If cleaning is slow, people skip it. If cleaning is inconsistent, a few bad boxes ruin trust in the whole fleet.
Your goal is a short routine that always happens.
A 10-minute cleaning routine (easy to audit)
-
Remove debris immediately after return.
-
Wipe inside surfaces with mild detergent solution.
-
Spot-scrub corners and lid grooves.
-
Rinse-wipe to remove soap film.
-
Towel-dry and air-dry open before stacking.
| Maintenance item | Daily check | Weekly check | Practical meaning for you |
|---|---|---|---|
| Lid groove | wipe and inspect | deep clean | prevents hidden odor |
| Corners | quick visual | scrub build-up | avoids “smell zones” |
| Handles | wipe | inspect wear | safer carries |
| Exterior | wipe | check damage | better brand presentation |
Practical tips and suggestions
-
Store boxes open to dry for 30 minutes before nesting or stacking.
-
Assign one role per shift to own cleaning quality.
-
Use a simple “OK / HOLD” tag so damaged boxes don’t re-enter service.
Practical example: A delivery fleet extended the life of each EPP cooler box large after adding a 3-minute end-of-route wipe plus open-air drying.
How do you validate EPP cooler box large performance before scaling?
Validation answers the only question that matters: will your EPP cooler box large keep your shipment within your target range for the full route? You do not need perfect lab tests. You need a repeatable lane test that matches real openings, real handling, and real ambient conditions.
A smart validation plan also stops overpacking. Overpacking increases cost and can increase condensation risk.
EPP cooler box large thermal performance test (lane-realistic)
Run this test for one lane:
-
Choose a reference load (same products, same layout every time).
-
Simulate route openings (example: 15 seconds each stop).
-
Record temperature at the product core zone (center mass).
-
Repeat on a hot day and a mild day.
-
Update your SOP based on results.
| Test type | What you measure | What you learn | Practical meaning for you |
|---|---|---|---|
| Thermal hold | time in range | coolant needs | fewer surprises |
| Handling | scuffs, cracks, lid shift | layout weaknesses | fewer damage claims |
| Process | pack time + closure errors | human factor | easier training |
Pilot-first strategy (low regret, high learning)
Before buying a full fleet:
-
Pilot 2–4 weeks
-
Track temperature exceptions, damage rates, and pack time
-
Ask drivers: “Can you open and close this fast?”
-
Lock one winning pack-out photo and train it
Interactive ROI calculator (copy and use)
Fill in your numbers:
-
Shipments per week: S = ____
-
Current claim/spoilage rate: R = ____%
-
Average cost per claim: C = ____
-
Expected reduction with better packaging: E = ____%
-
Box purchase cost: B = ____
-
Expected reuse trips per box: T = ____
-
Operating cost per trip (cleaning + handling): O = ____
Weekly savings = S × R × C × E
Per-trip box cost = (B ÷ T) + O
If weekly savings exceeds weekly box cost, the program pays back.
Practical example: One operator found the box was fine, but headspace was the problem. A simple insert improved hold time without adding coolant.
2025 developments and trends in EPP cooler box large programs
In 2025, reusable cold chain packaging is becoming more standardized and fleet-managed. Teams are moving away from “random boxes” and toward route-specific pack-outs with clear maintenance rules. Customers also notice cleanliness more than ever. A clean, stable EPP cooler box large signals quality before the food is opened.
Latest progress snapshot
-
More modular inserts: dividers and void blocks reduce headspace and shifting
-
More trackability: box IDs and scan zones support asset control
-
More workflow focus: reduce lid-open time and staging time, not just “add insulation”
-
More right-sizing: fewer one-size-fits-all mistakes, more lane-based selection
Market insight: Your customer doesn’t praise foam density. They praise “arrived cold, looked clean, felt professional.”
Frequently asked questions
Q1: How long can an EPP cooler box large keep products cold?
It depends on route time, ambient heat, coolant amount, and how full the box is. A snug pack-out typically beats a half-empty box.
Q2: Is an EPP cooler box large better than EPS foam boxes?
Often yes for reuse and handling durability. EPS can insulate well, but it may crack or chip under repeated use.
Q3: Can an EPP cooler box large keep food cold without coolant?
Insulation slows warming but does not create cold. For chilled targets, coolant or strict short routes are usually needed.
Q4: What’s the biggest operational mistake with an EPP cooler box large?
Oversizing. Too much headspace warms quickly and forces you to overuse coolant.
Q5: How do I reduce condensation inside an EPP cooler box large?
Use a separator layer, avoid direct coolant contact with cartons, reduce headspace, and close the lid quickly.
Q6: How to clean an EPP cooler box large without odors?
Wipe, rinse-wipe, then air-dry fully open. Odors often come from storing boxes closed while damp.
Q7: What should I prioritize when buying a stackable EPP cooler box large?
Prioritize lid fit, interlocking stack geometry, handle comfort, a visible label zone, and easy cleanability.
Summary and recommendations
An EPP cooler box large is a practical upgrade when you need stable temperature control, strong impact protection, and repeatable daily performance. You get the best results when you right-size the box to reduce headspace, standardize one pack-out layout, and treat lid-open time like a cost. Build cleaning and maintenance routines that keep the fleet odor-free and trusted. Then validate performance lane-by-lane before scaling.
Next-step action plan (CTA)
-
Choose 1–2 EPP cooler box large sizes that fit your peak loads.
-
Pilot for 2–4 weeks using one consistent pack-out photo.
-
Track three metrics: temperature exceptions, damage claims, and pack time.
-
Tune one variable at a time (size, inserts, coolant placement, open time).
-
Scale only after results are repeatable across hot and mild days.
About Tempk
At Tempk, we help cold chain teams build reusable packaging systems that work in real routes, not perfect lab conditions. We focus on right-sizing, standardized inserts, lane-based validation, and cleaning SOPs that keep an EPP cooler box large fleet reliable across seasons. Our goal is fewer temperature exceptions, fewer damage claims, and a delivery experience your customers trust.
Call to Action: Share your route duration, stop count, and product mix. We can map a lane-based EPP cooler box large setup (size + pack-out + validation + cleaning routine) you can pilot immediately.
Thermal EPP Cooler Box Premium: Worth It in 2025?
Thermal EPP Cooler Box Premium: Worth It in 2025?
A thermal EPP cooler box premium is worth it when your routes face delays, frequent opening, or rough handling. You are not buying “a box.” You are buying stable temperature time during real-life chaos, like traffic and handoffs. Many EPP grades are reported around λ 0.035–0.041 W/mK, and common EPP density ranges are widely described across grades.
This article will answer for you:
-
How a thermal EPP cooler box premium for food delivery protects quality on real routes
thermal EPP cooler box premium
-
What drives premium EPP cooler box temperature retention time (and what doesn’t)
thermal EPP cooler box premium
-
How to choose a thermal EPP cooler box premium for seafood without overpaying
thermal EPP cooler box premium
-
How to run a reusable thermal EPP box for last-mile logistics with fewer losses
thermal EPP cooler box premium
-
How to handle thermal EPP cooler box premium cleaning and sanitizing fast and safely
thermal EPP cooler box premium
What is a thermal EPP cooler box premium, in simple terms?
A thermal EPP cooler box premium is a reusable insulated container made from expanded polypropylene (EPP) that’s built to perform under repeated stress. “Premium” usually means stronger construction, better lid sealing, consistent walls, and design details that reduce heat leaks at corners and handles.
thermal EPP cooler box premium
Think of it like this: a basic cooler is a jacket on a mild day. A thermal EPP cooler box premium is a winter coat with a zipper and cuffs.
thermal EPP cooler box premium
Premium performance is not only “thicker walls.” It also depends on lid fit, corner strength, stacking stability, and how clean the inside stays.
thermal EPP cooler box premium
That matters because your operation is not gentle. Boxes get dropped, dragged, and stacked every day.
thermal EPP cooler box premium
Premium features that actually change outcomes
Premium designs focus on repeatability: the lid closes the same way every time. Corners resist dents that become cracks later. Stacking lips reduce wobble in vans and hubs. This is why EPP is chosen in daily logistics where impact resistance matters.
thermal EPP cooler box premium
If your lids feel “loose,” the seal is your hidden problem, not wall thickness.
thermal EPP cooler box premium
| What “premium” changes | Basic insulated box | Thermal EPP cooler box premium | Practical meaning for you |
|---|---|---|---|
| Lid interface | Inconsistent closure | Firm, repeatable seal | Fewer “random warm” complaints |
| Corners/handles | Crack risk rises fast | Better impact tolerance | Fewer replacements and downtime |
| Stacking | Rocking and slipping | Stable stacking geometry | Safer hubs and faster loading |
| Cleanability | Stains and odor linger | Easier wipe + dry routine | Better hygiene confidence |
Practical tips you can use today
-
Loose lids: add a “10-second lid check” at dispatch before the van door closes.
thermal EPP cooler box premium
-
Cracked corners: upgrade corner geometry before you add more coolant.
thermal EPP cooler box premium
-
Stack failures: standardize one box footprint with reliable stacking lips.
Real case: A last-mile food team cut “arrived warm” complaints after standardizing one thermal EPP cooler box premium size and enforcing a simple closure check at dispatch.
thermal EPP cooler box premium
How does a thermal EPP cooler box premium improve temperature retention time?
A thermal EPP cooler box premium improves hold time by reducing heat leaks and slowing temperature rise, especially at the lid seam. In real routes, heat enters through the lid gap most often, then through corners and edges over time.
thermal EPP cooler box premium
Frequent opening and “hot loading” also crush your time cushion fast.
thermal EPP cooler box premium
If your product starts warm, even the best box struggles.
thermal EPP cooler box premium
The big win is not magic insulation. The win is fewer small mistakes that add up. Your team can control four drivers without becoming engineers.
thermal EPP cooler box premium
The 4 drivers you can control in one shift
-
Starting temperature: pre-chill product and coolant before pack-out.
thermal EPP cooler box premium
-
Seal quality: a reliable lid closure can matter more than thicker walls.
thermal EPP cooler box premium
-
Load pattern: big air gaps behave like “mini ovens” inside the box.
thermal EPP cooler box premium
-
Open-time discipline: every opening is like opening your fridge in summer.
thermal EPP cooler box premium
| Driver | What helps most | What hurts most | Practical meaning for you |
|---|---|---|---|
| Starting temp | Pre-chill product | Loading warm items | Shorter safe time window
thermal EPP cooler box premium |
| Lid seal | Firm, consistent closure | Warped lids | Sudden temperature spikes
thermal EPP cooler box premium |
| Packing method | Coolant around critical zones | Big air pockets | Uneven product temperatures
thermal EPP cooler box premium |
| Opening time | Short, planned access | Frequent full opening | Faster drift and more complaints |
Practical tips and suggestions
-
Hot dispatch areas: stage closed boxes in a cooler spot before final loading.
thermal EPP cooler box premium
-
Multi-drop routes: use a “top-layer access plan” to avoid full unpacking.
-
Long routes: set a simple rule: “re-close within 20 seconds.”
Real case: A seafood shipper improved consistency by placing coolant near the “heat entry side” (often the lid/top) and reducing air space with dividers.
thermal EPP cooler box premium
How do you choose a thermal EPP cooler box premium without overpaying?
You avoid overpaying when you match the thermal EPP cooler box premium to your route reality, not your worst imagination. The right choice depends on transit time, ambient exposure, how often drivers open the lid, stacking pressure, and reuse cycles.
thermal EPP cooler box premium
Overpaying usually happens when you buy premium features you never use. Underbuying happens when one failure costs more than the box.
thermal EPP cooler box premium
A “fit” purchase is calm to operate. Packing becomes repeatable and training gets faster. That is often the real premium benefit in 2025 operations.
thermal EPP cooler box premium
Fit-for-Route decision tool (interactive)
Answer “Yes” or “No.” Count your “Yes” answers.
-
Do you deliver over 2 hours regularly?
thermal EPP cooler box premium
-
Do delays happen weekly (traffic, missed handoff)?
thermal EPP cooler box premium
-
Do drivers open the box more than 3 times per route?
thermal EPP cooler box premium
-
Do boxes get stacked in vans or hubs?
thermal EPP cooler box premium
-
Do you reuse boxes in a pooling loop?
thermal EPP cooler box premium
Score → recommendation
-
0–1 Yes: basic EPP may be enough (focus on process).
thermal EPP cooler box premium
-
2–3 Yes: thermal EPP cooler box premium is usually justified.
thermal EPP cooler box premium
-
4–5 Yes: premium + lane-validated pack-out + monitoring is the safer play.
thermal EPP cooler box premium
| Buying question | If “Yes” | What to prioritize | Practical meaning for you |
|---|---|---|---|
| Many openings | Heat enters repeatedly | Lid seal + fast closure | Fewer warm spikes |
| Heavy stacking | Pressure damage risk | Corner strength + lips | Fewer collapses |
| High reuse | Cost per trip matters | Cleanability + ID-ready | Better ROI stability |
| Delay-prone lanes | Stress is normal | Validation + lane kit | Fewer surprise failures |
Practical tips and suggestions
-
Small operators: start with one “workhorse” size and scale after 30 days.
thermal EPP cooler box premium
-
High volume: standardize sizes to cut training time and packing errors.
thermal EPP cooler box premium
-
Pooling: pick a design that supports scanning and clear labeling.
thermal EPP cooler box premium
Real case: One delivery brand spent less by buying fewer premium boxes, then improving pre-chill and lid discipline to outperform “more boxes.”
thermal EPP cooler box premium
How should you pack a thermal EPP cooler box premium for food delivery?
A thermal EPP cooler box premium performs best when you pack it like a “cold sandwich”: coolant, product, coolant, minimal air gaps, fast close. Tight packing slows drift because air space accelerates warming inside.
thermal EPP cooler box premium
Most failures come from empty space and repeated reopening. The box can’t save a messy pack-out.
thermal EPP cooler box premium
Use photo-based pack-out maps so the “right way” is the easiest way. This is why visual SOPs outperform long manuals in 2025 operations.
thermal EPP cooler box premium
If you need help building standard maps, start with Pack-out SOP for reusable shippers.
thermal EPP cooler box premium
3 pack-out maps you can teach in 10 minutes
Pick one map per “lane,” then lock it.
| Lane | Coolant option | Placement rule | Practical meaning for you |
|---|---|---|---|
| Controlled ambient | Mild buffer packs / PCM | Top + hottest side | Protects against heat spikes |
| 2–8°C chilled | Gel packs or setpoint PCM | Sides + top, payload centered | More even temps |
| Frozen | Frozen coolant strategy | Strong buffering, fewer opens | Prevents thaw cycles |
Practical tips and suggestions
-
Hot kitchens: close boxes away from ovens and steam before staging.
thermal EPP cooler box premium
-
Multi-order vans: assign each box a “no-open until stop” rule.
-
Rush dispatch: do a “push corners + center” lid check in 10 seconds.
Real case: A meal-kit team reduced temperature variability by adding dividers, making correct packing fast and repeatable.
thermal EPP cooler box premium
How do you validate a thermal EPP cooler box premium in 2025?
A thermal EPP cooler box premium becomes credible when you validate it against realistic temperature profiles and document pass/fail criteria. ISTA-style thermal standards are widely used to compare insulated shipper performance, and 7E profiles are described as newer testing profiles built from real-world lane data.
thermal EPP cooler box premium
Validation doesn’t need to be complicated. It needs to be repeatable and aligned to your worst lanes.
thermal EPP cooler box premium
Start with three tests: hot-season worst lane, cold exposure, and your normal volume lane. That gives you honest coverage in about two weeks.
thermal EPP cooler box premium
If you want a ready format, use Thermal testing plan template.
thermal EPP cooler box premium
Simple 3-test validation plan (you can run in two weeks)
| Test | When to run | What to watch | Practical meaning for you |
|---|---|---|---|
| Hot profile | Worst summer lane
thermal EPP cooler box premium |
Peak temperature | Finds hidden lid-seam leaks |
| Cold profile | Winter or cold staging
thermal EPP cooler box premium |
Overcooling risk | Prevents “too cold” damage |
| Normal lane | Your main volume route
thermal EPP cooler box premium |
Consistency | Confirms daily repeatability |
Practical tips and suggestions
-
Set acceptance limits before you test. Don’t “reinterpret” after failure.
thermal EPP cooler box premium
-
Validate the system, not the box alone. Box + coolant + payload is the truth.
thermal EPP cooler box premium
-
Change one variable at a time (coolant mass, placement, insert, lid fit).
Real case: One company stopped arguing about “box quality” after validation. The data showed hot staging time was the real root cause, not insulation thickness.
thermal EPP cooler box premium
How do you run thermal EPP cooler box premium cleaning and sanitizing for reuse?
Thermal EPP cooler box premium cleaning and sanitizing works when you treat drying as the final quality step, not an afterthought. Wet stacking drives odor, hygiene concerns, and performance decline over time.
High-volume teams win by making cleaning simple and consistent. A drying rack station often prevents most reuse failures.
thermal EPP cooler box premium
The fastest programs use liners to reduce mess, then focus on seam areas and full drying. Your goal is “clean, sanitized, dry, and seal-checked.”
thermal EPP cooler box premium
For a full workflow, use.
thermal EPP cooler box premium
The “No wet boxes in storage” rule (the premium protector)
| Step | What “done” looks like | What goes wrong | Practical meaning for you |
|---|---|---|---|
| Wash | No visible residue
thermal EPP cooler box premium |
Rushed wipe only | Odor and staining rise |
| Sanitize | Correct contact time
thermal EPP cooler box premium |
Immediate wipe-off | Hygiene confidence drops |
| Dry | No trapped moisture
thermal EPP cooler box premium |
Stacked wet | Shorter box life |
Practical tips and suggestions
-
High volume: build a drying rack station to prevent wet stacking.
thermal EPP cooler box premium
-
Fast turnarounds: use liners to reduce cleaning time.
thermal EPP cooler box premium
-
Training line: “Clean is not enough—dry is the finish line.”
thermal EPP cooler box premium
Real case: A hub improved reuse quality after adding one rule: “No wet boxes in storage,” enforced with a simple supervisor walk-by.
thermal EPP cooler box premium
How do you measure ROI for a thermal EPP cooler box premium?
ROI for a thermal EPP cooler box premium can be measured with three numbers: cost of failure, frequency of failures, and reuse cycles. If premium reduces complaints or damage even modestly, savings add up fast.
thermal EPP cooler box premium
You do not need complex spreadsheets to start. You need a 30-day pilot and honest tracking.
thermal EPP cooler box premium
Track deliveries using the thermal EPP cooler box premium, temperature-related complaints, refunds or reships, and damaged boxes replaced.
thermal EPP cooler box premium
Then compare the pilot routes to your baseline routes with the same products and SOP.
thermal EPP cooler box premium
ROI mini-calculator (interactive)
Fill in the blanks:
-
Failed-delivery cost = $_____ per incident (refund + reship + labor)
thermal EPP cooler box premium
-
Failures per month (baseline) = _____
-
Failures per month (pilot) = _____
-
Savings per month = (baseline − pilot) × failed-delivery cost
-
Replacement savings = baseline box replacements − pilot replacements
thermal EPP cooler box premium
| ROI input | What to track | Why it matters | Practical meaning for you |
|---|---|---|---|
| Complaints | Count per week
thermal EPP cooler box premium |
Quality signal | Measures stability |
| Replacements | Boxes/month
thermal EPP cooler box premium |
Durability signal | Measures lifetime |
| Route delays | Delay events
thermal EPP cooler box premium |
Stress test | Shows real value |
Practical tips and suggestions
-
Start small: pilot 20–50 boxes on your worst routes.
thermal EPP cooler box premium
-
Compare fairly: same route, same product, same packing SOP.
thermal EPP cooler box premium
-
Avoid false wins: measure at least 4 weeks because weather varies.
thermal EPP cooler box premium
Real case: A last-mile operator justified premium boxes after calculating that cutting two reships per week covered the monthly cost difference.
thermal EPP cooler box premium
2025 latest developments and trends for thermal EPP cooler box premium programs
In 2025, thermal EPP cooler box premium programs are moving toward reuse, standardization, and operational simplicity. Operators prefer fewer box models and train teams to pack them perfectly.
thermal EPP cooler box premium
Visual SOPs and packing diagrams are replacing long manuals, because they reduce mistakes under pressure.
thermal EPP cooler box premium
Cleanliness expectations are rising too, because reuse programs live or die by consistent cleaning and drying routines.
thermal EPP cooler box premium
Latest progress snapshot
-
More standard sizes: one “workhorse size” plus one larger option.
thermal EPP cooler box premium
-
Faster training: visual SOPs outperform long manuals.
thermal EPP cooler box premium
-
Higher hygiene bar: consistent cleaning + drying routines are now expected.
thermal EPP cooler box premium
Market insight: customers are more sensitive to “proof of control.” Even food delivery teams are building simple records and SOPs to protect trust during disruptions.
thermal EPP cooler box premium
Frequently asked questions
Q1: How long can a thermal EPP cooler box premium hold temperature?
It depends on starting temperature, coolant choice, packing method, and opening frequency. Control those, and retention improves.
thermal EPP cooler box premium
Q2: Is a thermal EPP cooler box premium better than a cheap insulated box?
Often yes for daily reuse, stacking, and rough handling. Premium boxes tend to seal more consistently and last longer.
thermal EPP cooler box premium
Q3: Can I use a thermal EPP cooler box premium for frozen items?
Yes, but frozen stability depends heavily on coolant strategy and fast closure discipline during handling.
thermal EPP cooler box premium
Q4: What is the biggest mistake with reusable thermal EPP boxes?
Storing boxes wet. Moisture increases odor issues and reduces hygiene confidence across reuse cycles.
thermal EPP cooler box premium
Q5: What should I validate first for a thermal EPP cooler box premium?
Validate peak temperature and time out of range on your worst hot lane, then lock a lane kit recipe.
thermal EPP cooler box premium
Summary and recommendations
A thermal EPP cooler box premium is worth it when your real routes include delays, repeated opening, stacking, and rough handling. The biggest gains come from seal quality, right-sizing to reduce air gaps, and consistent pack-out maps. Temperature retention improves most when you control starting temperature, lid closure, packing pattern, and open-time discipline.
thermal EPP cooler box premium
Action plan: pilot one thermal EPP cooler box premium size on your worst route for 30 days. Train one pack-out map, enforce a 10-second lid check, and track complaints and replacements weekly. Then scale the best lane kit and lock it with a simple validation report.
thermal EPP cooler box premium
About Tempk
At Tempk, we help cold chain teams run reusable packaging systems that work in daily operations. We focus on repeatable outcomes: stable temperature performance, fast pack-out routines, and reuse workflows that stay clean and trackable. If you share your temperature band, payload size, transit time, and return loop model, we can help you define a thermal EPP cooler box premium lane kit and a simple validation checklist.
Call to action: Request a “Premium EPP Lane Kit Blueprint” from us—box size, pack-out map, cleaning loop, and a 2-week validation plan.
Best Gel Ice Pack for Head Swelling (2025)
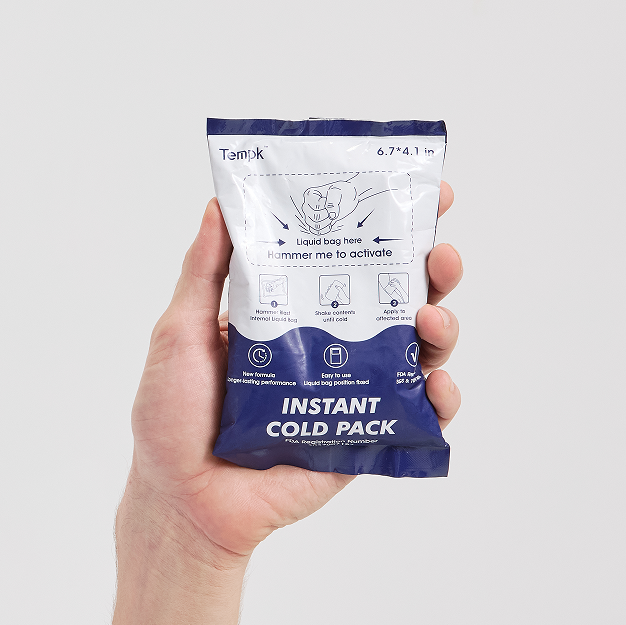
If you’re searching for the best gel ice pack for head swelling, you’re trying to solve three problems at once: shrink swelling, calm pain, and protect your skin. This guide shows you how to use the best gel ice pack for head swelling with a timer and a clear plan, not guesswork. Many consumer-facing guides from providers like Cleveland Clinic and national health services echo this short-session, barrier-first approach. Most practical guidance keeps it simple—use a thin cloth barrier, run short sessions (often 10–20 minutes, never more than 20), then take a real break before repeating.
Educational guide only, not a diagnosis. If swelling follows a significant head injury, use the safety checklist below and seek medical care when in doubt.
This guide will answer for you:
-
How to choose the best gel ice pack for head swelling based on fit, flexibility, and comfort
-
How long to use the best gel ice pack for head swelling safely (and why “longer” can backfire)
-
Which shape works best for forehead bumps, temples, eye-area puffiness, and back-of-head swelling
-
A 60-second red-flag self-check so you know when to seek urgent care
-
A 24–48 hour routine you can follow without guesswork
-
A leak-safety and hygiene checklist (especially for kids and pets)
What makes the best gel ice pack for head swelling actually work?
The best gel ice pack for head swelling is the one you can use correctly every time: flexible when frozen, comfortable with a barrier, and stable enough that you don’t have to hold it. If it’s rock-hard, it won’t touch the bump evenly. If it’s heavy or slippery, you’ll quit early. If it’s painfully cold on bare skin, you risk irritation instead of relief.
best gel ice pack for head swel…
When you shop, prioritize contact + comfort + control, not “maximum cold.” A pack that feels tolerable for a short session is more effective than one you rip off in two minutes. That’s why the best gel ice pack for head swelling often includes a sleeve or works well with a thin towel barrier.
best gel ice pack for head swel…
The 5-feature checklist for the best gel ice pack for head swelling
Use this checklist to avoid buying a “great pack” that never fits your head. Think of it as your best gel ice pack for head swelling buyer checklist.
best gel ice pack for head swel…
| Feature | What to look for | Why it helps | What it means for you |
|---|---|---|---|
| Flexibility when frozen | Bends, drapes, molds | Better contact on curves | More relief with less pressure |
| Soft edges & smooth surface | No sharp seams | Fewer pressure points | More comfort near hairline/eyes |
| Secure-but-gentle hold | Strap, wrap, or cap | Hands-free icing | You actually finish sessions |
| Right size options | Small / medium / wrap | Less sliding | Easier placement on bumps |
| Barrier-friendly design | Sleeve or towel-friendly | Skin protection | Safer, repeatable routine |
Practical tips and advice
-
If the bump is on top of your head: pick a wrap/cap—gravity will defeat handheld packs.
-
If you ice often: keep two packs so breaks are easy and automatic.
-
If you’re sensitive to cold: add a thicker towel and shorten the first session.
Real-world note: If you keep “holding” the pack the whole time, it’s not the best gel ice pack for head swelling for your routine—switch to a hands-free wrap.
best gel ice pack for head swel…
How long should you use the best gel ice pack for head swelling?
For most minor bumps, the safest pattern is short, timed sessions: usually 10–20 minutes with a cloth barrier, and do not exceed 20 minutes per session. If it burns, stings, or goes numb fast, stop early and add more barrier next time.
best gel ice pack for head swel…
Short sessions work because they cool the surface without stressing the skin. Long icing can increase irritation risk and can make the area feel worse later. The best gel ice pack for head swelling is designed for “one safe session,” not “stays cold forever.”
best gel ice pack for head swel…
A simple 24–48 hour icing schedule you can follow
This schedule is for mild, stable symptoms. If symptoms worsen after a hit, jump to the red-flag section.
best gel ice pack for head swel…
| Time window | Session length | How often (awake) | What you’re trying to do |
|---|---|---|---|
| First 6 hours | 10–15 min | Every 2–4 hours | Calm pain and slow swelling |
| 6–24 hours | 10–20 min | Every 3–4 hours | Reduce “goose egg” size |
| 24–48 hours | 10–15 min | As needed | Control tenderness and re-swelling |
Practical tips and advice
-
Set a timer every time. “Just a bit longer” causes most cold injuries.
best gel ice pack for head swel…
-
Never fall asleep with cold on skin. You can’t feel warning signs while asleep.
-
Place gently, don’t press. You’re cooling tissue, not flattening swelling.
best gel ice pack for head swel…
Realistic pattern: A forehead bump often looks smaller after the first session, then returns slightly. Consistency beats intensity.
best gel ice pack for head swel…
Which shape is the best gel ice pack for head swelling by location?
The best gel ice pack for head swelling depends on where the swelling is. Forehead bumps do well with a flat, flexible panel. Temple swelling needs a smaller strip near the hairline. Back-of-head swelling often needs a wrap so you can rest without holding it.
best gel ice pack for head swel…
Heads are curved, hair reduces contact, and packs slide. If the pack keeps slipping, you didn’t choose the wrong temperature—you chose the wrong shape. That’s why “fit by location” is the fastest upgrade to the best gel ice pack for head swelling experience.
best gel ice pack for head swel…
Quick picker: match the best gel ice pack for head swelling to the spot
| Swelling location | Best pack style | Why it helps | What you’ll feel |
|---|---|---|---|
| Forehead “goose egg” | Flat + flexible panel | Broad coverage without digging | Even cooling |
| Temple area | Narrow flexible strip | Better contact near hairline | Less sliding |
| Around eye/cheekbone | Small soft pack | Lower pressure, easy placement | Gentler relief |
| Back of head | Curved wrap | Stays put while you rest | No “hand-holding” |
| Whole-head discomfort | Cap-style wrap | Covers multiple areas | Comfort + stability |
Practical tips and advice
-
If it slides, change shape—not pressure. Pressure increases pain and can aggravate tender tissue.
best gel ice pack for head swel…
-
Eye-area swelling: use a smaller pack, avoid pressure, and keep sessions shorter if it feels better.
best gel ice pack for head swel…
-
Back-of-head swelling: create a towel “nest” so the pack stays steady while you rest.
Real-world note: This is how you avoid buying an “athletic knee pack” and trying to force it onto your forehead.
best gel ice pack for head swel…
When is head swelling a red flag (and not an ice-pack problem)?
The best gel ice pack for head swelling is a tool for external swelling and comfort. It is not a tool for brain safety. If the swelling followed a significant impact, or if symptoms change over the next 1–2 days, take warning signs seriously and seek medical evaluation.
best gel ice pack for head swel…
Kids and older adults deserve extra caution. For kids, supervision matters as much as cold therapy. For older adults or people on blood thinners, consider earlier medical advice even after a “small” bump.
60-second “Ice or urgent care?” self-check (interactive)
Answer YES/NO. If you hit any YES, prioritize urgent medical care.
-
Repeated vomiting, seizure, or worsening headache
-
Confusion, unusual behavior, or increasing drowsiness
-
Weakness, slurred speech, major balance problems
-
Vision changes or one pupil looking larger than the other
-
Clear fluid or blood from the nose/ears
Kid-specific safety rules (simple, high value)
-
Always use a cloth barrier between cold and skin.
best gel ice pack for head swel…
-
Limit sessions to about 15–20 minutes and don’t let a child fall asleep with cold on skin.
best gel ice pack for head swel…
-
Watch closely for symptoms for 24–48 hours after a head injury.
best gel ice pack for head swel…
| Kid scenario | Best gel ice pack for head swelling choice | What you do | When to escalate |
|---|---|---|---|
| Small bump, normal behavior | Soft, flexible pack | 10–15 min with towel | Vomiting/confusion |
| Large swelling | Don’t rely on cold alone | Seek medical advice | Same day |
| Baby crying nonstop | Treat as higher risk | Seek urgent care | Immediately |
Practical tips and advice
-
Watch the person, not just the bump. The bump can shrink while symptoms worsen.
-
If you can’t supervise icing, skip it. Unsafe icing is worse than no icing.
best gel ice pack for head swel…
-
If you’re unsure, use the best gel ice pack for head swelling only for comfort and get medical advice.
Scenario: If a child seems fine, then becomes unusually sleepy and vomits twice, stop home care and seek urgent help.
Decision tool: Find the best gel ice pack for head swelling in 2 minutes
Score each statement 0 (no) to 2 (yes). Total 0–12. This decision tool helps you pick the best gel ice pack for head swelling without guessing.
best gel ice pack for head swel…
-
My swelling is mainly on the forehead.
-
My swelling is near the temple/side of the head.
-
I need hands-free icing while resting.
-
I’m sensitive to cold and want gentler cooling.
-
I plan to ice multiple times today.
-
I want something that stays flexible straight from the freezer.
Results (what to choose):
-
0–4: A small or medium flexible pack is enough.
best gel ice pack for head swel…
-
5–8: A medium flexible pack + soft wrap is usually best.
best gel ice pack for head swel…
-
9–12: Choose a wrap/cap-style pack for hands-free use.
best gel ice pack for head swel…
Best gel ice pack for head swelling vs ice: which is best?
If you want a repeatable routine, the best gel ice pack for head swelling usually wins because it’s reusable, less drippy than melting ice, and can conform to curves when flexible. If you only buy one item, choose a best gel ice pack for head swelling that fits your most common swelling location. Homemade options can work in a pinch, but they’re easier to misuse (too cold, too long, too messy).
best gel ice pack for head swel…
Leak-safety and cleanup (quick checklist)
Reusable packs can leak after heavy bending or years of use. Treat leaks as a cleanup task, not a panic moment. Cleaning matters because the best gel ice pack for head swelling often touches the face and hairline.
-
Keep gel away from eyes, mouth, kids, and pets.
-
Wipe up, bag the waste, then wash the surface with soap and water.
-
Replace packs with cloudy seams, cracks, or sticky residue.
| Leak-risk detail | Lower risk choice | Higher risk choice | What it means for you |
|---|---|---|---|
| Seams | Wide welds | Thin seals | Long-term durability |
| Cover | Washable sleeve | Bare plastic | Comfort + hygiene |
| Storage | Freezer bag | Loose in freezer | Cleaner, fewer punctures |
2025 latest trends in the best gel ice pack for head swelling
In 2025, the biggest improvements are comfort and fit, plus clearer safety messaging: softer sleeves, stronger seams, and more head-specific wraps that stay put.
best gel ice pack for head swel…
Latest progress you’ll notice
-
More cap/wrap designs for crown bumps
-
Better flexibility when frozen for curved contact
-
More durable film and seams for fewer leaks
-
Clearer “timer + barrier” instructions so you don’t over-ice
Market insight: the best gel ice pack for head swelling is the one you can use with a timer, a barrier, and zero drama.
Frequently asked questions
Question 1: What is the best gel ice pack for head swelling after a minor bump?
A medium flexible pack that covers the area without pressure, used with a cloth barrier and short sessions, is a practical choice.
best gel ice pack for head swel…
Question 2: How long should I use the best gel ice pack for head swelling each time?
Keep sessions around 10–20 minutes and avoid exceeding 20 minutes at a time.
best gel ice pack for head swel…
Question 3: Can I put the best gel ice pack for head swelling directly on my skin?
It’s safer to use a thin cloth barrier to reduce cold injury risk.
best gel ice pack for head swel…
Question 4: What size is the best gel ice pack for head swelling?
Small for temples/under-eye, medium for forehead, and wrap/cap for back-of-head or hands-free use.
best gel ice pack for head swel…
Question 5: What if swelling is around the eye?
Use a smaller, softer pack, avoid pressure, and keep sessions shorter if it feels better.
best gel ice pack for head swel…
Question 6: When should I worry about head swelling after an injury?
Seek medical care if you have worsening symptoms like confusion, severe headache, repeated vomiting, or symptoms that persist or worsen over 1–2 days.
best gel ice pack for head swel…
Question 7: What’s the most common mistake with the best gel ice pack for head swelling?
Icing too long, placing cold directly on skin, or pressing hard on the swollen area.
best gel ice pack for head swel…
Question 8: How do I choose the best gel ice pack for head swelling if I need hands-free use?
Use the score tool above—high scores usually point to wrap or cap-style packs.
best gel ice pack for head swel…
Summary and recommendations
The best gel ice pack for head swelling is flexible, fits the swelling location, and works comfortably with a cloth barrier. A best gel ice pack for head swelling should feel tolerable, not painfully cold. Use short, timed sessions (often 10–20 minutes, never longer than 20), take breaks, and avoid pressing hard.
best gel ice pack for head swel…
Action plan (CTA)
-
If a hit caused the swelling, run the 60-second red-flag checklist first.
-
Match pack shape to location (forehead vs crown vs back of head).
-
Do one safe session today: barrier + timer + gentle placement.
About Tempk
At Tempk, we work with temperature-control materials and reusable cold-pack systems where predictable cooling and safe handling matter. We use a “process-first” mindset: the right shape, the right barrier, and the right timing. If you share where the swelling is (forehead, temple, eye area, or back of head) and whether you need hands-free use, we can recommend a practical pack style and a simple session routine.
Amazon Gel Ice Pack for Elbow Pain Relief (2025)
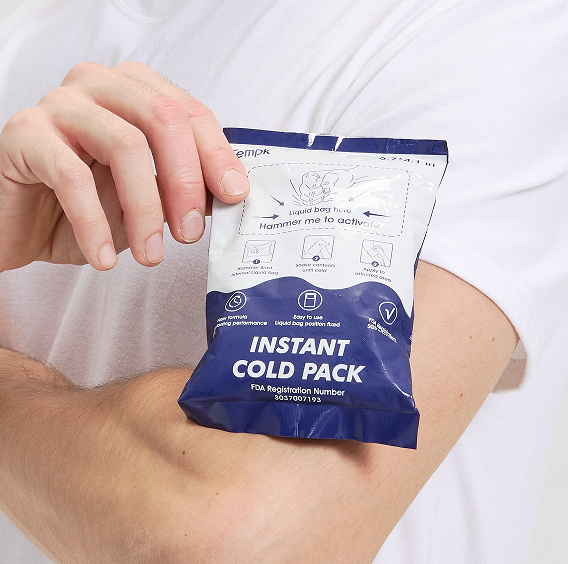
Amazon Gel Ice Pack for Elbow Pain Relief: Best Pick?
An Amazon gel ice pack for elbow pain relief can be a simple tool that helps you get through work, workouts, and daily flare-ups with less frustration. The secret is not buying the “coldest” pack. The secret is choosing one that fits your elbow, stays comfortable, and supports safe timing.
Many reputable clinical guides commonly recommend short cold sessions (often 10–20 minutes) and a cloth barrier between the cold pack and your skin. This article shows you how to pick the right type, use it safely, and build a routine you will actually follow—because consistency is what usually drives results.
This article will answer for you
-
How an Amazon gel ice pack for elbow pain relief works for common elbow issues
-
Which type fits best: wrap, sleeve, contoured, or flat gel pack
-
The safest 10 to 20 minute icing intervals for elbow pain (and why longer can backfire)
-
A fast decision tool to pick the right gel ice pack elbow wrap with strap
-
How to avoid messy surprises with leak-proof gel ice pack packaging
-
2025 trends: better wraps, washable covers, and “comfort-first” designs
Why would you use an Amazon gel ice pack for elbow pain relief?
An Amazon gel ice pack for elbow pain relief is popular because it is reusable, easy to store, and usually simpler than managing loose ice cubes. Cold therapy can reduce pain and swelling for many short-term flare-ups. It can also help after activity when your elbow feels “hot,” irritated, or overworked.
A lot of elbow pain comes from repeated gripping, lifting, typing, or tool use. Cold therapy can calm symptoms while you fix the real trigger with rest, better movement habits, and smarter breaks.
Common elbow situations where cold helps
-
Tennis elbow style pain (outside elbow): flares after gripping or typing
-
Golfer’s elbow style pain (inside elbow): flares after pulling or lifting
-
Minor sprain or bump: tenderness and swelling after a twist or impact
-
Overuse soreness: warm, achy discomfort after a long day
| Your situation | What you usually feel | What cold can do | Practical meaning for you |
|---|---|---|---|
| Overuse soreness | warm, achy | reduces discomfort | easier sleep and work |
| Tendon flare | sharp with movement | calms irritation | better tolerance for rehab |
| Mild sprain/bump | swelling + tenderness | reduces swelling | less stiffness later |
Practical tips you can use today
-
If pain started suddenly: cold is commonly used early to reduce swelling.
-
If pain is chronic and stiff: heat may feel better later, but don’t guess—test carefully and use what matches your symptoms.
-
If you have numbness, poor circulation, or reduced sensation: talk to a clinician before heavy cold use.
Practical case example: A warehouse worker used short, timed cold sessions after shifts. The biggest improvement came from consistent timing, not “extra cold.”
How long should an Amazon gel ice pack for elbow pain relief stay on?
For most people, an Amazon gel ice pack for elbow pain relief works best with short, timed sessions. A simple safety rule many clinicians repeat is: don’t exceed 20 minutes per session, and use a thin cloth barrier.
Long cold exposure can irritate skin and tissues. Over-icing can also create a rebound effect where the area feels worse later.
A simple timing routine you can follow
Use this baseline routine unless your clinician gives different instructions:
-
Cold on: 10–20 minutes
-
Cold off: let skin return to normal temperature
-
Repeat: 2–4 sessions/day (or more early on, if advised)
How often can you ice an elbow?
Frequency depends on your situation. A practical starting point:
-
Acute flare or swelling: a few short sessions across the day
-
Tendon flare after work/sport: cold after the triggering activity
-
General soreness: 2–4 sessions daily for comfort support
| Condition type | Typical pattern | Why it works | What it means for you |
|---|---|---|---|
| Acute flare | spaced through the day | reduces swelling | predictable routine |
| Early tendon flare | more frequent short sessions | fast symptom calming | useful for first days |
| General soreness | 2–4 sessions daily | comfort support | easy to maintain |
Practical tips and recommendations
-
Always use a cloth barrier (or a built-in sleeve).
-
Set a timer so you don’t “accidentally over-ice.”
-
Stop if skin becomes very red, numb, blotchy, or painful.
Practical case example: A home user switched from “ice until it feels better” to timed 20-minute sessions. They had fewer rebound aches and less skin irritation.
Which Amazon gel ice pack for elbow pain relief type fits best?
The best Amazon gel ice pack for elbow pain relief is the one you will actually use correctly. Fit and comfort matter as much as cold strength. If it slips when you bend your arm, you’ll stop using it.
The four common styles you’ll see
-
Wraparound elbow sleeve (strap): hands-free and consistent
-
Contoured elbow pack: designed to cup the joint
-
Flat gel pack: versatile but needs holding or a bandage
-
Hot/cold dual pack: useful if you later switch to heat for stiffness
Sleeve wrap vs flat gel pack—what should you pick?
If you multitask or forget timers, a sleeve wrap often makes routine easier. If you want one pack for many body parts, a flat pack is more versatile.
| Pack style | Comfort | Hands-free | Practical meaning for you |
|---|---|---|---|
| Elbow sleeve wrap | high | yes | easiest daily habit |
| Contoured elbow pack | high | sometimes | strong fit with less slip |
| Flat gel pack | medium | no | flexible but needs effort |
| Mini gel pack | medium | sometimes | good for pinpoint areas |
Practical tips and recommendations
-
If you work at a desk, choose a wrap so you can keep typing.
-
If you lift weights, choose a tougher cover and reinforced seams.
-
If you travel, choose a compact pack with a leak-resistant liner.
Practical case example: A tennis player stayed consistent with a wrap-style pack after practice because it stayed on while walking and cleaning gear.
What features should you look for in Amazon listings?
When you search Amazon gel ice pack for elbow pain relief, listings can look identical. The real differences are usually construction, comfort, and durability.
The features that actually matter
Fit and coverage
-
Does it cover the pain zone you have (outside vs inside elbow)?
-
Does it wrap far enough around the forearm/upper arm?
-
Do straps tighten evenly without pinching?
Cold feel and flexibility
-
Does the gel remain flexible after freezing?
-
Is there a fabric cover to reduce “too cold” shock?
Safety and skin protection
-
Does it include a cover or clearly recommend a barrier?
-
Are timing rules easy to follow (10–20 minute sessions)?
Durability and leak prevention
-
Double-sealed edges
-
Strong stitching on sleeves
-
A second inner liner (when present)
| Listing claim | What to verify | Why it matters | Practical meaning for you |
|---|---|---|---|
| “Reusable” | seam quality | prevents leaks | fewer replacements |
| “Flexible when frozen” | reviews mention softness | improves comfort | more consistent use |
| “Hands-free” | real strap design | prevents slipping | better results |
Practical tips and recommendations
-
Search reviews for keywords like “leak,” “stiff,” “Velcro,” “itchy.”
-
Prefer wide straps over thin straps (less pinching).
-
Choose size based on your arm measurement, not product photos.
Practical case example: A buyer who chose “one size fits all” found straps too loose. A better-sized wrap improved comfort and follow-through.
How do you use an Amazon gel ice pack for elbow pain relief safely?
Safe use is part of the product. A great pack used incorrectly can cause irritation. The safest approach is simple: barrier + timer + gentle contact.
HowTo: Safe cold therapy for elbow pain
-
Freeze the gel pack according to instructions.
-
Place a thin cloth barrier (or use the included fabric cover).
-
Position the pack on the painful area (outer or inner elbow).
-
Use gentle contact pressure—do not clamp it painfully tight.
-
Apply for 10–20 minutes only.
-
Remove and let skin return to normal temperature.
-
Repeat later if needed.
The “too cold” warning signs you should respect
Stop and warm the area gently if you notice:
-
burning or stinging
-
extreme redness
-
prolonged numbness
-
skin looks pale, gray, or blotchy
A “strong cold bite” is not a success metric. Comfort supports consistency.
Practical tips and recommendations
-
Don’t fall asleep while icing. Use a timer and stay awake.
-
Don’t ice directly on skin. Always use a barrier.
-
Don’t exceed 20 minutes per session.
Practical case example: A user iced through a full TV episode and developed skin irritation. Switching to timed sessions fixed the problem.
Positioning that actually stays put
An Amazon gel ice pack for elbow pain relief works best when it sits on the right spot and doesn’t slide when you bend your arm. The elbow is a hinge, so placement usually works better slightly above or below the crease, not directly across the bend.
Match placement to your pain zone
-
Outside elbow pain: cover the outer bump and nearby tendon area
-
Inside elbow pain: cover the inner bump and nearby tendon area
-
Tip/back swelling: use a pack that cups the back of the elbow
One-hand setup tricks (because the elbow is awkward)
| Problem | Simple fix | Why it helps |
|---|---|---|
| Strap won’t tighten evenly | anchor one strap first, then adjust second | reduces twisting and slipping |
| Pack slides while typing | rotate pack slightly above the crease | keeps cold zone stable |
| Too much pressure | loosen straps and add a fabric sleeve | comfort increases repeat use |
Practical tips and recommendations
-
Do a “bend test” before starting the timer. Bend your arm 3 times. If it slips, reposition.
-
Avoid placing gel directly across the crease where it will fold and move.
-
Tight is not better. Stable is better.
Practical case example: A desk worker placed the pack over the crease and it popped off repeatedly. Moving it slightly above the bend made sessions effortless.
Interactive decision tool: pick the best Amazon gel ice pack for elbow pain relief
Use this tool before you add to cart. It keeps your choice simple and repeatable.
Step 1: Identify your pain pattern
Choose one:
-
Overuse ache after work
-
Sharp pain with gripping (tennis elbow style)
-
Swelling after a minor injury
-
Ongoing tendon discomfort with stiffness
Step 2: Score your “hands-free need” (0–5)
Add 1 point for each “yes”:
-
You will use it while working
-
You forget to hold a pack in place
-
You need to walk around during recovery
-
You want consistent placement every time
-
You want to reduce user error for a family member
Results
-
0–1: flat gel pack can work
-
2–3: contoured elbow pack is better
-
4–5: wrap/sleeve is usually best
Step 3: Choose your cold comfort preference
-
Sensitive to cold → thicker cover or fabric sleeve
-
Wants stronger cooling → larger gel mass, but keep timing strict
Maintenance: make your pack last longer
A longer-lasting Amazon gel ice pack for elbow pain relief saves money and avoids surprise leaks. Most packs fail from repeated freeze cycles plus rough handling: folded seams, sharp buckles, and being shoved into crowded freezer doors.
A simple care routine (weekly)
| Habit | What you do | What it prevents |
|---|---|---|
| Store flat | lay it flat in the freezer | reduces seam stress |
| Dry before freezing | wipe and dry after use | prevents odor and material stress |
| Inspect seams | quick look for bubbles/sticky spots | catches leaks early |
Practical tips and recommendations
-
Avoid sharply folding the gel area. Folded corners become weak points.
-
Keep it away from sharp freezer trays or metal edges.
-
Wash removable sleeves regularly like workout gear.
Practical case example: A user stored the pack folded around a shelf edge. It leaked after weeks. Storing flat prevented repeat failures.
If you sell: leak-proof gel ice pack packaging for Amazon orders
If you sell an Amazon gel ice pack for elbow pain relief, packaging is not “extra.” It’s part of perceived quality. Customers judge the product by the unboxing. A small leak can ruin a carton and trigger a return.
Your packaging should assume: (1) parcels get dropped and squeezed, and (2) customers hate anything messy.
Packaging fixes that reduce returns
| Failure mode | Packaging fix | What the customer experiences |
|---|---|---|
| Micro-leak stains box | sealed inner pouch + optional absorbent pad | clean unboxing, higher trust |
| Buckle punctures pack | hardware in separate pouch | fewer “arrived damaged” claims |
| Pack shifts and rubs seams | insert or snug fit carton | less abrasion, fewer leaks |
Practical tips and recommendations
-
Contain first: a sealed inner pouch is cheap insurance.
-
Right-size the carton: empty space is a damage multiplier.
-
Add a simple insert: “how to chill + how long to use” reduces misuse complaints.
Practical case example: A seller separated hardware and added an inner pouch. Complaints dropped because cartons arrived clean.
2025 trends in Amazon gel ice pack for elbow pain relief
In 2025, the biggest shift isn’t “colder packs.” It’s more usable cold therapy that people can follow.
Latest progress snapshot (2025)
-
Better strap systems with less slipping and fewer pressure points
-
Washable covers becoming standard
-
More ergonomic elbow shapes that cup the hinge better
-
Simpler instruction cards that improve first-time success
Market insight you can use
People stop using therapy tools that are annoying. The listings that win are the ones that reduce friction:
-
easier to position
-
easier to clean
-
easier to time correctly
Internal link suggestions (3–5)
Use these as internal pages on your site (no external links).
-
Elbow cold therapy timing guide: 10–20 minute sessions explained
-
How to use a gel ice pack safely at home
-
Reusable gel pack care: cleaning and freezer storage tips
-
Tennis elbow recovery routine: cold therapy + activity changes
-
Leak-proof packaging SOP for shipping reusable gel packs
Frequently asked questions
Q1: How long should I use an Amazon gel ice pack for elbow pain relief each time?
Most guidance favors 10–20 minute sessions with a cloth barrier. Longer sessions can irritate skin and slow comfort recovery.
Q2: How many times per day can I use an Amazon gel ice pack for elbow pain relief?
Many people use a few short sessions per day, and often use cold right after the activity that triggered pain.
Q3: Should the gel pack touch my skin directly?
No. Use a towel or built-in sleeve. Direct skin contact increases irritation risk.
Q4: Wrap, sleeve, contoured, or flat—what’s best?
If you want hands-free consistency, a wrap or sleeve usually wins. Flat packs are flexible but often slip.
Q5: When should I consider heat instead of cold?
Cold is often preferred for fresh flare-ups and swelling. Heat may feel better later for stiffness, once swelling settles.
Q6: How do I stop slipping?
Position slightly above/below the elbow crease, tighten evenly, and do a bend test before timing.
Summary and recommendations
An Amazon gel ice pack for elbow pain relief works best when it fits your elbow zone, stays in place, and feels comfortable enough to repeat. Use a boring, consistent routine: barrier + timer + 10–20 minutes. Choose a wrap or sleeve if you need hands-free use. Check reviews for seam quality to reduce leak risk. Store the pack flat and inspect seams weekly to extend its life.
Your next steps (CTA)
-
Use the decision tool to pick wrap/sleeve vs contoured vs flat.
-
Commit to timed sessions for the next 7 days (not longer sessions).
-
If pain persists or worsens, get professional guidance—cold packs are support tools, not a full diagnosis.
About Tempk
At Tempk, we build temperature-control products and packaging workflows designed for repeatable daily use. We focus on comfort, durability, and clear instructions—because cold therapy only helps when people actually follow the routine. If you run a clinic kit program or sell at scale, we can help you standardize kitting and leak-proof gel ice pack packaging to reduce returns and improve customer experience.
Next step: Share your target user scenario (desk work, sports recovery, swelling after minor injury) and preferred style (wrap vs sleeve vs contoured). We’ll help you map a simple, consistent routine and product spec checklist.
Cold Chain Fish Training Solutions That Work (2025)
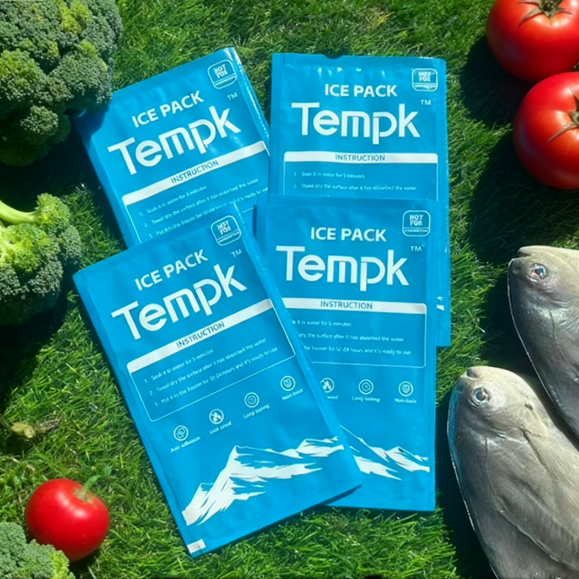
Cold Chain Fish Training Solutions That Work?
If your fish quality is “great on Monday and risky on Friday,” your biggest gap is usually training, not equipment. Cold Chain Fish Training Solutions turn temperature control and clean handling into habits your team can repeat under pressure. In real operations, one missed lid closure, one slow unloading, or one ignored alarm can cost more than a packaging upgrade. This guide gives you a role-based training system, short drills, and proof your customers and auditors trust.
This article will help you:
-
Build a fish cold chain training program checklist your staff actually follows
-
Run seafood temperature control staff training that prevents “silent spoilage” during handoffs
-
Teach HACCP-style training for fish handling without overwhelming new hires
-
Standardize last-mile fish delivery cold chain training for drivers and hubs
-
Improve data logger and alarm response training for seafood with a simple drill system
What are Cold Chain Fish Training Solutions, and why do they fail on real docks?
Cold Chain Fish Training Solutions are a practical training system—roles, SOPs, checks, refreshers, and proof—that keeps fish within target conditions from receiving to dispatch to delivery. Most programs fail because they read like a textbook: long, vague, and disconnected from what staff must do in the next 10 minutes. A working system is short, visual, role-based, and measured.
Think of training like a seatbelt. You do not need a lecture on physics. You need one motion, done every time. Cold Chain Fish Training Solutions should create “automatic habits” for temperature checks, ice handling, drainage control, and clean tools—especially during rush hours.
The “3-Minute Reality Check” (use it today)
Ask your shift lead to answer these in under 3 minutes:
-
What is the target receiving temperature for today’s fish categories?
-
Where is the nearest calibrated probe thermometer right now?
-
What happens if the dock is delayed by 20 minutes?
-
Who can decide: hold, re-ice, re-pack, reject, or release?
-
Where is it recorded so it is audit-ready?
If answers vary by person, you do not have a training system yet—you have tribal knowledge.
| Training failure point | What staff often do | What you need instead | Practical meaning for you |
|---|---|---|---|
| Receiving under pressure | “Looks fine” acceptance | 2-point check + record | Fewer disputes, fewer bad lots |
| Door openings | Frequent long openings | “Open/close discipline” | Less temperature bounce |
| Alarm events | Silence and move on | 5-step response plan | Faster saves, cleaner audits |
Practical tips you can use this week
-
Peak receiving: use a “two-person receiving rule” (one checks, one records).
-
Dock congestion: set staging time limits (maximum minutes out of control).
-
New hires: train the top 5 mistakes first, not the full manual.
Practical case: One seafood site reduced “mystery odor” complaints after adding a 10-minute receiving drill plus a clear “stop-the-line” rule for warm cartons.
How do Cold Chain Fish Training Solutions reduce spoilage, claims, and margin loss?
Cold Chain Fish Training Solutions reduce spoilage by controlling the moments where temperature and hygiene slip: unloading, staging, repacking, last-mile transfer, and exceptions. The biggest gains come from consistency—doing small things the same way every time—because fish quality punishes variation fast.
Use a simple metaphor your team remembers: fish quality is like a phone battery in the heat. Every extra warm minute drains quality faster than you expect. Cold Chain Fish Training Solutions protect your “quality battery” by removing drain moments.
Build a “Quality Protection Loop” (teach it as a cycle)
-
Pre-chill and prepare (room, packaging, ice, tools ready)
-
Receive fast and verify (time + temperature + condition)
-
Protect during handling (cover, limit exposure, clean tools)
-
Pack and seal consistently (same pattern, same closure checks)
-
Document and learn (records, quick review, coaching)
| Loop step | Standard to teach | Simple proof | Benefit to you |
|---|---|---|---|
| Receive | Probe + surface check | Logged reading + note | Fewer supplier disputes |
| Handle | Max exposure-time rule | Timer or checklist tick | Less temperature rise |
| Pack | Ice placement standard | Packing diagram sign-off | More stable last-mile outcomes |
A mini “Warm-Time Budget” tool (simple, fast, repeatable)
Use this quick rule in training huddles:
-
Warm-Time Budget = (Allowed minutes out of control) – (Actual minutes out of control)
-
If the budget goes negative, the rule is: protect + record + escalate.
Example: If your lane allows 20 minutes max out of control, and you already spent 18 minutes, you only have 2 minutes left. That makes decisions obvious and calm.
Practical tips and suggestions
-
Short staffing day: teach a “minimum viable SOP”—the 6 steps you never skip.
-
Mixed loads: teach “separation logic” (odor, meltwater, allergen separation where relevant).
-
Claims prevention: teach an “evidence pack” (time stamp, temperature, condition notes).
Practical case: After adding a 5-step exception drill, one operator cut disputed deliveries because drivers stopped guessing and started recording “what happened + what we did.”
How do you design a fish cold chain training program checklist that staff follow?
A checklist only works if it matches real workflow. Cold Chain Fish Training Solutions should use a “short checklist + visible standard” approach: fewer items, clearer pass/fail standards, and immediate feedback.
The “15-item maximum” checklist rule
If your checklist is longer than 15 items per role, it will be skipped under pressure. Split it into:
-
Start-of-shift checks (5–7 items)
-
Per-load checks (5–7 items)
-
Exception checks (3–5 items)
Sample receiving checklist (teach + practice)
-
Dock ready (space cleared, tools ready, liners ready)
-
Carton condition check (wet, crushed, odor, leakage)
-
Quick temperature verification (defined method, consistent location)
-
Time-out-of-control estimate (ask + observe)
-
Action decision (accept / hold / re-ice / reject)
-
Record (temp, time, action, initials)
| Checklist item | “Good” looks like | “Bad” looks like | Meaning for you |
|---|---|---|---|
| Temp check | Same method every time | “Felt cold” guessing | Less variance, fewer disputes |
| Carton check | Notes/photos when needed | No notes until complaint | Stronger claim defense |
| Decision | Clear hold/rework rules | Ad hoc calls | More predictable quality |
Practical tips to make it stick
-
Post a one-page “gold standard” photo at the workstation.
-
Keep thermometers and wipes in one fixed location.
-
Score checklist completion weekly (simple pass/fail per shift).
Practical case: One site improved completion after removing “nice-to-have” items and tying three critical items to a daily supervisor walk-through.
What should seafood temperature control staff training include for alarms, delays, and data loggers?
Alarms and delays are where quality is saved—or lost. Cold Chain Fish Training Solutions must train calm, repeatable responses, not panic decisions.
The 5-step alarm response (teach it like a fire drill)
-
Confirm (real event? sensor placement? door open?)
-
Protect (close doors, cover product, add ice if SOP allows)
-
Stabilize (move to colder zone, reduce exposure time)
-
Record (time, temp, cause, action)
-
Escalate (who approves hold/release; what evidence is required)
| Alarm situation | First action | Second action | Benefit to you |
|---|---|---|---|
| Door left open | Close + protect | Record + coach | Fewer repeat events |
| Cooling slow | Move to backup | Escalate decision | Less loss |
| Delivery delay | Add protection | Document chain | Stronger customer trust |
Data logger training (keep it simple)
Your team does not need charts on day one. Teach three habits:
-
What a “peak temperature event” means in plain language
-
Where to find the event in your system (one screen, one place)
-
What to do next: protect + record + escalate
Practical tips for drivers and hubs
-
Teach drivers: “call + protect + record” during delays.
-
Use a photo guide for sensor placement to prevent confusion.
-
Build a no-blame culture that rewards early escalation.
Practical case: A fleet reduced repeat alarm events after introducing two questions: “Is product protected?” and “Is it recorded?”
Which temperature and hazard rules belong in every Cold Chain Fish Training Solutions module?
Cold Chain Fish Training Solutions work best when your rules fit the reality of fresh fish, frozen fish, and high-risk categories. Keep it teachable by using “three zones” and product-specific hazard modules.
Teach the “three target zones” (fresh / frozen / out-of-control time)
-
Fresh fish: train “as cold as required,” commonly taught as near melting-ice conditions for fresh handling in many standards
-
Fish stored under ice: train “meltwater must drain away from product” as a pass/fail habit
-
Frozen fish: train a strict frozen target (commonly taught around –18°C for frozen integrity)
Add hazard modules only when they match your products
Use a simple story format: trigger → control → proof
-
Histamine-risk species: time + temperature abuse risk → rapid chilling + minimal warm staging → receiving logs + corrective actions
-
Reduced oxygen / vacuum-packed refrigerated fish: strict refrigeration control → clear hold/release authority → documented corrective actions
-
Fish intended for raw consumption: validated parasite-control step (time/temperature freezing plan) → freezer logs + verification routine
Practical training rule: “If you sell it, you must train it”
Do not bury critical hazards inside general onboarding. If you sell a risky category, make it a separate module with a separate sign-off.
Practical case: One distributor reduced high-risk exposure by moving histamine-risk checks to first priority at receiving and empowering the trained decision-maker to reject out-of-spec lots immediately.
How to implement Cold Chain Fish Training Solutions in 30 days
Cold Chain Fish Training Solutions are real only if you can prove competence and corrective action—not just attendance. A fast rollout uses short drills, “watch-me” checks, and one weekly review loop.
Your 4-week rollout plan (one drill per week)
-
Week 1: Timer discipline + “out-of-control time” rule
-
Week 2: Ice placement + drainage check drill
-
Week 3: Receiving rapid-check drill + accept/hold/reject rules
-
Week 4: 12-minute dock-delay simulation + record review coaching
The 12-minute “Dock Delay” simulation (interactive)
Scenario: Truck arrives late. Dock is busy. Fresh fish must stay cold.
Choose one response:
-
Unload now and “log later.”
-
Start a timer, unload fastest-to-cold items first, log as you go.
-
Leave the load and hope it stays cold.
Best answer: #2 because it controls time and creates proof.
| Simulation step | What trainees do | What you score | Meaning for you |
|---|---|---|---|
| Timer start | Start at door-open | Yes/No | Stops warm-time blindness |
| Prioritize | Coldest/riskiest first | Correct order | Protects sensitive loads |
| Decision | Accept/hold/reject | Correct call | Prevents bad product release |
| Documentation | Log in real time | Complete | Audit-ready evidence |
KPI set (review in 10 minutes weekly)
-
Temperature excursion rate (target: down)
-
Receiving decision accuracy (target: up)
-
Drainage compliance (target: up)
-
Record error rate (target: down)
-
Drill pass rate (target: up)
2025 latest fish cold chain training trends that matter
In 2025, fish operations are shifting from “annual compliance training” to continuous performance training. Customers and auditors want evidence, not promises. The winners are using:
-
Micro-training blocks: 5–10 minute drills outperform long lectures during peak season
-
Exception-first training: alarms, delays, and corrective actions get trained like fire drills
-
Proof packs: time + temperature + actions recorded consistently to resolve disputes faster
Market reality: disruptions are normal now. Cold Chain Fish Training Solutions that survive peak season are short, visual, role-owned, and measured.
Frequently asked questions
Q1: How fast can Cold Chain Fish Training Solutions show results?
Many teams see fewer mistakes in 2–4 weeks when you train one key skill per day and track checklist completion.
Q2: What is the best first module in Cold Chain Fish Training Solutions?
Start with receiving. If accept/hold/reject decisions and records are inconsistent, problems spread downstream.
Q3: Do I need advanced technology for Cold Chain Fish Training Solutions?
No. Start with SOPs, drills, and proof habits. Technology helps later, but training makes technology useful.
Q4: How do I train drivers without slowing routes?
Use a 7-minute pre-trip routine plus one delay drill. Keep it role-specific and repeat weekly.
Q5: Why is drainage trained as a pass/fail step?
Because fish sitting in meltwater drives quality loss and hygiene risk. Drainage control is a simple habit with big payoff.
Q6: How often should I refresh Cold Chain Fish Training Solutions training?
Short refreshers monthly work well, plus immediate coaching after exceptions or alarms.
Summary and recommendations
Cold Chain Fish Training Solutions work when they are short, visual, role-based, and measured. Focus first on receiving discipline, exposure-time control, ice and drainage habits, and a repeatable alarm/delay response. Keep checklists under 15 items per role so people use them on busy days. Then prove improvement with drills, log reviews, and a small KPI set.
Next step: run a 14-day micro-training pilot at one site, track three metrics (checklist completion, exception count, repeat incident rate), and roll out the best version by role.
About Tempk
At Tempk, we support cold chain operators with practical packaging and process support designed for real shipping conditions. We focus on solutions that help you keep temperature stable, reduce handling risk, and make compliance easier to prove. Our approach connects packaging performance with training routines—so your team can repeat the right actions even during peak demand.
Call to action: If you want a role-based rollout plan for Cold Chain Fish Training Solutions (receiving, packing, drivers, QA) with checklists and drill scripts, contact our team for a training blueprint you can deploy this month.
Cold Chain Meat Management: Prevent Loss in 2025
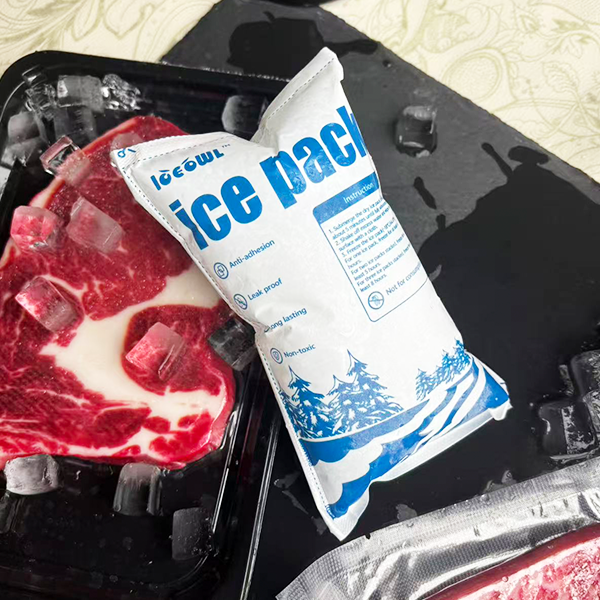
Cold Chain Meat Management: Prevent Loss in 2025?
Last updated: December 18, 2025
Cold chain meat management is how you keep meat safe, consistent, and sellable from storage to delivery. In 2025, the fastest losses usually come from handoffs—staging, loading, and multi-stop delivery. Even short “warm minutes” can quietly reduce shelf life and trigger claims later. You can fix this with clear temperature lanes, tight dock discipline, simple monitoring, and proof you can retrieve in minutes.
This article will help you:
-
Build a cold chain meat management checklist your team actually follows
-
Cut losses by reducing warm minutes at docks and cross-docks
-
Set practical temperature lanes for chilled vs frozen products
-
Choose temperature monitoring for meat shipments without drowning in data
-
Track the right cold chain meat management KPIs weekly
-
Use a simple meat transport deviation decision tree that stops repeat problems
Cold Chain Meat Management Checklist: What Are Your Non-Negotiables?
Cold chain meat management works when you control temperature, time, hygiene, and proof as one system. If you only “keep it cold,” you still lose margin during door openings and rushed staging. Your non-negotiables should be short, visible, and easy to repeat on busy days.
Think of cold chain meat management like protecting a candle in the wind. You cannot stop the wind. You can build a shield and follow a routine.
The 4 pillars of cold chain meat management
| Pillar | What it controls | What it prevents | What it means for you |
|---|---|---|---|
| Temperature stability | product condition | spoilage, texture loss | fewer rejects |
| Hygiene discipline | contamination risk | odors, slime, safety issues | fewer incidents |
| Transition control | handoff exposure | warm spikes, condensation | longer shelf life |
| Proof and traceability | evidence speed | claim disputes | faster resolution |
Your 60-second self-check (score 0–2)
Score each item: 0 = No, 1 = Sometimes, 2 = Yes, consistently.
-
We verify product temperature before loading.
-
We control door-open time with a clear rule.
-
We limit staging outside cold zones with a timer.
-
We separate chilled and frozen lanes during handling.
-
We store shipment proof in one consistent folder format.
-
We document corrective actions after deviations.
Your score:
-
0–5: High risk. Fix handoffs first.
-
6–9: Medium risk. Improve consistency and proof speed.
-
10–12: Strong control. Optimize and scale.
Practical example: One operator reduced weekly claims by adding dock timers and standard proof packs. Product stayed the same. Management improved.
Cold Chain Meat Management Temperature Lanes: How Cold Is “Cold”?
Cold chain meat management starts with clear temperature lanes that everyone can describe in one sentence. Your buyer specs and local rules may differ, but most teams use simple baselines. Chilled foods are often kept around 4°C / 40°F or below, and frozen foods are commonly kept around -18°C / 0°F or below.
Many food-safety trainings also use the “danger zone” concept (commonly 40°F–140°F / 4°C–60°C) to remind teams that time at warmer temperatures increases risk. Use it as a risk signal, not a replacement for your spec.
Lane builder (a quick decision tool)
Answer these three questions for each SKU:
-
What is the product state? chilled / frozen / ready-to-eat
-
Where are the handoffs? receive → stage → load → deliver → verify
-
What’s your warm-minute budget? how many minutes outside the lane is acceptable?
| Lane type | Practical goal | Biggest risk | Your control lever |
|---|---|---|---|
| Chilled meat | stay in the chilled lane | warm-minute spikes | staging + door discipline |
| Frozen meat | stay fully frozen | thaw-refreeze damage | sealing + stop-order loading |
| Ready-to-eat | tight lane + strict hygiene | cross-contact | separation + proof pack |
Practical tips you can use today
-
Write one lane sentence per SKU: “This item stays in the chilled lane end-to-end.”
-
Define a “do not load” rule: if it fails the lane check, it pauses.
-
Track stability, not averages: averages hide short spikes that matter most.
Cold Chain Meat Management at the Dock: How Do You Cut Warm Minutes?
Most cold chain meat management failures happen at the dock, not on the highway. Doors open, warm air enters, pallets wait, and people rush. A short delay can create more damage than a long drive.
Treat warm minutes like money. If you do not track them, you will overspend.
Refrigerated meat loading checklist (dock timer tool)
Start a timer when the door opens. Capture four timestamps.
| Dock step | What you do | What you record | What it means for you |
|---|---|---|---|
| Pre-stage | keep pallets in cold buffer | buffer zone + start time | less warming |
| First pallet in | begin loading sequence | timestamp | exposure control begins |
| Last pallet in | finish loading fast | timestamp | warm minutes measurable |
| Door close + seal | close immediately | seal photo + time | fewer disputes |
The warm-minute budget worksheet (simple and usable)
Fill in these numbers for each lane:
-
Staging minutes: ____
-
Loading minutes: ____
-
Receiving minutes: ____
-
Total warm minutes: ____
Rule: If total warm minutes exceed your budget, you trigger a corrective action.
Practical dock rules that actually stick
-
Cold-only staging lane: no “parking pallets” near open doors.
-
Door-open limit per load: one rule, one owner, one timer.
-
Load by stop order: less searching, fewer door openings.
-
Dock owner per shift: one person controls flow and decisions.
Real case: A processor cut deviation events by using a “load clock” rule. If loading was not ready in 10 minutes, pallets returned to cold storage.
Cold Chain Meat Management Monitoring: What Data Actually Matters?
The best cold chain meat management monitoring is simple, consistent, and actionable. You do not need a dashboard nobody checks. You need signals that trigger action during real operations.
The 3 signals that matter most
| Signal | What it tells you | Why it matters | Your practical win |
|---|---|---|---|
| Temperature history | stability over time | spikes predict shelf-life loss | better decisions |
| Time out of lane | warm minutes | shows handoff weakness | fast ROI fixes |
| Arrival condition | photos + basic checks | supports accountability | fewer disputes |
Sensor placement that catches the worst spot
-
Place sensors where risk is highest: near doors, top-front pallets, and mixed zones.
-
Do not rely on one wall display reading. Use product-adjacent placement when possible.
-
Calibrate and label devices. Untrusted data becomes wasted work.
The “proof pack” template for every load
Keep one consistent proof pack per shipment:
-
Pre-load temperature check result
-
Dock timer timestamps (warm minutes)
-
Trip temperature log summary
-
Exceptions + corrective actions
-
Arrival photos + seal verification
If proof retrieval takes more than 2–3 minutes, simplify the format.
Cold Chain Meat Management KPIs: What Should You Review Weekly?
Cold chain meat management KPIs should predict loss before loss happens. If you track too many metrics, teams stop caring. Track a small set, review exceptions weekly, and change one root cause per week.
A simple KPI scorecard (ready to use)
| KPI | What it measures | Good direction | What it means for you |
|---|---|---|---|
| Warm minutes per load | time outside lane | down | less hidden quality loss |
| Door-open minutes | exposure at loading | down | fewer spikes |
| Excursion count | out-of-range events | down | fewer claims |
| Claim rate | customer disputes | down | margin protected |
| Shrink % | waste and markdown | down | more sellable inventory |
| On-time delivery | schedule discipline | up | fewer curbside waits |
| Calibration compliance | sensor trust | up | audit readiness |
Practical tips that change behavior
-
Review exceptions, not averages. Averages hide the most expensive minutes.
-
Tie each KPI to one habit. Door-open minutes improves quickly when visible.
-
Post results where teams work. Visibility creates ownership faster than emails.
Cold Chain Meat Management Deviations: What’s Your Decision Tree?
Strong cold chain meat management is not “no deviations.” It is predictable response speed. Delays and equipment issues happen. Your playbook decides whether it becomes a minor event or a costly claim.
Detect → Contain → Decide → Fix → Verify (the playbook)
| Step | What you do | What you record | What it means for you |
|---|---|---|---|
| Detect | identify out-of-lane event | time + location | fast response |
| Contain | isolate impacted pallets | pallet + lot ID | prevents mixing |
| Decide | release / hold / downgrade | decision + reason | consistent outcomes |
| Fix | correct process/equipment | owner + action | stops repeats |
| Verify | re-check within days | proof of improvement | audit-ready control |
Deviation decision tree (simple “if/then” tool)
-
If you cannot prove duration, then treat as high risk until verified.
-
If product was out of lane during a handoff, then hold and measure first.
-
If the same deviation repeats weekly, then change the process, not the reminder.
Practical tips for defensible corrective actions
-
Write one sentence: what happened, what you did, what changed.
-
Avoid “be careful.” It is not a corrective action.
-
Require a re-check. “Fixed” means tested, not promised.
Operational example: One DC reduced repeat deviations by assigning one dock staging owner and requiring weekly re-checks of the warmest zone.
Cold Chain Meat Management Hygiene: What Must Stay Clean?
Cold chain meat management must include hygiene because cold slows growth, but does not remove contamination. Dirty surfaces can preserve risk longer. Leaks and wet cartons are early warning signs.
Sanitation snapshot checklist
| Area | What to check | Frequency | What it means for you |
|---|---|---|---|
| Dock floor + staging zone | clean, dry, no residue | every shift | fewer contamination events |
| Trailer interior | clean, dry, no debris | every load | fewer odor complaints |
| Door seals | intact, closes fully | every load | less contamination entry |
| Tools and totes | cleanable and documented | scheduled | better audit outcomes |
Practical tips you can use today
-
Treat the dock like a food area, not a parking area.
-
Fix leaks at the source. Wet cartons increase claim risk immediately.
-
Use separation rules between raw handling and clean packing zones.
Cold Chain Meat Management for Last-Mile: What Changes?
Last-mile cold chain meat management is mainly about repeated openings and small exposures. Multi-stop routes create many small temperature hits. Those hits add up when drivers search, or customers are not ready.
Last-mile route risk score (interactive)
Score each factor 0–2, then total it:
-
Stops per route
-
Door openings
-
Outdoor curbside waiting
-
Order complexity (many small picks)
-
Ambient heat
Score guide:
-
0–4: Low risk. Standard SOP likely holds.
-
5–7: Medium risk. Tighten staging and handoffs.
-
8–10: High risk. Add insulation support and stricter timers.
Practical last-mile tips that reduce warm minutes
-
Load by stop order. Search time becomes door-open time.
-
Use micro-batches for picking. Smaller waves reduce dock exposure.
-
Separate chilled and frozen physically when mixing is unavoidable.
2025 Cold Chain Meat Management Trends You Should Plan For
In 2025, cold chain meat management is shifting toward evidence-first operations. Teams want fewer surprises, faster decisions, and proof that travels with the load. Buyers also expect faster responses when questions appear.
Latest progress snapshot (2025)
-
Warm-minute KPIs replacing “average temperature” thinking
-
Exception-first reviews that focus on what went wrong, not everything
-
Standard proof packs that close claims faster and reduce audit stress
-
Better monitoring placement inside high-risk zones, not only on walls
Market reality (plain language)
Consistency is a performance metric. If you can prove stable handling, reorders happen faster and disputes shrink.
Internal Link Suggestions (no external links)
Use these as internal content pieces on your site:
-
Meat loading dock temperature break prevention checklist
-
How to separate chilled and frozen products in transport
-
Temperature monitoring basics for meat shipments
-
Corrective action workflow for cold chain deviations
-
Airflow and stowage rules for refrigerated meat loads
Frequently Asked Questions
Q1: What is cold chain meat management in one sentence?
Cold chain meat management keeps meat in the right temperature lane, limits warm minutes at handoffs, and proves control with simple records.
Q2: What is the fastest way to reduce loss in cold chain meat management?
Control dock staging first. A visible timer, cold-only staging, and one owner usually deliver the quickest gains.
Q3: Do I need a temperature logger on every shipment?
Not always. Start with risk-based monitoring for high-value loads, multi-stop routes, and hot-weather lanes.
Q4: What should I document when a deviation happens?
Time, location, affected pallets, temperature evidence, and the corrective action you took. Keep it short and consistent.
Q5: Can packaging replace refrigeration in cold chain meat management?
No. Packaging supports stability and hygiene during transitions, but refrigeration provides the cold lane.
Summary and Recommendations
Cold chain meat management protects safety, shelf life, and profit by controlling temperature stability, hygiene discipline, transition control, and proof. Most losses come from staging and loading, where warm minutes and door-open time create hidden damage. Start with clear temperature lanes, a dock timer routine, and a proof pack per load. Then review a small KPI set weekly and fix one root cause at a time.
Your next steps (simple 7-day plan)
-
Define chilled and frozen lanes for your top SKUs.
-
Add a dock timer and record warm minutes on every load.
-
Standardize sensor placement in the warmest zones.
-
Build one proof pack template and enforce 2-minute retrieval.
-
Run one deviation drill and require a re-check within days.
CTA: If you want fewer claims and more predictable quality, treat cold chain meat management as a daily routine—not an emergency response.
About Tempk
At Tempk, we support cold chain meat management with practical packaging and temperature-control expertise designed for real dock pressure. We help you reduce temperature swings during transitions, improve load stability, and standardize proof packs that hold up in audits. Our goal is measurable improvement: fewer deviations, fewer disputes, and more consistent delivery outcomes.
Next step: Talk with our specialists to map your handoff risks, set lane rules, and build a dock-ready cold chain meat management workflow for 2025.
Cold Chain Meat Standards: 2025 Compliance Playbook

Cold Chain Meat Standards: What to Meet in 2025?
Cold chain meat standards help you keep meat safe, saleable, and defensible from plant to customer. If your process fails, you don’t just lose quality—you risk rejections, chargebacks, and disputes you cannot prove. In 2025, the winning pattern is simple: control time and temperature, prevent contamination, and keep clean evidence at every handoff. Your goal is not perfect shipping. Your goal is repeatable control and fast corrective action when reality gets messy.
This article will answer for you:
-
How cold chain meat standards work in daily receiving, storage, and delivery
-
Which meat cold chain temperature requirements matter most for chilled vs frozen
-
How sanitary transportation rules for meat change what shippers and carriers must do
-
How to build HACCP-style controls for meat cold chain without turning it into paperwork
-
What audit-ready records for meat shipments reduce disputes and speed up audits
-
A practical decision tool: hold, re-chill, accept, or reject
What do cold chain meat standards mean in plain English?
Cold chain meat standards are the rules you follow to keep meat cold, clean, and traceable across storage and transport. They focus on three things: temperature control, contamination prevention, and records that prove what happened. Think of meat like a phone battery. Warm minutes drain shelf life faster. Your standards are the charger, the case, and the receipt showing you used them.
cold chain meat standards
The 4 outcomes cold chain meat standards protect
-
Food safety: lower pathogen growth risk
-
Quality: better color, texture, odor, and drip performance
-
Shelf life: more predictable sell-by results
-
Commercial trust: fewer claims, faster dispute resolution
| Standard area | What it controls | Common failure | What it means for you |
|---|---|---|---|
| Cold holding | Growth rate | Storage too warm | Faster spoilage + higher safety risk |
| Transport | Heat gain | Doors open too long | Temperature spikes and claims |
| Hygiene | Contamination | Dirty tools / cross-contact | Rejections and brand damage |
| Records | Proof | Missing or unclear logs | You lose disputes |
Practical tips you can use today
-
Stop guessing: put thermometers where people actually look.
-
Make “cold” measurable: write pass/fail limits for each product lane.
-
Train with one line: “Warm minutes cost money and safety.”
Real example: A distributor cut disputes by logging product temp + timestamp + exception note on every high-risk lane.
cold chain meat standards
Which temperature numbers matter most in cold chain meat standards?
The most useful temperature numbers in cold chain meat standards are the ones your team can apply fast at storage, staging, and receiving. In practice, you should separate:
-
Cold holding limits (to slow growth)
-
Frozen limits (to prevent thaw/refreeze damage)
-
“Danger zone” thinking (to reduce time in rapid-growth ranges)
cold chain meat standards
A simple “cheat sheet” for daily operations
| Control point | What you’re preventing | Practical benchmark you’ll see | What it means for you |
|---|---|---|---|
| Refrigeration baseline | Rapid growth | ~4°C / 40°F (common guidance) | Safer chilled storage baseline |
| Cold holding in service | Growth during handling | ~5°C / 41°F (food code benchmark) | Operational compliance target |
| Freezer baseline | Thaw drift | ~-18°C / 0°F | Protect frozen integrity |
| Handling time | Warm exposure | Minimize minutes above targets | Less risk, fewer claims |
Practical tips and suggestions
-
Pick one internal target (example: “≤4°C everywhere for chilled”) and enforce it.
-
Calibrate thermometers on a schedule, or your numbers become arguments.
-
Train what to do when warm so staff don’t improvise.
cold chain meat standards
How do U.S. vs EU cold chain meat standards differ?
Cold chain meat standards share the same goal globally—safe, chilled meat—but regions can differ in how specific they are. EU rules are often more product-category specific (for example, different expectations for carcass meat, offal, and minced meat). Many buyers also apply the strictest rule across all lanes to simplify audits.
cold chain meat standards
A high-level comparison you can act on
| Framework style | What it emphasizes | What you feel day-to-day | What it means for you |
|---|---|---|---|
| “Baseline guidance” approach | Keep cold foods cold | Simple thresholds and habits | Easy training and enforcement |
| “Food code” operations | Cold holding + time controls | Logs and time limits | Clear SOP execution |
| “Category-specific” hygiene rules | Product-category temperatures | More detail by product type | Important for exporters |
Practical tips and suggestions
-
Ask buyers for acceptance thresholds in writing before shipping.
-
Build lane-specific SOPs (short route ≠ long route).
-
When unsure, use the stricter internal rule to prevent expensive mistakes.
cold chain meat standards
How do sanitary transportation rules for meat change compliance?
Cold chain meat standards are not only temperature rules—sanitation matters. A “cold truck” is not enough if the trailer is dirty, previously carried incompatible loads, or cannot hold stable temperature during stops. The cleanest operations treat sanitation as a daily checklist, not a monthly deep clean.
cold chain meat standards
Who owns what at each handoff?
| Role | What they must ensure | What to ask for | What it means for you |
|---|---|---|---|
| Shipper | Clear temperature + sanitation requirements | Written instructions | Fewer disputes later |
| Loader | Correct loading + protection | Load photos + seal log | Better evidence for claims |
| Carrier | Equipment condition + temperature control | Pre-cool proof + temp record | Fewer excursions |
| Receiver | Verify condition + accept/reject decision | Receiving checklist | Faster decisions, less waste |
Practical tips and suggestions
-
Put requirements into a one-page transport SOP (temps, cleaning, rejection rules).
-
Treat pre-cooling as mandatory, not optional.
-
Separate incompatible loads to reduce contamination risk.
cold chain meat standards
Real example: One shipper reduced chargebacks by attaching the same “transport requirements sheet” to every load.
cold chain meat standards
How do you build HACCP-style controls for meat cold chain without jargon?
HACCP-style controls for meat cold chain mean: identify the risky points, set limits, measure, correct fast, and document. You do not need a textbook. You need three habits: define control points, measure them the same way, and act immediately when something is off.
cold chain meat standards
The 7-step HACCP-style template (simple and operational)
-
Map the flow: pickup → storage → loading → transport → receiving
-
Identify hazards: warm exposure, leaks, cross-contamination, delays
-
Choose control points: pre-cool, staging time, door time, receiving checks
-
Set limits: temperature targets + max minutes outside controlled areas
-
Monitor: loggers + timestamps + thermometer checks
-
Correct: hold, re-chill, reject, and fix root cause
-
Verify: weekly review + calibration checks
| Control point | Simple limit | Monitoring method | What it means for you |
|---|---|---|---|
| Staging time | Max minutes outside cold | Dock timestamp | Fewer warm events |
| Trailer condition | Clean + odor-free | Pre-load check | Lower contamination risk |
| Temperature control | Maintain target band | Continuous logger | Better proof for disputes |
| Receiving | Pass/hold/reject | IR + probe (per SOP) | Faster, consistent decisions |
Practical tips and suggestions
-
Put limits on a dock sign, not buried in a manual.
-
Train with pictures: “acceptable vs reject” conditions.
-
Review exceptions weekly: standards improve through repetition.
cold chain meat standards
What audit-ready records for meat shipments reduce disputes?
Audit-ready records for meat shipments are the evidence chain that shows you controlled temperature and sanitation—and acted when something drifted. Don’t aim for perfect data everywhere. Aim for credible, consistent proof on high-risk lanes and key customers.
cold chain meat standards
The minimum “evidence packet” per shipment
Keep these together (one folder per shipment ID):
-
Shipment ID + product + lot/batch
-
Temperature requirements communicated to carrier
-
Trailer pre-load inspection (cleanliness, odor, prior cargo check)
-
Temperature record (logger summary or time-stamped checks)
-
Seal record + delivery confirmation
-
Receiving temperature check + disposition (accepted/held/rejected)
-
Corrective action note (if needed)
| Evidence item | Who creates it | How it’s used | What it means for you |
|---|---|---|---|
| Requirements sheet | Shipper | Sets expectation | Stops “we didn’t know” |
| Pre-load inspection | Loader/carrier | Confirms sanitation | Prevents contamination disputes |
| Temperature record | Carrier | Proves control | Defends quality claims |
| Receiving check | Receiver | Acceptance decision | Reduces chargebacks |
| Corrective action | Ops lead | Shows response | Proves system control |
Practical tips and suggestions
-
Define what “excursion” means (temperature + duration) in writing.
-
Store evidence consistently—one folder structure beats email chaos.
-
Calibrate tools, or your data creates more arguments than clarity.
cold chain meat standards
How do you run cold chain meat receiving temperature checks in 5 minutes?
Cold chain meat receiving temperature checks are where you win or lose. If receiving is inconsistent, you either accept risky product or reject good product. Both outcomes cost money. Your goal is a quick, defensible decision based on the same criteria every time.
cold chain meat standards
Interactive tool: the 5-minute receiving routine (print this)
-
Look: damage, leaks, wet cartons, off-odors
-
Read: shipment ID, lot, labels, seal integrity
-
Measure: IR screen check, then probe where SOP requires
-
Decide: accept / hold / reject (based on written limits)
-
Record: temp + timestamp + photos + disposition note
| Finding | Best action | What to document | What it means for you |
|---|---|---|---|
| Seal broken | Hold and investigate | Photos + time + carrier note | Stronger dispute position |
| Wet cartons / leaks | Hold and assess | Photos + affected count | Stops contamination spread |
| Temp near limit | Hold for verification | 2nd reading + logger review | Fewer wrong decisions |
| Clear excursion | Reject or quarantine | Temps + full evidence packet | Protects safety and brand |
Decision tool: Hold, Re-chill, Accept, or Reject?
Use this when reality is “almost fine”:
-
ACCEPT if: within limits + intact packaging + clean trailer + evidence complete
-
HOLD if: missing records, near-limit temps, seal issues, or unclear condition
-
RE-CHILL if: product is safe but exposure was short and SOP allows recovery
-
REJECT if: clear out-of-spec temps, leaks, contamination risk, or no proof on a high-risk lane
Real example: A DC reduced “silent warm loads” by letting receivers quarantine immediately when readings exceeded limits.
cold chain meat standards
How do you meet refrigerated meat transport standards without guesswork?
Refrigerated meat transport standards usually fail for one reason: door-open time plus poor airflow. Even when the unit is cold, repeated openings create warm pockets. Airflow is the “invisible refrigeration.” If cartons are packed too tight, cold air cannot move.
cold chain meat standards
Interactive calculator: “Door-Open Minutes” risk score
Fill in your route:
-
Stops per route: ____
-
Average door-open minutes per stop: ____
-
Total door-open minutes = stops × minutes
Risk rating:
-
Under 20 minutes: low risk
-
20–45 minutes: medium risk
-
Over 45 minutes: high risk
If you’re medium or high, increase protection: faster handoffs, better loading order, and more thermal buffer.
Airflow patterns that change outcomes
| Load pattern | Airflow quality | Temperature uniformity | What it means for you |
|---|---|---|---|
| Over-packed, no gaps | Poor | Uneven | More exceptions |
| Channels maintained | Good | Better | Fewer claims |
| Zoned by sensitivity | Best | Best | Predictable quality |
Practical tips and suggestions
-
Pre-cool the trailer before loading.
-
Load to minimize re-opening (plan sequence first).
-
Use a “door captain” during peak loading shifts.
cold chain meat standards
How do you set temperature monitoring standards for meat distribution?
Temperature monitoring standards for meat distribution should prove control, not create busywork. Start with credible monitoring on your highest-risk lanes, then expand. Your minimum standard should answer: what was shipped, what conditions it experienced, and what you did when something went wrong.
cold chain meat standards
The “minimum viable monitoring” setup
-
One continuous logger (or equivalent) on high-risk routes
-
Time-stamped checks at key handoffs (load close, delivery)
-
A written response rule for alarms or excursions
-
Calibration schedule for devices and thermometers
-
Weekly review of exceptions (one root-cause fix per week)
2025 latest developments and trends in cold chain meat standards
In 2025, cold chain meat standards are shifting toward stronger proof and faster traceability. The biggest change is not one new temperature number. It is the growing expectation that you can show: continuous control, corrective actions, and a clean evidence packet per shipment—especially when delays and mixed loads are common.
cold chain meat standards
Latest progress you can use right now
-
More “proof-first” operations: logs, alarms, and documented responses
-
Lane profiling: standards by route, not averages
-
Receiving discipline: faster accept/hold/reject decisions reduce waste
-
Clear responsibility mapping: fewer gray areas at handoffs
cold chain meat standards
Common questions (FAQ)
Q1: Are cold chain meat standards only about temperature?
No. Temperature is central, but hygiene, cross-contamination prevention, airflow, and records are equally important.
cold chain meat standards
Q2: Why do some operations use 40°F and others use 41°F?
Different frameworks use different operational thresholds. Choose one internal target, document it, and train it consistently.
cold chain meat standards
Q3: What is the fastest “quick win” for compliance?
Measure and reduce door-open minutes. It prevents spikes without buying new equipment.
cold chain meat standards
Q4: What should I do if a trailer arrives warm but product feels cold?
Hold the load, verify product temperature per SOP, review the temperature record, and document before deciding.
cold chain meat standards
Q5: What documentation is “enough” for audits and disputes?
Enough means you can prove what was shipped, what it experienced, and what actions you took during exceptions.
cold chain meat standards
Summary and recommendations
Cold chain meat standards are easiest to meet when they are operational, not theoretical. Your best results come from consistent cold holding, minimized warm exposure, clean sanitation habits, and fast receiving decisions. Build your system around clear limits, simple monitoring, and audit-ready shipment evidence. When something goes off-spec, use the same decision path every time: hold, verify, correct, and document.
cold chain meat standards
Your next-step action plan (7 days)
-
Write acceptance thresholds (temperature + time + required proof).
-
Implement the 5-minute receiving check with photos.
-
Measure door-open minutes on top 3 routes and cut them by 25%.
-
Calibrate thermometers and label the next due date.
-
Review one week of exceptions and fix one root cause.
About Tempk
At Tempk, we help cold chain teams protect temperature-sensitive products with packaging and workflows that are practical under real pressure—busy docks, mixed loads, and unpredictable delays. For cold chain meat standards, we focus on stable thermal performance, pack-out discipline, and handoff routines that create proof of control without slowing your operation.
cold chain meat standards
Call to action: Share your product type (fresh cuts, offal, mince, frozen), destination market, route time, and stop count. We’ll suggest a packaging + loading workflow and a checklist that reduces claims on your highest-risk lanes.