


Cold Chain Artisanal Chocolate Cost: 2025 Guide
Cold Chain Artisanal Chocolate Cost: 2025 Guide
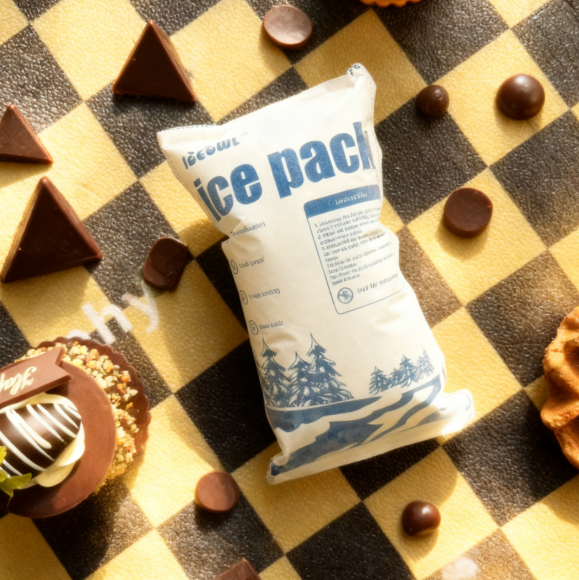
Cold Chain Artisanal Chocolate Cost: What Will You Pay?
Cold chain artisanal chocolate cost is never “just shipping.” It’s what you pay to keep chocolate looking perfect through heat spikes, porch delays, and hub handling. Chocolate can soften close to body temperature (about 34–38°C / 93–101°F), so small mistakes become refunds fast. A bulky insulated shipper can also trigger dimensional (DIM) billing—meaning a light box may be priced like a much heavier one. This guide gives you a clean cost model, decision tools, and tactics you can apply today.
This article will help you answer:
How to map every line item inside cold chain artisanal chocolate cost
How DIM billing inflates dimensional weight chocolate shipping cost
When gel packs vs PCM reduces total cost (not just unit cost)
How to calculate “cost per successful delivery” (the profit-safe metric)
How to reduce cold chain artisanal chocolate cost without melting
What 2025–2026 trends mean for pricing, packaging, and compliance
What drives cold chain artisanal chocolate cost the most?
Cold chain artisanal chocolate cost is usually driven by billed shipping weight (often DIM), coolant strategy, and failure rate. If your insulation makes the box bigger, carriers may bill by volume, not scale weight. If your coolant is “too much,” you can trigger condensation and surface defects that look like quality issues. And if even a small share of orders need reship/refund, you pay twice for the same customer.
The simplest mindset shift is this: don’t optimize for the cheapest shipment. Optimize for the lowest total cost of getting the right product delivered once, in perfect condition. That’s where margins stop swinging.
The 5-layer cost map (copy into your spreadsheet)
| Cost layer | What’s inside | What makes it rise | What it means for you |
|---|---|---|---|
| Product value-at-risk | ingredients + labor + primary packaging | cocoa/ingredient volatility | higher replacement pain |
| Pack-out | insulated shipper + liner + coolant + inserts | thicker insulation + more coolant | higher billed weight |
| Freight | parcel/courier rate by zone + speed | bigger box + faster service | cost jumps quickly |
| Handling/fees | surcharges + special handling + storage | delays + extra services | “surprise” add-ons |
| Loss risk | refunds + reships + support time | heat spikes + porch delays | silent margin killer |
Practical tips you can use today
Track failures like a cost line: melted, bloomed, broken, late, leaking. Fix the top one first.
Separate “pack-out cost” from “freight”: you need both to price correctly.
Measure billed weight, not just scale weight: DIM can be your #1 driver.
Practical case: A gift-focused chocolatier found that reducing reships by a few points saved more than negotiating cents off postage.
How does DIM weight inflate cold chain artisanal chocolate cost?
DIM weight inflates cold chain artisanal chocolate cost when your insulated shipper is big and light. Carriers often compare your scale weight to a dimensional weight estimate based on box volume, then bill the higher number. This is why “safer packaging” can backfire financially if it adds inches you don’t need.
Think of it like paying rent for space in a delivery truck. You might only “weigh” 3 lb, but if you occupy the space of a 14 lb package, you may be priced like one. That’s why right-sizing is often the fastest win.
Mini calculator: are you paying for air?
Measure your outer box L × W × H (inches).
Multiply to get cubic inches.
Divide by a common DIM divisor used in many domestic parcel contexts (varies by service/account).
Compare DIM weight to scale weight. The higher number usually drives pricing.
| Input | Example | Result | What it means for you |
|---|---|---|---|
| Box size | 16 × 12 × 10 in | 1,920 in³ | bulky shipper |
| DIM estimate | 1,920 ÷ 139 | ~13.8 lb | may bill near 14 lb |
| Scale weight | 3 lb | 3 lb | not what you pay |
| Billed driver | DIM > scale | DIM | cost rises fast |
Practical tips you can use today
Reduce one inch where it matters: trimming height or width often drops billed weight sharply.
Standardize 2–3 box sizes: “single” and “multi” beats “one big box for everything.”
Remove decorative void fill that forces bigger cartons: keep the unboxing premium, not oversized.
Practical case: One team saved enough from shrinking carton height to fund better coolant placement on hot routes—net cost went down, quality went up.
Gel packs vs PCM: which lowers cold chain artisanal chocolate cost?
Gel packs can look cheaper per unit, but PCM can lower cold chain artisanal chocolate cost when it lets you use fewer packs and a smaller shipper. Chocolate usually needs stable cool conditions, not extreme cold contact. Overcooling can create condensation as the box warms, which can trigger surface complaints.
Your best choice depends on lane time, outside heat, porch delay risk, and product type. Bars tolerate more than glossy bonbons, so the same coolant plan should not apply to every SKU.
Coolant comparison (total cost, not unit price)
| Coolant type | Unit cost feel | Shipping weight/size effect | Best use | What it means for you |
|---|---|---|---|---|
| Gel packs | lower | often heavier/more volume | short lanes, mild risk | predictable budgeting |
| PCM (matched set point) | higher | can reduce packs + shipper size | consistency lanes | may lower total cost |
| Dry ice (where appropriate) | variable | strong cooling + compliance | select long/hot routes | more rules + handling time |
Interactive tool: per-order coolant calculator
Fill in your numbers:
Gel pack cost per pack: ____
Packs per order: ____
PCM cost per unit (if used): ____
PCM units per order: ____
Added labor minutes for coolant handling: ____
Now compare:
Gel total = (cost/pack × packs) + labor impact
PCM total = (cost/unit × units) + labor impact
Winner = the option with the lower cost per successful delivery, not just lower materials.
Practical tips you can use today
Add a buffer layer: keep coolant from touching chocolate directly.
Use fewer packs with better placement: walls and “heat-entry surfaces” matter most.
Test one lane in summer, one lane in winter: your cost model improves fast.
Practical case: A bonbon brand replaced “more gel packs everywhere” with fewer, better-placed packs and a tighter insert. Complaints stayed flat, costs dropped.
How do you calculate cold chain artisanal chocolate cost per successful delivery?
Cold chain artisanal chocolate cost becomes predictable when you calculate “cost per successful delivery.” A cheap shipment that fails is expensive because you pay again: replacement product, replacement shipping, and support time. This is why a small packaging upgrade can be profitable if it reduces failures even slightly.
Use a simple model you can share with your team. Keep it visual, and update it monthly. You don’t need perfect data to start—just consistent tracking.
The “honest” formula
Cost per successful delivery = A + (B × C)
A = all-in ship cost per order (pack-out + freight + labor + fees)
B = failure rate (orders needing refund/reship)
C = cost per failure (replacement product + replacement ship + support time)
| Variable | What it is | Where you get it | What it means for you |
|---|---|---|---|
| A | baseline cost/order | invoices + BOM | your starting point |
| B | failure rate | returns/reship logs | your risk level |
| C | cost per failure | product + reship + time | your hidden tax |
| Upgrade | added cost | better liner/packs | your lever |
Practical tips you can use today
Split failure rate by season: May–Sep behaves differently than Oct–Apr.
Split by product type: bars vs bonbons need different rules.
Count support time: a few minutes per complaint is real money in peak weeks.
Practical case: A brand added ~$2–$3 of protection on the hottest lanes only. Failure rate fell enough that total cost per successful delivery improved.
How can you lower cold chain artisanal chocolate cost without melting?
You lower cold chain artisanal chocolate cost by removing waste, not removing protection. The biggest wins are usually box right-sizing, lane-based pack-outs, and tighter packing SOPs. These changes cut billed weight, reduce pack errors, and lower reships.
Start with the basics: never pack warm product, keep pack time short, and limit sun exposure at handoff. Then build a simple “lane rule” system so you don’t overpay on low-risk routes.
Pack-out SOP that saves money fast
| SOP step | Common failure | Fix | What it means for you |
|---|---|---|---|
| Stage product | warm product packed | cool-to-stable rule | fewer moisture issues |
| Pre-chill coolant | half-frozen packs | verification check | higher stability |
| Placement | cold on one side only | 3-side placement rule | fewer hot spots |
| Barrier layer | direct contact | separator sheet | less condensation risk |
| Handoff | sun/dock dwell | shade + fast pickup | less heat exposure |
Practical tips and suggestions
Right-size first: smaller outer dimensions often save more than “cheaper materials.”
Use lane cards: one page per lane with the exact recipe.
Ship early-week: fewer weekend delays means fewer failures.
Practical case: A team pre-built “pack-out kits” for top SKUs (liner + inserts + coolant). Packing time dropped, and consistency improved immediately.
How should you price cold chain artisanal chocolate cost for summer?
Price cold chain artisanal chocolate cost for the worst realistic week, not the best week. If you price shipping like it’s always mild, you will undercharge exactly when risk spikes (heat waves, gifting peaks). Customers hate surprises, so keep pricing simple and explainable.
You typically have three workable options: build protection into product price, use a clear seasonal protection fee, or use zone/temperature-based rules at checkout. Your best choice depends on catalog size and climate spread.
Shipping pricing options (simple and customer-friendly)
| Model | What customers see | What you control | What it means for you |
|---|---|---|---|
| Built-in protection | higher product price | stable margin | clean checkout |
| Flat-rate shipping | one shipping price | simple ops | can over/undercharge by season |
| Seasonal protection fee | “hot weather protection” | risk-aligned funding | fewer summer losses |
| Free shipping threshold | free over $X | higher AOV | protects small orders |
Mini decision tool: pick your pricing rule
Answer “yes” or “no”:
Do you ship across very different climates?
Do summer complaints spike?
Are most orders gifts where appearance drives reviews?
If you said “yes” to 2–3, avoid one flat price year-round. Use a seasonal protection fee or lane-based rule.
Practical case: A brand introduced a summer minimum order and a clear “hot weather option.” Refunds fell because customers chose the right service.
2025–2026 developments and trends that affect cold chain artisanal chocolate cost
In 2025–2026, cold chain artisanal chocolate cost is shaped by four forces: raw material volatility, stricter packaging expectations, carrier pricing mechanics, and smarter packaging design.
Latest progress snapshot
Higher value-at-risk: when ingredients cost more, every failed box hurts more.
More DIM focus: brands are redesigning packaging to reduce volume without losing protection.
Smarter coolant strategy: fewer packs, better placement, more stability.
More compliance pressure: packaging waste rules and reporting expectations are rising in key markets.
Common questions (FAQ)
Q1: What is the biggest driver of cold chain artisanal chocolate cost?
For many brands, it’s billed weight (often DIM) plus reship risk. One failed order can erase multiple small savings.
Q2: Should you always use maximum protection packaging?
No. Overpacking raises freight and can increase condensation risk. Match protection to lane time and heat exposure.
Q3: Are gel packs always cheaper than PCM?
Not always. Gel packs can require more weight and space. PCM can cost more per unit but reduce total billed weight.
Q4: What is the fastest way to cut cold chain artisanal chocolate cost?
Shrink the outer shipper and reduce failure rate. DIM exposure and reships are usually the biggest hidden costs.
Q5: How do you avoid summer losses without scaring customers?
Use a clear seasonal policy: built-in protection, a simple hot-weather fee, or a lane-based shipping rule customers understand.
Summary and recommendations
Cold chain artisanal chocolate cost is a system cost: product value-at-risk, pack-out materials, billed freight, fees, and failure probability. Your biggest levers are box size (DIM), coolant strategy, and lane-based SOP discipline. Start by measuring billed weight, then build two or three pack-out tiers by lane risk. Track cost per successful delivery monthly, and upgrade protection only where it lowers total cost.
Next-step action plan (copy and use)
Measure your top 2 box sizes and estimate DIM exposure.
Track reship/refund rate by month and product type.
Create 3 pack-out recipes: mild / warm / hot lanes.
Run a 2–4 week lane test and adjust coolant placement.
Set a summer pricing rule that funds protection consistently.
About Tempk
At Tempk, we help brands design practical temperature-control packaging strategies for sensitive foods, including premium chocolate. We focus on right-sized insulated shippers, lane-based pack-outs, and repeatable SOPs that reduce failures without unnecessary cost. Our approach is simple: control billed weight, control handoff minutes, and improve cost per successful delivery so your cold chain program stays profitable and predictable.
Call to action: Share your top 3 lanes, two box sizes, average order weight, and summer failure rate. We’ll recommend a lane-based protection plan you can apply immediately.
Cold Chain Vegan Chocolate Supply Chain Management 2025
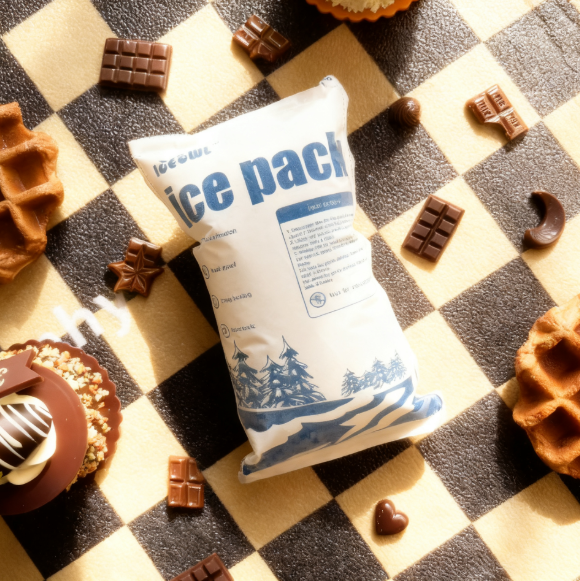
Cold Chain Vegan Chocolate Supply Chain Management?
Last updated: December 23, 2025
Cold chain vegan chocolate supply chain management keeps your vegan bars glossy, snappy, and on-brand from factory to customer. Aim for a stable cool band (often 16-20°C) and treat humidity and odor as equal risks. The biggest damage usually happens in the worst 30 minutes: dock staging, cross-docks, and doorstep dwell. In this playbook, you will get lane specs, pack-out rules, validation tests, and a simple scorecard you can use today.
You will learn:
How cold chain vegan chocolate supply chain management differs from standard chocolate lanes
How to ship vegan chocolate at 16-20°C with clear, repeatable specs
How humidity control for vegan chocolate distribution prevents condensation and sugar bloom
How PCM selection for vegan chocolate shipping reduces temperature cycling
How to run a cold chain vegan chocolate packaging validation test before scaling
What makes cold chain vegan chocolate supply chain management different?
Core answer: cold chain vegan chocolate supply chain management is different because vegan formulas can be more sensitive to odor pickup, humidity events, and texture shifts after short heat spikes. Many plant-based recipes use alternative fats and inclusions that react differently during warm-cool cycles. That means the “old dairy chocolate rules” may not fully protect vegan SKUs. Your job is to protect appearance, snap, and flavor together.
In real routes, vegan chocolate often shares storage with strong odors, mixed loads, and busy docks. Even if the bar arrives “not melted,” it can still feel chalky, dull, or greasy. Customers judge premium vegan chocolate fast, with eyes and bite first. Cold chain vegan chocolate supply chain management reduces those small defects that become big refunds.
Why odor and inclusions raise your risk
Vegan bars can behave like a sponge for nearby smells. Inclusions (nuts, fruit, wafers) also add fracture and moisture traps.
| Sensitivity driver | What can happen | Where you see it | What it means for you |
|---|---|---|---|
| Plant-based fat profile | Faster softening or greasy feel | Unboxing, bite texture | More “quality” complaints |
| Odor pickup | Off-flavors and aftertaste | Tasting feedback | Lower repeat purchase |
| Humidity exposure | Sticky wrap or sugar bloom | Surface haze, labels | Returns and rejects |
| Inclusions | Cracks, crumbs, moisture pockets | Corners and seams | Higher damage rate |
Practical tips you can use today
Treat vegan SKUs as odor-sensitive: store away from spices, cleaners, seafood, and fragrances.
Separate inclusion-heavy products: give them higher-protection lanes and tighter handling rules.
Standardize “touch time”: most defects start at docks, not in your factory.
Example scenario: A warehouse reduced off-odor complaints after moving vegan chocolate away from scented packaging and cleaning supplies zones.
How do you set 16-20°C specs for cold chain vegan chocolate supply chain management?
Core answer: cold chain vegan chocolate supply chain management works best when you set a simple target band (often 16-20°C), plus an excursion rule that matches reality. The enemy is not the average temperature. It is a short spike during staging, cross-docks, or last-mile dwell. Design your chain around the “worst 30 minutes,” not the “best 23 hours.”
Start with one lane profile per route. Then define four numbers: target temperature band, maximum time out of control, humidity handling rule, and handoff timer rule. When the rules are clear, training becomes easy. When the rules are vague, every site ships differently.
Spike control at handoffs (the fastest win)
| Handoff point | Common spike cause | Simple control | What it means for you |
|---|---|---|---|
| Pick/pack area | Product left out early | “Cold-last” picking | Fewer soft bars |
| Loading dock | Doors open too long | Pre-stage inside + timer | Better gloss |
| Cross-dock | Long transfer dwell | Earlier pickup window | Fewer dull surfaces |
| Customer receiving | Warm air shock | Sealed acclimation note | Fewer complaints |
Practical tips you can use today
Set a staging limit: start with 10-15 minutes and enforce it.
Use “cold-last” picking: pick chocolate near dispatch, not hours early.
Add a sealed acclimation rule: keep cartons sealed 20-30 minutes before opening in warm rooms.
Example scenario: A team reduced “dull surface” complaints after adding a dock timer and a sealed receiving instruction.
How do you manage humidity control for vegan chocolate distribution?
Core answer: humidity control for vegan chocolate distribution prevents condensation, which drives sticky packaging, label damage, and sugar bloom. When cool chocolate meets warm, humid air, moisture can form fast. Think of a cold drink on a summer day. Water appears quickly, and chocolate packaging behaves the same way.
You do not need complex equipment to reduce humidity damage. You need disciplined receiving, repacking rules, and moisture barriers when routes demand it. If you win temperature but lose moisture, you still lose premium appearance.
Condensation prevention SOP that teams actually follow
| Situation | Why it is risky | What you do | What it means for you |
|---|---|---|---|
| Warm receiving dock | Cold carton meets humid air | Keep sealed, short acclimation | Cleaner packaging |
| Open-air repacking | Moisture hits fast | Repack in controlled area | Better surface finish |
| Doorstep delivery | Outdoor humidity swings | Insulated shipper + fast retrieval | Fewer complaints |
Practical tips you can use today
Never open cold cartons immediately in warm, humid rooms.
Avoid open-air sorting on hot, humid days.
Use a vapor barrier when cartons must pass through humidity zones.
Example scenario: A DTC shipper reduced sticky wrapper issues after switching to sealed acclimation instructions and limiting doorstep dwell time.
Which packaging works for cold chain vegan chocolate supply chain management?
Core answer: the best packaging for cold chain vegan chocolate supply chain management is lane-based, not one-size-fits-all. Your pack-out must buy time against heat spikes, reduce scuffing, and protect against odors and moisture. Vegan chocolate often uses premium wraps, so small scratches can look like “cheap damage.”
A reliable system usually needs four layers: an outer shipper, insulation, a temperature buffer (often PCM), and a moisture barrier. Then add inner protection to stop rub and corner crush. The “best” design is the one your team can pack the same way, every time.
A repeatable 4-layer packaging system
| Packaging layer | What it protects | Common mistake | What it means for you |
|---|---|---|---|
| Outer shipper | Crush and corner impacts | Weak corners, poor tape | Broken bars, dented packs |
| Insulation | Heat gain and swings | Gaps or poor closure | Warm spots, cycling |
| Temperature buffer (PCM) | Stable hold point | Wrong conditioning | Unstable temperature curve |
| Vapor barrier | Condensation control | Skipped or punctured barrier | Sticky wrap, sugar bloom |
PCM selection for vegan chocolate shipping (simple guide)
PCM helps hold near a chosen temperature while it changes phase. That reduces cycling that causes dull haze and texture shifts.
| PCM hold point idea | When it helps | What to watch | What it means for you |
|---|---|---|---|
| ~18°C hold | Hot lanes, DTC, porch risk | Needs good insulation | Stable gloss and snap |
| ~20-22°C hold | Mild lanes, retail | May not cover extreme heat | Cost-efficient control |
| No PCM | Short local delivery | High variability | Higher failure risk |
Practical tips you can use today
Seal insulation fully: a lid gap can ruin performance.
Add dividers or sleeves: stop wrap scuffing and corner crush.
Remove air pockets: voids warm fast and create local swings.
Example scenario: A premium vegan brand reduced “scratched wrapper” complaints after adding simple dividers and tighter void fill.
How do you run a cold chain vegan chocolate packaging validation test?
Core answer: you validate cold chain vegan chocolate supply chain management by testing your exact pack-out under worst-case heat, humidity, delay, and handling. One “good run” is not proof. You need repeatable results that your team can reproduce. Validation protects your brand before you scale volume.
Test the whole journey, including unboxing. Warm air rush during opening can trigger condensation and sugar bloom. Place sensors near product, not only near the box wall. Document pack-out photos, conditioning steps, and closure method every run.
Cold chain vegan chocolate packaging validation test (7-run plan)
| Run | Scenario | Duration | What it proves |
|---|---|---|---|
| 1-2 | Typical ambient | Lane time | Baseline stability |
| 3-4 | Hot exposure | Lane time + buffer | Summer survivability |
| 5 | Humid exposure | Lane time | Condensation risk |
| 6 | Delay | +8-12 hours | Carrier disruption |
| 7 | Handling stress | Lane time | Packaging integrity |
What “pass” looks like for vegan chocolate
Product stays in your band for most of the journey.
Excursions are short and within your acceptance rule.
No visible moisture damage on wrap, labels, or cartons.
Gloss and snap remain consistent after arrival and rest.
Example scenario: A team discovered humidity caused more damage than heat, then improved results by strengthening the barrier layer.
Where does cold chain vegan chocolate supply chain management usually break?
Core answer: most breaks in cold chain vegan chocolate supply chain management happen at handoffs, not in the middle of transit. Production storage is often controlled. Problems start when pallets wait on docks, doors stay open, and parcels sit in warm vans or on porches. These short exposure events add up.
If you want quick improvement, map your top three breakpoints: warm dock staging, cross-dock transfers, and last-mile dwell. Then assign one owner and one timer rule to each breakpoint. A simple handoff checklist often delivers faster wins than buying more coolant.
The handoff map you can use this week
| Step | Typical failure | Fix | What it means for you |
|---|---|---|---|
| Cold room → staging | Too long out | Timer + sign-off | Immediate gain |
| Staging → trailer | Open doors | Fast load discipline | Fewer spikes |
| Trailer → customer | Porch dwell | Cool-hour windows | Better appearance |
| Customer opening | Warm humid shock | Sealed acclimation note | Less condensation |
Last-mile controls that reduce complaints
Deliver during cooler hours in hot seasons.
Use clear “retrieve immediately” messaging for porch risk.
Add a short receiving guide on the box to prevent condensation.
Example scenario: A DTC program reduced summer complaints after shifting delivery windows earlier and adding “retrieve within 30 minutes” guidance.
How do KPIs prove ROI in cold chain vegan chocolate supply chain management?
Core answer: you improve cold chain vegan chocolate supply chain management by measuring cost per perfect delivery, not cost per shipper. Packaging can look expensive, yet save margin by preventing refunds and reships. You need simple KPIs that tie shipping behavior to customer outcomes.
Start with four metrics and review weekly across packing, transport, and customer service. Track claims by cause, not only count. When you pair trip evidence with claim tags, you stop guessing and start fixing. That is where ROI becomes visible.
The KPI set that drives fast wins
| KPI | How to track | What “good” looks like | What it means for you |
|---|---|---|---|
| Perfect delivery rate | QA + CS tags | Rising monthly trend | Better retention |
| Excursion rate | Pilot sensors | Falling trend | Fewer defects |
| Claim rate | Per 1,000 orders | Stable low baseline | Margin protection |
| Pack-out compliance | Photo audits | >95% in mature lanes | Repeatability |
Decision tool: lane risk scorecard (interactive)
Add points and follow the recommendation.
Lane duration: Under 24h (1) / 24-48h (2) / Over 48h (3)
Climate risk: Mild (1) / Mixed (2) / Hot region or summer (3)
Handoffs: Direct (1) / One transfer (2) / Two+ transfers (3)
Product sensitivity: Plain bars (1) / Inclusions (2) / Premium wrap + inclusions (3)
Visibility: Regular audits (1) / Occasional audits (2) / No trip evidence (3)
Score meaning
5-7: Low risk. Tighten dock timers and pack-out consistency.
8-11: Medium risk. Upgrade hot-lane insulation and add audits.
12-15: High risk. Reduce handoffs, strengthen packaging, add monitoring.
Self-check quiz: are you creating hidden risk?
Answer Yes/No. If you have 3+ Yes, tighten controls this week.
Do pallets wait on a dock without a timer?
Do different sites pack vegan chocolate differently?
Do you ship near strong odors (spices, cleaners, seafood)?
Do customers open cartons immediately in warm air?
Do you lack temperature evidence for claim disputes?
2025 trends in cold chain vegan chocolate supply chain management
In 2025, cold chain vegan chocolate supply chain management is becoming more lane-specific and more evidence-driven. Brands are moving from “ship the same way everywhere” to “ship based on risk.” Climate volatility is pushing more worst-day planning for summer last-mile. Vegan buyers also expect premium sensory quality, so odor control and receiving guidance are now competitive advantages.
Latest developments snapshot
More hold-point tuning: PCM choices are set to reduce cycling, not “go colder.”
More standard pack-out libraries: photo-based SOPs by SKU and lane.
More targeted audits: small pilots on high-claim routes instead of blanket monitoring.
Frequently Asked Questions
Q1: Do I need refrigeration for cold chain vegan chocolate supply chain management?
Usually no. Most vegan chocolate ships best in a stable cool band, not 2-8°C. Too-cold shipping can trigger condensation during warm-up.
Q2: What is the best target for how to ship vegan chocolate at 16-20°C?
Start with 16-20°C if your product supports it. Then validate with hot and humid scenarios before scaling volume.
Q3: How do I prevent bloom and melt in vegan chocolate logistics quickly?
Reduce temperature cycling and moisture hits. Enforce dock timers, add a vapor barrier, and standardize pack-out so every box behaves the same.
Q4: Is humidity control for vegan chocolate distribution really necessary?
Yes. Humidity drives condensation and sugar bloom, especially at receiving and unboxing. Sealed acclimation and barriers often solve it.
Q5: What is the simplest cold chain vegan chocolate packaging validation test?
Run repeated tests across typical, hot, humid, and delay conditions. Keep product mass and pack-out identical every run.
Q6: What is the biggest operational mistake in cold chain vegan chocolate supply chain management?
Long dock dwell and slow packing with open lids. These short spikes cause dull finish and texture complaints.
Q7: How do I protect vegan integrity during shipping?
Use segregation rules, lot-level tracking, and “no silent changes” supplier controls. Quality is temperature plus integrity.
Summary and recommendations
Cold chain vegan chocolate supply chain management works when you manage temperature stability, humidity, and handoffs as one system. Set lane specs (often 16-20°C), enforce a dock timer rule, and protect against condensation with sealed acclimation and vapor barriers. Choose lane-based packaging with repeatable pack-outs, and validate under hot, humid, and delay conditions. Track KPIs like perfect delivery rate and excursions so improvements stay evidence-based.
Next step (clear CTA): Pick your highest-risk lane and run a 2-4 week pilot. Standardize one pack-out, add simple audit loggers, and review results weekly across packing, transport, and customer service.
About Tempk
At Tempk, we help temperature-sensitive brands turn shipping quality into a repeatable operating system. For vegan chocolate, we focus on lane-based specs, practical packaging design (including insulation, PCM, and moisture barriers), and validation plans that match real routes. We also help teams standardize pack-outs with photo SOPs and use simple KPIs to reduce claims over time.
Call to action: Share your lane time, peak summer exposure, handoff count, and product format (plain bars, filled, inclusions). We can outline a pilot plan to strengthen cold chain vegan chocolate supply chain management right away.
VIP Transport Box for Biologics Transport (2025)

VIP Transport Box for Biologics Transport (2025 Guide)
Last updated: December 22, 2025
A VIP transport box for biologics transport helps you keep high-value therapies inside their labeled temperature range when real lanes bring delays, handoffs, and weather swings. Many biologics target 2–8°C, while others require frozen conditions. In 2025, the winning approach is simple: define lane risk, lock a pack-out recipe, qualify performance, and monitor only where it changes decisions.
This article will help you:
Choose a VIP transport box for biologics transport using a lane risk score (not guesswork)
Build a repeatable 2–8°C VIP shipper with PCM pack-out that avoids accidental freezing
Run biologics cold chain packaging qualification with DQ/OQ/PQ that auditors can follow
Place loggers for temperature logger placement in VIP shipper data you can trust
Use a self-audit checklist and ROI tool to reduce excursions and cost without lowering control
Do you really need a VIP transport box for biologics transport?
You need a VIP transport box for biologics transport when your lane is longer, harsher, or more expensive to fail than your current packaging can reliably handle. VIP adds thermal “time,” but it also demands stricter packing discipline.
90-second decision tool: “VIP or not?”
Answer Yes/No:
Are excursions expensive (high-value lots, clinical urgency, limited supply)?
Is your lane duration longer than your current hold time by 20%+?
Do you have 2+ handoffs (airport, cross-dock, carrier transfer, clinic receiving)?
Do you ship through summer heat, winter cold, or mixed climates?
Have you had QA holds, disputes about evidence, or repeat deviations?
Do you need smaller outer dimensions to reduce dimensional-weight costs?
Score
0–2 Yes: Fix workflow first; standard passive shipper may be enough
3–4 Yes: Pilot VIP on high-risk lanes or premium SKUs
5–6 Yes: A VIP transport box for biologics transport is strongly justified
Practical takeaway: VIP is most valuable when it reduces both temperature risk and the evidence gap (your ability to prove control).
What makes a VIP transport box for biologics transport work in real lanes?
A VIP transport box for biologics transport is a system, not a material. Think in four layers:
Insulation (VIP panels): slows heat flow like “super-thermos walls”
Thermal buffer (PCM, gel, dry ice): stores “cold energy”
Payload configuration: placement, separators, tightness, void control
Process controls: conditioning, pack time, closure discipline, handoff rules
The most common failure: “VIP walls, foam habits”
A VIP shipper can still fail if you:
leave large air gaps
place coolant inconsistently
start with product at the wrong temperature
keep the lid open too long
Warm air inside the box becomes a hidden heater. VIP slows heat transfer, but it cannot undo sloppy pack-out.
| System element | What goes wrong | What to do instead | What it means for you |
|---|---|---|---|
| VIP insulation | Strong walls, weak closure | Tight lid + sealing SOP | Longer hold time |
| Coolant/PCM | Wrong mass or starting temp | Lane-specific recipe | Fewer excursions |
| Payload | Shifting + air gaps | Inserts + tight pack | More stable range |
| Process | Long open time | Pack fast, close fast | Less warm-air exchange |
Which temperature band should your VIP transport box for biologics transport target?
Your VIP transport box for biologics transport must match your product requirement, not a generic “cold chain.” Trying to build “one shipper for everything” increases errors and deviations.
Temperature bands you should plan for
| Band | Typical use | Common risk | Practical packaging approach |
|---|---|---|---|
| 2–8°C | Many biologics | Freeze risk below 2°C + warm spikes | PCM near +5°C, buffer layers |
| 15–25°C (CRT) | Some injectables | Overheat during summer staging | Insulation + thermal buffering |
| Frozen | Some drug substance, enzymes | Partial thaw + refreeze cycles | Frozen strategy + strict handling |
| Ultra-cold | Specialized therapies | Dry ice management + safety | Dedicated SOPs and labeling |
The hidden trap in 2–8°C shipping
2–8°C sounds easy, but it fails at the edges. If cooling is too aggressive, you can freeze sensitive products near cold surfaces. A VIP transport box for biologics transport must keep you cold enough without going too cold.
Practical tips
Use a buffer layer every time (no direct coolant contact).
Create separate SOPs for 2–8°C vs frozen.
Do not mix profiles unless you validated that exact mixed configuration.
How to choose PCM, gel packs, or dry ice in a VIP transport box for biologics transport
A VIP transport box for biologics transport needs a coolant strategy that matches both the temperature band and lane risk.
Quick guide: gel packs vs PCM vs dry ice
| Coolant | Strength | Typical failure mode | Best use |
|---|---|---|---|
| Gel packs | Easy and familiar | Overcooling early | Short/medium 2–8°C lanes |
| PCM | Stable near target point | Wrong phase point choice | Long 2–8°C lanes needing stability |
| Dry ice | Strong freezing power | Safety + venting needs | Frozen/ultra-cold programs |
Mini “pack-out calculator” (fast planning tool)
Use this to size your first pilot recipe:
Lane duration: ___ hours
Worst-case season: summer / winter
Handoffs: low / medium / high
Payload heat load: low / medium / high
Rule of thumb: Longer lanes and high handoffs need more thermal mass consistency, not only thicker insulation.
Reality check: You do not “win” by adding more cold. You win by controlling drift without freezing.
How to pack a VIP transport box for biologics transport (repeatable HowTo)
A repeatable pack-out is the fastest way to reduce excursions with a VIP transport box for biologics transport. Make it trainable, auditable, and hard to improvise.
HowTo: Pack a VIP transport box for biologics transport (2–8°C)
Pre-condition materials: stage shipper, inserts, and PCM in the packing area
Confirm product state: product is already at the correct controlled condition
Build bottom buffer: place PCM in the validated layout
Add separator layer: prevent direct cold contact to reduce freeze risk
Load payload tight: minimize air gaps; use inserts to stop shifting
Add top/side buffer: protect lid and corner “warm entry” zones
Close fast: keep open time short and consistent
Record pack-out: timestamp + configuration/version ID
Apply monitoring (if used): log device ID and start time
Dispatch quickly: avoid warm staging
The “open time” rule (simple and measurable)
Every minute the lid is open, you trade stable internal air for warm external air.
Set a target: pack + close in ___ minutes, then train and audit it.
Practical tips you can deploy this week
Two-person verification for high-risk lanes (PCM count + placement).
One pack-out photo standard per lane (removes “creative packing”).
A short receiving card: open fast, move to storage, then document.
Real-world style example: Teams cut repeat deviations when they enforce one pack-out version per lane and block improvisation during peak days.
How to qualify a VIP transport box for biologics transport under GDP expectations
A VIP transport box for biologics transport becomes “audit-ready” when you can show: requirement → test → result → controlled use.
DQ / OQ / PQ in plain English
DQ (Design Qualification): Does the shipper design match your requirement and risk?
OQ (Operational Qualification): Does it perform under defined hot/cold profiles?
PQ (Performance Qualification): Does it work in real lanes, seasons, and handoffs?
What your qualification package should contain
| Document | What it proves | Minimum contents | Why it helps you |
|---|---|---|---|
| User Requirement Spec | What you need | band, duration, payload, lane | Prevents scope creep |
| Pack-out Work Instruction | How you pack | photos, counts, version ID | Reduces human error |
| OQ report | Lab performance | hot/cold profiles + acceptance | Audit-friendly proof |
| PQ report | Real lane performance | lane studies + logger data | Reality validation |
| Change control | Control after changes | what changed + rationale | Prevents silent drift |
Practical rule: If you change PCM brand, mass, placement, inserts, or payload format, treat it as a controlled change. Small “equivalents” can break performance.
Temperature logger placement in a VIP transport box for biologics transport
Monitoring should answer two questions:
Did we stay in range? 2) Where did failure begin?
Bad placement creates false confidence. Place sensors where risk starts, not where it is easiest to tape.
Logger placement options (and what they really tell you)
| Placement | What it captures | What it can miss | Best use |
|---|---|---|---|
| Payload core | Most representative average | Edge warming | Baseline monitoring |
| Near cold source | Freeze risk | True payload risk | 2–8°C safety insight |
| Near wall (buffered) | Worst-case drift trend | Very little if standardized | Best for decisions |
| Under lid area | Warm intrusion + openings | Center stability | High-handoff lanes |
Monitoring tiers (risk-based, scalable)
Tier A: lane qualification + periodic verification shipments
Tier B: loggers on high-risk lanes or premium SKUs
Tier C: logger + alerts + documented lane reviews
Calibration discipline (the detail auditors notice): keep certificates, assignment logs, and a clear review SOP.
What to do when a VIP transport box for biologics transport has an excursion
Excursions happen. The quality failure is not “an excursion happened.”
The failure is: no consistent, documented response.
Excursion playbook (copy into your SOP)
Quarantine (do not release)
Collect evidence: logger data, timestamps, handoff records
Check product rules: allowed excursions vary by product
Quality review: release vs reject using approved criteria
Root cause + CAPA: fix recipe, training, or handoff control
Update lane risk: re-qualify if assumptions were wrong
Simple “Green / Yellow / Red” action lines
Green: within range → release
Yellow: short drift, within approved limits → QA review + document
Red: outside approved limits → hold + investigation + disposition
Your goal is not “never an excursion.” Your goal is “excursions never become surprises.”
VIP transport box for biologics transport vs foam: when does the upgrade pay back?
A VIP transport box for biologics transport often pays back where the cost of failure is high: rejects, reships, QA holds, and disputes.
| Decision factor | Foam shipper | VIP shipper | Practical meaning |
|---|---|---|---|
| Hold time at same size | Moderate | Higher | Supports longer lanes |
| Size at same hold time | Larger | Smaller | Helps parcel constraints |
| Coolant needed | Often more | Often less | Potential weight savings |
| Sensitivity to packing errors | Medium | Higher | Needs strict SOP |
| Upfront cost | Lower | Higher | Deploy on high-risk lanes |
ROI mini-calculator (fast and honest)
Fill in your numbers:
Weekly shipments: ___
Current excursion/hold rate: ___%
Avg cost per event: $___
Expected reduction with VIP: ___%
Added cost per VIP shipment: $___
Estimated weekly savings = shipments × excursion rate × cost per event × reduction
Estimated weekly added cost = shipments × added cost per shipment
If savings > added cost, your VIP transport box for biologics transport is justified for that lane.
2025 trends for VIP transport box for biologics transport programs
In 2025, the biggest shift is standardization that reduces human error:
Lane-based pack recipes by season and service level
Fewer shipper types, more validated configurations
Risk-based monitoring instead of “logger on every shipment”
Stronger emphasis on documentation, calibration, and review discipline
More attention to handoff behavior (open time, staging, receiving steps)
Market reality: Two validated configurations often beat ten “flexible” options.
Frequently Asked Questions
Q1: When is a VIP transport box for biologics transport worth it?
When lanes are long or unpredictable, handoffs are frequent, or failures are expensive. VIP adds thermal time and reduces evidence disputes.
Q2: Can a VIP transport box for biologics transport reduce coolant usage?
Often yes, because stronger insulation can reduce required coolant mass for the same lane—after you validate performance.
Q3: Do I need a logger in every VIP transport box for biologics transport shipment?
Not always. A risk-based plan works well: qualify the lane, then monitor representative shipments and all exceptions.
Q4: What is the #1 packing mistake with a VIP transport box for biologics transport?
Large air gaps and long open-lid time. Warm air inside the shipper can erase your insulation advantage.
Q5: How do I prevent freezing in a 2–8°C VIP transport box for biologics transport?
Use PCM near the target point, add buffer layers, and never allow direct coolant contact with product.
Q6: What documents should I keep for audit readiness?
Lane risk assessment, pack-out version control, OQ/PQ reports, monitoring records, and deviation/CAPA files.
Summary and recommendations
A VIP transport box for biologics transport is a high-performance option for lanes where delays, handoffs, and seasonal extremes make standard packaging too risky. The most reliable 2025 approach is lane-based: define temperature targets, lock a pack-out recipe, qualify the system, and monitor where it changes outcomes. When you standardize configuration and tighten handling, VIP becomes predictable instead of “sometimes great.”
Action plan (CTA)
Pick your top 3 highest-risk lanes (value + delays + handoffs).
Create one pack recipe per lane (by season if needed).
Run a focused PQ pilot (10–20 shipments) and review weekly.
Lock the winning version into training, photos, and change control.
Scale only after results are repeatable and review is routine.
About Tempk
At Tempk, we build practical temperature-controlled packaging workflows for life-science shipments, including VIP transport box for biologics transport programs. We focus on lane-based pack recipes, qualification-ready documentation, and monitoring strategies that reduce deviations without adding operational chaos. Our goal is simple: help you ship with confidence, prove control, and scale with repeatability.
Next step (CTA): Share your temperature band (2–8°C or frozen), target hold time, lane duration, payload format, and handoff count. We’ll suggest a lane-based VIP packaging plan you can pilot immediately.
Vacuum Panel Container for Wine Shipping (2025)
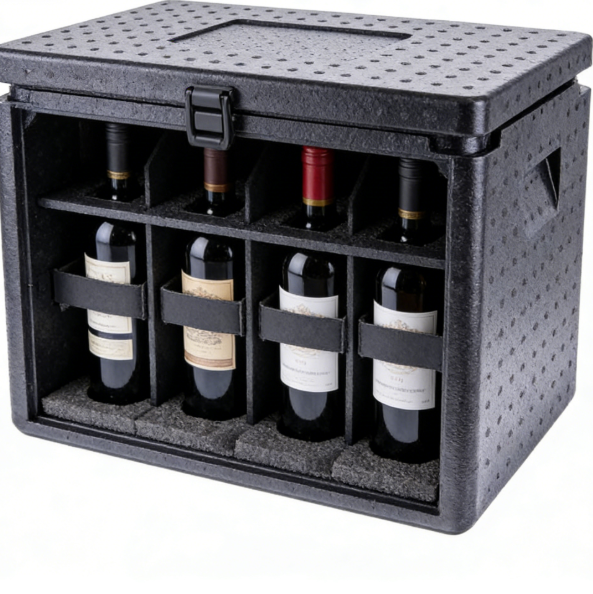
Vacuum Panel Container for Wine Shipping in 2025?
Wine can survive “not cold,” but it struggles with swings. A vacuum panel container for wine shipping helps you hold a steadier internal temperature when docks run hot, vans idle, and customers are not home. For most bottles, the practical goal tracks cellar-like stability around 50–60°F (10–16°C), while avoiding long warm exposure above ~75–80°F and winter freeze risk near -7°C to -10°C. This guide shows lane-based pack-outs you can repeat, not theories.
Last updated: 2025-12-22
This article will help you answer:
How a vacuum panel container for wine shipping reduces heat spikes and last-mile losses
How to set the ideal wine shipping temperature range 50–60°F (10–16°C) without overcooling
How to prevent wine heat damage above 75°F and 80°F risk during handoff minutes
How to manage wine freezing risk -7°C to -10°C cork push in winter lanes
How to validate with ISTA STD-7E thermal testing for wine shippers and stop guessing
How to plan reusable vacuum panel container for wine shipping ROI with simple return KPIs
Vacuum panel container for wine shipping: why do bottles fail in transit?
Most failures come from “messy minutes,” not the drive. Your box sits on a warm dock. It waits in a parked van. It bakes on a porch. A vacuum panel container for wine shipping buys time, but you still need a process that controls the worst moments.
The three hotspots you should design for:
Dock time: staged pallets and small parcels in warm air
Vehicle time: stops, traffic, and sun exposure through windows
Handoff time: doorsteps, concierge desks, and missed deliveries
The stability rule: “steady beats colder”
For wine, stability usually matters more than “deep cold.” A vacuum panel container for wine shipping is a stability tool first. If your system avoids sharp swings, you reduce cork stress, flavor drift, and complaint risk.
| Where risk happens | What increases it | What lowers it | What it means for you |
|---|---|---|---|
| Warm staging | sun + hot docks | shaded staging + fast pickup | fewer “cooked” complaints |
| Long dwell time | missed delivery + wide windows | narrow windows + pickup options | fewer refunds |
| Route complexity | many stops + traffic | clustered routes + early dispatch | less insulation needed |
What is a vacuum panel container for wine shipping?
A vacuum panel container for wine shipping uses VIP walls (vacuum insulated panels) to slow heat flow in a thin profile. Think “thermos wall.” You get strong insulation without the bulky outer box that drives dimensional weight.
Why this matters operationally:
Thin walls can mean smaller cartons and less filler
Smaller cartons can mean lower dimensional charges
Longer hold time means fewer reships when handoff goes wrong
VIP vs foam: what you gain (without the jargon)
VIP is powerful, but not magical. Panels need protection from puncture and crushing. A vacuum panel container for wine shipping should include a protective structure, stable inserts, and “no force close” rules.
| Insulation type | Typical thickness feel | Thermal performance feel | Your practical meaning |
|---|---|---|---|
| EPS foam | thick | “okay” | fine for mild, short lanes |
| PU foam | medium-thick | better | still bulky for long lanes |
| VIP (vacuum panels) | thin | high hold time | smaller box, steadier temperature |
Vacuum panel container for wine shipping: what temperature target should you use?
A vacuum panel container for wine shipping works best when you aim for a band, not a single number. The practical target aligns with cellar-like conditions: 50–60°F (10–16°C) when feasible. Your real mission is to avoid the long warm hours and the deep cold events.
Use this simple target logic:
Keep wine cool and steady when you can
Avoid prolonged warm exposure (especially above ~75–80°F)
Avoid freeze-range exposure (winter events can push corks and crack glass)
Heat + cold risk in one table (for your SOP)
| Risk type | Trigger pattern | What you might see | What you change |
|---|---|---|---|
| Heat damage | sustained warm exposure | flat, “cooked” profile | upgrade lane kit + reduce dwell |
| Cork movement / seepage | repeated warm/cool swings | leakage, stained labels | stabilize with VIP + buffer |
| Freezing | very low temps (-7°C to -10°C range) | cork push, cracked bottles | winter kit + “hold” rules |
How do you pick PCM setpoints without freezing wine?
If you add thermal buffers, don’t use “frozen food logic.” For most lanes, a controlled-ambient approach is safer. Many teams use PCM setpoints around 15–20°C as a stability buffer, not a deep-cold source.
Practical rule: your PCM should buffer spikes, not drive the bottle cold.
| Season | Recommended approach in a vacuum panel container for wine shipping | Common mistake | What it means for you |
|---|---|---|---|
| Summer | VIP + heat-buffering PCM + fast handoff | underestimating porch time | more heat complaints |
| Winter | VIP + “anti-freeze” buffering + strict routing | using frozen gel packs | cork push / break risk |
| Shoulder | VIP only or mild buffering | overbuilding every order | unnecessary cost |
Vacuum panel container for wine shipping: what pack-out prevents breakage and label damage?
Your insulation is only as good as your pack-out. A vacuum panel container for wine shipping slows heat transfer, but it cannot stop glass-to-glass contact. You need one repeatable build that new packers can learn fast.
A reliable pack-out has four layers:
Bottle protection: rigid inserts, dividers, neck support
Thermal control: VIP walls + consistent liners
Void control: no movement, no rattling
Seal discipline: clean closure to avoid “heat leaks”
The No-Clink Rule (fast training that works)
After packing, gently rock the box.
If you hear glass clinking, you have a breakage risk.
If you feel movement, you have a shock risk.
| Pack-out checkpoint | Fast test | Common failure | What it means for you |
|---|---|---|---|
| No-Clink Rule | gentle rock | cracked bottles | fewer claims |
| No-rattle | light shake | insert collapse | fewer replacements |
| Seal check | lid pressure | “heat leak” gaps | better stability |
Temperature logger placement for bottle shippers
If you measure, you improve. Place a logger where the bottle “feels” the hottest or coldest zone. In many parcel boxes, that is near the lid seam or outer edge, not next to a coolant pack.
Quick placement rules:
Keep sensors near the bottle, not touching PCM
Use the same placement every test for comparison
Record pack time and handoff time on the label
Decision tool: which vacuum panel container for wine shipping setup fits your lane?
Use this to stop overbuying premium packaging for low-risk orders. A vacuum panel container for wine shipping pays back fastest where failure is expensive.
Step 1: score your lane (1–5 each)
Transit duration: same-day (1) / 1–2 days (3) / 3+ days (5)
Dwell risk: low (1) / medium (3) / high (5)
Ambient risk: mild (1) / hot or cold (3) / extreme (5)
Delivery uncertainty: low (1) / medium (3) / high (5)
Total score guidance:
4–8: standard insulation may be enough
9–14: use a mixed fleet (VIP on worst lanes)
15–20: vacuum panel container for wine shipping + buffering + monitoring
| Score band | Recommended setup | Why it works | Your practical meaning |
|---|---|---|---|
| 4–8 | standard shipper + strong inserts | lane is forgiving | lowest cost |
| 9–14 | VIP on hot/cold lanes | targeted protection | best ROI |
| 15–20 | VIP + PCM + logger + rules | high stability | fewer claims |
Step 2: pick your “lane recipe” (summer vs winter)
A vacuum panel container for wine shipping should have two photo-recipes you can print. One for heat spikes. One for freeze risk. One box, one “guess,” equals inconsistent outcomes.
How do you validate a vacuum panel container for wine shipping in 2025?
Testing turns “premium packaging” into a program. If you ship via parcel networks, ISTA STD-7E is built around parcel-style thermal exposures. You can use that mindset (or formal testing) to compare pack-outs and stop guessing.
A simple validation plan you can run (fast and repeatable)
Define pass/fail: peak temp, time out of band, and “no leak / no break”
Choose worst lanes: hottest week lane + coldest week lane
Pack normally: normal staff, normal speed, normal materials
Place sensors consistently: same bottle position every time
Run thermal profiles: parcel-realistic exposures (STD-7E style)
Change one variable: PCM mass, placement, or insert fit
Retest and lock: publish one-page lane recipes
| Test metric | Why it matters | Pass signal | What it means for you |
|---|---|---|---|
| Peak temperature | predicts heat complaints | no high spikes | fewer “cooked” disputes |
| Time out of band | predicts cumulative drift | low duration | better consistency |
| Minimum temperature | predicts freeze events | stays above freeze-risk | fewer cork push events |
| Break/leak rate | predicts real failures | near zero | fewer refunds |
Vacuum panel container for wine shipping: how do you reduce “Doorstep Minutes”?
Handoff minutes are where wine loses the battle. A vacuum panel container for wine shipping helps, but the best savings often come from reducing porch time.
Three tactics that cut heat exposure fast:
Narrow delivery windows: give a 2-hour window, not “all day”
Hold-at-location: route to pickup points when customers are often away
Proactive alerts: “arriving today” + “delivered now” notifications
A single KPI that predicts complaints: Doorstep Minutes
Track minutes from delivery to retrieval. Use doorbell camera feedback, customer surveys, or support notes.
| KPI | Good | Risky | What it means for you |
|---|---|---|---|
| Doorstep minutes | under 30 | over 90 | higher heat complaints |
| Missed delivery rate | low | high | more depot exposure |
| Replacement rate | low | high | higher total cost |
Reusable vacuum panel container for wine shipping ROI: when does reuse win?
Reuse is great when assets return. Your real KPI is return rate, not purchase price. A reusable vacuum panel container for wine shipping program works when your reverse logistics are reliable and simple.
Quick ROI calculator (use real numbers, not hope)
| Input | What to estimate | Why it matters | Your practical meaning |
|---|---|---|---|
| Return rate | % that come back | drives lifecycle cost | low return kills ROI |
| Cycles per container | expected uses | spreads fixed cost | higher cycles win |
| Reverse cost | pickup + handling | adds OPEX | must be controlled |
| Damage rate | panels/lids harmed | affects uptime | reduces availability |
Simple rule: If return rate is below ~80% on a lane, pilot first. Add deposits or scheduled pickups before you scale.
2025–2026 trends: what’s changing for wine packaging programs?
In 2025, the shift is from “ship it and hope” to “engineer the lane.” That means lane recipes, proof-driven testing, and less wasted space. Packaging pressure is also rising, including the EU Packaging and Packaging Waste Regulation (PPWR) entering into force on 11 February 2025 with broad application after an 18-month window, and compliance timelines that many teams plan around in 2026.
What you should prepare for now:
Right-sizing becomes a default expectation (less empty space shipped)
Reuse and circular planning accelerates where returns are possible
Documentation and labeling discipline increases in e-commerce flows
A vacuum panel container for wine shipping can support these goals if you design for fewer failures, smaller cartons, and recoverable components.
Common questions (FAQ)
Q1: What is a vacuum panel container for wine shipping?
It is a wine shipper that uses VIP insulation to slow heat transfer. It helps stabilize temperature during docks, vans, and handoff.
Q2: What is the ideal wine shipping temperature range 50–60°F (10–16°C)?
It’s a practical cellar-like target band. You aim for stable conditions, not “ice cold,” and you avoid long warm exposure.
Q3: When does wine heat damage above 75°F and 80°F risk become serious?
Risk rises with time and repeated spikes. Focus on preventing porch time and warm staging during the hottest hours.
Q4: Can wine freeze in transit and cause cork push?
Yes. In very cold exposure, wine can approach freeze-range conditions and push corks or damage bottles. Winter pack-outs matter.
Q5: Should I add ice packs inside a vacuum panel container for wine shipping?
Not by default. Deep-cold packs can create overcooling and condensation. Controlled-ambient buffering is usually safer for wine lanes.
Q6: How do I validate a vacuum panel container for wine shipping?
Set pass/fail limits, place sensors consistently, and test worst hot and cold lanes. ISTA STD-7E style profiles help mimic parcel realities.
Q7: Are reusable VIP shippers worth it?
They can be, if your return rate stays high and damage stays low. Start with a pilot lane and track returns weekly.
Summary and recommendations
A vacuum panel container for wine shipping helps you protect wine by slowing temperature rise during the exact moments that cause complaints: warm staging, long dwell, and doorstep delays. Aim for cellar-like stability around the 50–60°F (10–16°C) band when feasible, and plan for both heat spikes and winter freeze risk. Pair VIP insulation with rigid inserts, consistent sealing, and lane-based pack-outs that your team can repeat.
Action plan (CTA)
Split shipments into same-day, next-day, and 2-day lanes.
Publish two lane recipes per lane (summer + winter) with photos.
Add loggers to 10 shipments per high-risk lane to get real curves.
Validate using parcel-realistic thermal thinking (ISTA STD-7E style).
Track Doorstep Minutes, replacements, and breakage every week.
About Tempk
At Tempk, we design temperature-protective packaging that works on real shipping days. For vacuum panel container for wine shipping programs, we focus on VIP-based insulation structures, bottle-protection inserts that reduce breakage, and lane recipes your team can pack consistently. We also support validation planning and reusable workflows where returns make sense, so you reduce heat complaints, cork issues, and reship waste.
Next step: Share your lane type (local, next-day, 2-day), bottle count, and your hottest/coldest shipping months. We’ll map a lane-based pack-out you can implement immediately.
Insulated Bags Walmart: Best Picks & Buying Guide

Insulated Bags Walmart: How Do You Pick the Best?
Insulated bags Walmart shoppers buy can help you keep food safe on the way home. If you’ve watched ice cream soften in the car, you know the problem. Food safety guidance (including the FDA Food Code) warns about a “danger zone”—often rounded to 40°F to 140°F (4°C–60°C)—where bacteria can grow faster. The right insulated bag, plus one or two ice packs, can buy you hours of buffer during errands and commutes.
This guide will answer for you about insulated bags Walmart
How insulated bags Walmart sells actually hold temperature (in plain English)
Which insulated bags Walmart offers fit groceries, lunch, travel, or delivery
How to estimate “cold time” with and without ice packs
What features matter most: leakproof liners, zippers, and carry strength
How to clean and store your bags so they don’t smell (or mold)
What are insulated bags Walmart sells, and why do you need them?
Direct answer: Insulated bags Walmart carries are reusable thermal carriers that slow heat change. They help keep cold items cold and hot items warm for longer than a regular tote.
Insulated bags work like a jacket for your food. The insulation layer slows heat transfer, so outside heat does not rush in (or inside heat does not rush out). For you, that means fewer melted items, less food waste, and less stress when your trip takes longer than planned.
How insulated bags Walmart designs work (simple breakdown)
| Part of the bag | What it usually is | What it does | What it means for you |
|---|---|---|---|
| Thermal lining | Foil film or coated liner | Reflects heat and reduces heat flow | Keeps chilled items colder, longer |
| Insulation layer | Foam or padded fill | Adds thickness and “air barrier” | Better temperature hold in summer |
| Closure | Zipper, Velcro, roll-top | Reduces warm air exchange | Fewer temperature swings in transit |
| Inner surface | Wipe-clean, leak-resistant | Stops leaks and stains | Faster cleanup, less odor |
| Outer shell | Fabric or coated material | Adds strength and water resistance | Survives daily use and heavy loads |
Practical tips you can use today
Put cold items together. Cold things help each other stay cold.
Pre-chill when possible. A cool bag starts stronger than a warm bag.
Keep the bag closed. Every open-and-close is like opening a fridge door.
Real-world example: If you do a 45-minute grocery run in summer, insulated bags Walmart offers can help protect dairy and frozen items—especially when you add a small gel pack.
Which insulated bags Walmart offers match your use case?
Not every “insulated” bag is built the same. The best insulated bags Walmart sells depend on what you carry, how long you travel, and how rough the bag’s daily life will be.
Quick decision tool: pick your insulated bags Walmart style in 2 minutes
Answer these five questions. Give yourself 1 point for each “Yes.”
Do you often drive 45+ minutes before unpacking?
Do you buy frozen food every trip?
Do you carry liquids (milk, soup, iced drinks)?
Do you shop in hot weather (85°F / 29°C or higher)?
Do you need the bag for delivery or long events (picnic, sports, catering)?
Score it:
0–1: Basic freezer-style insulated bags Walmart stocks are enough.
2–3: Step up to thicker reusable thermal grocery bags with a zipper.
4–5: Choose Walmart insulated cooler bags or delivery-grade totes, and use ice packs.
Match the bag type to the job
| Your main job | Best bag category | Typical capacity | “Best for” result |
|---|---|---|---|
| Daily lunch | Leakproof insulated lunch bag | 10–17L | Keeps lunch stable through workdays |
| Weekly groceries | Walmart large insulated grocery bag | 20–40L | Protects dairy, meat, and frozen foods |
| Beach / picnic | Walmart leakproof cooler tote | 20–35L | Longer cold time with ice packs |
| Meal delivery | Walmart insulated delivery bags | 30L+ | Handles multiple orders, better sealing |
| Meds / baby items | Small cooler or medical tote | 5–15L | Steadier temps for sensitive items |
How do insulated bags Walmart perform in hot and cold weather?
Direct answer: In heat, insulated bags Walmart models work best when they stay sealed and shaded. In cold, they hold warmth well, but wind and snow can still cool food over time.
Hot weather is usually the bigger problem. Sunlight can heat the bag’s outer shell fast, even if the air feels mild. Cold weather is easier for “cold loads,” but it can cool hot meals quickly if the bag is thin or frequently opened.
What to do in summer (simple steps)
Load cold items last. Don’t let them sit in a warm cart.
Use two small gel packs instead of one large pack for better coverage.
Shade the bag in your car. A back seat floor is often cooler than the trunk.
Close the zipper fully. A half-open top leaks cold air fast.
What to do in winter (yes, it still matters)
Keep hot food separate. Hot and cold together hurts both.
Use a tight seal. Wind steals heat through gaps.
Add a towel layer around hot containers to reduce heat loss.
| Weather situation | Best insulated bags Walmart choice | Extra add-on | What you gain |
|---|---|---|---|
| 90°F / 32°C errands | Zippered cooler tote | 2 gel packs | Fewer melted items |
| Long outdoor event | Soft cooler bag | 3–4 packs | Longer cold window |
| Freezing commute | Thermal lunch bag | towel wrap | Hot food stays warm |
Practical example: If you shop on a 95°F day, moving insulated bags Walmart purchases out of direct sun can feel like “free extra insulation.”
How long can insulated bags Walmart options keep food cold or hot?
Direct answer: Most insulated bags Walmart offers keep items stable for 2–4 hours in typical errands. With better insulation, tight zippers, and ice packs, many setups reach 6–12 hours.
The “time” depends on four simple variables: (1) bag insulation thickness, (2) closure quality, (3) ice packs or no ice packs, and (4) outside temperature. A thin freezer bag can be perfect for a quick store run. A soft cooler is safer for long days outside.
Cold-time estimator you can actually use
| Your setup | Realistic cold time | Best for | What you should do |
|---|---|---|---|
| Basic freezer bag, no ice | 1–2 hours | quick trips | keep it shaded in the car |
| Basic freezer bag + 1 gel pack | 2–4 hours | errands + commute | put frozen items near the pack |
| Zippered grocery tote + 2 packs | 4–8 hours | big shopping days | avoid opening until home |
| Soft cooler tote + 2–4 packs | 6–12 hours | picnic / travel | pre-chill bag, then load fast |
Pro tip for hot food
If you carry hot food, treat it like a “heat pack” problem. Use a clean liner, keep the bag closed, and avoid mixing hot food with cold items. Many insulated bags Walmart sells can handle both hot and cold, but mixing them reduces performance for both.
What features should you check before buying insulated bags Walmart has?
Direct answer: Focus on insulation thickness, leakproof liner, closure quality, and carry strength. Those four features decide whether your bag works when life gets messy.
The must-check list (fast)
Leakproof liner: Helps with ice melt, sauces, and spills
Zipper or tight seal: Reduces warm air exchange
Reinforced handles: Helps when the bag is heavy
Flat, stable base: Prevents tipping in the trunk
Wipe-clean interior: Makes the bag last longer
Enough capacity: Bigger is not always better—match your load
Mini self-test: are you buying “insulated” or just “padded”?
Ask the seller photos these two questions:
Is there a reflective lining or a clearly sealed inner layer?
Does the closure fully cover the top, not just “fold over”?
If both answers are “yes,” insulated bags Walmart shoppers love usually perform better in real errands.
How to pack insulated bags Walmart for groceries in 5 steps
Direct answer: Pack cold items together, add ice packs, and keep the top sealed. This simple routine makes insulated bags Walmart choices perform much closer to a hard cooler.
Plan your cart. Put shelf-stable items first.
Shop cold last. Dairy, meat, and frozen items go near the end.
Pre-stage ice packs. Put one pack on the bottom of the bag.
Load smart. Frozen items near packs, soft items on top.
Seal and go. Close the zipper fully and head home directly.
Packing order that protects your food
| Pack layer | What goes here | Why it helps | What it means for you |
|---|---|---|---|
| Bottom | gel pack + frozen items | cold “core” | slower melting |
| Middle | dairy, meat, seafood | steady chill | safer temps longer |
| Top | produce, bread | avoids crushing | better quality |
One more tip that saves dinner
If you must make extra stops, keep one insulated bag as your “cold-only bag.” This makes insulated bags Walmart setups far more predictable.
A simple shortlist: insulated bags Walmart shoppers buy most
The shortlist below reflects the most common insulated bags Walmart shoppers look for in 2025—lunch totes, reusable freezer bags, and cooler-style carriers.
insulated bags walmart
Here’s a cleaner way to think about your shortlist (prices and availability change):
Budget freezer bags: Great for short trips and quick wins
Premium freezer bags: Better insulation and stronger seams
Cooler totes (12–18 can range): Good for drinks, lunch, and day trips
Expandable lunch bags: Helpful when you pack multiple containers
Large grocery carriers (2-pack sets): Strong choice for weekly shops
Hot/cold tote bags (30L+): Useful for meal delivery and catering
Examples you may see in insulated bags Walmart listings
These names change by store and season. Examples from common late-2025 assortments include:
Ozark Trail 12-Can Cooler Tote: quick lunches and drinks
Igloo 18-Can Cooler (Laguna-style): picnics and beach days
Expandable insulated lunch bag (about 17L): meal prep containers
Reusable insulated freezer bag: short grocery runs
Premium reusable insulated freezer bag: stronger seams for heavier loads
Deluxe cooler shopping tote: weekly groceries and errands
2-pack large insulated grocery bags (set): bulk shopping and trunk loads
32-qt hot/cold tote bag: delivery routes and catering
| Example category | Best use | Why it works | What it means for you |
|---|---|---|---|
| Reusable freezer bag | quick grocery trip | light and low cost | easy to keep in the car |
| Cooler tote (12–18 can) | day trips | thicker insulation | longer cold window |
| Large grocery carrier | weekly shop | big volume | fewer trips from car |
What to look for inside the “best value” option
A zipper that closes smoothly
A liner that feels like a single, sealed surface
Handles that are stitched twice (or boxed stitched)
A base panel that stops sagging
Insulated bags Walmart vs premium brands: when should you upgrade?
Insulated bags Walmart options are usually the best value for everyday use. For most grocery runs, school lunches, and weekend trips, they do the job when you pair them with a gel pack.
Upgrade when you need one of these:
Long durations (8+ hours) in heat
Professional delivery routes with frequent opening
Very high-value cargo (specialty food, sensitive supplies)
| Feature | Insulated bags Walmart options | Premium cooler brands | What it means for you |
|---|---|---|---|
| Price | Low to mid | Mid to high | Easier to buy multiples |
| Insulation | Good for errands | Strong for long days | Longer hold time outside |
| Sealing | Varies by model | Usually tighter | Better in heat and wind |
| Durability | Everyday use | Heavy-duty | Fewer replacements |
How to clean insulated bags Walmart buys (so they last)
Direct answer: Wipe after each use, deep clean weekly if you carry food, and dry fully before storage.
HowTo: fast cleaning routine
Empty and shake crumbs.
Wipe liner with mild soap water.
Rinse with a clean damp cloth.
Air dry with the bag open (never closed and wet).
Store in a dry spot with zippers partly open.
Odor reset (when the bag smells “off”)
Mix warm water with a small amount of baking soda.
Wipe the liner, then wipe again with clean water.
Dry overnight with the bag open.
Practical example: If you use insulated bags Walmart sells for drinks and ice, drying fully is the difference between “fresh” and “mildew” next weekend.
2025 insulated bags Walmart trends you should know
In late 2025, shoppers are asking for bags that do more than carry groceries. They want bags that save time, clean easily, and survive daily use.
Latest progress you’ll see more of
Better leakproof liners: smoother seams, fewer drips
Dual-purpose designs: lunch + grocery, or grocery + light delivery
Eco-lean materials: more reusable fabrics and recycled blends
Smarter add-ons: divider panels and “ice pack sleeves”
Market insight (what this means for you)
The best value is moving toward multi-use. If you buy one bag that handles lunch and groceries, you use it more often. That cuts waste and pays back faster.
Frequently Asked Questions about insulated bags Walmart
Q1: How long do insulated bags Walmart models keep food cold?
Most everyday models hold cold 2–4 hours in normal errands. Add ice packs and a tight zipper, and many setups reach 6–12 hours.
Q2: Can I use insulated bags Walmart options for hot food?
Yes. Keep hot items in a clean bag, close the top, and avoid mixing hot and cold loads.
Q3: Are insulated bags Walmart sells leakproof?
Many have leak-resistant liners, but not all. Look for a sealed inner surface and reinforced seams.
Q4: What size should I buy for groceries?
If you shop for a household, a Walmart large insulated grocery bag (20–40L) usually fits frozen and chilled items well.
Q5: What’s the best bag for work lunches?
A Walmart insulated lunch bag for work with a zipper and wipe-clean liner is the simplest win.
Q6: Can I use them for meal delivery?
Yes. For delivery, choose Walmart insulated delivery bags with stronger handles and a top that seals well.
Q7: Do I still need ice packs?
If you carry frozen food, dairy, seafood, or medication, ice packs are strongly recommended.
Summary and recommendations for insulated bags Walmart
Insulated bags Walmart shoppers rely on are a simple way to protect food quality during daily life. Pick a bag based on your real trip length, not wishful thinking. Choose leakproof liners and tight closures first, then worry about style. Add ice packs when you carry anything sensitive, and clean the liner so the bag stays fresh.
Next step (simple plan):
Choose your main job: lunch, groceries, travel, or delivery.
Buy the right size once, not three sizes “maybe.”
Add 1–2 gel packs for cold loads.
Keep the bag clean and dry so it lasts.
About Tempk
At Tempk, we build practical cold-chain packaging and temperature-control solutions. We help teams choose insulation that matches real routes, real weather, and real budgets. Our focus is durability, easy handling, and predictable temperature control—so your products arrive the way you packed them.
Call to action: Tell us what you carry (groceries, lunch, delivery, or sensitive items) and your typical trip time. We’ll help you choose a simple insulated setup that works.
Insulated Bag Coolers: Which One Fits 2025?
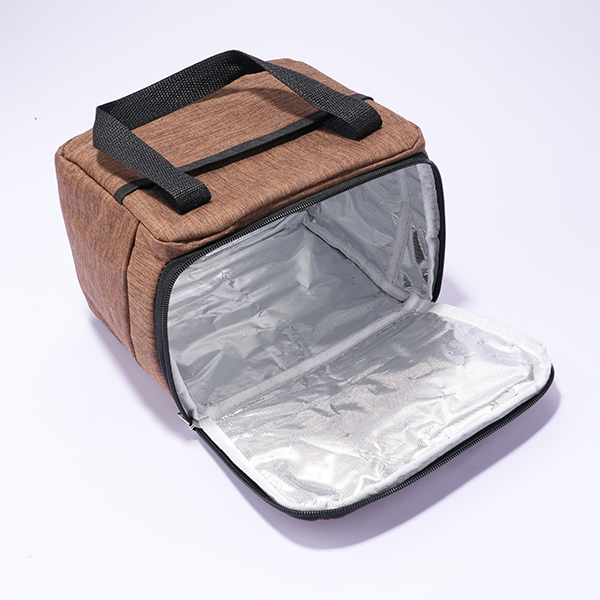
Insulated Bag Coolers: Which One Fits Your 2025 Needs?
Insulated bag coolers help you keep cold items cold during the “messy middle” between storage and use. If you carry perishables, your goal is simple: reduce time above safe temperatures, and avoid unnecessary warm-air exposure. Many teams use 40°F (4°C) as the practical cold target for perishables, then plan routes and packing around it. With the right insulated bag coolers, you cut leaks, reduce waste, and keep quality predictable.
This article will answer for you:
How insulated bag coolers stay cold using seal quality and insulation thickness
Which insulated bag coolers match groceries, travel, and food delivery use cases
How to choose sizing for insulated bag coolers to reduce empty air space
When you need leakproof insulated bag coolers for groceries and why liners matter
How long insulated bag coolers keep ice using a real-life estimator
How to pack insulated bag coolers with gel packs (no soggy mess)
How to clean and standardize insulated bag coolers with a simple 2025 SOP
What makes insulated bag coolers actually keep things cold?
Insulated bag coolers keep things cold by slowing heat entry and limiting air exchange. The biggest performance driver is not the logo. It is the closure seal, the insulation consistency, and how tightly you pack the inside. Think of insulated bag coolers like a winter jacket: a thicker coat helps, but an open zipper ruins everything.
In real use, the “cold loss” happens at the lid, corners, and seams. That is why insulated bag coolers with tighter closures often outperform thicker bags with zipper gaps.
Seal beats thickness: the 4-part cold barrier
| Cooler bag part | What “good” looks like | What “bad” looks like | What it means for you |
|---|---|---|---|
| Insulation layer | even thickness, firm feel | thin corners, soft spots | shorter cold time |
| Liner | smooth, wipe-clean | porous, wrinkly | odor and stains |
| Seams | welded or reinforced | exposed stitch holes | leaks and mildew |
| Closure | tight, smooth close | gaps, snagging | warm air enters |
Practical tips you can use today
If you want longer ice time: choose insulated bag coolers with a tighter seal before chasing bigger size.
If you carry soups or seafood: prioritize a stronger liner and reinforced seams to prevent leaks.
If you open the bag often: use more gel packs, because every opening dumps cold air fast.
Practical example: When users switch from a wide-top tote to a tighter seal, the same gel packs often last longer.
Which types of insulated bag coolers fit your use case?
Insulated bag coolers come in types that match how you carry, load, and clean them. If you pick the wrong type, you fight the bag every day. If you pick the right type, you stop thinking about it and just use it. In 2025, insulated bag coolers are used for lunches, grocery runs, last-mile delivery, and medical-style “keep cold” tasks.
Match the type to your workflow first. Then choose features like liner, seal, and structure.
Common types of insulated bag coolers in 2025
| Type | Best for | Strength | Watch-out | Practical meaning for you |
|---|---|---|---|---|
| Lunch-size bags | office and school | light and easy | limited ice time | daily convenience |
| Tote soft coolers | groceries | easy loading | zipper gaps if cheap | fast errands |
| Backpack coolers | travel and commuting | hands-free | corner cleaning | better mobility |
| Roll-top coolers | beach and wet use | stronger seal | slower access | fewer leaks |
| Box-style soft coolers | meal prep and delivery | stable and stackable | bulkier storage | repeatable loads |
Practical tips you can use today
For travel: a soft-sided insulated cooler bag for travel works best when it stays upright in a car.
For delivery: insulated bag coolers with structure reduce spills and speed up handoffs.
For beach days: roll-top insulated bag coolers usually reduce leak risk and warm-air entry.
Practical example: Teams reduce “warm food” complaints by separating drinks and perishables into two insulated bag coolers.
How do you choose the right size for insulated bag coolers?
Size is the most common mistake with insulated bag coolers. Too small means containers do not fit. Too large means extra air space melts your cold source faster. Air is the hidden enemy inside insulated bag coolers, because warm air moves heat quickly.
Choose insulated bag coolers that fit your usual load with minimal empty space. Then plan your gel pack layout for your trip length.
Simple sizing guide (realistic and practical)
| Typical load | Recommended size | Best style | What it means for you |
|---|---|---|---|
| 1–2 meals + drink | 5–10 L | lunch bag | quick daily use |
| 2–3 grocery bags | 10–20 L | tote | better for errands |
| day trip kit | 15–30 L | structured tote/backpack | more stable packing |
| delivery route loads | 20–40 L | box-style/structured | repeatable stacking |
“Ice-to-food ratio” rule of thumb
Under 3 hours: 1–2 flat gel packs usually works.
3–6 hours: use at least one-third of the space as cold source.
6–10 hours: increase gel packs and reduce opening time aggressively.
Practical example: Many users improve cold time by downsizing one size, because the inside packs tighter.
Do you need leakproof insulated bag coolers for groceries?
If you carry melting ice, raw proteins, or sauces, you usually need leakproof insulated bag coolers for groceries. Leaks create two problems: a mess you cannot ignore and odors that never fully leave. A good liner and seam build is the difference between “wipe and go” and “replace the bag.”
In practice, sealed gel packs reduce risk more than loose ice. But insulated bag coolers still need durable seams and a liner that does not absorb smells.
What “leakproof” should mean in real life
| Feature | Helps with | Trade-off | What it means for you |
|---|---|---|---|
| Welded/reinforced seams | spills and meltwater | higher cost | fewer leaks |
| Durable liner material | cleaning and odor | slightly heavier | longer life |
| Tighter closure | air + water entry | slower access | longer cold time |
| Removable insert | cleaning and shape | added weight | faster sanitation |
Practical tips you can use today
If you use ice cubes: put ice in sealed bags, or choose insulated bag coolers rated for leak resistance.
If you use gel packs: leaks are less likely, but seam quality still matters.
If you do deliveries: one leak can damage customer trust faster than a late arrival.
Practical example: Switching from loose ice to flat gel packs often cuts trunk leaks to near zero.
How long do insulated bag coolers keep ice in real life?
How long insulated bag coolers keep ice depends on your process, not just the product. Two people can use the same insulated bag coolers and get very different results. Seal quality, packing tightness, and heat exposure usually matter more than “marketing ice hours.”
Treat insulated bag coolers as a buffer, not a refrigerator. Your goal is stable time-temperature control until the next cold handoff.
Ice-time estimator (quick and practical)
Score each factor from 0–3, then add them.
Estimated cold performance score =
Seal quality (0–3) + Cold mass (0–3) + Packing tightness (0–3) − Heat exposure (0–3) − Lid openings (0–3)
| Factor | 0 (low) | 1–2 (medium) | 3 (high) | What it means for you |
|---|---|---|---|---|
| Seal quality | gaps | decent close | tight close | less warm air entry |
| Cold mass | 1 small pack | 2–3 packs | layered packs | more cold reserve |
| Packing tightness | many gaps | some gaps | tight pack | less warm air inside |
| Heat exposure | cool indoors | warm car | sun + hot trunk | heat is the enemy |
| Lid openings | many | occasional | rare | openings kill cold time |
How to read your score
6+: insulated bag coolers should hold well for typical errands.
3–5: improve packing and reduce openings before buying a new bag.
0–2: you need more cold mass, better seal, or shorter time in heat.
Practical example: Many “bad cooler” complaints are actually “too many openings” problems.
How do you pack insulated bag coolers with gel packs for maximum hold time?
Packing is the cheapest performance upgrade for insulated bag coolers. Even premium insulated bag coolers fail when you pack warm items, leave gaps, or place cold sources randomly. Your goal is even cooling and minimal air movement.
Use a repeatable layout. Consistency matters more than perfection.
The “Top + Bottom” gel pack layout (works for most trips)
Start with pre-chilled items when possible.
Place a flat gel pack on the bottom.
Load items tightly in the middle.
Place a second gel pack on top.
Fill gaps with small packs or a clean towel, then close fast.
| Packing choice | Better | Worse | What it means for you |
|---|---|---|---|
| Starting temp | chilled | room temp | longer hold time |
| Cold source layout | top + bottom | random | fewer warm zones |
| Gap control | filled | empty air | slower warming |
| Sun exposure | shaded | direct sun | longer cold time |
Practical tips you can use today
If you open often: keep drinks in a separate bag so your food bag stays closed.
If you carry raw proteins: use sealed inner containment to avoid cross-contact mess.
If you want predictable results: keep the same gel pack positions every trip.
Practical example: A simple “no extra peeking” rule often stabilizes temperature more than adding pockets.
How do you clean and standardize insulated bag coolers in 2025?
Cleaning is what makes insulated bag coolers usable long-term. Odor builds when moisture sits in seams and zipper corners. A short routine after each use prevents most problems. For business delivery, a simple SOP keeps performance repeatable across shifts.
The goal is fast reset: wipe, dry, store open.
10-minute cleaning routine (easy to repeat)
Empty crumbs and meltwater.
Wipe liner with mild soap solution.
Wipe again with clean water.
Dry corners and zipper area with a towel.
Air-dry fully with the bag open.
| Problem | Quick fix | Prevent future issues | What it means for you |
|---|---|---|---|
| Odor | wipe + full dry | store open | longer lifespan |
| Mold spots | deeper clean | dry seams well | safer use |
| Sticky liner | mild soap only | avoid harsh scrub | less liner damage |
Mini-SOP for teams using insulated bag coolers
Pre-shift check: zipper closes smooth, liner clean, gel packs frozen.
Pack-out standard: one layout per product type (chilled vs hot).
Separation rule: keep messy items in sealed secondary containment.
Close-time rule: minimize open time during handoffs.
Post-shift reset: wash, dry fully, store open.
Practical example: Teams reduce replacements when they standardize packing and cleaning, not just bag selection.
2025 latest developments and trends for insulated bag coolers
In 2025, insulated bag coolers are trending toward workflow-first design, not just outdoor recreation. Buyers want predictable performance, faster cleaning, and fewer leak incidents. Delivery and last-mile use also pushes demand for structured designs that stay upright and stack well.
Latest progress snapshot
Tighter closures: better seals reduce warm-air exchange during frequent stops.
Cleaner liners: smoother liners and fewer creases reduce odor and cleanup time.
More structure: semi-rigid panels help stacking and reduce crushed items.
More repeatability: pack sleeves and inserts support consistent gel pack placement.
Market insight: the “best” insulated bag coolers are the ones your team uses correctly every single trip.
Frequently Asked Questions
Q1: How long do insulated bag coolers keep ice?
It depends on seal quality, heat exposure, and openings. Two gel packs (top and bottom) and tight packing usually improves performance most.
Q2: Are insulated bag coolers good for food delivery?
Yes. Choose structured insulated bag coolers with fast access and a liner you can wipe quickly between stops.
Q3: What are the best ice packs for insulated bag coolers?
Flat gel packs are easy to layer and reduce mess. Use two medium packs rather than one giant pack.
Q4: Do I need leakproof insulated bag coolers for groceries?
If you carry raw proteins, sauces, or loose ice, yes. Focus on liner seams and closure gaps.
Q5: How do I stop insulated bag coolers from smelling?
Clean the liner and zipper corners, then air-dry fully with the bag open. Trapped moisture causes most odors.
Q6: Should I put drinks and food in the same bag?
Usually no. Drinks cause frequent openings, which warms perishables faster. Separate bags help.
Summary and recommendations
Insulated bag coolers work best when you match type to your use case and pack with a repeatable layout. Prioritize seal quality, liner cleanability, and reinforced seams before chasing bigger size. Pack tight, use a top-and-bottom gel pack method, and reduce lid opening time to stabilize temperatures. If you standardize cleaning and pack-out rules, insulated bag coolers become predictable tools instead of guesswork.
Next steps (clear CTA)
Today: measure your typical containers and choose insulated bag coolers that pack tight.
Next trip: use two gel packs (top + bottom) and fill air gaps.
This week: adopt a simple wipe-and-dry routine and store the bag open.
For teams: run a 7-day pilot and track leaks, cleanup time, and complaints.
About Tempk
At Tempk, we build practical temperature-control packaging for last-mile handling and daily use. We focus on predictable insulation performance, fast cleanability, and repeatable packing methods. That means fewer leaks, fewer temperature swings, and smoother operations for both personal routines and delivery workflows.
Next step: Tell us your scenario (groceries, travel, or delivery), your trip time, and your container sizes. We will help you choose an insulated bag coolers setup and gel-pack layout you can repeat every day.
Insulated Bag Breast Milk Storage Guide (2025)
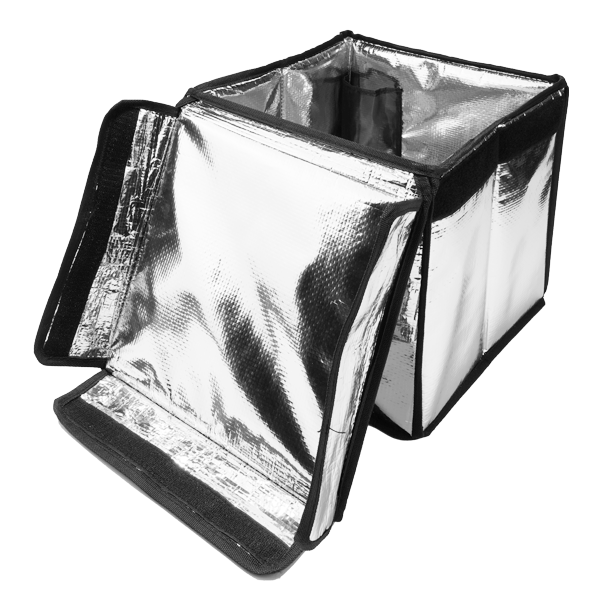
Insulated Bag Breast Milk: How Do You Keep It Safe?
If you use an insulated bag breast milk routine, your goal is simple: keep milk cold, keep it clean, and keep time under control. A practical anchor many parents use is that breast milk can stay in an insulated cooler bag with frozen ice packs up to 24 hours during travel, then it should be used, refrigerated, or frozen at your destination.
This guide turns official-style rules into a repeatable routine you can actually follow on workdays, daycare drop-offs, errands, and flights.
This article will help you answer:
- How long insulated bag breast milk storage stays safe in real life (and when to be more conservative)
- How to pack a breast milk cooler bag with ice packs to avoid warm spots and leaks
- How to handle daycare labeling and handoff steps that prevent mix-ups
- How to pump at work without a reliable fridge (and still keep milk protected)
- How to travel by air with fewer security surprises and fewer wasted ounces
Quick note: Most published storage charts are written for healthy, full-term babies. If your baby is premature or medically fragile, follow your clinician’s advice first.
How long can insulated bag breast milk stay safe?
Start with one “memory rule” so you don’t have to re-google everything at 2 a.m. Many parents remember the “Rule of 4s” and then add the cooler-bag travel limit on top.
Here’s a simple reference chart you can print and tape near your pump parts.
| Storage situation | Target temp | Practical time window | What it means for you |
|---|---|---|---|
| Countertop | ≤77°F / 25°C | Up to 4 hours | OK for short stretches; shorten if the room is warm |
| Refrigerator | ~40°F / 4°C | Up to 4 days | Best for daily rotation and “tomorrow’s bottles” |
| Freezer | 0°F / -18°C or colder | ~6 months best; 12 months acceptable | Freeze in small portions to reduce waste |
| Cooler bag + frozen ice packs | Keep it cold | Up to 24 hours (travel) | Strong option for commutes and travel days |
| Thawed (in fridge) | Cold | Use within 24 hours | Plan next-day bottles; don’t “push it” |
| Leftover after feeding | Room temp | Use within 2 hours | Don’t save it “for later” |
What about “8 hours vs 24 hours” in a cooler bag?
You may see different advice in different materials. One approach commonly references up to 24 hours with frozen ice packs during travel, while some materials mention 8 hours in a cooler with an ice pack.
If you want a rule that stays simple and feels safe:
- Aim for same-day use when you can
- Use more ice packs and open the bag less
- Choose the more conservative timeline for higher-risk situations
What temperature should insulated bag breast milk feel like?
Your insulated bag is not a magic fridge. It’s a pause button that slows warming until you reach a real refrigerator or freezer.
A practical target is “refrigerator-cold” (about 40°F / 4°C) as quickly as possible.
The two-touch test you can use anywhere
- If milk feels like it just came from the fridge, you’re on track.
- If the inside of the bag feels warm, treat it as a warning and move milk to a fridge/freezer ASAP.
How do you pack an insulated bag breast milk setup fast?
The simplest method is: pre-freeze ice packs, pre-chill milk, pack tight, and keep the bag closed.
The reliable 6-step pack-out
- Freeze ice packs solid overnight.
- Chill milk first (avoid packing warm milk when possible).
- Use clean, sealed containers made for milk storage.
- Pack ice packs around the milk (sides + top beats bottom only).
- Fill empty space with a small towel/spacer to reduce air gaps.
- Close the bag and keep it closed until you truly need it.

A “busy morning” packing table (reduces decision fatigue)
| Packing element | Best practice | Common mistake | What it means for you |
|---|---|---|---|
| Ice packs | Fully frozen | “Kind of cold” packs | Shorter safe window |
| Container | Sealed + labeled | Unlabeled bottles | Confusion + waste |
| Layout | Ice around milk | Ice only under milk | Uneven cooling |
| Space | Packed snug | Lots of empty air | Faster warming |
| Access | Open once, close fast | Repeated peeking | Temperature drift |
How do you prevent contamination and leaks with insulated bag breast milk?
Cold helps, but cleanliness matters too. A simple routine includes washing hands, keeping pump parts clean, avoiding unclean contact, and wiping spills promptly.
The “two-zone” habit that stops most mess
- Clean zone: sealed milk containers
- Dirty zone: used parts, wipes, anything that touched a counter
- Use a small separate pouch for dirty-zone items so the milk compartment stays clean.
Bottles or storage bags: which is safer on the go?
Pick the option you can seal, label, and keep cold consistently. Bottles are sturdy; bags save space but can leak if crushed.
| Option | Strength | Weak point | Best use for you |
|---|---|---|---|
| Bottles/containers | Strong seal, easy pouring | Takes more space | Workdays with a stable routine |
| Storage bags | Compact, freezer-friendly | Leak risk when crushed | Freezing and high-volume storage |
| Hybrid | Flexible | Extra handling step | When you need both space + structure |
Practical leak-proofing tips:
- Put milk bags inside a second zip pouch for “double protection.”
- Keep containers upright with a divider so they don’t tip.
How do you use insulated bag breast milk at work (even without a fridge)?
For an 8–12 hour day, the bag is your bridge, not your home base. Reduce openings and plan one mid-day transfer if a fridge is available.
A realistic workday routine
- Morning: pack milk + frozen ice packs
- Midday: move milk to a refrigerator if available
- Afternoon: return milk to the insulated bag for the commute
If your workplace doesn’t provide a refrigerator
Workplace guidance can still support using a personal cooler. It may require employers to allow a nursing employee to bring an insulated container/personal cooler and provide a place to store it while working.
| Work situation | Best choice | Why it works | Your key habit |
|---|---|---|---|
| No office fridge | Personal cooler bag | Controlled environment | Bring enough ice packs |
| Shared fridge | Cooler + fridge backup | Fewer mix-ups | Use a labeled container |
| Frequent meetings | Cooler + strict timing | Prevents warming | Schedule pump windows |
How do you handle daycare labeling for insulated bag breast milk?
Daycare success is mostly labeling and fast handoff. Labeling can include the date/time expressed and the child’s name when delivering to childcare.
Daycare-ready checklist
- Label each container with date/time expressed
- Add your child’s name if required
- Pack the oldest milk first (FIFO)
- Hand off quickly (don’t chat with the bag open)
Some childcare guidance also references storing expressed breast milk in a refrigerator kept at 40°F (4°C) or below.

Can you fly with insulated bag breast milk and ice packs?
Yes—plan for extra screening and keep items easy to access. Guidance can allow breast milk in quantities above typical liquid limits, and it can permit cooling accessories like ice packs/freezer packs/frozen gel packs used to cool breast milk.
Simple airport strategy that reduces stress
- Tell the officer you’re carrying breast milk
- Keep milk accessible so you don’t unpack the whole bag
- Bring backup zip bags or absorbent pads for leaks
- Plan for delays: your insulated bag is your buffer
Power outage or hotel-freezer “thaw panic”: what to do
| Situation | What you check | What you do | What it means for you |
|---|---|---|---|
| Ice crystals present | Partially thawed | Can refreeze | Less waste |
| Fully thawed but cold | No crystals | Use within 24 hours or discard | Safer choice |
| Warmed milk | Warm to touch | Use within 2 hours | Don’t stretch it |
If you must warm milk, use warm water—not a microwave.
Decision tool: Which insulated bag breast milk setup fits your day?
This quick tool helps you match insulation + ice packs to your real schedule (not your ideal schedule).
Step 1: Score your exposure (0–10)
Add points:
- Time away from a fridge: under 2h (+1), 2–6h (+2), 6–10h (+3), 10+h (+4)
- Outdoor heat risk: mostly indoors (+0), some walking (+1), hot commute/car time (+2)
- How often you’ll open the bag: 1–2 (+0), 3–5 (+1), 6+ (+2)
Step 2: Match your setup
- 0–3 points: compact insulated bag + 1–2 solid ice packs
- 4–6 points: stronger insulation + 2–3 ice packs + tight packing
- 7–10 points: highest insulation you can carry + extra packs + backup plan (fridge at destination)
Step 3: Pick one rule you will follow all day
- “Bag stays closed except pump times.”
- “Never leave it in a parked car.”
- “Ice packs always touch the milk containers.”
Self-check quiz: Did your insulated bag breast milk stay cold enough?
Answer yes/no:
- Did you start with fully frozen ice packs?
- Did you keep the bag closed most of the time?
- Did you keep the bag out of sun and hot cars?
- Did you label containers clearly?
- Did you transfer milk to a fridge/freezer at the end of the day?
If you answered “no” to 2+ items, tighten your plan next time: add one more ice pack, reduce openings, pick a cooler spot at work, and set an end-of-day reminder.
Common mistakes that break insulated bag breast milk safety
Most failures come from predictable problems, not “bad effort”:
- Leaving the bag in a warm car
- Using ice packs that aren’t fully frozen
- Opening the bag repeatedly
- Packing warm milk without enough cooling buffer
- Letting bottles tip and leak (wet insulation loses performance)
Fast fixes you can actually do:
- Keep the bag in the cabin, not the trunk.
- Keep one “emergency” ice pack at work.
- Pre-group bottles so you open once and grab fast.
2025 updates and trends for insulated bag breast milk routines
In 2025, the biggest improvement is not “more gadgets.” It’s clearer alignment across official-style guidance and more repeatable routines. One summary notes breast milk handling/storage guidance updated in May 2025, and it highlights simple limits for room temperature, fridge, freezer, and cooler-bag travel.
What’s most useful right now (2025)
- Better alignment on time windows across major guidance summaries
- Clearer travel language: up to 24 hours in an insulated cooler bag with frozen ice packs
- More workplace acceptance of personal coolers when fridges aren’t available
Frequently asked questions
Q1: How long can insulated bag breast milk stay safe with ice packs?
A common travel anchor is up to 24 hours in an insulated cooler bag with frozen ice packs, then use, refrigerate, or freeze at your destination.
Q2: What is the “4 hours / 4 days / 6 months” rule?
A simple way to remember storage is 4 hours at room temperature, 4 days in the fridge, and ~6 months best in the freezer (with longer sometimes listed as acceptable).
Q3: Can daycare refuse milk without labels?
Many programs require clear labeling. A practical checklist includes labeling containers and adding the child’s name when required for childcare delivery.
Q4: Is breast milk allowed through airport security with ice packs?
Guidance can allow breast milk and permit cooling accessories like ice packs/freezer packs/frozen gel packs used to cool it, with screening steps.
Q5: What should I do with leftover milk after a feeding?
A commonly stated rule is to use leftover milk within 2 hours and avoid saving it for later.
Summary and recommendations
A strong insulated bag breast milk routine comes down to three levers: cold, clean, and clock. Use fully frozen ice packs, pack tightly with ice around the containers, and keep the bag closed as much as possible.
For travel days, a practical anchor is up to 24 hours in an insulated cooler bag with frozen ice packs, then refrigerate/freeze at your destination.
Your next step (simple 7-day plan)
- Freeze ice packs every night.
- Use the same pack-out layout every morning (no improvising).
- Set one daily reminder: “Transfer milk to fridge/freezer.”
About Tempk
At Tempk, we apply cold-chain style temperature-control principles to real life—so you can protect temperature-sensitive items with less stress. We focus on repeatable pack-outs, stable insulation performance, and easy-to-clean designs that reduce temperature swings and prevent avoidable waste.
Call to action: Share your typical time away from a fridge, bottle count, and commute type. We’ll suggest a clear insulated bag breast milk setup (ice layout + bag size + simple monitoring habits) you can standardize immediately.
Costco Insulated Bag: Keep Food Cold in 2025

Costco Insulated Bag: How to Keep Food Cold in 2025?
A costco insulated bag is a simple way to slow heat gain during the trip from checkout to your fridge. But it is not a refrigerator. In 2025, more shoppers treat that short drive like a “mini cold chain” because hot cars, traffic, and extra errands can raise risk fast. A practical rule many food-safety guides use: keep perishables out of the 40°F–140°F “Danger Zone,” and limit unrefrigerated time to 2 hours (or 1 hour in extreme heat).
This article will answer for you:
how long does a costco insulated bag keep food cold on real trips (not marketing claims)
best way to pack a costco insulated bag with ice packs using a repeatable “two cold sources” method
costco insulated bag size choices for bulk groceries and awkward box shapes
leakproof insulated bag habits to prevent drips, stains, and odors
costco insulated bag for grocery delivery routines that reduce warm spikes and returns
Is a Costco insulated bag enough for cold groceries?
Yes—if you use your costco insulated bag as a short-trip temperature buffer, not as permission to delay. It performs best when you pack cold items tightly, keep it fully closed, and add at least one cold source in warm weather. Think of insulation like a winter jacket: it slows heat movement, but it cannot “create cold.”
In real life, the bag helps most when your groceries would otherwise sit in a warm trunk or get opened repeatedly. If your routine includes multiple stops, long commutes, or hot parking lots, the system matters more than the bag. Your goal is simple: reduce time, reduce openings, and add cold mass.
The “Enough vs Not Enough” decision table
| Situation | Costco insulated bag alone | Add cold sources? | What it means for you |
|---|---|---|---|
| <20 min drive, mild weather | Often fine | Optional | Easy win with low effort |
| 20–60 min drive, warm car | Risk rises | Yes (1–2 packs) | Better texture + safer margin |
| 60+ min or multiple stops | Usually not enough | Yes + stronger cooling | Upgrade your system, not just the bag |
Practical tips you can use today
Shop cold items last: Put refrigerated and frozen items in the costco insulated bag right before checkout.
Keep it closed: A half-open zipper is a warm-air invitation.
Put the bag in the cabin: The trunk can heat up fast, especially in sun.
Real-world example: A weekly bulk shopper reduced “soft edge” ice cream issues by packing frozen items together inside a costco insulated bag, adding two gel packs, and keeping the zipper closed until home.
How long does a Costco insulated bag keep food cold?
How long a costco insulated bag keeps food cold depends on heat, fullness, cold sources, and openings—not the logo on the bag. A full, zipped bag with gel packs can stay cold far longer than a half-empty bag that gets opened at every stop. Instead of chasing one “magic number,” plan by time blocks and risk level.
If your trip can stretch past an hour in warm conditions, use cold sources every time. If you might hit two hours (traffic + errands), treat that as a system-design problem: use more cold mass, reduce stops, or move to a hard cooler.
A quick hold-time planner (interactive)
Pick the best match and follow the plan:
Trip time
Under 60 minutes → pack tight, keep closed
60–120 minutes → add 2–4 cold sources and avoid extra stops
Over 120 minutes → use stronger cooling (hard cooler or validated shipper)
Outside temperature
Mild → easier to manage
Warm → add cold mass
Hot → treat this as a “one-hour” scenario for high-risk foods
What you carry
Frozen → protect texture, minimize opening
Chilled (meat/dairy/seafood) → use cold sources and leak barriers
Shelf-stable → keep outside the insulated bag
What controls cold-hold time the most?
| Factor | Better choice | Worse choice | What it means for you |
|---|---|---|---|
| Fullness | Snug packing | Air gaps | Less warm air circulation |
| Cold source | 2 gel packs | None | Bigger safety margin |
| Placement | Cabin shade | Hot trunk | Less heat load |
| Access | Keep closed | Peek often | Each open “resets” cold air |
Practical tips you can use today
Eliminate air gaps: Fill space with a towel or paper bag.
Use “cold mass”: Chilled drinks act like extra ice packs.
Stop peeking: Opening is the fastest way to lose cold.
Real-world example: A commuter doing a 90-minute return trip kept dairy colder by using two gel packs and placing the costco insulated bag on the back seat, not in the trunk.
How do you choose the right Costco insulated bag size for bulk shopping?
The right costco insulated bag size is usually the smallest bag that fits your real “cold load.” Bigger is not always better because extra empty space becomes warm air. A snug fit typically holds temperature longer and prevents crushing.
Bulk shopping creates shape problems: wide frozen boxes, tall milk jugs, and deli trays. Choose for your most common shape, not your biggest fantasy haul.
Quick size matching by shopping style
| Your typical trip | Best bag shape | What to look for | What it means for you |
|---|---|---|---|
| Frozen-heavy | Wide, boxy tote | Flat base, rigid sides | Less crushing + better fit |
| Dairy + deli | Medium tote | Strong zipper + wipeable liner | Fewer leaks and odors |
| Party trays | Tall + wide | Reinforced handles | Easier carry, fewer spills |
| Mixed bulk | Two-bag approach | One cold, one dry | Faster packing and better control |
The “Fit Finder” mini tool (interactive)
Give yourself points:
Cold items per trip: 1–3 (1) / 4–8 (2) / 9+ (3)
Drive time: <20 min (1) / 20–60 (2) / 60+ or stops (3)
Hot weather frequency: rare (1) / sometimes (2) / often (3)
Score guide
3–4: Small/medium costco insulated bag
5–7: Medium/large bag + cold sources
8–9: Two-bag system + higher cooling capacity
Practical tips you can use today
Measure your “largest regular item.” If it won’t fit, you won’t use the bag.
Check handle stitching. Bulk loads stress handles more than insulation.
Split heavy + fragile. One bag for frozen blocks, one for delicate dairy/produce.
Real-world example: A shopper stopped crushing berries and soft cheese by using a smaller costco insulated bag for fragile chilled items and a separate tote for heavy frozen boxes.
Best way to pack a Costco insulated bag with ice packs
The best way to pack a costco insulated bag with ice packs is a “two cold sources” layout: one below and one above perishables. This stabilizes the base and protects against warm-air dumps when you open the zipper. Add a thin buffer if foods are delicate.
A key rule: never put warm groceries into the bag and “hope the ice fixes it.” Start cold and stay cold.
Costco insulated bag pack-out map (copy/paste SOP)
| Layer | What you place | Why it works | What it means for you |
|---|---|---|---|
| Bottom | Cold source (gel pack/frozen bottle) | Blocks heat from below | Firmer frozen items |
| Middle | Perishables (dairy, deli, seafood) | Protected cold core | Better safety margin |
| Top | Second cold source | Guards against openings | More consistent cold |
Step-by-step pack-out (HowTo)
Pre-chill (5–10 minutes): Keep gel packs in the bag while you shop.
Group by temperature: Frozen with frozen, chilled with chilled, dry outside.
Add a buffer: Use a thin towel or paper bag near delicate foods.
Seal proteins: Double-bag raw meat/seafood to prevent drips.
Top-cap cold: Place a cold source on top, then zip fully.
Unload first: Empty the costco insulated bag before anything else.
Practical tips you can use today
Use two medium packs instead of one giant pack for even coverage.
Place packs on side walls when space allows to reduce air pockets.
Protect delicate items (berries, chocolate, greens) with a buffer layer.
Real-world example: A shopper kept frozen items firmer by placing two flat gel packs along the side walls of the costco insulated bag instead of directly on top of ice cream.
Costco insulated bag leak control: how to pack raw meat safely?
A costco insulated bag must manage two risks at once: temperature and contamination. Raw meat and seafood should be treated as “liquid risk.” Keep them sealed, separated, and positioned so any leak cannot spread to ready-to-eat foods.
Most “my bag smells” problems start here: one small drip that never gets fully cleaned. Build your routine so separation happens automatically.
Raw-protein packing rules (simple and repeatable)
Rule 1: Raw protein goes in sealed secondary containment (inner bag or container).
Rule 2: Raw protein goes low and away from produce, deli, and cooked foods.
Rule 3: If a leak happens, you wash and fully dry the bag the same day.
| Risk point | What causes it | Your fix | What it means for you |
|---|---|---|---|
| Drips | Punctured packaging | Secondary containment | Less contamination |
| Warmth | Long errand loop | Two cold sources + faster route | Safer cold holding |
| Odor | Moisture in seams | Clean + dry open | Bag lasts longer |
Practical tips you can use today
Bring one dedicated “protein liner.” It keeps the main liner clean.
Add an absorbent pad under seafood or meat packages.
Don’t overstuff. If the zipper won’t close, insulation can’t help.
Real-world example: Many “the cooler bag stopped working” complaints are really “the zipper never fully closes because it’s overpacked.” A smaller, better-packed costco insulated bag often wins.
Costco insulated bag for grocery delivery: is it reliable?
A costco insulated bag for grocery delivery can be reliable for short routes if you standardize your process. Delivery success is less about the bag and more about repeatability: pre-chill, pack last, deliver first, keep closed, and rotate dry bags.
If your routes are long, your climate is hot, or you have frequent door-open cycles, consider higher-performance insulated containers and a tighter delivery schedule.
The “Delivery Reality Check” (interactive)
Give yourself 1 point for each “yes”:
Deliveries are typically under 60–90 minutes door-to-door
You use cold sources on every perishable order
Cold items are staged last and delivered first
The bag stays closed between stops
You can reject or re-pack when packs are not fully frozen
You can clean and dry bags daily
Score guide
0–2: High risk → upgrade system
3–4: Workable with strict SOP
5–6: Strong short-range setup
Practical tips you can use today
Route planning: Deliver frozen and dairy first, shelf-stable last.
Standardize one pack-out: Fewer “creative” variations means fewer failures.
Rotate bags: Never pack into a damp liner.
Real-world example: A meal-prep business improved ratings by making one rule: every cold order goes into a pre-chilled costco insulated bag with two gel packs.
How to clean and dry a Costco insulated bag to prevent odor
To clean and dry a costco insulated bag to prevent odor, you need full drying—not just wiping. Odor usually comes from trapped moisture in seams and corners. If the bag stays damp overnight, smell and mold risk rise quickly.
Treat your bag like a mini cooler. If it stays dry and clean, it stays usable—and you actually keep using it.
Cleaning checklist (fast enough to stick)
Empty crumbs and debris
Wipe liner with mild soapy solution
Rinse with a clean damp cloth (soap residue can smell)
Dry fully: towel dry + air dry
Store unzipped in a ventilated spot
| Cleaning step | Frequency | Biggest mistake | What it means for you |
|---|---|---|---|
| Wipe liner | Every use | Skipping corners | Odor returns fast |
| Dry fully | Every use | Storing closed | Mold risk rises |
| Deep clean seams | Weekly | Ignoring zipper track | Hidden residue builds |
Practical tips you can use today
After seafood: add an extra rinse wipe for odor residue.
Dry with zipper open and the bag “propped” so air circulates.
Wipe seams, not only flat panels. Seams hold odor.
Real-world example: A shopper eliminated persistent smell by switching to “dry-first storage” and leaving the costco insulated bag unzipped overnight after every use.
Costco insulated bag vs hard cooler for road trips
A costco insulated bag vs hard cooler decision comes down to time, heat, and opening frequency. The bag wins for convenience: light carry, quick grocery runs, and short stop-to-fridge travel. A hard cooler usually wins for long, hot trips and repeated openings.
If you routinely exceed one to two hours with high-risk foods, use a cooler that can hold temperature longer. If you stay inside short windows, the costco insulated bag system (with cold sources) is often enough.
Quick comparison
| Feature | Costco insulated bag | Hard cooler | What it means for you |
|---|---|---|---|
| Portability | High | Medium/low | Easier daily use |
| Cold hold time | Short-to-medium | Medium-to-long | Better for long trips |
| Door-open cycles | Sensitive | More forgiving | Delivery and road trips favor cooler |
| Cleaning | Easy if dried | Easy but bulky | Choose what you’ll maintain |
Practical tips you can use today
If you travel: use a hard cooler as “base,” and a costco insulated bag as “grab bag.”
If you do stops: reduce openings—stage what you need near the top.
If you want consistency: measure your routine, then choose your container.
Real-world example: A family used a hard cooler for a beach day but still used a costco insulated bag for quick snack runs—less lifting, less fuss.
2025 trends in Costco insulated bags and everyday cold chain
In 2025, more shoppers treat store-to-home transport like a personal cold chain. Curbside pickup, meal kits, and short-distance delivery push people to standardize routines: pre-chill, two cold sources, and better separation. The biggest shift is mindset: process beats product.
You also see more demand for easy-clean liners, stronger handles for bulk loads, and “two-zone” packing habits. People increasingly keep multiple bags and rotate them so they never pack into damp interiors.
Latest developments snapshot
More “two-zone” habits: one bag for frozen, one for chilled
More leak control: liners and absorbent layers reduce wet-bottom mess
More routine cold sources: gel packs live permanently in the freezer
Frequently Asked Questions
Q1: How long does a costco insulated bag keep food cold without ice packs?
Usually only for short trips. If you’re carrying dairy, meat, or seafood, add cold sources and keep the bag zipped to reduce warming and risk.
Q2: What is the best way to pack a costco insulated bag with ice packs?
Use two cold sources: one at the bottom and one on top, with perishables in the middle. Add a thin buffer layer for delicate foods to prevent cold damage.
Q3: Can I put raw meat and ready-to-eat foods in the same costco insulated bag?
You can, but it’s safer to separate them. Use sealed secondary containment for raw proteins and keep them low so any leak can’t reach ready-to-eat items.
Q4: Why does my costco insulated bag smell even after wiping?
It likely stayed damp. Odor often comes from moisture trapped in seams. Fully air-dry the bag open and wipe corners and zipper tracks.
Q5: Is a costco insulated bag good for grocery delivery?
Yes for short routes—if you standardize your SOP. Pre-chill, use cold sources every time, keep the bag closed between stops, and rotate dry bags daily.
Summary and recommendations
A costco insulated bag is a powerful everyday tool when you treat it like a system. Pack tight, keep it closed, and use two cold sources for perishables in warm conditions. Separate raw proteins to prevent leaks and contamination, and fully dry the bag to prevent odor. When trips get long or hot, upgrade your cooling capacity instead of hoping insulation can “win” alone.
Your next-step action plan (clear CTA)
Pick one standard pack-out and use it for your next three trips.
Keep two cold sources in your freezer permanently.
Create a protein liner habit to stop leaks and smells.
Track your risk triggers: heat, stops, and opening frequency.
If your routine exceeds short-trip limits, move to a stronger cooler system.
About Tempk
At Tempk, we focus on practical temperature-control habits and packaging systems that reduce temperature spikes during real transport. We help teams build repeatable pack-outs, improve leak control, and choose the right cooling capacity for their route realities. Our goal is simple: fewer surprises, cleaner deliveries, and more consistent product quality.
Next step: Share your typical trip time, climate (mild/warm/hot), and what you buy most (frozen vs dairy vs meat). We’ll recommend a simple costco insulated bag packing routine and cold-source setup you can reuse every trip.
Stackable EPP Storage Container Guide 2025
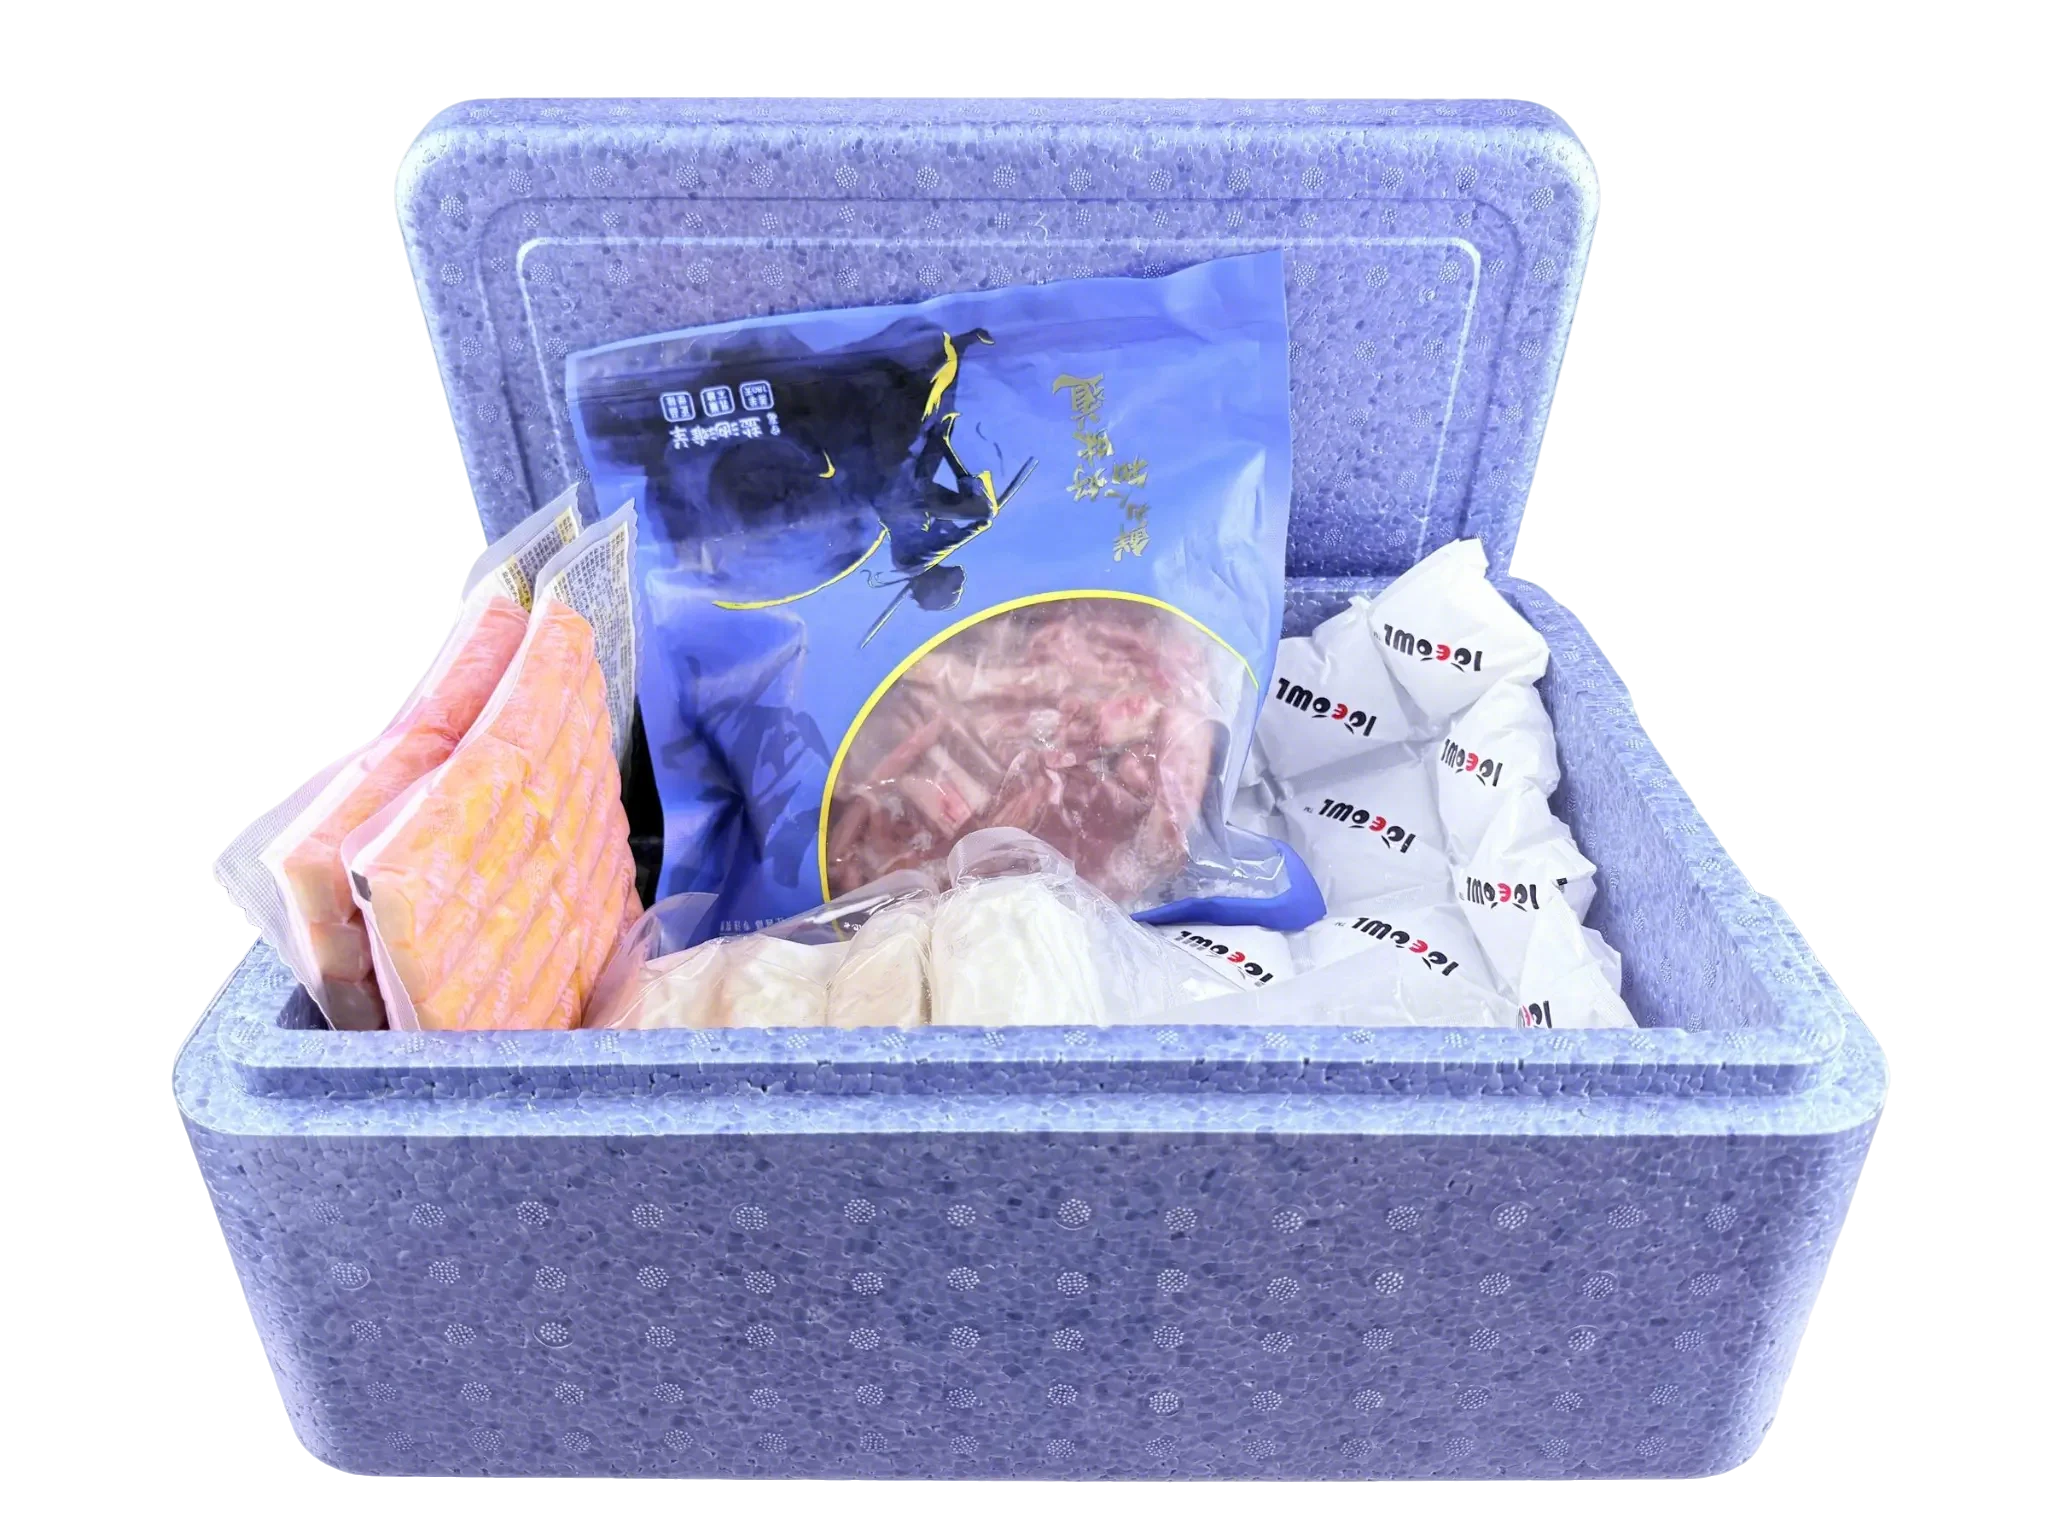
Stackable EPP Storage Container: How Do You Choose the Right One in 2025?
A stackable EPP storage container is one of the simplest upgrades you can make to protect temperature-sensitive goods while cutting handling damage and wasted space. If you ship food, pharmaceuticals, biotech samples, or chilled meal kits, you already know the pain: temperature swings, crushed packaging, messy condensation, and pallets that never stack “cleanly.” In 2025, more teams are switching to reusable EPP because it’s lightweight, durable, and built for repeat cycles—without sacrificing insulation.
This article will help you:
Understand stackable EPP storage container insulation performance and what it means for your product risk
Compare EPP vs. common alternatives so you can justify cost to your team
Use cold chain EPP container design tips to prevent temperature loss and stacking failures
Apply stackable EPP storage container customization options for mixed loads and fragile items
Follow 2025 trends like smart monitoring and sustainability targets—without overcomplicating your operation
What Is a Stackable EPP Storage Container?
Direct answer: A stackable EPP storage container is a reusable box made from expanded polypropylene foam that can be stacked safely for storage and transport, while also providing strong insulation and impact resistance.
EPP is a bead-foam material with a closed-cell structure. Think of it like a “tiny air-pocket jacket” around your products: it slows heat transfer and cushions shocks. The stackable part is just as important as the insulation—flat lids, reinforced corners, and stable footprints let you build reliable stacks in a warehouse, on pallets, and inside trucks.
Why EPP feels different from “regular foam”
EPP is designed to “bounce back” after impacts. Instead of cracking like brittle foams or denting permanently like weaker plastics, it absorbs energy and returns closer to its original shape. That matters when your containers get handled dozens (or hundreds) of times.
| What you’re evaluating | EPP container behavior | What it means for you |
|---|---|---|
| Thermal insulation | Slows temperature change | More stable product temps in real transit |
| Impact resistance | Absorbs drops/vibration | Fewer damage claims and re-shipments |
| Stack stability | Reinforced geometry | Safer, denser storage and cleaner pallet builds |
| Reuse cycles | Built for repeat use | Lower cost per trip over time |
Practical tips you can use today
If your loads are heavy: Choose a high-density design with reinforced corners and a load-rated lid.
If your lanes are long: Pair the stackable EPP storage container with phase change packs (PCMs) or gel packs that match your target range.
If your warehouse is tight: Standardize 2–3 footprints so stacking and racking become predictable.
Real-world example: A regional distributor standardized container footprints and reduced “odd stacks” on pallets. The result was faster loading, less rework in the warehouse, and fewer crushed corners in transit.
Why Does a Stackable EPP Storage Container Matter for Cold Chain?
Direct answer: A stackable EPP storage container helps you reduce temperature drift, protect goods from shocks, and improve warehouse space efficiency—at the same time.
If you’re running cold chain, the enemy is not just heat. It’s temperature fluctuation (small swings that repeat), handling stress, and inconsistent packing. EPP helps by providing stable insulation and predictable stacking so you can build a repeatable shipping process instead of reinventing the pack-out every day.
What problems it solves (in plain language)
Temperature drift: The insulation buys you time during delays and handoffs.
Crushing and vibration: The foam structure cushions product and reduces movement damage.
Space waste: Stackable geometry makes pallet builds cleaner and more dense.
Single-use packaging clutter: Reusable cycles reduce waste and procurement churn.
How Do You Pick the Right Stackable EPP Storage Container?
Direct answer: Choose based on your temperature range, lane duration, payload weight, and how your team stacks and handles containers.
Here’s a simple way to decide—without getting stuck in specs.
A quick decision tool (2 minutes)
Step 1 — What temperature must you protect?
Frozen (below 0°C)
Chilled (2–8°C)
Cool (8–15°C)
Step 2 — How long is your worst-case transit?
Same-day
24–48 hours
72+ hours (or international lanes)
Step 3 — What’s your handling reality?
Gentle (controlled warehouse + dedicated trucks)
Mixed (couriers, cross-docks, multi-handling)
Rough (high vibration, frequent transfers, congested hubs)
Recommended match (rule of thumb):
Longer lanes + rough handling → thicker walls, reinforced lid, tighter closure, optional inserts
Short lanes + controlled handling → lighter designs that still stack reliably
Self-check: are you overpaying or under-protecting?
Give yourself 1 point for each “Yes”:
Do you see condensation or wet cartons after delivery?
Do you frequently add “extra ice” because you don’t trust your pack-out?
Do pallets collapse or lean in storage?
Do you re-ship due to temperature excursions or damaged goods?
Do you throw away large amounts of single-use packaging each week?
Score interpretation
0–1: You may only need a basic stackable EPP storage container footprint standardization.
2–3: You likely need better insulation planning (PCM match + lid seal + loading rules).
4–5: You should redesign the system: container + coolant + inserts + monitoring + SOPs.
What Features Should You Look For in 2025?
Direct answer: Prioritize stack safety, insulation consistency, cleanability, and repeatable pack-out—then add smart features if they solve a real problem.
Stack safety and load performance
A stackable EPP storage container must remain stable when fully loaded. Look for:
Reinforced corners and edges
A lid that locks or seats firmly
Flat, stable stacking surfaces
Clear load-limit labeling (so people don’t guess)
Insulation and sealing
Insulation is not just “thick walls.” It’s the whole system:
Wall thickness + density
Lid fit (air gaps are silent temperature killers)
Insert compatibility (for fragile or mixed SKUs)
Coolant pairing (gel pack, PCM, or dry ice strategy)
Cleanability for reuse
Reusable cold chain only works when cleaning is simple:
Smooth interior surfaces
Drainage-friendly geometry
Resistance to odor and staining
Easy labeling and relabeling
| Feature | What to check | Practical meaning for you |
|---|---|---|
| Lid seal quality | Tight fit, repeatable closure | Less warm air leakage during delays |
| Reinforced lid | Doesn’t bow under stack load | Fewer leaning stacks and crushed corners |
| Insert options | Modular dividers, corner blocks | More consistent pack-out across teams |
| Label zones | Flat, scannable, removable | Faster receiving and fewer misroutes |
Practical tips you can implement
Build a “pack-out template” (same coolant positions every time).
Train stacking rules (max height, max weight, pallet patterns).
Do a simple lane test (worst-case ambient + longest transit) before scaling.
Practical case: A pharma shipper standardized coolant placement and lid checks. They reduced temperature exceptions because the pack-out became repeatable across shifts and sites.
EPP vs. Traditional Containers: What’s the Real Difference?
Direct answer: A stackable EPP storage container typically delivers better insulation-to-weight, stronger impact resistance, and more reuse cycles than common single-use options—often reducing total cost per shipment over time.
| Comparison | Stackable EPP storage container | Common alternatives | Impact on your operation |
|---|---|---|---|
| Insulation stability | Strong and consistent | Varies widely | More predictable product temps |
| Handling durability | High impact resistance | Cracks/dents more easily | Fewer damaged shipments |
| Reusability | Built for many cycles | Often single-use | Lower cost per trip long-term |
| Warehouse stacking | Designed for stable stacks | Inconsistent footprints | Better space efficiency |
| Sustainability | Recyclable + reusable | Higher waste | Supports sustainability targets |
How to justify ROI internally
Track damage claims before/after
Measure packaging spend per shipment
Compare warehouse footprint (pallet density + rack utilization)
Estimate labor time saved from simpler stacking and pack-out
How Do You Maximize Space Efficiency With Stackable EPP Storage Containers?
Direct answer: Standardize sizes, set stacking rules, and design pallet patterns that your team can repeat without thinking.
Three proven tactics
Standardize footprints
Pick 2–3 container sizes that fit your product mix. Avoid “one-off” sizes that break stacking flow.Use consistent pallet patterns
Teach one default pattern (and one alternate). Make it visual and post it at pack stations.Label stack limits clearly
Put max stack height and max loaded weight where handlers can see it instantly.
Quick checklist for your warehouse SOP
Container footprint standard list
Max stack height by payload class
Approved pallet patterns (photo examples)
“No gap” rule (avoid voids that cause shifting)
Damaged container quarantine process
Cold Chain EPP Container Design Tips for Better Temperature Control
Direct answer: Treat the container like a temperature system: container + coolant + packing method + monitoring.
The “4-piece” temperature system
Container: stackable EPP storage container wall + lid seal
Coolant: PCM/gel/dry ice matched to your target range
Pack-out: consistent placement, minimal voids, secure products
Monitoring: spot checks or sensors on high-risk lanes
Common mistakes (and how to avoid them)
Mistake: Coolant touches product directly (freezing risk).
Fix: Add inserts or separators to create safe spacing.
Mistake: Too much empty space inside.
Fix: Use fillers or modular inserts so air volume stays low.
Mistake: Lid not seated fully.
Fix: Add a “lid press + visual check” step before labeling.
2025 Developments and Trends You Should Watch
In 2025, stackable EPP storage container adoption is accelerating because operations want packaging that supports automation, reduces waste, and increases visibility without adding complexity.
Latest developments (what they mean for you)
Smart monitoring add-ons (2025): More shippers are using simple temperature indicators or reusable sensors for high-value lanes.
Your benefit: Faster root-cause analysis when something goes wrong.
Higher-density options (2025): Brands are expanding high-density designs for heavier payloads and taller stacks.
Your benefit: Better stack safety without switching to heavier materials.
Customization for mixed loads (2025): Modular inserts and partitions are becoming more common.
Your benefit: One container system can support multiple SKUs with fewer packing errors.
Market insight you can act on
Customers and regulators increasingly expect waste reduction, repeatability, and temperature accountability. A stackable EPP storage container supports all three—especially when you back it with SOPs and basic monitoring.
Frequently Asked Questions
Q1: How long can a stackable EPP storage container keep products cold?
It depends on your coolant and lane time. With the right PCM or gel pack plan, many operations target 24–72+ hours of stable performance.
Q2: Are stackable EPP storage containers safe to stack when fully loaded?
Yes—if you follow load ratings and stacking limits. Look for reinforced lids and train handlers on max stack height.
Q3: Are stackable EPP storage containers reusable and washable?
Yes. Reuse works best when cleaning is simple and standardized, with a clear process for damaged units.
Q4: Can I customize a stackable EPP storage container for fragile or mixed products?
Yes. Inserts, dividers, and shaped cavities can reduce movement, protect corners, and improve pack-out consistency.
Q5: What’s the easiest way to start without disrupting operations?
Start with one lane and one footprint. Run a short pilot: measure damage rate, temperature stability, and handling time—then scale.
Summary and Recommendations
A stackable EPP storage container helps you protect temperature-sensitive goods, reduce handling damage, and improve warehouse space efficiency. In 2025, the biggest win is not just insulation—it’s repeatability: consistent stacking, consistent pack-out, and fewer surprises in transit. If you standardize footprints, match coolant correctly, and train simple SOPs, you can cut waste and reduce total cost per shipment.
Your next steps (simple plan)
Audit your top 1–2 lanes (highest cost or highest failure rate).
Select one stackable EPP storage container footprint to pilot.
Define pack-out rules (coolant placement + lid check + label zone).
Train stacking limits and post a visual guide at the station.
Review results after 2–4 weeks (damage, temperature, labor time, waste).
About Tempk
At Tempk, we focus on practical cold chain packaging that teams can run every day—not just in lab-perfect conditions. Our stackable EPP storage container solutions are designed for durability, reliable insulation, and repeatable stacking in real warehouses and real routes. We support customization options like inserts and partitions, and we help you match container design to your lane time, payload, and handling reality.
Call to action: If you want to reduce temperature risk and improve stacking efficiency, contact us for a lane-based recommendation and a pilot configuration.
Portable EPP Box Price in 2025: What Should You Pay?
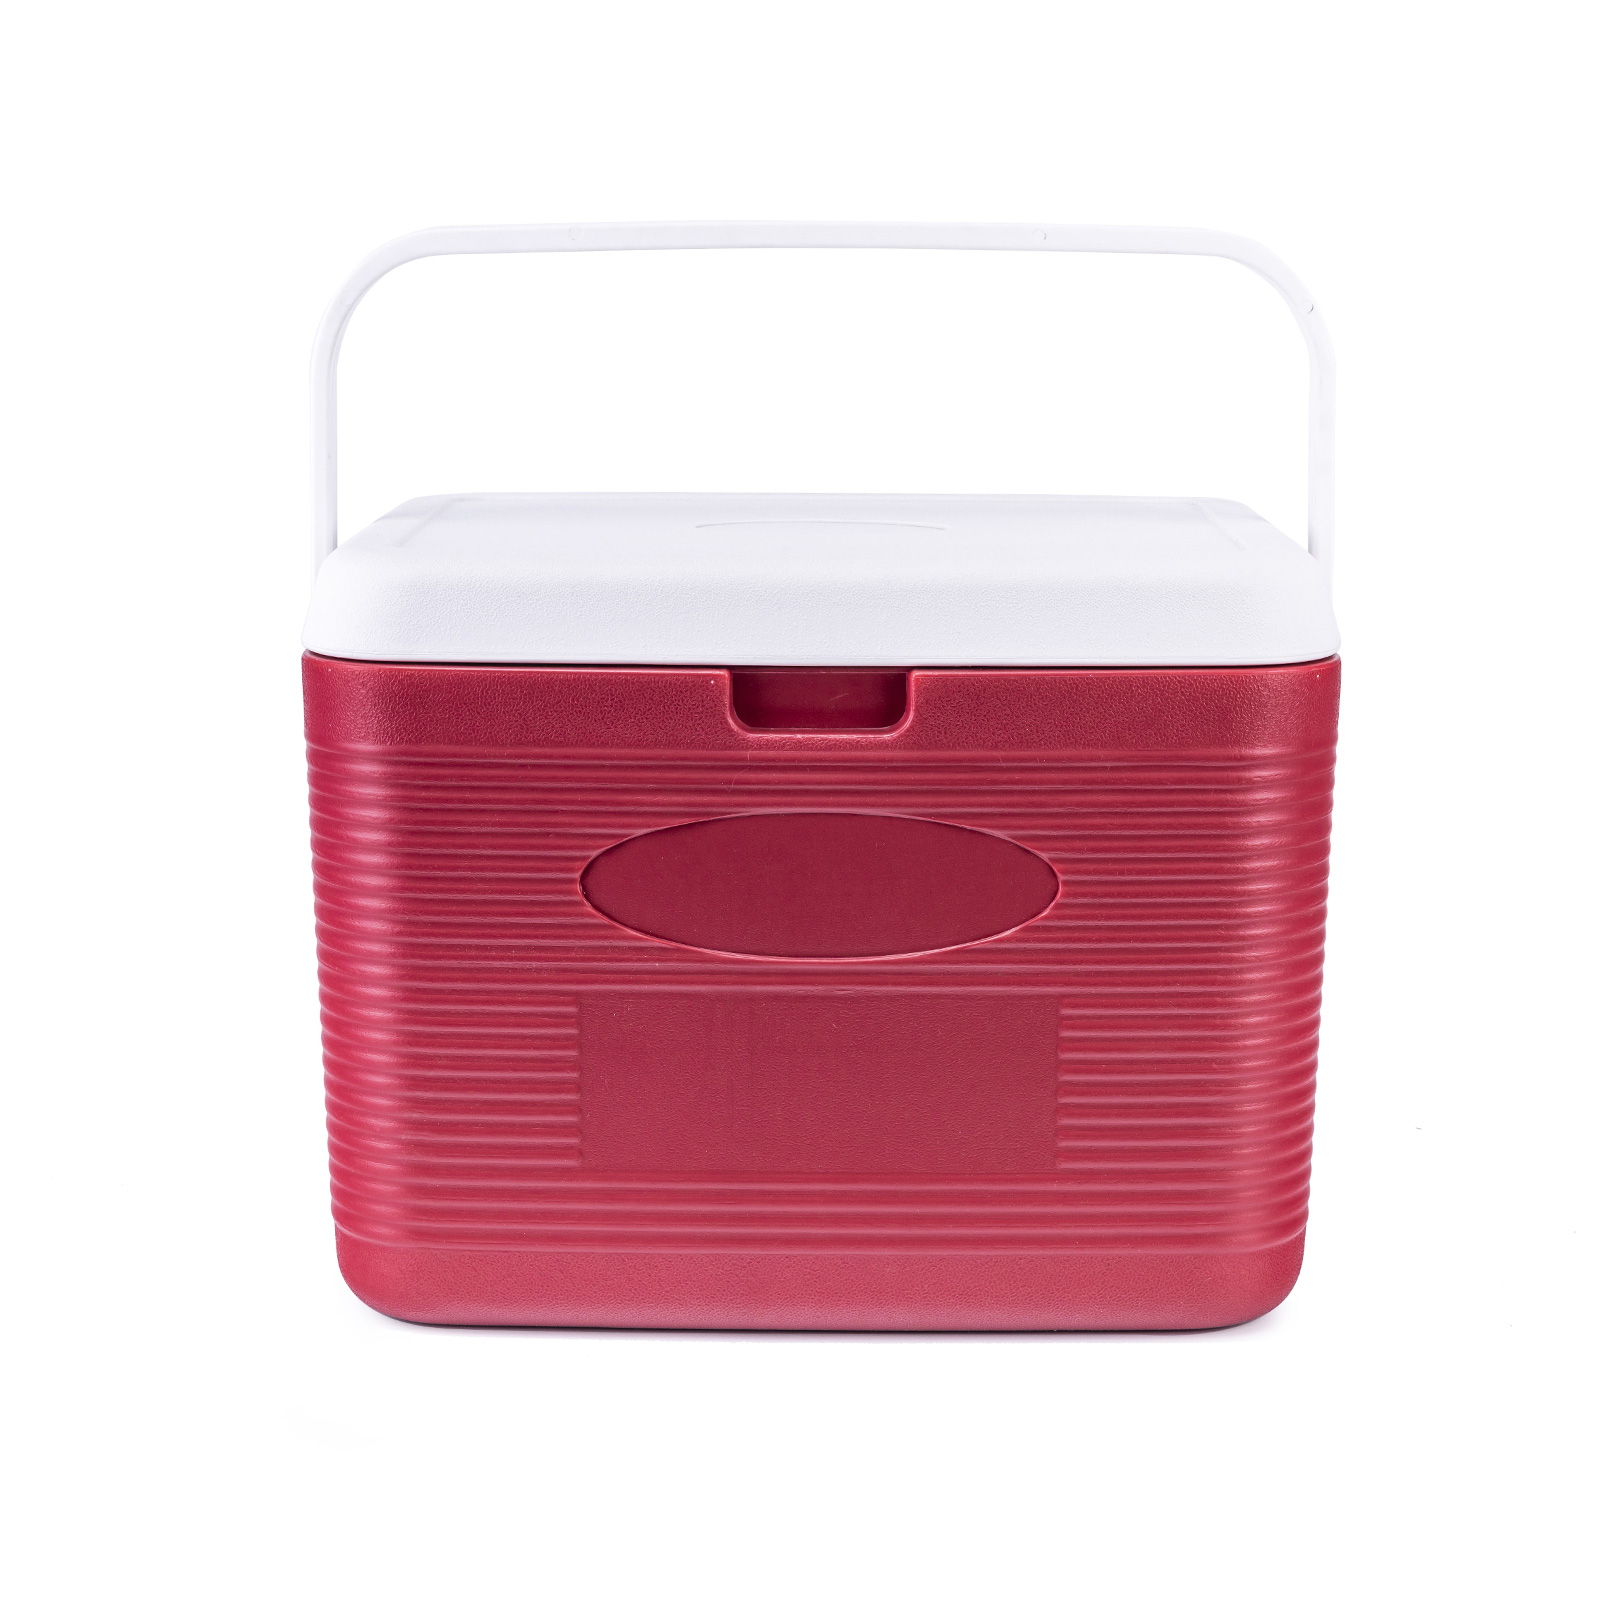
Portable EPP box price can look random until you break it into simple drivers: density, wall thickness, lid seal, and reuse cycles. In 2025, small boxes often land around $20–$50, while commercial reusable models commonly reach $100+ depending on size and features. The real win is cost per successful trip—e.g., a $150 box over 300 trips is $0.50 per trip when your return system works.
This article will help you answer:
How portable EPP foam box pricing factors actually change durability and insulation
What a “fair” portable EPP box price looks like for food, pharma, and last-mile
How to calculate portable EPP box price per trip (ROI) without guesswork
How right-sizing reduces portable EPP cooler shipping cost and coolant waste
Which lid, seal, and handling upgrades are worth paying for in 2025
Why does portable EPP box price vary so much?
Portable EPP box price varies because EPP is not one standard foam. Different densities, wall designs, and lid geometries change strength, temperature stability, and how many cycles the box survives. Two boxes can look similar, yet one lasts a season and one lasts years. In 2025, smart buying starts by matching the box to your route risk and reuse plan, not by chasing the lowest quote.
Most price spread comes from:
Material density (how “tight” the foam is)
Wall thickness (insulation hold time vs weight/volume)
Tooling and mold complexity
Accessories (handles, gaskets, dividers, label zones)
Quality consistency (tolerances that keep lids fitting over time)
Portable EPP foam box pricing factors you can measure
If you want clarity fast, ask suppliers for the values below. Then compare quotes “apples to apples” instead of by photos.
| Pricing factor | Lower-cost build | Higher-cost build | What it means for you |
|---|---|---|---|
| EPP density | Lower density | Higher density | Higher density usually survives more drops and stacking |
| Wall thickness | Thinner walls | Thicker walls | Thicker walls usually hold temperature longer |
| Lid interface | Flat lid | Interlocking / sealed fit | Better fit reduces leakage and coolant need |
| Hardware | None | Handles / locks / gaskets | Faster handling, fewer mistakes, less leakage |
| Tolerances | Basic | Tighter QC | More consistent performance across shipments |
| Reuse target | Few cycles | Many cycles | Higher cycles can cut cost per trip dramatically |
Practical tips you can use today
If you deliver daily: judge portable EPP box price by lifecycle cost, not unit cost.
If damage claims are rising: density and lid fit are usually your first fixes.
If temperature complaints happen: check lid seal before adding more refrigerant.
Example: A meal-kit operator paid more in portable EPP box price, then cut reships because boxes survived real handling.
What is a fair portable EPP box price for your lane and product?
A “fair” portable EPP box price is the price that matches your transit time, handling abuse, and reuse system. There is no single correct number without context. A 2-hour city route needs strong handling and fast pack-out. A 24–48 hour lane needs insulation stability and a lid that stays tight under delays.
Use this quick “lane fit” logic:
Short lanes (same-day): pay for durability + speed features (handles, stack stability)
Longer lanes (overnight): pay for thickness + lid seal (reduce temperature drift)
High-value goods: pay for predictability (repeatable performance, less variance box-to-box)
Cost of portable EPP insulated box by use case
| Use case | Typical priority | Common mistake | Better buying logic |
|---|---|---|---|
| Grocery last-mile | Durability + speed | Oversized boxes | Right-size, add grip/handles, standardize pack-out |
| Seafood delivery | Leakage control + cold retention | Weak lids and messy liners | Sealed lid options + clean-friendly design |
| Meal kits | Reuse cycles + operational speed | Ignoring cleaning workflow | Choose surfaces and shapes that clean fast |
| Chilled pharma | Temperature band stability | Overcooling product | Match coolant strategy to product tolerance |
Practical tips and suggestions
If your route is unpredictable: design for the worst day, not the best day.
If your team is rushed: pick closures that are hard to do wrong.
If you reuse boxes: build return + cleaning SOPs before you scale purchases.
Example: A seafood brand reduced failures by standardizing one box size per product tier and training one packing layout.
How do density and thickness change portable EPP box price?
Density and thickness are the two biggest physical levers behind portable EPP box price. Density mainly buys you strength and longer life. Thickness mainly buys you insulation hold time. Many buyers overpay by improving the wrong lever—like buying thick walls when the real issue is a leaking lid, or buying high density when the lane is gentle.
A simple way to think about it:
Higher density = tougher “springy” foam that resists dents
Thicker walls = slower heat flow, longer stable temperatures
When higher density is worth a higher portable EPP box price
Higher density usually pays back when your boxes are:
stacked tightly in vans or depots
handled by many hands or multiple handoffs
reused frequently over months
| Spec choice | What improves | What you pay for | Your real benefit |
|---|---|---|---|
| Higher density | Strength, longevity | More material cost | More reuse cycles, fewer replacements |
| Thicker walls | Hold time | More weight/volume | Longer protection, less coolant needed |
| Better lid seal | Leakage control | Design + QC | Less drift, fewer temperature failures |
Practical tips and suggestions
If boxes return dented: density is likely too low for your handling reality.
If product warms up: thickness and lid seal usually matter more than density.
If stacking is heavy: prioritize shape stability and lid fit retention.
Example: A distributor increased wall thickness and improved lid fit, then saw fewer temperature complaints and fewer refunds.
How do you calculate portable EPP box price per trip (ROI)?
Your true portable EPP box price is not the invoice number. It’s cost per successful delivery cycle. That means you include expected cycles, loss rate, cleaning labor, and the cost of failures. Once you do this, “expensive” boxes often become cheaper than disposable options.
Use this baseline formula:
A simple ROI calculator you can copy (interactive)
Fill in your best estimates:
Portable EPP box price (unit): ______
Expected trips before replacement: ______
Loss rate (not returned): ______ %
Cleaning + handling cost per trip: ______
Cost of one failed delivery (refund/reship): ______
Now use this decision rule:
If a better box prevents even a small number of failures, it often pays back fast.
If a better design saves packing time, it saves labor every single day.
| Track this input | Why it matters | What you improve | Your benefit |
|---|---|---|---|
| Trips achieved | Shows durability reality | Density + lid fit | Lower replacement spend |
| Temperature complaints | Shows insulation + seal | Thickness + closure | Higher customer trust |
| Pack-out time | Shows labor cost | Handles + closure design | Faster throughput |
| Return rate | Shows system health | Deposit / pickup plan | Lower loss rate |
Practical tips and suggestions
If return rate is low: portable EPP box price will always look “high.” Fix returns first.
If cleaning is slow: choose smooth shapes and easy-drain corners.
If failures are costly: invest in stability before negotiating pennies.
Example: After a 30-day pilot, a chilled food shipper found a slightly higher portable EPP box price reduced reships enough to pay back within one quarter.
How do you right-size to reduce portable EPP cooler shipping cost?
Size selection can make or break portable EPP box price efficiency. Bigger boxes cost more, but the hidden penalty is often freight, coolant, and dead space. You want the smallest box that fits the payload and a repeatable coolant layout, with minimal air gaps.
Use the “right-size” method:
Measure your most common order footprint and height
Choose the smallest internal dimensions that fit safely
Standardize one pack-out layout per size
24L portable EPP insulated box price vs oversized boxes
The 24L portable EPP insulated box price often looks attractive, but it only wins if it matches your real orders. Oversizing forces extra coolant and higher shipping cost.
| Sizing choice | What happens | Why it matters | Best practice |
|---|---|---|---|
| Too small | Crushing risk | Damage claims rise | Add safe clearance zones |
| Too large | More dead space | More coolant + higher freight | Standardize 2–3 sizes |
| Just right | Stable load | Fewer failures | Train one layout per size |
Practical tips and suggestions
If you use one box for everything: portable EPP box price and shipping cost both rise.
If orders vary: standardize sizes by order tiers (small / medium / large).
If you ship liquids: choose layouts that reduce tilt and movement.
Example: A brand reduced coolant use after switching from “one big box” to two standardized sizes with trained pack-outs.
What lid, seal, and portability features improve portable EPP box price value?
Lids are where many “cheap” boxes fail. Even with thick walls, a poor lid fit leaks cold air and causes drift. Paying more in portable EPP box price can be worth it when it buys you repeatable closures, seal stability over time, and faster handling.
Features that often pay back:
interlocking edges or secure fit zones
gasket options when your lane demands tighter control
stack-support geometry that resists warping
ergonomic handles and grip texture for fewer drops
Lid performance checklist (portable EPP box price value)
Ask these four questions:
Does the lid stay tight after repeated trips?
Can staff close it correctly every time?
Does it resist warping under stacking?
Is it easy to clean without trapping residue?
| Feature | Value | Risk if missing | Operational impact |
|---|---|---|---|
| Interlocking edge | Better seal | Temperature leaks | More stable arrivals |
| Quick-close design | Faster pack-out | Inconsistent closures | Less training burden |
| Stack support | Less deformation | Loose lid fit | Longer lifespan |
| Clean-friendly shape | Lower labor | Hygiene issues | Faster turnaround |
Practical tips and suggestions
If you see drift: inspect lid fit before changing refrigerant strategy.
If staff make mistakes: simplify closures and add visual cues.
If drops happen: handles are often cheaper than replacements.
Example: A city delivery team reduced drops after adding grip zones and better handles—portable EPP box price rose slightly, damage fell quickly.
2025 trends impacting portable EPP box price
In 2025, portable EPP box price is shaped by three practical shifts:
Reuse is now the default: packaging is treated like equipment, not a disposable supply.
Standardization is rising: brands reduce SKUs to 2–3 box sizes and train one layout each.
Reverse logistics is a KPI: return rate and loss rate decide whether reuse savings are real.
Latest developments at a glance
More lane testing before scaling: pilots on the toughest routes reduce costly mistakes.
Better operational design: faster packing and fewer closure errors matter more than “nice-to-have” features.
Sustainability pressure with business logic: waste reduction is paired with ROI per trip.
Market insight: buyers increasingly accept a higher portable EPP box price when it reduces failures and protects repeat customers.
Self-assessment: Are you overpaying for portable EPP box price?
Answer Yes or No. If you have 3+ Yes, you likely have fast savings available.
Are you using oversized boxes for most shipments?
Do you add extra coolant because you don’t trust the packaging?
Do you lack a standard pack-out layout for each box size?
Is your return rate low or unknown?
Do you replace lids often due to warping or loose fit?
Score guide
0–2 Yes: you’re close to optimized
3–4 Yes: fix sizing and standardization first
5 Yes: redesign your system before buying more volume
Frequently Asked Questions
Q1: What affects portable EPP box price the most?
Density, wall thickness, lid design, and expected reuse cycles drive portable EPP box price the most. Match specs to your lane.
Q2: Is a higher portable EPP box price always better?
No. Overbuying performance wastes money. A better choice matches route time, handling risk, and return rate.
Q3: What is a typical 24L portable EPP insulated box price?
A 24L portable EPP insulated box price often sits in entry-level ranges, but exact quotes depend on density and lid design.
Q4: How do I reduce portable EPP cooler shipping cost?
Right-size the box, reduce dead space, and standardize pack-out layouts. This lowers freight and coolant needs.
Q5: How do I calculate portable EPP box price per trip?
Divide unit price by expected trips, then add cleaning/handling and loss rate. Cost per trip beats sticker price.
Q6: Why do lids matter so much for portable EPP box price value?
A poor lid seal leaks cold air, forcing more coolant and raising failure risk. Better lids often pay back quickly.
Summary and recommendations
Portable EPP box price makes sense when you connect it to your route reality. Density buys durability, thickness buys hold time, and lid fit often decides whether temperature stays stable. Right-sizing reduces freight and coolant waste. The smartest approach in 2025 is to judge portable EPP box price by cost per successful trip, not by unit price.
Next steps (simple plan):
Choose 2–3 standard sizes, define a pack-out layout for each, run a 30-day pilot on your toughest lane, and track trips, failures, pack-out time, and return rate. Then scale purchases with confidence.
About Tempk
At Tempk, we help teams choose reusable cold chain packaging that performs in real delivery conditions. We focus on practical design choices—durability, lid fit, portability, and lane-based sizing—so your portable EPP box price translates into stable deliveries and fewer exceptions. We support pilots and standardization so your team can pack fast, train easily, and scale without chaos.
Call to action: Share your route time, payload size, and temperature band. We’ll help you map the right spec and a simple cost-per-trip model.