


Customizable Expanded Polypropylene Box Price (2025)
Customizable Expanded Polypropylene Box Price (2025)
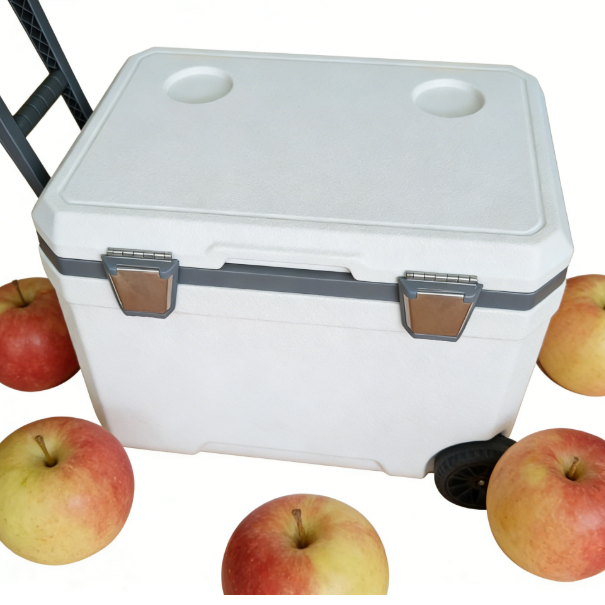
Customizable Expanded Polypropylene Box Price?
Last updated: December 22, 2025
If you’re comparing customizable expanded polypropylene box price, you’re really buying three things: protection, insulation, and predictability. In 2025, most buyers see the biggest price swings from size, wall thickness, customization, and order quantity. Bulk volume can often reduce unit pricing by about 10–40%, while small-batch custom features can push per-unit cost into double digits.
This guide will help you:
Understand the biggest customizable expanded polypropylene box price drivers
Choose customization that improves performance—not just looks
Use MOQ strategies to lower custom EPP cooler box cost
Estimate total landed cost for EPP packaging (not just factory price)
Apply a simple decision tool to match price to your cold chain route
What Drives Customizable Expanded Polypropylene Box Price?
The fastest way to predict customizable expanded polypropylene box price is to check four levers: size, wall thickness, customization complexity, and MOQ. When any one of these jumps, pricing usually jumps with it. The key is to match performance to your route time, temperature target, and handling risk.
A helpful mental model is this: you pay for material, tooling, and repeatability. Material is the foam used in the box. Tooling is the mold and setup required for your exact design. Repeatability is the supplier’s ability to produce the same quality at scale.
Cost drivers you can control (and what they mean)
| Cost driver | What changes the price | Typical impact | What it means for you |
|---|---|---|---|
| Box size | More material + longer molding cycle | Medium–High | Choose the smallest size that still packs safely |
| Wall thickness | More EPP + higher insulation performance | Medium–High | Don’t “max thickness” unless your route needs it |
| Custom mold/tooling | New mold or complex geometry | High (one-time + risk) | Standardize sizes to avoid repeat tooling fees |
| Inserts/dividers | More parts + more labor | Medium | Worth it when damage/temperature risk is high |
| MOQ/volume | Economies of scale | High (unit price drops) | Plan ordering cadence to unlock better tiers |
How Does Customization Change Customizable Expanded Polypropylene Box Price?
Customization raises customizable expanded polypropylene box price mainly because it increases tooling and production complexity. Custom dimensions and molded inserts are the most common cost adders, because they often require unique molds. Branding and color can add cost too, but usually less than structural changes.
The smart move is to customize in layers. Start with performance needs (fit, insulation, durability). Add usability next (handles, closures). Add branding last (color, embossing) if your ROI is real.
Customization options that actually move the needle
| Custom feature | Why it adds cost | When it’s worth it | Your real benefit |
|---|---|---|---|
| Custom dimensions | New mold + validation | Mixed product sizes, tight packout | Less void space, better thermal stability |
| Molded inserts | Extra tooling + parts | Fragile or high-value products | Fewer breaks, fewer returns |
| Reinforced edges | More material + design | Rough handling lanes | Less damage from drops/impacts |
| Closures/locks | More components | Reuse programs, tamper control | Faster operations, fewer leaks |
| Sensor/access port | Extra steps + fit risk | Monitoring-required shipments | Cleaner data collection and compliance |
Practical tips you can use right away
Standardize first: Use 1–3 box sizes for 80% of SKUs.
Customize only for risk: Pay for inserts when damage is expensive.
Brand with restraint: Embossing can be cleaner than multi-color printing.
Validate early: A bad fit can cost more than the box itself.
Practical example: One shipper reduced per-unit packaging spend by focusing on standard sizes and only upgrading insulation where route time demanded it—saving roughly a quarter per unit while keeping performance stable.
customizable expanded polypropy…
MOQ and Volume: How to Get Better Customizable Expanded Polypropylene Box Price?
MOQ is often the biggest lever for lowering customizable expanded polypropylene box price. When you move from small batches to planned volume, suppliers can run longer production cycles and reduce setup waste. Many buyers see about 10–40% unit cost improvement as volume increases, depending on design complexity and how “standard” the tooling becomes.
customizable expanded polypropy…
The trick is not “buy more forever.” It’s “buy smarter on a schedule.” Quarterly ordering, seasonal forecasting, and long-term supply agreements can stabilize both price and lead time.
A simple volume framework (use it for quote comparisons)
Low volume (1–100 units): Expect higher unit price + possible tooling fees
Mid volume (100–1,000 units): Best balance of flexibility and savings
High volume (1,000+ units): Best unit price, strongest leverage for specs
Mini “MOQ Cost Planner” (quick self-check)
Fill in these values:
Monthly shipments: ____
Reuse cycles per box: ____ (e.g., 10–30)
Boxes needed in rotation: monthly shipments ÷ reuse cycles = ____
Add buffer (10–20%): rotation × 1.1–1.2 = ____
Target order size: enough for 2–3 months = ____
If your target order size lands in the mid-volume tier, you’re usually positioned for a stronger customizable expanded polypropylene box price.
Insulation Performance vs Price: How Thick Should Your EPP Box Be?
Wall thickness is where customizable expanded polypropylene box price and cold chain performance meet. Thicker walls slow heat transfer, like adding more “winter coat layers” around your product. But extra thickness also adds material cost and sometimes changes mold design.
A better strategy is to match thickness to your route, then use coolants (gel packs, PCM, or dry ice where appropriate) to extend hold time without overbuilding the box.
Thickness choices, simplified
| Wall approach | Best for | Price impact | What you’ll notice |
|---|---|---|---|
| Thin–medium | Short routes, mild climates | Low | Lowest cost, but less hold time buffer |
| Medium | Typical food delivery lanes | Medium | “Good enough” for many chilled workflows |
| Thick | Long routes, hot climates, strict SOPs | High | Better hold time, higher cost and bulk |
Practical tips and suggestions
Short deliveries (same-day / next-day): Start with medium insulation, validate packout.
48+ hour lanes: Consider thicker walls or better coolant strategy first.
Hot weather lanes: Add buffer through coolant placement and tighter void control.
Avoid “max insulation by default”: It can inflate customizable expanded polypropylene box price without adding real value.
Practical case: For shipments over 48 hours, some teams improve outcomes by pairing EPP boxes with stronger coolant plans (like dry ice or PCM where allowed), instead of only increasing wall thickness.
customizable expanded polypropy…
Total Landed Cost: The Price You Actually Pay
Factory quotes are not your true customizable expanded polypropylene box price. Your real cost includes shipping, duties (if applicable), handling, storage, returns, and—most importantly—how many times you can reuse the box.
If you run a reuse program, your best metric is cost per trip, not cost per unit.
A simple cost-per-trip formula
Cost per trip = (Unit price + inbound logistics + handling) ÷ expected reuse cycles + cleaning/return costs
This is where EPP often wins: it’s lightweight, tough, and built for reuse—so cost per trip can drop sharply when reuse is managed well.
Hidden cost checklist (use it before you sign)
Tooling/setup fees: one-time or amortized
Freight mode and packaging volume: air vs ocean vs ground
Warehouse footprint: thick boxes take space
Damage and claims: insert cost vs breakage cost
Reverse logistics: returns, cleaning, relabeling
Decision Tool: Choose the Right EPP Box Pricing Strategy in 5 Steps
This tool helps you align customizable expanded polypropylene box price with real operational risk. It’s designed so you don’t overbuy features that don’t reduce failures.
Step 1: Define your temperature job
Chilled: ____ °C target, ____ hours
Frozen: ____ °C target, ____ hours
Mixed load: separate compartments? (Yes/No)
Step 2: Score route difficulty (0–10)
Transit time: 0–3 short, 4–6 medium, 7–10 long
Ambient heat exposure: 0–3 mild, 4–6 warm, 7–10 hot
Handling risk: 0–3 gentle, 4–6 normal, 7–10 rough
Total score (0–30): ____
Step 3: Pick a build level (based on score)
0–10: Standard size, medium insulation, minimal custom parts
11–20: Add fit improvements (inserts), tighten void space, validate packout
21–30: Consider thicker walls + reinforced edges + monitoring options
Step 4: Choose an MOQ play
If you reorder monthly, negotiate quarterly volume pricing.
If demand is seasonal, order early to stabilize lead time and cost.
Step 5: Compare quotes the right way
When comparing customizable expanded polypropylene box price, require each quote to list:
Unit price, MOQ, lead time
Tooling/setup fees
Material density and wall thickness
Insert/closure specs
Packaging and shipping assumptions
2025 Trends Affecting Customizable Expanded Polypropylene Box Price
In 2025, customizable expanded polypropylene box price is being shaped by three forces: sustainability pressure, faster delivery expectations, and better design-to-quote workflows. Buyers are also pushing for clearer performance proof, not just “thicker is better.”
Latest progress snapshot (what you’ll see more often)
More reuse programs: Cost-per-trip thinking is replacing unit-price thinking.
Faster customization cycles: Digital design and quoting tools reduce iteration time.
Smarter packouts: More teams pair EPP with PCM/gel strategy to avoid overbuilding.
More compliance-friendly documentation: Clear specs help validation and audits.
Market insight you can act on
If you want a stable customizable expanded polypropylene box price, push for:
Standardized sizes across SKUs
Clear validation targets (hours, temperature band, ambient profile)
Long-term ordering cadence to lock production planning
Frequently Asked Questions
Q1: What most affects customizable expanded polypropylene box price?
Size, wall thickness, customization (molds/inserts), and MOQ have the biggest impact on customizable expanded polypropylene box price.
Q2: Are custom EPP cooler box costs always higher than stock boxes?
Usually yes, because custom molds and setup add costs. But higher volume can reduce custom EPP cooler box cost.
Q3: Can I order small quantities at a reasonable customizable expanded polypropylene box price?
You can, but unit pricing is often higher. Ask about shared tooling or semi-standard sizes to reduce setup fees.
Q4: Is thicker insulation always better for customizable expanded polypropylene box price value?
Not always. Match thickness to route time. You can often improve outcomes with better coolant strategy instead.
Q5: How do I estimate total landed cost for EPP packaging?
Add unit price, inbound freight, handling, and return/cleaning costs, then divide by reuse cycles to get cost per trip.
Q6: What should I request in a quote to avoid surprises?
Ask for unit price, MOQ, tooling fees, material density, wall thickness, lead time, and shipping assumptions—every time.
Summary and Recommendations
The best customizable expanded polypropylene box price is the one that meets your route requirements without buying unnecessary features. Focus on four levers: size, wall thickness, customization complexity, and MOQ. Use cost-per-trip thinking if you reuse boxes, and compare quotes using identical spec assumptions. If you align insulation and packout design to your real transit time, you’ll protect product quality and keep spending controlled.
Next step (CTA): Write down your temperature target, transit hours, and monthly volume, then request at least three quotes using the same spec sheet. Use the decision tool above to choose the option with the lowest risk per dollar.
About Tempk
At Tempk, we help cold chain teams choose EPP packaging that protects product quality without overspending. We support practical decisions across box design, insulation strategy, packout validation, and total cost modeling. Our focus is simple: predictable temperature control, durable reuse, and pricing that makes sense for your real routes.
CTA: Share your product type, target temperature band, route hours, and monthly volume. We’ll help you estimate a customizable expanded polypropylene box price that fits your performance needs.
Insulated EPP Box Bakery Products Guide 2025
Insulated EPP Box Bakery Products: How Do You Ship Without Damage?
If you ship pastries, cakes, or frozen dough, insulated EPP box bakery products is not just a packaging choice—it’s a quality-control system. Frozen bakery items are especially sensitive: a GCCA/WFLO commodity guide notes that bakery products (especially frozen dough and cream-filled pastries) are quite sensitive to temperature fluctuations during frozen storage, particularly above 0°F (-18°C). Meanwhile, many bakery items with dairy or egg fillings behave like time/temperature control for safety foods, where the FDA Food Code says TCS foods must be maintained at 41°F (5°C) or less or 135°F (57°C) or above (except limited cases).
This Guide Will Help You Solve:
How to select an insulated EPP box bakery products setup that matches your lane time and order mix
How to pack an insulated EPP box bakery products shipment without crushing or sliding
How to handle cream cakes safely using cold-holding rules (keep cold foods ≤40°F)
How to ship frozen pastries with an insulated EPP box bakery products plan that respects 0°F (-18°C) quality guidance
How to manage moisture so croissants stay crisp and cakes stay clean
How to validate performance with ISTA thermal testing methods (STD-7E)
Why Use Insulated EPP Box Bakery Products Instead of Basic Bags?
The core value of insulated EPP box bakery products is control. You control crush protection, temperature drift, and the “microclimate” inside the package. EPP is a closed-cell bead foam known for energy absorption, multiple-impact resistance, thermal insulation, and water resistance. That mix matters for bakery, because bakery failures are usually physical (crushed) and moisture-related (soggy or stale).
Expanded explanation: A tote or bag can be fine for short trips. But bakery delivery is often multi-stop and messy. Boxes get stacked. Doors stay open. Drivers brake hard. A premium insulated EPP box bakery products program absorbs those real-world problems. It also standardizes your workflow. When packing is consistent, quality becomes consistent.
What “Premium” EPP Features Actually Matter for Bakery Shipping?
| Premium Feature | What It Changes | What It Prevents | What It Means for You |
|---|---|---|---|
| Tight lid interface | Reduces heat & moisture exchange | Temperature drift, sogginess | More consistent arrivals |
| Reinforced corners | Survives repeated stacking | Corner crush, lid gaps | Fewer cracked boxes |
| Stack-lock design | Stops sliding & tipping | Smearing, toppling | Safer multi-stop routes |
| Smooth, cleanable liner | Faster cleaning | Odor & residue build-up | Better hygiene confidence |
Practical tips and advice:
If your #1 complaint is “smashed”: prioritize structure and inserts before “more ice.”
If your #1 complaint is “soggy”: prioritize moisture strategy (vent vs seal) before thicker insulation.
If you run repeat routes: prioritize reusability and fast cleaning, not disposable padding.
Which Bakery Items Need Insulated EPP Box Bakery Products Most?
Not every bakery item needs the same insulated EPP box bakery products strategy. The right approach depends on whether the item is ambient, chilled, or frozen. The biggest mistake is treating every item like the same “cold chain” product. That creates condensation for croissants and unnecessary cost for cookies.
Bakery Category Map (Use This to Set Your Lane Rules)
| Bakery Category | Examples | Primary Risk | Best Insulated EPP Box Approach |
|---|---|---|---|
| Ambient Bakery | Bread, cookies, brownies | Crushing, staling, moisture pickup | Structure + airflow choices |
| Chilled Bakery | Cheesecake slices, custard tarts, cream cakes | Unsafe temperatures + condensation + icing smear | Cold packs + strict timing |
| Frozen Bakery | Frozen dough, frozen pastries | Temperature fluctuation, freezer burn, moisture migration | Strong insulation + frozen control |
Frozen Bakery: Why 0°F Matters for Quality
Frozen bakery products, especially frozen dough and cream-filled pastries, are highly sensitive to temperature fluctuations. The GCCA/WFLO guide highlights that frozen bakery is sensitive to temperature fluctuations, especially when stored above 0°F (-18°C), and notes a suggested holding temperature of 0°F (-18°C) or below to reduce quality degradation. This matters because frozen pastries don’t always smell “bad” when damaged. They just get gummy, bland, or structurally weak.
Frozen Bakery Risk Map
| Frozen Bakery Risk | What You See | What Likely Happened | What to Change |
|---|---|---|---|
| Gummy texture after thaw | Soft, sticky crumb | Thaw/refreeze cycle | Tighten freezer handoffs |
| White “ring” under crust | Dry crust zone | Moisture migration | Better vapor barrier packaging |
| Fast staling | Dry, tough bread | Held in 20–50°F zone | Move quickly through that range |
Practical tips and advice:
For cream cakes: treat them as perishable cold foods and keep them cold (≤40°F).
For croissants: decide whether you want crispness (vent) or softness (seal).
For frozen pastries: protect against “short warm spikes,” not only long hauls.
How Do You Pack Insulated EPP Box Bakery Products Without Crushing?
The #1 reason bakery deliveries fail is physical damage. An insulated EPP box bakery products system solves this only when you pack with structure. “Soft filler” rarely protects a tart. You need rigid trays, dividers, and a “no-slide” layout.
Practical tips and advice:
Standardize your tray sizes: consistency beats creativity.
Use a “shake test”: gently shake the closed box; nothing should move.
Label orientation: “this side up” reduces driver mistakes.
Real case: A cupcake brand cut returns after introducing one insert layout per SKU family inside insulated EPP box bakery products routes.
How Do You Manage Time-and-Temperature on Real Routes?
An insulated EPP box bakery products shipment reduces thermal drift, but time rules still decide safety and quality. The FDA Food Code allows time as a public health control with written procedures under §3-501.19, including a common “maximum up to 4 hours” approach for certain uses.
For broader consumer guidance, USDA FSIS warns not to leave food out over 2 hours (or 1 hour above 90°F). Even if you deliver quickly, staging delays can push you into risky territory.
Time Control SOP for Bakery Products
Pack Only When the Driver Arrives: Reduces staging time.
Seal and Label: Label pack time and discard time where applicable.
Delivery in Priority Order: Most sensitive items first.
Record Exceptions: Delays, door-open events, re-pack actions.
Practical tips and advice:
Put the discard time on the label. If it’s not labeled, it gets forgotten.
Train drivers to treat the zipper like a vault. Open only at drop.
Use the 1-hour rule for hot weather planning.
Real case: A bakery improved outcomes by changing one rule: “No staging more than 10 minutes before pickup.” Complaints dropped without changing packaging.
2025 Updates for Insulated EPP Box Bakery Products
In 2025, packaging decisions are increasingly shaped by regulation and reporting expectations—especially for e-commerce shipments.
Frozen Bakery Sensitivity: Quality losses in frozen bakery are quicker than many teams assume. The GCCA/WFLO guide stresses that frozen dough and cream-filled pastries are highly sensitive to temperature fluctuations, particularly above 0°F (-18°C).
Packaging Waste Pressure: Regulations are pushing for more recyclable and reusable packaging. The European Commission’s PPWR regulation demands that all packaging be recyclable by 2030.
Practical tips and advice:
Validate lanes to ensure you’re not overpacking or underpacking, which both waste money.
Design for reuse in city loops where returns work well.
Build a sustainable packaging story that matches regulatory expectations.
Next Step:
To optimize your insulated EPP box bakery products program, classify your catalog into Ambient, Chilled, and Frozen categories, and select the right thermal targets for each lane. Implement a 2-week pilot with lane testing, track temperature compliance, and adjust for packaging cost reductions.
Cold Chain Meat Compliance: Audit-Ready in 2025
Cold Chain Meat Compliance: Are You Audit-Ready in 2025?
Cold chain meat compliance is how you keep meat safe and prove it—from cold storage to truck to the customer’s dock. Your biggest risks usually happen during fast handoffs: warm staging, door-open loading, small leaks, or missing records. In many Food Code–based programs, cold holding for time/temperature control foods is commonly tied to 41°F (5°C), so “close enough” is not a strategy.
This article will answer for you
- What cold chain meat compliance means in day-to-day operations
- How to set cold chain meat compliance temperature limits by lane and product
- How to prevent leaks and cross-contact with simple separation rules
- What proof and records reduce audit stress the fastest
- A weekly cold chain meat compliance checklist you can score in 5 minutes
- 2025 trends pushing “prove the lane,” not “trust the thermostat” (Global Cold Chain Alliance)

What is cold chain meat compliance in real operations?
Direct answer: Cold chain meat compliance means you control temperature, hygiene, separation, and traceability at every handoff—and you keep evidence that your team followed the process. It includes how you pack, stage, load, monitor, clean, and respond when something goes wrong. If you only “keep it cold,” you can still fail audits when records, sanitation, or roles are unclear.
Expanded explanation: Think of compliance like a seatbelt. You do it for normal days, not only inspection days. Meat is sensitive because small temperature drift can accelerate quality loss, and a small leak can become a contamination incident. The goal is a system your team can run when the day is messy—late trucks, multi-stop routes, and tight labor. That is why cold chain meat compliance is a repeatable routine, not a single temperature reading.
Cold chain meat compliance map: what auditors actually check
| Compliance area | What you control | Evidence to keep | What it means for you |
|---|---|---|---|
| Temperature control | Targets + limits + time | Logs, logger files, receiving checks | Fewer spoilage claims |
| Sanitation | Cleaning steps + verification | Sanitation SOP + daily record | Lower contamination risk |
| Separation | Raw vs RTE zoning | Checklists, photos, training | Fewer audit findings |
| Traceability | Lot + shipment chain | Scan trail, POD, exception log | Faster investigations |
| Corrective actions | Decisions during failures | CAPA / deviation report | “Controlled story” in audits |
Practical tips you can use today
- Rewrite vague SOPs (“keep cold”) into measurable rules (“target, limit, and action”).
- Train one sentence your team repeats: “Cold, clean, separated, proven.”
- Treat missing records as a failure, even if the product looked fine.
Practical case (composite): One operator cut audit findings by switching from “notes” to a one-page handoff checklist tied to timestamps and sanitation sign-off.
Cold chain meat compliance temperature limits: how do you set targets?
Direct answer: Set temperature lanes (chilled vs frozen, plus high-risk products) with a target, a limit, and a maximum out-of-control time. Many teams use safety anchors like ≤40°F (4°C) for refrigerators and ≤0°F (-18°C) for freezers as practical baselines, then tighten rules by customer, product, and region.
Expanded explanation: Temperature “limits” without time controls are incomplete. A short warm stage at the dock can do more damage than an hour of stable driving. Also, if you ship globally, requirements change by market and product type. For example, EU rules include category-specific internal temperatures used for meat preparations (like ≤7°C for other meat, ≤4°C poultry, ≤3°C offal) and stricter rules for minced meat and preparations.
Quick reference: common targets you should recognize
| Context | Example expectation | Best used for | What it means for you |
|---|---|---|---|
| Food Code cold holding (model) | 41°F (5°C) for TCS cold holding | Retail/foodservice SOPs | Clear “pass/fail” |
| U.S. consumer safety baselines | Fridge 40°F or below; freezer 0°F or below | Storage discipline | Simple training target |
| EU meat preparation examples | ≤7°C other meat; ≤4°C poultry; ≤3°C offal | EU-facing programs | Category lanes matter |
| EU minced/prep rules | Minced ≤2°C; preparations ≤4°C; frozen ≤-18°C | Grinding/prep lines | Tight control required |
Decision tool: choose your temperature lane in 60 seconds
- Is it frozen product (must stay frozen)?
- Yes → Frozen lane (target ≤0°F / -18°C, monitor high-risk loads).
- Is it minced meat / high-risk prep?
- Yes → High-control chilled lane (tighter limits, shorter dock time).
- Is it raw whole-cut meat for chilled distribution?
- Yes → Standard chilled lane (target + limit + strict staging cap).
- Is it RTE meat or mixed loads with RTE items?
- Yes → add enhanced separation + sanitation verification.
Practical tips and recommendations
- Set a target and a limit: target drives stability; limit triggers action.
- Write “maximum dock minutes” (staging is where most failures hide).
- Don’t “cool in transit.” Trucks should maintain safe product, not fix warm product.
Practical case (composite): Adding a 20-minute dock staging cap reduced summer rejects more than adding extra coolant.
Cold chain meat compliance at handoffs: how do you stop “mystery warming”?
Direct answer: Most cold chain meat compliance failures happen at pack-out, staging, loading, and receiving, not on highways. Your best control is a simple handoff discipline: pack last, seal fast, load first, receive immediately. Make each step measurable with a timer and a checkbox.
Expanded explanation: Handoffs are where people improvise. Labels print late. Drivers arrive early or late. Doors open repeatedly on multi-stop routes. The fix is not “be careful.” The fix is to design work so the right action is the easiest action. Your compliance system should still work on the worst day of the week, with new staff and a late truck.
The “first hour / last hour” risk map
| Stage | Why it fails | Your control | What it means for you |
|---|---|---|---|
| Pack-out | Exposure + handling | Packing order + seal check | Less early warming |
| Staging | Time disappears | Max staging minutes + timer | Fewer silent drifts |
| Loading | Door-open time | Load sequence + door discipline | Fewer spikes |
| Receiving | Product sits | “Inspect, measure, store, record” | Faster decisions |
| Returns | Cross-contact risk | Separate returns flow | Cleaner operations |
Practical tips you can use today
- Pre-stage paperwork and labels before meat leaves cold storage.
- Use a visible timer at the dock (no timer = no control).
- Assign one owner for exception decisions per shift.
Practical case (composite): A subscription program reduced excursions by enforcing: “Product leaves cold storage only when the vehicle is ready.”
Cold chain meat compliance hygiene: how do you prevent cross-contamination?
Direct answer: Cold chain meat compliance hygiene is built on three habits: contain leaks, separate raw vs ready-to-eat, and verify cleaning. The simplest rule your team can remember is: raw meat must be sealed and isolated—every time.
Expanded explanation: Temperature slows bacterial growth, but it does not stop contamination spread. One small leak can contaminate totes, floors, and handling tools. Treat your truck like a moving food room. In the U.S., sanitary transportation expectations focus on preventing practices that can make food unsafe, including inadequate cleaning and failure to protect food during transport.
Separation rules that actually work
| Rule | What you do | What it prevents | What it means for you |
|---|---|---|---|
| Secondary containment | Sealed bag/tray inside tote | Leak spread | Fewer incidents |
| Raw vs RTE zoning | Separate zones/vehicles | Cross-contact | Stronger audits |
| Tool control | Dedicated gloves/tools | Hidden contamination | Less rework |
| Clean/dirty flow | Returns never touch clean stock | Recontamination | Safer reuse |
Practical tips and recommendations
- Put raw meat in secondary containment before it touches any tote.
- Never stack raw above RTE inside the same container.
- Define “clean enough” with a checklist, not opinions.
Practical case (composite): Adding sealed containment for poultry and a quick dispatch wipe step reduced customer complaints.
Cold chain meat compliance records: what proof wins audits fast?
Direct answer: Your records should answer four questions: what happened, when, who, and what you did about it. That is the fastest way to reduce audit stress. The goal is not paperwork volume—it is clear evidence.
Expanded explanation: Auditors look for two things: (1) defined procedures and (2) proof you follow them. The Sanitary Transportation framework explicitly includes vehicles/equipment, operations, records, and training, and it applies across shipper, loader, carrier, and receiver roles. (U.S. Food and Drug Administration) If your system is too complex, people skip steps. Keep it lightweight, consistent, and tied to shipment ID.
Minimum viable records pack (steal this list)
- Temperature evidence (storage, loading, receiving; plus loggers on high-risk lanes)
- Sanitation SOP + daily verification record
- Training proof for transport roles (drivers/loaders/receivers) (U.S. Food and Drug Administration)
- Traceability fields: lot/batch, pack time, shipment ID, route ID, POD
- Exception log + corrective action form (CAPA)
Copy-friendly log table (simple and defensible)
| Date/Time | Location | Product/Lot | Target | Observed | IN/OUT | Action taken | Verified by |
|---|---|---|---|---|---|---|---|
| 2025-12-22 07:40 | Dock staging | Lot A123 | Chilled lane | 4.2°C | IN | Loaded within 10 min | J.S. |
| 2025-12-22 09:10 | Delivery | Lot A123 | Chilled lane | 6.8°C | OUT | Quarantined; QA review | M.K. |
| 2025-12-22 11:00 | Cooler | Lot A123 | Chilled lane | 3.8°C | IN | Held pending disposition | QA |
Interactive self-test: Records Readiness Score (0–8)
Give yourself 1 point for each “yes.”
- We can retrieve temperature evidence for any shipment within 10 minutes.
- We record both IN and OUT readings (not only “good” numbers).
- We have a written excursion form with required fields.
- We document corrective actions and verification (how we confirmed it worked).
- We keep sanitation verification daily for food-contact areas.
- We keep training proof for drivers/loaders/receivers. (U.S. Food and Drug Administration)
- We have a device calibration schedule and proof.
- We review exceptions monthly and update SOPs quarterly.
Score guide:
- 0–3: high audit risk
- 4–6: stable, but exceptions can hurt
- 7–8: audit-ready and scalable
Temperature excursion SOP for cold chain meat compliance: what do you do next?
Direct answer: When a shipment is out of range, you need a written, repeatable decision path: quarantine, preserve evidence, assess risk, decide disposition, and prevent recurrence. Consistency matters more than perfection, because audits punish improvisation.
Expanded explanation: People often panic during delays and make “reasonable” choices that are impossible to defend later. Your SOP should define who decides, what data is required, and what outcomes are allowed. If you operate in the EU, some product categories have stricter internal temperature expectations, so a one-size-fits-all decision is risky.
Step-by-step response plan (print this)
- Quarantine the load (physically separate and label “HOLD”).
- Preserve evidence (logger file, timestamps, photos of packaging, receiving temps).
- Confirm the lane (chilled vs frozen vs high-risk prep) and compare to your limit.
- Apply your disposition rules (release, rework, downgrade, or discard).
- Document corrective action (what you changed to prevent the same failure).
- Review within 48 hours (fast review prevents repeat mistakes).
Delay protocol table (simple and actionable)
| Delay situation | Weak response | Strong response | What it means for you |
|---|---|---|---|
| Pickup late | “Ship anyway” | Re-pack or re-chill | Lower risk |
| Vehicle breakdown | Wait on dock | Return to cold storage | Less excursion |
| Missed delivery | Leave at door | Return or reschedule | More control |
| Route extended | No action | Add protection or split route | Fewer losses |
Practical tips and recommendations
- Define thresholds before shipping (don’t negotiate after delivery).
- Train drivers to call early (early notice prevents big failures).
- Log every exception—missing documentation is often worse than the event.
Practical case (composite): A program reduced spoilage by requiring delayed loads to return to controlled storage for re-pack before re-dispatch.
2025 developments and trends in cold chain meat compliance
Trend overview: In 2025, cold chain meat compliance is shifting from “set the thermostat” to “prove the lane.” Customers want faster evidence, clearer accountability, and fewer repeat deviations. For frozen lanes, industry groups released a protocol to standardize and modernize temperature monitoring across the frozen food supply chain (announced July 21, 2025). (Global Cold Chain Alliance)
Latest progress snapshot
- More standardized temperature evidence: comparable time-temperature data across operators (AFFI – American Frozen Food Institute)
- More role-based accountability: clearer shipper/loader/carrier/receiver responsibilities (U.S. Food and Drug Administration)
- More audit focus on exceptions: not just what failed, but what you changed afterward
Market insight
Your competitive advantage is predictable compliance. Many teams can deliver meat. Fewer can deliver meat with clean evidence every week.

Frequently asked questions
Q1: What is cold chain meat compliance?
Cold chain meat compliance is the documented control of temperature, hygiene, separation, and traceability for meat from dispatch to receipt.
Q2: What cold holding limit is commonly used in Food Code–based programs?
Many Food Code–based programs commonly tie cold holding of TCS foods to 41°F (5°C).
Q3: What baseline temperatures are often recommended for storage targets?
A common safety baseline is 40°F (4°C) or below for refrigerators and 0°F (-18°C) or below for freezers.
Q4: What does the FSMA Sanitary Transportation rule cover in practice?
It establishes expectations for vehicles/equipment, transportation operations, records, and training, across shippers, loaders, carriers, and receivers.
Q5: What EU temperature rules should exporters recognize first?
EU hygiene rules include specific internal temperatures used in meat preparation contexts (such as ≤7°C other meat, ≤4°C poultry, ≤3°C offal) and stricter limits for minced meat and preparations.
Q6: Do you need temperature monitoring on every shipment?
Not always. Start with high-risk lanes (long routes, multi-stop, summer peaks), then expand based on failure patterns.
Q7: Where do most failures happen?
Most failures happen at handoffs—staging, loading, and receiving—where doors open and time grows.
Q8: What’s the fastest improvement you can make this week?
Control dock dwell time with a timer and a hard staging limit. It often reduces excursions faster than adding more coolant.
Summary and recommendations
Key takeaways: Cold chain meat compliance is built on repeatable temperature control, strict hygiene and separation, audit-ready traceability, and disciplined corrective actions. Most failures happen at docks, not in transit. If you cap staging time, enforce secondary containment, keep a minimum records pack, and run a weekly self-audit, you reduce risk and improve audit outcomes in 2025.
Action plan (start this week):
- Set lane targets (chilled vs frozen) and write a target + limit + action rule.
- Enforce a maximum dock staging time with a visible timer.
- Require secondary containment for all raw meat shipments.
- Standardize an exception form and train one owner per shift to decide disposition.
- Run the weekly self-audit, fix the top failure cause, and repeat.
About Tempk
We help cold chain teams operationalize compliance with packaging systems, monitoring workflows, and SOP templates designed for real-world handling. Our focus is practical: temperature stability, leak prevention, repeatable handoffs, and documentation habits that reduce disputes and audit friction.
Next step (CTA): Share your product mix (fresh, poultry, offal, minced, frozen), route duration, and handoff points. We can help you map a lane-specific cold chain meat compliance checklist and a 2-week validation pilot you can run immediately.
Cold Chain Meat Traceability: How to Prove It in 2025?
Cold Chain Meat Traceability: How to Prove It in 2025?
Cold chain meat traceability is how you prove which meat it is, who handled it, and whether it stayed cold from pack-out to the customer. If you can answer those questions in minutes (not days), you cut recalls, chargebacks, and “mystery shrink.” A simple baseline many teams use is keeping chilled handling at 40°F (4°C) or below, then documenting any exception clearly. In 2025, your buyers want evidence, not reassurance.
This article will answer for you:
How to build a cold chain meat traceability system that works at pallet, case, and mixed-order levels
How to choose meat lot code and case label standards that survive cold rooms
How to make temperature logging for meat traceability defensible without overspending
How to run meat chain-of-custody records that people actually complete
How to pass audits faster using a 2-hour recall drill and a one-page report
Why does cold chain meat traceability matter so much?
Cold chain meat traceability matters because meat risk is time-sensitive. A short temperature break can turn into fast quality loss, and a small labeling gap can turn into a wide recall. When you have cold chain meat traceability, you can isolate the right lots, respond to disputes with facts, and protect your margin. When you do not, you end up pulling “everything shipped that week” because you cannot prove what was affected.
In plain terms: cold chain meat traceability is your insurance policy that actually pays out. It shortens investigations, reduces wasted disposal, and gives your customers confidence when something feels uncertain.
| Business problem | What it feels like | What traceability changes | Practical meaning for you |
|---|---|---|---|
| Broad recalls | You destroy good inventory | You isolate exact lots | Lower recall cost |
| Claims drag on | Endless emails and guesses | Evidence is ready | Faster resolution |
| Mystery shrink | You cannot find root causes | You find the warm point | Targeted fixes |
| Audit stress | Scrambling for records | One folder, clear story | Less disruption |
Practical tips you can apply today
If disputes drag on: store a “handoff scan + temperature summary” under each shipment ID.
If recalls scare you: enforce receive/ship scan gates and standard lot-to-case rules.
If shrink is high: track dwell time at handoffs, not just average room temperature.
Real-world example: A distributor reduced claim disputes by requiring a receiving scan for every pallet and saving one temperature snapshot with the shipment ID.
What does “good” cold chain meat traceability look like?
Good cold chain meat traceability is fast, consistent, and provable. It is not a thick manual. It is a repeatable system that answers questions on demand: identity, custody, and cold-condition evidence. If any one of those is missing, your story collapses under pressure.
Think of cold chain meat traceability as a “passport” for each lot and pallet. If the stamps are missing, the shipment gets stuck in disputes, holds, or recalls.
The Proof Triangle that makes traceability credible
One strong record set connects three corners:
| Corner | What you capture | What breaks it | Practical meaning for you |
|---|---|---|---|
| Product identity | SKU + lot + pack date | Mixed lots with no link | Recalls expand |
| Chain of custody | Who had it + when | Missing handoff timestamps | Disputes increase |
| Temperature evidence | Proof linked to IDs | Logs stored separately | Not defensible |
Practical tips you can apply today
Use a single “join key”: shipment ID or pallet ID must connect scans and temperature proof.
Treat repack as a formal event: no repack leaves the room without a recorded link.
Keep it readable: codes must be scannable and human-readable at 2 a.m.
Real-world example: A DC found its warm dwell zone by adding one scan: outbound staging entry.
How do you map cold chain meat traceability in your operation?
Cold chain meat traceability starts with mapping reality, not software. You map where meat moves, waits, and changes hands. Those points are where identity gets lost and temperatures drift. Your goal is to define the smallest set of “must-scan” events that protect the chain.
Once you have the map, you decide your traceability depth. Start simple, then deepen where risk and claims are highest.
Step-by-step: a practical traceability map
List nodes: packing, cold room, dock, carrier pickup, cross-dock, DC receiving, store receiving.
Mark must-scan events: custody change, higher temperature risk, split/merge (repack, relabel, pallet rebuild).
Define trace unit depth: pallet-level, case-level, or item-level.
Decision tool: What depth do you actually need?
Score each question 0–2 (0 = no, 2 = yes). Total 0–10.
Do you repack or split orders daily?
Do you ship mixed SKUs on the same pallet often?
Do you get frequent “arrived warm” claims?
Do buyers ask for case-level evidence (not pallet-only)?
Do you export or face frequent border/document checks?
Your result
0–3: Start with pallet-level cold chain meat traceability, then add a few high-risk case lanes.
4–7: Build case-level cold chain meat traceability for claim-heavy SKUs and mixed pallets.
8–10: You likely need deep case-level (and selective item-level) cold chain meat traceability.
| Depth | Best for | Effort | Practical meaning for you |
|---|---|---|---|
| Pallet-level | Commodity lanes | Low | Fast start, less precision |
| Case-level | Mixed SKUs, frequent claims | Medium | Smaller recalls, better proof |
| Item-level | Premium programs | High | Strongest proof, higher cost |
Real-world example: A shipper improved traceability by scanning pallets leaving receiving cold room and entering outbound staging.
Which labels make cold chain meat traceability work in cold rooms?
Cold chain meat traceability fails when labels fail. Condensation, frost, and abrasion can make codes unreadable. If the label falls off or smears, the best system becomes guesswork. You want labels that stick cold, stay readable wet, and scan fast.
Keep the label simple: one scannable code, one human-readable line, and one consistent placement zone.
Label essentials you should standardize
Strong adhesive that holds on cold cartons
Print that resists moisture and rubbing
A code size that scans quickly from normal distance
Human-readable lot and pack date as backup
Placement rules so stretch wrap does not block scanning
| Label type | Strength in cold chain | Risk | Practical meaning for you |
|---|---|---|---|
| 1D barcode | Fast scanning | Limited data | Good for pallet IDs |
| 2D code | Rich data + error tolerance | Needs training | Great for case ID + lot |
| RFID | No line-of-sight | Higher cost | Best for high-volume lanes |
Practical tips you can apply today
Condensation: add a quick dry-wipe step before labeling.
Frost zones: avoid edges where ice forms first.
Scan failures: increase code size and standardize placement on the same panel.
Real-world example: A processor cut “unscannable cases” by standardizing placement and slightly enlarging 2D codes.
How do you link temperature logging to cold chain meat traceability?
Temperature logging for meat traceability only works when it is linked to the same IDs you scan. A temperature chart without shipment identity is a picture. A lot record without temperature evidence is a promise. Cold chain meat traceability needs both, tied together by a join key.
You do not always need second-by-second graphs. You need proof that is time-stamped, interpretable, and exception-ready.
The temperature evidence ladder (choose what fits your risk)
| Evidence level | What you use | Best for | Practical meaning for you |
|---|---|---|---|
| Basic | Manual checks + setpoint notes | Short, low-risk lanes | Low cost, weaker proof |
| Better | Logger per trailer or high-risk pallets | Most lanes | Stronger claims defense |
| Best | Real-time telematics + alerts | Long, high-value lanes | Faster intervention |
The 3-point placement method (simple and practical)
Pallet edge: catches dock and ramp spikes
Pallet center: catches hidden warm product
Top layer: catches door-open exposure
Practical tips you can apply today
Link automatically: logger ID must attach to shipment ID without manual copy-paste.
Track minutes out of range: averages hide short spikes.
Simplify alerts: use green/yellow/red so teams respond consistently.
Real-world example: A carrier lane reduced repeat spikes by changing loading order and keeping staging inside the cold room.
How do you manage repack, relabel, and lot splits in cold chain meat traceability?
Repack and relabel are where cold chain meat traceability breaks most often. The moment product changes form, the “identity thread” can snap. Your fix is a parent-child record: the original ID is the parent, the new outbound IDs are children.
This is the difference between “we think it came from that pallet” and “we can prove it.”
The parent-child rule set (easy to teach)
The inbound pallet or case ID becomes the parent
New cases or pallets become children
Each child stores: parent ID, time, operator, reason
| Event | Required record | Common mistake | Practical meaning for you |
|---|---|---|---|
| Pallet break | Parent-to-child link | No link stored | Recalls expand |
| Repack | New case ID + lot link | Lot gets lost | Audit failure |
| Relabel | Old ID mapped to new | Old label discarded | Disputes increase |
Practical tips you can apply today
Make linkage mandatory: no child can ship without a recorded parent.
Mixed pallets: scan cases into a pallet ID like a shopping cart.
Temporary workaround: if manual, store photos under shipment ID until digitized.
Real-world example: A DC cut recall time by adopting a pallet-build scan process that preserved parent-child links.
What is an audit-ready cold chain meat traceability workflow?
An audit-ready cold chain meat traceability workflow is the one you can demonstrate live. Auditors and customers reward speed and clarity. Your team should be able to tell a simple story: identity, custody, temperature, decisions.
Teach it as a short routine, not a policy document.
The 7-step workflow you can train in one hour
Receive: scan pallet/case + inbound temperature snapshot
Put-away: scan location (cold room zone)
Move (optional): scan doorway moves for high-value lanes
Pick: scan cases into orders
Build pallet: confirm pallet contains the right cases
Ship: scan outbound + assign carrier + departure time
Store evidence: temperature summary + chain-of-custody under shipment ID
| Recall question | Your traceability output | Target time | Practical meaning for you |
|---|---|---|---|
| Where did it go? | Customer list + quantities | Minutes | Narrower recall |
| What was affected? | Lot scope by case ID | Minutes | Less waste |
| Was cold maintained? | Linked temperature summary | Minutes–hours | Defend quality |
| What did you do? | Quarantine + action log | Same day | Audit success |
Interactive self-test: Are you audit-ready?
Score 0 (no), 1 (partly), 2 (yes). Total = 20.
We can link lot → case IDs → pallet IDs consistently.
We scan at receiving and shipping every time.
We record custody changes with timestamps.
We link temperature evidence to shipment IDs.
We record parent-child links for repack and relabel.
We quarantine product when temperature is out of range.
We can produce a one-page recall report quickly.
Labels stay readable in cold and moisture.
Staff can explain the workflow in plain language.
We run recall drills and record results.
Score guide
0–8: High risk. Fix scan discipline and lot linkage first.
9–14: Medium risk. Improve exception handling and temperature linkage.
15–20: Strong. Focus on speed, training, and continuous improvement.
Real-world example: Teams improved audit outcomes by running short monthly drills on random lots.
How do you reduce labor while improving cold chain meat traceability?
The fear is “traceability will slow us down.” In practice, weak traceability slows you down more during disputes and recalls. The best cold chain meat traceability design reduces rework by preventing missing IDs and rescans.
You win by simplifying: fewer scan points, better labels, and one-page outputs.
| Labor pain | Simple fix | Why it works | Practical meaning for you |
|---|---|---|---|
| Scan retries | Larger 2D code + placement rule | Fewer rescans | Faster flow |
| Missing IDs | Mandatory receive scan gate | Stops ghost pallets | Less searching |
| Manual lot entry | Encode lot in 2D code | No typing | Fewer errors |
| Report building | Auto one-page summary | Less stitching | Faster disputes |
Practical tips you can apply today
Micro-training: 10 minutes daily beats one long training session.
Visual cues: post “where to label, where to scan” at the dock.
Measure clean scans: what gets measured gets repeated.
Real-world example: A warehouse improved speed by standardizing label location and reducing time spent hunting for codes.
2025 latest developments and trends in cold chain meat traceability
As of December 2025, cold chain meat traceability is shifting from “basic compliance” to evidence-based performance. Customers want shareable records that match across labels, invoices, and temperature proof. They also expect faster response during incidents, even when the issue is small.
Latest progress snapshot (practical takeaways)
More case-level programs: especially for premium, private-label, and export lanes.
Faster recall expectations: hours matter, so drills and templates become standard.
Richer identifiers: teams are moving toward codes that reduce manual entry.
Cold-chain continuity proof: temperature evidence is treated like a deliverable, not an internal file.
More exception discipline: quarantine and disposition logs are becoming non-negotiable.
Frequently Asked Questions
Q1: What is “one step forward, one step back” for meat?
It means you can identify your direct supplier and direct customer for each lot. Cold chain meat traceability goes further by linking those transactions to temperature proof and internal transformations.
Q2: What are the minimum scan points to start cold chain meat traceability?
Start with two: receiving and shipping. Add required scans only where identity changes, like repack, relabel, and cross-dock handoffs.
Q3: Do I need case-level traceability for all meat?
Not always. Many operations use pallet-level for stable commodity lanes and case-level for claim-heavy or frequently repacked SKUs.
Q4: How do I link temperature data to meat lots without complexity?
Use a shared join key like shipment ID or pallet ID. Store that key in both the scan records and the temperature file name or record.
Q5: What should I do when temperature goes out of range?
Quarantine the product, record the event under the shipment ID, and document what you did next. Clear disposition rules reduce repeat problems.
Q6: What is the fastest improvement in 30 days?
Standardize label placement, enforce receive/ship scan gates, and store one temperature summary per shipment ID. These steps fix most “missing proof” failures.
Summary and recommendations
Cold chain meat traceability is your ability to prove meat identity, custody, and cold-condition evidence across the supply chain. The winning formula is simple: unique IDs, consistent scans at must-scan points, parent-child links for repack events, and temperature proof tied to shipment IDs. If you build it this way, you reduce recall scope, defend claims faster, and replace “mystery shrink” with clear root causes.
Action plan (clear CTA)
This week: enforce receiving and shipping scan gates for every pallet.
Next 14 days: link temperature summaries to shipment IDs for high-risk lanes.
Within 30 days: implement parent-child mapping for repack/relabel and run one recall drill.
Ongoing: review exceptions monthly and fix the top repeated failure point first.
About Tempk
At Tempk, we support cold chain teams that need traceability you can actually use under pressure. We focus on practical workflows: clear labeling logic, clean handoffs, and temperature-proof records that stand up in audits, claims, and recall drills. We help you reduce disruption by keeping the system simple, consistent, and easy for operators to follow across shifts.
Next step: Share your flow (plant → DC → customer), repack frequency, and top three lanes. We will help you design a cold chain meat traceability plan that fits your speed, cost, and compliance needs.
Best Shellfish Cold Chain Kits for 2025 Shipping
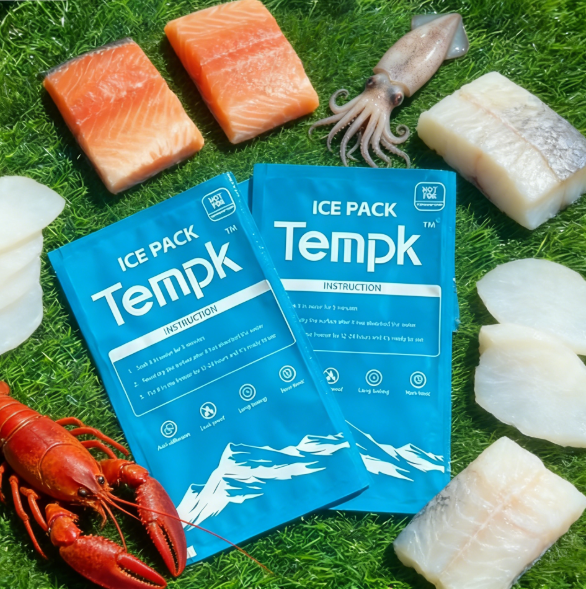
Best Shellfish Cold Chain Kits: What Works in 2025?
Last updated: December 22, 2025.
If you ship seafood, best shellfish cold chain kits are the fastest way to cut temperature spikes, leaks, and “wet box” rejections. Many programs use simple receiving triggers (like shellstock internal ≤50°F and shucked product ≤45°F) and a strict focus on avoiding long dock exposure. Your goal is not “perfect cold.” Your goal is repeatable, claim-proof delivery that customers trust.
This guide will help you answer
- How best shellfish cold chain kits for live oysters differ from kits for shucked product
- How to ship shellfish near 0–4°C (32–39°F) without freezing damage
- How to run a shellfish cold chain kit validation test before scaling
- How to reduce wet-box claims with moisture-first packaging
- What to tell customers with a simple shellfish receiving checklist

What makes the best shellfish cold chain kits different in 2025?
Core answer: the best shellfish cold chain kits work because they control temperature stability, moisture management, and physical protection at the same time. If you only “keep it cold,” you still get leaks, cracked shells, odor, and soggy cartons. That is why a kit must act like one system, not a shopping list.
A practical way to compare kits is a simple three-layer model. It helps you spot hidden risks before the first shipment goes out.
The three-layer model for best shellfish cold chain kits
| Kit Layer | What it does | Common failure | What it means for you |
|---|---|---|---|
| Outer protection | Prevents crush + puncture | Weak corners, soft cartons | More broken shells, more leaks |
| Insulation layer | Reduces temperature swings | Too thin for the lane | Warmer product at delivery |
| Inner control | Controls moisture + movement | No absorbent, poor spacing | Wet labels, odor, messy claims |
Practical tips you can use today
- Start with one question: “Where is my worst handoff point?” Then design around it.
- Standardize one pack-out per lane. Variation is a hidden cost.
- Treat moisture as a main risk. Wet cartons trigger rejections even when product is fine.
Real-world example: One shipper cut “wet box” rejects by increasing absorbent capacity and sealing the inner liner better—without changing refrigerant.
Which best shellfish cold chain kits work for live oysters and shellstock?
Core answer: for live oysters and other shellstock, best shellfish cold chain kits must keep product cool without creating sealed, wet, suffocating conditions. Your target is stable “cool,” not deep freezing. Direct contact with hard-frozen packs can create local freeze damage even when the average temperature looks okay.
Live shellfish often fails for boring reasons: standing water, crushing, and rough movement. That is why oyster kits prioritize cushioning, drainage control, and stable cool zones.
A live shellfish pack-out blueprint you can standardize

| Live shellfish need | What to do in the kit | What to avoid | What it means for you |
|---|---|---|---|
| Stability | Insulation + tight void fill | Loose movement | Less breakage |
| Moisture control | Pads + drainage strategy | Standing water | Fewer mortality complaints |
| Shock protection | Corner support + separators | Overstacking | Better unboxing experience |
Practical tips you can use today
- Use separators so shells do not grind against each other in transit.
- Size absorbents to the lane, not “one pad fits all.”
- Add clear orientation marks so customers do not flip the box and flood product.
Real-world example: One oyster program improved survival after adding a rigid divider layer and reducing top-down pressure in the carton.
Which best shellfish cold chain kits work for shrimp and shucked shellfish?
Core answer: for shrimp and cooked or shucked shellfish, best shellfish cold chain kits focus on preventing thawing, drip, and odor spread. These products can look “fine” after a warm event, but texture and smell degrade. That hurts repeat orders more than it hurts refunds.
Most shrimp failures come from one mistake: wrong cold-source placement. If refrigerant touches product, you can get partial freezing or surface damage. If refrigerant is too far, you get warm pockets.
Placement rules that reduce shrimp quality loss
| Shrimp issue | What causes it | Kit fix | What it means for you |
|---|---|---|---|
| Drip + odor | Thawing + leak spread | Seal + absorbent strategy | Cleaner delivery, fewer claims |
| Texture loss | Warm spikes | Better insulation + faster handoffs | Better repeat orders |
| Crushed packs | Poor void fill | Inserts + snug packing | Better presentation |
Practical tips you can use today
- Use a two-step seal: inner bag seal plus liner closure.
- Design for worst-case handling: assume one drop and one tilt.
- Add a “mess barrier”: stop leaks before they hit corrugate.
Real-world example: One shrimp brand reduced returns by stopping product shifting (better void fill) and tightening liner closure.
How do you choose best shellfish cold chain kits by lane length?
Core answer: lane length is not just drive time. It includes pick time, dock time, hub dwell, and customer receiving time. That total exposure is what your kit must survive. Choosing kits by lane (not habit) reduces both failures and overspend.
Decision tool: best shellfish cold chain kits lane score (interactive)
Add points. Then follow the recommendation.
1) Lane length (total exposure)
- Under 24 hours (1)
- 24–48 hours (2)
- Over 48 hours (3)
2) Handoffs
- Direct ship (1)
- One handoff (2)
- Two or more handoffs (3)
3) Weather risk
- Mostly cool season (1)
- Mixed season (2)
- Hot season / hot regions (3)
4) Species sensitivity
- Cooked, sealed packs (1)
- Raw shrimp / mixed seafood (2)
- Live shellfish (3)
5) Claim tolerance
- Low (1) / Moderate (2) / High (3)
Score meaning
- 5–7: Basic kit + strong process controls
- 8–11: Mid kit + improved insulation + moisture control
- 12–15: High-performance kit + monitoring + strict handoff discipline
Self-check quiz: are your best shellfish cold chain kits used correctly?
Answer Yes/No. If you have 3+ Yes, fix process before buying more packaging.
- Do boxes sit on a warm dock for more than 15 minutes?
- Do packers change the pack-out “when busy”?
- Do you ship mixed odors in the same load area?
- Do customers open cartons immediately in warm air?
- Do you lack trip evidence for disputes?
What insulation and refrigerant strategy should the best shellfish cold chain kits use?
Core answer: insulation buys time, but fit and closure discipline decide whether you actually get that time. A loose insulation set acts like a jacket left unzipped. Tight seams and a reliable lid close slow heat entry.
Refrigerant is not magic. Placement and buffering prevent freeze spots and warm pockets. For live shellfish, many teams shift toward “temperature-buffer” packs (often called PCM packs) because they melt near a set temperature and reduce harsh cold contact.
Quick comparison table (plain-language purchasing specs)
| Component | Minimum that works | Better for long / risky lanes | Practical meaning for you |
|---|---|---|---|
| Insulation | Basic insert sized to payload | Higher-performance panels + tight fit | Longer stability without “more ice” |
| Refrigerant | Gel packs for short lanes | Temperature-buffer packs for stability | Fewer freeze spots, fewer warm pockets |
| Buffer layer | Simple spacer sheet | Standardized buffer stack | Prevents direct contact damage |
| Closure | Tape only | Standard tape + consistent method | Less seam failure under stress |
Practical tips you can use today
- Right-size the box. Less empty space means fewer warm swings.
- Standardize one closure method. Consistency beats “fast today.”
- For frozen shellfish: only use a frozen strategy if you validate it on your lane and season.
How do best shellfish cold chain kits prevent leaks and wet-box claims?
Core answer: wet-box claims happen when meltwater, drip, or condensation reaches corrugate. Then cartons weaken and customers reject deliveries—even when product is still cold. The fix is a layered moisture strategy you can repeat every time.
A simple moisture-control stack (repeatable)
- Primary containment: sealed inner bags or sealed trays
- Secondary barrier: liner that keeps liquid off corrugate
- Absorbent capacity: pads sized to lane moisture risk
- Path control: stop pooling near seams and bottom corners
Practical tips you can use today
- Put absorbent where water goes (usually low corners).
- Treat leak control as a customer trust issue, not just a mess issue.
- Include a short receiving note: “Open in a cool area to reduce condensation.”
Real-world example: A retailer stopped rejecting boxes after adding a secondary barrier liner and increasing absorbent capacity in bottom corners.
How should you monitor temperature in best shellfish cold chain kits?
Core answer: monitoring turns best shellfish cold chain kits into a measurable system, not a guess. You do not need complex technology to start. You need evidence on your highest-risk lanes so you can fix the true failure point and defend fair claims.
Monitoring options you can use (choose one to start)
| Monitoring type | Best use | Strength | What it means for you |
|---|---|---|---|
| Spot checks | Receiving discipline | Fast + low cost | Better daily control |
| Trip loggers (audit) | Lane testing | Clear trip story | Best for root-cause |
| Real-time visibility | High-value loads | Alerts during transit | Best for critical customers |
Practical tips you can use today
- Run 10 audit shipments on your highest-claim lane first.
- Track time above threshold, not only “max temperature.”
- Review data weekly with packing and transport teams.
How do you validate best shellfish cold chain kits before scaling?
Core answer: validation protects you from scaling the wrong pack-out. It also gives you a training tool that replaces opinions with evidence. A simple plan is lane-based: define the lane, lock the pack-out, test worst-case scenarios, and repeat for consistency.
Many teams use acceptance windows like shellstock internal ≤50°F and shucked ≤45°F, plus a strict focus on limiting uncontrolled dock time.
A practical validation plan (7 runs)
| Run | Scenario | Duration | What it proves |
|---|---|---|---|
| 1–2 | Typical ambient | Lane time | Baseline performance |
| 3–4 | Hot exposure | Lane time + buffer | Summer survivability |
| 5 | Cold exposure | Lane time | Freeze-risk check |
| 6 | Delay | +8–12 hours | Weekend / hub delay |
| 7 | Handling | Drop/vibration + lane time | Seam + container integrity |
Practical tips you can use today
- Measure product temperature, not only air temperature.
- Keep sensor placement consistent (corner + center).
- If you change coolant size, you changed the system—document it.
How do best shellfish cold chain kits reduce total cost without lowering quality?
If you only compare kit price, you miss the real cost drivers: refunds, reships, support time, and damaged cartons. The best metric is simple: cost per successful delivery. Standardization also speeds packing and reduces “random outcomes.”
Cost-per-success mini calculator (interactive)
Fill in your numbers:
- Average order value: $____
- Cost per failed delivery (refund + reship + support): $____
- Current failure rate: ____%
- Target failure rate after improvements: ____%
- Added packaging cost per shipment: $____
Rule of thumb: If savings from fewer failures > added packaging cost, your “expensive kit” is actually cheaper.
What should customers do when receiving shellfish?
Core answer: even the best shellfish cold chain kits can fail if receiving is sloppy. The last 10 minutes often decide whether the delivery looks perfect or suspicious. Your job is to make receiving simple and repeatable.
A 10-minute receiving checklist (include in every box)
| Step | What you check | Pass condition | Fail action |
|---|---|---|---|
| Identification | Tags + documents | Present and correct | Reject or hold |
| Live condition | Shellstock alive | Alive and intact | Reject suspect lots |
| Temperature (shellstock) | Internal body temp | ≤50°F | If >60°F, reject |
| Temperature (shucked) | Product temp | ≤45°F | If >50°F, reject |
| Immediate control | Storage placement | Under refrigeration/ice quickly | Log deviation if delayed |
2025 trends in best shellfish cold chain kits
In 2025, the biggest shift is not “new materials.” It is repeatable systems: lane-based pack-outs, stronger moisture control, and more temperature-buffer strategies to reduce freeze spots. Market expectations are also higher. Customers judge cleanliness and presentation, not just “safe enough.”
Latest progress at a glance
- More temperature-buffer adoption to reduce harsh cold contact points.
- More moisture-first designs (liners + absorbents) to prevent wet-box rejections.
- More “proof thinking” (pilots + repeatable validation) before scaling.
Frequently Asked Questions
Q1: What is the fastest way to improve best shellfish cold chain kits without buying new packaging?
Cut warm-dock time, standardize pack-out photos, and run 10 audit trips on the worst lane.
Q2: Are gel packs enough for best shellfish cold chain kits?
Sometimes for short lanes. For longer or extreme lanes, temperature-buffer packs and better insulation often give more stable results.
Q3: Why do I get wet-box claims even when product is cold?
Because meltwater or condensation reaches corrugate. Add a barrier liner and place absorbents in low corners.
Q4: Should I use the same pack-out for live oysters and shucked shellfish?
Usually no. Live shellfish needs cool stability without harsh cold contact, while shucked product needs strict leak containment.
Summary and recommendations
The best shellfish cold chain kits succeed when you control temperature stability, moisture, and handling shocks as one system. Choose kits by lane length and handoffs, not by habit. Then lock pack-outs with photos so every shipment looks the same.
Next-step action plan (simple and executable)
- Score your top 5 lanes with the lane tool (above).
- Standardize one pack-out per lane and train with photos.
- Add a moisture stack: inner seal, barrier liner, absorbents in low corners.
- Run 10 audit shipments with trip monitoring on the highest-claim lane.
- Put the receiving checklist in every box to reduce last-mile mistakes.
About Tempk
At Tempk, we help teams design and run reliable cold chain systems for sensitive seafood, including shellfish. We focus on practical kit selection, repeatable pack-out methods, and clear shipment evidence through monitoring. Our goal is to reduce wet-box rejects, improve delivery consistency, and make claims easier to resolve with standardized processes.
Call to action: Share your species mix, lane length, and handoff count, and we can outline a lane-based best shellfish cold chain kits plan with a pack-out workflow your team can apply immediately.
Cold Chain Shellfish Storage Insulation (2025)
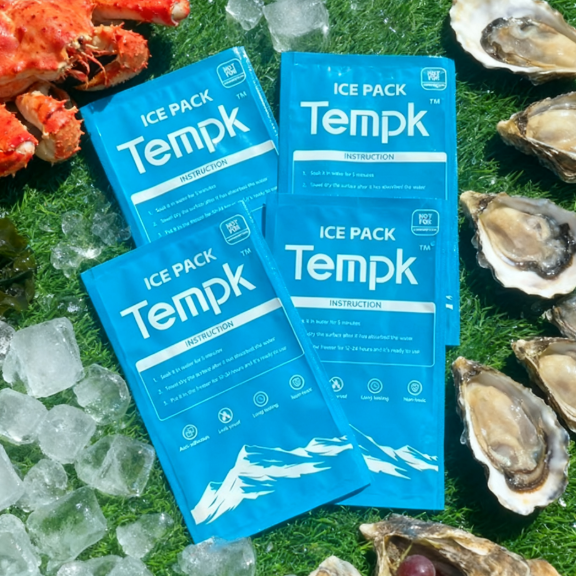
Cold Chain Shellfish Storage Insulation in 2025?
Cold chain shellfish storage insulation works when you control temperature, time, and moisture—not when you simply “make it cold.” If you want fewer refunds, fewer off-odors, and more consistent arrivals, you need stable targets (often 41°F / 5°C for cold holding), plus meltwater control and fast handoffs.
This article will help you:
- Choose temperature targets for live, shucked, and frozen shellfish (without guesswork).
- Use cold chain shellfish storage insulation to prevent warm spikes during staging and delivery.
- Build a “keep it dry” packout that reduces leak complaints and odor problems.
- Set up 90-day tag/recordkeeping habits that protect you during disputes and audits.
- Pick the right insulation level (EPS, VIP, PCM) using a quick decision tool.
Why is cold chain shellfish storage insulation so strict?
Cold chain shellfish storage insulation is strict because shellfish quality can collapse fast after short warm exposure. The real damage often happens in the “handoff minutes,” not only during the full route.
Think of shellfish like fresh-cut flowers. Once they are stressed, they rarely “bounce back.”
What failures are you preventing?
You are usually preventing these four outcomes:
- Warm spikes that speed spoilage.
- Cross-contamination from meltwater and drips.
- Quality collapse (odor, mushy texture, drip loss).
- Missing proof that your process stayed controlled.
What temperature targets make cold chain shellfish storage insulation work?
A common day-to-day target in cold holding is 41°F / 5°C or below, with regular verification. Cold chain shellfish storage insulation should help you stay stable, especially when doors open, trucks arrive late, or a porch delay happens.
Quick targets by product type
Use this table as your “posting on the wall” rule set:
| Shellfish type | Practical target | Biggest risk | What it means for you |
|---|---|---|---|
| Live shellstock | ~0–4°C (32–40°F) | Sealing, soaking, standing water | Keep cold, breathable, and drained |
| Shucked shellfish | ≤5°C (41°F) | Warming + contamination | Seal tight, cool fast, avoid lot mixing |
| Frozen shellfish | ≤-18°C (0°F) | “Soft-frozen” warming | Stay fully frozen end-to-end |
The “two thermometers” habit
Use one thermometer for cooler air and one probe for product. Air temperature can look fine while product drifts warmer in busy hours.
Practical example: A cooler read 3°C, but the top shelf hit 8–10°C during peak traffic. Small airflow changes plus better insulation reduced spikes and discard.
How do you store live shellfish with cold chain shellfish storage insulation?
Live shellfish storage succeeds when they can breathe, stay cold, and stay damp—without sitting in water. Cold chain shellfish storage insulation helps, but it cannot fix suffocation or drowning.
Live oysters storage temperature and humidity
Treat live shellstock like a living shipment, not packaged meat. Keep it cold, give it airflow, and prevent standing water.
| Live storage factor | Do | Don’t | Real impact on you |
|---|---|---|---|
| Airflow | Vented tray or breathable container | Airtight bin | Better survival rate |
| Moisture | Damp cover (breathable) | Submerge in water | Humidity without drowning |
| Drainage | Keep above meltwater | Let product sit in drips | Fewer odor and mortality issues |
The “breathing rule” your staff will remember
Shellfish are like a team on a bus ride. They do fine when the bus is cool and the windows are cracked. They struggle when you seal the bus and park it in the sun.
Practical tips and suggestions
- Label cartons: “LIVE—DO NOT SEAL” so the most common mistake never happens.
- Use a slotted tray + drip pan: cold chain shellfish storage insulation gets stronger when meltwater is managed.
- Daily check: remove dead shellfish promptly so spoilage does not spread.
Real-world result: Switching from sealed buckets to vented trays with damp covers reduced mortality and eliminated “off smell” complaints in days.
How do you store shucked shellfish in cold chain shellfish storage insulation?
Shucked shellfish needs tighter cold control and cleaner separation than live product. Many workflows aim for cold holding near 41°F / 5°C and regular verification.
Shucked shellfish cold holding at 41°F (5°C)
Keep shucked product sealed, keep it colder, and keep it away from drips and messy ice bins. Cold chain shellfish storage insulation helps most when your cooler door opens all day.
Shellfish tag retention: the 90-day workflow
If you cannot prove lot identity, you lose disputes even if your temperatures were perfect. Shellfish identification records are commonly kept for 90 days in many food code-based practices.
| What you keep | How long | Simple method | What it protects |
|---|---|---|---|
| Tags / labels / invoices | 90 days | File by “last sold date” | Faster traceback and fewer write-offs |
| Lot separation notes | During holding | Shelf map + log | Prevents mixed recalls |
| Cooler temp checks | Daily (or more) | Log sheet or app | Proof of control |
Practical tips and suggestions
- One shelf = one lot: never “top up” a bin with a new lot.
- Protect from drips: place shellfish where nothing can drip onto it.
- Receiving reality check: some workflows allow higher receiving temperatures if you cool to 41°F / 5°C within a defined window—write your rule and train it.
Practical example: Filing tags by “last sold date” helped a small market isolate affected product in minutes instead of hours.
Which insulation and coolants should you use for cold chain shellfish storage insulation?
Cold chain shellfish storage insulation is like a winter coat. A great coat fails when it is unzipped, oversized, or soaking wet.
EPS vs VIP vs PCM in plain language
You will usually choose from:
- EPS (foam): solid baseline performance.
- VIP (vacuum panels): much higher insulation in thinner space, best for long/hot lanes.
- PCM (phase change material): a temperature buffer that reduces swings when tuned correctly.
The “fit rule” most teams miss
Even strong cold chain shellfish storage insulation fails if:
- You have big empty air gaps.
- Refrigerant touches product directly.
- You forget drainage and leak paths.
Right-sizing is a performance feature. It reduces warm air volume and keeps packs in place.
Decision tool: choose cold chain shellfish storage insulation in 90 seconds
Score each item 0–2, then follow the result:
- Transit time: 0 (<8h) / 1 (8–24h) / 2 (24–48h+)
- Heat exposure: 0 (controlled) / 1 (some staging) / 2 (frequent outdoor)
- Delay risk: 0 (rare) / 1 (sometimes) / 2 (frequent)
- Product value: 0 (commodity) / 1 (mid) / 2 (premium/live)
Total 0–3: EPS + disciplined process + strong drainage.
Total 4–6: Thicker insulation + improved fit + add basic monitoring.
Total 7–8: VIP and/or PCM buffering + monitoring + written response plan.
How do you pack for last-mile delivery with cold chain shellfish storage insulation?
Insulation is a thermos, not a fridge. It does not create cold—it protects the cold you already built. Your packout must also keep the inside dry, because water speeds warming and spreads odor.

Keep it dry: meltwater control that reduces complaints
For shellfish, water is a double problem:
- It transfers heat quickly, so warming speeds up.
- It can cross-contaminate and create odor issues.
Build your packout with:
- Absorbent pads or barriers (when appropriate).
- Leak-resistant inner layers.
- A “keep product above meltwater” design.
Step-by-step packout (works for most chilled lanes)
- Pre-chill the shipper if you can.
- Add a leak barrier + absorbent layer to control drips.
- Place refrigerant around the product, not directly on it.
- Add dividers so product does not crush and packs do not shift.
- Close fast: insulation works best when sealed quickly.
| Packout element | Good default | Common mistake | What it means for you |
|---|---|---|---|
| Insulation fit | Tight, no air gaps | Oversized box | Faster warming |
| Refrigerant placement | Around product | Touching product | Texture damage or cold spots |
| Meltwater control | Drain + absorb | Pooling water | Odor, mess, higher risk |
How do you stop temperature spikes during handoffs?
Most losses happen in 20–60 minutes—loading, staging, and delivery—not across the entire trip. Cold chain shellfish storage insulation buys time, but your process decides whether you use that time well.
The 7-minute loading rule
Train your team to follow this sequence:
- Truck is ready first.
- Boxes are sealed and labeled before product leaves the cooler.
- Product comes out last.
- Loading is one continuous push.
Last-mile protection options (choose one)
- Signature required for hot climates and premium/live product.
- Pickup point / locker to reduce porch exposure.
- Delivery window messaging so customers are ready.
- Route planning so perishables are delivered first.
User engagement tool: Cold Chain Shellfish Storage Insulation Score (0–18)
Fill this out for your top lane:
- Route time: 0 (<8h) / 2 (8–24h) / 4 (24–72h) / 6 (>72h)
- Heat exposure: 0 (controlled) / 2 (some staging) / 4 (frequent outdoor/doorstep)
- Water/melt exposure: 0 (dry + drainable) / 2 (sometimes wet) / 4 (pooling/drips)
- Proof of control: 0 (logs) / 2 (occasional) / 4 (no records)
Total: ____ / 18
- 0–5: Stable basics. Improve speed and consistency.
- 6–11: Improve insulation design and meltwater control.
- 12–18: Upgrade insulation, add monitoring, redesign handoffs.
What monitoring proves cold chain shellfish storage insulation worked?
Monitoring should answer one question: can you prove control when it mattered? You do not need advanced devices everywhere, but you do need visibility where decisions change.
The monitoring ladder
- Thermometer checks + logs: receiving, daily cooler check, dispatch check.
- Time-temperature indicators: visual signals for “this got warm too long.”
- Data loggers: audits, high-value shipments, lane validation.
| Monitoring tool | What you capture | Best use | What it means for you |
|---|---|---|---|
| Receiving checks | Temp + condition | Every delivery | Stops bad lots early |
| Data logger | Trend over time | Long/hot lanes | Strong evidence in disputes |
| Photos | Ice, tags, seals | Training + audits | Faster root cause work |
What to do when you find a spike
Decide your rule before it happens:
- Hold for quality check.
- Shorten shelf-life window.
- Segregate and label.
- Investigate root cause (staging, delay, wet insulation).
How do you build a simple SOP for cold chain shellfish storage insulation?
A good SOP is short, visual, and repeatable. It should work on a busy Friday, not only in training.
The 8-step SOP (easy to train)
- Receive cold: verify and log.
- Tag/trace: store required records.
- Zone placement: live vs shucked vs cooked.
- Keep dry: prevent pooling water.
- Daily check: temp verification + remove dead shellfish.
- Pack fast: product leaves cooler last; close boxes immediately.
- Insulation discipline: correct liner placement; no wet insulation.
- Handoff control: define delivery rules for high-risk lanes.
A table your team will actually use
| Step | What to do | What not to do | Why it matters to you |
|---|---|---|---|
| Receive | Temp check + log | “It feels cold” | Prevents silent warm deliveries |
| Store | Zone by product type | Stack randomly | Avoids stress and cross-contact |
| Pack | Seal fast | Leave lids open | Insulation works only when closed |
| Ship | Clear handoff plan | “Leave at door” always | Last mile is the hottest minute |
One rule that saves money: “No shellfish boxes staged outside the cooler more than 10 minutes.” It reduced warm spikes more than changing coolants.
2025 developments and trends in cold chain shellfish storage insulation
In 2025, cold chain shellfish storage insulation is being shaped by three forces: tighter handling discipline, clearer packaging expectations for perishables, and stronger sustainability pressure.
What is changing fastest (and why it helps you)
- More focus on time + temperature discipline during handling, staging, and air cargo steps.
- More “proof-of-control” expectations: logs, corrective actions, and validation become routine.
- Smarter packaging choices: more lane-based insulation and right-sized packouts, not one box for everything.
Market insight (simple and practical)
Customers do not buy “temperature graphs.” They buy confidence: clean presentation, firm texture, and reliable arrival temperature. When you deliver warm or leaking product, you lose trust quickly.
Common questions about cold chain shellfish storage insulation
Q1: What is the safest cold holding temperature for shucked shellfish?
Many workflows target 41°F / 5°C or below and focus on steady control with regular checks.
Q2: Can I store live shellfish in sealed containers?
No. Live shellfish need airflow, and sealing increases stress and mortality risk.
Q3: Why does my insulated box arrive warm even with cold packs?
Common causes are warm staging time, wet insulation losing performance, air gaps, and poor lid sealing.
Q4: Why does “dry inside the box” matter so much?
Water transfers heat quickly and can spread odors and cross-contamination across product.
Q5: Do I need advanced monitoring for every shipment?
No. Start with logs, then use indicators or data loggers on high-risk lanes and premium SKUs.
Q6: What is the fastest, cheapest improvement I can make this week?
Control the handoff minutes: load fast, stage less, and pick a last-mile rule that reduces doorstep time.
Summary and recommendations
Cold chain shellfish storage insulation succeeds when you keep product cold, stable, and dry, then control the short handoff minutes where most spikes occur. Use insulation like a thermos: eliminate gaps, keep it dry, and seal fast. Store live shellfish with airflow and no soaking, and store shucked product colder with clean separation and lot discipline.
Action plan (CTA)
- Pick your top two routes and run the 0–18 score above.
- Standardize one packout per route and enforce the 7-minute loading rule.
- Track complaints/returns for 30 days, then tune insulation and drainage only where the data shows risk.
About Tempk
At Tempk, we help you build cold chain shellfish storage insulation systems you can run every day. We focus on practical insulation design, ice and drainage strategy, and monitoring workflows that create clear proof for customers and auditors.
Next step: Share your product type (live vs shucked vs frozen), typical transit time, and the hottest exposure point on your route. We’ll map a simple packout and monitoring plan you can standardize across lanes.
Temperature-Controlled Express Delivery Tracking 2025
Temperature-Controlled Express Delivery Tracking 2025
If you ship perishables fast, speed alone won’t protect quality. Temperature-controlled express delivery tracking is how you spot risk early, intervene before product warms, and prove what happened after delivery. In 2025, customers and auditors want parcel-level evidence, not guesses. When you use temperature-controlled express delivery tracking, you link temperature, time, and location into one story you can act on.
This guide answers:
- How temperature-controlled express delivery tracking for last mile prevents “silent” temperature damage
- How to choose sensors for real-time temperature monitoring for express parcels without overpaying
- How to create proof-of-temperature delivery for perishable shipments customers accept in minutes
- How to build temperature excursion alerts that trigger action, not alarm fatigue
- What changed in 2025, and how to upgrade your temperature-controlled express delivery tracking workflow
What is temperature-controlled express delivery tracking, really?
Temperature-controlled express delivery tracking is the practice of tracking where a parcel is and how its temperature behaves during fast transport. It is not just a map and it is not just a data file. It is a control loop: detect risk, respond fast, and document outcomes. If you only “record,” you learn after the loss. If you use temperature-controlled express delivery tracking, you can often prevent the loss while it is still fixable.
Tracking works best when everyone shares one simple goal: keep the parcel inside a defined range, and prove it quickly. That range might be chilled (often 2–8°C), frozen (often -18°C or lower), or controlled room temperature (often 15–25°C). Your product spec is the source of truth.
Tracking vs monitoring vs proof-of-temperature delivery
Monitoring is a sensor reading. Tracking connects readings to time and location. Proof packages the story into a report a customer trusts.
| Concept | What it captures | When it helps you | Practical meaning for you |
|---|---|---|---|
| Monitoring | Temperature readings | During or after transit | “Did it warm up?” |
| Tracking | Temp + time + location | During transit | “Where did it warm up?” |
| Proof-of-temperature | Trace + limits + chain-of-custody | After delivery | “Was it compliant?” |
Practical tips you can use today
- For short express lanes: prioritize response speed over ultra-high sampling rates.
- For high-value goods: add chain-of-custody events (handoffs, dwell, delivery attempt).
- For repeat lanes: treat lanes like products—baseline them, then improve them.
Practical case: A meal-kit shipper used temperature-controlled express delivery tracking to reroute delayed parcels to pickup points, cutting claims without slowing delivery.
Which shipments need temperature-controlled express delivery tracking the most?
Not every cold shipment needs the same level of control. Temperature-controlled express delivery tracking matters most when your “temperature budget” is small and your failure cost is high. If a 2–3 hour delay can ruin quality, you need earlier warning and clearer proof.
Prioritize temperature-controlled express delivery tracking when you have one or more of these traits:
- Tight ranges (chilled, frozen, or controlled room temperature)
- High value per box (specialty proteins, premium desserts, biotech samples)
- Zero-tolerance customer experience (melted gelato, soft seafood, spoiled produce)
- Unpredictable last mile (heat waves, apartment access delays, weekend holds)
Quick “Should I track this?” checklist (last mile)
If you answer “yes” to 3 or more, implement temperature-controlled express delivery tracking for last mile.
- Would a 2–3 hour delay create quality risk?
- Would one excursion trigger a refund, chargeback, or quarantine?
- Is the lane exposed to hot vehicles or uncontrolled staging?
- Do handoffs between partners create blind spots?
- Do customers ask for proof-of-temperature delivery?
| Risk signal | What it usually means | What to do first | Practical meaning for you |
|---|---|---|---|
| Tight range + fast spoilage | Small margin for error | Add alerts and rescue options | Fewer surprises |
| Many handoffs | Disputes and “no one knows” | Add chain-of-custody events | Faster claims closure |
| High value per box | Costly replacements | Use higher-grade sensors | Better ROI |
| Unstable last mile | Porch or vehicle exposure | Change delivery method | Less doorstep loss |
Practical tips you can use today
- Start with your top 3 claim lanes, not your whole network.
- Score lanes by dwell time risk, not only distance.
- Add a “safe delivery option” (pickup, signature, timed window) for heat-risk days.
Practical case: A seafood brand used temperature-controlled express delivery tracking to identify hub dwell as the top risk, then changed cutoff times and reduced late deliveries.
How do you design temperature-controlled express delivery tracking from pickup to doorstep?
A strong temperature-controlled express delivery tracking program is not “buy sensors and hope.” It is a simple system with clear decisions. Your goal is a repeatable loop:
Plan → Pack → Track → Alert → Act → Prove
You win when alerts map to actions, and proof maps to customer expectations.
Lane-based design beats “one rule for everything”
Two lanes with the same distance can behave very differently because of pickup cutoffs, hub congestion, vehicle exposure, and missed delivery attempts. With temperature-controlled express delivery tracking, define performance by lane:
- Lane A: same city, 0–12 hours, low dwell
- Lane B: one or two hubs, 12–24 hours, moderate dwell
- Lane C: overnight + weekend risk, high dwell
Operational table: where tracking signals should trigger action
| Stage | Common risk | Tracking signal | Your best action |
|---|---|---|---|
| Pre-pickup | Warm staging | High start temperature | Repack or re-ice before handoff |
| Hub transfer | Dwell spike | No movement + rising trend | Escalate and prioritize processing |
| Out for delivery | Vehicle heat | Rapid warming trend | Reroute to pickup point or earlier delivery |
| Delivery attempt | Missed delivery | Attempt logged + delay | Customer contact + alternate drop option |
| Post-delivery | Claim dispute | Report requested | Provide proof-of-temperature delivery |
Practical tips you can use today
- Capture five “must-have” events: sealed, pickup, hub, out-for-delivery, delivered.
- Use one shipment key (order or tracking number) across systems.
- Treat dwell time as the enemy. Parcels fail when they stop moving.
Practical case: A pharmacy program added an out-for-delivery rule in temperature-controlled express delivery tracking. If the parcel was late on a heat day, the team offered pickup instead of porch delivery.
Which technologies work best for temperature-controlled express delivery tracking?
No single device fits every use case. The best option depends on whether you need rescue in transit or proof after delivery. In temperature-controlled express delivery tracking, you usually choose from four stacks:
- Real-time IoT trackers (cellular / LTE-M / NB-IoT): live alerts and location context
- BLE loggers + gateways: cost-effective near-real-time updates at hubs or vehicles
- NFC/QR “tap-to-read” loggers: low-cost proof at handoff and receiving
- Hybrid model: proof for scale, real-time on exceptions and high-risk lanes
Technology comparison: what it means for you
| Option | Data timing | Typical best use | Practical meaning for you |
|---|---|---|---|
| Real-time IoT | In transit | Rescue, reroute, prevent loss | Higher cost, fewer claims |
| BLE + gateways | Near real time | Networked hubs and fleets | Affordable scale in dense ops |
| NFC/QR logger | After delivery | Proof and audits | Low cost, limited rescue |
| Hybrid model | Mixed | Scale + control | Track smarter, not louder |
Practical tips you can use today
- If you can’t act on an alert, don’t pay for real-time. Use proof first.
- Choose devices that buffer readings during signal gaps.
- Match device cost to shipment value and your intervention window.
- For audit-sensitive goods, many teams target about ±0.5°C sensor accuracy and keep calibration records.
Practical case: A biologics shipper used a hybrid temperature-controlled express delivery tracking approach: proof loggers on most lanes, real-time trackers during seasonal extremes and VIP customers.
How do you set temperature excursion alerts in temperature-controlled express delivery tracking?
Bad alerts create alarm fatigue. Good alerts feel like a teammate who only interrupts you for real emergencies. For temperature-controlled express delivery tracking, alerts should be:
- Lane-aware: different rules for different routes and seasons
- Trend-based: rate of warming matters, not only peak temperature
- Time-based: “time out of range” beats single spikes
- Action-mapped: each alert has one owner and one next step
The simplest alert structure that works
Keep three levels consistent across teams:
- Level 1: Watch — trend is risky, but still recoverable
- Level 2: Act — risk is likely, trigger an operational action
- Level 3: Fail — excursion confirmed, trigger customer and QA workflow
A simple, easy-to-explain rule is time outside range:
- Watch: 10–15 minutes outside range
- Act: 20–30 minutes outside range
- Fail: 45–60 minutes outside range
Your product and packaging define the numbers. Temperature-controlled express delivery tracking defines the discipline.
Alert escalation ladder template
| Trigger | Example rule | Who owns it | What you do next |
|---|---|---|---|
| Watch | Near limit for 10–15 min | Dispatcher | Check ETA, change delivery method |
| Act | Out of range for 20–30 min | Ops lead | Intercept, reroute, cold hold |
| Fail | Out of range for 45–60 min | QA + CS | Quarantine, reship, document |
| Data gap | No readings for 15 min | Ops support | Verify device, log the gap |
Decision tool: What level of temperature-controlled express delivery tracking do you need?
Score your shipment. Add points and follow the recommendation.
Step 1: Add points
- Product sensitivity
- Frozen dessert, seafood, biologics: +3
- Chilled foods, dairy, specialty produce: +2
- Ambient-sensitive (chocolate, supplements): +1
- Value per shipment
- Over $300: +3
- $100–$300: +2
- Under $100: +1
- Lane variability
- Multi-hub, weekend risk, last-mile delays: +3
- Some variability: +2
- Stable same-day routes: +1
- Customer requirements
- Proof-of-temperature required: +3
- Complaints/claims are frequent: +2
- Low complaint sensitivity: +1
Step 2: Choose your setup
- 4–6 points: Proof logger + lane baseline
- 7–9 points: Hybrid temperature-controlled express delivery tracking
- 10–12 points: Real-time temperature-controlled express delivery tracking + rescue playbooks

Practical tips you can use today
- Tune rules monthly using outcomes: claims, complaints, and QA decisions.
- Route alerts only to people who can act within 30 minutes.
- Track “false alarms” as a KPI. Reduce noise without increasing risk.
Practical case: A gelato seller used “Act” alerts in temperature-controlled express delivery tracking to trigger pickup-point reroutes, improving reviews and lowering refunds.
How do you prove compliance with temperature-controlled express delivery tracking data?
Proof is not just a chart. It’s a story that a customer, auditor, or quality team can trust. With temperature-controlled express delivery tracking, your proof package should show:
- Product target range and pass/fail rule
- Time–temperature trace (or excursion windows)
- Key events (sealed, pickup, hubs, out-for-delivery, delivered)
- Excursion summary (duration, peak, recovery)
- Chain-of-custody notes (handoffs and responsibility)
Standards and guidance you can reference in SOPs (no external links)
Use these names in your QA docs and customer discussions. They help signal E-E-A-T without adding external links.
- ISO 23412:2020 — temperature-controlled parcel delivery with intermediate transfers
- WHO guidance — temperature monitoring discipline and definitions (including “temperature excursion”)
- GDP expectations (EU / PIC/S style) — documented evidence, deviations, and risk assessment
- GS1 EPCIS 2.0 — event-based traceability that can include sensor condition data
- IATA ONE Record — standardized data sharing concepts for multi-party logistics
One-page proof-of-temperature delivery report template
Put this on page one. Make it readable for non-technical reviewers.
- Shipment ID + lane + service level
- Target range + pass/fail rule
- Simple timeline (sealed → pickup → hubs → delivered)
- Temperature summary (min/max, time out of range, result)
- Conclusion: Pass / Fail / QA Review Required
Then attach deeper evidence (full trace and event log) for audits.
Chain-of-custody tracking makes proof stronger
Disputes rise when parcels change hands. Add chain-of-custody events to your temperature-controlled express delivery tracking workflow:
- Pickup time + start temperature
- Hub arrival/departure times
- Out-for-delivery time
- Delivery time + recipient confirmation or safe-drop method
Practical tips you can use today
- Use consistent time zones in reports (UTC inside, local for humans).
- Keep raw data immutable after delivery. Version control summaries.
- Use the same report template for every lane. Consistency wins claims.
Practical case: A medical distributor reduced chargebacks by attaching proof-of-temperature delivery from temperature-controlled express delivery tracking reports to every dispute.
How do you improve lanes and packaging with temperature-controlled express delivery tracking?
Tracking should change how you pack and how you run lanes. Otherwise, temperature-controlled express delivery tracking becomes an expensive dashboard. Use your data to answer:
- Which lane overheats most often, and where?
- How long is typical dwell time by hub?
- Do excursions happen early, mid-route, or last mile?
- Is the root cause process, packaging, or delivery method?
Packaging optimization loop (simple and repeatable)
- Baseline a lane with temperature-controlled express delivery tracking for 2–4 weeks.
- Identify the top failure mode (dwell, vehicle heat, missed delivery).
- Change one variable (coolant mass, insulation fit, pack layout, cutoff time).
- Retest and compare pass rates and complaint rates.
| Tracking insight | Likely root cause | Best change to test | Meaning for you |
|---|---|---|---|
| High start temperature | Warm staging | Pre-chill SOP + verification | Better first-mile stability |
| Rapid warming trend | Poor insulation fit | Reduce voids / upgrade insulation | Slower temperature rise |
| Late last-mile spikes | Vehicle or porch exposure | Add buffer coolant or pickup option | More delivery tolerance |
| Repeat failures on one lane | Long hub dwell | Shift cutoff / change carrier node | Fewer consistent losses |
Self-test: Are you ready to scale temperature-controlled express delivery tracking?
Score each statement 0 (no), 1 (partly), 2 (yes). Total: 20.
- We have written temperature specs for every product lane.
- Pack-out is standardized and audited.
- Device pairing is scan-based, not manual.
- Alerts reach people who can act within 30 minutes.
- We have “save vs replace” rules that everyone follows.
- We can produce a one-page proof report in minutes.
- We store device settings and calibration evidence.
- We review trends monthly and run corrective and preventive actions (CAPA) for repeat issues.
- Customer service has a simple, consistent script.
- We re-test lanes when hubs or service levels change.
What your score means
- 0–8: Start with packaging + proof. Build discipline before live alerts.
- 9–15: Scale operational tracking on key lanes.
- 16–20: Scale temperature-controlled express delivery tracking across products.
Practical tips you can use today
- Keep “bad runs.” Failures teach you what to change.
- Separate exceptions into three buckets: temperature event, data event, delay event.
- Fix transfers and last mile first. That’s where many excursions start.
Practical case: A seafood shipper used temperature-controlled express delivery tracking to prove porch exposure caused most failures, then moved summer deliveries to signature or pickup.
2025 temperature-controlled express delivery tracking trends
In 2025, the big shift is from “tracking as a report” to temperature-controlled express delivery tracking as a workflow. Express delivery is too fast for manual chasing. Teams want decisions to trigger automatically, with clean evidence ready for customers.
Latest progress you’ll see in 2025
- Predictive risk scoring: systems flag high-risk parcels before excursions occur.
- Lane-based automation: alert thresholds adjust by lane and season.
- Customer-facing proof: shorter, clearer proof reports reduce disputes and churn.
- Lower-power devices: longer runtimes support multi-day lanes without bulky hardware.
- Event + condition timelines: temperature is attached to scan events for faster investigations.
Market insight you can use
Buyers are choosing partners who can show measurable outcomes: fewer excursions, audit-ready proof, and repeatable lane improvements. In many categories, temperature-controlled express delivery tracking is no longer a “nice add-on.” It is a competitive requirement.
Frequently Asked Questions
Q1: Is temperature-controlled express delivery tracking only for pharma?
No. It also helps seafood, meal kits, dairy, premium desserts, and biotech samples. Start with your riskiest lanes.
Q2: What’s the minimum setup for temperature-controlled express delivery tracking?
Define the target range, use proof loggers on key lanes, and standardize a simple pass/fail proof report.
Q3: How often should sensors record temperature in express shipping?
Record faster when you need to catch short handoff spikes. Record slower when you mainly need proof at delivery.
Q4: How do I reduce false alarms in temperature-controlled express delivery tracking?
Use time-out-of-range rules, trend alerts, and lane-specific thresholds instead of reacting to single spikes.
Q5: What should customers see in a proof-of-temperature delivery report?
A one-page pass/fail summary, key timestamps, and a simple temperature trace with clear limits.
Q6: Can temperature-controlled express delivery tracking help me use less packaging?
Yes. Once lanes are stable, data often shows where coolant or insulation can be optimized safely.
Summary and recommendations
Temperature-controlled express delivery tracking helps you keep express speed without sacrificing product safety. The strongest programs combine lane-based design, the right device tier, clear alert rules, and fast response playbooks. They also generate simple proof-of-temperature delivery reports that customers understand.
Your next steps (simple plan)
- Pick your top 3 risky lanes and baseline them for 2–4 weeks.
- Choose a tracking tier: proof, hybrid, or real-time temperature-controlled express delivery tracking.
- Create Watch / Act / Fail alerts, and assign owners and actions.
- Standardize a one-page proof report for every high-value shipment.
- Use insights to fix the top failure mode per lane (dwell, vehicle heat, missed delivery).
About Tempk
Tempk supports temperature-sensitive shippers with practical cold-chain packaging and tracking workflows designed for real operations. We focus on lane-based design, actionable alerts, and clear proof-of-temperature delivery—so you reduce excursions, improve last-mile performance, and handle claims faster.
Call to action: If you want to implement temperature-controlled express delivery tracking on your highest-risk lanes, share your temperature range, lane map, and delivery method. We can help you build a pilot plan with clear metrics and playbooks.
International Refrigerated Express Delivery 2025

International Refrigerated Express Delivery in 2025?
International refrigerated express delivery is the fastest way to move temperature-sensitive goods across borders while staying inside a defined temperature band (like 2–8°C, 15–25°C, or dry ice −80°C). The catch: “express” compresses your decision window, but it does not remove delays at airports, customs, and last-mile. Updated December 22, 2025.
This article will help you answer:
- How to make international refrigerated express delivery repeatable, not stressful
- Which temperature band to book (2–8°C, 15–25°C, frozen, dry ice)
- How to choose packaging (insulation + coolant vs powered control)
- How to prevent customs delays from breaking temperature control
- How to ship dry ice legally with UN1845 + Air Waybill entries
- How to use lane scoring + monitoring + ROI tools to control cost

What makes international refrigerated express delivery truly safe?
International refrigerated express delivery is only “safe” when your packaging and process can hold temperature through delays. Speed helps, but dwell time at hubs and customs can still break your cold chain. Think of it like taking ice cream home: driving fast matters, but leaving it on the counter ruins it.
A reliable setup has three layers: thermal design, operational control, and proof. That combination is what turns international refrigerated express delivery into a system.
International refrigerated express delivery is not one continuous ride. It’s a chain of pauses: staging, pickup, export handling, flight transfer, import handling, and last-mile. If you design for “flight time only,” you design for failure.
| Risk point in transit | What typically goes wrong | What you should do | What it means for you |
|---|---|---|---|
| Origin staging | Shipment sits before pickup | Set a strict pack-out → pickup window | Less early temperature drift |
| Airport export | Waiting for screening/build | Add buffer hours in design | Fewer surprise warm excursions |
| Customs/import | Clearance delays | Clear docs + compliant labeling | Faster release, fewer holds |
| Last-mile | Route variance | Design for worst last-mile | More consistent delivery outcomes |
Practical tips you can use today
- Two-airport routes: design for extra buffer time, not published flight time.
- Unpredictable clearance: treat customs like a “mini-warehouse” in your thermal design.
- High-value goods: add monitoring so you can prove performance, not guess.
Real case: A chilled seafood shipper reduced claims by switching from tight pack-out timing to a buffer design that tolerated delay, making international refrigerated express delivery repeatable.
Which temperature band should you book for international refrigerated express delivery?
Book the temperature band that matches your product’s labeled tolerance—then engineer around worst-case dwell. Common bands include 2–8°C, 15–25°C, frozen (−15 to −25°C or colder), and dry ice (−80°C class). If you choose the wrong band, packaging rarely saves you.
Many teams try to ship “colder than needed” to feel safe. That can backfire, because over-cooling can damage chilled goods and create cold spots. For international refrigerated express delivery, stability is often more important than extreme cold.
International refrigerated express delivery temperature map
| Product type | Common booking band | Typical cold source | Practical meaning for you |
|---|---|---|---|
| Many biologics / vaccines | 2–8°C | PCM/gel or qualified shipper | Stable cold chain is non-negotiable |
| Many diagnostics / tablets | 15–25°C | Controlled ambient pack | Protect from heat and freezing ramps |
| Frozen class | −15 to −25°C or colder | Frozen PCM / active container | Plan for replenishment risk |
| Ultra-cold | Dry ice (−80°C) | Dry ice + compliant labeling | Dangerous goods rules apply |
How do you avoid accidental freezing in chilled international refrigerated express delivery?
Accidental freezing usually happens when strong refrigerants meet tight insulation—especially with direct contact layouts. Your simplest fix is spacing: separate refrigerant from product with a divider or buffer layer.
| Chilled shipping mistake | What it causes | Better move | Your benefit |
|---|---|---|---|
| Overpowered refrigerant | Frozen edges | Gentler cooling or buffer | Better arrival quality |
| No separation layer | Cold spots | Add spacing + liners | More stable internal temps |
| No lane test | Surprises at scale | Pilot worst lane first | Fewer claims later |
Practical tips and suggestions
- If your product is chill-sensitive, prioritize stable cold over “as cold as possible.”
- If your product is heat-sensitive, design for the hottest handoff points, not the average.
- If you ship mixed SKUs, don’t force one configuration—segment by tolerance.
Real case: A dessert brand improved texture consistency by adding a spacer and changing layout—international refrigerated express delivery stayed cold without over-freezing corners.
What packaging works best for international refrigerated express delivery?
The best international refrigerated express delivery packaging matches your lane time, temperature band, and handling stress. You’re balancing insulation power, coolant sizing, box strength, weight efficiency, and sustainability. Predictable beats “cheap vs premium” in 2025.
Start with insulation family selection. Common options include EPS-style foam, tougher EPP-style foam, and VIP hybrid designs for long lanes and tight targets. For some lanes, you also decide between passive (insulation + coolant) and active (powered control).
Insulation choices that fit express shipping realities
| Packaging type | Strength & handling | Insulation power | Best use in your lane |
|---|---|---|---|
| Standard foam shipper | Basic | Medium | Short express lanes |
| Durable foam (reusable-grade) | High | Medium–high | High-risk handling routes |
| VIP hybrid shipper | Medium | Very high | Long lanes, tight temperature targets |
Passive vs active packaging for international refrigerated express delivery
| Packaging approach | Best for | Weakness | Practical meaning for you |
|---|---|---|---|
| Passive parcel shipper | Small, urgent parcels | Depends on ambient | Great for true express lanes |
| Pre-conditioned programs | Repeat lanes | Needs discipline | Faster packing, fewer errors |
| Active containers | High value, volatile lanes | Cost + assets | Strongest stability, highest cost |
The “2-Minute Packaging Fit Test” (interactive)
Fill this out for one lane:
- Total door-to-door time: ______ hours
- Customs/airport dwell risk: Low / Medium / High
- Ambient extremes (winter ramp / summer heat): Low / Medium / High
- Product tolerance: Tight / Medium / Wide
- Failure cost per shipment: $______
Decision rule: If dwell risk or ambient extremes are High, move up spec (higher-performance passive or active). If tolerance is Tight, avoid “generic insulation.”
Practical tips and suggestions
- If boxes get crushed, upgrade strength before adding more coolant.
- If the lane is long, upgrade insulation first, then optimize coolant weight.
- Standardize pack-out so two operators pack the same way every time.
Real case: A clinical shipper reduced rework by switching from custom packs to a standardized passive pack-out plus pre-conditioning.
How do you plan lanes for international refrigerated express delivery without guessing?
Lane planning is your biggest lever in international refrigerated express delivery. Treating every destination the same makes you overpay on easy lanes and fail on hard ones. A lane score lets you segment packaging, monitoring, and SOP strictness.
Use a lane scorecard: best-case and worst-case time, number of handoffs, customs risk, last-mile variability, and seasonal exposure. Then choose configurations based on risk, not habit.
The 5-minute lane scoring tool (interactive)
Add points and total 0–10.
- Transit time risk (0–3): under 24h (0) … over 72h/unpredictable (3)
- Handoff count (0–2): one hub (0) … three+ hubs (2)
- Customs risk (0–3): fast clearance (0) … unpredictable demands (3)
- Last-mile risk (0–2): direct (0) … remote/high variance (2)
Interpretation:
- 0–3: standard packaging may work
- 4–7: add buffer + stronger monitoring
- 8–10: design for delays, upgrade insulation, enforce SOP discipline
| Lane score | What to change | What to standardize | What it means for you |
|---|---|---|---|
| 0–3 | Right-size packaging | Basic checklist | Lower cost, still in-range |
| 4–7 | Add buffer hours | Monitoring on key lanes | Fewer temperature surprises |
| 8–10 | Upgrade insulation + escalation rules | Strict SOP + proof pack | Fewer failures on hard lanes |
Practical tips and suggestions
- If your lane score is 8+, don’t hope express saves you—design for worst-case.
- If risk changes by season, build summer and winter configurations.
- If you add a new country, pilot first, then scale.
How do you avoid customs delays in international refrigerated express delivery?
In international refrigerated express delivery, compliance is not a paperwork tax—it’s a speed tool. Focus on clear product description, temperature handling statements when appropriate, packaging description, consignee contacts, and consistent labels.
Borders are where “express” often fails. A simple mindset shift helps: customs is a temperature event, not an admin task. Decide responsibilities early using Incoterms (who provides docs, who clears, who pays).
Labeling that reduces delays in international refrigerated express delivery
Customs and handlers move faster when they instantly know what it is, whether it’s safe, and how to handle it. Use consistent labels like “Temperature-sensitive shipment,” “Keep refrigerated/frozen,” and “Do not stack” when needed.
| Documentation weakness | What happens | Fix | Your benefit |
|---|---|---|---|
| Vague description | Extra inspection | Clear product terms | Faster clearance |
| Missing contacts | Delayed resolution | Add phone/email | Faster problem-solving |
| Inconsistent labels | Mishandling | Standardize label set | Fewer excursions |
Customs pre-clearance checklist for international refrigerated express delivery
| Item | Why it matters | Owner | Practical meaning |
|---|---|---|---|
| Commercial invoice + HS codes | Clearance speed | Shipper | Fewer random holds |
| Import permits (if required) | Legal entry | Consignee | Prevents seizure |
| Temperature handling note | Warehouse routing | Shipper + carrier | Keeps shipment in cold area |
| Incoterms agreement | Defines who clears | Buyer + seller | Avoids “who pays” delays |
| Weekend/holiday plan | Dwell risk | Both | Protects shelf-life |
Practical tips and suggestions
- New lane? Run a “paperwork test shipment” with a low-value pack first.
- Regulated goods? Request pre-clearance and cold storage at entry when possible.
- Frequent shipping? Lock a reusable document packet template.
Real case: A biotech team cut delays by standardizing Incoterms and sending import docs 24 hours before pickup.
What compliance standards matter for international refrigerated express delivery?
If you ship pharmaceuticals or clinical goods, international refrigerated express delivery must be auditable—not just fast. In air cargo, IATA’s Temperature Control Regulations (TCR) define handling expectations. The Time and Temperature Sensitive Label is stated as mandatory (not optional) for booked temperature-sensitive healthcare cargo, and it shows the transportation temperature range.
WHO guidance on temperature-sensitive pharmaceutical products reinforces the same idea: monitoring, SOPs, and documented control reduce quality loss. You don’t need to overcomplicate it—you need repeatable proof.
International refrigerated express delivery standards map
| Standard / program | What it controls | What you need to show | Practical meaning for you |
|---|---|---|---|
| GDP guidelines | Storage + distribution quality | Documented system + training | Better audit readiness |
| WHO TTSPP guidance | Monitoring, alarms, SOPs | Records + calibrated monitoring | “Proof” culture, fewer surprises |
| IATA TCR | Air cargo handling | Correct label + acceptance checks | Fewer mishandled handoffs |
| IATA CEIV Pharma | Certified pharma handling | Audited facilities + processes | Easier partner qualification |
Practical tips and suggestions
- Build a one-page shipment proof pack (label, temperature record, handoff events).
- Insist the booked temperature range is visible and consistent at handoffs.
Real case: A shipper passed an audit faster by showing label compliance plus monitoring records and SOP alignment.
How do you ship dry ice legally in international refrigerated express delivery?
Dry ice is powerful for international refrigerated express delivery, but it triggers dangerous goods rules. A key requirement: the Air Waybill “Nature and Quantity of Goods” should include UN1845, “Dry ice” (or “Carbon dioxide, solid”), number of packages, and net kg of dry ice.
Dry ice also requires safe packaging design. Your package must allow CO₂ gas to vent, and you should not fully seal it. Treat paperwork as part of the packaging, because missing entries can mean airport rejection.
Dry ice step-by-step for international refrigerated express delivery
- Confirm classification: dry ice is UN1845 (check if other DG apply).
- Use venting packaging: never fully seal; gas must escape.
- Mark and label correctly: include Class 9 markings as required.
- Complete AWB entries: UN1845 + “Dry ice” + package count + net kg.
- Plan replenishment when needed on longer lanes.
| Dry ice risk | What causes it | Your control | Practical meaning |
|---|---|---|---|
| Pressure hazard | Sealed packaging | Venting design | Prevents rupture events |
| Clearance delay | Missing AWB info | Pre-check checklist | Less time sitting warm |
| Quantity mismatch | Wrong weight entry | Weigh and record | Avoids rework at acceptance |
Practical tips and suggestions
- Don’t rely on “extra dry ice” alone—build a delay plan.
- Standardize a dry ice checklist at pack-out, not at pickup.
Real case: A clinical team stopped airport rejections by adding a dry ice acceptance checklist and verifying AWB entries before pickup.
How do you monitor international refrigerated express delivery without adding complexity?
Monitoring works only when it triggers action. Start simple: use indicators for low-risk lanes, loggers for high-value shipments, and escalation rules for critical goods. The goal in 2025 is not to collect data—it’s to catch exceptions early and improve lanes over time.
A practical rule is the 3S method: Start (confirm initial condition), See (make exceptions visible), Solve (define what you do next). This keeps international refrigerated express delivery proof-based instead of hope-based.
Monitoring options for international refrigerated express delivery
| Monitoring level | Best for | Operational burden | What it gives you |
|---|---|---|---|
| Basic indicator | Low-risk lanes | Low | Quick pass/fail signal |
| Full logger | High-value shipments | Medium | Proof + lane optimization |
| Logger + alerts | Critical shipments | Higher | Faster intervention |
The “Evidence Pack” you can standardize (template)
Keep it lightweight and repeatable:
- Shipment ID + lot ID (if applicable)
- Booked temperature range (label range)
- Temperature trace summary (min/max + excursion minutes)
- Handoff timeline (picked up → delivered)
- Corrective actions taken (if excursions occurred)
Practical tips and suggestions
- High value? Use full logging to protect revenue and reputation.
- High volume? Use indicators broadly and log selectively by lane.
- No one reviews data? Simplify—unused data is wasted cost.
How do you control cost in international refrigerated express delivery?
Cost control comes from standardization and lane segmentation. If you change packaging every time, you pay more and learn less. Focus on the real cost drivers: volumetric weight, coolant weight, premium insulation, re-shipments, and pack-out labor.
A simple budgeting upgrade is to price “success,” not just freight. Compare the added express cost against failure reduction using a lane-level calculator.
The “Cost-per-Successful-Delivery” calculator (interactive)
Fill these in for one lane:
- Shipment value: $________
- Failure cost (rework + refund + delay): $________
- Current failure rate: ________%
- Target failure rate after improvements: ________%
- Monthly shipments: ________
- Added cost per express shipment: $________
Monthly savings = shipments × (failure rate reduction) × failure cost
Monthly added cost = shipments × added cost per shipment
Cost-saving moves that don’t increase risk
- Upgrade insulation to reduce coolant weight (when possible).
- Standardize 2–3 pack sizes instead of 10.
- Build lane rules so staff select the right configuration fast.
- Reduce pack-out time with a simple checklist.
| Cost driver | Typical mistake | Better approach | Your win |
|---|---|---|---|
| Volumetric weight | Oversized boxes | Right-size shippers | Lower freight spend |
| Coolant weight | “Just in case” adding | Lane-based dosing | Predictable costs |
| Labor | No SOP | Simple pack checklist | Faster, fewer errors |
How do you choose providers for international refrigerated express delivery?
International refrigerated express delivery providers typically fall into three types: integrators, specialty healthcare couriers, and forwarder-plus-airline solutions. The right choice depends on shipment size, temperature band, and how much control you need at handoffs.
Use this as a quick fit table:
| Provider type | Best for | What you must manage | Practical meaning for you |
|---|---|---|---|
| Express integrator | Small parcels, time-definite lanes | Correct booking + packaging | Fast workflow if docs are right |
| Specialty healthcare courier | Tight tolerance, clinical goods | Qualification + SOP alignment | More escalation control |
| Forwarder + airline | Larger freight, palletized loads | More handoffs | Strong for ULD/pallet workflows |
2025 trends in international refrigerated express delivery
In 2025, shippers are treating international refrigerated express delivery like a product experience. Customers judge you on arrival condition consistency, not just speed. Three trends stand out:
- Smarter lane segmentation: different packaging by route risk, not habit
- Proof-focused shipping: monitoring used to improve lanes, not just record failures
- Packaging efficiency pressure: dimensional optimization without losing stability
Latest developments at a glance
- Lane-based SOPs (“golden pack-outs”) are becoming standard.
- Exception management is tightening with clear actions for delays.
- Demand is rising for sustainable options without performance loss.
Self-check: Is your international refrigerated express delivery setup ready?
Answer “yes” or “no.” If you get 3+ “no,” you have a clear upgrade path.
- Do you have a lane list with best-case and worst-case transit time?
- Do you use at least two packaging configurations (easy vs hard lanes)?
- Do you separate refrigerant from product to avoid cold spots?
- Do you have a pack-out checklist new staff can follow?
- Do you track exceptions and fix root cause (not just resend)?
Quick interpretation: 0–2 “no” = optimize; 3–4 “no” = standardize now; 5 “no” = redesign before scaling.
FAQ
1) How long can international refrigerated express delivery stay cold?
Design for worst-case time including customs holds, not advertised transit time. Add buffer and validate on your hardest lane.
2) Should I always choose the coldest option to be safe?
No. Over-cooling can damage chilled goods. Match the temperature band to product tolerance and prevent direct coolant contact.
3) What’s the biggest mistake in international refrigerated express delivery?
Treating every destination the same. Lane segmentation reduces both failure risk and cost creep.
4) What must be listed on the Air Waybill for UN1845 dry ice?
Include UN1845, “Dry ice” (or “Carbon dioxide, solid”), package count, and net kg of dry ice.
5) What is the simplest way to reduce customs delays?
Use clear product descriptions, consistent labels, destination contacts, and a pre-clearance packet.
6) Do I really need temperature monitoring?
If the product is high value or claims are painful, yes. Use monitoring to catch exceptions and improve lanes over time.
Summary and recommendations
International refrigerated express delivery succeeds when you treat it as a controlled system: correct temperature band, packaging designed for delays, customs pre-clearance, and proof-based monitoring. Your highest-leverage moves are lane scoring, standard pack-outs, and a simple escalation playbook.
Action plan (CTA): Pick one high-value lane and run a 30-day pilot. Build a lane playbook (docs + pack-out + monitoring + escalation), then scale only after you can explain delay behavior on one page.
About Tempk
At Tempk, we help teams make international refrigerated express delivery repeatable. We focus on practical packaging design, temperature band selection, pack-out discipline, and monitoring workflows that create clear evidence—so shipments arrive in spec and stay audit-ready.
Call to action: Share your product temperature range, lane duration, and destination country pair. We’ll outline a lane playbook (packaging + documents + monitoring + contingency) you can run immediately.
Temperature-Controlled Creamery Best Packaging Canada
Temperature-Controlled Creamery Best Packaging Canada?
Temperature-controlled creamery best packaging Canada is not one “magic box.” It is a repeatable system that keeps chilled dairy near ≤4°C and frozen desserts near ≤-18°C, while stopping leaks, crush, and label loss. If you ship in Canada, your biggest enemies are time, temperature swings, and moisture. This guide gives you a lane-based packing method you can train fast and scale safely.
Last updated: December 22, 2025
This guide will help you:
Choose temperature-controlled creamery best packaging Canada by lane risk (time, handoffs, season, last-mile exposure)
Set teachable targets for Canada dairy cold chain temperature 4°C and frozen dessert shipping Canada -18°C
Build a 6-layer packout that reduces “wet box,” odor pickup, and warm-arrival disputes
Use a 90-second decision tool and a 6-minute self-audit to standardize daily packing
Protect bilingual dairy label requirements Canada with moisture-ready label habits
Validate and monitor temperature-controlled creamery best packaging Canada without drowning in paperwork
Temperature-Controlled Creamery Best Packaging Canada: What does it really mean?
Temperature-controlled creamery best packaging Canada means you protect a cold start through real transit. Packaging does not “make” cold. It slows change, like a thermos protects heat. Your process matters just as much as your materials.
Think of it as three promises you make to the receiver:
Temperature promise: chilled stays chilled; frozen stays frozen
Clean promise: leaks and meltwater do not contaminate the box
Identity promise: labels, lot codes, and storage cues stay readable
The “thermos + raincoat + helmet” model
Thermos: insulation reduces heat flow
Raincoat: liners + absorbents manage moisture and leaks
Helmet: structure + immobilization prevents crush and shifting
| Packout goal | What causes failure | What fixes it | What it means for you |
|---|---|---|---|
| Stable temperature | Air gaps + long dwell | Right-size + stronger insulation | Fewer “arrived warm” claims |
| Dry, clean box | Condensation + leaks | Barrier liner + absorbent zones | Less odor, fewer rejects |
| Surviving labels | Wet cartons | Moisture-ready labels + protected placement | Faster QA decisions |
Practical tips and suggestions
Build one “no warm staging” rule: if it sits out, it gets re-checked before it ships.
Treat leaks as a reject signal: leaks quickly become odor + label loss + disputes.
Make packing repeatable: the best system is the one your team can execute every day.
Practical example: A small gelato brand cut complaints after enforcing a strict staging timer and adding a sealed inner barrier in every shipper.
Temperature-Controlled Creamery Best Packaging Canada: What temperature targets should you design for?
Your temperature-controlled creamery best packaging Canada plan should separate chilled and frozen workflows. Mixing rules creates mistakes. Use targets your team can remember and act on quickly.
A simple operating map:
Chilled dairy (milk, cream, yogurt, many cheeses): design for ≤4°C
Frozen desserts (ice cream, gelato, frozen dairy): design for ≤-18°C (or your product spec)
Product-based targets you can actually operate
| Creamery product | Practical target | Biggest risk | What it means for you |
|---|---|---|---|
| Milk, cream, yogurt | ≤4°C | Warm drift + quality loss | More shelf life, fewer returns |
| Soft cheeses | ≤4°C | Sweating + odor pickup | Moisture control matters more |
| Butter | Cool/chilled | Odor pickup + scuffing | Use low-odor barriers + snug fit |
| Ice cream / gelato | ≤-18°C | Thaw/refreeze texture damage | Strong insulation + strict last-mile SOP |
Practical tips and suggestions
Use “time + temperature” thinking: minutes matter at the dock and doorstep.
In winter, protect chilled dairy from freezing: “too cold” can be a quality failure.
Keep rules short: one target + one action line beats ten confusing rules.
Practical example: A creamery improved consistency by creating two packouts: one for chilled (≤4°C) and one for frozen (≤-18°C), each with a single photo SOP.
Temperature-Controlled Creamery Best Packaging Canada: The 6-layer packout blueprint
The most reliable temperature-controlled creamery best packaging Canada approach is layered. Each layer solves a different failure mode. When you skip a layer, you usually pay later in refunds.
The 6 layers (copy-and-train)
Primary container: sealed tub/carton/pouch
Secondary sealed barrier: bag or inner liner for leaks and odor
Absorbent layer: placed in leak zones (bottom + corners)
Coolant layer: gel packs, PCM, or dry ice (when appropriate)
Insulation layer: EPS/EPP/PU/VIP depending on lane risk
Outer shipper + closure: strong corrugate + tamper evidence
H3: Common layer mistakes (and the simple fix)
| Layer | Common mistake | Fix | What it means for you |
|---|---|---|---|
| Secondary barrier | “It never leaks” thinking | Use it for all liquids | Fewer wet cartons |
| Absorbent | Skipping on chilled lanes | Put pads in corners + base | Cleaner receiving |
| Coolant placement | Coolant touching product | Add spacers/buffers | Less freeze damage |
| Insulation fit | Oversized shipper | Right-size + inserts | More stability, less cost |
Practical tips and suggestions
Right-size first: extra air warms faster than you think.
Use spacers: keep very cold surfaces off chilled dairy containers.
Seal fast: open-lid time is a silent temperature killer.
Practical example: A dairy subscription program reduced “leaked in box” incidents by adding a secondary barrier and a rigid base insert—without adding more coolant.
Temperature-Controlled Creamery Best Packaging Canada: How do you choose insulation by lane risk?
Temperature-controlled creamery best packaging Canada works best when insulation matches your worst stop, not your average stop. One hot doorstep or one long transfer can break the shipment.
Tier system you can standardize (simple and scalable)
Tier 1 (low risk): short routes, controlled handoff
Tier 2 (medium risk): regional, multi-stop, moderate dwell risk
Tier 3 (high risk): long lanes, interprovincial, unknown dwell, seasonal extremes
| Tier | Best use case | Insulation level | What it means for you |
|---|---|---|---|
| Tier 1 | same-city, direct | baseline insulation | low cost, high discipline |
| Tier 2 | regional + transfers | higher insulation | fewer swings, fewer disputes |
| Tier 3 | long + uncertain | highest insulation (often premium) | protects highest-risk revenue |
Practical tips and suggestions
Protect the lid interface: heat leaks often happen at closures.
Build two seasonal packouts: summer and winter is a strong start.
Avoid “one pack fits all Canada”: Canada lanes vary too much.
Practical example: A creamery improved frozen stability by upgrading lid sealing and reducing headspace, without changing coolant weight.
Temperature-Controlled Creamery Best Packaging Canada: How do you pick the right coolant (gel, PCM, dry ice)?
Coolant choice decides whether temperature-controlled creamery best packaging Canada is “okay” or “repeatable.” Your goal is stability, not drama.
Quick coolant guidance
Gel packs: simple, strong early cooling, common daily choice
PCM packs: steadier temperature band (great when you need stable chilled control)
Dry ice: powerful for frozen lanes, but needs venting and trained handling
H3: Coolant comparison (daily decision table)
| Coolant | Best for | Strength | Risk | What it means for you |
|---|---|---|---|---|
| Gel packs | chilled short–medium | simple | condensation | easiest standard recipe |
| PCM packs | chilled stability | fewer swings | higher cost | more repeatable results |
| Ice | short chilled holds | cheap | meltwater | needs containment discipline |
| Dry ice | frozen long lanes | strong freezing power | safety + carrier rules | best for long frozen routes |
Practical tips and suggestions
Contain anything that melts: meltwater ruins cartons and labels.
Avoid overcooling in winter: chilled dairy can suffer freeze damage.
Standardize pack counts: consistency beats improvisation.
Practical example: A frozen dessert brand improved reliability by fixing dry-ice weight per box size and tightening delivery windows on hot days.
Temperature-Controlled Creamery Best Packaging Canada: Moisture, leaks, and “wet cartons”
Moisture is the hidden failure mode in temperature-controlled creamery best packaging Canada. Even when temperature is fine, a wet box triggers rejects, odor, and label loss.
H3: Moisture-control stack (simple and effective)
Secondary containment: sealed product + sealed inner barrier
Barrier liner: stops moisture from weakening corrugate
Absorbent zones: bottom + corners, where leaks pool
Dry-out rule: never store returned packaging closed while wet
| Moisture problem | What causes it | Packaging fix | What it means for you |
|---|---|---|---|
| Wet base | leak + meltwater | absorbent base + barrier | fewer rejections |
| Odor pickup | leaked dairy | sealed inner barrier | cleaner customer experience |
| Smeared labels | condensation | moisture-ready label stock | traceability stays intact |
Practical tips and suggestions
For liquids, double-contain every time.
Put absorbent where gravity wins: base and corners.
Add a “keep sealed briefly” receiving note: it can reduce condensation shock.
Practical example: A creamery reduced soggy cartons by adding a sealed inner liner and one absorbent pad—no extra coolant added.
Temperature-Controlled Creamery Best Packaging Canada: Labels, bilingual rules, and traceability
Temperature-controlled creamery best packaging Canada must protect traceability, not just temperature. If labels fail, your QA decisions slow down fast. Many creamery products sold in Canada also need English and French for required consumer information, with defined exceptions.
H3: Label durability checklist (built for wet environments)
| Label element | Why it matters | Where it fails | What to do | What it means for you |
|---|---|---|---|---|
| Storage cue | handling control | small text ignored | big “KEEP REFRIGERATED/FROZEN” | fewer wrong-temp holds |
| Date mark | customer trust | condensation smears | protected placement | fewer disputes |
| Lot / trace ID | recall scope | label falls off | duplicate lot label inside | faster investigations |
| Bilingual text | Canada readiness | space constraints | clean layout planning | smoother compliance |
Practical tips and suggestions
Treat labels as wet-grade labels: condensation happens somewhere in most lanes.
Use two labels: one retail label, one logistics label (simpler and clearer).
Make lot code “one-second findable.”
Practical example: A creamery reduced “missing date” complaints by moving the best-before panel to a protected label zone and using moisture-resistant stock.
Temperature-Controlled Creamery Best Packaging Canada: Validation and monitoring buyers trust in 2025
In 2025, temperature-controlled creamery best packaging Canada is judged by outcomes, not intentions. You do not need heavy paperwork. You need light, consistent proof habits.
A one-week validation plan (fast, practical)
Thermal hold test: simulate route time (include expected delays)
Handling test: stack + vibration + corner checks
Last-mile simulation: add a “porch time” window where relevant
| Test | What you do | What you measure | Pass signal | What it means for you |
|---|---|---|---|---|
| Thermal hold | route simulation | time in target band | no long drift | predictable quality |
| Handling | abuse simulation | leaks + crush | no leakage | fewer damage claims |
| Last mile | doorstep exposure | worst-case temp | acceptable outcome | fewer disputes |
H3: Monitoring that fits real budgets
Low volume: sample high-risk lanes only
Medium volume: weekly lane sampling
High volume: continuous monitoring on top lanes
Sensor placement rule: place sensors near an outer wall, buffered from coolant, and not touching the cold source. This shows your true risk point.
Practical tips and suggestions
Test with real opening behavior: multi-stop routes behave differently.
Change one variable at a time: otherwise learning is noisy.
Capture “minimum proof” consistently: pack recipe ID + pack-out time + lot code.
Practical example: A creamery cut reships after validating one high-risk lane and discovering porch time—not insulation—was the real failure.
A 90-second decision tool: Which packaging tier should you use?
Use this to standardize temperature-controlled creamery best packaging Canada by risk, not guesswork. Answer Yes/No:
Will the shipment be outside controlled refrigeration for more than 2 hours?
Are there multiple stops or transfers?
Is the lane exposed to summer heat (indoor staging or outdoor delivery)?
Is the lane exposed to winter freeze risk (unheated handling)?
Is the product high sensitivity (cream, soft cheese, premium frozen)?
Do you need temperature evidence for QA or customers?
Scoring:
0–2 Yes: Tier 1 is usually enough
3–4 Yes: Tier 2 recommended
5–6 Yes: Tier 3 + monitoring pilot recommended
A 6-minute self-audit: Is your program truly cold-chain ready?
Give yourself 1 point for each “Yes.”
Cold control (0–6)
Product is pre-chilled or fully frozen before packing
You have lane-based pack recipes (summer vs winter)
Shippers are right-sized to reduce air gaps
Coolant placement is consistent
Dock dwell time is minimized
You can show basic temperature evidence when needed
Leak + hygiene control (0–5)
Liquids are double-contained
Barrier liner is used
Absorbent pads are placed in leak zones
Returns are cleaned and dried before storage
Staff know what to do with a wet carton
Operational repeatability (0–4)
Packers hit a consistent pack time window
Closures are easy and consistent
Labels and lot IDs are always in the same place
You have a simple exception playbook
Score meaning
13–15: strong program
9–12: medium risk; seasonal spikes likely
0–8: high risk; fix workflow before scaling
2025 trends in Canadian creamery shipping
What is changing in the real world:
More lane-based recipes: teams standardize by route risk, not guesswork
More seasonal playbooks: summer and winter packouts are becoming the baseline
More moisture discipline: liners and absorbents move from “nice” to “necessary”
More proof habits: light monitoring on problem lanes beats logging everything
More modular packaging: inserts and dividers reduce damage without adding coolant
Frequently Asked Questions
Q1: What is temperature-controlled creamery best packaging Canada in one sentence?
It is a repeatable system that protects chilled and frozen creamery products, prevents leaks and damage, and preserves traceability through Canadian seasons.
Q2: What chilled target should I train staff to use?
Train a simple rule: chilled creamery products should be packed and handled to stay at or below 4°C through delivery whenever refrigeration is required.
Q3: What frozen target should I design for?
A practical operating target is at or below -18°C for frozen desserts, unless your product spec requires something stricter.
Q4: Do I need temperature loggers in every shipment?
Not usually. Sample high-risk lanes, peak-heat weeks, and peak-freeze weeks first, then expand only if it changes outcomes.
Q5: How do I stop wet cartons fast?
Use a sealed inner barrier, add absorbent pads in the base and corners, and keep meltwater from contacting the product area.
Q6: Why is winter still risky for chilled dairy?
Winter can cause accidental freezing and later condensation shock during indoor transitions, which hurts quality and labels.
Summary and recommendations
The best temperature-controlled creamery best packaging Canada approach is lane-based and repeatable. Separate chilled and frozen programs, design around ≤4°C and ≤-18°C, right-size shippers, and control moisture with barriers and absorbent zones. Use a tier system, validate your packouts by season, and monitor the lanes that actually cause complaints. When your process is consistent, quality becomes predictable.
Action plan (CTA)
Classify products: chilled vs frozen.
Score your top lanes with the 90-second tool (Tier 1/2/3).
Build two seasonal pack recipes (summer + winter) for each tier you use.
Run a 10-shipment pilot on Tier 3 lanes with monitoring.
Train packers using a one-page photo SOP and a staging timer.
About Tempk
At Tempk, we help creamery brands turn temperature-controlled creamery best packaging Canada into a system your team can run daily. We focus on lane-based pack recipes, moisture-control layers that reduce wet cartons, and simple validation routines that create clear QA decisions. Our goal is practical: fewer complaints, fewer reships, and packaging workflows that stay consistent in Canadian seasons.
Next step (CTA): Share your product type (chilled dairy vs frozen dessert), average transit time, and delivery model (B2B or DTC). We will recommend a tier-based pack chart you can pilot immediately.
Cool Chain Gelato Eco-Friendly Logistics Guide
Cool Chain Gelato Eco-Friendly Logistics in 2025?
You’re not just “keeping gelato frozen.” You’re protecting texture while cutting waste. Cool chain gelato eco-friendly logistics does both by stabilizing temperature (anchor to 0°F / -18°C for frozen holding) and by tightening the messy handoff minutes (target under 60 seconds at the door or dock). When you standardize pack-outs, right-size shippers, and reduce failed deliveries, you lower melt risk and reduce packaging, emissions, and reships.
This article will help you answer:
- How to reduce melt-refreeze damage using cool chain gelato eco-friendly logistics lane “recipes”
- Which eco-friendly insulation materials for frozen delivery actually hold up in real, wet shipping
- How to choose PCM vs gel packs vs dry ice without overpacking or overfreezing
- How to build a last-mile frozen logistics plan that cuts emissions and missed deliveries
- How to validate performance with simple thermal testing (ISTA STD-7E style) and weekly KPIs
- What 2025 policy pressure (PPWR reuse/recyclability, low-GWP refrigerants) means for your plan
Why is cool chain gelato eco-friendly logistics harder than standard frozen delivery?
Cool chain gelato eco-friendly logistics is harder because gelato’s “comfort zone” is narrower. Gelato is often served warmer than ice cream (commonly around -8°C to -12°C), so a small warm-up can change scoopability fast. The second problem is eco pressure: you can’t fix every risk by adding more insulation, more dry ice, and a bigger box. If you do, you raise cost, waste, and customer frustration.
In practice, gelato failures are usually a temperature swing story: partial thaw, then refreeze. That’s when ice crystals grow and texture turns gritty. Cool chain gelato eco-friendly logistics works when you reduce swings, not when you chase “colder than cold.”
The hidden enemy: the handoff minutes
Most texture damage doesn’t happen on the highway. In cool chain gelato eco-friendly logistics, it happens during:
- Pick/pack waiting on a dock
- Driver searching for parking
- Customer not home (porch exposure)
- Lobby/concierge delays
A simple guardrail from U.S. food-safety guidance is the “2-hour rule” for perishable foods out of refrigeration (and about 1 hour if it’s above 90°F / 32°C). Gelato is frozen, but the timing lesson still helps: shorten uncontrolled time.
If you can protect gelato through these messy minutes, cool chain gelato eco-friendly logistics starts to feel “effortlessly reliable” to your customers.
| Gelato stage | What usually goes wrong | The simple control | What it means for you |
|---|---|---|---|
| Packing | Box too big, product moves | Right-size + no movement | Less filler, better hold time |
| Loading | Door open too long | “Open–close fast” rule | Better texture, lower energy use |
| Last mile | Missed delivery / porch hold | Appointment or pickup option | Fewer reships (your biggest eco win) |
Practical tips you can use today
- Set a dwell-time goal: aim for <60 seconds from vehicle to handoff for high-risk days.
- Stop “hero packing”: design pack-outs that normal staff can repeat perfectly.
- Treat exceptions as signals: every refund is a process clue, not a “bad customer.”
Practical example: One gelato brand reduced complaints after tightening cutoff times and enforcing “no movement” pack-outs—without increasing insulation thickness.
What temperature targets make cool chain gelato eco-friendly logistics work?
Cool chain gelato eco-friendly logistics needs two clear targets: frozen stability and (optional) tempered service. For frozen inventory, 0°F (-18°C) is a widely used frozen holding benchmark in U.S. food-safety guidance, and stable holding at that level supports safety and quality. For service, gelato is commonly enjoyed warmer (often -8°C to -12°C), which means your chain must manage transitions carefully.
The mistake is “accidental tempering.” In cool chain gelato eco-friendly logistics, that’s when frozen product warms during staging, then refreezes later. Texture pays the price.
Frozen vs tempered distribution: pick one model per lane
You usually have two models:
- Frozen distribution: keep product deeply frozen; the receiver controls tempering.
- Tempered distribution: deliver closer to service temperature for fast scooping.
Frozen distribution is more forgiving for multi-stop routes. Tempered distribution can work, but only with strict timing and short handoffs.
| Delivery model | Practical target | Main risk | What it means for you |
|---|---|---|---|
| Frozen distribution | 0°F / -18°C or colder | Freeze–thaw swings | More consistent texture across lanes |
| Tempered distribution | Around -8°C to -12°C band | Warm staging | Requires tight SOPs and short routes |
The “30-second temperature story” you can teach your team
- Storage: keep frozen inventory stable (avoid swings).
- Transport: minimize door-open time and warm staging.
- Handoff: prevent porch holds and lobby delays.
If your team remembers only one line, use this: “Stability beats extreme cold.” That’s the mindset behind cool chain gelato eco-friendly logistics.
How do you design low-waste packaging for cool chain gelato eco-friendly logistics?
Cool chain gelato eco-friendly logistics packaging should be right-sized, repeatable, and recoverable. “Eco-friendly” doesn’t mean weak. It means you hit your delivery window with less material and fewer failures.
A reliable pack-out for cool chain gelato eco-friendly logistics has four parts:
- Product containment: pints/tubs + seals that don’t leak.
- Thermal barrier: insulation that performs even when humid.
- Cold source: PCM packs, gel packs, or dry ice (where appropriate).
- Air + motion control: tight fit, liner discipline, minimal voids.
Packaging comparison: reusable vs recyclable vs hybrid
Think in lanes, not opinions. Choose what fits your operating reality.
| Packaging option | Best use case | Waste profile | Performance risk | What it means for you |
|---|---|---|---|---|
| Reusable EPP shipper | Local/regional, return loop | Low (many cycles) | Low when standardized | Great for subscriptions and store routes |
| Fiber shipper + barrier liner | Parcel + broad coverage | Medium (often recyclable) | Medium (wet sensitivity) | Good balance if you control moisture |
| Hybrid (reusable core + recyclable outer) | Mixed networks | Low–medium | Low–medium | Lets you scale without losing performance |
| High-performance insulation (VIP/advanced) | Premium lanes | Low material per box | Needs careful handling | Smaller boxes with strong hold time |
Decision tool: pick the simplest pack-out that still works
Use this decision tool to strengthen cool chain gelato eco-friendly logistics before you buy “better packaging.”
Step 1: Choose your lane
- Local (0–30 miles / same-day)
- Regional (next-day)
- National (2–3 days or variable handoffs)
Step 2: Answer three yes/no questions
- Is a return loop possible (pickup, store return, deposit)?
- Do you have predictable ship cutoffs every day?
- Is the destination climate hot or humid this week?
Step 3: Match the strategy
- Return loop = YES → reusable shipper + standardized PCM “recipe”
- Return loop = NO, cutoffs = YES → fiber shipper + optimized PCM placement
- Return loop = NO, handoffs variable = YES → stronger insulation + higher safety margin coolant (but right-sized)
This tool prevents the #1 mistake in cool chain gelato eco-friendly logistics: buying premium materials to cover process inconsistency.
Practical tips and advice
- Right-size first: oversized cartons are silent profit killers.
- Remove movement: if you can shake the box and feel motion, you’ll see drift.
- Make one “lane recipe” page: materials + placement + cutoff + exceptions.
Practical example: A DTC gelato program cut filler by downsizing one carton size and adding a snug internal frame—without raising melt complaints.
What coolant strategy fits cool chain gelato eco-friendly logistics best?
Cool chain gelato eco-friendly logistics succeeds when coolant is placed well, not just added. The cleanest win is often “less coolant + better timing + better placement.”
PCM vs gel packs vs dry ice (plain language)
- PCM packs (phase change materials): hold near a target plateau, like a “thermal sponge.”
- Gel packs: common and low-cost, but less precise around target temps.
- Dry ice: very cold and powerful, but can overfreeze edges and adds handling rules.
For many predictable lanes, PCM near your target range protects texture without the “deep cold shock” of dry ice.
| Coolant option | When it fits | Biggest risk | What it means for you |
|---|---|---|---|
| PCM | Predictable routes and cutoffs | Wrong PCM setpoint | Better texture protection with less overfreezing |
| Gel packs | Short lanes, cost-sensitive | Too warm for long holds | Needs tight timing and placement discipline |
| Dry ice | Long/variable lanes (when allowed) | Overfreezing + handling | Use with spacers and clear SOPs |
Placement rules that reduce coolant mass
Use these simple rules in cool chain gelato eco-friendly logistics:
- Put coolant around product, not only on top.
- Avoid direct contact with pint walls (use a thin spacer).
- Seal the weak points (seams and lids leak cold fastest).
- Kill empty air pockets (air becomes a warming pocket).
Rule-of-thumb: if the pack-out has internal movement, you’ll see more temperature swing. That’s why cool chain gelato eco-friendly logistics is a packaging and process discipline.
Tips for “no dry-ice panic” lanes
- Shift cutoffs to reduce parked time in warm hours.
- Add handoff controls before adding more coolant.
- Keep one escalation option (extra PCM or stronger shipper) for heat waves.
How do you reduce last-mile emissions without raising melt risk in cool chain gelato eco-friendly logistics?
Last mile is where eco wins—or collapses. In cool chain gelato eco-friendly logistics, the trick is simple: reduce time, reduce exceptions, reduce idling. When you do that, you can often use less packaging “insurance” while improving customer experience.
Three low-emission tactics that protect gelato
- Micro-hubs near demand: shorter routes reduce the need for extra insulation.
- Time-window delivery: fewer “not home” failures means fewer reships.
- Cold handoff discipline: pre-chilled totes + scan-and-go SOP + a dwell-time target.
The last-mile risk score (interactive)
Score each factor 0–4 and add your total for cool chain gelato eco-friendly logistics:
- Outdoor temperature: mild (0) / warm (2) / hot (4)
- Drop risk: direct handoff (0) / lobby risk (2) / porch risk (4)
- Transit time: <30 min (0) / 30–90 min (2) / >90 min (4)
- Customer readiness: confirmed (0) / uncertain (2) / unknown (4)
0–5: standard lane recipe
6–10: add proactive messaging + tighter handoff control
11–16: require handoff or pickup hold + stronger shipper recipe
This is a practical way to run cool chain gelato eco-friendly logistics without guessing.
Practical tips and advice
- Deliver early on heat-wave days to reduce both energy and melt risk.
- Offer pickup holds for apartments and offices (lobbies are delay traps).
- Pre-message customers: “Be ready at the door” reduces failures fast.
Practical example: A subscription program cut replacements by adding appointment windows on hot-zip deliveries—no packaging upgrade required.
How do you validate and monitor cool chain gelato eco-friendly logistics without overcomplicating it?
Cool chain gelato eco-friendly logistics becomes predictable when you validate one lane at a time and track a few weekly KPIs. You don’t need a lab coat. In cool chain gelato eco-friendly logistics, you need repeatable tests and clear pass/fail.
A 7-step validation plan (ISTA STD-7E style)
- Define your pass/fail (arrives frozen, no softening, texture intact).
- Pick your worst lane (hottest region + longest time + most complaints).
- Pack normally (no “special” test packing).
- Place a logger near the warm spot (often lid/seam area).
- Run thermal profiles that mimic parcel reality (STD-7E style).
- Review peaks and duration (spikes + long holds drive texture loss).
- Change one variable (fit, sealing, coolant placement) and retest.
| What you measure | What “good” looks like | What it means for you |
|---|---|---|
| Peak temperature | No thaw behavior | Fewer refunds and reships |
| Time at risk | Short and controlled | Better texture consistency |
| Moisture events | Dry interior | Eco insulation performs better |
| Exceptions | Downtrend weekly | Proof your program works |
Minimal monitoring stack (starter to advanced)
| Maturity level | What you use | What you learn | What it means for you |
|---|---|---|---|
| Starter | One data logger per worst lane | Where it warms | Stop guessing, start fixing |
| Growing | Logger + dock timer | Staging vs transport impact | Big gains without new packaging |
| Advanced | Real-time alerts on worst lanes | Intervene before loss | Fewer reships, lower total waste |
Self-test: Is your process eco-ready?
Score each item 0–2 (0 = no, 1 = partly, 2 = yes):
- We have one standard pack-out per lane (local/regional/national)
- We use 2–3 shipper sizes, not 10
- We track “melt” complaints and reships weekly
- We have a returnable option where routes allow
- We train drivers on handoff dwell time
8–10: strong foundation
5–7: waste is coming from inconsistency
0–4: packaging will keep getting thicker (and so will your costs)
Mini calculator: melt loss → “eco priority” (interactive)
Write down for cool chain gelato eco-friendly logistics:
- Your weekly replacement shipments (count).
- Average packaging cost per replacement.
- The #1 root cause: staging / porch holds / long routes.
Rule: fix the highest-frequency cause first. In cool chain gelato eco-friendly logistics, fewer reships is your fastest sustainability win.
2025 trends and compliance in cool chain gelato eco-friendly logistics
In 2025, cool chain gelato eco-friendly logistics is being pulled by three forces: packaging policy, refrigerant transition, and cost pressure. Even if you don’t sell into Europe, EU-style packaging rules are influencing global supplier roadmaps for cool chain gelato eco-friendly logistics.
What to prepare for now in cool chain gelato eco-friendly logistics
As of December 2025, two policy signals matter most for planning:
- EU packaging: the EU Packaging and Packaging Waste Regulation (PPWR) entered into force on February 11, 2025, with broad application about 18 months later (around August 2026).
- Refrigerants: the EU F-gas Regulation (EU) 2024/573 applies from March 2024 and keeps tightening the shift toward lower-GWP options. In the U.S., EPA has scheduled some higher-GWP HFC restrictions for new equipment starting January 1, 2025 in certain categories.
- Right-sizing expectations: shipping “less air” becomes a cost and compliance advantage.
- Reuse and recovery: return loops become more attractive where reverse logistics exists.
- Recycled-content planning: procurement needs lead time for compliant materials.
- Lower-GWP refrigeration: equipment choices increasingly need “future-proof” refrigerants.
- Dry ice constraints: many teams are testing alternatives (better PCM, better fit, better timing).
Latest developments you should track for cool chain gelato eco-friendly logistics (2025–2026)
- More reusable packaging pilots tied to deposits or pickup loops
- Better fiber-based insulation barriers that tolerate humidity better
- More standardized thermal qualification for parcel shippers
- More focus on “no-reship” design as a sustainability KPI
Market insight (plain and practical)
If your eco strategy is “use less packaging” but your quality strategy is “add more insulation,” you’ll lose both. Cool chain gelato eco-friendly logistics wins by lane segmentation, right-sizing, and handoff discipline—then you remove materials after proof, not before.
Frequently Asked Questions
Q1: What’s the safest approach for cool chain gelato eco-friendly logistics?
Standardize one pack-out per lane, right-size the shipper, and control handoff time. Consistency often beats adding more insulation or more coolant in cool chain gelato eco-friendly logistics.
Q2: What is the ideal freezer temperature for gelato storage?
Use 0°F (-18°C) or colder as a strong frozen holding baseline. The key is stability: swings and door-open time cause more texture damage than a steady setpoint in cool chain gelato eco-friendly logistics.
Q3: Is dry ice always better for gelato shipping?
No. Dry ice is powerful, but it can overfreeze edges and complicate handling. Many lanes perform well with PCM when cutoffs and handoffs are predictable.
Q4: Which eco-friendly insulation materials for frozen delivery work best?
There isn’t one winner. Fiber-based options can work well when protected from moisture. Reusables work best when your return loop is reliable and consistent.
Q5: How do I cut packaging waste without increasing melt risk?
Start with right-sizing and eliminating movement inside the box in cool chain gelato eco-friendly logistics. Then improve handoff speed and route timing. Remove insulation only after lane testing proves the hold time is still safe.
Q6: What does PPWR 2025 packaging reuse and recyclability mean for me?
Expect more pressure to minimize packaging, design for recyclability, and build reuse systems where feasible. Planning now protects your costs and avoids rushed redesigns later.
Q7: What thermal testing should I use for parcel gelato shippers?
Use parcel-realistic thermal testing (ISTA STD-7E style) to compare pack-outs under hot and cold profiles that resemble real delivery networks.
Q8: What’s the fastest last-mile fix?
Reduce failed deliveries: appointment windows, pickup holds, and “delivery-ready” messaging usually cut melt complaints faster than adding packaging.
Summary and recommendations
Cool chain gelato eco-friendly logistics in 2025 is about protecting gelato’s texture while cutting waste and emissions. In cool chain gelato eco-friendly logistics, the best eco metric is fewer reships. Standardize lane recipes, right-size cartons, place coolant correctly, and treat handoff minutes as part of transit. Validate the worst lanes first, then remove material only after proof. If you can build a return loop, reusable shippers can cut waste quickly while keeping performance stable.
What to do next (simple 30-day plan)
- Pick your top 3 lanes (hottest, longest, most complained) for cool chain gelato eco-friendly logistics.
- Write one “lane recipe” per lane (box size, insulation, coolant placement, cutoff).
- Run a worst-week test with a logger and a dock timer.
- Add one last-mile control (appointment window or pickup hold).
- Review weekly: reships, complaints, and exceptions—then improve one variable at a time.
About Tempk
At Tempk, we build practical cold chain packaging systems that help you run cool chain gelato eco-friendly logistics with fewer failures and less waste. We support right-sized insulation options (including reusable solutions), coolant pairing strategies, and pack-out designs that your team can repeat at scale. Our focus is operational reliability, because the best sustainability win is the one you can execute every day.
Next step: Share your lane (local/regional/national), transit time, and destination climate for cool chain gelato eco-friendly logistics. We’ll help you map a cool chain gelato eco-friendly logistics pack-out that protects texture while reducing packaging and reship cost.