


Foldable EPP Foam Box: 2025 Buyer’s Guide
Foldable EPP Foam Box: 2025 Buyer’s Guide
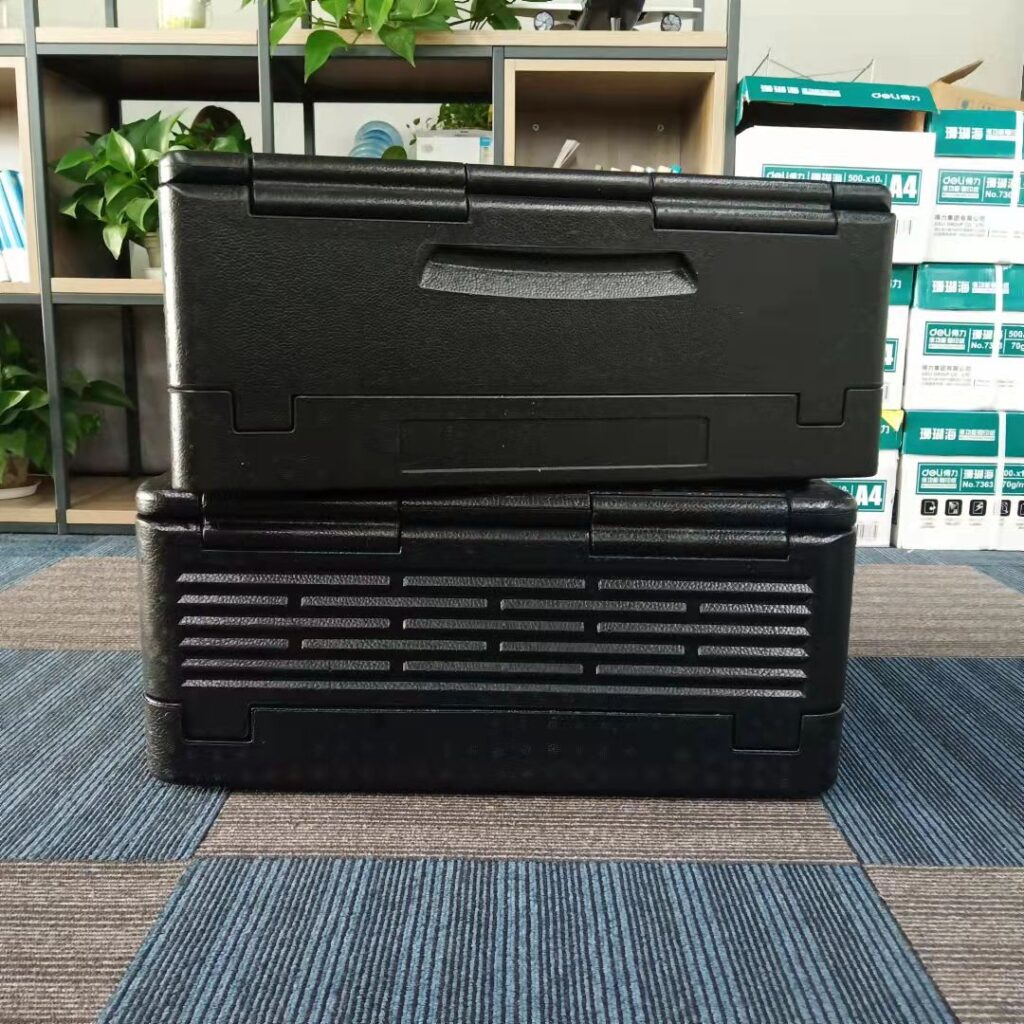
Foldable EPP Foam Box: How to Choose in 2025?
A foldable EPP foam box helps you protect temperature-sensitive goods while cutting the space you waste on empty returns. If your foldable EPP foam box collapses to about one-quarter to one-third of its height, you can often reduce empty return “cube” by roughly 65–75% in the same truck footprint.
That’s real money, because you stop paying to ship air. In this guide, you’ll learn how to pick the right foldable EPP foam box, validate performance, and run a return loop your team will follow.
This article will answer for you
How a foldable EPP foam box works (and when it does not make sense)
A quick decision tool to estimate return savings and ROI
What to check in hinges, latches, seams, and lid seals
How to choose foldable EPP foam box size without creating temperature drift
A practical foldable EPP foam box return logistics checklist
A simple foldable EPP foam box cleaning SOP that prevents odor and downtime
2025 trends pushing reusable packaging to scale faster
What Is a Foldable EPP Foam Box Used For?
Direct answer: A foldable EPP foam box is a reusable insulated container made from expanded polypropylene that collapses for compact storage and cheaper returns.
foldable EPP foam box
It’s built for cold-chain delivery where you want insulation and durability, but you also want fewer bulky empties in your warehouse.
Think of it like a strong cooler that can “pack flat” after delivery. A rigid box stays big even when empty. A foldable EPP foam box gives you a second mode: it becomes a compact asset for backhaul and storage. That’s why it shows up in meal delivery, grocery routes, pharma distribution loops, and internal facility transfers.
Foldable EPP foam box vs rigid EPP: the real trade-offs
| Comparison point | Foldable EPP foam box | Rigid EPP container | What it means for you |
|---|---|---|---|
| Empty return volume | Low when collapsed | High (fixed volume) | Less backhaul space waste |
| Training need | Medium | Low | SOP matters more for foldable |
| Failure mode | Hinge/latch wear | Corner damage | Different inspection checklist |
| Best fit | Closed-loop routes | One-way or low-return | Match to your network |
Practical tips you can apply now
If you control returns weekly, a foldable EPP foam box usually earns a pilot.
If you ship one-way with no returns, foldability is often “nice” but not ROI.
If your staff are new, prioritize obvious “locked” indicators and simple assembly.
Real-world example: A subscription delivery program reduced backhaul clutter after switching to a foldable return routine and stack rules.
foldable EPP foam box
When Does a Foldable EPP Foam Box Pay Off?
Direct answer: A foldable EPP foam box pays off when you have frequent returns, limited storage, or expensive backhaul space. It is an economics feature, not just a packaging feature.
foldable EPP foam box
You can deliver perfectly and still lose money on the empty trip home. That’s the hidden cost center many teams ignore. When you fold, you reclaim truck capacity, rack space, and handling time.
90-second decision tool: is a foldable EPP foam box worth piloting?
Answer Yes/No:
Do your insulated containers return at least weekly?
Is warehouse space tight or expensive?
Do you pay for backhaul volume or vehicle space?
Do you handle large quantities of empty containers daily?
Do you want to standardize reusable packaging in 2025?
If you answered “Yes” to 3 or more, pilot a foldable EPP foam box.
| Your reality | Folding benefit | Why it happens | What it means for you |
|---|---|---|---|
| Tight warehouse space | High | Less empty volume | More usable capacity |
| Backhaul is expensive | High | More units per return trip | Lower cost per return |
| Low return rate | Low | Boxes don’t come back | Weak ROI |
Mini ROI calculator (simple and usable)
Use this before you buy a full fleet.
Cost per trip = (Box cost ÷ expected trips) + cleaning + return handling + loss allowance
Savings per trip = avoided single-use cost + fewer damage refunds + return-space savings
ROI signal = savings per trip − cost per trip
Tip: ROI depends on cost per successful trip, not purchase price.
foldable EPP foam box
Does a Foldable EPP Foam Box Hold Temperature Like a Rigid Box?
Direct answer: A foldable EPP foam box can insulate very well, but seams, joints, and lid seal quality decide real performance.
foldable EPP foam box
A tight lock can outperform a thicker box with a weak seal.
Here’s a simple way to picture it. Your box is the “thermos shell.” Your coolant is the “battery.” A leaky shell drains the battery fast, even if the foam is good.
What usually drives temperature drift in a foldable EPP foam box?
Air gaps caused by loose corners or uneven lid compression
Void space inside (too much empty air warms up quickly)
Inconsistent closure when teams rush
Dwell time during pickup or receiving
What to check in fold seams and closures (fast inspection)
| Design detail | Good sign | Bad sign | What it means for you |
|---|---|---|---|
| Panel locking | Firm, repeatable “click” | Loose fit | More temperature drift |
| Corner joints | Tight corners | Visible gaps | Heat leak risk |
| Lid closure | Even compression | Warped lid | Less stability |
| After many folds | Holds shape | Soft edges | Shorter lifespan |
Practical tips you can apply now
Fix void space before you add more coolant. Dense packing stabilizes temperature.
If the top warms first, improve lid seal and add a top buffer pack.
If corners drift, your lock design or closure sequence needs attention.
Real-world example: A route stabilized after the team stopped over-stuffing the foldable EPP foam box and standardized closure steps.
foldable EPP foam box
How Do You Choose the Right Foldable EPP Foam Box Size?
Direct answer: Choose foldable EPP foam box size based on your typical load profile, handling ergonomics, and required hold time. Avoid “maximum volume thinking.” A box that is too large creates air space, which increases temperature drift and product movement.
foldable EPP foam box
In cold chain packing, “fuller is better.” Air is where temperature swings live. A right-sized foldable EPP foam box also stacks better and reduces crushing.
Fast sizing method: three measurements + one margin
Measure:
Payload footprint (length × width of your typical load)
Payload height (including inner packaging)
Coolant zone (space you need for packs or buffers)
Add a 10–15 mm margin per side for easy loading
If you have to force the lid, you are under-sized. Forced lids destroy seals fast.
Table: picking the right foldable EPP foam box size
| Decision factor | What to check | “Good” sign | What it means for you |
|---|---|---|---|
| Footprint | Fits trays/crates | No bending or wedging | Faster pack-out |
| Height | Lid closes easily | No forced pressure | Better seal life |
| Collapsed height | Stacks flat on return | Stable folded stacks | Lower return cube |
| Weight rating | Handles heaviest lane | No deformation | Less damage risk |
Practical tips you can apply now
Standardize 2–3 sizes max to reduce packing and folding errors.
Use inserts for mixed loads to reduce shifting.
Avoid “one huge box for everything” unless your loads are always dense.
Real-world example: A team reduced drift by switching from one large box to two medium foldable EPP foam box units with denser packing.
foldable EPP foam box
Which Hinge, Latch, and Seal Details Matter Most?
Direct answer: The hinge and latch are the make-or-break parts of a foldable EPP foam box. You need smooth folding, obvious locking, and consistent seal compression. If “locked” feels optional, field failures become normal.
foldable EPP foam box
Your goal is a design that makes mistakes hard to make. The best foldable EPP foam box guides hands into the right motion.
What to inspect before you buy (the buyer checklist)
Lock indicator: clear click, visible marker, or flush-fit alignment
Hinge reinforcement: thicker fold points that tolerate repeated cycles
Latch protection: placement that avoids impact damage
Corner geometry: corners carry stack stress; weak corners crush first
Lid alignment: lid should seat the same way every time
| Component | Good design sign | Bad design sign | What it means for you |
|---|---|---|---|
| Hinge | Folds smoothly, no tearing | Early cracking/whitening | Shorter box life |
| Latch | Positive lock feedback | “Maybe locked” feel | Higher failure rate |
| Corners | Reinforced and square | Soft collapse | More crush damage |
| Lid | Self-aligning | Needs pushing to fit | Seal inconsistency |
Practical tips you can apply now
If drivers stack, prioritize corner strength and latch protection.
If packers rush, prioritize obvious lock feedback.
If sanitation is frequent, avoid latch areas that trap residue.
Real-world example: “Open-on-arrival” incidents dropped after switching to a foldable EPP foam box with a visible lock indicator.
foldable EPP foam box
How Do You Run Return Logistics for a Foldable EPP Foam Box Fleet?
Direct answer: A foldable EPP foam box only wins if you run a real closed loop: deliver → collect → consolidate → reset. If returns are random, you will lose inventory and lose ROI.
foldable EPP foam box
The folding feature is not magic. The process is what creates payback.
Foldable EPP foam box return logistics checklist
Use this to keep returns boring and reliable:
Assign a unique ID per foldable EPP foam box (QR or printed code)
Define who owns the return at the customer site
Set a return schedule (daily, weekly, or per pickup)
Standardize one fold method (photos help)
Define “dirty box” handling rules
Track loss rate and set a threshold for action
60-second “Return Loop Readiness” self-test
Give yourself 1 point for each “yes.”
We deliver to repeat customers or fixed sites.
We can schedule pickups or backhauls.
We have space to store collapsed units.
We have a cleaning and drying routine.
We can track asset IDs.
We can train staff with a one-page SOP.
We quarantine damaged boxes fast.
We measure loss rate monthly.
Score guide:
0–3: pilot small
4–6: workable with tracking
7–8: scale-ready
| Return step | What to standardize | Common failure | What it means for you |
|---|---|---|---|
| Collapse | One method for all | Wrong folding damages hinges | Shorter life |
| Consolidate | Stack height rules | Unstable stacks | Damage in transit |
| Reset | Clean + inspect | Dirty returns re-enter fleet | Odor complaints |
Practical tips you can apply now
If boxes go missing, add deposits, incentives, or scan-at-handoff rules.
Collapse at the customer site if return trucks fill too fast.
Keep scanning to two events: pickup and return.
Real-world example: Return rate improved after adding a simple “scan on pickup” rule for each foldable EPP foam box.
foldable EPP foam box
What Is a Simple Foldable EPP Foam Box Cleaning SOP?
Direct answer: The best foldable EPP foam box cleaning SOP is short, repeatable, and strict about drying. Drying is what prevents odor, mold, and sticky residue. If you fold while damp, smell returns fast.
foldable EPP foam box
Make the SOP designed for speed. If it’s complicated, it won’t happen consistently.
7-step foldable EPP foam box cleaning SOP (copy/paste)
Pre-check: remove liners, labels, and debris
Pre-rinse: quick rinse for visible soil
Wash: detergent scrub on folds, seams, and latch areas
Rinse: remove detergent residue
Sanitize: approved sanitizer with correct contact time
Dry: air dry fully open (do not collapse yet)
Inspect: latch function, hinge wear, odor, deformation
3-zone cleaning map (makes cleaning faster)
Zone A (touch + spill): interior base and corners
Zone B (seal area): lid lip, closure points, hinge edges
Zone C (handling): exterior handles and fold joints
| SOP step | What gets missed | Strong habit | What it means for you |
|---|---|---|---|
| Wash | Latch recess | Brush corners and folds | Prevents buildup |
| Sanitize | Contact time | Use a simple timer | Better audit confidence |
| Dry | Wet stacking | Dry fully before fold | Stops odor recurrence |
| Inspect | “Looks fine” | Quick lock check | Fewer field failures |
Reuse readiness self-test (score 0–2 each)
Cleaning checklist exists
Drying is controlled (no wet stacking)
Lock points inspected daily
Damaged units removed quickly
Storage zone stays clean
8–10: ready to scale reuse
5–7: pilot and refine
0–4: fix basics first
Real-world example: Odor complaints dropped after one change: drying boxes fully open before collapsing.
foldable EPP foam box
How Do You Validate a Foldable EPP Foam Box Lane in 2025?
Direct answer: Validate a foldable EPP foam box with lane-based testing that reflects real delivery behavior. Test hot days, typical days, and cold days. Use the same packout recipe every time, or your results won’t mean anything.
foldable EPP foam box
If you want a recognized approach, many cold-chain teams align lane tests with modern thermal shipping test profiles (for example, ISTA-style thinking) while keeping the execution simple.
A practical lane test plan (10 runs)
3 shipments on a cool day
4 shipments on a typical day
3 shipments on a hot day
Use the same foldable EPP foam box packout recipe each time
Record: packout time, pickup time, delivery time, and internal temperature on arrival. If possible, use a data logger for the temperature curve.
| Test element | What you’re proving | What “pass” looks like | What it means for you |
|---|---|---|---|
| Seal stability | Lid/folds stay tight | No visible gaps | Predictable hold time |
| Packout repeatability | Staff can follow recipe | Same layout every time | Fewer exceptions |
| Worst-case dwell | Delays don’t break system | Acceptable arrival temp | Confidence to scale |
| Wash + fold cycle | Reuse doesn’t degrade fit | Lock stays consistent | Long cycle life |
Practical tips you can apply now
If results swing, reduce void space before adding more coolant.
If drift follows washing, inspect seals and fold edges for wear.
If hinge fatigue appears, your fold method may be forcing the wrong angle.
User Engagement: The “Buy or Pass” Checklist for a Foldable EPP Foam Box
Before you commit, confirm these are true:
The foldable EPP foam box locks firmly every time
The lid seal compresses evenly with no visible gaps
One person can assemble it fast under pressure
It stacks securely when open and when folded
Cleaning is easy around seams and corners
You can standardize sizes across your operation
You can track returns (even with simple scan events)
If you can’t say “yes” confidently, run a pilot first.
2025 Trends Shaping Foldable Reusable Cold-Chain Packaging
Trend overview: In 2025, reusable cold-chain packaging is moving from “nice idea” to “operational advantage.” Teams are under pressure to reduce waste, control costs, and prove consistent outcomes. That’s why foldable EPP foam box programs are growing: they support reuse while reducing return volume.
foldable EPP foam box
Latest progress snapshot
More closed-loop programs: fixed routes make returns reliable
More asset tracking: QR-based scans replace manual counting
More standardization: fewer box sizes and simpler assembly to reduce errors
More modular inserts: one box can serve multiple SKUs with internal kits
More “collapse-at-customer” SOPs: return cube drops before the truck moves
Market insight you can use
The best foldable EPP foam box programs win by being boring.
Boring means repeatable: one folding method, one cleaning SOP, and clear pass/fail inspection rules.
foldable EPP foam box
Frequently Asked Questions
Q1: When is a foldable EPP foam box worth it?
When you have reliable returns, tight storage, or expensive backhaul space. Without returns, ROI is weak.
Q2: Does a foldable EPP foam box insulate as well as rigid boxes?
It can. In real operations, seam tightness and lid fit often matter more than thickness alone.
Q3: What fold ratio should I target?
Use collapsed height ÷ expanded height. Roughly one-quarter to one-third height often delivers meaningful return savings.
foldable EPP foam box
Q4: What’s the biggest operational mistake?
Folding while damp and using multiple fold methods. Both increase odor complaints and hinge fatigue.
Q5: Do I need tracking for a foldable EPP foam box fleet?
If you want reliable ROI, yes. Even simple scan-on-pickup and scan-on-return reduces loss rate.
Q6: How do I stop odor problems?
Dry fully while the box is open, then fold. Odor is usually trapped moisture, not “lack of sanitizer.”
foldable EPP foam box
Summary and Recommendations
A foldable EPP foam box is most valuable when your pain is empty returns, depot space, and handling time. Choose a design with tight seams, obvious locking, and repeatable closure. Then win with process: standard packout, standard folding, standard cleaning, and standard inspection. If you run a 14-day pilot and track return savings, loss rate, cleaning minutes, and hinge failures, you will know whether to scale with confidence.
foldable EPP foam box
Action plan you can start this week
Pick one stable route and one foldable EPP foam box size.
Post a 10-second fold + lock SOP with photos.
Enforce a strict dry-before-fold rule.
Track four KPIs: return cube saved, loss rate, cleaning minutes, hinge/seal failures.
Scale only after performance is repeatable with normal staff.
About Tempk
At Tempk, we help teams build reusable cold-chain packaging systems that work under daily delivery pressure. We focus on practical outcomes: stable temperature control, lower damage risk, and smoother return workflows. For foldable programs, we support lane-based pilots, packing layouts, inspection routines, and cleaning SOPs that keep performance consistent over many reuse cycles.
Call to Action: Share your route time, ambient range, return method, and typical payload size. We’ll help you map a foldable EPP foam box pilot plan and the key KPIs to track before you scale.
Expanded Polypropylene Box Custom Price (2025)
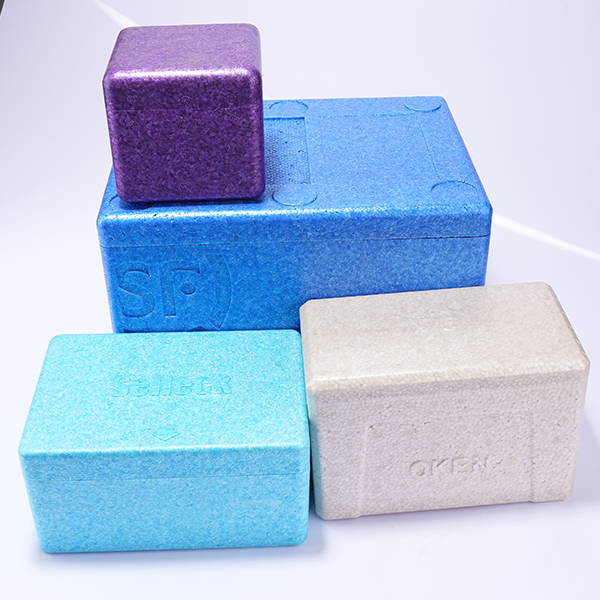
Expanded Polypropylene Box Custom Price in 2025?
Last updated: December 19, 2025
If you’re trying to lock down an expanded polypropylene box custom price, you’re not stuck—you’re just seeing how molded packaging is priced. Your cost is shaped by tooling, MOQ, density, geometry complexity, and add-ons, not just “foam in a box.”
In this guide, you’ll learn how to predict pricing before you request quotes, and how to reduce cost without weakening real-world cold-chain performance.
This article will help you answer:
- How expanded polypropylene box custom price is built (tooling + unit cost + risk control)
- What to include in an expanded polypropylene box custom price quote request (RFQ)
- How EPP box tooling cost and MOQ tiers change your unit price
- Which design features and add-ons raise expanded polypropylene box custom price fastest
- How to convert expanded polypropylene box custom price into cost per trip for reusable programs
- What changed in 2025 pricing behavior (modularity, transparency, faster sampling)
Why does expanded polypropylene box custom price vary so much?
Expanded polypropylene box custom price varies because EPP is molded, not cut-and-fold. You’re paying for material and the mold, cycle time, and design choices that make the box survive shipping. Two boxes with the same outer size can price very differently if one needs tight lid fit, complex ribs, or higher density.
A simple way to think about it: flour is cheap, but a custom cake costs more when the mold, layers, and finish get complicated.
Expanded polypropylene box custom price typically moves when one of these levers changes:
- Tooling/mold scope
- MOQ and volume breaks
- Density and wall thickness targets
- Geometry complexity (latches, hinges, undercuts)
- Add-ons (inserts, gaskets, printing, tracking features)
Price Impact Map (fast to scan)
| Price driver | What changes it | “Quote clue” you can spot | What it means for you |
|---|---|---|---|
| Tooling / mold | New mold, multiple actions, cavities | “Custom mold required” | Biggest upfront cost; affects timeline |
| MOQ / volume | Pilot vs scale quantities | “Price breaks at 2k/5k/10k” | Unit price drops quickly with volume |
| Density / thickness | Strength, durability, insulation targets | “Target density range needed” | Higher spec usually increases cost and weight |
| Complexity | Latches, deep ribs, tight fit | “Multiple cores/actions” | Raises tooling + cycle time + scrap risk |
| Add-ons | Inserts, seals, labels, pockets | “Assembly steps” | Adds labor + variability + inspection |
Practical tips you can use today
- Ask suppliers to name the top 3 cost drivers in your design (they should agree broadly).
- Freeze the outer box first, then iterate inserts (cheaper changes, faster learning).
- Treat tolerance like money: tight fits are valuable only when you truly need them.
Real example: A seafood shipper improved lid fit and stacking strength, but expanded polypropylene box custom price rose because tooling complexity and cycle time increased.
What should a quote include for expanded polypropylene box custom price?
A solid expanded polypropylene box custom price quote separates one-time costs from recurring costs and clearly lists what’s included. If you only get a single “unit price,” you risk surprises later (missing lid, inserts, or QC assumptions).
Your goal is a quote that reads like a mini bill-of-materials plus a production plan.
A complete quote should include:
- Tooling (one-time): mold design/build, sampling
- Unit price (recurring): price at multiple MOQ tiers
- Packaging & logistics: packing method, pallet config, shipping terms
- Add-ons: inserts, printing, labels, gaskets
- Quality plan: tolerances, inspection method
- Lead times: sampling + mass production
Quote completeness checklist (copy/paste)
Score each item 0–2 (0 missing, 1 partial, 2 clear). Total 0–12.
- Dimensioned drawing or CAD included
- Density range + performance intent stated
- Lid/seal approach defined
- Pilot quantity + annual forecast included
- Add-ons listed (inserts/labels/handles)
- QA + acceptance criteria described
Score guide
- 0–5: High risk (expect re-quotes and delays)
- 6–9: Medium risk (confirm assumptions)
- 10–12: Low risk (compare suppliers apples-to-apples)
What a “good” quote line item table looks like
| Quote line item | One-time or recurring | Typical risk if missing | What it means for you |
|---|---|---|---|
| Tooling | One-time | Surprise invoices later | Budget shock |
| Sampling | One-time | Revision chaos | Slower launch |
| Unit tiers | Recurring | No leverage | Overpaying |
| Add-ons | Recurring | “Not included” disputes | Inconsistent shipments |
| QA plan | Recurring | Hidden scrap | Variation risk |
Practical tips before you approve any quote
- Ask for at least 3 MOQ tiers (example: 500 / 2,000 / 10,000).
- Request tooling terms: ownership + maintenance + change control in writing.
- Confirm whether the expanded polypropylene box custom price includes lid + inserts + partitions.
Real example: A meal-kit team assumed “box price” included lid + divider. It didn’t. A clearer BOM-style quote would have prevented the mismatch.
How do tooling decisions affect expanded polypropylene box custom price?
Tooling is why expanded polypropylene box custom price can feel “high” in the first run. The mold is a fixed cost, and complex features can increase both mold cost and cycle time.
Your fastest wins usually come from making Rev A simpler, then upgrading once your lane is stable.
Tooling cost rises when:
- You need undercuts, latch actions, or multi-part assemblies
- You request very tight tolerances for sealing/stacking
- You need higher output via multi-cavity tooling
- The design is hard to vent/cool consistently
Design details that raise tooling cost
| Design feature | Why it adds cost | Safer alternative | What it means for you |
|---|---|---|---|
| Precision snap locks | Needs tighter tooling + process control | Simple latch + security strap | Lower risk and faster stability |
| Deep ribs everywhere | More complex mold + longer cycles | Fewer, smarter ribs | Similar strength, lower cost |
| Sharp deep logo emboss | Precision machining + wear | Replaceable logo insert | Easier updates later |
| Ultra-thin walls | Higher defect risk | Targeted reinforcement | Better yield at scale |
| Tight interference fit | More rejects | Functional tolerance band | Lower scrap and rework |
Practical tips to reduce tooling risk (without “cheapening” the box)
- Launch with a Version 1 design: remove one “nice-to-have” closure feature.
- Use replaceable logo zones if branding may change.
- Don’t demand “plastic-like” tolerances unless you truly need them.
Real example: Simplifying latch geometry and using an external band reduced tooling complexity while maintaining performance.
How do density and performance targets change expanded polypropylene box custom price?
Density and thickness choices influence expanded polypropylene box custom price because they affect material usage, durability, and shipping weight. Higher density can feel like “stronger foam,” but it can raise both unit cost and freight.
The best strategy is simple: choose the lowest spec that still passes your real handling conditions.
Ask yourself:
- Is this box single-trip or reused 10–30+ trips?
- What is the max payload and typical stacking height?
- How rough is your distribution (drops, conveyor impacts, last-mile)?
- Do you need insulation hold time, or mostly handling durability?
Density selection guide (plain-language)
| Use case | Density direction | Why | What it means for you |
|---|---|---|---|
| Single-trip delivery | Lower to mid | Cost control | Lower unit price |
| Reusable pool system | Mid to higher | More cycles | Lower cost per trip |
| Heavy payloads | Higher | Compression strength | Fewer cracks/returns |
| Light fragile goods | Mid | Cushion + stiffness | Balanced performance |
Practical tips and advice
- Price lifecycle, not unit price. A slightly higher expanded polypropylene box custom price can be cheaper if it doubles usable trips.
- Reinforce corners and base first before raising density everywhere.
- Tolerance is money: if a tight fit isn’t required, allow a wider band.
Real example: Relaxing one dimension tolerance (where it didn’t affect stacking) reduced rejects and stabilized production.
Which add-ons change expanded polypropylene box custom price the most?
Add-ons often move expanded polypropylene box custom price more than you expect because they add parts + labor + inspection. The most expensive add-ons usually involve tight fit or multi-component builds.
Cost-driving add-ons include:
- Custom insert sets (extra parts + fit risk)
- Gaskets/seals (tolerance control + installation)
- Tracking pockets or label holders (assembly time)
- Printing/alignment requirements (reject risk)
- Special material requirements (process control)
Add-on impact table
| Add-on | Price impact | Hidden risk | What it means for you |
|---|---|---|---|
| Insert set | Medium–High | Misfit and rattling | Higher QA needs |
| Gasket | High | Seal variation | Tighter tolerances required |
| Printing | Low–Medium | Smudges/rejects | Needs process discipline |
| Tracking pocket | Medium | Assembly defects | More inspection time |
Practical tips and advice
- Use removable inserts so one outer box can serve multiple SKUs.
- Use labels first when branding changes frequently.
- Reserve gaskets for true seal requirements, not “nice to have.”
Real example: Switching from glued inserts to removable partitions reduced labor and improved flexibility.
How do MOQ and volume breaks reshape expanded polypropylene box custom price?
MOQ is often the fastest lever for lowering expanded polypropylene box custom price. At low volume, setup time, tuning scrap, and inspection effort are spread across fewer units.
Many projects look expensive at 500 units and become reasonable at 5,000.
Volume tiers (what changes, in plain terms)
| Volume tier | What changes | What to ask | What it means for you |
|---|---|---|---|
| Pilot (200–800) | Setup dominates | “Pilot tool option?” | Higher unit cost, faster learning |
| Launch (1k–5k) | Stability improves | “Breaks at 2k/5k?” | Better pricing + predictability |
| Scale (10k+) | Efficiency wins | “Multi-cavity strategy?” | Lowest unit cost |
Practical tips to get better MOQ pricing
- Combine SKUs using modular inserts instead of multiple box sizes.
- Bundle orders by quarter instead of many micro-orders.
- Request pricing in two views: tooling separated and tooling amortized.
Interactive estimator: predict expanded polypropylene box custom price before you request quotes
This tool won’t replace a supplier quote, but it will prevent surprises and help you negotiate realistically.
Step 1: Score your project (self-assessment)
Add points:
A) Geometry complexity
- Simple shape + flat lid (1)
- Some ribs + stacking features (2)
- Latches, deep ribs, tight fit (3)
B) Performance requirement
- Basic protection (1)
- Durable reuse (2)
- High stacking + tight tolerance (3)
C) Add-ons
- None (1)
- Label pocket or simple branding (2)
- Inserts + gasket + multi-part (3)
D) MOQ
- Under 1,000 (3)
- 1,000–10,000 (2)
- Over 10,000 (1)
Step 2: Interpret your score
- 4–6: More economical expanded polypropylene box custom price
- 7–9: Mid-range custom program
- 10–12: Higher pricing (complex tooling + tighter QA + labor)
Step 3: Cost-control moves (choose one per bucket)
- Geometry: remove one complex latch or reduce rib depth
- Add-ons: switch permanent insert → removable insert
- MOQ: consolidate SKUs to increase volume per design
- Process: widen tolerances where performance allows
Convert expanded polypropylene box custom price into cost per trip (the ROI method)
If your box is reusable, the unit quote is not the real decision. The real decision is cost per successful trip.
Cost-per-trip calculator (fill in your numbers)
Tooling per unit = Tooling cost ÷ Total units
Adjusted unit cost = Unit price + Tooling per unit
Effective cycles = Reuse cycles × (1 − Loss rate)
Cost per trip = (Adjusted unit cost ÷ Effective cycles) + Cleaning cost + Return cost
Example (illustration only)
| Input | Value | Notes | What it means for you |
|---|---|---|---|
| Unit price | 22.00 | quoted | baseline |
| Tooling per unit | 3.00 | amortized | true unit cost |
| Reuse cycles | 30 | target | depends on handling |
| Loss rate | 10% | not returned | reduces cycles |
| Cleaning cost | 0.20 | per trip | labor + supplies |
| Return cost | 0.35 | per trip | reverse logistics |
Effective cycles = 30 × (1 − 0.10) = 27
Cost per trip ≈ (25 ÷ 27) + 0.20 + 0.35 ≈ 1.48
Practical tips and advice
- Track loss rate weekly. Small improvements create big savings.
- Time your cleaning steps. Minutes matter at scale.
- Run two scenarios: best-day and worst-day lane conditions.
Supplier comparison: how to pick the best expanded polypropylene box custom price without overpaying
The cheapest expanded polypropylene box custom price is not always the cheapest project. If quality drifts, you pay later in rejects, delays, and replacements.
Compare suppliers using repeatability, not promises.
Supplier scorecard (rate 1–5)
| Category | What to check | Why it matters | What it means for you |
|---|---|---|---|
| Material spec control | density range consistency | affects strength/feel | reduces batch drift |
| Fit & seal | lid alignment, gap control | affects hold time | fewer claims |
| QA process | checkpoints + sampling | catches defects early | fewer surprises |
| Tooling capability | change control + maintenance | protects specs long-term | avoids silent drift |
| Replacement plan | spares + policy | keeps fleet running | reduces downtime |
“Red flags” to watch
- One-line quotes with no assumption list
- “Any density is fine” (usually weak process control)
- No sample plan or revision control
- Ultra-low pricing paired with vague QA language
Quote-ready RFQ template for expanded polypropylene box custom price (copy/paste)
Use this as a one-page request to get faster, cleaner quotes.
- Use case: chilled / frozen / controlled ambient
- Internal usable dimensions: L × W × H (mm)
- Payload: max kg and loading pattern
- Lane time: “worst-day” total hours + door-open time
- Stacking: stack height and storage conditions
- Reuse target: expected trips per box + return flow
- Cleaning: wipe-down vs wash, frequency, chemical limits
- Lid/closure: separate lid / hinge / strap / seal requirement
- Add-ons: inserts, labels, tracking pocket, color
- Quantity plan: pilot qty + annual forecast + growth
- Quality: tolerances, inspection, acceptance criteria

2025 latest developments and trends in expanded polypropylene box custom price
In 2025, expanded polypropylene box custom price outcomes improve when you treat pricing as a design + operations system, not a negotiation fight.
The strongest programs are using modular platforms, clearer sampling control, and lifecycle math.
Latest progress snapshot (what’s working in 2025)
- Modular platforms: one outer box, multiple insert kits
- Faster sampling cycles: clearer “Rev A / Rev B” change control
- Lifecycle-value focus: durability targets tied to cost per use
- Smarter branding: replaceable logo zones or label-first programs
- More structured quote formats: tooling separated, MOQ tiers clarified
Market insight (what to do next)
- Standardize your outer box early, then customize the inside.
- Pilot fast, lock Rev A, and let data guide upgrades.
- Convert every quote into cost per trip before deciding.
Frequently asked questions
Q1: What is the fastest way to lower expanded polypropylene box custom price?
Increase MOQ or consolidate SKUs into one modular design. Asking for three MOQ tiers also reveals the real price breaks.
Q2: Does higher density always mean a better solution for custom EPP foam box pricing?
No. Higher density can raise cost and freight weight. Choose the lowest density that still meets payload and reuse goals.
Q3: How do I estimate EPP box tooling cost and MOQ impact quickly?
Ask for tooling separated and amortized views. Then divide tooling by forecast units to see the per-unit effect.
Q4: What should be on my expanded polypropylene box quote checklist?
Tooling, sampling, unit tiers, add-ons, QA plan, lead times, and a written assumption list.
Q5: How do inserts affect expanded polypropylene box custom price?
Inserts add parts and assembly time. Removable, standardized inserts often reduce long-term cost and improve flexibility.
Q6: How can I avoid paying for tolerances I don’t need?
Define acceptable tolerances in writing. If tight fits aren’t required, widen the tolerance band to reduce rejects.
Summary and recommendations
Expanded polypropylene box custom price is driven by tooling, MOQ, density, complexity, and add-ons—and it becomes predictable when your specs are clear.
Start by requesting quotes with the same assumptions, including three MOQ tiers and a separated tooling line. Then prioritize cost-down moves that reduce complexity and labor before cutting material thickness. Finally, if you reuse boxes, decide using cost per trip, not sticker price.
Next step (CTA): Create a one-page RFQ today (dimensions, payload, lane time, reuse cycles, add-ons). Request two options (cost-down vs performance) and compare them using cost-per-trip math.
About Tempk
At Tempk, we help teams design and source reusable cold-chain packaging with clear performance targets and predictable cost. We focus on practical engineering—modular inserts, right-sized designs, and repeatable production specs—so your expanded polypropylene box custom price matches real operations, not just a prototype.
Call to action: Share your box dimensions, target payload, reuse cycles, and whether you need inserts or gaskets. We’ll help you structure a quote request and identify the design moves that reduce cost without weakening protection.
Food-Grade EPP Cooler Box: Choose in 2025

Food-Grade EPP Cooler Box: How to Choose in 2025?
You choose a food-grade EPP cooler box to protect food quality, reduce spoilage, and make reuse easier to manage. If you ship chilled items, aim to keep them at 40°F (4°C) or below, and treat your box as part of that system. EPP is lightweight and durable, but your results depend on proof (documents), fit (size and lid seal), and process (pack-out + cleaning).
This article will help you:
Pick the right food-grade EPP cooler box size to reduce headspace and coolant waste
Confirm what “food-grade” means using EU/FDA-style proof and a simple checklist
Choose wall thickness and density based on your lane time, stops, and abuse risk
Pack a food-grade EPP cooler box so temperature stays stable with fewer surprises
Clean, dry, and prevent odor so reuse stays safe and customer-friendly
Run a 10-day validation plan (temperature + cleaning cycles + handling) before scaling
Use a supplier scorecard and cost-per-trip model to avoid “cheap that gets expensive”
Understand 2025–2026 trends (EU PPWR + repeated-use expectations)
What is a food-grade EPP cooler box, in plain language?
A food-grade EPP cooler box is a reusable insulated container made from expanded polypropylene (EPP). Think of it like a “mobile cold room.” The walls slow heat flow, the lid reduces air exchange, and your cold source (gel packs, PCM, ice, or dry ice) does the cooling.
What makes it different is repeat use. Your food-grade EPP cooler box should handle stacking, drops, and daily cleaning without warping. If the lid fit drifts, temperature control drifts with it.
EPP vs EPS vs PU: which one fits your reality?
| Material option | Typical strength | Typical reuse fit | Typical weak spot | What it means for you |
|---|---|---|---|---|
| Food-grade EPP cooler box | High impact resistance | High | Needs cleaning discipline | Best for return loops and daily handling |
| EPS foam box | Low to medium | Low | Breaks, dents, “one-way” feel | Often used for single-use shipments |
| PU insulated box/panels | High insulation | Medium | Cost + repair complexity | Good when space is tight or holds are long |
Practical rule: if you can bring boxes back reliably, a food-grade EPP cooler box usually wins on durability and repeatability.
What does “food-grade” mean for a food-grade EPP cooler box in 2025?
“Food-grade” is not a vibe. It’s proof that your food-grade EPP cooler box is suitable for contact scenarios in your market, and that quality stays consistent across batches.
EU mindset: materials must not release harmful substances or ruin taste/odor. Food Safety
US mindset: polypropylene food-contact use is commonly referenced under FDA rules like 21 CFR 177.1520, subject to conditions and provisions. eCFR
If your shipment is packaged food, you still need “food-grade thinking.” Leaks, condensation, and broken packs happen in real life.
The “Food-Grade Proof Pack” checklist (fast, usable)
Give yourself 1 point for each Yes:
You can explain direct vs indirect food contact for your use case.
You can provide EU-style safety principles (1935/2004 alignment) if needed.
You can provide plastics compliance evidence (EU 10/2011) if needed.
You can show GMP-style manufacturing controls (EC 2023/2006) if needed.
For US programs, you can reference PP compliance under 21 CFR 177.1520.
Score guide
5/5: strong “food-grade EPP cooler box” foundation
3–4/5: workable, but expect retailer/audit questions
0–2/5: high compliance risk (and costly delays)
Compliance table you can use in procurement
| Market need | Key reference | What you ask suppliers for | Why it protects you |
|---|---|---|---|
| EU general food-contact safety | Regulation (EC) 1935/2004 | Safety + taste/odor statement | Stronger defensibility |
| EU plastics scope | Regulation (EU) 10/201 | Plastics compliance + DoC expectations | Fewer approval delays |
| EU manufacturing discipline | Regulation (EC) 2023/2006 | GMP/QA overview + traceability | Less batch drift |
| US polymer reference | 21 CFR 177.1520 eCFR | Resin/additives statement + conditions | Easier customer acceptance |
How do you choose food-grade EPP cooler box size, wall thickness, and density?
A food-grade EPP cooler box should be the smallest size that fits your product plus coolant. Extra air warms fast and forces you to “buy temperature” with more gel packs.
Quick sizing guide (by use case)
10–20 L: lunch delivery, short last-mile drops
20–40 L: meal kits, seafood orders, mixed grocery
40–80 L: bulk chilled distribution, B2B routes
80 L+: hub-to-hub consolidation
Headspace warning: if your food-grade EPP cooler box is half empty, warm air becomes a heater. Tight packing is performance.
Wall thickness: pick it by lane time, not by guess
| Route reality | Practical choice | Why it works | What you gain |
|---|---|---|---|
| 1–3 hours, low stops | Moderate wall + good lid | Less bulk, fast handling | Faster pack-out |
| 3–8 hours or hot ambient | Thicker wall or better inserts | Less temperature swing | Fewer complaints |
| 8+ hours or high risk | Thicker + disciplined SOP | Handles worst-case | Predictable results |
Density (durability) vs thickness (insulation)
Thickness helps you slow heat gain.
Density helps your food-grade EPP cooler box survive stacking, drops, and reuse.
Use this simple match:
| Your biggest risk | Lean toward | What it means for you |
|---|---|---|
| Drops + stacking | Higher density features | Fewer cracks and lid drift |
| Long holds | Thicker walls + better seal | Slower drift |
| Tight courier limits | Right-sized box + smart inserts | Better cube efficiency |
| Cleaning speed matters | Smooth interior + fewer grooves | Less labor and odor risk |
How do you pack a food-grade EPP cooler box for stable temperature?
A food-grade EPP cooler box performs like a system, not a standalone product. Your goal is repeatability: the same steps, same layout, same results.
Pack-out steps (simple, repeatable)
Pre-condition the box (start cool, not warm).
Pre-chill the product (don’t expect the box to cool warm food).
Place cold sources strategically (top + sides beats “all at the bottom”).
Reduce void space (use inserts or clean fillers).
Close fast and keep closed (every opening is a temperature hit).
Coolant placement cheat table
| Your goal | Best placement | Best for | What you’ll notice |
|---|---|---|---|
| Even cooling | Top + both sides | Mixed loads | Less warm “top layer” |
| Protect delicate items | Side near sensitive item | Seafood, dairy | Better texture |
| Long hold | Top + sides + base | Long routes | Slower drift |
Decision tool: choose your pack-out pattern (interactive)
Pick one lane and follow it every time:
Chilled meal kits (target 0–6°C): top + sides, product centered, minimal air gaps
Frozen (target ≤ -18°C): stronger cold source, tight seal, minimal doorstep dwell
Mixed loads: use a divider so it behaves like “two boxes in one”
Tip: take one photo of the “perfect pack.” Train from that photo, not from memory.
How do you clean, dry, and prevent odor in a food-grade EPP cooler box?
Reusable programs fail for one boring reason: cleaning is inconsistent. Your food-grade EPP cooler box should be chosen with cleanability in mind, then run with a simple SOP.
The 4-step cleaning SOP (daily)
Clean: detergent + light brush, focus on lid lip and corners
Rinse: remove detergent residue
Sanitize (if your SOP requires): correct concentration and contact time
Dry fully: lid open, airflow, no “wet storage”
Drying is not optional. Wet storage drives odor and microbial risk.
“Drying Matters” self-check (interactive)
If you see any of these, your drying step is weak:
Boxes smell musty after storage
Lids feel damp inside
Water beads stay in corners
Labels peel because moisture remains
Fix in one sentence: store boxes open until fully dry, then close and stack.
Cleaning design features that save you labor
| Feature | What it does | Why it matters | Your benefit |
|---|---|---|---|
| Smooth interior | Fewer dirt traps | Faster wipe-down | Lower labor cost |
| Rounded corners | Less residue | Less scrubbing | Faster turnaround |
| Drain strategy | Less standing water | Better drying | Less odor |
| Durable surface | Resists abrasion | Stays cleanable longer | Longer lifespan |
How do you validate a food-grade EPP cooler box before scaling?
A food-grade EPP cooler box is only “good” if it holds your temperature on your real routes. Validate with your real staff, real food mass, and worst-case ambient.
For food safety basics, many public guidelines set refrigerators at 40°F (4°C) or below and freezers at 0°F (-18°C) or below. FoodSafety.gov Your delivery targets should be tighter than storage targets because routes include door openings and delays.
10-day lane validation plan (practical)
Day 1–2: pack-out training + timing
Day 3–5: worst-case ambient test (hot day / heated room)
Day 6–7: handling stress test (multiple short openings)
Day 8–9: clean–dry cycles, then re-test hold
Day 10: review logs, lock SOP, and set acceptance rules
Validation table (copy into your project file)
| Test | What you measure | Pass indicator | Why it matters |
|---|---|---|---|
| Temperature hold | Time-in-range | Meets lane duration | Customer trust |
| Peak temperature | Highest spike | Under your limit | Peaks drive complaints |
| Reuse-cycle impact | Hold after cleaning cycles | Stable | Reuse confidence |
| Drop/stack | Cracks + lid fit | No seal failure | Lower replacement cost |
Logger tip: if you need audit-ready evidence, use temperature recorders that match recognized logistics expectations (EN 12830 is commonly referenced for temperature recording systems in transport and storage). iTeh Standards
How do you buy the right food-grade EPP cooler box (without getting trapped by price)?
The best food-grade EPP cooler box purchase is the one with the lowest cost per successful trip. That means fewer failures, fewer replacements, and fewer customer refunds.
Supplier scorecard (interactive, 0–2 each)
Score each supplier from 0 to 2:
Provides your market’s proof pack (EU/FDA style). Food Safety+1
Explains additive/colorant control and change control.
Shows QA/GMP discipline for food-contact materials (if relevant). EUR-Lex
Supports pilot testing and lane validation.
Can keep lid fit consistent (tolerances + QC approach).
Supports traceability (batch IDs, records, change notices).
Score guide
0–5: high risk
6–8: pilot only
9–12: strong candidate
Mini ROI calculator (fast, useful)
Use this simple model:
Cost per trip = (Box cost ÷ expected trips) + cleaning cost + loss/claim cost
To improve ROI, you usually do two things:
Increase expected trips (durability + cleaning discipline)
Reduce loss/claim cost (seal + pack-out + validation)
2025–2026 trends that change food-grade EPP cooler box decisions
In the EU, the Packaging and Packaging Waste Regulation (PPWR) is now framed as Regulation (EU) 2025/40. EUR-Lex The European Commission notes PPWR entered into force on 11 February 2025, with a general application date 18 months later. Environment
What this means in plain language: reuse and waste prevention expectations are rising. Your food-grade EPP cooler box program becomes stronger when you can measure reuse cycles and reduce failures.
Repeated-use expectations are getting sharper
Commission Regulation (EU) 2025/351 highlights a repeated-use concern: deterioration over cycles can increase migration, so repeated-use articles need design and instructions that prevent that risk. EUR-Lex+1
Your move: treat your box like a controlled asset:
validate after cleaning cycles
lock change control with suppliers
track cycles, odor rate, and temperature exceptions
Common questions (FAQ)
Q1: What is a food-grade EPP cooler box used for?
A food-grade EPP cooler box is used for reusable cold-chain transport of chilled or frozen goods like meal kits, seafood, dairy, meat, and groceries. It protects temperature stability, improves handling durability, and supports return logistics when you can reuse boxes consistently.
Q2: How do I prove my food-grade EPP cooler box is really “food-grade”?
Ask for a proof pack that matches where you sell. In the EU, buyers often expect alignment with the food-contact framework and plastics rules, plus GMP discipline. Food Safety+1 In the US, polypropylene often references FDA rules like 21 CFR 177.1520. eCFR
Q3: What size food-grade EPP cooler box should I buy?
Choose the smallest food-grade EPP cooler box that fits your payload plus coolant with minimal headspace. Oversized boxes trap warm air and force extra gel packs. Start with one “most common order” size and standardize it before expanding sizes.
Q4: How thick should a food-grade EPP cooler box be?
Match thickness to lane time and ambient risk. Moderate walls can work for short urban drops, but longer or hotter routes usually need thicker insulation or tighter inserts. Your best answer comes from a short lane validation test, not a catalog.
Q5: What’s the biggest mistake in pack-out for a food-grade EPP cooler box?
Putting all cooling at the bottom and leaving big air gaps. For most chilled lanes, top-and-side placement reduces warm “lid zones.” Then keep the lid closed between stops.
Q6: What’s the biggest failure in reusable cooler box programs?
Wet returns. A food-grade EPP cooler box can be clean, but if it’s stored damp, odor and complaints will follow. Build a drying step (open lids + airflow) into your daily workflow.
Q7: Do I need temperature loggers for a food-grade EPP cooler box program?
If you want audit-ready proof or you ship higher-risk products, loggers help you validate worst-case performance. EN 12830 is commonly used as a reference for temperature recording systems in transport and storage. iTeh Standards
Q8: How do I set a simple temperature target for chilled vs frozen?
Public food safety guidance commonly points to 40°F (4°C) or below for refrigerators and 0°F (-18°C) or below for freezers. FoodSafety.gov Use tighter internal targets for delivery because stops and delays create spikes.
Summary and recommendations
A food-grade EPP cooler box is a strong choice when you treat it like a system: proof (documents), fit (size + lid seal), and process (pack-out + cleaning). Start by choosing the right size to reduce headspace, then standardize coolant placement and lid discipline. Validate your lane performance with real food, real staff, and cleaning cycles. When you do this, you get fewer failures, less waste, and higher customer trust.
Action plan (do this next week):
Pick one lane and one box size to standardize.
Run a 10-day pilot with loggers and cleaning cycles.
Lock a simple pack-out photo SOP and a dry-storage rule.
Scale only after performance is stable and repeatable.
About Tempk
At Tempk, we design temperature-control packaging systems for real-world cold chain operations. We focus on repeatable performance: stable temperatures, hygiene-ready reuse, and SOP-friendly handling that teams can execute daily. With a food-grade EPP cooler box program, our goal is to help you reduce product loss, cut single-use waste, and deliver a cleaner customer experience through consistent packaging and process design.
Next step (CTA): Share your product type, route duration, stop count, peak summer ambient, and cleaning method. We’ll outline a lane-specific food-grade EPP cooler box configuration and a pilot checklist you can run immediately.
High-Density Insulated EPP Box Best Choice in 2025?
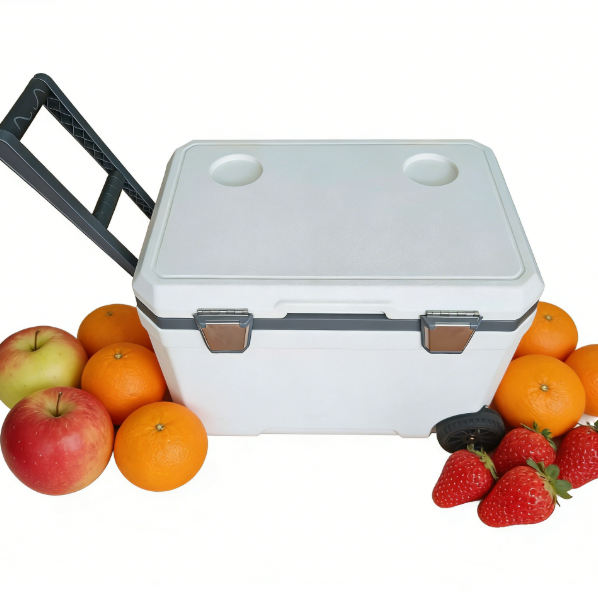
High-Density Insulated EPP Box Best Choice in 2025?
Last updated: December 19, 2025
If you’re searching for the high-density insulated EPP box best option, you’re really asking one question: how do you keep product temperature stable on your worst day—without fragile packaging or process chaos? In practice, most failures come from lid gaps, rushed packouts, stacking damage, and inconsistent reuse—not “insulation theory.” This guide gives you simple decision rules, buyer checklists, and a repeatable test plan you can run before scaling.
This article will answer for you:
What “high density” means in high density EPP foam g/L selection
How to choose EPP box wall thickness for cold chain hold time (without wasting payload space)
Which lid and closure details make the high-density insulated EPP box best in real handling
How to run a simple validation plan (including ISTA 7E thermal testing for insulated shippers when needed)
How to estimate reusable EPP box cost per trip and avoid “expensive reuse that never returns”
A practical food-grade EPP box cleaning checklist for safe, repeatable reuse
Why is the high-density insulated EPP box best for repeatable cold chain?
Direct answer: The high-density insulated EPP box best choice stays square, seals reliably, and survives repeated handling—so your temperature performance stays consistent across cycles.
Expanded explanation: EPP (expanded polypropylene) is a lightweight, closed-cell foam often used for reusable insulated shipping. High-density grades feel less “squishy” and more “tool-like,” which matters when boxes get dropped, stacked, and reused. If a box warps, your lid seal weakens and your packout shifts, creating temperature spikes that look like “bad insulation.”
What changes in real operations with higher density?
| Operational Challenge | Standard foam outcome | High-density EPP outcome | What it means for you |
|---|---|---|---|
| Repeated stacking | corners crush | corners resist | fewer damaged returns |
| Fast handling | lid loosens | fit stays consistent | fewer temperature spikes |
| Cleaning cycles | surface wears | surface holds up | longer service life |
Practical tips you can use today
If you reuse weekly: density upgrades often pay back faster than “more insulation.”
If your team loads fast: prioritize lid reliability over extra features.
If brand trust matters: fewer failures protect reviews and repeat orders.
Practical case example: A multi-stop distribution team reduced “lid won’t close” incidents after switching to a more rigid, high-density EPP lid geometry and adding a quick closure check step.
How do you define “high density” for the high-density insulated EPP box best choice?
Direct answer: “High density” is not one universal number. In buying conversations, it means a higher molded density band than your current packaging—chosen to improve shape retention and durability.
Expanded explanation: Suppliers commonly quote density in g/L. Many packaging-grade EPP systems sit in lower bands, while higher bands target heavy reuse, stacking, and abuse. The key is to ask for molded density and design intent, not marketing labels.
High density EPP foam g/L selection: a buyer-friendly cheat sheet
| Practical label | Approx. density band (g/L) | Typical goal | Best-fit scenario |
|---|---|---|---|
| Standard | 20–60 | balance cost + durability | light reuse, low drop risk |
| High density | 60–100 | stronger walls, better fit retention | repeat routes + stacking |
| Ultra | 100+ | maximum toughness | high-abuse handling, long service life |
Practical tips and recommendations
Buy density with a reuse plan. Density pays back through cycles, not promises.
Ask for molded density. Mold design and geometry change real outcomes.
Match density to handling abuse. Gentle lanes should spend on seal + packout first.
Practical case example: A returns program stopped corner dents by moving up a density band and adding rib reinforcement—without increasing wall thickness.
How do you choose wall thickness for the high-density insulated EPP box best hold time?
Direct answer: For the high-density insulated EPP box best result, treat density as a strength knob and thickness as a hold-time knob. Don’t overpay for one when your lane needs the other.
Expanded explanation: Thicker walls can improve thermal resistance, but they also reduce internal volume and can increase shipping weight. Many teams “solve” temperature failures by choosing thicker boxes, then lose payload efficiency or packing speed. A better approach is to match thickness to lane duration and fix leaks and packout first.
Selection table you can use immediately
| Box spec focus | Best when you need | Tradeoff | Practical meaning for you |
|---|---|---|---|
| Higher density | heavy reuse + stacking | more weight | fewer replacements |
| Thicker walls | longer hold time | less payload space | fewer excursions |
| Medium density + good thickness | balanced lanes | moderate | strong all-around choice |
| Ultra thick + high density | extreme lanes | cost + bulk | specialty use only |
Practical tips and recommendations
If boxes return damaged: raise density before raising thickness.
If temperature drifts slowly: increase thickness or improve coolant strategy.
If one corner warms: fix packout and lid seal before buying a bigger box.
Practical case example: A team fixed “warm corner” failures by standardizing product centering and adding a spacer—no thickness change required.
What lid and seal design makes the high-density insulated EPP box best in real handling?
Direct answer: The high-density insulated EPP box best design treats the lid like a gasketed door: overlap, consistent compression, and closure force that prevents corner gaps.
Expanded explanation: In real shipping, the lid is often the weak point. A perfect wall can’t save a lid that’s “almost closed.” Your goal is a closure that works even when staff move fast and handling is imperfect.
Lid reliability checklist (60-second audit)
Does the lid seat the same way every time?
Do corners stay aligned after stacking and drops?
Can staff verify closure at a glance?
Does the closure still work after repeated open/close cycles?
Closure style comparison
| Closure style | Strength | Risk | What it means for you |
|---|---|---|---|
| Friction-fit | simple | depends on shape stability | needs higher density + good geometry |
| Strap closure | forgiving | slower handling, straps can be lost | reduces training mistakes |
| Latch closure | fast + consistent | latch wear over time | track maintenance and replacements |
Practical tips and recommendations
Do the “paper-strip test.” Close the lid on a strip of paper and pull gently.
Inspect corners after impacts. Corner deformation is the first leak path.
Use a “two-check rule.” One visual check + one tactile check beats assumptions.
Practical case example: A hub cut temperature spikes after switching to a deeper-overlap lid and adding a 3-second closure verification step.
How do you pack out so the high-density insulated EPP box best actually performs?
Direct answer: The high-density insulated EPP box best still fails with inconsistent packout. Your packout controls hot spots, cold spots, and drift rate.
Expanded explanation: Think of packout like a recipe. The same ingredients can produce different results if placement changes. Packout variation often looks like “bad insulation,” but it’s really process noise.
The four packout rules that win
Center the payload (avoid wall contact hot spots)
Balance refrigerants (not “top only”)
Minimize free air space (air moves heat around)
Use buffer layers (avoid direct contact risks)
Packout pattern table
| Packout pattern | When it works | Common failure | What it means for you |
|---|---|---|---|
| Top-only refrigerant | very short lanes | warm corners | inconsistent arrivals |
| Side + top coverage | most lanes | lid gaps matter more | best general approach |
| Full surround + spacer | long/hot lanes | wrong conditioning | most stable hold time |
The “10-minute packout check” (run every shift)
Answer yes/no:
Is the product pre-conditioned to the target range?
Is the coolant conditioned correctly for your band?
Is there a barrier between coolant and sensitive surfaces?
Is empty space minimized with safe dunnage?
Is closure consistent (strap/latch/tape plan)?
If you have 2+ “no” answers, your high-density insulated EPP box best performance will feel random—fix the process first.
Practical case example: A seafood shipper improved quality by adding a barrier layer and photo-based coolant placement. Same box. Better results.
User engagement: Decision tool to find the high-density insulated EPP box best for your lane
Use this before you buy. It prevents “over-buying” and “under-buying.”
Step 1: Score your lane risk (3–9)
Transit time
0–24 hours (1)
24–48 hours (2)
48–72+ hours (3)
Ambient exposure
mild/cool (1)
warm (2)
hot/extreme (3)
Handling intensity
single handoff (1)
several handoffs (2)
multi-stop + stacking (3)
Step 2: Match the score to your starting spec
3–4 points: medium thickness, medium-to-high density, simple closure
5–7 points: thicker walls, higher density, better overlap lid, defined packout
8–9 points: high density + thick walls + strict packout + monitoring/validation
Step 3: Pick your “non-negotiable”
Choose one:
maximum hold time
maximum durability
easiest cleaning
lowest shipping weight
highest reuse ROI
Your high-density insulated EPP box best choice is the one that meets your lane risk and your non-negotiable without adding operational complexity your team won’t follow.
How do you validate the high-density insulated EPP box best with simple tests (and ISTA 7E)?
Direct answer: Validation turns your high-density insulated EPP box best decision from belief into a repeatable spec. Start with simple lane simulations, then use standards like ISTA 7E when parcel-style networks or audits demand it.
Expanded explanation: Without a consistent test plan, you can’t tell if a “better box” helped—or if you just added more coolant that day. Your goal is comparability: same packout, same sensors, same conditions, repeated runs.
A practical validation plan (3 steps)
Define your lane: duration, ambient range, delivery risks (porch, cross-dock, tarmac).
Lock your packout: product placement, coolant type, conditioning, closure method.
Measure and repeat: run at least 3 trials per lane condition before scaling.
| Test condition | Ambient simulation | Duration target | What it means for you |
|---|---|---|---|
| Typical day | 20–25°C | route time | checks daily stability |
| Hot risk day | 30–35°C | route + buffer | finds summer failures |
| Delay scenario | typical ambient | +4 to +8 hours | tests disruption risk |
Sensor placement checklist (don’t skip this)
| Sensor location | Why it matters | What you learn | Practical win |
|---|---|---|---|
| warm corner near lid | common failure zone | lid leak impact | better design feedback |
| center of payload | true product condition | compliance evidence | stronger audit story |
| near coolant | freeze risk | overcooling detection | safer packouts |
Practical case example: A pharma distributor found the “best box” failed only because staff skipped the strap step. Training fixed it—same box passed consistently.
How do you calculate ROI: reusable high-density insulated EPP box best cost per trip?
Direct answer: The high-density insulated EPP box best option is often the one with the lowest cost per successful trip, not the lowest purchase price.
Expanded explanation: Reuse only wins when the box returns, gets cleaned, and ships again. If reverse logistics is weak, single-use can be cheaper in practice. A simple calculator keeps you honest.
Cost-per-trip model (simple and practical)
Cost per trip = (Box cost ÷ expected cycles) + cleaning + reverse logistics + loss risk
Quick break-even logic:
If higher density doubles cycles, it can lower cost per trip.
If weight increases shipping cost, you need more cycles to win.
Self-assessment: will you actually get reuse value?
Score 0–2 for each (max 10):
You have a reliable return channel.
You can clean and dry boxes quickly.
You track IDs or batches and loss rates.
You can retire damaged units consistently.
You run standardized lanes and packouts.
Score meaning
0–4: reuse risk is high; start with process cleanup and pilots
5–7: mixed; pilot one lane and measure cycles and loss
8–10: strong; higher density often pays back quickly
How do you keep reuse safe: a food-grade cleaning checklist for the high-density insulated EPP box best?
Direct answer: The high-density insulated EPP box best program needs cleaning that people will actually do. Repeatable beats “perfect.”
Expanded explanation: If cleaning is too complex, it gets skipped. If boxes are stacked while wet, odor and residue problems grow. Build a checklist that fits your throughput and staffing.
Food-grade EPP box cleaning checklist (operationally realistic)
Pre-rinse: remove debris and liquids immediately after returns
Wash: approved cleaner at correct dilution and contact time
Rinse: remove residues
Dry: air dry fully before stacking or storage
Inspect: check cracks, stains, lid edges, corner deformation
Quarantine: remove damaged units from circulation
| Step | What you do | What you avoid | What it means for you |
|---|---|---|---|
| Wash | controlled dilution + scrub points | overly aggressive chemistry | less material wear |
| Dry | full dry before stacking | wet stacking | fewer odor complaints |
| Inspect | check lid edges + corners | ignoring small cracks | fewer hygiene and seal risks |
Practical tips and recommendations
Set a retire rule: if the lid no longer closes firmly, remove it.
Train with photos: show pass vs fail examples.
Track cycles simply: barcode, QR, or even batch color tags can work.
Supplier scorecard: what to ask before buying a high-density insulated EPP box best program?
Direct answer: The high-density insulated EPP box best purchase is a system decision—training, cleaning, spare parts, and tolerances—not just “a box.”
Expanded explanation: If a supplier cannot explain validation, closure standardization, and dimensional consistency, you may get a box your team cannot run reliably.
Supplier scorecard: 12 questions that matter
Can you share lane-based performance data (not only material claims)?
What molded density options exist, and how do they change durability?
What lid designs are available, and how is sealing standardized?
What cleaning guidance exists, and which chemicals are compatible?
Are replacement parts available (lids, straps, inserts)?
Can you support a pilot with small quantities?
How do you manage dimensional variance across batches?
What is the realistic lifecycle expectation for my lane?
What quality checks are performed on arrival?
What labeling zones or ID options support tracking?
Can you support monitoring integration if required?
What changes are possible without breaking lead times?
| Supplier factor | What “good” looks like | Red flag | What it means for you |
|---|---|---|---|
| Pilot support | small run + guidance | “buy big first” | lower scale risk |
| Consistency | clear tolerances | vague answers | fewer packing failures |
| Spare parts | lids/straps available | “replace whole box” | lower downtime costs |
2025 trends: what’s changing for high-density insulated EPP box best buyers?
Trend overview: In 2025, the biggest shift is that reusable packaging is treated like an asset fleet, not a disposable supply. Buyers care less about slogans and more about repeatable execution: closure checks, photo packouts, tracking IDs, and cost-per-success metrics.
Latest progress snapshot (what you’ll see more of)
Fleet thinking: box IDs, cycle counts, and return workflows
Lane-based standardization: fewer SKUs, less training burden
Faster training: line-side photos and short checklists
Better ergonomics: grips and designs built for real handling
More validation culture: seasonal packouts (summer/winter) are becoming normal
Market insight: The high-density insulated EPP box best strategy is usually process-first:
standardize packout
enforce closure checks
track reuse cycles
validate critical lanes
upgrade materials only where data proves it
This often improves performance faster than buying the most expensive box.
Frequently Asked Questions
Q1: What does “high density” mean for the high-density insulated EPP box best choice?
High density typically means a tighter foam structure and higher molded density band, improving durability and shape retention so the lid seal stays consistent.
Q2: Is thicker wall always better for a high-density insulated EPP box best result?
Not always. Thicker walls can improve hold time, but reduce payload space and can increase shipping cost. Match thickness to lane duration first.
Q3: Why do shipments fail even with a high-density insulated EPP box best design?
Most failures come from lid gaps and packout variation. A strong box still needs a photo-based packout and a fast closure check.
Q4: How do I validate the high-density insulated EPP box best for my lane?
Define lane conditions, lock the packout, place sensors consistently, and run at least three repeat tests. Use ISTA 7E when networks and audits require standardized comparison.
Q5: What’s the fastest way to detect lid leaks?
Use the paper-strip test and inspect lid corners after drops. Corner deformation is the most common leak path.
Q6: When should I retire a reusable EPP box?
Retire when the lid no longer closes firmly, corners deform, cracks appear, or cleaning cannot remove residue. A strict retire rule protects the program.
Q7: Is the high-density insulated EPP box best always better than EPS or VIP?
No. EPS can work for one-way, low-abuse lanes. VIP systems can win for extreme hold time. High-density EPP often wins for repeat routes with heavy handling and reuse.
Summary and recommendations
The high-density insulated EPP box best for you is the one that matches your lane risk, handling intensity, and reuse reality. High density improves durability and shape stability, which helps the lid seal stay consistent across cycles. Wall thickness supports hold time, but only when paired with strong closure discipline and a standardized packout. If you want fewer excursions, start with seal and process repeatability before buying thicker walls.
Your next step (clear CTA)
Pick one high-volume lane today. Score the lane risk, choose one box standard, and build a “gold packout” with photos. Add a 3-second closure check, then run three hot-day simulations before scaling. If you want help, share your lane duration, ambient risk, payload size, and reuse method—and request a pilot plan.
About Tempk
At Tempk, we help cold chain operators build packaging systems that work under real pressure—not just in theory. We focus on lane-based selection, repeatable packouts, and durable reusable EPP configurations so your team can execute consistently. Our approach prioritizes practical SOPs, validation-driven decisions, and lifecycle thinking, so your high-density insulated EPP box program stays stable across real-world cycles.
Next step: Share your lane profile and target temperature band. We’ll outline a lane-matched spec and a pilot validation plan you can run before scaling.
Cold Chain Meat Safety Standards: 2025 Guide
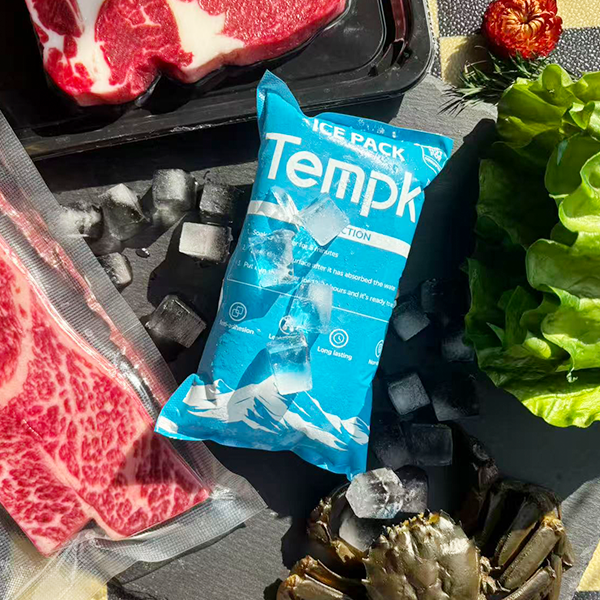
Cold Chain Meat Safety Standards: 2025 Checklist?
Cold chain meat safety standards are the daily controls that keep meat cold, clean, and provably controlled from plant to customer. In 2025, “cold on arrival” is not enough—you need repeatable handoffs, clear limits, and fast proof. Food-safety guidance commonly highlights a 40–140°F “danger zone” where bacteria can multiply rapidly, and many teams use simple time rules (like a 2-hour cap, or 1 hour in hot conditions) to drive urgent dock decisions.
This article will answer for you:
How a cold chain meat safety standards checklist should look in real operations
How to set temperature lanes for cold chain meat safety standards for storage and transport
How to control handoffs in cold chain meat safety standards for transport (dock + last mile)
How to build a practical meat temperature excursion response plan
How to create “audit-evidence packs” that reduce claims and speed disputes
cold chain meat safety standards
What do cold chain meat safety standards really mean in 2025?
Cold chain meat safety standards boil down to three pillars: time–temperature control, sanitary handling, and recorded proof. Your goal is not “a cold truck.” Your goal is a controlled system that survives handoffs.
cold chain meat safety standards
Think of temperature like a bank statement. A display is a snapshot. A log is the history you can defend.
| Pillar | What it controls | What you should measure | What it means for you |
|---|---|---|---|
| Time–temperature control | Microbial growth + shelf-life loss | Out-of-range minutes + peak temp | Fewer spoilage events |
| Sanitary handling | Cross-contact + contamination | Zone rules + cleaning verification | Fewer safety incidents |
| Recorded proof | Accountability + dispute speed | Evidence pack completeness | Faster audit + claims closure |
Practical tips you can use today
Write one standard per handoff: plant → dock → truck → receiver.
Log exceptions, not just “normal.” Auditors trust realistic systems.
Make proof fast: if a record takes 3 minutes, it won’t happen consistently.
cold chain meat safety standards
Practical case: One operator reduced “mystery warm arrival” disputes by saving one folder per load: dock times, temperature log, and a one-line corrective note.
Which temperature lanes should you define for cold chain meat safety standards?
Cold chain meat safety standards work better when you define temperature lanes by product type and process step. “Meat” is not one lane. Chilled fresh, frozen, and ready-to-eat (RTE) behave differently, and mixing them without a plan creates weak evidence and predictable claims.
cold chain meat safety standards
A lane is more than a setpoint. A lane includes:
a target range,
a time budget for being out of range,
and a response rule when drift occurs.
A simple lane table you can start with
| Lane | Goal | What to monitor | Real meaning for you |
|---|---|---|---|
| Chilled fresh meat | Stable refrigeration | Warm minutes + door-open time | Protects shelf life |
| Frozen meat | No partial thaw | Door events + hot spots | Prevents thaw-refreeze damage |
| Ready-to-eat meat | Strict hygiene + cold | Separation + quick checks | Reduces cross-contact risk |
| Mixed loads | Protect the most sensitive | Worst-spot sensors | Fewer disputes |
Interactive tool: the “Warm-Minutes Budget” (2 minutes)
Fill in your route. Then set a rule: if you exceed the budget, you trigger a deviation review.
Expected staging minutes: ___
Expected loading minutes: ___
Expected door-open minutes across stops: ___
Expected curbside/receiver minutes: ___
Total warm minutes: ___
Rule example: If total warm minutes exceeds your lane budget, you must document cause + corrective action.
Practical tips and recommendations
Monitor the worst spot, not the average. Standards are won near doors and corners.
Avoid casual mixed loads. If you must mix, separate physically and document the plan.
Use one sentence per SKU: “This SKU stays in the chilled lane end-to-end.”
cold chain meat safety standards
Practical case: A carrier reduced returns after separating chilled and frozen zones and loading by stop order to reduce door-open time.
How do cold chain meat safety standards succeed at the loading dock?
Cold chain meat safety standards fail most often at handovers—especially loading and unloading—because temperature rises fastest and hygiene discipline is under pressure. The dock is your highest ROI control point.
cold chain meat safety standards
Interactive dock checklist (yes/no, under 2 minutes)
Product ready? Product is at required shipping condition (not “almost cold”).
Trailer ready? Clean, dry, odor-free, food-suitable.
Pre-cool done? Trailer at setpoint before loading starts.
Load plan set? Airflow paths protected (no blocked return air).
Door time tracked? Start/stop time recorded.
Logger armed? Device IDs recorded and placed per SOP.
Seal applied? Seal number recorded if required.
A simple dock-timer standard that changes behavior
Target door-open time: ___ minutes
Max door-open time: ___ minutes
If exceeded: document cause + corrective action (one line is enough).
| Dock risk | What it looks like | Your standard | What you gain |
|---|---|---|---|
| Warm staging | Pallets sit outside cold control | Cold staging zone + timer | Less temperature drift |
| Slow loading | Doors open too long | Door-open KPI | Fewer excursions |
| Weak proof | “We usually…” | One-page log | Faster claims closure |
Practical tips and recommendations
Stage in controlled zones whenever possible.
Use one “good load photo” as training—faster than lectures.
Record what happened when it goes wrong. That’s what audits ask for.
cold chain meat safety standards
Practical case: A shipper reduced warm-load disputes by documenting door-open minutes and saving one temperature log per shipment.
What sanitation controls strengthen cold chain meat safety standards?
Cold slows growth, but it does not remove contamination. Cold chain meat safety standards require sanitation that is repeatable, documented, and realistic—especially if you use reusable totes, returnable packaging, or shared equipment.
cold chain meat safety standards
A common failure is cleaning without drying. Damp surfaces invite odors and risk.
SSOP basics you can apply today
| SSOP item | Minimum standard | Verification | What it means for you |
|---|---|---|---|
| Food-contact surfaces | Clean after use | Visual check + log | Fewer residues |
| Tools | Stored clean and dry | Shift sign-off | Less cross-contact |
| Reusable totes | Wash and dry | Random spot check | Stable hygiene |
| Spills/leaks | Immediate response | Incident log | Fewer recurring odors |
Practical tips and recommendations
Separate tools by zone. Never move tools from raw to RTE.
Write a spill protocol. Spills are predictable—treat them like a routine.
Add “drying” to every cleaning step. “Clean + wet” is not clean enough.
cold chain meat safety standards
Practical case: A micro-fulfillment site reduced odor findings by adding a required open-air dry step after washing reusable totes.
How should monitoring and temperature logging work for cold chain meat safety standards in 2025?
Monitoring turns cold chain meat safety standards into proof. Without monitoring, you rely on assumptions. With monitoring, you can identify deviations early and prevent repeat failures.
cold chain meat safety standards
Keep monitoring simple: measure what drives decisions
Time in target range
Time out of target range (warm minutes)
Peak temperature during deviations
Conditions at handover moments
Practical logging intervals (lane-based)
Use an interval that lets you act before product is lost. Many operators in 2025 target 5–15 minutes depending on risk and route design.
cold chain meat safety standards
| Lane scenario | Suggested logging interval | Why it works |
|---|---|---|
| High-risk chilled + multi-stop | 5–10 minutes | Door events show up fast |
| Standard chilled long-haul | 10–15 minutes | Actionable without data overload |
| Frozen stable loads | 15 minutes + door events | Stable when doors stay closed |
Alarm design that prevents “alert fatigue”
Create three tiers:
Early warning: trend drifting → check doors, airflow, setpoint
Action alarm: out of range → execute SOP + document
Critical alarm: prolonged out of range → quarantine/hold + escalate
Calibration routine for cold chain thermometers
If your data isn’t trusted, your standards don’t exist. A practical routine is: weekly sanity check, quarterly verification, annual (or risk-based) calibration.
cold chain meat safety standards
| Calibration step | What you do | What you save | Why it matters |
|---|---|---|---|
| Sanity check (weekly) | Compare readings | 1-line log | Catches drift early |
| Verification (quarterly) | Compare to reference | Verification sheet | Builds trust |
| Corrective | Repair/replace | Action record | Keeps data defensible |
What is a meat temperature excursion response plan under cold chain meat safety standards?
Cold chain meat safety standards are judged by what you do when control is lost. Quiet fixes create loud claims later.
Decision tree (fast, defensible)
Confirm the facts: sensor placement, door event, or equipment issue?
Estimate duration: how long was exposure? (Time is a hazard input.)
Restore control: can you return to target quickly?
Decide disposition: release, hold, downgrade, or reject—based on risk + evidence.
| Excursion scenario | First move | What to document | Defensible outcome |
|---|---|---|---|
| Door-related spike | Close doors, restabilize | Door time + temp curve | Controlled event |
| Slow drift warmer | Inspect reefer/airflow | Action taken + recheck | Prevents full loss |
| Unknown duration/data gap | Quarantine/hold | Missing-data note | Audit-ready decision |
Practical tips and recommendations
Require supervisor approval for releases after excursions.
Write your decision rules before a crisis. Don’t invent rules mid-incident.
Run monthly drills. Practice makes response faster.
cold chain meat safety standards
Practical case: A shipper used a one-page disposition guide. Drivers stopped guessing, and holds became consistent.
What records prove cold chain meat safety standards—and win disputes fast?
Records are not paperwork. They’re your protection when questions arise. A strong “proof pack” format beats a folder of random screenshots.
cold chain meat safety standards
The “5-minute retrieval test”
If a buyer asks for proof, can you produce it quickly? If not, you risk penalties even if handling was fine.
The proof pack: your compliance “receipt”
| Proof pack item | What it proves | Owner | Practical meaning for you |
|---|---|---|---|
| Lot + pack data | Identity | Warehouse/QA | Faster investigations |
| Handoff timestamps | Warm minutes | Dock/receiver | Reveals gaps |
| Excursion summary | Lane control | Logistics | Dispute defense |
| Corrective action note | Active control | QA/ops | Audit readiness |
| Load photo | Packing discipline | Dock lead | Fewer repeat errors |
How do you verify and audit cold chain meat safety standards (without slowing ops)?
Verification proves your cold chain meat safety standards work in real life, not just on paper. Strong programs use short weekly checks and deeper monthly reviews, focused on staging, door routines, and reusable asset hygiene.
cold chain meat safety standards
Audit readiness self-test (score 0–2)
| Item | 0 | 1 | 2 |
|---|---|---|---|
| Lanes defined | No | Informal | Documented + trained |
| Warm minutes tracked | No | Sometimes | Consistent per load |
| Exception response | Ad hoc | Partial | Repeatable playbook |
| Proof pack retrieval | Slow | Inconsistent | Under 2 minutes |
| Calibration discipline | Missing | Partial | Scheduled + logged |
Score guide:
0–4: High risk (fundamentals missing)
5–7: Medium risk (fix handoffs + proof packs first)
8–10: Strong baseline (optimize + improve weekly)
cold chain meat safety standards
Practical tips and recommendations
Audit during peak volume. Failures appear when volume is highest.
Verify corrective actions. A fix is real only after a re-check.
Review patterns weekly. One improvement per week beats one big project.
cold chain meat safety standards
2025 latest developments and trends in cold chain meat safety standards
In 2025, programs are shifting toward exception-first operations: fewer dashboards, faster action. Many teams track warm minutes, door-open minutes, and handoff timestamps because these predict problems earlier than average temperature graphs.
cold chain meat safety standards
Latest progress snapshot
Warm-minutes KPI: time outside lane becomes a core metric
Proof packs by default: one template per shipment
Lane owners: one role accountable for each lane’s exceptions
Short weekly coaching loops: behavior changes faster than long trainings
Stricter reusable asset discipline: clean + dry + inspect + trace every cycle
cold chain meat safety standards
Market insight (what wins contracts)
Buyers move faster when you can show: control, monitoring, corrective action, and proof—without hunting for files.
cold chain meat safety standards
Frequently Asked Questions
Q1: What are cold chain meat safety standards in one sentence?
They are the daily controls that keep meat in the right temperature lane, prevent contamination, and prove it with records and corrective actions.
cold chain meat safety standards
Q2: Is temperature control the only thing that matters?
No. Temperature is critical, but sanitation, separation, traceability, and deviation handling matter just as much.
cold chain meat safety standards
Q3: What is the fastest way to improve cold chain meat safety standards?
Control dock staging and door-open time first, then standardize a proof pack and a repeatable deviation playbook.
cold chain meat safety standards
Q4: Is truck air temperature enough?
Usually not. Air readings can look stable while pallets warm in door zones or corners. Use product-zone checks for stronger proof.
Q5: How often should I review exceptions?
Weekly is a strong baseline. Treat exceptions as improvement fuel, not blame events.
Q6: What should be inside an audit evidence pack?
Lot identity, handoff timestamps, excursion summaries, corrective actions, and a load photo are a strong core set.
cold chain meat safety standards
Summary and recommendations
Cold chain meat safety standards protect safety and shelf life through temperature lanes, sanitary handling, monitoring, and proof. In 2025, the biggest failures happen at handoffs—staging, loading, cross-docking, and last-mile stops—so your best improvements often come from timers, door discipline, and consistent evidence packs. Start simple, measure warm minutes, document deviations, and verify fixes so problems don’t repeat.
cold chain meat safety standards
Your next steps (simple action plan)
Define chilled vs frozen lanes and set alarm tiers.
Implement a dock timer + one-page loading checklist.
Log temperatures at intervals that allow action (often 5–15 minutes by risk).
Use a decision tree for excursions and require one-line corrective notes.
Run a weekly exception review and re-check the fix within days.
CTA: If you want fewer claims and stronger contracts, treat cold chain meat safety standards as daily habits—not emergency paperwork.
About Tempk
At Tempk, we help cold chain operators turn standards into routines teams can execute under real pressure. We focus on the points where control breaks most often—docks, handoffs, and last-mile variability—so you can reduce deviations, protect product conditions, and retrieve proof fast during audits or claims. Our approach prioritizes measurable outcomes: fewer temperature exceptions, fewer disputes, and more consistent deliveries.
Next step: Contact Tempk to map your handoff risks and build a lane-specific checklist pack (loading, sanitation, monitoring, deviation response, and calibration logs).
Cold Chain Meat Industry Trends: What’s Changing in 2025?
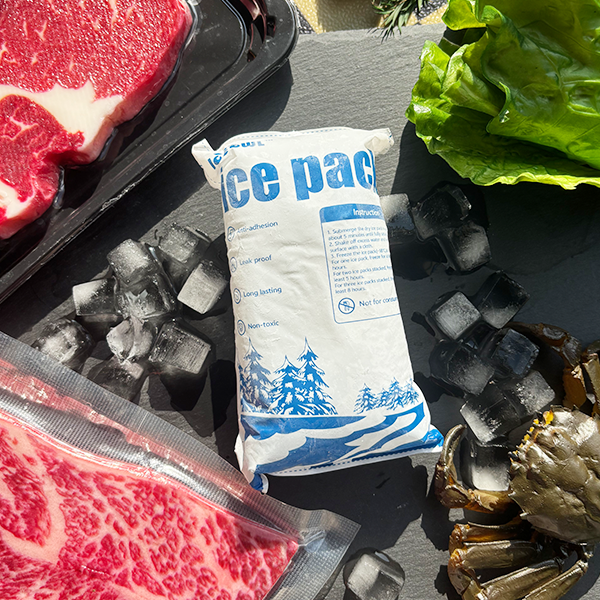
Cold Chain Meat Industry Trends: What’s Changing in 2025?
Last updated: December 19, 2025.
Cold chain meat industry trends in 2025 are pushing you toward one operating model: provable control with fewer “mystery losses.” In the U.S., FDA has proposed moving Food Traceability Rule compliance to July 20, 2028, and Congress directed FDA not to enforce before that date. () In California, all truck TRUs operating in-state must be zero-emission by December 31, 2029. ()
This article will answer for you:
- Which cold chain meat industry trends matter most for safety, quality, and margin
- How sanitary transportation compliance for meat logistics becomes “data-first”
- Where automation in refrigerated meat warehousing pays back fastest
- How low-GWP refrigerants for cold storage warehouses change your capex timing
- How real-time temperature monitoring for meat shipments works without alarm fatigue
- A practical 90-day roadmap to reduce exceptions without overengineering
What are the biggest cold chain meat industry trends in 2025?
Core answer: The biggest cold chain meat industry trends in 2025 are (1) stronger proof and traceability, (2) automation and AI that reduce labor waste, (3) decarbonization pressure on refrigerants and TRUs, and (4) monitoring that triggers action at handoffs.
Here’s the simple framing: your system must still work when routes run late and docks get crowded. That’s why “process + data + sustainability” is replacing “just buy better equipment.”
The 2025 “pressure map” (use it to prioritize)
| Pressure | What it looks like | What it forces you to do | What it means for you |
|---|---|---|---|
| More proof | Buyers ask “show me” | Faster evidence packets | Fewer disputes |
| Less tolerance | Complaints escalate fast | Tighter SOPs by shift | Lower shrink |
| Higher costs | Energy + labor stay painful | Cut wasted motion | Better margins |
| More complexity | More nodes + handoffs | Standardize handoffs | More predictability |
Practical tips and suggestions
- Don’t chase every trend: pick the two that reduce your biggest losses first.
- Start with handoffs: most failures hide where ownership changes.
- Make one lane “perfect”: then copy the same playbook to the next lane.
Practical example: Teams often reduce exceptions faster by fixing staging and door-open behavior than by buying new hardware.
How are cold chain meat industry trends changing traceability and proof?
Core answer: The most important cold chain meat industry trends in traceability are about speed and credibility. You need to answer “what happened” in minutes, not days. In the U.S., FDA’s traceability timeline has shifted, but the direction is unchanged: buyers still want faster, cleaner records. ()
Think of proof like a receipt. If you lose it, you end up arguing from memory.
The minimum “proof pack” you should capture (simple and scalable)
You do not need a complex platform to begin. Start with a five-item packet you can produce quickly.
- Lot / batch identifier
- Route or shipment ID
- Handoff timestamps (received → staged → loaded → delivered)
- Temperature evidence (spot checks + exceptions)
- Corrective action notes (what you did and why)
Proof pack table (what each item solves)
| Proof item | What it solves | Why it matters | What it means for you |
|---|---|---|---|
| Lot + route link | “Which boxes?” confusion | Faster isolation | Fewer blanket holds |
| Handoff times | “Where did it happen?” | Accountability | Less finger-pointing |
| Excursion summary | “Was it out of spec?” | Faster decisions | Less rework |
| Receiving disposition | “Accept or hold?” | Consistency | Fewer shift conflicts |
| Corrective action note | “What did you do?” | Audit readiness | Stronger trust |
Practical tips and suggestions
- Make scanning easy: if it takes too long, people skip it.
- Record exceptions, not everything: most ROI is in the outliers.
- Train one sentence: “If it’s warm, hold and log.”
Practical example: A simple handoff log often cuts dispute time because timestamps replace opinions.
Where do last-mile refrigerated meat delivery trends hit you hardest?
Core answer: Last-mile refrigerated meat delivery trends increase “doorstep risk.” You get more stops, more handoffs, and less buffer time. That pushes your cold chain meat industry trends response toward faster receiving and better handoff discipline.
If you only optimize truck setpoints, you miss the real leak. The real leak is warm minutes during waiting.
A quick “handoff risk” checklist (interactive)
Answer Yes/No:
- Do loads sit at the dock more than 20 minutes?
- Are doors opened more than 3 times per route?
- Do receivers delay unloading during peak hours?
- Do you lack a consistent accept/hold/quarantine rule?
If you answered Yes to two or more, start your program at handoffs, not in transit.
Practical tips and suggestions
- Direct-to-consumer: treat “delivered-to-received time” as a KPI, not a mystery.
- Foodservice: pre-book receiving slots for the highest-risk drops first.
- Retail: prioritize speed and consistency over more monitoring everywhere.
How is automation in refrigerated meat warehousing evolving?
Core answer: Automation in refrigerated meat warehousing is no longer about “cool robots.” It is about fewer touches, fewer errors, and predictable throughput when labor is tight. The fastest payback appears where walking time is high and mistakes are costly.
If your facility is the bottleneck, automation becomes a margin lever.
Where automation pays back first
| Automation area | Best for | First benefit you’ll feel | What it means for you |
|---|---|---|---|
| AS/RS in frozen | Dense storage | Higher throughput | Fewer late loads |
| AMRs in chilled | Case movement | Less walking | Less fatigue |
| Vision QA | Label / lot checks | Fewer mix-ups | Fewer chargebacks |
| Dock scheduling tools | Appointment flow | Less staging | Fewer warm minutes |
AI readiness self-test (0–10) — keep it honest
Score each 0–2 (0 = no, 1 = partial, 2 = yes). Total / 10.
- Consistent product IDs and lane IDs
- Time-stamped temperature records you can retrieve
- Exceptions tracked with reasons
- Rough door-open minutes measured
- Weekly performance review happens
0–4: fix data basics first.
5–7: start with simple decision rules.
8–10: you are ready for advanced optimization.
Practical tips and suggestions
- Start at your constraint: if docks are slow, don’t automate picking first.
- Measure touches per case: fewer touches usually means fewer quality issues.
- Plan for cold realities: condensation and sensor protection matter.
Practical example: A freezer warehouse improved on-time shipping by automating the tightest aisles with the highest travel time.
How do low-GWP refrigerants for cold storage warehouses affect your plan?
Core answer: Low-GWP refrigerants for cold storage warehouses affect you in two practical ways: capex timing and maintenance readiness. Refrigerant policy is tightening, and U.S. HFC phasedown targets point to an 85% reduction by 2036 under the AIM Act. (Reuters)
This is not only a “facility topic.” It changes equipment availability and service costs across your network.
Decarbonization pressure: the 4 levers you must plan for
| Decarbonization lever | What changes | Operational risk | What it means for you |
|---|---|---|---|
| Zero-emission TRUs | Fleet transition | Downtime if unprepared | Plan lane coverage |
| HFC phasedown | Refrigerant availability | Service cost swings | Train + stock parts |
| Energy efficiency | Power demand rises | Peak-rate exposure | Optimize controls first |
| Reporting pressure | More buyer questions | Proof burden | Standardize metrics |
Practical tips and suggestions
- If you operate in California: plan now for the TRU zero-emission pathway by 2029. ()
- If you own cold storage: build a refrigerant transition roadmap aligned to expansion.
- If budgets are tight: start with efficiency wins before replacement cycles.
Practical example: One operator avoided a rushed retrofit by sequencing upgrades: controls first, then refrigerant transition, then expansion.
How do you design real-time temperature monitoring for meat shipments?
Core answer: Real-time temperature monitoring for meat shipments works only when alerts are rare, meaningful, and tied to decisions. Alarm fatigue kills adoption. Use a three-level model so every alert leads to a clear next step.
Treat alerts like a traffic light. Too many “red lights” and drivers ignore them all.
The 3-level alert ladder (Watch / Act / Stop)
| Alert level | Trigger logic | Who receives it | What it means for you |
|---|---|---|---|
| Watch | Warming trend | Dispatcher | Prevent failure early |
| Act | Minutes above limit | Ops lead | Reroute or speed receiving |
| Stop | Sustained excursion | QA + receiver | Hold/quarantine decision |
Accept / Hold / Quarantine tool (interactive)
Answer in order:
- Do you have lot ID + shipping docs? (Yes/No)
- Do you have temperature evidence (spot or logger)? (Yes/No)
- Is it within your acceptance threshold? (Yes/No)
- Was there a known delay or door-open event? (Yes/No)
- If #1 or #2 is No: Hold until verified.
- If #3 is No: Quarantine and escalate.
- If #3 is Yes but #4 is Yes: Accept with note and prioritize use.
Practical tips and suggestions
- Use time-above-limit logic: one spike is not the same as two hours warm.
- Summarize for humans: excursion minutes beat raw charts in daily ops.
- Close the loop: every “Act” alert needs one corrective note.
Why are standards and temperature expectations more explicit in 2025?
Core answer: Standards are becoming a competitive baseline because buyers may adopt the strictest market rule they face. In EU hygiene rules, Regulation (EC) No 853/2004 includes contexts referencing targets like 7°C for other meat and 3°C for offal during certain processing steps. ()
Even if you don’t export, your customers might. That’s why your internal rules should be consistent by lane.
Practical tips and suggestions
- Write acceptance rules once: then train every shift to the same playbook.
- Standardize evidence: a consistent packet reduces disputes dramatically.
- Align to strictest buyer: it prevents rework later.
What packaging and pack-out changes support cold chain meat industry trends?
Core answer: In 2025, packaging is treated as part of the cold chain system, not just a cost line. The biggest improvements often come from seal quality, void reduction, and pack-out standardization.
A thicker shipper does not automatically win. A repeatable pack-out usually wins.
Pack-out engineering levers that actually move the needle
| Lever | What it changes | When it matters most | What it means for you |
|---|---|---|---|
| Better seal | Air exchange rate | Long lanes, hot days | Longer stability |
| Void control | Convection inside | Mixed loads | Fewer warm pockets |
| Standard pack-out | Human variability | Busy docks | More consistency |
Practical tips and suggestions
- Use a photo SOP: one packing photo beats ten pages of text.
- Match pack-out to lane time: short routes need speed, long routes need buffer.
- Treat reuse as a system: reverse logistics must be reliable before you scale.
Practical example: A carrier can be perfect, but inconsistent pack-out still creates claims.
A 90-day plan to respond to cold chain meat industry trends
Core answer: The fastest path is baseline → fix one leak → standardize proof → scale. This approach reduces exceptions without turning your operation into a science project.
Use this plan exactly as written for one high-claim lane first.
Week 1–2: Baseline (measure before you buy)
- Record: excursion minutes, dock dwell time, claim rate
- Identify: top 3 heat entry points by lane
- Choose: one pilot lane (high volume or high value)
Week 3–6: Fix the biggest leak
- Add: a clear alert ladder (watch / act / hold)
- Enforce: warm-loading rules and dock time limits
- Report: weekly lane KPIs to one owner
Week 7–12: Add proof and scale
- Standardize: event timeline per shipment
- Align: data formats with key customers (event-based thinking)
- Plan: decarbonization pathway for refrigerants and TRUs in regulated lanes
Cold Chain Meat Trend Readiness Score (0–20)
Score each item 0–2. Total 0–20.
- We track excursion minutes (not just single readings).
- We measure dock dwell time by door.
- We have an excursion playbook with actions.
- We can produce a shipment event timeline in 10 minutes.
- Lot IDs are consistent across systems.
- We calibrate and validate monitoring devices.
- We review KPIs weekly with one accountable owner.
- We have a TRU and refrigerant transition plan for regulated lanes.
Score meaning:
- 0–7: fix fundamentals first.
- 8–14: pilot-ready for process + tech upgrades.
- 15–20: scale-ready; you can differentiate on proof and sustainability.
2025 latest developments and trends
In late 2025, the clearest signals behind cold chain meat industry trends cluster into five themes: automation investment, decarbonization planning, tighter audit expectations, stronger event data, and lane-level exception management.
Latest progress at a glance
- Traceability clarity (U.S.): FDA proposed July 20, 2028, and intends to comply with the non-enforcement directive. ()
- TRU decarbonization (California): all truck TRUs operating in California must be zero-emission by Dec 31, 2029. ()
- Refrigerants: AIM Act implementation targets an 85% HFC phasedown by 2036. ()
- EU temperature targets: 853/2004 references 3°C for offal and 7°C for other meat in specific contexts. ()
- Operational reality: winners treat cold chain as a system: process + data + sustainability.
Market insight: Growth does not automatically mean profit. Profit comes from controlling exceptions and speeding decisions.
Frequently asked questions
Q1: Are cold chain meat industry trends mostly about new technology?
Not really. Tech helps, but the biggest wins usually come from workflow: staging, door discipline, handoffs, and decision rules. Start there, then add tech where it supports action.
Q2: Do I need real-time temperature monitoring for meat shipments on every load?
Only if you can intervene before delivery. If you cannot act mid-route, use baseline logging and focus on exception review and handoff control.
Q3: Why are disputes getting harder in 2025?
Because buyers expect proof. When records are unclear, conversations become opinion-based, and that usually costs time or money. A simple proof pack prevents most arguments.
Q4: What standards matter if I ship into the EU?
EU hygiene rules include explicit temperature expectations in specific contexts, including references such as 7°C for other meat and 3°C for offal. Your internal rules should align to the strictest market you serve. ()
Q5: What is the fastest way to reduce temperature excursions in meat logistics?
Reduce door-open minutes and staging time first. Warm minutes are the silent killer, and small dock changes often beat big equipment spending.
Q6: How do I prepare for California TRU rules without panic spending?
Map which lanes touch California, ask carriers for their TRU transition plan, and set a phased timeline. The rule targets full zero-emission truck TRUs in-state by Dec 31, 2029. ()
Summary and recommendations
The most important cold chain meat industry trends in 2025 push you toward the same model: predictable handoffs with provable control. Build a minimum proof pack, reduce door-open minutes, standardize pack-out, and use automation only where it removes real bottlenecks. Then add monitoring with Watch/Act/Stop alerts so people trust it.
Action plan (CTA): Pick one high-claim lane. Instrument handoffs (time + temp + exception notes), cut door-open minutes by 25%, and review exceptions weekly for eight weeks.
About Tempk
At Tempk, we build temperature-control packaging and operational workflows that make meat cold chains easier to run under real pressure—busy docks, mixed loads, and unpredictable delays. We focus on practical performance: stable thermal buffering, pack-out routines that reduce warm minutes, and handoff processes that create clear proof without slowing your teams.
Call to action: Share your typical route time, stop count, and top 3 failure modes (temperature spikes, claims, rework, delays). We’ll suggest a packaging + workflow approach aligned to cold chain meat industry trends in 2025, designed to reduce exceptions and improve consistency.
Cold Chain Seafood Products: 2025 Requirements
Last updated: December 19, 2025
Cold chain seafood products succeed when you control temperature, hygiene, and traceability across every handoff. If you miss one step, seafood can arrive “on time” but still be rejected. Many chilled lanes work around 0–4°C (32–39°F), while many frozen lanes aim for ≤−18°C (0°F). The goal is simple: fewer warm swings, fewer wet cartons, and clearer proof at receiving.
This article will help you:
Define cold chain seafood products by category (chilled, frozen, live, value-added)
Turn seafood cold chain requirements into a repeatable 5-pillar system
Set practical cold chain seafood temperature requirements without confusing staff
Choose seafood packaging solutions that prevent leaks, crush, and heat spikes
Build seafood temperature monitoring that creates action, not noise
Train a receiving-friendly seafood QA checklist and exception playbook
Validate lanes using a seafood cold chain validation checklist you can run this month
What counts as cold chain seafood products in daily operations?
Cold chain seafood products are any seafood items where safety or quality depends on staying cold end-to-end. That includes products that spoil quickly, products that leak, and products where traceability must be flawless. If you ship seafood through multiple handoffs, you are operating a cold chain—even if you don’t call it that.
Think of cold chain seafood products like ice cream in a backpack. It can start perfect and still fail. The failure usually happens during the “in-between moments.”
Cold chain seafood products categories you should separate
| Category | Typical examples | What fails first | Your operational focus |
|---|---|---|---|
| Fresh / chilled | whole fish, fillets, cooked chilled seafood | odor, texture, drip | speed + temperature stability |
| Frozen | IQF shrimp, blocks, glazed fish | partial thaw, refreeze damage | stable frozen state |
| Live shellfish | oysters, clams, mussels | stress, mortality, label checks | viability + traceability discipline |
| Value-added | ready-to-cook, ready-to-eat seafood | hygiene + label errors | separation + strict handling |
Practical tips and suggestions
Don’t use one “universal” SOP for all cold chain seafood products.
Separate lanes by chilled vs frozen vs live first. Then optimize.
Train staff to recognize what “failure” looks like for each category.
Practical example: A team reduced mis-sorts by labeling staging racks as LIVE / CHILLED / FROZEN and enforcing simple routing rules.
Cold chain seafood products requirements: the 5 pillars you must control
Most cold chain seafood products requirements collapse into five pillars: temperature, hygiene, hazard control, traceability, and verification. You don’t need a perfect system. You need a repeatable system that prevents repeat mistakes.
If you control these pillars, you reduce rejections and claims. You also make audits easier.
The 5 pillars (plain language)
Time–temperature control: keep it cold and avoid swings
Hygiene control: prevent contamination during handling
Hazard control: focus on product-specific risks (HACCP thinking)
Traceability: keep lot identity attached and visible
Verification: keep records that prove what happened
HACCP explained: HACCP means Hazard Analysis and Critical Control Points. In simple terms, you identify where risk happens, then control those steps.
Requirements vs. real-world failure modes
| Requirement pillar | What “good” looks like | Common failure | What it means for you |
|---|---|---|---|
| Temperature | clear targets + short handoffs | warm staging and door-open time | shorter shelf life |
| Hygiene | sealed packs + clean tools | wet cartons and cross-contact | odor and safety risk |
| Hazard control | species-aware rules | “one rule fits all” | avoidable incidents |
| Traceability | lot stays with product | commingling and relabel errors | bigger recalls |
| Verification | quick, consistent records | “no evidence” disputes | weaker claim defense |
Practical tips and suggestions
Put your targets on wall charts and pack-out photos.
Treat cross-docking as high-risk by default.
Use one “golden rule” for teams: Keep it cold. Keep it sealed. Keep the lot identity.
Practical example: A distributor reduced disputes after making pack-out time and receiving time mandatory on every shipment.
What temperature requirements should cold chain seafood products follow?
Cold chain seafood temperature requirements must be easy to remember and easy to enforce. Complex temperature bands fail in busy shifts. Use one target per category, plus one action rule when you drift.
Many chilled programs use 0–4°C (32–39°F) as a working range. Many frozen programs use ≤−18°C (0°F) as a working target. Always align with your buyer specs and local rules.
Practical targets by cold chain seafood products category
| Category | Practical working target | Biggest risk | What you do if it drifts | What it means for you |
|---|---|---|---|---|
| Chilled seafood | 0–4°C | warming + drip | hold + QA check | fewer odor complaints |
| Frozen seafood | ≤−18°C | thaw/refreeze | inspect + assess excursion | better texture |
| Live shellfish | cool, stable (species-dependent) | stress/mortality | separate + inspect | less dead loss |
| Ready-to-eat seafood | tight control, shortest exposure | higher safety sensitivity | reject if uncertain | protects customers |
The biggest temperature mistake: cycling, not peaks
Many teams only look for the “maximum temperature.” That misses the real killer: temperature cycling.
A typical cycle looks like this:
warms during loading
cools again in transit
warms at receiving
cools again in storage
Cycling shortens shelf life and increases drip. It can also create inconsistent product within the same carton.
H3: The “Time-Out-of-Cold” rule for cold chain seafood products
Use a timer rule your team can follow without arguing:
Green: brief exposure during normal work
Yellow: longer exposure → hold and inspect
Red: sustained exposure → reject or rework per your food safety plan
| Zone | What triggers it | First action | Why it helps you |
|---|---|---|---|
| Green | short handling exposure | continue SOP | normal flow |
| Yellow | longer exposure | hold + evaluate | consistent decisions |
| Red | sustained exposure | reject/rework | avoids risky releases |
Practical tips and suggestions
Measure product-zone temperature when possible. Ambient air is misleading.
Set a staging limit in minutes, not “soon.”
Train the team to reduce door-open time during loading.
Practical example: A retailer cut “fishy smell” complaints after enforcing a simple yellow-zone hold rule.
Which hazards drive cold chain seafood products requirements?
Cold chain seafood products requirements exist because seafood has hazards that worsen when temperature rises or hygiene slips. You don’t need to scare your team with long lists. You need a few hazard “buckets” that guide your SOP choices.
Think of hazards like “spoilers” in a movie. Temperature and time give them the chance to show up.
Hazard buckets (operations-friendly)
| Hazard bucket | Where it hits hardest | What increases risk | Your control focus |
|---|---|---|---|
| Histamine risk | certain finfish species | warm time during handling | strict time/temperature discipline |
| Bacterial growth | chilled products | cycling and long staging | fast handoffs + cold stability |
| Parasite controls | raw-intended products | missed freezing treatment | product-specific rules |
| Natural toxins / chemicals | sourcing-dependent | poor records | traceability strength |
| Physical contamination | any product | sloppy handling | clean tools + sealed packs |
Practical tips and suggestions
Don’t treat all seafood as equal risk. Category rules reduce mistakes.
Build “raw-intended” handling as a special workflow, not a footnote.
Make traceability part of hazard control. It limits scope if something happens.
Practical example: Teams often reduce risk faster by improving handoffs than by adding more coolant.
Cold chain seafood products solutions: packaging that prevents leaks and heat spikes
The best seafood packaging solutions work as a system: insulation + containment + stability. If you only solve temperature, you still get leaks and crushed trays. If you only solve leaks, you still get warm product.
Use a small number of validated pack-outs. Too many options create confusion.
The 3-layer packaging model (simple, repeatable)
Insulation layer: slows outside heat
Containment layer: prevents leaks and isolates meltwater
Stability layer: stops movement and crush damage
Packaging options for cold chain seafood products (quick comparison)
| Packaging option | Best for | Strength | Weak spot | Your practical meaning |
|---|---|---|---|---|
| Insulated mailer + packs | short–medium DTC | simple and scalable | limited long heat | good starter |
| Rigid insulated box | medium–long lanes | better stability | higher volume cost | fewer swings |
| Reusable EPP box | multi-stop B2B | durable and stackable | needs cleaning SOP | strong ROI in loops |
| High-performance panels (VIP style) | premium/high risk | strong insulation | cost + handling | best for tough lanes |
| Secondary leak barrier | wet seafood | cleaner handling | adds a step | fewer rejections |
H3: The meltwater trap (why “iced fish” cartons fail)
Ice keeps seafood cold, but meltwater can:
weaken cartons
smudge labels
contaminate outer surfaces
create a bad unboxing experience
Rule: keep product separated from free water using liners, trays, absorbent layers, or sealed inner packs.
| Meltwater control | What it does | Common mistake | Your benefit |
|---|---|---|---|
| Sealed inner liner | blocks free water | relying on carton alone | cleaner receiving |
| Absorbent layer | manages small leaks | hiding major leaks | fewer messy reworks |
| Upright inserts | prevents slosh/crush | loose packs shifting | fewer burst packs |
| “Dry label zone” | keeps IDs readable | labels on wet corners | better traceability |
Practical tips and suggestions
Right-size the shipper to reduce headspace. Empty air warms fast.
Immobilize packs so they can’t rub, burst, or crush.
Keep coolant off direct contact with delicate product when possible.
Practical example: A chilled fillet program reduced “wet box” rejections after adding a sealed inner liner and a dedicated absorbent layer.
What solutions work best for chilled cold chain seafood products?
Chilled cold chain seafood products perform best when you shorten warm exposure and stabilize the internal environment. Chilled seafood doesn’t tolerate long staging. Your biggest wins usually come from workflow discipline first, then packaging tuning.
Chilled solution stack (build in this order)
Pre-chill product (packaging can’t “fix” a warm start)
Fast pack-out (reduce ambient time)
Leak containment (keep meltwater controlled)
Right-size insulation (match lane risk)
Monitoring samples (learn and improve)
| Chilled lane risk | Packaging pattern | Monitoring level | What it means for you |
|---|---|---|---|
| Short local | light insulation + strict timing | spot checks + sampling | low cost, high discipline |
| Medium regional | stronger insulation + buffered coolant | weekly sampling | better stability |
| Multi-handoff | premium insulation + tighter SOP | more sampling + exceptions | fewer surprises |
Practical tips and suggestions
Reduce door-open time during loading. That’s where drift starts.
Use a delay trigger: “If delay exceeds X minutes, do Y.”
Train “keep it sealed” behavior during staging and receiving.
Practical example: A courier improved chilled stability by loading in route order and limiting lid-open time per stop.
What solutions work best for frozen cold chain seafood products?
Frozen cold chain seafood products fail when they partially thaw and refreeze. That creates texture damage, drip loss after thaw, and “looks refrozen” complaints. Your goal is a stable frozen state with minimal warm events.
Frozen solution stack (keep it simple)
keep product fully frozen before pack-out
minimize staging time
use insulation sized to lane + weather
reduce repeated opens during multi-stop delivery
define a clear “missed delivery” rule
| Frozen failure risk | What you may see | What to change first | What it means for you |
|---|---|---|---|
| Edge thaw | damp carton, soft corners | stronger insulation + faster handoff | fewer defects |
| Refreeze cycle | large ice crystals | strict exception rules | protects texture |
| Dehydration | frost burn | better sealing and fit | better appearance |
Practical tips and suggestions
Avoid repeated “open and search” behavior inside the box.
Define a hold/return rule for missed deliveries.
Pre-condition containers if stored in warm spaces.
Practical example: A frozen shrimp shipper reduced refreeze complaints after enforcing “missed delivery = return to cold storage.”
Monitoring and proof for cold chain seafood products in 2025
Monitoring should help you answer: where did the risk happen, and what do we change next? You don’t need a logger in every carton. Start with risk-based sampling and exception monitoring.
Monitoring only matters if it changes behavior. If it doesn’t, it becomes expensive noise.
Monitoring options (match to your goal)
| Method | Best use | What it tells you | Effort | Your practical meaning |
|---|---|---|---|---|
| Spot checks | pack-out + receiving | “right now” condition | low | fast decisions |
| Logger sampling | lane validation | full time profile | medium | root cause clarity |
| Connected sensors | high-value export lanes | near real-time drift | higher | intervene faster |
| Visual indicators | last mile quick checks | simple breach signal | low | faster support |
Seafood shipment temperature data logger placement: what tells the truth?
A good placement rule: near a risk point, buffered from coolant.
Don’t place sensors touching ice packs. That creates false confidence.
| Sensor placement | What it captures | What it misses | What it means for you |
|---|---|---|---|
| Next to coolant | best-case temp | warm corners | false comfort |
| Center of payload | average condition | early edge warming | good baseline |
| Near outer wall (buffered) | worst-case trend | little if standardized | best for protection |
What to record (simple but powerful proof)
pack-out time and location
product temp at pack-out (sampling)
shipper type and pack recipe version
carrier pickup time
receiving time and exceptions
corrective actions when issues occur
Practical tips and suggestions
Use a placement photo for each pack recipe.
Review weekly in 15 minutes. Track peaks and time-out-of-range.
Train customer support to ask: “How long was it outside?” not only “Was it warm?”
Practical example: Sampling often reveals cross-dock dwell is the main spike point, not driving time.
Last-mile requirements for cold chain seafood products
Last mile is where cold chain seafood products are most likely to fail. A perfect system can still lose if a box sits on a sunny porch. You can’t control every doorstep, but you can reduce risk with delivery rules and customer messaging.
Last-mile seafood delivery requirements (simple SOP)
deliver in cooler windows for high-risk lanes (morning beats afternoon)
send “receive now” alerts before arrival
instruct safe placement (shade/indoors) when possible
reduce open time for multi-stop vehicles (open–grab–close)
define what happens when delivery fails (return, pickup, hold)
| Last-mile risk | What causes it | Simple solution | What it means for you |
|---|---|---|---|
| Porch dwell | unattended delivery | alerts + windows | fewer disputes |
| Re-delivery | missed recipient | pickup option | less total exposure |
| Multi-stop openings | searching in boxes | zone labels + route order | fewer spikes |
| Weather exposure | rain/heat | protected placement | less damage |
Practical tips and suggestions
Create a “high-risk lane list” that triggers stricter rules.
Use a standard message template for heat wave days.
Add a receiving checklist card in the box for B2B buyers.
Practical example: A DTC seafood brand reduced claims after shifting deliveries into a tighter window and adding short alerts.
Validation checklist for cold chain seafood products requirements and solutions
Validation proves your pack-outs work on the routes you actually run. It also stops overpacking. Overpacking increases cost and can create moisture issues.
Think of validation like a road test. You don’t judge a vehicle only in the parking lot.
Seafood cold chain validation checklist (lane-based)
| Validation step | What you do | What you measure | What you change after | Your practical win |
|---|---|---|---|---|
| Thermal hold test | simulate real route | time within target | coolant + insulation | fewer excursions |
| Handling test | drop/vibration simulation | leaks/crush | inserts + layout | fewer damage claims |
| Process test | run with real staff | pack time + errors | training + photos | higher consistency |
| Seasonal test | warm + mild days | worst-case behavior | lane rules | fewer surprises |
10-shipment pilot plan (doable in two weeks)
Pick two lanes: one stable, one risky.
Lock one pack recipe per lane (no improvising).
Sample temperature profiles on a subset.
Track three outcomes: temp exceptions, leaks, complaints.
Change one variable only (size, layout, coolant amount, or handoff time).
Repeat until outcomes are repeatable.
Interactive decision tool: choose your solution tier
Step 1: Product risk
A) Very high (live shellfish, raw-intended premium items)
B) High (fresh chilled fish, cooked chilled seafood)
C) Medium (robust frozen items, stable short lanes)
Step 2: Lane risk (count “Yes”)
warm ambient exposure likely
more than one handoff
delivery time uncertain
high humidity season
buyer requires temperature proof
Tier selection
0–1 Yes: Tier 1 (Essentials)
2–3 Yes: Tier 2 (Controlled)
4–5 Yes: Tier 3 (Critical)
| Tier | What you use | What you must do | What it means for you |
|---|---|---|---|
| Tier 1 | basic insulation + leak control | strict timing | big gains, low cost |
| Tier 2 | stronger insulation + tuned coolant | sampling + exception rules | predictable weekly results |
| Tier 3 | premium insulation + monitoring | strict handoff + proof | protects high-risk lanes |
Practical example: Many teams improve fastest by tightening staging time and lid-open time before changing materials.
2025 developments and trends for cold chain seafood products
In 2025, cold chain seafood products programs are becoming more lane-based and more buyer-evidence driven. Teams are simplifying into two or three validated pack recipes. Monitoring is becoming smarter, with fewer devices but better sampling choices.
Sustainability pressure is rising too. That pushes right-sizing, reusable packaging loops where possible, and fewer reships through better first-time success.
Latest progress snapshot
Lane-specific pack recipes: seasonal and route-based variants
Faster feedback loops: weekly reviews and one-variable improvements
Better wet-proof labeling: treated as quality control, not admin
Clearer exception playbooks: fewer random decisions under stress
Internal link strategy suggestions (no external links)
Frequently Asked Questions
Q1: What are the core requirements for cold chain seafood products?
Stable time-temperature control, clean handling, hazard-aware controls, traceability, and verification records.
Q2: What temperature should chilled seafood target?
Many operations use 0–4°C (32–39°F) as a practical working target, then follow buyer specs and local rules.
Q3: What temperature should frozen seafood target?
Many operations aim for ≤−18°C (0°F) to protect frozen state and prevent partial thaw cycles.
Q4: What is the biggest mistake with cold chain seafood products?
Long warm staging and door-open time. Most warming happens during waiting and loading.
Q5: Do I need temperature loggers in every shipment?
Not usually. Start with lane sampling on high-risk routes and add exception monitoring for complaints.
Q6: How do I prevent leaks and cross-contact?
Use a secondary leak barrier, upright inserts, and a receiving rule that holds leaking packs immediately.
Q7: How should I place temperature loggers in seafood shippers?
Place them near an outer wall with a buffer layer, away from direct coolant contact, to capture risk-zone trends.
Summary and recommendations
Cold chain seafood products perform best when you run a system, not a collection of tricks. Set clear chilled and frozen targets, reduce temperature cycling by shortening staging and door-open time, and choose packaging that controls leaks and movement. Use monitoring as a learning tool on high-risk lanes, and validate pack recipes with route-realistic tests. When your SOP is repeatable, you ship with confidence and defend decisions with proof.
Action plan (CTA)
This week, pick your top two lanes and run a 10-shipment pilot. Lock one pack recipe per lane, sample temperature profiles, and track leaks and complaints. Then change only one variable at a time until results are repeatable.
About Tempk
At Tempk, we help seafood teams turn cold chain seafood products requirements and solutions into practical daily workflows. We focus on lane-based pack recipes, wet-proof packaging discipline, monitoring that drives action, and receiving checklists that keep decisions consistent. Our goal is fewer rejections, fewer claims, and a smoother buyer experience without operational overload.
Next step: Share your product category (chilled/frozen/live), lane duration, and handoff count. We can map a lane-based solution tier and a pilot checklist you can run immediately.
Cold Chain Seafood Monitoring Devices Guide 2025

Cold Chain Seafood Monitoring Devices in 2025?
Cold chain seafood monitoring devices help you catch temperature spikes, long warm holds, and “invisible delays” that quietly destroy shelf life. In 2025, you win by choosing the right device for the decision speed you actually have. If your team can act mid-route, you need alerts. If you can only act after delivery, you need reliable records and a weekly review loop.
This article will answer for you:
- How real-time temperature monitoring for seafood shipments prevents silent spoilage
- What to choose: data loggers vs real-time monitors vs TTIs (and why)
- How a GPS temperature tracker for seafood logistics reduces disputes and delay confusion
- The best placement for temperature loggers in seafood boxes so the data reflects product risk
- How to build SOPs so cold chain seafood monitoring devices create action, not noise
Cold chain seafood monitoring devices: What problem do they solve?
Cold chain seafood monitoring devices solve one core problem: you cannot fix what you cannot see. Seafood can arrive “looking fine” yet lose shelf life after repeated short warm events at docks, hubs, and last-mile stops. Devices turn those hidden moments into measurable evidence, so you stop guessing and start improving.
Packaging slows warming, but it cannot tell you what happened during a specific delay. Monitoring fills that gap. A simple way to explain it to your team: packaging is the seatbelt, monitoring is the dashboard warning light.
The 3 signals you should capture first
Start simple. If you track these three signals well, you will find most root causes fast.
| Signal | What it tells you | Devices that capture it | Practical meaning for you |
|---|---|---|---|
| Peak temperature | “Did it ever get too warm?” | Logger, tracker | Predicts rejects and odor issues |
| Time above limit | “How long was it risky?” | Logger, tracker | Predicts shelf-life loss |
| Where it happened | “Dock, hub, or last mile?” | Real-time + GPS | Pinpoints the process fix |
Practical tips you can use today
- If claims feel random: measure staging time and door-open spikes first.
- If data is messy: standardize one device type and one SOP before scaling.
- If alerts get ignored: reduce alerts to “only what needs action now.”
Practical case: A seafood hub reduced complaints after finding a repeat warm spike during peak-hour staging—visible only after monitoring at the dock handoff.
Cold chain seafood monitoring devices: Which types should you use?
You usually need a small “device ladder,” not one perfect gadget. Most operations succeed with: proof for accountability, alerts for the highest-risk lanes, and context when disputes are common.
Here are the device families you should know.
| Device type | Best use | Biggest mistake | Practical meaning for you |
|---|---|---|---|
| Temperature data logger | Evidence after delivery | No SOP to review data | Data without action |
| Real-time monitor with alerts | Preventing loss now | Too many alerts | Alert fatigue |
| GPS temperature tracker | Finding “where” | Not matching to loads | Confusing context |
| Fixed sensors (rooms/trucks) | Facility stability | Poor placement | Blind spots |
| TTIs (time–temperature indicators) | Simple handling accountability | Treating TTI as a “live alert” | Great for “was it abused?” not “save it now” |
The “Action vs Evidence” rule (60-second test)
Before you buy anything, answer one question:
- Can you act during transit?
- Yes → prioritize real-time alerts.
- No → prioritize proof loggers + a weekly review.
Practical tips and suggestions
- Start simple: prove where the problem is before buying everything.
- Match device to risk: high-value seafood deserves real-time alerts.
- Control placement: placement often matters more than sensor brand.
Practical case: A distributor saved money by using proof loggers on low-risk lanes and real-time devices only on long, delay-prone lanes.
Cold chain seafood monitoring devices: How do you choose by workflow and risk tier?
Choosing cold chain seafood monitoring devices is about your workflow, not a catalog. The best device is the one your team uses consistently and the one that matches your decision speed.
Risk tiers (simple and usable)
Segment lanes and products so monitoring cost stays under control.
| Risk tier | Typical lane reality | Recommended setup | What it means for you |
|---|---|---|---|
| Tier A (high risk / high value) | Long routes, frequent handoffs | Real-time + GPS + proof | Fewer losses on worst lanes |
| Tier B (medium) | Steady routes, controlled hubs | Proof + selective real-time | Balanced cost and control |
| Tier C (lower) | Short local lanes | Proof only (spot audits) | Baseline accountability |
Lane Risk Score (interactive decision tool)
Score each item and add points:
- Transit time: same day (0) / next day (2) / 2+ days (4)
- Heat exposure: mild (0) / mixed (2) / hot handoffs (4)
- Delay uncertainty: low (0) / medium (2) / high (4)
- Product sensitivity: frozen (1) / chilled fresh (3) / histamine-risk (4)
Score → your device stack
- 0–5: basic logger sampling + receiving checks
- 6–10: logger per shipment + weekly review
- 11–16: real-time alerts for priority loads + GPS context for disputes
Practical tips and suggestions
- Scaling fast: choose one platform and standardize training.
- Many carriers: pick devices with easy report sharing.
- Many SKUs: keep Tier A coverage tight and deliberate.
Practical case: A lane improved quickly after the team stopped trying to monitor everything live and focused real-time only where intervention was possible.
Cold chain seafood monitoring devices: Where should you place sensors?
Placement decides whether your data reflects reality. Many failures happen because sensors measure “the wrong air,” not the risk zone. Seafood warms first near warm entry points, frequent opens, and poor airflow zones.
Best-practice placement zones (simple rules)
- Measure near the warm entry point: often near the door side or top layer.
- Measure suspected hot spots: corners, edges, and frequent-open zones.
- Be consistent: same placement per lane so comparisons are fair.
| Placement choice | What it tends to read | Risk | Practical meaning for you |
|---|---|---|---|
| Near door/top layer | Warmer, more realistic | Low (if consistent) | Better risk detection |
| In direct airflow | Too cold | Miss excursions | False confidence |
| Touching coolant | Too cold | Hides warming | Missed shelf-life loss |
Placement self-check (interactive)
Answer “Yes/No”:
- Is the sensor touching ice/gel/PCM directly?
- Is the sensor right next to a vent or fan?
- Does placement change every shipment?
If you answered Yes to any, your data may be misleading. Fix placement before buying more devices.
Practical tips and suggestions
- Use a placement photo SOP: one photo per lane is enough.
- For totes: place the device in the same tote position every time.
- For boxed shipments: avoid direct coolant contact; measure the product-zone air.
Practical case: One shipper “fixed” a lane by moving sensors away from the coldest airflow zone, revealing real excursions they had been missing.
Cold chain seafood monitoring devices: How do you set alarms that create action?
Alarms reduce loss only when they trigger a clear decision. Without a response plan, alerts become noise. Your team needs short “if this, then that” rules that work under pressure.
The 3 alert levels that prevent alert fatigue
- Warning: watch, confirm conditions
- Critical: intervene now
- Hold / Stop-the-line: high-risk event, QA decision required
The 5-step alert response (seafood-friendly)
- Confirm (door open, unit off, sensor shifted?)
- Protect (close doors, cover product)
- Stabilize (move to colder zone or backup unit)
- Record (time, temp, cause, action)
- Escalate (who decides hold/rework/reject)
| Alert scenario | First action | Second action | Benefit to you |
|---|---|---|---|
| Door-open spike | Close + protect | Coach behavior | Fewer repeat spikes |
| Unit drift | Move to backup | Maintenance ticket | Prevent larger loss |
| Delay event | Add protection | Record + escalate | Fewer disputes |
Practical tips and suggestions
- Keep messages short: “Protect + Record + Call” beats long instructions.
- Review weekly: reduce false alerts and tune thresholds.
- Avoid “instant spike” alarms that do not require action.
Practical case: Adoption improved after drivers treated alerts like a fire drill: the same 5 steps every time.
Cold chain seafood monitoring devices: What data should you track (and ignore)?
More data is not always better. Your goal is to answer: “Was the chain stable, and where did it break?” Track the few numbers that predict quality outcomes, then coach behavior and fix handoffs.
The “Seafood 6” metrics (simple and powerful)
- Average temperature (lane trend)
- Max temperature (risk moment)
- Time above threshold (damage indicator)
- Number of excursions (process stability)
- Door-open spikes (behavior indicator)
- Excursion location (ownership indicator)
| Metric | Why it matters | How to use it | Practical meaning for you |
|---|---|---|---|
| Time above threshold | Predicts damage | Compare lanes weekly | Focus improvement fast |
| Excursion count | Predicts instability | Coach processes | Fewer repeats |
| Excursion location | Finds root cause | Fix handoffs | Faster results |
What to ignore at first
- Detailed graphs nobody reviews
- Complex KPIs teams cannot explain
- Alerts that do not require action
Cold chain seafood monitoring devices: How do you stay audit-ready?
Audit-ready is simple when you build a “proof pack” per lane and keep it consistent. Devices support compliance only when records link to decisions.
What “audit-ready” looks like (simple checklist)
- A defined monitoring plan (what, where, how often)
- A basic verification routine (so readings are trusted)
- Records stored in one searchable place
- Corrective actions documented after excursions
- Training records for people who respond to alerts
The “Proof Pack” (one folder per lane)
- Temperature summary report (min/max + time above limit)
- Any excursion note + action taken
- Shipment ID + date/time + device ID
- Placement photo standard
| Audit need | Evidence from devices | Common miss | Practical meaning |
|---|---|---|---|
| Monitoring plan | Lane SOP | No lane ownership | Confusion in audits |
| Corrective action | Exception log | No action recorded | “So what?” problem |
| Training | Short training record | Not refreshed | Repeat mistakes |
Practical tips and suggestions
- If you feel overwhelmed, start with one lane and one template.
- Keep records short and readable. Long forms reduce compliance.
- Train receiving first. Receiving is where bad product enters.
Cold chain seafood monitoring devices: Traceability and event-based records in 2025
In 2025, buyers and partners increasingly want event-based traceability, not just final delivery temperature. Your monitoring becomes more valuable when it attaches to simple “events” like receiving, handoff, dispatch, and delivery.
A simple exception-first workflow
- Collect: device captures curve + timestamps
- Detect: system flags peak or time above limit
- Decide: accept, hold, test, or reject
- Correct: fix the process step that caused it
- Document: store proof for audits and claims
Example “temperature event” record (copy/paste template)
{
  "eventTime": "2025-12-19T19:42:00Z",
  "eventType": "TemperatureExcursion",
  "lane": "SEA-CHI-NextDay",
  "shipmentId": "LOT-20251219-1047",
  "deviceId": "LOGGER-009183",
  "peakTempC": 9.2,
  "minutesAboveLimit": 67,
  "limitC": 4.4,
  "locationHint": "LastMile",
  "actionTaken": "HoldAndInspect"
}
Cold chain seafood monitoring devices: How do you validate lanes and packaging?
Validation is how you stop arguing and start standardizing. If you change packaging, routes, or carriers, validate again.
The 3-lane validation plan (fast and effective)
- Worst hot lane (summer conditions)
- Worst cold lane (winter exposure)
- Your volume lane (most shipments)
| Item | Pass rule | Evidence | Action if fail |
|---|---|---|---|
| Temperature stability | Meets lane target most of trip | Logger curve | Adjust pack-out or lane rules |
| Time out of range | Below your max duration | Time-in-excursion | Tune alarms + SOP |
| Handoff discipline | Minimal door-open time | Timestamps + notes | Re-train and re-stage |
| Packaging integrity | No leaks/soak | Receiving photos | Add liners/drainage rules |
Practical tips and suggestions
- Validate one variable at a time so you can learn.
- Use devices to teach, not only to audit. Share results with operators.
- Pre-write corrective actions. “Decide later” becomes “shipped anyway.”
Cold chain seafood monitoring devices: 30-day rollout plan that teams will follow
Rollouts fail when devices feel like extra work. Make the program feel like protection that reduces future headaches. Start small, prove value, then expand.
A simple 30-day rollout
| Week | Focus | What success looks like | Meaning for you |
|---|---|---|---|
| 1 | One pilot lane + placement SOP | Clean, consistent data | Confidence |
| 2 | Fix top 2 causes | Fewer spikes | Real improvement |
| 3 | Expand to lane #2 | Comparable lanes | Scaling control |
| 4 | Lock standards | Repeatable system | Lower operating risk |
Practical tips and suggestions
- Make SOPs visual: one page, one photo, five response steps.
- Keep training short: 10 minutes beats 60 minutes.
- Celebrate one quick win. One fixed staging habit can justify the program.
Practical case: Adoption improved after switching from long guides to daily 6-minute drills on placement and response steps.
2025 latest developments and trends
In 2025, the strongest programs treat cold chain seafood monitoring devices as a system: device + SOP + training + weekly review. Devices alone rarely solve quality issues.
Latest progress snapshot (practical)
- Selective real-time adoption: real-time on Tier A lanes, loggers elsewhere.
- Alert fatigue reduction: fewer alert levels, more action-based triggers.
- More focus on handoffs: monitoring shifts to docks and transfer points.
- Growing interest in TTIs and quality sensing: useful after the basics are stable.
Frequently asked questions
Q1: Do cold chain seafood monitoring devices need to be real-time?
Not always. If you cannot intervene during transit, proof loggers plus strong receiving checks are often enough. Use real-time alerts only on lanes where someone can actually act.
Q2: What is the biggest mistake with cold chain seafood monitoring devices?
Inconsistent placement and missing SOPs. If placement changes each run, you cannot compare curves. If nobody reviews data weekly, you just bought expensive paperwork.
Q3: How many alert levels should we set?
Start with two or three levels only. Too many alerts cause fatigue and slower responses. Then tune thresholds after two weeks of real lane data.
Q4: Where is the best placement for temperature loggers in seafood boxes?
Place the sensor near the warmest expected zone, often near the top layer or door-side risk area. Avoid direct airflow and direct coolant contact to prevent misleading readings.
Q5: Can a GPS temperature tracker reduce disputes?
Yes. GPS adds location context so you can identify where excursions happen. That reduces “blame loops” and helps you fix the handoff point causing repeat loss.
Q6: What should we review every week?
Review peak temperature, time above threshold, and where excursions occur. Fix the top one or two causes per week, then re-test to confirm improvement.
Summary and recommendations
Cold chain seafood monitoring devices protect freshness by revealing where instability happens: docks, handoffs, doors, and delays. Start with the “Seafood 6” metrics, standardize placement with photos, and keep alerts action-based. Use proof loggers for baseline lane truth, add real-time only where intervention is possible, and add GPS when disputes are common. Then run a 30-day pilot, fix two root causes, and lock a repeatable lane standard.
Next-step action plan (CTA):
- Pilot one high-risk lane for 30 days with standardized placement.
- Use only 2–3 alert levels and a 5-step response plan.
- Track time above threshold and excursion location, then fix the top 2 causes.
- Expand only after SOPs are stable and responses are consistent.
About Tempk
At Tempk, we help seafood cold chain operators turn monitoring into practical control. We combine packaging options with monitoring routines, simple alert response workflows, and repeatable reporting so you reduce excursions and improve accountability across handoffs.
Call to action: If you want a lane-by-lane blueprint for cold chain seafood monitoring devices—device selection by risk tier, placement SOPs, alert thresholds, and a 30-day rollout plan—contact Tempk for a practical program design you can implement immediately.
Cold Chain Express Delivery for Vaccines (2025)
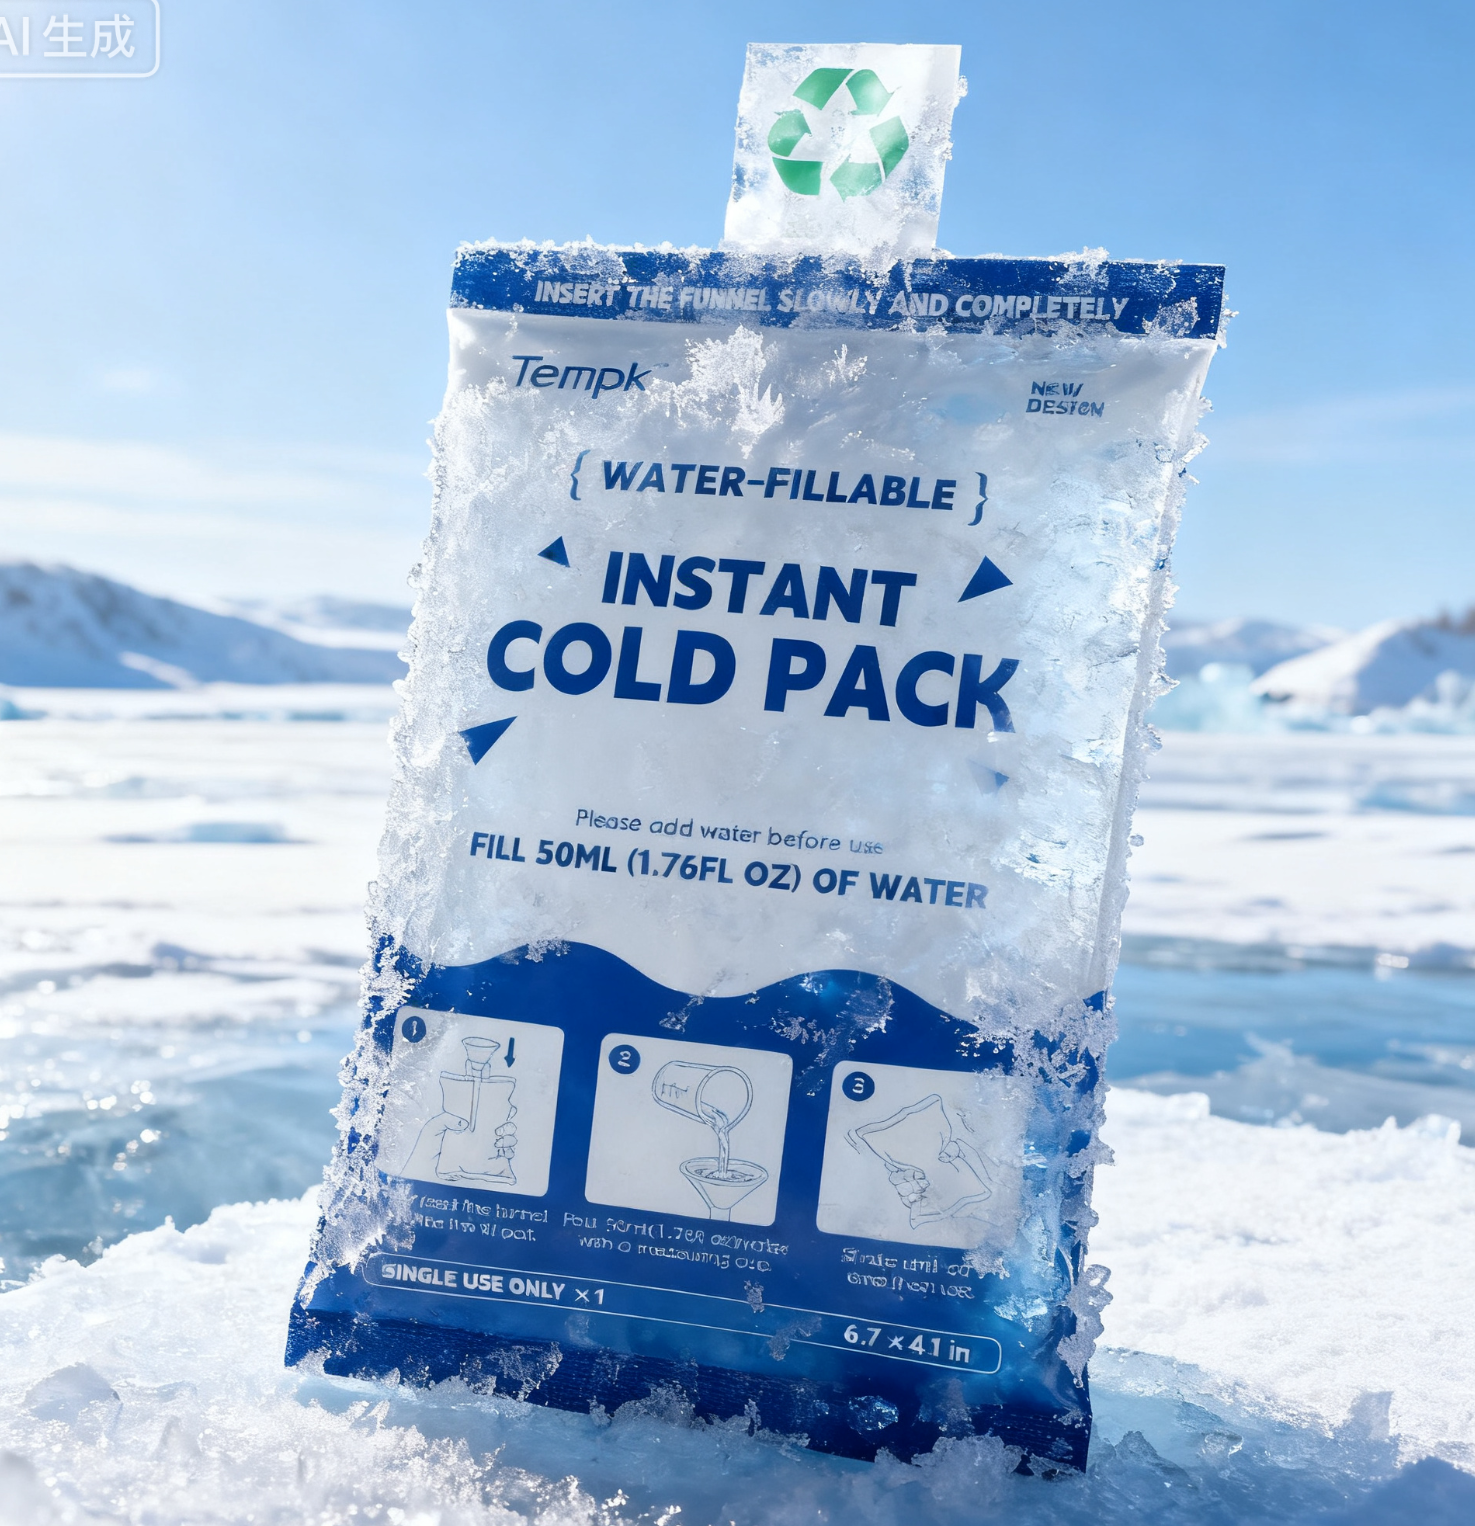
Cold Chain Express Delivery for Vaccines in 2025?
If you run cold chain express delivery for vaccines, you’re balancing speed with something tougher: temperature integrity you can prove. Most routine vaccine lanes are planned around 2°C–8°C, while some lanes require frozen or ultra-cold handling. A single preventable handoff delay can trigger an excursion, and a single missing record can trigger a quarantine. In 2025, the teams that win are the ones that standardize packouts, reduce dwell time, and make “proof” automatic.
This article will answer for you
- How cold chain express delivery for vaccines should be defined so teams stop guessing
- How to set temperature lanes and match them to packaging and monitoring
- Where excursions really happen (and how to prevent them in the first and last hour)
- A 90-second decision tool to choose the right lane approach
- A simple SOP checklist drivers and staff will actually follow
- 2025 trends raising expectations for evidence, calibration, and lane validation
What Does Cold Chain Express Delivery for Vaccines Really Mean?
Direct answer: Cold chain express delivery for vaccines is fast delivery that keeps vaccines inside their labeled temperature range from pickup to receipt, using validated packaging, controlled handoffs, and monitoring evidence. Speed reduces time risk, but systems reduce temperature risk. Your goal is not “arrive cold.” Your goal is arrive in-range with proof.
In real life, vaccine delivery behaves like a relay race with a fragile baton. Most failures happen at handoffs, not highways. So your definition must include routing, packout discipline, and what happens when something goes wrong.
The “Range–Time–Proof” rule (the simplest definition you can train)
| Promise | What breaks it | What fixes it | What it means for you |
|---|---|---|---|
| Range (temperature) | Wrong packout, poor coolant placement | Lane-specific packout recipe | Fewer quarantines and write-offs |
| Time (dwell control) | Late pickup, slow receiving | Cutoff rules + staffed windows | Fewer first/last-hour spikes |
| Proof (evidence) | No logger, missing records | Monitoring plan + storage by shipment ID | Faster release decisions, easier audits |
Practical tips you can apply now
- Write one sentence that defines cold chain express delivery for vaccines for your team.
- Treat hubs and transfer points like mini warehouses, not “quick stops.”
- Buy “proof” upfront: define how fast you get data after delivery.
Real-world case: A clinic network reduced disputes when it required a temperature summary for every cold chain express delivery for vaccines shipment.
What Temperature Lanes Define Cold Chain Express Delivery for Vaccines?
Direct answer: Cold chain express delivery for vaccines works best when you manage shipments by lane categories (refrigerated, frozen, ultra-cold) and label them clearly. Lanes prevent the most common mistake: treating all vaccines like they behave the same.
The biggest hidden risk is that heat and freezing are both damage for many products. That’s why lane labels and “no direct contact” packouts matter as much as insulation.
Temperature lane planning table (use lanes to stop mistakes)
| Lane label | Typical target | Main risk | What it means for you |
|---|---|---|---|
| Refrigerated lane | 2°C–8°C | Accidental freezing at edges | “No-freeze” packout and barriers |
| Frozen lane | Per product needs | Thaw cycles during delays | Stronger insulation + faster handoffs |
| Ultra-cold lane | Very low targets | Handling complexity + dwell | Specialized packout + strict exception plan |
| Light-sensitive handling | Per product | Light exposure | Keep in original packaging when required |
Practical tips you can apply now
- Put the lane on the shipper: “2–8°C,” “Frozen,” “Ultra-cold.”
- Train one phrase: “Freeze can be damage.”
- If you ship mixed products, split the shipment unless a trained approver signs off.
Real-world case: A public health team reduced repeat failures after splitting refrigerated and frozen lanes in its cold chain express delivery for vaccines program.
Where Do Most Excursions Happen in Cold Chain Express Delivery for Vaccines?
Direct answer: Most excursion risk in cold chain express delivery for vaccines shows up during packing, staging, and receiving, not during driving. The highest-risk window is often the first hour and last hour of the shipment lifecycle.
If vaccines sit in a warm staging area for “just a few minutes,” those minutes stack up. Add paperwork delays, missed deliveries, and door-open stops, and you get temperature drift that no one noticed until the data shows it.
The First-Hour Rule (a simple workflow that prevents spikes)
| Step | What you control | What it prevents | What it means for you |
|---|---|---|---|
| Pre-stage materials | Packaging readiness | Long exposure time | More stable packout performance |
| Bring vaccines out last | Time outside cold storage | Early warming | Larger safe window |
| Pack fast, seal, dispatch | Warm staging | Temperature spikes | Fewer alarms and quarantines |
| Confirm pickup window | Idle waiting | Uncontrolled dwell | Fewer “mystery” excursions |
Practical tips you can apply now
- Set a maximum staging time (and measure it).
- Prepare paperwork before vaccines enter the packout area.
- If receiving is uncertain, do not ship without a staffed window.
Real-world case: One site reduced excursion flags after enforcing a strict “no staging over X minutes” rule and building a ready-to-pack station.
What Packaging Works Best for Cold Chain Express Delivery for Vaccines?
Direct answer: The best packaging for cold chain express delivery for vaccines is packaging that matches your lane target, route risk, and “bad-day” time—not average time. Performance matters, but repeatability matters more. A great box with inconsistent packout becomes an unreliable system.
Think of packaging as three jobs: insulate, stabilize, and protect. Your packout recipe should be easy enough that a trained person can execute it the same way every time.
Packaging choice guide (simple comparison)
| Packaging option | Best for | Main risk | What it means for you |
|---|---|---|---|
| Insulated shipper + gel packs | Short refrigerated lanes | Over/under cooling if inconsistent | Works if SOP is strict |
| Insulated shipper + PCM | 2–8°C “no-freeze” lanes | Wrong conditioning | More stable temps, less freeze risk |
| Dry ice shipper | Frozen/ultra-cold lanes | Safety + venting + labeling | Strong cooling, stricter rules |
| Active container/vehicle | Long, strict lanes | Cost + door discipline | Fewer manual steps, higher control |
Coolant placement patterns that reduce risk
| Placement pattern | Best for | Risk | What it means for you |
|---|---|---|---|
| Top + sides | Many refrigerated packouts | Cold edges if unprotected | More even cooling with a barrier |
| Sides only | Freeze-sensitive products | Warm top layer | Requires verification and discipline |
| Compartmented zones | Mixed loads (approved only) | Complexity errors | Needs training and packout diagrams |
Practical tips you can apply now
- For refrigerated lanes, uniform stability beats “maximum cold.”
- Add a thin barrier layer so coolant does not touch vials directly when freezing risk exists.
- Standardize one packout diagram per lane and post it at the pack station.
Real-world case: A health system reduced alarms after it banned “custom packing” and used one packout layout per lane.
Ultra-cold lanes: dry ice basics (keep it safe and predictable)
- Use packaging designed to vent gas when dry ice is present.
- Train simple PPE rules and “no sealed-tight” habits.
- Choose sensors that actually measure the lane temperatures (avoid blind spots).
Real-world case: A hospital avoided re-icing chaos by limiting ultra-cold deliveries to staffed windows and enforcing vented packaging rules.
How Should You Monitor Cold Chain Express Delivery for Vaccines?
Direct answer: Monitoring turns cold chain express delivery for vaccines from a promise into evidence. It tells you how high/low, for how long, and where a temperature problem likely happened. Monitoring should be planned by lane risk, not added randomly.
If you can’t monitor everything, don’t guess. Monitor lanes, then scale coverage based on risk and performance.
Monitoring ladder (choose proof that matches risk)
| Tool | What it proves | Best use | What it means for you |
|---|---|---|---|
| Threshold indicator | Pass/fail threshold | High-volume, medium risk | Fast triage |
| Data logger | Full temperature curve | Lane validation | Finds where the spike happened |
| Real-time sensor | Live alerts | Highest risk lanes | Enables intervention |
| Chain-of-custody scans | Handoff history | Regulated lanes | Reduces disputes |
A 30-day monitoring plan you can actually run
- Start with your highest-risk lanes (seasonal heat/cold, long routes, multi-stop).
- Track two numbers: peak excursion and time out of range.
- Review weekly with packout and courier teams.
- Change one variable at a time (coolant mass, layout, staging time).
- Expand coverage after you stabilize performance.
Practical tips you can apply now
- Store monitoring results by shipment ID, not email threads.
- Define how fast you can access data (example SLA: within 24 hours).
- Put the sensor where failure is most likely, not where it’s easiest.
Real-world case: One network discovered most spikes happened during “handoff waiting,” then fixed pickup scheduling and reduced alarms within weeks.
How Do You Choose a Courier for Cold Chain Express Delivery for Vaccines?
Direct answer: Choose a courier for cold chain express delivery for vaccines based on lane capability, on-time discipline, handoff behavior, monitoring support, and exception response—not marketing language. A cheap courier that causes quarantines is expensive.
You want a courier that behaves consistently under pressure, especially when something goes wrong.
Courier scorecard (rate 1–5 and compare providers)
| Score area | Weak looks like | Strong looks like | What it means for you |
|---|---|---|---|
| Lane discipline | Vague “cold shipping” | Defined lane targets on SOPs | Fewer handoff mistakes |
| On-time reliability | Wide windows | Predictable pickup/delivery | Less dwell time |
| Handoff control | Uncontrolled staging | Cutoffs + staffed windows | Fewer first/last-hour spikes |
| Monitoring support | Optional or ad hoc | Standard options + reporting | Faster decisions |
| Exception response | “Case-by-case” | Written escalation protocol | Less chaos during delays |
Practical tips you can apply now
- Pilot the courier on your hardest lane, not your easiest.
- Require a written plan for missed delivery and late pickup.
- Define who decides “release vs quarantine” when an alarm triggers.
Real-world case: A vaccination program improved performance after requiring a written delay protocol and measuring handoff waits above a set threshold.
SLA clauses that prevent finger-pointing (keep them simple)
- Lane definitions: the transport range is written and visible.
- Data access: monitoring results available within a defined timeframe.
- Excursion ownership: a named decision owner and escalation path.
- Calibration/maintenance: monitoring devices are maintained on a schedule.
- Delivery rules: no leaving packages unattended or at alternative premises.
Interactive Decision Tool: Which Cold Chain Express Delivery for Vaccines Setup Should You Use?
Use this to pick a practical approach in 90 seconds.
Step 1: Pick your lane
- A: Refrigerated (2–8°C)
- B: Frozen
- C: Ultra-cold / highest sensitivity
Step 2: Pick your route profile
- 1: Same-day, direct
- 2: Same-day, multi-stop
- 3: Next-day or long distance
- 4: Seasonal extremes (hot/cold) or uncertain receiving
Step 3: Match to a recommended setup
| Your combo | Packaging | Monitoring | SOP focus (what you do first) |
|---|---|---|---|
| A + 1 | Standard insulated + no-freeze layout | Spot monitoring | First-Hour Rule + staffed receiving |
| A + 2 | Better insulation + door discipline | Route sampling | Stop warm staging + limit door-open time |
| B + 3 | High-performance packout | Loggers (routine) | Cutoffs + exception plan for delays |
| C + 4 | Specialized + dry-ice-safe design | Real-time (preferred) | Escalation tree + staffed delivery window |
How Do You Validate Cold Chain Express Delivery for Vaccines Lanes?
Direct answer: Lane validation proves cold chain express delivery for vaccines works in real conditions, not just on a perfect day. You test the route with monitoring, capture dwell times, and lock a lane-specific packout recipe that your team can repeat.
You’re not trying to “pass once.” You’re trying to prove your lane survives normal bad days.
A practical lane validation plan (10 test shipments)
Run 10 monitored shipments per lane:
- 3 in cooler conditions
- 4 in typical conditions
- 3 in worst-case seasonal conditions (your real pain window)
Track:
- Packout-to-pickup time
- Transit time
- Delivery-to-storage transfer time
- Temperature curve (or indicator status)
- Root cause notes for any deviation
| Validation check | What you test | Pass signal | What it means for you |
|---|---|---|---|
| Pickup staging | Warm dwell risk | Stable temps pre-pickup | Better pack station discipline |
| Transit | Vehicle exposure | No out-of-range spikes | Lane is viable |
| Receiving | Desk/doorstep delay | Fast transfer to storage | Fewer avoidable quarantines |
Practical tips you can apply now
- If results vary by driver, your SOP is too vague—add photos and a 60-second checklist.
- If the biggest spike is at pickup, fix staging, not the box.
- If the biggest spike is at receiving, require scheduled receiving.
Real-world case: A depot improved lane performance after discovering most deviations happened during receiving delays, not driving.
What Should You Do During a Vaccine Temperature Excursion?
Direct answer: When an excursion is suspected in cold chain express delivery for vaccines, your first job is to prevent accidental use and protect evidence. Use a simple script so people don’t improvise under stress: DO NOT USE → Store correctly → Show the proof.
The STOP–STORE–SHOW response (simple and effective)
- STOP: Do not use the vaccine. Quarantine it.
- STORE: Keep it at the correct temperature while you evaluate.
- SHOW: Capture evidence (monitoring data, time stamps, photos, notes).
| Step | What to do | What not to do | What it means for you |
|---|---|---|---|
| Isolate | Move to marked area | Mixing back into stock | Prevents accidental administration |
| Document | Save the temperature curve | “We think it’s fine” | Speeds decisions and audits |
| Decide | Follow the SOP decision owner | Ad-hoc approval | Reduces liability and delays |
Practical tips you can apply now
- Train one phrase: “DO NOT USE.” Make it automatic.
- If you don’t know duration, your monitoring plan is too weak—upgrade the lane.
- If excursions repeat, fix the single biggest dwell-time cause first.
Real-world case: A clinic reduced repeat excursions after adding a receiving checklist that required immediate transfer to cold storage.
2025 Developments and Trends in Cold Chain Express Delivery for Vaccines
Trend overview: In 2025, cold chain express delivery for vaccines is moving toward proof-first operations. Distribution is more decentralized (more clinics, pharmacies, mobile programs), so the winning systems are the ones that stay reliable across many sites. That pushes three priorities: simpler lanes, repeatable packouts, and faster evidence.
Latest progress snapshot
- More standardization: fewer packout variants to reduce errors.
- More proof expectations: temperature evidence is increasingly treated as default.
- More handoff measurement: staging time and receiving readiness are being tracked.
- More “freeze-risk” awareness: teams are designing refrigerated lanes to prevent edge freezing, not just warming.
Market insight: Many teams can ship vaccines quickly. Fewer can ship them consistently with low excursions and clean documentation. The advantage comes from treating packaging, training, courier selection, and monitoring as one system.
Frequently Asked Questions
Q1: What is cold chain express delivery for vaccines?
It’s fast delivery that keeps vaccines in-range end-to-end using a lane-specific packout, controlled handoffs, and monitoring proof.
Q2: What causes most temperature excursions?
Packing delays, warm staging, slow receiving, and missed delivery attempts cause more failures than driving time. Fix dwell time first.
Q3: Do I need monitoring on every shipment?
Not always. Many teams monitor high-risk lanes routinely and use sampling on stable lanes. Start with lane tests, then scale.
Q4: How do I prevent freezing in a 2–8°C lane?
Use a no-direct-contact barrier, avoid over-icing, standardize packouts, and validate your worst-case seasonal window.
Q5: What’s the fastest improvement I can make this week?
Enforce a maximum staging time and require staffed receiving windows. These fixes reduce “mystery” excursions fast.
Q6: What should I demand from a courier?
Defined lane targets, on-time discipline, handoff rules, monitoring support, and a written exception protocol with escalation steps.
Q7: How do I validate a new lane?
Run 10 monitored test shipments across different conditions, record dwell times, then lock a lane-specific packout recipe and SOP.
Q8: What do I do if an alarm appears after delivery?
Quarantine as DO NOT USE, store correctly, capture monitoring evidence, and follow your decision-owner SOP for release or discard.
Summary and Recommendations
Key takeaways: Cold chain express delivery for vaccines succeeds when you standardize lanes, packouts, monitoring proof, and handoffs. The biggest risks usually live in the first and last hour—packing, staging, and receiving—not the road. When you reduce dwell time, use repeatable packout recipes, and store evidence by shipment ID, you cut excursions and speed release decisions.
Action plan (start now):
- Label every shipment by lane (refrigerated, frozen, ultra-cold).
- Standardize one packout diagram per lane and train it.
- Enforce a maximum staging time at pickup.
- Pilot monitoring on your highest-risk lanes and review weekly.
- Require a courier delay protocol and define your decision owner.
About Tempk
At Tempk, we support temperature-sensitive delivery programs with practical packaging and operational guidance built for real workflows. We focus on stable thermal performance, repeatable packout methods, and SOP-friendly systems that reduce excursions during the most vulnerable stages—packing, staging, and last-mile handoffs. Our goal is to help you run cold chain express delivery for vaccines with confidence, consistency, and documentation that stands up to audits.
Call to Action: If you want to reduce excursions quickly, share your lane target, route time, transfer points, and seasonal ambient range. We’ll help you map a packout recipe, monitoring plan, and lane validation checklist your team can execute every day.
Cool Chain Creamery Top Transport: 2025 Playbook

Cool Chain Creamery Top Transport: What Works in 2025?
Cool chain creamery top transport is not “buy a refrigerated truck and hope.” It is a system you can repeat every day: clear temperature lanes, the right transport mode, tight dock control, and proof you can export fast.
cool chain creamery top transpo…
If you run dairy, your targets must match product risk—think chilled bands like 0–4°C and frozen stability, plus stricter rules for raw milk and quick-frozen lanes in some regions.
This article will answer for you:
How cool chain creamery top transport works as a repeatable system (not a single truck)
cool chain creamery top transpo…
Which lane temperature targets are practical for raw, chilled, and frozen dairy
How to choose the best-fit mode: reefer, passive shipper, or hybrid
cool chain creamery top transpo…
How to cut dock dwell time (the hidden cause of most excursions)
cool chain creamery top transpo…
What “proof” to demand: logs, calibration, exception reports, and record retention
2025–2026 trends that change capacity, sustainability, and compliance expectations
What Is Cool Chain Creamery Top Transport, Really?
Cool chain creamery top transport means you pick the best transport method and operating routine to keep dairy stable from pack-out to receiving.
cool chain creamery top transpo…
It is a system made of four parts: temperature targets, thermal protection, process control, and proof.
cool chain creamery top transpo…
If you only buy equipment, you often overpay and still lose performance at handoffs.
Creamery products are fragile in two ways: flavor changes and texture damage. Small swings can create off-flavors, condensation, and melt–refreeze defects that customers notice immediately.
cool chain creamery top transpo…
That is why “stable cold” usually beats “extreme cold” with lots of door openings.
The 3 lanes you must separate in cool chain creamery top transport
Your biggest win is simple: do not average lanes. Raw milk, chilled finished goods, and frozen desserts have different failure modes.
cool chain creamery top transpo…
| Lane | Typical products | Simple target you can enforce | What breaks first |
|---|---|---|---|
| Raw intake | raw milk, cream | Cold chain + clean handling | Warm pickup + hygiene gaps cool chain creamery top transpo… |
| Chilled finished | yogurt, fresh cheese, butter | Your spec (often 0–6°C) | Cross-dock door time cool chain creamery top transpo… |
| Frozen desserts | ice cream, gelato | Stable frozen lane | Last-mile delays + melt–refreeze cool chain creamery top transpo… |
Practical tips and advice
Label lanes everywhere: pallets, paperwork, and temperature reports.
cool chain creamery top transpo…
Do not “split the difference” on mixed loads: chilled and frozen compete unless separated.
cool chain creamery top transpo…
Make proof non-negotiable: if logs cannot be exported, disputes will drag on.
cool chain creamery top transpo…
Practical case: A gelato complaint often comes from last-mile warming, not from production changes.
cool chain creamery top transpo…
Cool Chain Creamery Top Transport: Which Temperature Targets Work?
Your targets should match the product and the rule set where you operate.
cool chain creamery top transpo…
For many chilled dairy operations, a practical starting band is ~0–4°C (32–39°F).
cool chain creamery top transpo…
For frozen desserts, the goal is “frozen and stable,” with many operations aiming for deep-frozen conditions to prevent softening.
cool chain creamery top transpo…
For raw milk in EU contexts, the hygiene rules commonly referenced include: cool immediately to ≤8°C for daily collection or ≤6°C if collection is not daily, and arrive ≤10°C at the destination establishment.
cool chain creamery top transpo…
For quick-frozen lanes in EU contexts, rules anchor at −18°C or lower and allow limited transport deviations up to 3°C.
cool chain creamery top transpo…
Why “stable cold” beats “colder is always better”
If product warms and cools repeatedly, you get condensation, texture damage, and inconsistent shelf life. A slightly warmer but stable lane can outperform a colder lane with frequent dwell and door opens.
cool chain creamery top transpo…
| Lane decision | Common mistake | Better rule | What it means for you |
|---|---|---|---|
| Chilled | one setpoint for everything | define a chilled band | fewer shelf-life surprises cool chain creamery top transpo… |
| Frozen | “it feels frozen” checks | protect against melt–refreeze | better reviews + fewer refunds cool chain creamery top transpo… |
| Raw milk | temperature only | temperature + hygiene logs | fewer borderline loads |
Practical tips and advice
Define a probe method: who measures, where, and with what device.
cool chain creamery top transpo…
Add a reject rule: if arrival exceeds your limit, decide the next step now.
cool chain creamery top transpo…
Treat cleaning logs like temperature logs: both protect you in audits.
cool chain creamery top transpo…
Practical case: If you only check temperature, hygiene failures can still reduce shelf life later.
cool chain creamery top transpo…
How Do You Choose the Best Mode for Cool Chain Creamery Top Transport?
The “top transport” choice depends on lane length, ambient heat, delivery density, and product type.
cool chain creamery top transpo…
Most operations use one of three setups: full reefer, passive insulated shipper, or hybrid.
cool chain creamery top transpo…
Mode comparison: reefer vs passive vs hybrid
| Mode | Best for | Watch-outs | What it means for you |
|---|---|---|---|
| Full reefer lane | high volume, multi-stop, mixed chilled loads cool chain creamery top transpo… | door openings + warm starts cool chain creamery top transpo… | active cooling, less packaging dependency cool chain creamery top transpo… |
| Passive shipper lane | parcels, small orders, DTC frozen cool chain creamery top transpo… | needs correct pack-out + coolant sizing cool chain creamery top transpo… | unit-level protection even with messy handoffs cool chain creamery top transpo… |
| Hybrid lane | premium frozen, hot climates, risky handoffs cool chain creamery top transpo… | more components; needs SOP discipline cool chain creamery top transpo… | “shock protection” at docks and doorsteps cool chain creamery top transpo… |
Decision tool: Pick your cool chain creamery top transport (2 minutes)
Score each statement: 0 (no), 1 (sometimes), 2 (yes).
cool chain creamery top transpo…
Multiple stops with frequent door opens.
cool chain creamery top transpo…
Hot summer peaks on the route.
cool chain creamery top transpo…
Frozen desserts with premium texture expectations.
cool chain creamery top transpo…
Unattended receiving (porch, back door, dock queue).
cool chain creamery top transpo…
Mixed chilled + frozen in the same day.
cool chain creamery top transpo…
You can standardize pack-out and train staff consistently.
cool chain creamery top transpo…
Score guidance
0–4: Reefers alone may be enough; focus on pre-cooling + door discipline.
cool chain creamery top transpo…
5–8: Use a hybrid approach for peak heat and last-mile risk.
cool chain creamery top transpo…
9–12: High risk; design product-specific packaging + monitoring and tighten windows.
cool chain creamery top transpo…
Practical tips and advice
Use mixed-load separation: chilled and frozen compete without physical separation.
cool chain creamery top transpo…
Put sensitive SKUs in the least-opened zone: fewer warm peaks.
cool chain creamery top transpo…
Require a receiving SOP: cold chain should not end at the dock.
cool chain creamery top transpo…
Practical case: Positioning frozen pallets near the unit outlet and limiting stops can cut “soft ice cream” complaints.
cool chain creamery top transpo…
Cool Chain Creamery Top Transport at the Dock: How Do You Stop Spikes?
Most temperature abuse happens during “not driving.” Cool chain creamery top transport is won at dock staging, loading speed, door-open time, and delivery queue time.
cool chain creamery top transpo…
Your team only needs three rules to start seeing fewer excursions: pre-cool, load fast, and stage smart.
cool chain creamery top transpo…
Dock habits table (copy to your SOP)
| Dock moment | Bad habit | Better habit | What it means for you |
|---|---|---|---|
| Trailer arrival | load immediately | pre-cool to target first | fewer warm starts cool chain creamery top transpo… |
| Pallet staging | warm zone staging | stage in chilled zone | steadier temps cool chain creamery top transpo… |
| Door management | door propped open | open/close in bursts | less humidity + frost cool chain creamery top transpo… |
| Load plan | random placement | coldest products deeper inside | better protection cool chain creamery top transpo… |
Dwell Minute Audit (interactive)
If you reduce dwell by 20 minutes, you can beat an expensive packaging upgrade.
cool chain creamery top transpo…
Track three times for one week: arrival-to-door-open, door-open duration, door-close-to-departure.
cool chain creamery top transpo…
| Dwell metric | What it reveals | Typical fix | What it means for you |
|---|---|---|---|
| Queue time | scheduling gaps | appointment windows | fewer spikes cool chain creamery top transpo… |
| Door-open time | slow handling | pre-sort pallets | steadier temps cool chain creamery top transpo… |
| Paperwork time | admin delays | digital POD | faster exits cool chain creamery top transpo… |
Practical case: Label pallets by stop order so drivers stop searching in an open box.
cool chain creamery top transpo…
What Packaging Works Best for Cool Chain Creamery Top Transport?
Packaging is your insurance policy—especially for the last mile. Even with reefers, packaging reduces temperature spikes during handoffs.
cool chain creamery top transpo…
Chilled packaging should minimize short exposures and reduce cross-contact risk. Frozen packaging should prevent melt–refreeze and reduce headspace (shipping “air” warms fast).
cool chain creamery top transpo…
Gel packs vs PCM vs dry ice: what fits your lane?
Pick cold sources based on lane risk, not habit.
cool chain creamery top transpo…
| Cold source | Best for | Watch-out | What it means for you |
|---|---|---|---|
| Gel packs | predictable short lanes cool chain creamery top transpo… | weak in high heat cool chain creamery top transpo… | strong daily baseline cool chain creamery top transpo… |
| PCM | stable band control cool chain creamery top transpo… | needs correct conditioning cool chain creamery top transpo… | fewer temperature swings cool chain creamery top transpo… |
| Dry ice | long, hot frozen lanes cool chain creamery top transpo… | labeling/handling rules cool chain creamery top transpo… | highest hold power cool chain creamery top transpo… |
Practical tips and advice
Use seasonal designs: changing cold sources by season is smart operations, not inconsistency.
cool chain creamery top transpo…
Right-size insulation: avoid shipping “air” on frozen parcels.
cool chain creamery top transpo…
Add micro-packaging for the last 10–15 minutes: insulated totes protect handoffs.
cool chain creamery top transpo…
Practical case: A 12-stop route cut soft ice cream incidents with insulated totes, better stop sequencing, and shorter door-open time.
cool chain creamery top transpo…
What Monitoring Proof Do You Need Without Overcomplicating It?
Monitoring builds trust and reduces disputes. It also helps you improve packaging and routing with evidence, not opinions.
cool chain creamery top transpo…
A “minimum viable” setup is: timestamps, lane IDs, and temperature evidence scaled by lane value.
cool chain creamery top transpo…
Minimum viable monitoring checklist
Time stamps: pack-out, pickup, delivery
cool chain creamery top transpo…
Lane ID: route + stop count + season tag
cool chain creamery top transpo…
Temperature evidence: logger for high-value lanes; indicators for audits
cool chain creamery top transpo…
Monitoring stack (control vs proof)
For EU quick-frozen contexts, Regulation 37/2005 is often cited for frequent monitoring, EN 12830 compliance for instruments, and storing dated recordings for at least one year.
cool chain creamery top transpo…
Even if you are not in that corridor, the logic is excellent: control runs the truck; proof defends claims.
cool chain creamery top transpo…
| Layer | What it is | What it proves | When to use it |
|---|---|---|---|
| Truck telematics | setpoint + air temp | operational control | linehaul + last mile cool chain creamery top transpo… |
| Independent recorder | EN 12830-class mindset | audit-ready logs | high-value lanes cool chain creamery top transpo… |
| Probe checks | spot checks at handoff | acceptance decisions | pickup + delivery cool chain creamery top transpo… |
Practical tips and advice
Define sensor placement: door-side sensors catch real risk better than “center only.”
cool chain creamery top transpo…
Use exception alerts: review trips with excursions and repeated alarms.
cool chain creamery top transpo…
Build a “proof stack”: when a customer says “warm,” answer with timestamps and in-range data.
cool chain creamery top transpo…
Practical case: Exportable traces end “warm product” debates in minutes, not weeks.
cool chain creamery top transpo…
How Do You Write SLAs for Cool Chain Creamery Top Transport That Carriers Respect?
An SLA turns “best effort” into measurable performance. Your SLA must define lane targets, excursion definitions, data access speed, and corrective action timelines.
If your SLA says “keep it cold,” you will argue forever. If it says “−18°C lane with defined deviation rules,” you can act.
cool chain creamery top transpo…
SLA checklist (simple and enforceable)
| SLA item | What to specify | Why it prevents disputes |
|---|---|---|
| Lane targets | chilled vs frozen targets | stops vague arguments cool chain creamery top transpo… |
| Excursion definition | threshold + duration | defines failure clearly cool chain creamery top transpo… |
| Data access | export within X hours | faster claim resolution cool chain creamery top transpo… |
| Record retention | keep dated records | audit-ready proof cool chain creamery top transpo… |
| Corrective action | RCA due date | prevents repeat failures cool chain creamery top transpo… |
Carrier Scorecard (quick, practical)
If a carrier cannot show logs, cleaning records, and corrective actions before you sign, you will fight for them after.
cool chain creamery top transpo…
Use a scorecard that rewards evidence and response capability.
cool chain creamery top transpo…
Copy/paste RFQ questions (use the ones that match your lane):
How do you export trip temperature logs, and how long do you retain them?
cool chain creamery top transpo…
Which devices meet EN 12830-style expectations, and how are they verified?
cool chain creamery top transpo…
How do you prevent warm loading and long staging?
cool chain creamery top transpo…
What is your excursion definition and response timeline?
cool chain creamery top transpo…
For mixed loads, how do you separate zones physically?
cool chain creamery top transpo…
For raw milk lanes, how do you verify arrival temperature where required?
cool chain creamery top transpo…
For frozen lanes, how do you protect lane integrity and manage deviations?
cool chain creamery top transpo…
How Do You Reduce Excursions Fast When Something Goes Wrong?
Excursions usually come from loading time, door openings, or equipment drift. The fix is rarely “buy a colder truck.” It is process control.
cool chain creamery top transpo…
The 3-minute Excursion Root-Cause Test (interactive)
When an excursion happens, answer: product cold enough at loading, staging longer than limit, more stops than planned, alarm/defrost behavior, and sensor placement.
cool chain creamery top transpo…
If staging/stops caused it: fix routing and dock process first.
cool chain creamery top transpo…
If alarms/defrost caused it: fix maintenance and calibration next.
cool chain creamery top transpo…
If sensor placement is unknown: fix the sensor SOP before blaming anyone.
cool chain creamery top transpo…
Cost-of-excursion calculator (simple)
Estimate weekly cost: orders/week × claim rate × average refund + reship cost + lost customer value.
cool chain creamery top transpo…
Then compare it to the cost of better monitoring, better packaging, and tighter staging control.
cool chain creamery top transpo…
Practical tips and advice
Pre-cool the box: a warm trailer steals cold in minutes.
cool chain creamery top transpo…
Load cold-to-cold: avoid ambient staging whenever possible.
cool chain creamery top transpo…
Control last mile: multi-stop routes need stronger packaging and faster drops.
cool chain creamery top transpo…
Practical case: On a five-stop frozen route, the last stop is usually the problem.
cool chain creamery top transpo…
Cool Chain Creamery Top Transport Playbooks by Product
Frozen desserts: the “top transport” playbook
Frozen desserts are the hardest category because damage is visible. If a pint arrives soft, customers see it instantly.
cool chain creamery top transpo…
Use a repeatable playbook: pre-freeze hard, right-size insulation, strategic cold placement, minimize dwell, and validate summer/winter.
cool chain creamery top transpo…
| Risk | What causes it | What to do | Your benefit |
|---|---|---|---|
| Melt edges | porch time, sun exposure | shorter window + insulation | fewer refunds cool chain creamery top transpo… |
| Icy texture | melt–refreeze cycles | stabilize temperature | better reviews cool chain creamery top transpo… |
| Lid leakage | softening + movement | snug packing + absorb layer | cleaner deliveries cool chain creamery top transpo… |
| Off flavor | warm exposure | faster handoff | repeat customers cool chain creamery top transpo… |
Milk and cream: the chilled dairy playbook
Milk and cream are “quietly fragile.” They can look fine but lose quality quickly with weak handling.
cool chain creamery top transpo…
Keep chilled lanes simple, focus on sanitation, avoid warm starts, and use calibrated monitoring to prove the process.
cool chain creamery top transpo…
Cool Chain Creamery Top Transport for Refrigerated Parcels: What Does ISO 23412 Mean?
E-commerce changes cool chain creamery top transport because parcels can transfer between vehicles before delivery. ISO 23412 describes requirements for indirect refrigerated parcel delivery, including intermediate transfers and service communication.
cool chain creamery top transpo…
Top transport for parcels means a cold-capable network with disciplined handoffs, not a standard parcel lane plus extra ice.
cool chain creamery top transpo…
| Parcel factor | What you want | Why it matters |
|---|---|---|
| Network temperature control | refrigerated handling at hubs | reduces transfer warming cool chain creamery top transpo… |
| Handoff discipline | fast transfers + closed doors | cuts heat spikes cool chain creamery top transpo… |
| Communication | clear service promises | fewer disputes cool chain creamery top transpo… |
Practical tips and advice
Do not over-promise: don’t promise “frozen for 48h” if the network is chilled.
cool chain creamery top transpo…
Use delivery windows: shorter windows often beat heavier packaging.
cool chain creamery top transpo…
Keep proof simple: one trace per lane per day can boost trust.
cool chain creamery top transpo…
2025 Latest Developments and Trends in Cool Chain Creamery Top Transport
In 2025, the market is pushing toward auditable cold chain performance: more continuous data, faster exception reporting, and better cross-border documentation—without wasting energy.
cool chain creamery top transpo…
Policy and sustainability pressure are also changing equipment and packaging decisions. EU refrigerant policy tightened with F-gas rules that started applying in March 2024.
cool chain creamery top transpo…
EU packaging rules also apply from August 12, 2026, pushing reuse and waste reduction systems.
cool chain creamery top transpo…
Latest progress snapshot (practical)
Proof-first contracts: data delivery time becomes a KPI.
cool chain creamery top transpo…
Exception dashboards: monthly root-cause trends replace one-off blame.
cool chain creamery top transpo…
Lane validation: summer and winter become separate specs.
cool chain creamery top transpo…
Operational sustainability: right-sized routing and reduced dwell lower energy use.
cool chain creamery top transpo…
Market insight (simple)
When capacity tightens, delays increase—and delays create temperature risk. That makes cool chain creamery top transport less about “best truck” and more about the best system: packaging + process + proof.
cool chain creamery top transpo…
Frequently Asked Questions
Q1: What is cool chain creamery top transport in one sentence?
It is dairy transport that stays in target lanes with proof, clean handling, and fast corrective action.
cool chain creamery top transpo…
Q2: What raw milk cooling targets should I reference in EU contexts?
A commonly cited framework is immediate cooling to ≤8°C (daily collection) or ≤6°C (not daily), and arrival ≤10°C.
cool chain creamery top transpo…
Q3: What temperature target is commonly used for quick-frozen lanes in EU contexts?
EU quick-frozen references anchor at −18°C or lower and allow limited deviations up to 3°C during transport.
cool chain creamery top transpo…
Q4: What proof should a “top transport” provider provide?
You want exportable trip logs, calibration evidence, and exception reporting with corrective actions.
Q5: What is the biggest hidden cause of dairy transport failures?
Dock dwell time. Doors open, queues grow, and spikes appear even with good equipment.
Q6: Do I always need a refrigerated truck for cool chain creamery top transport?
Not always. Some lanes can work with passive shippers or insulated totes, but longer and multi-stop lanes often benefit from reefers.
cool chain creamery top transpo…
Q7: How do I protect ice cream texture during delivery?
Prevent melt–refreeze using stable cold, right-sized insulation, strategic cold placement, and shorter last-mile dwell.
cool chain creamery top transpo…
Summary and Recommendations
Cool chain creamery top transport works when you treat it as a controlled system: set lane targets, control dwell time, demand continuous proof, and close root causes fast. Start by separating raw, chilled, and frozen lanes, then match each lane to the right mode (reefer, passive shipper, or hybrid).
cool chain creamery top transpo…
Win the small moments: pre-cool, load fast, reduce door-open time, and protect handoffs.
Action plan (clear CTA)
Map your lanes: time, stops, heat exposure, receiving behavior.
cool chain creamery top transpo…
Pick one high-risk lane and design a hybrid solution for handoffs.
cool chain creamery top transpo…
Add minimum monitoring: timestamps + lane IDs + evidence for key lanes.
cool chain creamery top transpo…
Run the Dwell Minute Audit for one week and fix the worst time first.
cool chain creamery top transpo…
Pilot for 2–4 weeks, then scale only after two clean weeks of performance.
About Tempk
At Tempk, we help cold chain teams make cool chain creamery top transport repeatable across routes, seasons, and carriers. We focus on practical systems you can run daily: lane specs, pack-out logic, monitoring proof, and SOPs that cut dwell minutes and stop repeat failures.
cool chain creamery top transpo…
Next step (CTA): Share your product mix (raw, chilled, frozen), route time, stop count, and peak summer temperature. We’ll outline a lane blueprint and a pilot checklist you can test immediately.