


Cold Chain Courier Service: Choose Right in 2025
Cold Chain Courier Service: Choose Right in 2025
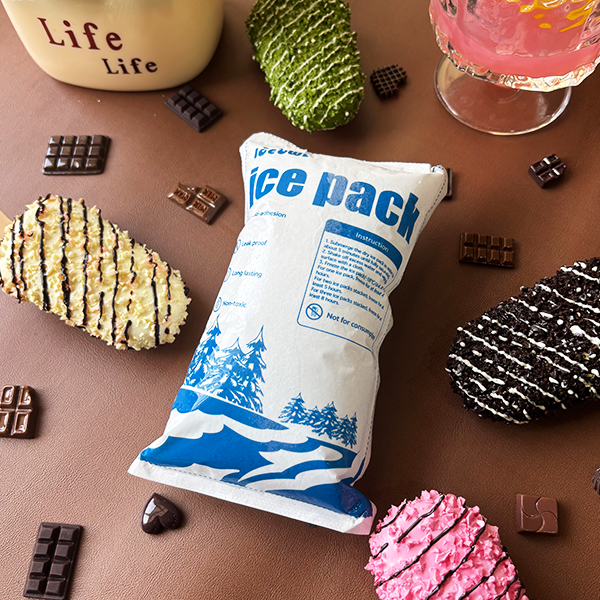
Cold Chain Courier Service: Choose Right in 2025?
You pick a cold chain courier service when “close enough” can ruin product, margin, and trust. In 2025, customers expect speed, but auditors expect proof. A true cold chain courier service controls temperature, time, and handoffs from pickup to the doorstep. It also gives you a clear plan for delays, missed deliveries, and disputes.
This article will answer for you
How to choose a cold chain courier service based on product risk and route reality
Which temperature targets a cold chain courier service should support for food, pharma, and labs
A cold chain courier service packaging checklist that prevents common warm-arrival failures
A cold chain courier service temperature monitoring checklist you can standardize
A simple cold chain courier service SLA checklist that prevents disputes
Cost drivers for cold chain courier service quotes and a cost-per-success calculator
2025 trends changing cold chain courier service expectations
What Is a Cold Chain Courier Service?
Direct answer: A cold chain courier service is a delivery system designed to keep shipments within a defined temperature range, with rules and proof. It combines controlled handling, time-sensitive routing, packaging requirements, and documentation. You are buying a process, not “a fast van with ice packs.”
Expanded explanation: Think of a cold chain courier service like a mobile fridge with a checklist. The checklist matters as much as the vehicle. Without consistent handoffs, even strong insulation can fail. Standards like ISO 23412 describe requirements for indirect refrigerated parcel delivery where transfers occur, which is a common risk point in real networks.
Quick reality check: Is it a true cold chain courier service?
| Check | If you hear “No” | Why it matters | What it means for you |
|---|---|---|---|
| Do they define temperature targets? | “We keep it cool.” | No target = no accountability | Higher dispute risk |
| Do they have written handling SOPs? | “Drivers know what to do.” | Improvisation causes spikes | More warm arrivals |
| Do they offer monitoring options? | “Not needed.” | No evidence means no improvement | Repeat failures |
| Do they have an exception plan? | “We try our best.” | Delays become losses | More write-offs |
Practical tips you can use today
Ask for lane definitions in writing: chilled, frozen, deep-frozen, and ambient-defined.
Require a delay protocol: what happens at 30, 60, and 90 minutes late.
Treat “no monitoring option” as a red flag for high-value goods.
Real-world example: One meal brand reduced refunds after adding a simple delay protocol and time-stamped handoffs.
Which Temperature Targets Should Your Cold Chain Courier Service Support?
Direct answer: Your cold chain courier service should match the temperature range your product truly needs, not what is convenient for the courier. Most shipments fall into chilled, frozen, or deep-frozen categories. Each category needs different packaging, handling, and proof.
Expanded explanation: Temperature needs are not one-size-fits-all. A “cold” shipment can mean different things for seafood, vaccines, or biologics. For food safety, public guidance often emphasizes keeping perishables out of the “danger zone” and limiting time unrefrigerated. CDC guidance, for example, warns against leaving perishable food out beyond 2 hours (or 1 hour above 90°F) and notes the 40°F–140°F danger zone.
Temperature category cheat sheet
| Category | Typical use | Main failure risk | What it means for you |
|---|---|---|---|
| Chilled | fresh meals, dairy, seafood | warming and shelf-life loss | more complaints and waste |
| Frozen | ice cream, frozen meals | thaw–refreeze cycles | texture damage and returns |
| Deep-frozen | specialty goods, some biologics | rapid warming during delays | high-value loss |
Practical tips and advice
If you ship mixed baskets, separate lanes or use compartment packaging.
Don’t accept “we keep it cold” as an answer—ask for the target band.
For premium goods, choose tighter control and stronger monitoring proof.
Real-world example: A seafood seller reduced “soft texture” complaints after switching to a chilled lane with consistent packout rules.
What Packaging Should a Cold Chain Courier Service Offer?
Direct answer: A strong cold chain courier service either provides packaging or gives you clear packaging specifications that work. Packaging is not an accessory. It is your temperature protection between every handoff.
Expanded explanation: Many failures happen before the van moves. If product sits warm while labels print, your packaging is already losing. The most reliable setups combine right-sized insulation, correctly conditioned refrigerant, and a repeatable layout. For frozen lanes using dry ice, packaging must allow gas venting and requires specific marking rules in many scenarios. FAA guidance, for example, states packages must not be airtight and must allow carbon dioxide venting.
Packaging types and when they work best
| Packaging type | Best for | Strength | Tradeoff | What it means for you |
|---|---|---|---|---|
| Insulated liner + carton | short chilled routes | low cost, easy | less durable | good for dense urban lanes |
| Reusable insulated containers | repeat routes | consistent and tough | needs return loop | lower cost per trip |
| High-performance passive shipper | longer routes | stronger protection | higher material cost | better for premium lanes |
| Active refrigerated vehicle | long or variable routes | stable air temp | door openings | needs stop discipline |
Cold chain courier service packaging checklist
Pre-condition product (start cold).
Match refrigerant type to the target range.
Block direct contact if freezing damage is possible.
Right-size the box to reduce air gaps.
Seal fast, then hand off immediately.
Real-world example: A meal-kit operator reduced “arrived warm” incidents after standardizing one reusable container and one coolant layout.
How Do You Compare Cold Chain Courier Service Providers?
Direct answer: Compare cold chain courier service providers using measurable criteria: on-time performance, excursion rate, exception handling, packaging guidance, and reporting. Price matters, but it is not the first filter.
Expanded explanation: A low-cost courier that causes spoilage is expensive. Your real cost is total cost per successful delivery, including refunds, support time, and lost repeat orders. So your evaluation should focus on success rate and risk control, not marketing claims.
The cold chain courier service scorecard you can use today (1–5)
Rate each provider:
Temperature capability (defined lanes + SOPs)
Speed predictability (hit windows consistently)
Packaging support (clear specs or provided kits)
Monitoring proof (indicator/logger options)
Exception response (rescue plan for delays)
| Score area | 1–2 (weak) | 3 (average) | 4–5 (strong) | What it means for you |
|---|---|---|---|---|
| Temperature control | “Best effort” | basic chilled | defined ranges + SOPs | fewer disputes |
| On-time delivery | unpredictable | acceptable | consistent | lower spoilage |
| Monitoring | none | optional | standardized | better prevention |
| Exceptions | ad hoc | limited | documented playbook | fewer disasters |
Practical tips for better outcomes
Ask: “What are your top three failure causes and what did you change?”
Require a pilot and review results weekly for the first month.
Compare providers by excursion rate, not average delivery time.
Real-world example: A specialty food brand improved retention after adopting weekly temperature summaries and a strict delay protocol.
Why Does a Cold Chain Courier Service Fail Most Often?
Direct answer: The most common cold chain courier service failures happen during packing, staging, and handoffs—not during driving. The first and last hour are the highest-risk zones.
Expanded explanation: Most teams obsess over routing. But warm minutes often come from the loading area and the doorstep. Public guidance highlights how quickly risk rises when perishables sit in unsafe temperature ranges. That is why your operating rules must control dwell time, not only transit time.
The “First Hour Rule” (simple workflow)
Stage packaging and refrigerant first.
Bring product out last.
Pack, seal, label, and load immediately.
Dispatch without delay.
| Step | What you control | What it prevents | What it means for you |
|---|---|---|---|
| Product last | exposure time | early warming | longer safe window |
| Fast sealing | heat entry | spikes and drift | more consistency |
| Immediate load | warm staging | excursions | fewer failures |
Practical tips
Use a visible “pack-by timer” in the packing zone.
Treat labeling as a pre-step, not a delay step.
Create a hot-day plan that shortens staging time.
Real-world example: A pharmacy program found excursions were driven by doorstep waits and reduced failures by adding signature rules.
How Should Monitoring Work in a Cold Chain Courier Service?
Direct answer: Monitoring should help you detect excursions, improve lanes, and prove compliance. You don’t need to monitor every shipment at the start. You do need consistent sampling and weekly review.
Expanded explanation: Monitoring is like a smoke alarm. You want early warning and evidence. For pharmaceutical distribution in the EU, GDP guidance highlights keeping temperature conditions within acceptable limits during transport, and it notes monitoring equipment should be maintained and calibrated, with temperature mapping under representative conditions and seasonal variation considered.
Monitoring options (simple → strong)
| Method | What you learn | Best use | What it means for you |
|---|---|---|---|
| Time stamps only | time exposure | low-risk pilots | minimal evidence |
| Threshold indicator | “did it exceed a limit?” | medium value lanes | fast triage |
| Data logger | full temperature curve | improvement projects | root-cause clarity |
| Real-time device | live alerts | high value lanes | enables intervention |
Cold chain courier service temperature monitoring checklist
Devices are calibrated (or vendor provides calibration proof).
Alarm thresholds and response actions are defined.
Records are stored by shipment ID, not email threads.
Exceptions are reviewed weekly, not yearly.
Corrective actions are documented and tracked.
30-day monitoring plan you can run
Monitor your top 2 routes for two weeks.
Identify where spikes happen (pack, transit, doorstep).
Fix the largest spike cause first.
Repeat monitoring to confirm improvement.
Real-world example: A hospital found the biggest spikes happened during pickup staging and fixed it by changing cutoff times.
What SOPs and SLAs Should Your Cold Chain Courier Service Include?
Direct answer: SOPs turn a courier into a system. Your cold chain courier service should have written SOPs for pickup timing, handling discipline, monitoring, and exception management. Your SLA should make responsibility and proof unambiguous.
Expanded explanation: “We’ll take care of it” is not a control. Your SLA must answer: what range applies, how it’s measured, who owns the data, what happens in a delay, and who decides release versus discard. For U.S. food transport, FDA describes the FSMA Sanitary Transportation rule goal as preventing practices that create food safety risks, including failure to properly refrigerate food and inadequate cleaning between loads. U.S. Food and Drug Administration
Cold chain courier service SLA checklist (copy into your RFP)
Temperature and monitoring
Target range per lane
Sensor placement rules
Data access within X hours
Excursion decision rule (release / hold / discard)
Operations
Pickup and delivery windows
Maximum dwell time rules
Chain-of-custody scan points
Exception handling playbook
Quality and safety
Vehicle and equipment cleaning procedures
Staff training frequency
Packaging acceptance criteria (including dry ice venting if used)
The delay protocol that saves shipments
| Delay scenario | Weak response | Strong response | What it means for you |
|---|---|---|---|
| Traffic delay | “We try.” | escalate + reroute | less spoilage |
| Missed delivery | leave at door | call + return option | better safety |
| Late pickup | still ship | re-pack or re-ice | better reliability |
Real-world example: A prepared-meals program reduced losses after adding a hard rule: delays beyond a threshold return to cold storage for re-pack.
How Do You Handle Dry Ice in a Cold Chain Courier Service?
Direct answer: Dry ice can be powerful for frozen lanes, but it adds compliance and safety steps. Your cold chain courier service should confirm venting, marking, and documentation rules before you scale.
Expanded explanation: Dry ice sublimates into carbon dioxide gas. If the package cannot vent, pressure can build. FAA guidance for dry ice notes packages must not be airtight and must allow venting, and it also describes marking the package “Dry ice” (or “Carbon dioxide, solid”) with net quantity in certain contexts.
Dry ice labeling and venting requirements (practical checklist)
Package allows gas to vent (never airtight).
“UN 1845” appears where required by your carrier/workflow.
Net dry ice quantity is shown in kilograms where required.
People handling the shipment understand the ventilation risk.
For many FedEx workflows, guidance explains filling in “UN 1845, Dry Ice, __ x __ kg” on shipping documents, including the net quantity in kilograms.
| Dry ice step | What to verify | Common mistake | What it means for you |
|---|---|---|---|
| Venting | lid and seams allow gas release | airtight cooler | safety risk + delays |
| Marking | correct name and net quantity | missing kg amount | acceptance holds |
| Training | handlers know what “dry ice” implies | no briefing | inconsistent execution |
Practical tips
Fix warm dwell time first before “just adding more dry ice.”
Use a dry ice checklist at pack-out and handoff.
Keep a photo example of a compliant label in the packing area.
Real-world example: A specialty pharmacy reduced carrier holds after standardizing dry ice marking and driver training.
Cost Drivers for Cold Chain Courier Service Quotes
Direct answer: Pricing feels messy because you are buying delivery plus risk control. Compare quotes using cost per successful delivery, not price per stop.
Expanded explanation: A quote can hide costs in wait time, exceptions, packaging responsibilities, and monitoring. Convert every bid into a single number that includes failure rate. This makes decisions calmer and more accurate.
Mini calculator: cost per successful delivery
Cost per successful delivery
= courier fee + packaging + monitoring + (failure rate × loss cost)
| Cost driver | What changes it | How to reduce it | What it means for you |
|---|---|---|---|
| Courier fee | speed + distance | route batching | lower base cost |
| Packaging | hold time needed | better SOP | less overpacking |
| Monitoring | proof requirements | tiered monitoring | spend where needed |
| Failure rate | dwell + variability | better handoffs | fewer refunds |
Practical tips
If bids vary widely, compare included wait time and exception handling.
Pay for monitoring on the top lanes first, not everywhere.
Negotiate route pricing for multi-stop runs instead of per-drop.
Real-world example: A retailer saved money by using scheduled chilled routes for low-risk lanes and reserving premium monitoring for high-risk deliveries.
How to Onboard a Cold Chain Courier Service in 14 Days
Direct answer: Onboarding works when you start with one lane, one packout recipe, and clear pass/fail rules. Scale only after you see stable proof.
Expanded explanation: Don’t start with your hardest lane. Start with a representative lane you can measure. Then lock the recipe and expand lane by lane. This approach prevents “pilot success, rollout failure.”
14-day rollout plan
Days 1–3: Define
Product list by lane (chilled, frozen, ambient-defined)
Targets and hold/discard rules
Packaging kit bill of materials
Days 4–7: Test
3–5 pilot shipments per lane
include one “delay test”
capture temperature evidence
Days 8–11: Lock
one-page photo SOP
driver handling rules
escalation contacts
Days 12–14: Launch
start with high-value customers
track exceptions daily
update once, then standardize
Readiness self-assessment (0–8)
Give yourself 1 point for each “yes”:
We know our target range per product.
We pre-condition refrigerant consistently.
We have a photo SOP per box size.
We defined dwell-time cutoffs.
We can access monitoring evidence quickly.
We defined an excursion decision rule.
We have an escalation contact list.
We review performance weekly.
0–3: fix basics first.
4–6: pilot-ready.
7–8: scale-ready.
Real-world example: A biotech shipper improved pass rate after tightening pickup windows and requiring handoff scans at every transfer.
2025 Trends Changing Cold Chain Courier Service Expectations
Trend overview: In 2025, “cold chain” is becoming more auditable and more data-driven. Buyers want proof, not promises. That pushes cold chain courier service providers to invest in monitoring, documentation, and standardized handling.
Three 2025 shifts you should plan around
More temperature proof for frozen lanes: GCCA and AFFI announced a protocol (July 21, 2025) to standardize and modernize temperature monitoring across the frozen food supply chain. Global Cold Chain Alliance
More attention to transfers: ISO 23412 focuses on indirect refrigerated delivery with intermediate transfer, which mirrors many courier networks.
Traceability timelines are moving: FDA has described proposing to extend the Food Traceability Rule compliance date by 30 months to July 20, 2028, with a directive not to enforce prior to that date. U.S. Food and Drug Administration+1
Market insight (simple and practical)
More companies can deliver quickly. Fewer can deliver cold with evidence at scale. Your advantage comes from systems: packout recipes, monitoring plans, and exception playbooks.
Frequently Asked Questions
Q1: What is a cold chain courier service in plain language?
A cold chain courier service delivers temperature-sensitive items with a defined temperature plan and proof, not just speed.
Q2: Do I need monitoring for every cold chain courier service delivery?
No. Start with sampling on high-risk lanes. Increase monitoring where losses or audits happen.
Q3: What causes most cold chain courier service failures?
Warm minutes during packing, staging, handoffs, and doorstep waits are common causes, not driving time.
Q4: What should I ask before signing a cold chain courier service contract?
Ask about lane targets, packaging specs, monitoring options, exception response, and data access timelines.
Q5: Can a cold chain courier service use dry ice?
Yes for frozen lanes, but packaging must vent gas and marking rules apply. Plan a checklist and training.
Q6: How do I compare cold chain courier service quotes fairly?
Use cost per successful delivery: courier fee + packaging + monitoring + expected loss from failures.
Summary and Recommendations
A cold chain courier service is only as strong as its system: lane definitions, packout discipline, monitoring proof, and a tight exception plan. Focus on the first and last hour, because that is where warm minutes hide. Use a pilot with measurable pass/fail rules, then scale lane by lane.
Next-step action plan (CTA)
Define your product lanes and target ranges.
Standardize one packout recipe per lane with photos.
Pilot one cold chain courier service on two routes for two weeks.
Track on-time rate, excursion rate, and exception response time.
Lock the SLA checklist and expand only after stable proof.
About Tempk
At Tempk, we help teams build reliable cold chain courier service programs that work under real last-mile pressure. We support practical packaging kits, lane validation plans, and monitoring options that match your risk level. We focus on repeatable SOPs, not “hero employees,” so performance stays consistent as you scale.
CTA: Share your product list, target ranges, delivery window, and handoff points. We’ll help you map a lane-by-lane plan you can deploy immediately.
Urgent Cold Chain Express Shipping Guide (2025)
Urgent Cold Chain Express Shipping: Stop Excursions?
Urgent cold chain express shipping only works when “fast” is treated as a controlled system, not a faster courier. As of December 18, 2025, customers expect speed and proof, especially for 2–8°C and frozen lanes. Some industry estimates place the global cold chain market in the hundreds of billions of USD in 2025, and monitoring markets continue to grow through 2030. Your real enemy is not distance. It is variability—late pack-out, stalled handoffs, and doorstep time.
This article will answer for you:
How urgent cold chain express shipping fails (and how you stop it)
How to set cut-offs and dwell limits that protect your worst days
How to choose passive vs active temperature control in plain English
How to standardize pack-out recipes without overcooling or leaks
What monitoring proof works in 2025 (and when real-time pays off)
A practical decision tool, ROI check, and rescue ladder you can use today
Why does urgent cold chain express shipping fail when it’s “urgent”?
Urgent cold chain express shipping fails when you compress time and increase handoffs without controlling dwell time. When teams rush, they skip conditioning, stage shipments too long, and accept risky delivery attempts late in the day. Every shortcut burns your thermal budget—the safe time your payload can tolerate outside ideal conditions.
In practice, most “mystery excursions” happen while a shipment is not moving. It sits on a bench, in a lobby, on a dock, or at a front door. If you control those minutes, reliability rises fast.
The three hidden failure points that burn your thermal budget
| Failure point | What usually happens | A simple limit you set | What it means for you |
|---|---|---|---|
| Staging time | Packed and waiting | 15–30 minutes | Prevents a “warm start” |
| Handoff dwell | Security, cross-dock, queue | 20 minutes per node | Stops silent warming at transitions |
| Doorstep time | Receiver unavailable | 5–10 minutes max | Prevents porch melt and disputes |
Practical tips and advice
Set one clock: seal time starts the thermal budget. Track it every time.
Make “waiting” visible: if it can’t be timed, it can’t be improved.
Refuse late-day risk: late cut-offs push delivery into the most chaotic hours.
Real-world case: A shipper reduced repeat excursions by enforcing a 20-minute hub dwell rule and a 10-minute doorstep rule. They changed behavior, not coolant volume.
When should you use urgent cold chain express shipping vs standard service?
Use urgent cold chain express shipping when speed reduces exposure risk or prevents a missed window with real consequences. If the consequence is small, “urgent” becomes wasted spend. You want urgency levels that match real risk, not feelings.
This is the simplest way to stop overusing premium service while still protecting critical loads.
Interactive decision tool: Is your shipment truly urgent?
Score each item 0–2 (0 = no, 2 = yes). Total 0–10.
Does a 2–4 hour delay trigger reship, rejection, or spoilage?
Will the receiver refuse delivery without temperature proof?
Is the payload high value per box (a failure hurts)?
Is there a narrow receiving window (clinic, lab, kitchen)?
Are there penalties tied to a time promise?
| Score | Urgency level | Recommended service design | What it means for you |
|---|---|---|---|
| 0–3 | Fast, not urgent | Standard cold chain + buffer | Lower cost, fewer exceptions |
| 4–7 | Urgent | Urgent cold chain express shipping + monitoring | Better reliability and proof |
| 8–10 | Critical | 24/7 dispatch + escalation + proof on every load | Lowest excursion risk |
Practical tips and advice
If you score 0–3, improve packaging and scheduling before paying urgent fees.
If you score 4–7, use urgent service only on lanes that fail often.
If you score 8–10, require a written rescue playbook and live escalation.
Real-world case: A clinic labeled everything urgent and costs spiked. After tiering urgency, they protected critical items and reduced late deliveries.
How do you choose passive vs active control for urgent cold chain express shipping?
Your first design choice in urgent cold chain express shipping is passive vs active temperature control. Passive means insulated packaging plus a finite coolant supply. Active means powered refrigeration during transport. Passive scales well when lanes are predictable. Active absorbs chaos better when variability is high.
You do not “graduate” to active because you want to look premium. You upgrade because your lane behaves like a bad day too often.
Plain-English comparison (the version teams actually remember)
Passive = “a thermos with smart ice.”
Works when pack-out is repeatable and handoffs are disciplined.Active = “a powered fridge on wheels.”
Works when variability is high and failure is expensive.
| Decision factor | Passive | Active | What it means for you |
|---|---|---|---|
| Trip variability | Medium risk | Lower risk | Active absorbs chaos |
| Cost per shipment | Lower | Higher | Passive scales cheaper |
| Setup speed | Fast if standardized | Slower to arrange | Urgent orders need speed |
| Proof | Strong with loggers | Strong with telemetry | Both can pass audits |
Practical tips and advice
Standardize passive first, then reserve active for the most unstable lanes.
If your lane includes many handoffs, treat it like a longer trip.
If a single failure is catastrophic, active may be cheaper than losses.
Real-world case: A biotech team moved only “critical-score” shipments to active control. Their overall costs stayed stable while excursions dropped.
How do you set cut-offs and handoff limits for urgent cold chain express shipping?
Cut-offs are the cheapest quality control in urgent cold chain express shipping. A late cut-off forces delivery into traffic peaks, low staffing, and poor receiver coordination. If you promise urgency too late, you create excursions that packaging cannot reliably rescue.
A good cut-off is not based on average transit time. It is based on the worst 20% day you still want to survive.
A practical cut-off calculator you can use today
Start with promised arrival time, then subtract buffers:
Pack-out time (include conditioning checks)
Max staging limit (your rule, not a hope)
80th percentile transit time (not the average)
Receiver access buffer (security, elevator, intake)
Contingency buffer (weather, surges, ramp delays)
If your remaining time is too small, you move the cut-off earlier or tighten zones.
The “handoff limit rule” (simple, powerful, trainable)
| Node | Maximum dwell | Trigger action | Proof you capture |
|---|---|---|---|
| Warehouse staging | 15–30 min | Re-ice / repack / delay release | Seal time + pickup scan |
| Cross-dock / hub | 20 min | Reroute / upgrade / cold staging | Hub-in / hub-out scans |
| Doorstep | 5–10 min | Redirect / return / staffed desk | Delivery attempt + acceptance time |
Practical tips and advice
Write limits as numbers, not words like “asap.”
Escalate early; late escalation is expensive escalation.
If receivers are often unavailable, add a backup delivery option.
Real-world case: A food shipper cut refunds after enforcing a hard doorstep limit and redirecting to staffed pickup points.
What packaging keeps urgent cold chain express shipping stable on bad days?
Packaging for urgent cold chain express shipping must be designed for exposure time, not transit time. Exposure time includes staging, handoffs, and doorstep minutes. The biggest mistake is choosing a shipper based only on “hours in transit.”
Also, “colder” is not always better. Overcooling can damage chilled goods just as easily as warming can.
The 4-part pack-out recipe for urgent shipments (repeatable under pressure)
Insulation layer (controls heat flow and reduces spikes)
Coolant strategy (gel, PCM, or dry ice matched to the band)
Product protection (dividers, liners, leak control, spacing)
Verification plan (indicator, logger, or real-time tracker)
Packaging choices that improve outcomes (without false safety)
| Packaging choice | What it improves | What it can break | What it means for you |
|---|---|---|---|
| More coolant only | Longer cold time | Cold spots, wet boxes | More complaints and rework |
| Better insulation | Slower heat gain | Slightly higher box cost | Fewer excursions and refunds |
| Divider + spacing | Fewer cold spots | Extra packing step | More consistent acceptance |
| Seasonal pack-outs | Stability across weather | More SOP discipline | Less “summer chaos” failure |
Practical tips and advice
Prevent freezing: keep coolant off direct contact using a divider layer.
Stop heat leaks first: lid fit and seam gaps matter more than “one more pack.”
Standardize with photos: one reference photo per lane reduces variation fast.
Real-world case: A pharmacy improved outcomes by upgrading insulation and spacing, not by adding more gel. Weight dropped and hold time improved.
What monitoring proof do you need for urgent cold chain express shipping in 2025?
In 2025, urgent cold chain express shipping is shifting to “evidence by default.” Customers want proof, audits expect traceability, and teams need data to improve lanes. But the “best device” is the one you can run consistently.
Start light, run it every time, then upgrade for lanes where intervention is possible.
Choose the lightest tool that still protects you
| Evidence type | Best for | Limitation | What it means for you |
|---|---|---|---|
| Temperature indicator | High volume, lower risk | Less precision | Quick acceptance check |
| Trip data logger | Audits, claims, lane validation | Post-trip only | Strong proof after delivery |
| Real-time IoT tracker | Rescue-capable, high-value | Needs response team | Enables mid-route intervention |
A simple rule for when real-time tracking pays off
Use real-time tracking if any is true:
One excursion causes full loss (high consequence).
Your route delays often, or handoffs are unreliable.
You can actually rescue mid-route (reroute, cold stage, meet-and-swap).
Disputes require proof within hours, not days.
Practical tips and advice
Pilot first: instrument 10–20 urgent runs per lane before scaling.
Define alert thresholds; too many alerts become background noise.
Train receivers on a simple acceptance routine to reduce disputes.
Real-world case: A lab used loggers for pilots, then reserved real-time trackers for the highest-risk lanes. Proof improved without runaway costs.
How do you build an exception playbook for urgent cold chain express shipping?
An exception playbook turns urgent cold chain express shipping from improvisation into controlled response. Delays will happen. Your job is to make delays predictable and survivable.
A good playbook answers three questions: What happened, what do we do now, and what proof do we save?
The R.E.S.C.U.E. one-page script (use it like a fire drill)
| Item | What you record | Owner | What it means for you |
|---|---|---|---|
| Route | Addresses + ETA | Dispatcher | Prevents last-minute confusion |
| Exposure | Max idle minutes | Driver | Cuts handoff warming |
| Spec | Temperature band | Shipper | Stops “close enough” thinking |
| Chain-of-custody | Seal/pickup/delivery times | Shipper + driver | Speeds investigations |
| Units | Box count + IDs | Shipper | Prevents missing pieces |
| Escalation | Triggers + contacts | Dispatcher | Turns panic into action |
Rescue ladder (small actions first, bigger actions when needed)
| Rescue level | Trigger example | Action | What it means for you |
|---|---|---|---|
| Level 1: Reroute | Minor delay | Reorder stops | Saves minutes fast |
| Level 2: Redirect | Receiver unavailable | Staffed backup site | Prevents doorstep warming |
| Level 3: Re-ice / swap | Major delay risk | Meet-and-swap coolant/box | Buys temperature time |
| Level 4: Abort safely | Range at risk | Return to hub | Prevents unsafe delivery |
Practical tips and advice
Pre-approve backup locations; don’t negotiate during the incident.
Keep a rescue kit ready: spare coolant, tape, labels, dividers.
Use one escalation phone tree so no one searches contacts under pressure.
Real-world case: A shipper added meet-and-swap for stalled routes. A second driver delivered fresh coolant and saved critical loads.
What does a good SLA look like for urgent cold chain express shipping?
A good SLA for urgent cold chain express shipping measures speed and quality together. If you only measure “delivered fast,” you will deliver fast failures. SLAs should include time, temperature, proof, and exception rules.
SLA metrics that improve outcomes
| SLA metric | What to track | Target style | Why it matters |
|---|---|---|---|
| On-time delivery | % within promise | High | Customer trust |
| Excursion rate | % out of range | Low | Direct quality signal |
| Dwell compliance | % within limits | High | Controls handoff risk |
| Exception closure time | Minutes to resolve | Low | Prevents repeat failures |
| Proof completeness | % with usable proof | High | Faster audits and disputes |
ROI calculator (quick, usable, honest)
Fill in your numbers:
Average gross margin per shipment: ____
Average reship/refund cost when compromised: ____
Current compromise rate: ____%
Target compromise rate: ____%
Incremental urgent service cost (per 100 shipments): ____
Expected savings per 100 shipments =(Current rate − Target rate) × (Reship/refund cost) × 100
If expected savings exceed incremental cost, urgent upgrades are financially justified.
2025 latest developments and trends in urgent cold chain express shipping
In 2025, urgent cold chain express shipping is becoming more standardized and less improvisational. More teams are building ready kits for rapid pack-out. More buyers expect evidence, not reassurance. Monitoring and visibility are expanding, and many shippers are treating temperature excursions like incident response with clear ownership.
Latest progress snapshot
Lane standardization rises: fewer one-off pack-outs, more repeatable recipes.
Proof becomes normal: monitoring plans are moving from optional to expected.
Escalation loops tighten: teams intervene earlier, not after complaints arrive.
“Rescue-ready” becomes a premium tier: not every urgent lane needs rescue capability.
Market insight: urgent programs scale best where failure is costly—high-value perishables, healthcare, and premium customer promises.
Common questions (FAQ)
Q1: When should you use urgent cold chain express shipping instead of standard service?
Use it when speed reduces exposure risk or prevents a missed receiving window with real consequences. If failure cost is high, urgency is justified.
Q2: Do you always need real-time temperature tracking for urgent shipments?
No. Many lanes succeed with trip loggers and strict dwell limits. Use real-time tracking when you can rescue mid-route.
Q3: What is the biggest cause of excursions in urgent cold chain express shipping?
Uncontrolled dwell time—staging, handoffs, or doorstep waiting. Control those minutes and reliability rises quickly.
Q4: How do you prevent chilled products from freezing in urgent shipping?
Avoid direct coolant contact. Use divider layers, spacing, and consistent layouts that prevent cold spots.
Q5: How much buffer should packaging provide for urgent cold chain express shipping?
Cover planned time plus realistic delay. Design for “normal chaos,” not perfect days.
Q6: What should an SLA include for urgent cold chain express shipping?
Include the deadline time, temperature band, proof method, dwell limits, and exception actions. Clarity prevents disputes.
Summary and recommendations
Urgent cold chain express shipping succeeds when you control variability, not when you chase speed alone. Set cut-offs that protect your worst days. Enforce hard limits for staging, handoffs, and doorstep time. Standardize one pack-out recipe per lane and temperature band. Add monitoring proof that matches risk, and run an exception playbook that triggers action fast.
Your next step (CTA)
Pick one lane and complete this 2-week upgrade:
Set three limits (staging, hub dwell, doorstep).
Standardize one pack-out recipe and photo reference.
Add proof (logger or real-time) based on your urgency score.
Review every exception weekly and fix one root cause each week.
About Tempk
At Tempk, we help teams build urgent cold chain express shipping workflows that stay stable under real-world delays. We focus on lane design, repeatable pack-out systems, monitoring plans that produce usable evidence, and rescue playbooks your team will actually follow. We avoid over-complication and prioritize controls that reduce excursions, disputes, and costly reships.
Call to action: Share your temperature band, worst-day transit time, and handoff map. We’ll outline a lane blueprint and a validation checklist you can operationalize quickly.
Temperature-Controlled Frozen Dessert Eco Delivery Plan
Temperature-Controlled Frozen Dessert Eco Delivery?
You can absolutely run temperature-controlled frozen dessert eco delivery—even in warm weather—if you treat it like a system, not a box. Your goal is simple: keep frozen desserts stable (often ≤ -18°C / 0°F) while reducing waste, weight, and reships. If you focus on temperature stability + fast handoffs + right-sized packaging, you get fewer melts, fewer refunds, and a greener footprint without “panic packing.”
This article will help you:
Pick a frozen dessert delivery temperature target that protects texture (not just food safety)
Build eco-friendly packaging for ice cream shipping with less waste and fewer failures
Decide dry ice vs gel packs vs PCM using lane-based rules (not guesswork)
Fix last-mile risks like porch dwell time and multi-stop warm spikes
Prove performance with monitoring (including EN 12830-aligned recorder expectations where relevant)
What does temperature-controlled frozen dessert eco delivery mean in practice?
Temperature-controlled frozen dessert eco delivery means your product stays inside a frozen “temperature lane” from pack-out to doorstep, while your packaging and operations minimize waste. It’s not “as cold as possible.” It’s stable, predictable cold that prevents thaw–refreeze damage and protects texture, shape, and customer trust.
You can think of it like carrying a snowball across a sunny parking lot. You don’t win by starting colder. You win by reducing heat exposure all the way.
The 3-Barrier model that makes temperature-controlled frozen dessert eco delivery work
In temperature-controlled frozen dessert eco delivery, three barriers must work together:
Thermal barrier: insulation slows heat coming in
Cold source: gel packs, PCM, dry ice, or a hybrid
Process barrier: fast pack-out, short dwell, smart routing, trained handoffs
| Barrier | What you control | What usually breaks | What it means for you |
|---|---|---|---|
| Thermal | Insulation, fit, closure | Air gaps, crushed corners | More stability with less coolant |
| Cold source | Type, placement, conditioning | Wrong amount, wrong prep | Fewer soft lids and leaks |
| Process | Staging time, routing, handoff | Porch time, multi-stop spikes | Fewer refunds and reships |
Practical tips you can use today
Write a one-page lane spec: time in transit, max ambient, dwell time, pack-out layout.
Set a staging timer: if orders sit out too long, your packaging can’t “save” it.
Train on early melt signs: lid gaps, spongy cartons, sticky labels, surface frost patterns.
Real case: One gelato shipper reduced complaints by shrinking box size, tightening staging, and standardizing a PCM layout—using less material than before.
Which temperature targets protect texture in temperature-controlled frozen dessert eco delivery?
In temperature-controlled frozen dessert eco delivery, the biggest enemy is not “warm.” It’s temperature swings. A brief warm spike can soften edges, then refreeze into crystals that customers feel immediately.
A practical baseline for many frozen programs is ≤ -18°C / 0°F. You can set colder internal targets for premium texture, but don’t skip testing.
A simple temperature map for frozen desserts (copy this)
| Product type | Practical target band | What to watch | What it means for you |
|---|---|---|---|
| Premium ice cream | Aim near ≤ -18°C | Peak spikes during stops | Smooth mouthfeel stays smooth |
| Gelato | Stable frozen band matters most | Long porch dwell | Fewer collapses and leaks |
| Sorbet | Needs stronger protection | Fast surface warming | Less refreeze grit |
| Frozen yogurt | Hates swings | Separation at edges | Better appearance and texture |
What to measure (most teams measure the wrong thing)
For temperature-controlled frozen dessert eco delivery, track:
Peak temperature (spikes drive texture damage)
Time above your limit (minutes matter more than averages)
Where the spike happened (dock, van staging, doorstep)
Practical tips and suggestions
Use two numbers: a target (goal) and a maximum allowed at delivery (limit).
Validate summer and shoulder-season separately: “average weather” hides failures.
Design for porch reality: the customer’s meeting is part of your cold chain.
Real case: A brand met average temperature goals but still got “grainy” reviews. Their logger showed spikes during multi-stop routes, not during transit.
How do you design packaging for temperature-controlled frozen dessert eco delivery?
Packaging for temperature-controlled frozen dessert eco delivery starts with your worst day, not your best day. Before you choose materials, lock five facts: total time, max ambient, dwell time, product mass, and customer unboxing delay.
If you can’t define these, you’ll overpack—and still fail on heat spikes.
Your packaging stack options (eco-friendly without fragile performance)
| Packaging approach | Eco upside | Watch-out | Best for |
|---|---|---|---|
| Reusable insulated box for frozen desserts | Lowest waste per successful delivery | Needs returns and recovery | Local/subscription routes |
| Right-sized recycle-ready insulation | Easier customer disposal | Must re-test hold time | National lanes with stable SLAs |
| Hybrid: reusable outer + minimal inner | Strong balance | More SOP discipline | Mixed lanes and mixed customers |
| “Overpack everything” | Fewer melts short-term | High waste + cost | Only extreme lanes (and temporary) |
Why right-sizing wins (more than “green materials”)
In temperature-controlled frozen dessert eco delivery, oversized boxes create three problems:
You ship more air (higher freight impact).
You need more coolant (higher cost and waste).
Air gaps become warm pockets (higher melt risk).
Rule of thumb: minimize void space, protect product shape, and seal the lid like a gasket.
Practical tips and suggestions
Place coolant with intention: top and sides often matter more than corners.
Design closure as a seal: lid gaps are silent failures.
Print disposal instructions: “what to do with this box” reduces confusion and complaints.
Real case: A shipper reduced packaging weight but saw more melts. The fix wasn’t “add more material.” It was better fit, tighter closure, and shorter staging time.
Dry ice vs gel packs vs PCM for temperature-controlled frozen dessert eco delivery?
The best coolant for temperature-controlled frozen dessert eco delivery is the one that meets your lane with the least material and the fewest failures. That means the “best” answer changes by route, season, and service level.
Dry ice is powerful for long or hot lanes, but it adds compliance and handling steps. Gel packs are simpler and can be reusable, but may struggle in long heat exposure. PCM can stabilize a chosen temperature band, but requires consistent conditioning and placement.
Decision table: dry ice vs gel packs vs PCM
| Coolant | Best at | Eco angle | Operational catch |
|---|---|---|---|
| Dry ice | Long transit + hot ambient | Efficient hold power per hour | Vented packaging + UN1845 marking + training |
| Gel packs | Short to medium lanes | Reusable potential | Heavier shipments; needs correct pre-chill |
| PCM | Stable temperature band | Reusable, tuned control | Conditioning process must be repeatable |
Dry ice basics (keep it simple, do it correctly)
If you use dry ice in temperature-controlled frozen dessert eco delivery, plan for:
Vented packaging: CO₂ gas must escape (sealed packs can bulge or rupture).
Correct marking: commonly includes UN1845 and net weight in kilograms.
Staff training: prevent skin contact and handle with clear SOPs.
Melt-Risk Calculator (2 minutes)
For your temperature-controlled frozen dessert eco delivery, pick one option per line:
Transit time: <12h / 12–24h / 24h+
Ambient exposure: cool / warm / hot
Stops: 0–2 / 3–8 / 9+
Handoff: in-person / porch / locker
Returns: yes / no
Quick read:
If you hit 24h+, hot, or porch + 9+ stops, you usually need stronger insulation and may need dry ice or a hybrid.
If you’re <24h with returns, gel/PCM often becomes the greener option after validation.
Practical tips and suggestions
Don’t mix coolants randomly: uneven zones create soft edges and lid leaks.
Condition PCM like an ingredient: wrong prep equals wrong performance.
Test two configs per lane: “light” and “robust,” then choose by data.
Real case: A shipper paired dry ice with a sealed inner wrap. Boxes bulged and failed. Switching to vented design solved it.
How do routing and handoffs improve temperature-controlled frozen dessert eco delivery?
Routing is invisible insulation in temperature-controlled frozen dessert eco delivery. A perfect shipper can still fail if it sits on a dock or porch in sun.
The three handoffs that break frozen desserts:
Pack-out → pickup (dock dwell)
Driver staging (warm van time)
Doorstep dwell (customer delay)
A simple SLA you can enforce internally (and with partners)
For temperature-controlled frozen dessert eco delivery, define:
Max dock time before pickup (example: 20–30 minutes)
Max staging time without cold control
Delivery window messaging (short, clear, action-focused)
Route checklist (yes/no)
Do you pre-sort orders so drivers don’t search with doors open?
Do you deliver frozen first on mixed routes?
Do you cap stop count or add buffer for multi-stop lanes?
Do customers get a 10-minute arrival alert?
If you answered “no” to two or more, fix operations before adding packaging.
| Last-mile risk | What goes wrong | Fix | What it means for you |
|---|---|---|---|
| Multi-stop | repeated warm spikes | pre-sort + stop cap | fewer melts |
| Porch time | unattended warming | windows + alerts | fewer refunds |
| Traffic delays | late delivery | buffer + lane rules | steadier outcomes |
Practical tips and suggestions
Add a handoff script: “Bring it inside immediately.”
Offer delivery windows for frozen: fewer porch failures beats “eco liner swaps.”
Treat high-risk ZIP codes as a separate lane: validate separately.
Real case: A brand reduced melt claims by delivering frozen orders earlier and limiting stops—without changing packaging.
What monitoring and proof should you keep for temperature-controlled frozen dessert eco delivery?
If you can’t prove it, you can’t improve it. Temperature-controlled frozen dessert eco delivery needs proof that is simple, consistent, and fast to retrieve.
You don’t need a lab. You need repeatable records:
Pack-out time and pickup time
Lane ID and packaging configuration ID
Temperature indicator or data logger (risk-based)
The “proof pack” checklist you can standardize
| Proof item | What it includes | Why it matters | What it means for you |
|---|---|---|---|
| Route temperature trace | time-stamped data | settles disputes | fewer refunds |
| Excursion report | cause + corrective action | prevents repeats | stronger SOPs |
| Pack-out spec | photo + layout + materials | standardizes results | fewer mistakes |
| Staging timer log | dwell time evidence | targets #1 hidden risk | fewer spikes |
| Recorder documentation | EN 12830 references where relevant | audit readiness | partner accountability |
Practical tips and suggestions
Use two sensors during pilots: one near product core, one near the lid zone.
Review exceptions only: don’t stare at every graph, flag spikes and causes.
Give customer support a short script: “Delivered within spec” + what to do if not.
Real case: A team found repeated spikes at one cross-dock handoff. Fixing that one point reduced complaints across multiple lanes.
How do costs and waste really break down in temperature-controlled frozen dessert eco delivery?
Cost control in temperature-controlled frozen dessert eco delivery comes from reducing failures, weight, and box volume—not from squeezing material prices alone.
The biggest drivers:
Dimensional weight (box size often costs more than materials)
Coolant weight (more weight = more shipping cost)
Labor time (complex pack-outs slow throughput)
Failure rate (refund + reship is the real budget killer)
The monthly scorecard (use this every month)
Track three numbers for your temperature-controlled frozen dessert eco delivery program:
Cost per successful delivery (include refunds and reships)
Packaging grams per order (and per successful order)
Failure rate by lane (and by season)
| Metric | What “good” looks like | What to fix if it’s bad |
|---|---|---|
| Cost per successful delivery | stable or falling | failures + box volume |
| Packaging per order | trending down safely | right-size + layout |
| Failure rate by lane | predictable and low | dwell time + routing |
Practical tips and suggestions
Reduce failures first, then reduce materials. That’s how “eco” stays real.
Don’t optimize packaging in winter and assume it works in summer.
Use lane codes on labels so you know what worked where.
Real case: One brand’s biggest footprint drop came from fewer reships, not “greener liners.”
2025 latest trends shaping temperature-controlled frozen dessert eco delivery
In 2025, the direction is clear: performance plus sustainability, not sustainability instead of performance. Packaging lifecycle pressure, proof expectations, and energy efficiency efforts are all pushing the market toward measured, validated systems.
Latest progress snapshot (what to do now)
Packaging lifecycle rules are tightening: design for recyclability, right-sizing, and reuse loops.
Proof expectations are rising: temperature logs and retention practices are becoming baseline in many supply chains.
Energy optimization is accelerating: some operators test freezer setpoints and monitoring upgrades to reduce energy use (but you must validate dessert quality).
Dry ice planning needs resilience: build backup lane designs that can run on gel/PCM when supply or cost shifts.
Practical next moves (low drama, high impact)
Re-test whenever you change a liner, box, or coolant.
Pilot one reusable lane locally before scaling nationally.
Make “first-delivery success” your top KPI. It improves eco and margin together.
Frequently Asked Questions
Q1: Can temperature-controlled frozen dessert eco delivery work without dry ice?
Yes. Many <24-hour lanes succeed with gel or PCM plus strong insulation and fast handoffs. Validate by season.
Q2: What’s the biggest reason frozen desserts arrive damaged even when “cold”?
Temperature swings. Partial melting and refreezing create crystals, separation, and soft edges customers notice fast.
Q3: What temperature should I target for temperature-controlled frozen dessert eco delivery?
A common baseline is around ≤ -18°C / 0°F, then tighter internal targets for premium texture as needed.
Q4: Is a reusable insulated box for frozen desserts always greener?
Only if you actually recover and reuse it enough. Your return rate and reuse cycles decide the real impact.
Q5: What does “UN1845” matter for in temperature-controlled frozen dessert eco delivery?
UN1845 is commonly used to identify dry ice shipments. Dry ice also needs venting and correct net-weight marking.
Q6: Do I really need data loggers for temperature-controlled frozen dessert eco delivery?
If you ship high-value product, handle disputes, or operate in regulated chains, logs pay for themselves quickly.
Q7: What’s the fastest way to cut waste without risking melts?
Reduce reships and shrink box volume through right-sizing. Those two moves beat most material swaps.
Q8: What should I do when a customer reports a melt?
Ask for photos, confirm delivery time, review the lane trace, and apply your excursion playbook consistently.
Summary and recommendations
Temperature-controlled frozen dessert eco delivery works when you build a complete system: right-sized insulation, the right cold source, and disciplined operations that reduce heat exposure. Focus on stability, not extreme cold. Reduce failures first, then reduce materials. Prove performance with simple records so you can improve lanes faster and resolve customer claims with confidence.
Action plan (simple, repeatable)
Pick your top 2–3 lanes and document worst-case time + ambient + dwell.
Test two pack-outs per lane (light vs robust) and log peak temperatures.
Lock the winner into a one-page SOP with photos and a staging timer.
Add customer alerts and delivery windows to reduce porch dwell time.
Revalidate seasonally and keep a backup coolant plan for high-risk days.
Internal linking suggestions (no external links)
About Tempk
At Tempk, we focus on practical cold-chain packaging and delivery design that helps frozen desserts arrive in-spec without unnecessary waste. We support teams with lane-based packaging selection, pack-out SOP design, and performance validation—so your temperature-controlled frozen dessert eco delivery can be repeatable, auditable, and cost-aware through every season.
Next step (CTA): Share your lane details (transit time, hottest-day ambient, stop count, dessert type, order size). We’ll outline two pilot pack-outs you can test immediately.
Refrigerated Ice Cream Top Solutions in 2025
Refrigerated Ice Cream Top Solutions That Work in 2025?
If you’re looking for refrigerated ice cream top solutions, you want one outcome: ice cream that arrives smooth, firm, and consistent. Not “kind of frozen,” and definitely not “soft then refrozen.” In 2025, the winning approach is not one magic box. It is a repeatable system that controls time, temperature, and handling across every handoff.
You’ll learn how to choose insulation, place refrigerants, standardize packout, and prevent dock warming. You’ll also get a self-test and a lane decision tool you can use today.
This article will answer for you
Which refrigerated ice cream top solutions reliably reduce melt and refunds
How to set ice cream cold chain temperature targets by stage, not habit
What packout layouts prevent hot spots and texture damage
How monitoring turns refrigerated ice cream top solutions into repeatable SOPs
A quick self-assessment to find your biggest weak link
2025 trends: lane tiering, fewer decisions, smarter reuse
What are refrigerated ice cream top solutions in 2025?
The best refrigerated ice cream top solutions fall into five connected categories. Most failures happen when one category is missing or inconsistent. Your packaging should be forgiving. You should not need perfect weather or perfect drivers.
The five solution categories (the full system)
Insulation: EPP, EPS, PU, VIP-style panels, multi-layer liners
Refrigerants: gel packs, phase change materials (PCMs), dry ice (when suitable)
Monitoring: indicators, data loggers, scan checkpoints, exception rules
Process: packout SOPs, staging limits, door discipline, routing rules
Customer experience: delivery windows, alerts, retrieval instructions, claims flow
| Solution category | What it solves | Typical failure | Practical meaning for you |
|---|---|---|---|
| Insulation | Slows heat gain | Wrong thickness | Hold time collapses early |
| Refrigerant | Stores “cold budget” | Too little mass | Partial melt and refreeze |
| Monitoring | Creates visibility | No accountability | Same mistakes repeat |
| Process | Creates consistency | “Tribal knowledge” | High variance by shift |
| Customer experience | Controls last mile | Missed delivery | Doorstep warming risk |
Practical tips you can apply this week
DTC: treat “delivery attempt failure” as a top risk, not a rare event.
B2B: prioritize repeatability and audit-friendly temperature records.
Premium pints: protect texture first, then optimize cost.
Practical case example: One DTC brand reduced reships after standardizing packout photos and enforcing staging time limits.
Which insulation is best for refrigerated ice cream top solutions?
The best insulation in refrigerated ice cream top solutions depends on your lane duration, heat exposure, and how disciplined your team is. “Most premium” is not always best. The right choice is the one that matches your route reality.
Common insulation options (and how they behave)
EPP boxes: durable, reusable, strong for route programs and returns
EPS foam: low cost, decent for short lanes, fragile under rough handling
PU foam shippers: stronger insulation, higher cost, bulkier to store
VIP-style systems: very high insulation in thin walls, needs careful packout
Insulated liners: flexible, easy storage, performance depends on sealing
A quick comparison you can use for decision-making
| Insulation option | Best for | Not ideal for | What it means for you |
|---|---|---|---|
| EPP | Reuse programs, repeat lanes | Ultra-long holds without design | Low damage + repeatability |
| EPS | Low-cost short lanes | Rough handling | Higher breakage risk |
| PU | Mid/long lanes | Tight storage | Strong performance, more bulk |
| VIP-style | Long lanes, hot weather | Low SOP discipline | Best hold time, needs care |
| Liners | Flexible ops | Extreme heat and long holds | Good for light lanes |
Practical tips and recommendations
1–2 day lanes: strong liners or EPS can work if packout is tight.
2–3 day lanes: prioritize PU, VIP-style, or reusable EPP with reinforced packout.
Hot climate: insulation choice often matters more than “adding extra packs.”
Practical case example: A regional shipper improved summer success by upgrading insulation thickness and reducing internal air gaps.
What refrigerants are top solutions for refrigerated ice cream shipments?
Refrigerants are central to refrigerated ice cream top solutions because they supply the cold energy your insulation protects. Your goal is to maintain product below your texture-risk zone through the lane plus delays.
The three refrigerant approaches most teams use
Gel packs (frozen): common, scalable, easier training
PCMs: tighter control when conditioned correctly, stricter SOP needed
Dry ice: high cooling power, more handling controls and ventilation needs
Gel packs vs PCMs: what changes for you?
Gel packs are forgiving, but can create local cold shock if they touch product. PCMs can be more stable, but only if your team conditions them consistently.
| Refrigerant type | Strength | Risk | Practical meaning for you |
|---|---|---|---|
| Gel packs | Simple + scalable | Hot spots or freeze points | Needs buffer layers |
| PCMs | Stable band control | Conditioning mistakes | Needs training + labels |
| Dry ice | Very strong cooling | Handling complexity | Best for long/hot lanes |
Practical tips and recommendations
Use buffer sheets between packs and product to reduce “cold shock.”
Secure novelties tightly so they don’t drift into warm corners.
Choose refrigerants your team can pack correctly at real volume.
Practical case example: A fulfillment team reduced soft corners by switching from “packs on top only” to balanced side-and-top placement.
How do you design a packout that belongs in refrigerated ice cream top solutions?
Packout design is one of the highest-impact refrigerated ice cream top solutions. A great box with a bad packout still fails. Hot spots usually come from wall contact, voids, and weak closure.
The “balanced cold” rule
You want cold sources around the product, not only above it. Heat enters from every direction, especially through seams and lids. A reliable baseline packout uses:
Side coverage to reduce wall hot spots
Top coverage to protect against ambient peaks
Centered payload to avoid wall contact warming
Minimal free air to reduce internal heat circulation
Packout layout table you can standardize
| Packout layout | When it works | When it fails | Practical meaning for you |
|---|---|---|---|
| Top-only packs | Very short lanes | Any delay | Soft corners and complaints |
| Side + top packs | Most lanes | Poor closure | Best general approach |
| Full surround + spacer | Long/hot lanes | Wrong conditioning | Most stable performance |
Practical tips and recommendations
Center the payload every time, and avoid wall contact.
Use a spacer so product does not lean into the lid seam.
Seal the liner cleanly. Wrinkles can act like open windows.
Practical case example: A DTC program reduced “one pint melted” complaints after eliminating empty voids and enforcing centered placement.
What monitoring belongs in refrigerated ice cream top solutions?
Monitoring turns refrigerated ice cream top solutions from opinions into facts. If you can’t see what happened, you can’t improve it. Monitoring also reduces claim disputes because you can verify patterns.
Monitoring options (from simplest to strongest)
Visual indicators: fast checks and customer confidence tools
Data loggers: objective time-temperature records for root cause analysis
Scan checkpoints: time and location accountability across lanes
Exception rules: clear actions when delays happen
The “same place every time” rule for loggers
If your logger moves around, your data becomes noise. Pick one defined position:
near the product center
not touching refrigerants
consistent across packers and shifts
| Monitoring tool | What you learn | What you miss | Practical meaning for you |
|---|---|---|---|
| Indicator | Obvious mishandling | Fine patterns | Quick confidence |
| Logger | Drift and spikes | Little if placed well | Real improvement |
| Scan checkpoints | Delay causes | Internal box temp | Lane accountability |
Practical tips and recommendations
Start with 5–10% shipment sampling, then expand.
Use loggers on high-value orders and hot lanes first.
If customers say “soft but not melted,” monitoring exposes recurring causes.
Practical case example: One team discovered a warm spike during late-day pickup and fixed it by changing staging rules.
How do you optimize fulfillment and last-mile for refrigerated ice cream top solutions?
Many failures happen after packing. Fulfillment and last-mile execution are core refrigerated ice cream top solutions because dock warming and missed deliveries destroy even perfect packouts.
The four operational rules that protect ice cream
Staging time limit: packed shippers should not sit at ambient.
Pickup discipline: coordinate pickup windows and avoid late-day exposure.
Delivery windows: avoid late doorstep drops in hot weather.
Exception handling: define what happens when a lane is delayed.
Door discipline (simple but powerful)
If you use cold rooms, door habits matter:
batch picking instead of one-off trips
pre-stage loads before opening the door
close between moves
| Process step | Good practice | Bad practice | Practical meaning for you |
|---|---|---|---|
| Packing | Cold-zone staging | Ambient staging | Faster warming |
| Pickup | Set window | “Whenever” | Unpredictable excursions |
| Delivery | Customer alerts | Silent drop | Doorstep melt risk |
Practical tips and recommendations
DTC: send alerts and request immediate retrieval.
B2B: schedule receiving with strict handoff SOPs.
Weekend risk: shift ship days to avoid idle transit.
Practical case example: A brand reduced weekend losses by shifting ship days and tightening pickup windows.
Interactive decision tool: choose refrigerated ice cream top solutions by lane
Score each item from 1 to 3. Add your total. Then match the lane tier.
Step 1: score your lane risk
Time out of freezer
1: ≤4 hours
2: 4–12 hours
3: 12–24+ hours
Ambient exposure
1: Mostly indoor transfers
2: Mixed docks and curbside
3: Hot weather or parked-van time
Delivery style
1: One drop, no opens
2: Multiple opens
3: Frequent access
Step 2: choose your lane tier
3–4 points (Light): lighter shipper + fast handoff + simple monitoring sample
5–7 points (Medium): stronger insulation + balanced packout + staging control
8–9 points (Heavy): validated packout + monitoring required + strict exceptions
Interactive self-assessment: Are you running refrigerated ice cream top solutions or just hoping?
Score each statement 0 to 2. Total max is 20.
We use a documented packout diagram.
Packs never touch product directly (buffer is standard).
We minimize internal air gaps every shipment.
Packed shippers have a staging time limit.
We control pickup windows.
We track warm-weather lanes separately.
We monitor shipments (at least sampling).
We have an exception rule for delays.
We train packers with photos of the “gold standard.”
We review claims monthly and change one variable.
Your result
0–7: biggest win is packout + staging standardization.
8–14: biggest win is monitoring + lane segmentation.
15–20: biggest win is continuous optimization and reuse programs.
2025 latest developments and trends in refrigerated ice cream top solutions
In 2025, the strongest shift is toward repeatable systems that reduce human variation. Winning operators aim for “fewer decisions per shipment.” They also design for the worst 20% of events, like delays and missed delivery attempts.
Latest progress snapshot
More reuse programs: reusable insulated boxes with trackable cycles
Better packout standardization: photo-based SOPs and line-side diagrams
Smarter exception handling: rules tied to lane delays and weather risk
Customer experience integration: proactive delivery alerts reduce doorstep warming
Right-sized packaging: less empty space, fewer hot corners, less refrigerant waste
Market insight you can use
Customers judge frozen delivery in one moment: opening the box. If your design survives delays and heat exposure, your brand becomes reliable. That reliability reduces refunds, reships, and negative reviews.
Internal link suggestions (3–5)
(Use these as internal page titles on your site. No external links.)
Cold Chain Packaging Guide for Frozen Desserts
Gel Pack vs PCM: Which Refrigerant Should You Use?
Packout SOP Template for DTC Ice Cream Shipping
How to Reduce Temperature Excursions in Last-Mile Delivery
Reusable Insulated Shipper Program: Setup and Cleaning SOP
Common questions (FAQ)
Q1: What is the most reliable refrigerated ice cream top solution for hot weather?
Use stronger insulation, balanced side-and-top packout, minimal air gaps, and strict staging limits. Heat exposure beats “more packs.”
Q2: Why does one pint melt while others stay firm?
Hot spots usually come from wall contact, empty voids, or top-only layouts. Center the payload and surround it evenly.
Q3: Do I need temperature loggers for every shipment?
Not always. Start with high-risk lanes and sampling. Use the data to fix patterns before expanding monitoring.
Q4: Are reusable shippers worth it for refrigerated ice cream top solutions?
They can be, if you track cycles, clean consistently, and control returns. Reuse often reduces damage and improves repeatability.
Q5: How can I reduce reships without changing carriers?
Standardize packout and staging limits, create delay exception rules, and improve delivery alerts. Process fixes often outperform carrier changes.
Summary and recommendations
The best refrigerated ice cream top solutions in 2025 are a system, not a product. Match insulation to lane risk. Place refrigerants in a balanced layout. Standardize packout with photos. Enforce staging limits and pickup windows. Add monitoring so improvements are based on facts, not arguments.
A simple action plan (start this week)
Build a “gold standard” packout and photograph it.
Add buffer layers and eliminate internal voids.
Set a staging time limit and enforce pickup discipline.
Monitor a sample set of shipments on hot lanes.
Review claims monthly and change one variable at a time.
CTA: If you want fewer soft deliveries within 30 days, start with packout and staging rules. Then upgrade insulation only where lane data proves it.
About Tempk
At Tempk, we help frozen product brands build practical cold chain systems teams can execute consistently. We focus on repeatable packouts, durable insulated shippers, and lane-based design that reduces melt risk without wasting refrigerant. Our goal is simple: help you ship ice cream that arrives the way you intended—smooth, firm, and ready to delight.
Next step: Share your lane duration, ship days, carton sizes, and summer temperature conditions. We can help you map a refrigerated ice cream top solutions strategy that fits your real routes.
Cold Chain Milk Chocolate Packaging in 2025?
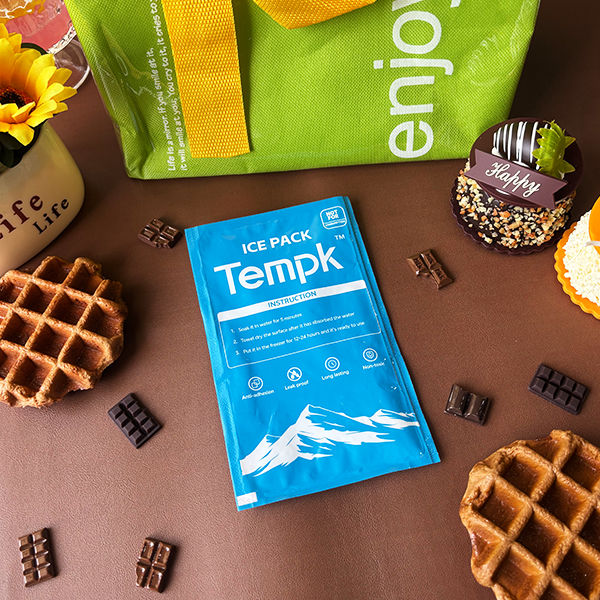
Cold Chain Milk Chocolate Packaging That Works in 2025?
Last updated: December 18, 2025
Cold chain milk chocolate packaging works when it keeps milk chocolate stable, dry, and protected during shipping and storage. Your goal is not “as cold as possible.” Your goal is fewer temperature swings, less humidity exposure, and zero rubbing damage. Many teams aim for a comfort zone around 15–18°C in controlled areas and work hard to avoid long holds above ~20–22°C, especially in the last mile.
This article will answer for you:
How cold chain milk chocolate packaging prevents melt, softening, and bloom
What a practical milk chocolate cold chain temperature range looks like by stage
How to add a moisture barrier for chocolate packaging to stop condensation
When PCM packs for chocolate shipping beat standard gel packs
How to build last-mile milk chocolate delivery packaging for porches and lockers
How to test and validate cold chain milk chocolate packaging before you scale
What must cold chain milk chocolate packaging protect?
Cold chain milk chocolate packaging must protect four things at the same time: temperature stability, moisture control, physical protection, and odor protection. If one fails, the customer sees it fast. A tiny white haze, a dull patch, or a bent corner can look like “old stock.” That is why packaging for milk chocolate is often tougher than packaging for many other foods.
Think of your shipper as a “portable pantry.” If the pantry gets warm, humid, smelly, or shaken, milk chocolate will show it. Cold chain milk chocolate packaging prevents that by creating a small, predictable micro-environment around the product.
| Risk you’re fighting | What usually causes it | What customers notice | What it means for you |
|---|---|---|---|
| Softening / deformation | Heat soak and long dwell | Bent bars, warped shapes | Higher refunds and reships |
| Bloom (white haze) | Temperature cycling + moisture | “Looks old” appearance | Lower perceived quality |
| Condensation | Cold meets humid air | Sticky wrapper, damp box | Complaints even if taste is fine |
| Scuffs / cracks | Micro-movement in parcel networks | Dull finish, chipped corners | Premium look disappears |
| Odor pickup | Mixed freight or scented materials | “Smells like cardboard/spice” | Flavor complaints and distrust |
Practical tips you can use today
Design cold chain milk chocolate packaging for stability, not extreme cold.
Protect corners and edges first. They show damage sooner than flat surfaces.
Treat odor control as a requirement if you ship through mixed freight hubs.
Practical example: A gifting brand reduced appearance complaints by adding a sealed inner barrier and removing empty space.
What temperature and humidity should cold chain milk chocolate packaging target?
Cold chain milk chocolate packaging should be built around stable “moderately cool and dry” conditions, because swings cause more damage than steady temperatures. Milk chocolate often softens gradually before it melts. Later, when it cools again, bloom can appear. Humidity makes this worse because moisture can condense during transitions.
Instead of chasing perfect numbers everywhere, train a simple ladder that your team can follow under pressure. This reduces mistakes at staging and handoffs.
Practical targets by supply chain stage (easy to train)
| Stage | Practical temperature goal | Practical humidity goal | Why it matters |
|---|---|---|---|
| Storage (controlled) | ~15–18°C | ~45–55% RH | Best long-term stability |
| Pick & pack | ~16–20°C | keep <60% RH | Reduces condensation risk |
| Transit buffer | slow change, avoid spikes | limit moisture ingress | Prevents cycling and sweating |
| Last mile | avoid long holds >~20–22°C | avoid rain/humid exposure | Protects appearance at delivery |
“Green–Yellow–Red” decision ladder (fast SOP)
Green: stable cool and dry → ship normally
Yellow: mild warming risk → shorten exposure, protect from sun
Red: hot hold or repeated swings → hold, inspect, document
Case insight: Teams often see fewer bloom incidents after standardizing staging time limits, not after buying thicker insulation.
Which layers make cold chain milk chocolate packaging reliable?
The strongest cold chain milk chocolate packaging is a layered system: inner barrier + structure + insulation + coolant strategy + movement control. Any single layer can look “good” and still fail. A great insulated shipper fails if the chocolate rattles. A great wrap fails if humid air leaks in.
Use a “layer map” so everyone understands what each piece does. This makes training faster and results more consistent.
Layer-by-layer packaging map
| Layer | What it does | Common mistake | Better practice | Your practical gain |
|---|---|---|---|---|
| Primary wrap | protects direct contact | weak seals | consistent tight seal | cleaner presentation |
| Secondary barrier | blocks moisture and odors | loose closure | full seal, sealed corners | fewer damp boxes |
| Structure (tray/dividers) | prevents scuffs and cracks | “void fill only” | rigid trays + corner guards | premium look survives |
| Insulation | slows heat gain | too thin for lane | match to route risk | fewer softening events |
| Coolant (gel/PCM) | absorbs incoming heat | touching product | spacer + perimeter placement | fewer condensation marks |
| Void management | reduces air exchange | empty headspace | snug fit, inserts | better stability |
Practical tips and suggestions
Always separate coolant from chocolate. Direct contact can trigger sweating.
Lock products in place. “Micro-movement” causes dull scuffs over time.
Use low-odor materials if you ship with mixed freight or long dwell.
Practical example: A subscription brand improved arrival “shine” after adding a tray to stop bar-to-bar friction.
How do you prevent bloom with cold chain milk chocolate packaging?
Prevent chocolate bloom during shipping by minimizing temperature swings and moisture exposure—especially during transitions. Bloom often shows up after a warm event, when chocolate cools again later. That is why teams get confused. The “damage moment” may happen in a hub, but the “visible symptom” appears at the customer.
Treat bloom prevention as a transition management problem. Packaging supports it, but process matters too.
Bloom prevention checklist (packaging + process)
| Bloom trigger | What usually causes it | Packaging fix | Process fix |
|---|---|---|---|
| Warm–cool cycling | dwell time + later cooling | better insulation + buffering | reduce staging time |
| Condensation | humid air meets cold surfaces | sealed inner barrier | keep sealed until acclimated |
| Cold pack touch | local cold spot + moisture | spacer layer + placement rules | staff training photo |
| Overcooling | big temperature gap | right-size coolant | avoid “more packs always better” |
Practical tips you can apply now
Use “duration thinking.” A short spike is often less harmful than a long warm hold.
Standardize summer and winter pack-outs. Do not improvise per order.
Add a simple instruction card so customers do not create condensation at unboxing.
Practical example: A retailer reduced bloom returns after adding a moisture barrier and enforcing a “dock exposure <20 minutes” rule.
How should you place gel packs or PCM in cold chain milk chocolate packaging?
Cold packs should stabilize the environment inside cold chain milk chocolate packaging, not freeze the product. Your target is a steady “cool room in a box.” Placement matters more than pack count. Poor placement creates cold spots, moisture, and surface defects.
PCM packs for chocolate shipping can be useful because they buffer near a chosen temperature point. Gel packs often cool hard at the start, then fade. PCM can feel steadier on longer lanes.
Cold pack placement patterns (simple rules)
| Pack-out style | Where packs go | Best for | Watch-out | Your practical gain |
|---|---|---|---|---|
| Perimeter shell | sides (and sometimes top) | longer routes | needs snug fit | steadier cooling |
| Top buffer | top with divider | short routes | avoid direct touch | fast packing |
| Multi-zone | sides + top | hot climates | more steps | more stability |
| No coolant | none | low-risk short lanes | porch exposure risk | lowest cost |
Practical tips and suggestions
Add a thin spacer between packs and chocolate to reduce local condensation.
Avoid “too many packs.” Overcooling can increase sweating during warm-up.
Standardize one placement photo per SKU. Consistency beats cleverness.
Case insight: Several teams improved outcomes by removing one extra gel pack that was causing condensation.
Which insulation types fit cold chain milk chocolate packaging lanes?
Choose insulation for cold chain milk chocolate packaging based on route duration, ambient risk, and delivery uncertainty—not a single R-value claim. Operational fit matters. If a pack-out is slow or confusing, it will be done differently every time.
Also consider crush resistance. Milk chocolate often ships as gifts. If the shipper arrives deformed, customers assume the chocolate is “old.”
Quick insulation comparison (operations-first)
| Insulation type | Thermal strength | Operational fit | Best fit | Your practical meaning |
|---|---|---|---|---|
| EPS | strong baseline | widely used | many lanes | dependable starter |
| EPP | durable, reusable | needs reverse flow | closed-loop | lower waste long term |
| Foam shippers | strong hold | bulkier storage | longer routes | stable performance |
| VIP panels | very high | careful handling | premium long lanes | best stability per thickness |
| Paper-based systems | improving fast | design sensitive | sustainability focus | reduce plastic where viable |
Practical tips and suggestions
Start with your lane time: under 12 hours vs 36–72 hours changes everything.
Tight fit matters. Empty air warms faster than you expect.
Choose low-odor materials for milk chocolate shipping packaging.
Practical example: A chocolatier improved unboxing quality after switching to a more rigid insulation format that reduced crushed corners.
How do you stop condensation in cold chain milk chocolate packaging?
Condensation control for chocolate packaging is the “silent win.” Condensation can create sticky wrappers, damp cartons, and sugar bloom after drying. It usually happens when a cold package meets warm, humid air. That can occur at delivery, in a mailroom, or during a fast warm-up indoors.
The simplest high-impact method is a sealed inner barrier plus a clear unboxing rule.
The Seal–Wait–Open rule (customer-friendly)
Seal: keep the inner barrier sealed during transit and at arrival
Wait: let the package acclimate 60–120 minutes (longer if the temperature gap is large)
Open: open only when the pack feels closer to room conditions
| Situation | What to do | What to avoid | Why it helps you |
|---|---|---|---|
| Winter delivery to warm home | wait sealed longer | open immediately | reduces surface moisture |
| Humid summer unboxing | keep sealed in cool room | open outdoors | lowers sweating risk |
| Retail backroom handoff | stage sealed in tote | leave packs open | keeps surfaces stable |
Practical tips and suggestions
Put the warm-up instruction on top, not buried under product.
Seal corners carefully. Small gaps are where humid air sneaks in.
Avoid “cold shock” strategies that create big temperature differences.
Practical example: A gift brand reduced “wet box” tickets by adding a sealed barrier and a warm-up card.
Interactive tool: build your cold chain milk chocolate packaging stack
Use this quick selector to choose a pack-out that your team can repeat every day.
Step 1: Transit time
A) 0–12 hours
B) 12–36 hours
C) 36–72 hours
Step 2: Peak heat risk at delivery
A) Low
B) Medium
C) High
Step 3: Humidity risk (rainy/coastal)
A) Low
B) Medium
C) High
Step 4: Presentation sensitivity
A) Standard
B) Premium gift
Stack guidance (repeatable rules)
If you choose C for time or heat → full stack: sealed barrier + rigid protection + insulation + buffered coolant + last-mile instruction card
If you choose C for humidity → add condensation control: sealed inner barrier + Seal–Wait–Open card
If presentation is premium → add anti-scuff structure: trays, dividers, corner protection
How do you protect the last mile with cold chain milk chocolate packaging?
Last-mile milk chocolate delivery packaging must survive porches, lockers, missed attempts, and sun exposure. Last mile is where time becomes unpredictable. A package can be “on time” and still sit in heat. This is why you should design for a realistic exposure budget.
Also, the shipper is part of your brand moment. Milk chocolate is often a gift. Structure and cleanliness matter as much as thermal performance.
Last-mile playbook (simple and practical)
| Last-mile scenario | Primary risk | What to add | Your practical gain |
|---|---|---|---|
| Sunny doorstep | heat spike | reflective outer + insulation | fewer softening complaints |
| Cold winter drop | condensation | sealed barrier + warm-up rule | fewer sticky wrappers |
| Locker pickup | long dwell | stronger buffering + snug fit | more predictable arrival |
| Missed attempt | repeated cycles | lane-based pack-out + monitoring sample | fewer “mystery bloom” cases |
Practical tips you can use today
Offer “cool-hour delivery” where possible. Morning beats late afternoon in hot months.
Add a clear label: “Keep out of direct sun.” It reduces porch dwell in practice.
Design unboxing flow: instruction card first, then product, then coolant layers.
Practical example: A retailer lowered negative reviews by moving the warm-up instruction card to the top layer.
How to validate cold chain milk chocolate packaging before scaling?
Validation turns cold chain milk chocolate packaging from “trial and error” into a repeatable system. You do not need a lab to start. You need a consistent method that matches your lanes. Then you change one variable at a time.
A practical validation plan has three tests: thermal hold, handling durability, and unboxing quality scoring. This protects your brand because milk chocolate is judged visually.
Simple validation plan (3 tests)
| Test | What you measure | How long | Pass example | Why it matters |
|---|---|---|---|---|
| Thermal hold | stability over route time | route duration | no prolonged warm holds | fewer softening events |
| Handling | scuffs, cracks, corner damage | 30–60 min sim | no chipped corners | protects premium look |
| Unboxing audit | gloss, smell, wrapper condition | 5–10 min | meets brand standard | reduces “looks old” claims |
10-day lane test you can run
Pick two lanes: one easy, one risky.
Lock one pack-out version (do not change multiple variables).
Run 10 shipments across different pickup times.
Capture temperature sample data (for a subset) and consistent photos.
Adjust one variable and repeat until performance is repeatable.
Self-assessment: are you ready to scale?
Give yourself 1 point for each “Yes”:
You have 2–3 standard pack-outs mapped to route risk.
Your inner barrier sealing has a visual seal check.
Your packaging includes anti-movement structure (trays/dividers).
You use Seal–Wait–Open instructions for customers.
You test in hot and cold seasons at least twice a year.
You track complaints by type: soft, scuffed, dull, odor, broken.
Score guidance:
0–2: start with sealing + structure + one lane test
3–4: add seasonal validation and clearer customer instructions
5–6: you are ready to scale and optimize cost
How do you reduce cost and waste without increasing risk?
Cost reduction in cold chain milk chocolate packaging works best when you reduce waste, not protection. The most expensive item is not the shipper. It is the reship, refund, and brand damage. Use “cost per successful delivery” as your metric.
Lane-based pack-outs are a major lever. Many teams overpack every order because they do not trust their lanes. Testing creates trust, then you can right-size.
| Cost lever | What you change | Risk if done wrong | Safer approach | Practical gain |
|---|---|---|---|---|
| Right-size the box | smaller shipper | crushing | keep rigid base | lower DIM costs |
| Lane-based pack-outs | fewer “one size fits all” | wrong assignment | simple lane chart | less overpack |
| Reusable components | inserts/totes | hygiene issues | clean-and-return SOP | lower long-term waste |
| Coolant tuning | fewer packs | warm holds | test one-pack changes | lower cost + less condensation |
Practical tips you can use today
Measure pack-out time. Slow pack-out increases warm staging exposure.
Keep the inner barrier and structure. Cut cost by right-sizing first.
Use checklists and photos. Human consistency is a hidden cost saver.
2025 trends in cold chain milk chocolate packaging
In 2025, cold chain milk chocolate packaging is moving toward lane-specific standards, simpler workflows, and better moisture control. Brands are reducing one-size-fits-all boxes and creating seasonal versions that match real ambient patterns. Sustainability expectations are rising too, so right-sizing and reuse programs are gaining momentum.
Latest progress snapshot
Modular protection: swappable trays, corner guards, and inserts
Smarter buffering: PCM packs for chocolate shipping used more on long lanes
Better moisture control: sealed inner barriers plus unboxing guidance
Cleaner operations: fewer variations, more repeatable SOPs
Market insight: Customers accept packaging changes. They do not accept dull, scuffed, or softened chocolate.
Frequently asked questions
Q1: What is the best milk chocolate cold chain temperature range for shipping?
Many teams aim for stable, moderately cool handling and avoid long warm holds above ~20–22°C. Stability matters most.
Q2: Why does bloom appear even if the chocolate never fully melts?
Bloom often follows temperature cycling. A warm event plus later cooling can trigger visible haze.
Q3: Do I always need coolant in cold chain milk chocolate packaging?
Not always. Short, low-risk lanes may rely on insulation and fast delivery. Hot or long lanes usually need buffering.
Q4: Can cold packs damage milk chocolate?
Yes, if they touch the product. Direct contact can create cold spots and condensation marks. Use spacers.
Q5: Why does my shipper arrive damp in winter?
It is often condensation during warm-up. Use a sealed inner barrier and Seal–Wait–Open instructions.
Q6: What is the fastest improvement for last-mile milk chocolate delivery packaging?
Right-size the shipper, add a sealed barrier, and put the warm-up instruction card on top.
Summary and recommendations
Cold chain milk chocolate packaging succeeds when it controls heat, humidity, movement, and odors at the same time. Start with a sealed inner barrier, add structure to stop scuffs, then choose insulation and coolant based on lane risk. Use Seal–Wait–Open to prevent condensation at delivery and unboxing. Validate with a simple lane test so your pack-outs become repeatable, not improvised.
Your next step (CTA)
Pick your top two lanes and run a 10-shipment validation with one pack-out version. Track unboxing quality, wrapper condition, and any bloom or softening. Then adjust one variable at a time until results are consistent.
About Tempk
At Tempk, we help teams build cold chain workflows that are simple to execute and easy to scale. We focus on repeatable cold chain milk chocolate packaging stacks, lane-based pack-out standards, moisture control steps, and practical validation routines your staff can follow on busy days. Our goal is fewer defects like bloom, softening, and scuffing—without overpacking every order.
Call to Action: Share your transit time, climate risk, and product format (bars, assortments, filled items). We can outline a lane-based cold chain milk chocolate packaging checklist you can implement this month.
Cold Chain Premium Chocolate Guide (2025)
Cold Chain Premium Chocolate Guide: Ship Perfectly?
Premium chocolate fails fast when temperature and moisture swing. This cold chain premium chocolate guide helps you protect shine, snap, and aroma from warehouse to doorstep. Many operators treat 12–18°C as a practical storage range for pure chocolate and use humidity limits (often framed as a maximum like 70% RH) to reduce condensation-driven defects.
You’ll learn lane rules, packaging recipes, and simple monitoring so your “arrived perfect” rate stays high in 2025.
This guide answers:
How a cold chain premium chocolate guide prevents fat bloom and sugar bloom during delivery
cold chain premium chocolate gu…
The ideal temperature and humidity for premium chocolate shipping you can train in one day
cold chain premium chocolate gu…
When 18°C PCM beats gel packs for premium chocolate transport
cold chain premium chocolate gu…
A premium chocolate pack-out SOP checklist your team can repeat under pressure
cold chain premium chocolate gu…
How to design last-mile rules that reduce “melted on arrival” messages
cold chain premium chocolate gu…
How to validate your shipper with lane tests and structured thermal comparisons (ISTA 7E)
cold chain premium chocolate gu…
Cold chain premium chocolate guide: What makes “premium” harder to ship?
A cold chain premium chocolate guide matters more for premium products because defects are visible and tolerance is low. A light haze, a softened edge, or a damp wrapper can turn a gift into disappointment. Premium shipping is about experience, not just safety. Your weak link is often the last mile, not the factory.
cold chain premium chocolate gu…
Premium items also warm unevenly. Thin shells and fillings heat faster than solid bars. Some fillings and inclusions can increase bloom risk, so one “universal box” often fails in summer.
cold chain premium chocolate gu…
Premium product risk tiers (use this to set your rules)
| Risk tier | Typical products | Common failure | What it means for you |
|---|---|---|---|
| Tier 1 (Low) | Solid dark bars | Minor scuffs | Basic controlled-ambient rules work |
| Tier 2 (Medium) | Milk/white, inclusions | Softening, bloom | Needs tighter heat protection |
| Tier 3 (High) | Bonbons, filled items | Condensation, texture loss | Needs fast lanes + stability |
| Tier 4 (Very high) | Gift sets, fragile décor | Presentation damage | Needs structure + timing |
This tiering approach helps you stop guessing and start standardizing. It’s the backbone of a scalable cold chain premium chocolate guide.
cold chain premium chocolate gu…
Practical tips and advice
Separate bars vs filled items into different lane rules and pack-outs.
Treat gifts as a last-mile product, not a warehouse product.
Build two recipes first: “mild lane” and “hot lane,” then expand.
Practical example: Brands reduce complaints when they stop forcing one pack-out onto every SKU and lane.
cold chain premium chocolate gu…
Cold chain premium chocolate guide: What temperature and humidity should you target?
Your cold chain premium chocolate guide should target stability, not “as cold as possible.” Overcooling creates condensation risk when the box warms. That moisture can trigger sugar bloom and wrapper issues. A practical shipping target many teams use is 65–70°F (18–21°C) with about 50–55% humidity, kept stable and consistent.
cold chain premium chocolate gu…
For pure chocolate storage, many operations keep a cooler band. A common baseline in manufacturer-style guidance is 12–18°C, paired with clear humidity limits (often described as a maximum like 70% RH) to reduce moisture problems.
cold chain premium chocolate gu…
Temperature strategy by stage (simple, teachable)
| Stage | Practical target | Biggest risk | What it means for you |
|---|---|---|---|
| Storage | 12–18°C (stable) | Odors + humidity spikes | Best gloss and aroma retention cold chain premium chocolate gu… |
| Pack room | Stable, not humid | Condensation events | Cleaner unboxing cold chain premium chocolate gu… |
| Transit | Controlled ambient | Heat spikes | Fewer soft edges cold chain premium chocolate gu… |
| Delivery | Fast handoff | Porch heat + delays | “Arrived perfect” reviews cold chain premium chocolate gu… |
The “cold soda can” rule (condensation in plain language)
If chocolate is colder than the surrounding air, it can “sweat” like a cold drink. That sweat becomes sugar bloom risk. One practical rule is to keep product sealed until it warms to room conditions when cool storage was used.
cold chain premium chocolate gu…
Practical tips and advice
Never “yo-yo” chocolate between cold rooms and warm air. Spikes cause defects faster than slow drift.
cold chain premium chocolate gu…
Control humidity events, not just averages. Door-open time often causes trouble.
cold chain premium chocolate gu…
Make airtight packaging a policy in storage and packing zones.
cold chain premium chocolate gu…
Practical example: Teams reduce sugar bloom reports when they keep product sealed until it reaches room conditions.
cold chain premium chocolate gu…
How do you prevent fat bloom and sugar bloom during delivery?
A cold chain premium chocolate guide prevents bloom by controlling heat, humidity, and time—especially at handoffs. Bloom is usually either fat bloom (linked to temperature swings) or sugar bloom (linked to condensation). Your job is to prevent the trigger, not argue with the symptom.
cold chain premium chocolate gu…
The easiest operational win is simple: reduce swings. Don’t overcool, don’t leave boxes open, and don’t let cartons sit in humid staging.
cold chain premium chocolate gu…
A 2-minute bloom triage at receiving (staff-friendly)
| What you see | Likely issue | Fast check | What you do next |
|---|---|---|---|
| Dusty, grainy surface | Sugar bloom | Often follows condensation | Fix warm-up + sealing SOP |
| Gray streaks, waxy feel | Fat bloom | Often follows warm swings | Tighten stability + lane rules |
| Bloom on filled pieces first | Oil migration risk | Fillings/inclusions can drive it | Separate SKUs + adjust pack-out |
This triage is designed to prevent repeat failures and stop vague “quality issues” from wasting time.
cold chain premium chocolate gu…
Practical tips and advice
Write one bloom response card so staff do not improvise.
cold chain premium chocolate gu…
Track bloom by lane and season. It clusters, so fixes are measurable.
cold chain premium chocolate gu…
Treat filled chocolates as a separate program until lane tests prove otherwise.
cold chain premium chocolate gu…
Practical example: Teams reduce refunds when they stop shipping high-risk assortments on peak-heat weeks.
cold chain premium chocolate gu…
Cold chain premium chocolate guide: Which packaging system fits your lane?
Your cold chain premium chocolate guide needs a packaging toolbox, not one box. Insulation buys time, but structure protects presentation. Moisture barriers protect wrappers and reduce odor pickup. The best design also reduces empty space, because air gaps warm faster and let products collide.
cold chain premium chocolate gu…
In 2025, packaging choices are expanding fast. Market estimates place the insulated shipper market around USD 9.76B in 2025, driven by e-commerce and temperature-sensitive delivery.
cold chain premium chocolate gu…
Packaging selection matrix (fast and practical)
| Your goal | Best starting choice | Common mistake | What it means for you |
|---|---|---|---|
| Short, mild routes | Basic insulation + fitted inserts | Overpacking | Lower cost, solid consistency |
| Hot summer routes | Higher insulation + controlled-ambient buffer | Relying on speed only | Fewer soft edges and bloom |
| Gift presentation | Rigid outer + locked tray | Loose void fill | Fewer scuffs, fewer breaks |
| Repeat B2B lanes | Reusable shipper system | No return plan | Better long-term ROI |
Controlled room temperature buffering (why it helps)
Controlled room temperature (CRT) buffering is becoming more common for “not frozen, not refrigerated” products. It helps reduce heat spikes without pushing chocolate into very cold conditions that can lead to condensation later.
cold chain premium chocolate gu…
Some CRT concepts are designed around stable protection across warm lanes (commonly discussed as protection in environments like 15–30°C), which can fit premium chocolate better than “deep cold” approaches.
cold chain premium chocolate gu…
Cold source decision tool: 18°C PCM vs gel packs
If your problem is heat spikes, 18°C PCM is often the cleaner solution. It’s used to hold a controlled-ambient band close to chocolate’s comfort zone. Gel packs can create cold spots and moisture, which increases condensation risk inside the shipper.
cold chain premium chocolate gu…
Answer these four questions (30 seconds):
Do you ship to hot cities or hot seasons?
Do you ship bonbons or filled products?
Do you see condensation or “wet wrapper” complaints?
Do you have multi-day or delay-prone lanes?
If you answered “yes” to 2 or more, test 18°C PCM first.
cold chain premium chocolate gu…
| Coolant option | Best for | Biggest risk | Practical benefit |
|---|---|---|---|
| 18°C PCM | Controlled-ambient stability | Higher unit cost | Fewer spikes and fewer “wet” events cold chain premium chocolate gu… |
| Gel packs | Very short routes | Overcooling + condensation | Low cost on mild lanes cold chain premium chocolate gu… |
| No coolant | Cool seasons, same-day | Heat surprises | Simplest workflow cold chain premium chocolate gu… |
Practical tips and advice
Condition your coolant. “Straight from freezer” is a common gel-pack mistake.
cold chain premium chocolate gu…
Add a moisture barrier regardless of coolant choice.
cold chain premium chocolate gu…
Test lane-by-lane and reserve premium materials for lanes that fail today.
cold chain premium chocolate gu…
Practical example: Many teams reduce total cost by using 18°C PCM only on hot zones and keeping simpler pack-outs on mild lanes.
cold chain premium chocolate gu…
What is the best premium chocolate pack-out SOP checklist?
Pack-out is where your cold chain premium chocolate guide is won or lost. The three silent killers are packing warm product, leaving boxes open too long, and misplacing coolant. You want boring pack-out, because boring means consistent.
cold chain premium chocolate gu…
Start with two temperatures: product temperature and room temperature. If your room is hot and humid, pack faster and seal better. If product starts warm, insulation will not “fix” it.
cold chain premium chocolate gu…
Copy/paste pack-out SOP (works on busy days)
This checklist is designed to be printable and trainable in one shift.
cold chain premium chocolate gu…
SOP failure table (so you can coach fast)
| SOP step | What can go wrong | Simple control | What it means for you |
|---|---|---|---|
| Pre-condition | Warm start | “No warm packing” rule | More time in spec cold chain premium chocolate gu… |
| Staging | Humidity + odors | Dry staging zone | Cleaner experience cold chain premium chocolate gu… |
| Seal and fit | Heat leaks | Lid check + gap check | Fewer swings cold chain premium chocolate gu… |
Practical tips and advice
Use a timer so packing speed becomes consistent.
cold chain premium chocolate gu…
Train with photos of “correct vs incorrect” placement.
Publish lane recipes as one-page cards near the pack table.
Practical example: Teams often see fewer re-shipments after adding a simple lid-gap check and timing pack-out.
cold chain premium chocolate gu…
Cold chain premium chocolate guide: How do you control humidity and odors?
Humidity and odors are first-class controls in a cold chain premium chocolate guide. Too much humidity can lead to condensation and sugar bloom. Strong odors can transfer into chocolate, damaging the premium experience.
cold chain premium chocolate gu…
A practical ceiling used in some guidance is 70% RH as a “do not exceed” style rule. When humidity rises, moisture uptake can increase water activity, which can soften textures and hurt crispness.
cold chain premium chocolate gu…
Humidity playbook (what to do at 50%, 70%, and “too wet”)
| Storage condition | Risk | What to do | What it means for you |
|---|---|---|---|
| Dry, stable room | Low | Airtight packaging + stable temp | Best finish and aroma cold chain premium chocolate gu… |
| Near 70% RH | Medium | Add barrier bags + reduce door-open time | Fewer texture complaints cold chain premium chocolate gu… |
| Above comfort humidity | High | Dehumidify zone + tighten packaging | Lower bloom and stickiness cold chain premium chocolate gu… |
Practical tips and advice
Create an odor quarantine zone away from cleaners, spices, and fragrances.
cold chain premium chocolate gu…
Store and stage unboxed product only in clean areas with stable conditions.
Reduce humidity events by shortening door-open time and sealing faster.
cold chain premium chocolate gu…
Practical example: Aroma complaints often disappear when staging is moved away from scented products.
cold chain premium chocolate gu…
Cold chain premium chocolate guide: How do you design lanes and last-mile rules?
Shipping lanes turn your cold chain premium chocolate guide into predictable playbooks. Once you define lanes, you can assign service levels, packaging recipes, and customer delivery rules. That is how you stop overpacking every order “just in case.”
cold chain premium chocolate gu…
Last mile needs special treatment. A perfect shipper still fails if a box sits on a porch. Your lane plan must include receiver behavior, not just transit time.
cold chain premium chocolate gu…
Lane Risk Score (2-minute self-assessment)
Add points:
Transit time: same-day (1), next-day (2), 2+ days (4)
Heat exposure: mostly indoor (1), mixed (2), hot handoffs (4)
Product fragility: bars (2), bonbons/filled (4)
Delivery uncertainty: low (1), medium (2), high (4)
Score guide:
4–7: Basic lane recipe
8–11: Upgraded insulation + strict ship days
12–16: PCM + timed delivery + hold/signature options
Lane rules table (what to do, what to avoid)
| Lane risk | Best lane rules | What to avoid | What it means for you |
|---|---|---|---|
| Low | Standard ship days | Weekend holds | Lower cost, stable outcomes |
| Medium | Earlier-week shipping | Late-day delivery | Fewer warm events |
| High | PCM + timed delivery | “Leave at door” | Fewer premium failures |
Practical tips and advice
Ship early week for high-risk lanes to reduce weekend stall risk.
Offer hold options for gifts and fragile assortments.
Use customer prompts: “Be delivery-ready” prevents porch exposure.
Practical example: Many “melted on arrival” complaints trace to out-for-delivery delays, not line-haul transit.
cold chain premium chocolate gu…
How do you validate and monitor a cold chain premium chocolate guide?
You can’t improve what you can’t prove. This cold chain premium chocolate guide uses a simple approach: lane tests first, then structured comparisons as you scale. Many teams adopt thermal profiles and parcel testing frameworks (often referenced as ISTA 7E) to compare solutions more fairly.
cold chain premium chocolate gu…
Monitoring does not have to be complicated. Start with two metrics: peak temperature and time outside your target band. Those two explain most chocolate failures.
cold chain premium chocolate gu…
HowTo: lane validation plan (simple version)
Pick your top 5 lanes by volume and complaints.
Define a target band and a warning threshold.
Pack with normal staff on normal days.
Place a logger near a warm-prone spot (often corner/lid edge).
Ship 10 tests per lane during the hottest period.
Review peak temperature, time above limit, and delay timestamps.
Change one variable and retest.
This approach supports repeatable improvement without guessing.
cold chain premium chocolate gu…
What you see → what to change (fast diagnosis)
| What you see | Likely cause | What to change | What it means for you |
|---|---|---|---|
| Short spikes | Last-mile heat | Delivery timing + PCM | Better appearance consistency cold chain premium chocolate gu… |
| Slow drift warmer | Insulation limit | Thicker shipper or tighter fit | Fewer soft edges |
| Moisture event | Condensation | Barrier + conditioning rules | Cleaner unboxing cold chain premium chocolate gu… |
Practical tips and advice
Use two thresholds: warning and quality-risk.
Tag exceptions: failed delivery attempts are a common root cause.
Turn results into lane recipes your team can follow daily.
Practical example: Teams often improve faster by fixing staging and last-mile rules before buying thicker packaging.
cold chain premium chocolate gu…
How do SOPs, monitoring, and compliance fit into a cold chain premium chocolate guide?
A cold chain premium chocolate guide works only if your team can follow it on busy days. You need minimum viable records and clear corrective actions.
cold chain premium chocolate gu…
If you handle products that qualify as time/temperature control for safety (TCS) foods, practical holding targets often used in U.S. guidance include cold holding at 41°F (5°C) or less and hot holding at 135°F (57°C) or above, depending on the food and process. Treat truly perishable filled chocolates as a separate program with stricter rules.
cold chain premium chocolate gu…
Minimum viable monitoring plan (repeatable)
| Control point | What you record | Pass limit | What to do if it fails |
|---|---|---|---|
| Pack-out start | Room temp + humidity snapshot | Stable, not humid | Pause packing, reduce humidity events cold chain premium chocolate gu… |
| Ship handoff | Box closed time | Minimize | Re-pack if staged too long cold chain premium chocolate gu… |
| Receiving | Product condition + temp trend | Stable | Hold lot, investigate lane cold chain premium chocolate gu… |
The “3 steps, 1 rule” SOP (teams remember)
Stage smart: keep product and packaging in the same stable room.
cold chain premium chocolate gu…
Pack fast: close quickly to avoid humidity exchange.
cold chain premium chocolate gu…
Seal and label: include warm-up instructions if cool storage was used.
cold chain premium chocolate gu…
One rule: if conditions are humid or product was cooled, keep it sealed until it stabilizes.
cold chain premium chocolate gu…
How do you handle claims and prevent repeats?
Claims are data, not drama. A cold chain premium chocolate guide gets stronger when every complaint becomes a process fix. Most teams fail here because they replace the box and move on. That keeps the same failure alive.
cold chain premium chocolate gu…
Claim diagnosis table (save this for your team)
| Customer symptom | Most likely cause | Fast verification | Best fix |
|---|---|---|---|
| White haze or streaks | Temperature swings | Lane temp log | Tighten lane rules + PCM test cold chain premium chocolate gu… |
| Grainy white film | Condensation | Inner barrier wetness | Sealing + warm-up instruction cold chain premium chocolate gu… |
| Soft corners | Heat soak + compression | Box damage check | Stronger structure + tighter fit |
| Damp wrapper | Cold surface + humidity | Humidity snapshot | Dry staging + faster close cold chain premium chocolate gu… |
| Off odor | Odor exposure | Storage audit | Odor quarantine + airtight policy cold chain premium chocolate gu… |
Practical tips and advice
Create a photo checklist (top, side, wrapper, label).
Track by lane because failures cluster.
cold chain premium chocolate gu…
Improve one step per month (pack time, staging, delivery rules).
Practical example: Many teams reduce refunds after switching from free-text notes to a small set of root-cause codes.
cold chain premium chocolate gu…
2025 latest developments and trends
In late 2025, premium brands are focusing less on “coldest shipping” and more on controlled-ambient stability and repeatable validation. This shift reduces condensation risk and improves presentation outcomes. It also increases adoption of structured testing approaches like ISTA 7E-style comparisons.
cold chain premium chocolate gu…
Cold chain packaging is also being shaped by sustainability, e-commerce expectations, and higher performance demands. Reusable shippers and smarter PCM systems are becoming easier to deploy, and CRT buffering is increasingly discussed for premium foods.
cold chain premium chocolate gu…
Latest progress snapshot (what you can apply)
Controlled-ambient PCM use is growing on stability-focused lanes.
cold chain premium chocolate gu…
Standardized testing is rising to compare shippers more fairly.
cold chain premium chocolate gu…
Humidity discipline is getting tighter because moisture drives defects and odor pickup.
cold chain premium chocolate gu…
Frequently Asked Questions
Q1: What temperature and humidity should I target for premium chocolate shipping?
A practical target many teams use is 65–70°F (18–21°C) with about 50–55% humidity, kept stable and consistent.
cold chain premium chocolate gu…
Q2: What storage range works for pure chocolate in a quality-focused program?
Many programs keep pure chocolate in a stable 12–18°C band and use humidity ceilings (often framed as a max like 70% RH) to reduce condensation risk.
cold chain premium chocolate gu…
Q3: Should I ship premium chocolate with gel packs?
Sometimes, but gel packs can overcool and create condensation. Many premium lanes perform better with controlled-ambient strategies.
cold chain premium chocolate gu…
Q4: When does 18°C PCM make sense?
Use it when heat spikes and last-mile delays happen and you want controlled-ambient stability close to chocolate’s comfort zone.
cold chain premium chocolate gu…
Q5: What is the fastest way to reduce summer complaints?
Start with high-risk lanes, add controlled timing rules, and fix pack-out consistency before buying more packaging.
cold chain premium chocolate gu…
Q6: How do I validate my shipper instead of guessing?
Run lane tests with loggers and compare peak temperatures. Structured comparisons like ISTA 7E-style profiles can help.
cold chain premium chocolate gu…
Summary and recommendations
This cold chain premium chocolate guide is built around one idea: stability wins. Target a cool, dry band, avoid spikes, and prevent condensation. Use lane recipes instead of one universal shipper. Choose insulation for your worst day, then add 18°C PCM where heat spikes and delays are common. Validate with lane tests and scale what works.
cold chain premium chocolate gu…
Your next-step action plan (CTA)
Classify SKUs into risk tiers (bars vs filled vs gifts).
Pick your top 3 problem lanes and run 10 test shipments per lane.
cold chain premium chocolate gu…
Publish one lane recipe card per lane and train pack-out with a timer.
cold chain premium chocolate gu…
Add one customer instruction card: “Keep sealed until room conditions.”
cold chain premium chocolate gu…
About Tempk
Tempk supports temperature-sensitive brands with practical packaging design, lane testing, and monitoring workflows. We help you turn a cold chain premium chocolate guide into daily routines your team can follow under real workload. Our focus is controlled-ambient stability, repeatable pack-out SOPs, and lane-based validation that reduces claims and protects presentation outcomes.
cold chain premium chocolate gu…
Next step: Share your product mix (bars vs bonbons), shipping zones, and typical transit times. We’ll map a lane-based plan you can run immediately.
Cold Chain Vegetables Regulations: Compliant in 2025?
Cold Chain Vegetables Regulations: Compliant in 2025?
Cold chain vegetables regulations are stricter in 2025 because “good intentions” don’t pass audits—evidence does. If you handle fresh-cut leafy greens, FDA retail guidance says they must be received at 41°F (5°C) or less. Traceability pressure is also rising: FDA has proposed extending the Food Traceability Rule compliance date to July 20, 2028, and Congress directed FDA not to enforce before that date.
Operational note: this is a practical guide, not legal advice.
This article will help you:
Decide which cold chain vegetables regulations apply to your role using a fast “lane” tool
Turn rules into a vegetable cold chain compliance checklist your team can run daily
Understand temperature requirements for fresh-cut vegetables without legal jargon
Build FSMA sanitary transportation produce compliance evidence that holds up under scrutiny
Apply EU 852/2004 transport requirements for food in real loading and delivery workflows
Create an “evidence pack” for traceability records you can retrieve in minutes
Which cold chain vegetables regulations apply to you?
Cold chain vegetables regulations apply to what you control—not your job title. If you touch produce in growing, packing, holding, transport, receiving, or retail handling, you own part of the contamination risk and the proof trail.
cold chain vegetables regulatio…
The easiest mindset shift is to run compliance like a relay race: every handoff must protect product and produce evidence.
A practical way to simplify cold chain vegetables regulations is to think in two layers: (1) regulatory requirements and (2) buyer specifications that can be stricter, especially for fresh-cut items.
cold chain vegetables regulatio…
If you only meet the first layer, you still lose money through rejections and disputes.
Decision tool: Identify your cold chain vegetables regulations “lane”
Pick the box that matches your operation (then build your checklist around it).
cold chain vegetables regulatio…
| Your lane | Primary risk | What “good” looks like | What it means for you |
|---|---|---|---|
| Farm / field | Contamination prevention | Clean harvest handling + separation | Fewer safety claims |
| Packing / fresh-cut | Time + sanitation | Cold hold + hygiene logs + clear zones | Faster audit pass |
| Cold storage / DC | Handoffs + drift | Door discipline + monitoring + exceptions | Fewer rejects |
| Carrier / last-mile | Sanitary transport | Clean equipment + training + records | Fewer disputes |
| Retail / foodservice | Receiving + holding | Fast checks + consistent decisions | Less shrink |
Practical tips you can use today
Write product categories into your SOP: “vegetables” is too broad for compliance decisions.
Make proof easy: if records are hard, they won’t exist when you need them.
Assign ownership: every checklist line needs one accountable role.
Practical case: A distributor split SOPs into “whole produce” and “fresh-cut.” They reduced audit stress and stopped over-checking low-risk loads.
Whole vs fresh-cut: why cold chain vegetables regulations feel stricter
Cold chain vegetables regulations feel stricter for fresh-cut because cutting raises risk. It increases surface area and releases juices, which can support faster microbial growth if handling is sloppy. FDA retail guidance is explicit for cut leafy greens: receive at 41°F (5°C) or less and avoid evidence of prior temperature abuse.
Think of a whole cucumber like a sealed bottle, and fresh-cut cucumber like an open cup. The open cup needs more protection, faster. That’s why cold chain vegetables regulations often push you to separate “fresh-cut lanes” from whole-produce lanes.
A simple whole vs fresh-cut rule you can train in 60 seconds
| Product type | Typical risk driver | What cold chain vegetables regulations focus on | Your practical move |
|---|---|---|---|
| Whole, intact vegetables | Mostly quality loss | Clean handling + stable storage | Control transitions |
| Fresh-cut / ready-to-eat | Safety + quality | Time/temperature + sanitation + records | Separate lane + tighter proof |
| Cut leafy greens | Higher sensitivity | Cold holding + receiving checks | Train “41°F habit” |
Practical tips to reduce risk immediately
Label your “fresh-cut lane” on the dock (signage beats memory).
Measure product temp, not only air temp (cartons can warm quietly).
Separate flows: raw field bins should never stage beside finished packs.
What temperature targets matter in cold chain vegetables regulations?
Cold chain vegetables regulations care about temperature because temperature drift destroys quality and can raise safety risk for fresh-cut foods. The mistake most teams make is chasing “cold enough” instead of “stable enough.” Temperature swings create condensation, and condensation is like leaving wet laundry in a bag—mold and decay find a way.
FDA retail guidance uses 41°F (5°C) as a clear control point for cut leafy greens at receiving, storage, and display. Use that as a training anchor for the lanes where it applies.
Why stability beats “average temperature”
Temperature swings can cause:
Faster aging (higher respiration)
Condensation inside packaging (higher decay risk)
Uneven quality across pallets (more rejects)
Temperature strategy by vegetable category (practical view)
| Vegetable category | Typical temperature strategy | Main risk if wrong | What it means for you |
|---|---|---|---|
| Leafy greens | Cold and stable | Wilting, slime | Rapid rejection |
| Root vegetables | Cool and steady | Softness, mold | Shorter shelf life |
| Fruit vegetables | Avoid over-chilling | Chilling injury | Flavor complaints |
| Fresh-cut items | Tight cold lane | Safety + quality loss | Highest scrutiny |
Practical temperature compliance tips you can use
Set dock time limits (door-open minutes become warm minutes).
Avoid mixed loads when temperature needs conflict (or zone the load).
cold chain vegetables regulatio…
Use a “pre-cool confirmation” step before loading, not after.
cold chain vegetables regulatio…
Real scenario: A shipper reduced leafy-green losses by enforcing door-open limits and checking carton temperature before loading.
How do hygiene and sanitation fit cold chain vegetables regulations?
Cold chain vegetables regulations include hygiene because cold slows decay but does not remove contamination. Dirty totes, standing water, and poor separation can turn a small issue into a major recall-scale event, especially in fresh-cut operations.
In the EU, Regulation (EC) 852/2004 Annex II (Transport) requires conveyances/containers to be kept clean and maintained to protect food from contamination, and—where necessary—capable of maintaining appropriate temperatures. EUR-Lex+1 This makes your truck part of hygiene control, not “just transport.”
The “clean zone” concept (plain English)
Treat your operation like a kitchen:
Incoming raw produce = “outside shoes”
Packed product = “clean plate”
If both touch the same wet surfaces, risk rises fast.
| Hygiene control | What auditors look for | What to do daily | What it means for you |
|---|---|---|---|
| Cleaning routines | Schedules + proof | Short checklist + initials | Fewer findings |
| Water control | No pooling/leaks | Dry-down at shift end | Less mold |
| Zoning | Dirty vs clean separation | Marked staging lanes | Fewer cross-contact issues |
| Pest control | Evidence + actions | Close gaps + document | Lower rejection risk |
Practical hygiene tips that actually work
Keep floors dry around packing/staging (water is a contamination highway).
Use short, repeatable sanitation logs (long manuals don’t get used).
Train “touch discipline”: what can touch finished packs and what cannot.
What do U.S. cold chain vegetables regulations expect under FSMA?
In the U.S., cold chain vegetables regulations are shaped by FSMA expectations across production and transportation. The FDA’s Sanitary Transportation rule establishes requirements for shippers, loaders, carriers, and receivers—covering vehicles/equipment, operations, training, records, and waivers.
Here’s the simplest way to explain it to a team: “clean + protected + controlled + documented.” If you can’t prove it, you can’t defend it.
FSMA proof map (what you should be able to show)
| FSMA area | What it controls | Simple proof | What it protects you from |
|---|---|---|---|
| Sanitary Transportation | Transport sanitation + practices | Training log + equipment check | Rejections + disputes |
| Transportation operations | Loading/handling discipline | SOP + exception log | “He said/she said” claims |
| Records | Evidence retention | Evidence pack folder | Slow investigations |
Practical tips for FSMA-aligned operations
Give carriers a one-page “clean + suitable + documented” checklist.
Make training measurable (a short quiz beats a signature-only sheet).
Separate food from chemicals in storage and transport every time.
What do EU cold chain vegetables regulations mean under Regulation (EC) 852/2004?
EU cold chain vegetables regulations push you toward HACCP-style control: define risks, set controls, and keep evidence. Regulation (EC) 852/2004 includes transport expectations like cleanliness, maintenance, and—where necessary—temperature capability.
In practice, EU-ready compliance looks like simple discipline:
Clean-to-load gates
Separation rules
Monitoring when temperature control is required
Fast traceability answers during investigations
“Two-click traceability” habit (the EU-friendly standard)
You should be able to answer quickly:
Who supplied this lot?
Who did we supply it to?
If it takes 20 minutes, it fails during a real event.
What records and traceability prove cold chain vegetables regulations compliance?
Cold chain vegetables regulations increasingly depend on traceability and fast evidence retrieval. Many shipments fail audits not because quality was bad, but because proof was missing, inconsistent, or slow to find.
The FDA’s Food Traceability List includes items like fresh-cut leafy greens, fresh melons, and fresh peppers. U.S. Food and Drug Administration FDA also states it proposed extending the Food Traceability Rule compliance date to July 20, 2028, and intends to comply with a Congressional directive not to enforce before that date. U.S. Food and Drug Administration Use this time to implement in phases, not to pause.
The 5-minute test (your real audit readiness)
If a buyer asks for last week’s temperature evidence and lot trail, can you show it in five minutes?
If not, you’re exposed—even if you did everything right.
Evidence pack: what to include every time
| Evidence item | Why it matters | Best format | What it means for you |
|---|---|---|---|
| Temperature checks | Proves control | Summary + exceptions | Faster dispute closure |
| Sanitation proof | Proves hygiene | Short log | Smoother audits |
| Lot + handoff stamps | Proves chain-of-custody | Scan/report | Smaller recall scope |
| Corrective actions | Proves risk control | One-line notes | Fewer penalties |
Practical traceability tips you can use
Start with fresh-cut items first (they’re commonly higher focus).
cold chain vegetables regulatio…
Make lot codes readable at speed (slow scanning breaks the system).
cold chain vegetables regulatio…
Build one “traceability evidence pack” template and use it everywhere.
cold chain vegetables regulatio…
Cold chain vegetables regulations checklist: your 15-point daily routine
Cold chain vegetables regulations become manageable when you turn them into daily checks. This 15-point routine is designed for real workflow moments: receiving, storage, staging, loading, and delivery.
cold chain vegetables regulatio…
The 15-point cold chain vegetables regulations checklist (copy-ready)
Temperature lane defined for each product group
Fresh-cut lane separated from whole produce
Vehicle cleanliness verified before loading
Load separation used where necessary
Cold room door discipline enforced
Airflow lanes maintained (no vent blocking)
Staging time tracked with a visible timer
Pre-cool confirmation recorded (when needed)
Sensor/loggers placed in high-risk zones
Calibration schedule documented and followed
Condensation risk checked and corrected
Packaging kept clean and protected
Lot codes readable on pallet faces
Shipping and receiving time stamps captured
Deviations logged with corrective actions and re-check
Make the checklist actionable with 3 “quick metrics”
| Checklist area | Quick metric | Target habit | What it means for you |
|---|---|---|---|
| Temperature | Warm minutes per load cold chain vegetables regulatio… | Reduce staging time | Longer shelf life |
| Hygiene | Clean-to-load pass rate cold chain vegetables regulatio… | Reject dirty assets | Fewer contaminations |
| Traceability | Lot scan success rate cold chain vegetables regulatio… | Scan at handoff | Faster response |
Practical tips and advice
Use stoplight results (green/yellow/red) so teams act, not file.
cold chain vegetables regulatio…
Review exceptions weekly to find repeat root causes.
cold chain vegetables regulatio…
Fix one behavior per week (consistency beats “big audits”).
cold chain vegetables regulatio…
Cold chain vegetables regulations for monitoring: where should sensors go?
Cold chain vegetables regulations become harder when you only monitor “easy spots.” You want monitoring to represent the warmest risk zones, not the safest corner.
cold chain vegetables regulatio…
FDA guidance for fresh-cut fruits and vegetables recommends placing temperature monitoring devices in warmer areas (like near doors) and calibrating regularly. U.S. Food and Drug Administration That approach also helps warehouses and vehicles because doors are where warm air enters.
Sensor placement map (simple and effective)
| Location | Why it matters | What it catches | What it means for you |
|---|---|---|---|
| Near doors | Warm air exchange | Loading spikes | Fewer surprises |
| Top-front pallets | Heat rises | Wilt/softening | More uniform quality |
| Return-air zone | Airflow pattern | Cold bias | Better interpretation |
| Known hot spot | Repeat drift | Chronic failures | Targeted fixes |
Practical tips you can use today
Monitor the worst spot: if it passes there, the rest usually passes.
Review exceptions first: ignore perfect lines, hunt spikes.
Tie alarms to actions: if nobody responds, alarms are noise.
Cold chain vegetables regulations for last-mile delivery: how do you reduce warm minutes?
Last mile is where cold chain vegetables regulations meet real life: traffic, door openings, and customer delays. Repeated openings can drift product temperature and shorten shelf life—especially for leafy greens.
cold chain vegetables regulatio…
Your best last-mile strategy is often not “more tech.” It’s fewer warm minutes and fewer unnecessary openings.
cold chain vegetables regulatio…
Build routes and load order to reduce searching time, and separate fresh-cut from whole produce.
A 90-second last-mile self-audit (interactive)
Score each from 0–2 (0 = No, 1 = Sometimes, 2 = Yes):
Stop-order loading used?
Cold staging until dispatch?
Door-open minutes tracked?
Fresh-cut kept in a dedicated zone?
Delivery handoff time stamp captured?
Score guide: 0–4 = High risk, 5–7 = Medium risk, 8–10 = Strong baseline.
Practical last-mile tips
Stop-order loading reduces rummaging and door-open minutes.
Micro-batch picking keeps orders out of warm staging.
Use a handoff script: “Please refrigerate promptly” cuts customer-side warm minutes.
What role do insulated packaging and handling play in cold chain vegetables regulations?
Cold chain vegetables regulations are easier when packaging and handling reduce temperature swings and condensation risk. Packaging does not replace refrigeration, but it stabilizes conditions during transitions like loading and delivery.
cold chain vegetables regulatio…
Packaging features that reduce compliance pain
| Packaging feature | What it does | Your practical benefit | What it means for you |
|---|---|---|---|
| Insulation | Slows warming | Fewer temperature deviations | More consistent arrivals |
| Strong structure | Reduces crushing | Less bruising | Lower claims |
| Moisture control | Reduces condensation | Less mold/decay | Better shelf life |
Handling habits that protect the cold chain
Stage packed vegetables in cold zones before loading.
cold chain vegetables regulatio…
Avoid leaving pallets near open doors.
cold chain vegetables regulatio…
Use a “cold-first unloading” routine at receiving.
cold chain vegetables regulatio…
Real scenario: A wholesaler reduced condensation complaints by tightening staging discipline—without changing refrigeration hardware.
cold chain vegetables regulatio…
2025–2026 cold chain vegetables regulations trends you should plan for
Cold chain vegetables regulations are becoming more evidence-driven, especially at handover points.
cold chain vegetables regulatio…
Buyers increasingly act like auditors, asking for fast proof, not long reports.
Latest progress snapshot (what’s changing)
Traceability planning is accelerating: FDA’s stated direction on the Food Traceability Rule pushes phased implementation planning through July 20, 2028.
Fresh-cut scrutiny stays high: FDA retail guidance keeps 41°F (5°C) as a clear benchmark for cut leafy greens receiving and holding. U.S. Food and Drug Administration+1
More “controlled, monitored, recorded” expectations: Codex guidance explicitly calls for cold storage temperature to be controlled, monitored, and recorded when appropriate.
Market insight (what wins contracts)
Companies that can answer these three questions fast tend to win:
What happened to this lot?
What did you do about it?
Can you prove it?
Frequently Asked Questions
Q1: Do cold chain vegetables regulations require one temperature for all vegetables?
No. Whole vegetables often focus on hygiene and quality, while fresh-cut items face tighter time/temperature expectations. For cut leafy greens, FDA retail guidance uses 41°F (5°C) or less as a clear receiving and holding benchmark. U.S. Food and Drug Administration+1
Q2: What is the fastest first step to improve cold chain vegetables regulations compliance?
Start with transition control: staging time, door-open time, and a short temperature record you can retrieve fast. Then add an exception log that documents what happened and what you did.
Q3: Where do cold chain vegetables regulations fail most often?
At handoffs: harvest-to-cooling delays, loading docks, cross-docks, and multi-stop delivery routes. These points create “warm minutes” and missing documentation.
Q4: What should I do when there’s a temperature deviation?
Record three things: what happened, what you did immediately, and what prevents repeat issues. Clear corrective actions reduce disputes and show you manage risk.
Q5: Which vegetables are on the FDA Food Traceability List?
Examples include fresh-cut leafy greens, fresh melons, and fresh peppers (among other categories). U.S. Food and Drug Administration
Q6: Should I delay traceability work because of the July 20, 2028 timing?
No. FDA’s statements indicate an extension proposal and non-enforcement direction before July 20, 2028—use the time to implement in phases and train teams. U.S. Food and Drug Administration
Summary and recommendations
Cold chain vegetables regulations are easiest to run as a system: hygiene + controlled conditions + proof. Focus on the highest-risk lanes first (fresh-cut, multi-stop, hot weather). Build a repeatable routine: defined lanes, short checklists, monitoring in warm zones, and clear corrective actions. Then store traceability and shipment proof so you can answer questions in minutes, not hours.
Your next steps (clear action plan)
Classify products (whole vs fresh-cut) and define temperature lanes.
Implement the 15-point checklist daily for two weeks.
Track warm minutes and door-open minutes as your leading KPI.
Standardize one evidence pack template for every shipment.
Review exceptions weekly and fix one behavior per week.
About Tempk
At Tempk, we help cold chain teams make compliance practical through packaging strategy, temperature-control workflows, and evidence habits that hold up under real pressure. We focus on reducing temperature swings during transitions, improving handling discipline, and building documentation routines that are easy for operators to follow—so your cold chain vegetables regulations program stays audit-ready.
Next step: Talk with us to map your vegetable lanes, identify your biggest “warm minute” sources, and build a checklist-and-evidence pack tailored to your operation.
Cold Chain Bio-Vegetables Distribution 2025
Cold Chain Bio-Vegetables Distribution: How Do You Keep Organic Quality in 2025?
If you run cold chain Bio-vegetables distribution, you’re protecting two promises at the same time: freshness and organic integrity. That’s why this topic is different from “normal produce shipping.” You can lose quality (wilt, bruises, condensation damage), and you can lose integrity (commingling with non-organic, or contact with prohibited substances).
In 2025, buyers are also asking for faster answers and clearer proof—so the best operations build an “integrity-first cold chain” where temperature control and records work together.
cold chain Bio-vegetables distr…
This article will answer for you:
How cold chain Bio-vegetables distribution differs from conventional produce logistics
cold chain Bio-vegetables distr…
How to prevent commingling organic and conventional produce without slowing your dock
cold chain Bio-vegetables distr…
Which “temperature + humidity + airflow” habits protect Bio quality the most
cold chain Bio-vegetables distr…
A simple route tool to control door-open minutes and packaging buffer
cold chain Bio-vegetables distr…
What’s changing in 2025 for bio vegetables distribution traceability expectations
cold chain Bio-vegetables distr…
Why is cold chain Bio-vegetables distribution “two systems in one”?
Core answer: Cold chain Bio-vegetables distribution has two failure modes: you can lose quality, and you can lose organic integrity.
cold chain Bio-vegetables distr…
That second failure mode is expensive because it can trigger rejected loads, broken audit trails, and lost buyer trust.
cold chain Bio-vegetables distr…
Think of it like carrying a wedding cake in a hot car: you need stable temperature so it doesn’t melt, and stable structure so it doesn’t collapse. For Bio vegetables, temperature is the “melt” risk and commingling is the “collapse” risk.
cold chain Bio-vegetables distr…
| Risk type | What triggers it | What you see later | What it means for you |
|---|---|---|---|
| Quality loss | Warm exposure, dehydration, condensation | Wilt, yellowing, bruises | Markdown and complaints cold chain Bio-vegetables distr… |
| Integrity loss | Mixing, residue, weak records | Rejection, audit issues | Lost accounts, delays cold chain Bio-vegetables distr… |
Practical tips you can use today
Separate is faster: pre-assign Bio-only lanes, carts, and staging zones.
cold chain Bio-vegetables distr…
Clean is not optional: document cleaning routines for shared equipment.
cold chain Bio-vegetables distr…
Records reduce conflict: basic traceability beats “trust me.”
cold chain Bio-vegetables distr…
Practical example: A distributor reduced Bio load rejections by using Bio-only pallets and color-coded wrap, plus a simple handoff log.
cold chain Bio-vegetables distr…
How do you prevent commingling in cold chain Bio-vegetables distribution?
Core answer: You prevent commingling and contamination by design, not by memory. Build three layers: physical separation, process separation, and proof (records).
cold chain Bio-vegetables distr…
Here’s what that looks like when your dock is busy:
Physical separation: Bio-only shelves, marked floor zones, dedicated bins/totes when possible.
cold chain Bio-vegetables distr…
Process separation: scheduled “Bio runs,” receiving order rules, cleaning verification.
cold chain Bio-vegetables distr…
Proof: a simple audit trail that tells a verifiable story.
cold chain Bio-vegetables distr…
Audit-trail thinking (the fastest way to stop disputes)
An audit trail is just a story you can prove: product identity, movement, handling, and transport checks (seal + temp notes).
cold chain Bio-vegetables distr…
| Audit-trail element | What to capture | Simple format | Meaning for you |
|---|---|---|---|
| Product identity | Lot, SKU, label | Photo + log line | Fewer disputes cold chain Bio-vegetables distr… |
| Movement | Where it went | Timestamp + location | Faster root cause cold chain Bio-vegetables distr… |
| Handling | Clean/segregated? | Yes/No checklist | Audit confidence cold chain Bio-vegetables distr… |
| Transport | Seal + temp notes | Seal ID + temp check | Stronger claims defense cold chain Bio-vegetables distr… |
Practical tips and suggestions
Bio-only labels: label two sides of each case so anyone can spot it fast.
cold chain Bio-vegetables distr…
Seal discipline: use numbered seals for high-value lanes.
cold chain Bio-vegetables distr…
One-page SOP: laminate a checklist at receiving and shipping.
cold chain Bio-vegetables distr…
Practical example: A 3PL cut commingling errors by adding a 20-second Bio verification step at pick start and pick end.
cold chain Bio-vegetables distr…
What temperature control matters most in cold chain Bio-vegetables distribution?
Core answer: The biggest wins usually come from reducing warm time, protecting humidity, and maintaining airflow—not from obsessing over a perfect setpoint for every SKU.
cold chain Bio-vegetables distr…
The “Warm Minutes” rule
Your biggest enemy is time spent:
on a warm dock
in a staging corridor
in a truck with doors opening repeatedly
Treat warm minutes like a leaking faucet: a small leak becomes a big bill.
Humidity + airflow (why “dry cold” still ruins vegetables)
Humidity is the difference between crisp and tired. Too dry = dehydration. Too wet = condensation and decay risk. You control it indirectly with packaging, airflow, and temperature stability.
| Problem | What causes it | What to change | What it means for you |
|---|---|---|---|
| Wilt | Dry air + time | Liners + faster handoff | Better appearance cold chain Bio-vegetables distr… |
| Condensation | Temp swings | Fewer door opens | Lower decay risk cold chain Bio-vegetables distr… |
| Bruising | Over-handling | Better pack design | Less shrink cold chain Bio-vegetables distr… |
Tips by lane length (simple and effective)
Short lane (same-day): focus on speed and fewer openings.
cold chain Bio-vegetables distr…
Medium lane (next-day): add packaging buffer and airflow discipline.
cold chain Bio-vegetables distr…
Long lane (export): build redundancy—packaging + monitoring + contingency.
cold chain Bio-vegetables distr…
Practical example: A Bio herb supplier improved shelf life by reducing door-open time and switching to a breathable liner that reduced condensation spikes.
cold chain Bio-vegetables distr…
How do you choose packaging for cold chain Bio-vegetables distribution?
Core answer: Packaging must do two jobs: thermal buffering and integrity protection (separation + clear identity).
cold chain Bio-vegetables distr…
Your best choice depends on lane time, seasonal heat risk, product sensitivity, and handling intensity.
cold chain Bio-vegetables distr…
Packaging “fit” (a quiet efficiency driver)
Oversized packaging creates dead air space and extra handling. Undersized packaging crushes product and blocks airflow.
cold chain Bio-vegetables distr…
| Packaging lever | What it improves | When it matters most | Practical meaning |
|---|---|---|---|
| Right-sized case | Less rework | Mixed SKUs | Faster packing cold chain Bio-vegetables distr… |
| Vent pattern | Better airflow | Leafy greens | More uniform cooling cold chain Bio-vegetables distr… |
| Liner choice | Moisture balance | Herbs, greens | Less wilt/condensation cold chain Bio-vegetables distr… |
| Tamper evidence | Integrity confidence | Premium buyers | Fewer disputes cold chain Bio-vegetables distr… |
Practical tips and suggestions
Use separators: keep Bio lots distinct inside mixed shipments.
cold chain Bio-vegetables distr…
Standardize case counts: fewer odd leftovers = fewer mistakes.
cold chain Bio-vegetables distr…
Add simple visual cues: color-coded corner labels for Bio loads.
cold chain Bio-vegetables distr…
Practical example: A retailer DC reduced Bio picking errors with a bright Bio corner label and a dedicated pallet color.
cold chain Bio-vegetables distr…
How do you design routes and handoffs for cold chain Bio-vegetables distribution?
Core answer: Cold chain Bio-vegetables distribution is usually won at handoffs. More stops means more door openings, dwell time, and handling touches—each stop is a temperature event and an integrity event.
cold chain Bio-vegetables distr…
The “Stop Penalty” planning tool (interactive)
Fill in for one route:
Number of stops: ______
cold chain Bio-vegetables distr…
Average door-open minutes per stop: ______
cold chain Bio-vegetables distr…
Total door-open minutes = stops × minutes/stop
cold chain Bio-vegetables distr…
Risk rating:
Under 20 minutes total: Low
cold chain Bio-vegetables distr…
20–45 minutes: Medium
cold chain Bio-vegetables distr…
Over 45 minutes: High
cold chain Bio-vegetables distr…
Decision rule:
If Medium/High: increase packaging buffer and reduce unnecessary openings.
cold chain Bio-vegetables distr…
Loading order that protects Bio lots
Use loading order to reduce repeat openings:
Stage in cold area until the truck is ready
Load by zone so drop-offs don’t force long door exposure
Keep Bio lots grouped and clearly marked
cold chain Bio-vegetables distr…
| Loading style | Door-open time | Mix-up risk | Meaning for you |
|---|---|---|---|
| Improvised | High | High | Higher claims + mistakes cold chain Bio-vegetables distr… |
| Planned sequence | Medium | Medium | More predictable cold chain Bio-vegetables distr… |
| Zoned + Bio grouped | Low | Low | Best for Bio integrity cold chain Bio-vegetables distr… |
Practical tips and suggestions
Assign a “door captain”: one person controls openings and sequence.
cold chain Bio-vegetables distr…
Use a pallet map: post it before doors open.
cold chain Bio-vegetables distr…
Keep Bio grouped: don’t scatter Bio cartons across pallets.
cold chain Bio-vegetables distr…
Practical example: A local Bio CSA delivery reduced wilt by switching from many small stops to fewer consolidated drops with tighter loading order.
cold chain Bio-vegetables distr…
Do you need complex monitoring for cold chain Bio-vegetables distribution?
Core answer: No. Start with monitoring where things change: receiving, post-staging, loading, and delivery. The goal is proof and improvement—not surveillance.
cold chain Bio-vegetables distr…
The “Proof-of-Control” mini log (interactive)
At each handoff, record 4 fields:
Timestamp
cold chain Bio-vegetables distr…
Product temperature (spot check)
cold chain Bio-vegetables distr…
Condition (cold room / dock / truck)
cold chain Bio-vegetables distr…
Bio integrity check (sealed? segregated? yes/no)
cold chain Bio-vegetables distr…
This takes seconds, but it changes behavior quickly.
cold chain Bio-vegetables distr…
Build a 10-point self-test for cold chain Bio-vegetables distribution (interactive)
Score each item 0–1 (no half points):
Bio-only staging zone exists
Bio lots labeled on two sides
Shared equipment has documented cleaning
Bio and non-Bio never stacked together without separation
Handoffs record time and temp
Loading order is planned before doors open
Door-open time is measured or controlled
Packaging matches lane time and season
Traceability records are audit-ready
Staff can explain Bio handling rules in one minute
cold chain Bio-vegetables distr…
Scoring:
0–4: High risk
5–7: Medium risk
8–10: Strong system
2025 trends shaping cold chain Bio-vegetables distribution
In 2025, Bio buyers increasingly expect tighter traceability and clearer proof, not just labels.
cold chain Bio-vegetables distr…
Operationally, that pushes the same direction as modern food supply expectations: better records, faster issue isolation, and stronger handoff discipline.
Latest progress snapshot (what you should prepare for)
More pressure to be audit-ready with simple, readable records
cold chain Bio-vegetables distr…
Efficiency-first cold chain execution (reduce warm minutes, reduce waste)
cold chain Bio-vegetables distr…
Practical traceability at handoffs (proof-of-control logs become standard habit)
Q1: Is Bio distribution only about paperwork?
No. Paperwork protects integrity, but temperature and humidity protect quality. You need both.
cold chain Bio-vegetables distr…
Q2: How do I reduce Bio load rejections?
Improve segregation, document cleaning for shared equipment, and keep audit-ready traceability so buyers get proof fast.
cold chain Bio-vegetables distr…
Q3: Where do problems happen most often?
At handoffs—receiving, staging, loading, and multi-stop delivery—because that’s where mixing and warm exposure sneak in.
cold chain Bio-vegetables distr…
Summary and recommendations
A strong cold chain Bio-vegetables distribution system protects freshness and organic integrity at the same time. Focus on the highest-impact moves:
Build separation by design: zones, labels, and planned loading
cold chain Bio-vegetables distr…
Reduce warm minutes: measure door-open time and fix the worst routes
cold chain Bio-vegetables distr…
Protect humidity + airflow: avoid “dry cold” and blocked venting
cold chain Bio-vegetables distr…
Use packaging fit + visual cues: fewer mistakes, faster packing
cold chain Bio-vegetables distr…
Keep proof at handoffs: time, temp, condition, Bio check
cold chain Bio-vegetables distr…
Next-step action plan (14 days)
Map your Bio flow: receiving → staging → loading → delivery.
Add Bio-only zones and a one-page cleaning + segregation SOP.
cold chain Bio-vegetables distr…
Measure door-open minutes on your top 3 routes using Stop Penalty.
cold chain Bio-vegetables distr…
Adjust packaging for your longest lane and hottest seasonal conditions.
cold chain Bio-vegetables distr…
Review exceptions weekly and simplify steps where teams struggle.
cold chain Bio-vegetables distr…
About Tempk
At Tempk, we help teams run practical temperature-control operations with packaging and workflows that work in real warehouses. For cold chain Bio-vegetables distribution, we focus on three things: stable thermal performance, segregation-friendly pack-out, and proof-ready handoff routines that support audit confidence without slowing your day.
cold chain Bio-vegetables distr…
Call to action: Share your route time, seasonal ambient range, and top Bio SKUs. We’ll map a packaging + handoff workflow that improves cold chain Bio-vegetables distribution performance with minimal operational complexity.
Non-Toxic Gel Ice Pack for Shoulder Pain Relief
Non-Toxic Gel Ice Pack for Shoulder Pain Relief 2025?
Last updated: December 17, 2025.
A non-toxic gel ice pack for shoulder pain relief can make everyday movement feel easier—if it fits your shoulder and you use it on a timer. If it slips or leaks, your non-toxic gel ice pack for shoulder pain relief becomes hard to trust. Many clinical self-care guides recommend short cold sessions (often 15–20 minutes) and repeating a few times per day, rather than “icing forever.”
This guide is educational, not medical advice. Use it to build a safer routine with a non-toxic gel ice pack for shoulder pain relief, then adjust based on comfort. If pain is severe, worsening, or limiting your arm movement, get professional help.
This article will help you answer
How to choose a non-toxic gel ice pack for shoulder pain relief that is clearer about materials and leak safety
How long to use a non-toxic gel ice pack for shoulder pain relief safely (the practical 10–20 minute rule)
How to pick a wearable non-toxic gel ice pack for shoulder pain relief wrap that stays in place while you rest
Where to place your pack (front/side/top/back) so you stop “chasing the pain”
What to do if a non-toxic gel ice pack for shoulder pain relief leaks, especially around kids and pets
What’s changing in 2025: safer labeling, fit-first designs, and travel rules
What makes a non-toxic gel ice pack for shoulder pain relief truly “non-toxic”?
A non-toxic gel ice pack for shoulder pain relief is “non-toxic” when its contents are low-risk in small accidents—but it is still not meant to be eaten or rubbed into eyes. Poison Control explains that reusable ice packs often contain water plus ingredients that lower freezing temperature, thickeners, silica gel, and coloring, while “instant” cold packs can involve different chemicals.
Treat “non-toxic” as a checklist, not a marketing word. Your goal is fewer surprises after months of repeat skin contact. A good non-toxic gel ice pack for shoulder pain relief should also explain safe use, time limits, and what to do if it breaks.
The “non-toxic” label checklist (PVC-free, BPA-free, latex-free)
Look for clear statements such as:
PVC-free / phthalate-free: some buyers prefer to avoid soft vinyl-style plastics
BPA-free: common concern for plastics in general
Latex-free: useful if you have sensitivities
Leak-resistant seams: reinforced edge welds and durable film
Sleeve or barrier layer: less risk of cold irritation
| What you check | What it means | What to watch for | The practical meaning for you |
|---|---|---|---|
| Clear material claims | Fewer unknowns | Vague “safe gel” wording | More confidence using it daily |
| Durable seams | Lower leak risk | Thin edges, uneven welds | Less mess and less skin exposure |
| Sleeve included | Skin barrier | Sleeve not washable | More comfort and easier timing |
| Flexible when frozen | Better shoulder contact | “Brick-like” rigidity | More even cooling on rounded joints |
The Non-Toxic Confidence Score (interactive)
Give yourself 1 point for each “Yes.”
The listing explains what the pack is made of (not just “non-toxic”).
It has reinforced seams or a double-sealed edge.
It includes a fabric sleeve (or clearly tells you to use a towel barrier).
It stays flexible when frozen (so it conforms to your shoulder).
It prints or repeats a time limit (10–20 minutes, not “use as long as you want”).
It provides a simple leak/cleanup instruction.
Score guide: 5–6 = strong candidate • 3–4 = workable with extra caution • 0–2 = skip. If you’re buying for repeat use, pick the option that helps you use a non-toxic gel ice pack for shoulder pain relief correctly every time.
How long should you use a non-toxic gel ice pack for shoulder pain relief?
Most people do best with timed sessions: start around 10 minutes and cap at 20 minutes per session. Cleveland Clinic advises that maximum icing time generally shouldn’t extend past 20 minutes, and 10–15 minutes is often enough.
Mayo Clinic’s self-care guidance for minor shoulder pain also suggests icing for 15–20 minutes a few times each day.
The point is comfort and control. Over-icing can irritate skin and make you stiffer, even with a non-toxic gel ice pack for shoulder pain relief.
10–20 minute rule: how long to ice shoulder pain safely
Use this simple routine every time you grab a non-toxic gel ice pack for shoulder pain relief:
Barrier first: thin towel or sleeve between cold gel and skin.
Timer on: 10 minutes for your first session.
Stop by 20: even if it still feels “good.”
Recover: wait until skin feels normal before repeating.
| Session goal | Time on | Time off | What it helps you do |
|---|---|---|---|
| New flare-up (day 1–2) | 10–15 min | 30–60+ min | Calm irritation without overdoing it |
| Post-activity soreness | 10–20 min | 60+ min | Reduce “angry” feeling after use |
| Cold-sensitive skin | 8–12 min | longer breaks | Lower cold-burn risk while staying consistent |
A 7-day plan you can actually follow
Days 1–2: Use a non-toxic gel ice pack for shoulder pain relief for 10–15 minutes, up to 2–4 sessions/day if it helps.
Days 3–5: Ice after activity with a non-toxic gel ice pack for shoulder pain relief, then add gentle range-of-motion after each session.
Days 6–7: use the non-toxic gel ice pack for shoulder pain relief only when symptoms spike.
Practical example: If your shoulder flares after desk work, a 12–15 minute session after work often beats a long session that makes you stiff.
How do you choose the best non-toxic gel ice pack for shoulder pain relief fit?
Fit is the hidden performance feature for any non-toxic gel ice pack for shoulder pain relief. A shoulder is curved and moves in multiple directions, so a flat rectangle often slides off and cools unevenly—especially when you want a non-toxic gel ice pack for shoulder pain relief to stay in contact.
A good non-toxic gel ice pack for shoulder pain relief should feel like a wrap, not a chore. When it stays put, you use your non-toxic gel ice pack for shoulder pain relief more consistently.
Shoulder Fit Finder: wrap, cape, or strap pad?
Pick the sentence that sounds like you:
“I need hands-free icing while I rest.” → Wrap/brace style
“My pain spreads across the top shoulder and upper arm.” → Cape/poncho style
“My pain is pinpoint and I want targeted contact.” → Contoured pad + straps
“I hate the ‘cold shock’ feeling.” → Choose a soft sleeve and shorter sessions first.
| Shoulder pack style | Best for | Common downside | The practical meaning for you |
|---|---|---|---|
| Wrap/brace | stability + hands-free | can feel bulky | best if you hate holding packs |
| Cape/poncho | broad coverage | can slide if loose | best for sofa recovery |
| Strap pad | targeted spot | smaller coverage | best for a single tender zone |
What materials matter most in 2025?
Prioritize these features when shopping for a non-toxic gel ice pack for shoulder pain relief:
Soft-touch barrier: reduces skin irritation and “too cold” shock
Flexible inner liner: avoids cracking after repeated freezing
Low-odor materials: strong plastic smell can be a warning sign
Clear care instructions: washable sleeve, seam checks, storage guidance
Practical case: People quit cold therapy because it’s inconvenient. Straps and a sleeve are “compliance features,” not luxury features.
Where should you place a non-toxic gel ice pack for shoulder pain relief?
Placement is the multiplier for your non-toxic gel ice pack for shoulder pain relief. If you place a non-toxic gel ice pack for shoulder pain relief on the wrong spot, you’ll think “ice doesn’t work” when the real issue is targeting.
Most shoulder pain clusters into four zones. Use this map with a non-toxic gel ice pack for shoulder pain relief and you’ll stop guessing.
Placement map: front, side, top, or shoulder-blade pain
| Your pain pattern | Best placement | Best pack style | What it helps you do |
|---|---|---|---|
| Front shoulder pain | front of shoulder, slightly down the arm | smaller flexible pack | calms tendon irritation from reaching |
| Side shoulder pain | outside “cap” of shoulder | medium pack or wrap | helps after lifting or carrying |
| Top shoulder pain | top near collarbone | wrap/contoured | hands-free relief when sleeping is hard |
| Shoulder-blade overlap | upper back near shoulder blade | flat pack + towel barrier | targets desk posture tension |
Three positioning tips that save time
Sit slightly forward to improve contact on the top/front shoulder.
Use gentle pressure; cold works by contact, not squeezing.
If it slides, adjust the strap, not your body.
Real-life win: Moving the pack one inch forward (from back to front) often changes the result fast.
Ice vs heat: what should you do when cold makes you stiff?
Ice is often used when pain feels irritated, warm, or newly flared. Heat is often used when pain feels stiff and “rusty.” Mayo Clinic notes ice can ease pain and swelling after a sudden tendon injury and recommends using a towel barrier.
You don’t need perfect diagnosis to choose a safer first step. You need a simple decision tool for using a non-toxic gel ice pack for shoulder pain relief (or choosing heat instead).
Ice-or-heat decision tool (interactive)
Choose ICE today if:
Pain flared in the last 48 hours
The area feels warm/tender
Movement triggers sharp pain
Choose HEAT today if:
Pain feels tight and stiff
A warm shower helps
There is no obvious swelling
Choose BOTH (alternating) if:
You’re stiff in the morning but sore after activity
If cold makes you stiff: try this alternating routine
Heat 10 minutes to loosen.
Easy movement 2–3 minutes (gentle range only).
Cold 10 minutes using your non-toxic gel ice pack for shoulder pain relief.
| Strategy | When it fits | Main goal | What it means for you |
|---|---|---|---|
| Cold only | after activity flare | calm pain | quick comfort without overthinking |
| Heat only | before stretching | loosen tightness | easier movement |
| Alternate | mixed symptoms | balance both | better daily function |
Leak safety: what to do if your gel pack breaks
Even a non-toxic gel ice pack for shoulder pain relief can leak after repeated freezing, bending, or pressure. If a leak happens, treat it like a household spill: keep it out of mouths and eyes, clean it promptly, and replace the non-toxic gel ice pack for shoulder pain relief.
Poison Control explains that small tastes of reusable ice pack liquid often cause minor effects like mouth irritation, but risk rises with larger exposures or different pack types.
Gel ice pack leak cleanup steps for a non-toxic gel ice pack for shoulder pain relief (kids & pets)
Isolate the pack in a plastic bag and remove it from reach.
Avoid direct contact with gel; use gloves if available.
Wipe up gel with paper towels and seal waste in a bag.
Wash the surface with soap and water.
Wash hands thoroughly.
If ingestion happens, contact Poison Control (U.S. is 24/7).
| Situation | What can go wrong | What you do | Why it matters |
|---|---|---|---|
| Toddler grabs a pack | chewing + gel exposure | store high, use sleeve | prevents accidental ingestion |
| Pet bites pack | gel ingestion | remove immediately, call for guidance | avoids GI upset and risk |
| Bead pack tears | choking hazard | collect carefully, discard | safer around children and pets |
2025 updates: materials, labeling, and travel rules
In 2025, the biggest shift is not a “magic gel.” It’s proof and usability: clearer labels, better sleeves, and fewer ways to misuse cold therapy with a non-toxic gel ice pack for shoulder pain relief.
What’s trending (and why it helps you)
Short-session education: many consumer health sources emphasize timed use and a 20-minute cap.
Better disclosure: more brands publish clearer material claims and care instructions.
Fit-first design: straps and contoured shapes improve contact, so people stick with routines.
Phthalate-aware buying is becoming normal
If a product uses soft, plasticized materials, some shoppers look for “phthalate-free” language. In the U.S., CPSC rules restrict certain phthalates above 0.1% in children’s toys and child care articles. U.S. Consumer Product Safety Commission
In the EU, REACH restrictions limit certain phthalates in plasticised materials in articles at 0.1% by weight under a revised entry.
That does not make every gel pack a children’s product. It does make “phthalate-free” a practical filter when choosing a non-toxic gel ice pack for shoulder pain relief for a family home.
Air travel rules for gel ice packs (frozen solid)
For airport security in the U.S., TSA guidance indicates frozen liquid items (including gel packs) are generally allowed through screening if they are frozen solid.
If your non-toxic gel ice pack for shoulder pain relief is partially melted, expect extra screening or different treatment depending on the officer.
Frequently asked questions
Q1: What’s inside a non-toxic gel ice pack for shoulder pain relief?
Reusable packs often contain water plus ingredients that help them stay cold and flexible, along with thickeners and coloring. Pack types differ, and “instant” packs can use other chemicals.
Q2: How long to ice shoulder pain safely with a non-toxic gel ice pack for shoulder pain relief?
A common guideline is 10–20 minutes per session with a towel barrier, and many sources recommend not exceeding 20 minutes.
Q3: Can I use a non-toxic gel ice pack for shoulder pain relief every day?
Often yes, if your skin tolerates it and you keep sessions timed. Stop if you see burning, numbness that lasts, or unusual skin color.
Q4: Should I put the gel pack directly on skin?
No. Use a sleeve or thin towel barrier to reduce cold injury risk.
Q5: Why does cold sometimes make my shoulder feel stiffer?
Cold can tighten muscles temporarily. Shorten sessions, use a sleeve, and do gentle movement afterward.
Q6: When should I stop self-care and get checked?
If pain is getting worse, you have swelling/redness/warmth, or you’re having a harder time moving your shoulder, it’s time for a clinician visit. Mayo Clinic+1
Summary and recommendations
A non-toxic gel ice pack for shoulder pain relief works best when you choose a pack with clear material claims, durable seams, and a comfortable sleeve—and then use the non-toxic gel ice pack for shoulder pain relief with a timer. Start with 10–15 minutes, stop by 20, and repeat only if it helps.
For many people, fit and consistency matter more than “extra cold.” If your pain persists, worsens, or limits movement, get evaluated.
About Tempk
At Tempk, we build temperature-control products with a simple philosophy: clear materials, repeatable performance, and routines people can actually follow. We apply the same thinking to comfort-focused cold therapy products—prioritizing sleeves, sealing, and fit so your non-toxic gel ice pack for shoulder pain relief is practical, not fussy, and so your non-toxic gel ice pack for shoulder pain relief stays dependable after repeated freezing.
CTA: Tell us where your pain sits (front/side/top/shoulder-blade), what triggers it (desk work, lifting, sports), and whether cold makes you stiff. We’ll suggest a simple cold/heat schedule and the most practical pack style for your routine.
Gel Ice Pack for Head Dental: Safe Use Guide?
If you’re using a gel ice pack for head dental swelling, your goal is simple: reduce puffiness and soreness without over-freezing your skin. Swelling often feels worst 48–72 hours after oral surgery, so your comfort routine needs to work beyond day one.
In 2025, research also shows many people don’t follow longer cold-compress plans—only 21.7% adhered to a ≥3-hour recommendation—so the best plan is the one you can actually repeat with a timer.
gel ice pack for head dental
Important note: This is general education, not medical advice. Always follow the exact instructions from your dentist or oral surgeon.
This article will help you answer:
How a gel ice pack for head dental swelling works (in plain language)
The safest 20 minutes on 20 minutes off ice pack dental timing you can stick to
Where to place ice pack for jaw swelling so you cool the right tissue
Which option fits you best: jaw wrap gel pack for dental surgery vs flat packs
How to keep a gel ice pack for head dental clean, reusable, and clinic-ready
How to build a simple at-home routine (even when you feel tired)
Why does a gel ice pack for head dental swelling work?
A gel ice pack for head dental swelling helps by “turning down” the swelling response and calming pain signals. Cold narrows small surface blood vessels and slows the “rush” that makes your cheek feel tight and hot.
gel ice pack for head dental
That’s why many people feel relief soon after a short, timed session.
In real life, “head dental” usually means you want cooling around your cheek, jawline, or jaw hinge, not inside your mouth. You’re not trying to freeze the socket—you’re trying to calm surrounding tissue with controlled cooling.
gel ice pack for head dental
What “head dental” usually means for placement
Use this quick placement map to avoid the most common mistakes.
gel ice pack for head dental
| Target area | Best placement | Common mistake | Practical meaning for you |
|---|---|---|---|
| Cheek (extraction side) | Flat against cheek | Direct skin contact | Higher irritation risk |
| Jawline (lower molars) | Wrap under jawline | Pressing too hard | More soreness, less comfort |
| Jaw hinge (near ear) | Gentle strap wrap | Leaving it on too long | Numbness or discomfort |
Practical tips you can use today
If you bruise easily: keep sessions short and repeatable, not intense.
If your skin is sensitive: add a thicker cloth barrier.
gel ice pack for head dental
If swelling feels “hot and tight”: cold is usually the first move, but keep it timed.
gel ice pack for head dental
Practical case example: A patient felt less throbbing when they used timed 20-minute cycles (with breaks) instead of continuous icing.
gel ice pack for head dental
How long should a gel ice pack for head dental stay on?
The safest default is short, timed sessions—often 15–20 minutes at a time with breaks. Many aftercare instructions describe either “15 minutes per hour” or “20 minutes on, 20 minutes off” cycles, especially early in recovery.
gel ice pack for head dental
Your best approach is to choose one timing style and repeat it consistently with a phone timer. Consistency beats “extra cold,” because overuse can irritate skin and trigger lingering numbness.
gel ice pack for head dental
Gel ice pack for head dental timing: which cycle fits you?
| Timing method | Typical pattern | Pros | What it means for you |
|---|---|---|---|
| 15 minutes per hour | 15 min cold, rest off | Gentle + cautious | Good if you’re worried about overdoing it |
| 20 on / 20 off | 20 min cold, 20 min rest | Easy to remember | Great for building a repeatable habit |
| “Whenever it hurts” | Inconsistent | None | Highest risk of overuse and skin irritation |
Practical tips and recommendations
Always use a cloth barrier (towel or sleeve), even if it feels less cold.
gel ice pack for head dental
Don’t sleep with cold on your face. You can’t track time while asleep.
gel ice pack for head dental
Stop if numbness persists after removing the gel ice pack for head dental session.
gel ice pack for head dental
Real-world example: When patients used timers, they reported fewer “ice burn” complaints and fewer follow-up calls.
Where should you place a gel ice pack for head dental jaw swelling?
A gel ice pack for head dental relief is placed on the outside of your face—usually over the cheek near the treated area. You’re cooling tissue next to the site, not the surgical socket itself.
gel ice pack for head dental
If you had lower molar work, focus on cheek + jawline coverage on that side. If you had wisdom teeth removal, many people do better when the pack sits slightly toward the jaw hinge (but still gentle and timed).
gel ice pack for head dental
The “gentle pressure rule” for gel ice pack for head dental comfort
Cold should calm. It should not squeeze. Strong pressure can increase tenderness and even trigger headaches.
gel ice pack for head dental
| Placement factor | Good practice | Bad practice | Practical meaning for you |
|---|---|---|---|
| Skin barrier | Cloth cover | Direct gel on skin | Lower irritation risk |
| Pressure | Gentle contact | Hard pressing | Less soreness |
| Spot rotation | Slightly shift the spot | Same exact spot | Less redness/numbness risk |
Practical tips you can use today
Put the gel ice pack for head dental pack where swelling “lives,” not where pain “echoes.”
If the pack feels “knife-cold,” add another cloth layer.
If you’re icing both sides, alternate sides to avoid camping on one spot too long.
Which gel ice pack for head dental design fits your routine?
The best gel ice pack for head dental design is the one you’ll actually use correctly and repeatedly. Wraps usually win because they stay in place hands-free, while flat packs often slip and create “fiddling time.”
gel ice pack for head dental
A good fit also prevents user error. If you must hold the pack with your hand, you’ll quit sooner—especially when tired. That’s why wrap styles often outperform flat packs in real recovery routines.
gel ice pack for head dental
Quick comparison: wrap vs flat vs instant cold
| Gel ice pack type | Best use case | Main upside | Main downside | What it means for you |
|---|---|---|---|---|
| Head/jaw wrap gel pack | Wisdom teeth, jaw swelling | Hands-free, stable | Still needs timer | Easiest compliance |
| Flat flexible gel pack | Small cheek soreness | Simple and low cost | Slips easily | More effort per session |
| Instant cold pack | Travel/emergency | No freezer needed | Short cooling time | Backup, not primary |
gel ice pack for head dental
Features checklist: what matters most in a gel ice pack for head dental wrap
Flexible when cold: avoids the “hard brick” feeling.
Soft-touch cover: reduces harsh cold contact.
Adjustable strap: stable fit without squeezing.
Leak resistance: reinforced seams reduce messy failures.
Decision tool: pick your gel ice pack for head dental setup in 60 seconds
Score yourself. Total your points, then follow the guide.
gel ice pack for head dental
Add points if “yes”:
You need hands-free use while resting (2)
You have swelling on both sides (2)
You plan to use cold therapy 6+ times per day (2)
Your skin is sensitive to cold (2)
You dislike tight straps or pressure (1)
You want a reusable, easy-to-clean option (1)
You need a clinic-ready kit for patients (2)
Score guide
0–3: Flat pack + sleeve is usually enough
4–7: Contour packs or light wraps fit best
8–12: Full head/jaw wrap kit is your best match
When should you switch from gel ice pack for head dental to warmth?
Cold is usually best early for puffiness. Warmth can feel better later, especially if stiffness dominates. A simple way to decide is symptom-based: swelling early → cold first; tight jaw muscles later → warmth may help.
gel ice pack for head dental
If you switch to warmth, keep the same timer habit. Never use high heat—gentle warmth is enough.
gel ice pack for head dental
Symptom-based switch guide (simple and safe)
| Symptom | Cold usually helps most | Warmth usually helps most | What you do next |
|---|---|---|---|
| Puffy swelling | Early phase | Later phase | Cold first, then reassess |
| Tight jaw muscles | Limited benefit | Often helpful | Switch sooner if stiffness dominates |
| Bruised tenderness | Early comfort | Later comfort | Choose what feels safer |
gel ice pack for head dental
How to clean, reuse, and kit gel ice pack for head dental products
A gel ice pack for head dental use is easiest to keep hygienic when you separate “cold material” from “skin contact.” That means a washable sleeve or a clean cloth barrier every time. It keeps routines simple and reduces odor problems.
Cleaning checklist for a reusable gel ice pack for head dental routine
Wipe the surface with mild soap + water.
Air dry fully before freezing again.
Wash the sleeve regularly (like a pillowcase).
Replace the pack if seams look damaged.
Dental clinic take-home ice pack kit: what to include
If you’re a clinic, a gel ice pack for head dental take-home kit is a service tool. Standardization reduces confusion and reduces support calls.
Clinic kit basics
Gel pack or wrap (one-size-fits-most)
Washable sleeve (comfort + hygiene)
One-page quick-start card (big font, 3 steps)
Containment pouch (assume leaks can happen)
Checklist label (prevents missing-item claims)
Shipping and storage: keep gel ice packs kit-ready
If you ship gel packs at room temperature, focus on leak prevention, durability, and clear user instructions.
gel ice pack for head dental
A simple 3-layer shipping mindset
Containment: sealed pouch (optional absorbent pad)
Cushion: protect edges and straps
Immobilize: right-size cartons to stop sliding
2025 gel ice pack for head dental trends you should know
In 2025, the big shift is “habit-friendly” aftercare. Research highlights a real compliance problem: only 21.7% of surveyed patients followed a ≥3-hour cold-compress recommendation, so better instructions and easier-to-wear wraps matter.
gel ice pack for head dental
Latest progress snapshot
More ergonomic wraps with better jawline contour and less strap pressure
gel ice pack for head dental
Washable sleeves becoming standard (comfort + hygiene in one step)
gel ice pack for head dental
Clinic-ready kitting with fewer missing items and fewer support calls
gel ice pack for head dental
More durable outer films that reduce micro-leaks over repeated freezing cycles
gel ice pack for head dental
A tiny “home care log” that boosts consistency
Copy/paste this into your notes app:
Frequently Asked Questions
Q1: What is the safest timing for a gel ice pack for head dental swelling?
Use short, timed cycles with breaks—many people use 15–20 minutes at a time, or 20 minutes on and 20 minutes off. Always use a cloth barrier and a timer so you don’t over-cool your skin.
gel ice pack for head dental
Q2: Should I put a gel ice pack for head dental directly on my face?
No. Direct contact increases irritation risk. Use a towel or soft sleeve every session, even if it feels “less cold,” because it protects your skin and makes the routine safer.
gel ice pack for head dental
Q3: Where do I place a gel ice pack for head dental jaw swelling?
Place it on the outside cheek near the treated area. For lower molars, aim for cheek + jawline coverage. Keep pressure gentle—cold should calm, not squeeze.
gel ice pack for head dental
Q4: Is a jaw wrap gel pack for dental surgery better than a flat pack?
Often yes, because a wrap stays in place hands-free, which makes it easier to repeat sessions correctly. Flat packs can work, but slipping and hand-holding reduce consistency.
gel ice pack for head dental
Q5: When should I switch from cold to warm compress after dental surgery?
Cold is usually best early for swelling. Warmth can help later if stiffness dominates. Keep the same timer habit either way, and avoid high heat—gentle warmth is enough.
gel ice pack for head dental
Q6: What should I avoid with a gel ice pack for head dental recovery?
Avoid direct skin contact, avoid leaving it on too long without breaks, and avoid icing while sleeping. If pain or swelling worsens unexpectedly, contact your clinician.
gel ice pack for head dental
Summary and recommendations
A gel ice pack for head dental recovery works best when it’s safe, timed, and easy to repeat. Use a cloth barrier, keep pressure gentle, and stick to short cycles like 15–20 minutes with breaks. Swelling can feel worse around 48–72 hours, so plan for a routine you can repeat on day two and three. If stiffness becomes the main issue later, gentle warmth may feel better—still timed, still cautious.
gel ice pack for head dental
Your next steps (CTA): Pick the gel ice pack for head dental format you’ll actually use (flat, contour, or wrap), set a timer habit, and keep a simple home-care log. If you’re building clinic take-home kits or shipping programs, standardize the pack + sleeve + quick-start card so patients can follow it even when tired.
About Tempk
At Tempk, we build temperature-control products and packaging systems designed for real-world routines—safe contact barriers, repeatable handling, and kit layouts that reduce mistakes. For gel ice pack for head dental programs, we support kitting workflows, leak-containment packaging, and reuse-friendly designs that reduce customer complaints and replacements.
gel ice pack for head dental
Next step: Share your target use case (clinic aftercare kits vs direct-to-consumer), typical shipment lanes, and preferred pack format. We’ll help you map a scalable gel ice pack for head dental solution with simple instructions people will actually follow.