


Insulated Grocery Bags: How to Choose in 2025
Insulated Grocery Bags: How to Choose in 2025
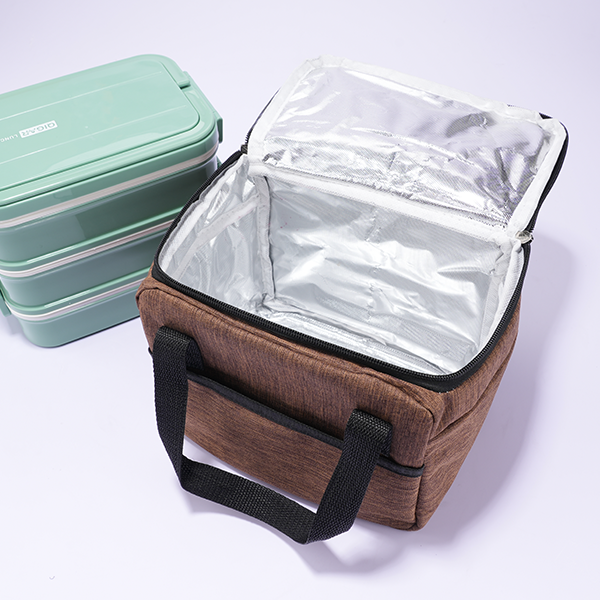
Insulated Grocery Bags: Which Ones Work in 2025?
Insulated grocery bags work when you treat them like a mini cold chain from checkout to fridge. Your goal is simple: keep cold food cold, prevent leaks, and avoid cross-contamination. Public guidance warns that food can become risky in the 40°F–140°F “Danger Zone,” and perishables should not sit out longer than 2 hours (or 1 hour if it’s above 90°F).
This article will answer for you:
How insulated grocery bags improve safety and quality (without “magic”)
insulated grocery bags
A fast insulated grocery bag temperature retention checklist you can follow every trip
insulated grocery bags
Which features matter most in insulated grocery bags with zipper and rigid base
insulated grocery bags
A packing method that reduces leaks and cross-contamination (especially for raw meat) U.S. Food and Drug Administration+1
How to clean insulated grocery bags so odors and bacteria don’t build up
2025–2026 trends (delivery platforms + bag laws) that change what “good” looks like
insulated grocery bags
Do insulated grocery bags really keep groceries safer?
Yes—when you use insulated grocery bags correctly, they buy you time, not immunity. They slow temperature change and help contain mess, but safety still depends on trip length and habits. Keep your refrigerator at 40°F or below and freezer at 0°F or below, and refrigerate perishables quickly.
Insulated grocery bags help most when your trip gets longer than you planned. Traffic, extra errands, and a hot trunk create “warm minutes” that quietly damage frozen texture and dairy quality. Your best win is reducing warm minutes and sealing the bag consistently.
insulated grocery bags
Insulated grocery bags don’t create cold—how do they work?
Insulated grocery bags work through insulation + sealing + packing discipline. Insulation slows heat flow. Sealing reduces warm air exchange. Packing discipline reduces air gaps that speed warming.
insulated grocery bags
| What you carry | Main risk | What insulated grocery bags improve | What you still must do |
|---|---|---|---|
| Frozen foods | Partial thaw + refreeze texture | Slower warming | Get home fast; add ice packs on long trips |
| Raw meat/seafood | Leaks + cross-contamination | Leak containment with liners | Separate from ready-to-eat foods |
| Dairy | Warm drift + off taste | Temperature buffer | Do not leave in the car “for a minute” |
| Hot prepared foods | Cooling into unsafe range | Heat retention | Keep hot items separate from cold items |
Practical tips you can use today
Close the bag every time: a zipper seal is often the biggest performance jump.
insulated grocery bags
Group frozen together: a bigger “cold mass” stays cold longer.
insulated grocery bags
Unload cold items first: treat it as the last step of your mini cold chain. U.S. Food and Drug Administration
Real scenario: One driver cut “warm dairy” complaints by using zipper insulated grocery bags and keeping them closed between stops.
insulated grocery bags
How do you choose insulated grocery bags by trip time?
Choose insulated grocery bags based on your “time-to-fridge,” not marketing words. If your total out-of-fridge time approaches the 2-hour safety window, you need better sealing, tighter packing, and usually ice packs.
A simple mindset helps: track warm minutes. Warm minutes are the time cold food spends outside a controlled cold space. Less warm minutes means better safety margin and better taste.
insulated grocery bags
Quick decision tool (60 seconds)
Under 20 minutes: basic insulated grocery bags can work if you seal them.
20–45 minutes: prioritize a zipper seal and thicker insulation.
45+ minutes or multiple stops: use zipper insulated grocery bags + ice packs + fewer bag openings.
| Trip pattern | Bag setup | Ice pack plan | What it means for you |
|---|---|---|---|
| Short errand | 1–2 insulated grocery bags | Optional | Less stress, fewer leaks |
| Multiple stores | Zipper insulated grocery bags | 1–2 packs | More stable temps |
| Long drive / traffic | Zipper + structured insulated grocery bags | 2–4 packs | Better safety margin and texture |
A mini “warm minutes” calculator (interactive)
Warm minutes = checkout wait + car time + extra stops + unloading delay
If warm minutes rise every week, quality complaints usually rise next.
Your target: keep warm minutes low enough that you can refrigerate quickly and consistently. U.S. Food and Drug Administration
Which insulated grocery bag features matter most in 2025?
In 2025, good insulated grocery bags are defined by sealing, structure, and cleanability. A thick bag with a leaky top performs like an open window. A strong seal with weak seams fails when leaks happen.
insulated grocery bags
Use a simple checklist instead of product claims.
The 5 must-have features checklist
Insulation that feels padded (not thin fabric)
A closure that seals (zipper is often best for temperature hold)
insulated grocery bags
A wipe-clean liner (spills will happen)
insulated grocery bags
A stable base (rigid base prevents tipping and crushing)
insulated grocery bags
Reinforced handles (heavy loads cut hands fast)
insulated grocery bags
Zipper vs open-top: what actually changes?
| Feature | Option A | Option B | What it means for you |
|---|---|---|---|
| Closure | Open top / flap | Zipper closure insulated grocery bags | Better seal = steadier cold |
| Structure | Soft base | Rigid base insulated grocery bags | Less tipping, fewer spills |
| Handling | Light but unstable | Slightly heavier but stable | Faster packing and fewer crushed items |
Practical tips you can use today
Check zipper corners: gaps often form there.
insulated grocery bags
Avoid “too tall, too narrow” bags: they tip and crush produce.
Pick fewer, better insulated grocery bags: one strong bag beats three weak ones.
Practical case: A shopper upgraded to insulated grocery bags with rigid bases. Eggs broke less and frozen items stayed firmer.
insulated grocery bags
What size insulated grocery bags do you actually need?
The right insulated grocery bags size matches your usual load and your temperature “groups.” Too small leads to overstuffing and poor sealing. Too large leads to shifting and crushing.
A simple rule from your drafts: one standard insulated grocery bag often fits about 1–1.5 paper-bag equivalents, and you should plan one bag per temperature group.
insulated grocery bags
Mini-calculator: how many insulated grocery bags?
Count your temperature groups: frozen, dairy/ready-to-eat, raw proteins, produce/bread.
insulated grocery bags
Add 1 bag per group.
Add +1 extra if it’s hot outside or you shop multiple stores.
insulated grocery bags
| Shopping pattern | Recommended bag set | Why it works | What it means for you |
|---|---|---|---|
| Quick top-up | 1–2 medium insulated grocery bags | Fast carry | Less hassle |
| Weekly household run | 2–3 medium + 1 large | Better separation | Cleaner, faster unloading |
| Frozen-heavy shopping | 1 dedicated frozen bag + ice packs | Cold mass stays cold | Better ice cream texture insulated grocery bags |
| Bulk club run | Large wide-mouth + rigid base | Fits bulky items | Fewer torn handles |
Practical tips you can use today
Measure your biggest frozen box first. Match the base width to it.
Dedicate one insulated grocery bag for frozen items. Consistency beats perfection.
insulated grocery bags
Use reinforced handles for heavy bottles.
insulated grocery bags
How should you pack insulated grocery bags for frozen food?
Best insulated grocery bags for frozen food work when you pack frozen together, reduce air gaps, and seal tight. A half-empty bag warms faster than a full one. Think “snowball effect”: bigger cold mass melts slower.
Also, raw meat should be separated from other foods during shopping and bagging to reduce cross-contamination.
The “3-bag method” for insulated grocery bags
| Bag zone | What goes inside | Add-ons | What it means for you |
|---|---|---|---|
| Clean cold zone | Dairy, deli, ready-to-eat | Ice pack | Keeps clean foods clean |
| Raw protein zone | Meat, poultry, seafood (double-contained) | Extra barrier | Less leak spread |
| Dry/crush zone | Produce, bread, chips | None | Less bruising and crushing |
Practical tips you can use today
Pack frozen items together in one insulated grocery bag. Then zip it shut.
Place ice packs on top when you expect frequent openings (multi-stop errands).
Never mix hot and cold items in one bag. Separate by temperature lane.
Real scenario: A commuter stopped buying “soft ice cream” by switching to zipper insulated grocery bags plus slim ice packs for long drives.
insulated grocery bags
How do you clean insulated grocery bags and prevent odors?
Cleaning is part of insulated grocery bags performance. If you skip it, moisture and residue build up in seams, and odors stick. A well-known study on reusable bags found large numbers of bacteria in many bags, and washing reduced bacteria by more than 99.9%.
Storage also matters. California public health guidance warns that storing reusable bags in a car trunk is not recommended, especially in warmer months.
A simple cleaning routine you will actually follow
| Frequency | What to do | Time | What it means for you |
|---|---|---|---|
| After each trip | Wipe liner + zipper | 1–2 min | Stops buildup insulated grocery bags |
| Weekly | Mild wash + full dry | 10–15 min | Prevents odor insulated grocery bags |
| Monthly | Inspect seams + base | 5 min | Extends life insulated grocery bags |
Practical tips you can use today
Dry the bag open overnight. Drying matters more than soap.
insulated grocery bags
Clean after any raw meat trip—no exceptions.
Store indoors, not in your trunk.
Real-world example: A delivery driver eliminated “fish smell” by wiping insulated grocery bags after every shift and line-drying overnight.
insulated grocery bags
Insulated grocery bags for delivery drivers: what changes?
For delivery work, insulated grocery bags become equipment, not accessories. Your priorities shift to speed, separation, and repeatable temperature control. More stops means more door openings, which increases warm minutes.
insulated grocery bags
Many platforms also check for minimum insulated bag dimensions and basic condition standards. For example, Uber lists minimum bag dimensions for standard, pizza, and large insulated bags. Uber+1
A 2-minute driver packing SOP (interactive)
Answer these and follow the action:
More than 2 stops?
Yes → use zipper insulated grocery bags and keep them closed between stops.
insulated grocery bags
Hot or sunny outside?
Yes → add ice packs to the highest-risk orders.
insulated grocery bags
Mixed hot and cold items?
Yes → separate insulated grocery bags by temperature lane.
insulated grocery bags
| Delivery risk | What to measure | Quick fix | What it means for you |
|---|---|---|---|
| Too many openings | Door-open minutes | Load by stop order | Fewer warm spikes insulated grocery bags |
| Order mixing | Mis-deliveries | Color tags | Fewer refunds insulated grocery bags |
| Slow staging | Warm minutes | Cold staging zone | Better freshness insulated grocery bags |
Practical tips you can use today
Label bags by order. Simple tags beat memory.
insulated grocery bags
Use a rigid base to prevent tip-overs and crushed items.
insulated grocery bags
Treat the bag like a food-contact surface. Wipe daily, deep-clean weekly.
insulated grocery bags
2025–2026 trends: what’s changing for insulated grocery bags?
In late 2025, insulated grocery bags are being shaped by policy, proof, and professional delivery expectations.
insulated grocery bags
Two changes matter most:
More pressure to bring your own reusable bags. California’s law bans plastic shopping bags starting in 2026.
Higher standards for what counts as “reusable.” CalRecycle lists durability and cleanability requirements, including design for at least 125 uses and 15 liters capacity, plus certification rules.
What “good” looks like now
You will see more structured bases and better zipper seals (less tipping, more temperature stability).
insulated grocery bags
You will see stronger hygiene messaging, especially about cleaning and avoiding trunk storage.
Delivery drivers will keep using larger insulated bags that meet minimum dimensions and inspection checks. Uber
Frequently Asked Questions
Q1: Do insulated grocery bags replace a cooler?
No. Insulated grocery bags slow temperature change, but you still need quick refrigeration and ice packs for long trips.
Q2: Are insulated grocery bags better with zippers?
Often yes. A zipper reduces air exchange, which usually improves temperature retention.
insulated grocery bags
Q3: How do I pack insulated grocery bags to avoid cross-contamination?
Separate raw meat, poultry, and seafood from ready-to-eat foods, and assume raw packaging can leak.
Q4: How do I clean insulated grocery bags after meat leaks?
Wash or wipe the liner and seams, then fully dry the bag open. Washing can reduce bacteria dramatically when done consistently.
Q5: Is it risky to store insulated grocery bags in my trunk?
Yes. Public health guidance discourages trunk storage in warm months because heat can promote bacterial growth.
Q6: What insulated grocery bags do delivery drivers need?
Look for thermal insulation, cleanable interiors, stable structure, and platform minimum size requirements where applicable.
Summary and recommendations
Insulated grocery bags help you protect food quality by reducing warm minutes, sealing cold air in, and containing leaks. In 2025, prioritize zipper seals, wipe-clean liners, rigid bases, and reinforced handles. Pack by temperature lanes, separate raw proteins, and unload cold items first. Clean and dry insulated grocery bags consistently, and store them indoors to prevent odor and bacterial buildup.
Your next step (simple plan)
Buy one strong insulated grocery bag and test it on your normal route.
Create a frozen-only insulated grocery bag plus one raw-protein bag.
insulated grocery bags
Add ice packs if your trip often exceeds 20–45 minutes.
Start a wipe-and-dry habit after every trip (it takes 2 minutes).
insulated grocery bags
About Tempk
At Tempk, we apply real cold-chain thinking to everyday and last-mile temperature protection. We focus on stable temperature control, practical handling routines, and packaging designs that are easy to clean and reliable in daily use. If you are building a delivery program or retail packaging offer, we can help you define bag performance requirements, packing SOPs, and hygiene workflows that reduce complaints and waste.
CTA: If you want a practical bag spec and packing checklist tailored to your routes and product mix, talk with our team.
Insulated Cooler Bag Breast Milk: 2025 Guide
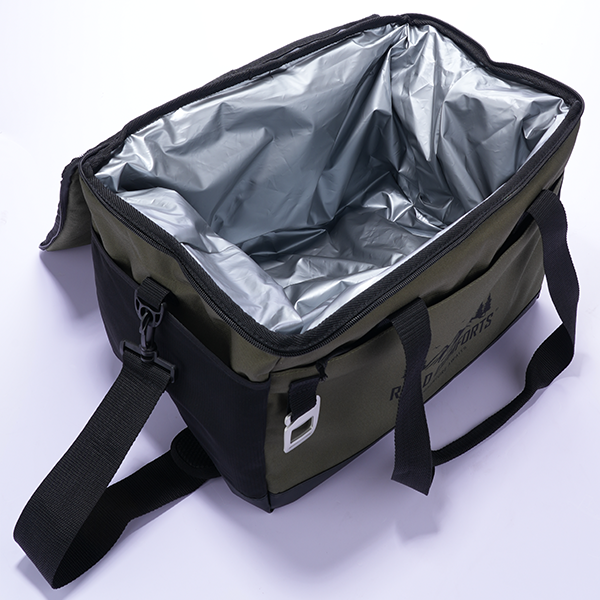
Insulated Cooler Bag Breast Milk: How Do You Keep It Safe in 2025?
If your day includes pumping, daycare runs, or travel, insulated cooler bag breast milk is your “portable fridge” strategy. Your goal is simple: keep milk cold, keep it sealed, and keep warm air out. CDC guidance says breast milk can be stored in an insulated cooler with frozen ice packs for up to 24 hours while traveling, then used, refrigerated, or frozen at your destination.
In this guide, you’ll learn:
How insulated cooler bag breast milk stays safe using time + temperature + cleanliness
How long insulated cooler bag breast milk can last in real-life routines (work, daycare, travel)
A repeatable packing method for insulated cooler bag breast milk for work commute
How to choose the best ice packs for breast milk cooler bag reliability
The simplest way to handle TSA breast milk cooler bag rules with less stress
How cleaning an insulated cooler bag for breast milk prevents odors and waste
Insulated cooler bag breast milk: What does “safe” really mean?
Direct answer: Insulated cooler bag breast milk is “safe” when milk stays cold enough, stays sealed, and avoids contamination. Safety is not only time. It’s time + temperature + clean handling. CDC also warns not to thaw or heat breast milk in a microwave and recommends specific time windows after warming or thawing.
Expanded explanation: Think of your cooler bag like a tiny refrigerator door. Every time you open it, cold air escapes and warm air enters. When that happens repeatedly, temperature swings rise and your “safe buffer” shrinks. Your best protection is a boring routine you can repeat when you’re tired.
Insulated cooler bag breast milk: The 4-point safety triangle
Detailed information: Use this as your mental checklist before you leave home.
| Safety factor | What it controls | What usually goes wrong | What it means for you |
|---|---|---|---|
| Ice packs | Temperature stability | Packs are too small or not fully frozen | Milk warms earlier than you think |
| Bag insulation | Heat gain rate | Thin bag or weak zipper seal | Hot commutes become riskier |
| Pack contact | Cooling efficiency | Packs don’t touch containers | “Cold air” isn’t enough |
| Opening discipline | Real-world performance | Bag opened too often | Temperature swings increase |
Practical tips you can use today
If you change one thing: make ice packs touch milk containers on 2 sides.
If your day is unpredictable: pack extra “cold mass” instead of relying on luck.
If you want less stress: open the cold zone once, close it fast, done.
Real-world example: One parent stopped “checking” the bag and only opened it to add milk. Their insulated cooler bag breast milk routine stayed colder all day.
insulated cooler bag breast milk
Insulated cooler bag breast milk: How long can it stay safe on the go?
Direct answer: For travel, CDC guidance states breast milk can be stored in an insulated cooler with frozen ice packs for up to 24 hours. After you arrive, CDC advises using it, refrigerating it, or freezing it.
Expanded explanation: “Up to 24 hours” is a ceiling, not a goal. Your real-world hold time depends on heat, air gaps, and how often the bag is opened. If you cannot control those, plan a shorter window and prioritize refrigeration sooner.
The hold-time “risk score” (interactive)
Add points and total your score:
Outdoor heat: under 75°F (+0), 75–90°F (+1), over 90°F (+2)
Cold-zone openings: 0–2 (+0), 3–6 (+1), 7+ (+2)
Ice packs: two+ fully frozen (+0), one/loose (+1), not fully frozen (+2)
Air space: mostly full (+0), half empty (+1)
| Score | What it means | What to do next | What it means for you |
|---|---|---|---|
| 0–1 | Low risk | Standard packout | More confidence, less guessing |
| 2–4 | Medium risk | Add cold mass, reduce openings | Better buffer time |
| 5–7 | High risk | Plan a fridge/freezer handoff | Avoid “hope-based” storage |
Quick reference: storage targets that support your cooler plan
Detailed information: Your cooler routine is a bridge to proper storage. Common guidance uses 40°F (4°C) for refrigeration and 0°F (-18°C) for freezers. FDA recommends keeping refrigerators at or below 40°F (4°C) and freezers at 0°F (-18°C). U.S. Food and Drug Administration
USDA WIC guidance for healthy, full-term babies lists up to 4 hours at room temperature (77°F or colder), up to 4 days refrigerated (40°F or colder), and “within 6 months is best” for freezer storage (0°F or colder), with up to 12 months acceptable.
Insulated cooler bag breast milk: How do you pack it for a work commute?
Direct answer: The most repeatable method is a “cold sandwich”: ice pack, milk, ice pack—then seal the bag and minimize openings. Pre-chilling the bag for 10–15 minutes helps, especially in summer.
insulated cooler bag breast milk
Expanded explanation: Your biggest enemy on a workday is not the commute. It’s repeated small openings and “warm items” stealing cooling power. Treat the milk zone like a fridge shelf: organized, full, and opened briefly.
Insulated cooler bag breast milk: The “Cold Sandwich” packout
Detailed information: This method is simple enough to repeat even on a rough day.
Pre-chill the bag (optional): add a frozen pack for 10–15 minutes.
Bottom layer: one flat frozen pack.
Middle: sealed bottles or milk storage bags.
Top/side layer: one flat frozen pack touching containers.
Fill air gaps: a clean towel or divider to reduce empty space.
Zip fully and avoid “half-open” carrying.
| Packout step | Do this | Avoid this | What it means for you |
|---|---|---|---|
| Pre-chill | Packs inside early | Loading into a warm bag | Longer cold hold |
| Cold sandwich | Milk between packs | Milk against warm walls | More stable cold |
| Fill gaps | Reduce air space | Big air pockets | Fewer warm swings |
Practical tips and suggestions
Busy workday: keep pump parts outside the milk zone so you open less.
Multiple sessions: use a “new milk zone” so warm milk doesn’t warm older milk.
If you’re unsure: move milk to a refrigerator sooner rather than stretching time.
Real-world example: A parent used one rule—only open the cold zone when adding milk. Their insulated cooler bag breast milk routine became more stable.
insulated cooler bag breast milk
Insulated cooler bag breast milk: Which ice packs and bag features matter most?
Direct answer: The best setup is the one that keeps ice packs in direct contact with milk containers, with minimal air gaps and a strong zipper seal. Flat packs usually make contact easier than bulky shapes.
insulated cooler bag breast milk
Expanded explanation: People often buy a bigger bag for “flexibility,” then accidentally create a half-empty air chamber that warms faster. In practice, a smaller structured bag that packs tight often performs better.
Best ice packs for breast milk cooler bag reliability
Detailed information: Your goal is steady cold, not extreme cold spots.
| Cold source | Works well for | Watch out for | What it means for you |
|---|---|---|---|
| Gel packs | Daily commuting | Too-cold contact on thin bags | Add a thin barrier if needed |
| Frozen water packs | Strong cooling | Leaks and sweating | Use sealed casings |
| Phase-change packs | Stable cooling range | Higher cost | Helpful for long, hot days |
Cooler Bag Fit Score (self-assessment)
Give yourself 1 point for each “Yes”:
I can freeze two flat packs overnight most days.
My bag fits milk + packs with minimal empty space.
The liner is wipeable and seams look durable.
The zipper closes fully and feels tight.
I can open the milk zone 3 times or less per day.
I have a plan to refrigerate or freeze after arrival.
Score meaning:
0–2: simplify your routine first.
3–4: improve pack contact and reduce air gaps.
5–6: you’re set for a strong insulated cooler bag breast milk routine.
Insulated cooler bag breast milk: Can you fly with it under TSA rules?
Direct answer: Yes. TSA allows breast milk in quantities greater than 3.4 oz (100 ml) and permits cooling accessories like ice packs and gel packs used to cool breast milk. You should expect separate screening.
Expanded explanation: Airport screening is smoother when your kit is tidy and easy to inspect. Your goal is fast inspection with minimal warming. You do not need a perfect speech. You need a calm, repeatable approach.
TSA breast milk cooler bag rules: the low-stress screening script
Detailed information:
“I’m carrying expressed breast milk and cooling packs.”
Keep milk together in one compartment.
Keep cold packs together.
Expect extra screening sometimes and plan extra time.
| TSA moment | What may happen | What you do | What it means for you |
|---|---|---|---|
| Extra screening | Bag pulled aside | Declare calmly | Less chaos, faster finish |
| Slushy packs | Questions about state | Explain purpose | Keeps milk cold and compliant |
| Many containers | “Reasonable amount” check | State travel need | Reduces repacking |
Real-world example: A traveler used a dedicated pouch inside the insulated cooler bag breast milk kit. Screening was quicker and nothing spilled.
insulated cooler bag breast milk
Insulated cooler bag breast milk: How do you keep it clean and low-stress?
Direct answer: Clean it like you’d clean a lunchbox for a baby: wipe spills immediately, wash the liner with mild soap, rinse, and air-dry fully with the bag open. Drying matters because damp seams create odors.
Expanded explanation: Most “sour smell” complaints are not mysterious. They are usually residue + moisture in corners and zipper tracks. A quick routine done often beats occasional deep cleans.
Cleaning an insulated cooler bag for breast milk: Clean–Dry–Air routine
Detailed information:
Empty the bag and remove inserts/dividers.
Wipe spills right away (especially seams).
Wash liner with mild soap + warm water.
Rinse well (soap smell can linger).
Air-dry open for several hours (don’t zip it closed damp).
| Area | Why it matters | What to do | What it means for you |
|---|---|---|---|
| Corners/seams | Residue hides here | Cloth + gentle brush | Less odor and less stress |
| Zipper track | Sticky buildup | Careful wipe | Zipper stays smooth |
| Dividers | Touch bags/bottles | Wash + dry | Cleaner daily routine |
Practical tips and suggestions
After a leak: clean the same day. Dried milk is harder to remove.
If odor persists: extend air-dry time. Moisture is usually the cause.
Keep it dedicated: don’t mix raw foods in the same bag.
Real-world example: One parent stopped storing the bag zipped overnight. Odor problems disappeared without changing products.
2025 latest trends in insulated cooler bag breast milk routines
Trend overview: In 2025, the winning approach is “low-effort safety”: structured bags, flatter ice packs, fewer openings, and clearer handoff routines. CDC continues to emphasize the travel rule—insulated cooler with frozen ice packs up to 24 hours—plus clear thawing and warming guidance.
Latest progress snapshot
More consistent travel planning: clearer expectations for transporting milk and cooling packs.
More workplace support clarity: DOL guidance notes employers must allow a nursing employee to bring a pump and an insulated food container or personal cooler, and provide a place to store them.
More “simple rules” education: AAP parent guidance highlights microwave avoidance and practical storage reminders. HealthyChildren.org
Market insight: The biggest gains still come from habits: pack contact, tight fit, and fewer openings. Gear helps, but routine wins.
Frequently Asked Questions
Q1: How long does insulated cooler bag breast milk stay safe with ice packs?
CDC guidance states up to 24 hours in an insulated cooler with frozen ice packs while traveling, then use, refrigerate, or freeze.
Q2: What temperature should an insulated cooler bag breast milk setup aim for?
Aim for “refrigerator-cold.” FDA recommends keeping refrigerators at or below 40°F (4°C) and freezers at 0°F (-18°C).
Q3: Can I add freshly pumped warm milk into my insulated cooler bag breast milk stash?
If you can, cool the new milk first so it doesn’t warm older milk. This is one of the easiest quality-protection habits.
Q4: What are the TSA breast milk cooler bag rules in plain English?
TSA allows breast milk in quantities greater than 3.4 oz and allows cooling accessories like ice packs and gel packs used to cool it. Expect separate screening.
Q5: What’s the safest way to warm milk after transport?
CDC recommends warming by placing the sealed container in warm water or under warm running water, and avoiding microwaves.
Q6: How long can thawed milk stay in the refrigerator?
CDC guidance says use thawed milk within 24 hours after it is completely thawed (and do not refreeze after thawing).
Summary and recommendations
A strong insulated cooler bag breast milk routine is not complicated. It’s repeatable. Use two fully frozen packs, make them touch the containers, pack tight to reduce air gaps, and minimize openings. Use CDC’s 24-hour travel guidance as your ceiling, then plan conservatively when your day is messy. If your baby is premature or medically fragile, follow your clinician’s guidance first.
Your next-step action plan (start tomorrow)
Freeze two flat packs overnight.
Pack using the cold sandwich method.
Cut your cold-zone openings in half for 7 days.
Transfer to fridge/freezer promptly after arrival.
Keep a quick “risk score” note for hot days and long delays.
About Tempk
At Tempk, we design temperature-control packaging and practical cold chain workflows that fit real life—commutes, pumping schedules, daycare handoffs, and travel delays. We focus on stable insulation performance, simple packout logic, and routines that reduce “warm minutes” without adding complexity.
insulated cooler bag breast milk
Call to action: Tell us your typical commute time, how many bottles/bags you carry, and how many times you open the bag each day. We’ll suggest an insulated cooler bag breast milk packout plan matched to your routine.
Trader Joes Insulated Bag Packing Guide (2025)

Trader Joes Insulated Bag: How to Pack Smarter?
A Trader Joes insulated bag can turn a normal grocery run into a mini cold chain. It helps you keep cold foods at safer temperatures, and frozen foods firmer, for longer. Many food-safety habits use 40°F / 4°C as a practical “keep it cold” line, and a simple “don’t linger too long” time rule. Your Trader Joes insulated bag works best when you pack fast, zip tight, and reduce stops.
In this guide, you’ll learn:
How to choose the right Trader Joes insulated bag size for your routine
How long a Trader Joes insulated bag stays cold (realistic expectations)
How to pack frozen items, dairy, and produce with fewer leaks and odors
A simple Trader Joes insulated bag ice pack placement guide you can repeat
A quick cleaning SOP that avoids mildew and “mystery smells”
What’s new in 2025 that makes insulated grocery habits more important
Which Trader Joes insulated bag size fits your run?
The best Trader Joes insulated bag is the smallest one that fits your cold items. Less air space means slower warming. Bigger is not always better if you only buy a few chilled items.
Think of it like a thermos: a half-empty thermos warms faster than a full one.
Mini vs large: what’s the practical difference?
| Bag option | Best for | Typical basket | What it means for you |
|---|---|---|---|
| Mini insulated tote | Lunch + small runs | 2–6 items | Easier daily habit |
| Large insulated bag | Weekly groceries | Dairy + frozen mix | Fewer temperature surprises |
| Zippered tote style | Longer errands | Mixed chilled + leak risk | Stronger “cold seal” |
Practical tips you can use today
If you buy frozen weekly: start with a larger Trader Joes insulated bag.
If you meal prep daily: a mini tote is easier to carry and keep packed tight.
If you drive far: prioritize a bag that closes fully (zip or tight flap).
Real example: One simple change fixes many problems: pack frozen last, then seal the Trader Joes insulated bag immediately.
How long does a Trader Joes insulated bag stay cold?
A Trader Joes insulated bag buys you time, but it does not create cold. Cold time depends on three things: your starting temperature, your cold source support, and your total “out of refrigeration” time.
If your groceries sit in a warm cart, your Trader Joes insulated bag starts behind. If you pack cold items quickly and keep the bag closed, you gain time.
A quick “cold time” rule you can remember
| Trip pattern | Risk level | What to do | What it means for you |
|---|---|---|---|
| Under 30 minutes | Low | Insulation alone often works | Easy routine |
| 30–90 minutes | Medium | Pack tight + keep it zipped | Better safety margin |
| 90+ minutes | High | Add cold sources | More predictable results |
Practical tips you can use today
Pack it full: dense packing slows warming.
Keep it closed: zipping matters more than people expect.
Avoid trunk heat: the rear floor area is often cooler than the trunk.
Real example: A family with a 60-minute drive kept milk colder by keeping the Trader Joes insulated bag on the rear floor, not in the trunk.
How do you pack a Trader Joes insulated bag like a cold chain pro?
The best Trader Joes insulated bag results come from smart layering. Use one simple rule: cold with cold, wet with wet, crush with crush.
You are trying to build a “cold block” and protect it from warm air and leaks.
Best way to pack frozen foods in an insulated tote
| Packing layer | Option A | Option B | What it means for you |
|---|---|---|---|
| Bottom | Flat ice pack | Dense frozen item | Creates a cold base |
| Middle | Frozen meals/veg packed tight | Frozen proteins packed tight | Less air = slower warming |
| Top | Ice cream centered | Extra ice pack on hot days | Fewer melt-and-refreeze issues |
Practical tips you can use today
Pre-open the bag so you can load fast at checkout.
Fill corners with small frozen items to remove air gaps.
Zip before you leave the store, not in the parking lot.
Real example: A shopper stopped “grainy refrozen” ice cream by moving ice cream to the center and surrounding it with frozen vegetables.
How do you prevent leaks in a Trader Joes insulated bag?
Leak control is the easiest quality upgrade for any Trader Joes insulated bag. Leaks spread odor, create messy cars, and make cleaning feel harder than it should.
Your goal is simple: raw items never touch the bag directly.
Trader Joes insulated bag for meat and seafood safety
| Leak control step | What it does | Best for | What it means for you |
|---|---|---|---|
| Secondary bag (double-bag) | Stops drip spread | Raw meat, seafood | Less cleanup stress |
| Rigid container | Prevents crushing | Fish fillets | Better texture |
| “Wet zone” corner | Isolates risk | Mixed loads | Cleaner routine |
Practical tips you can use today
Seafood run: double-bag and keep it in one bottom corner.
Dairy run: keep dairy in the protected center zone.
Mixed basket: separate raw protein from ready-to-eat foods.
Real example: A shopper ended “fish smell” issues by dedicating one Trader Joes insulated bag to raw items only.
Which ice packs work best with a Trader Joes insulated bag?
Ice packs make Trader Joes insulated bag performance more predictable. You do not need a complicated system. You need consistent shapes, consistent placement, and one “rule of use.”
A common mistake is placing a rock-hard pack directly against delicate items. That can cause freezing spots and condensation.
Trader Joes insulated bag ice pack placement guide
| Your goal | Pack condition | Best placement | What it means for you |
|---|---|---|---|
| Keep dairy chilled | “Conditioned” (not extreme) | Side or bottom | Less freezing risk |
| Keep ice cream firm | Fully frozen | Top + bottom | Better melt resistance |
| Mixed groceries | Mixed strategy | Bottom + one side | Balanced performance |
Practical tips you can use today
Two thin packs beat one thick pack for more even cooling.
Keep packs off leafy greens to avoid freeze damage.
Label packs “CHILL” vs “FROZEN” to prevent mistakes.
Real example: A household improved consistency by storing two labeled packs near the freezer door for fast grabs.
Interactive tool: Which Trader Joes insulated bag should you buy?
Answer these four questions (30 seconds):
How often do you buy frozen foods? Rare / Sometimes / Weekly
How long is your trip home? Under 20 min / 20–60 / Over 60
Do you buy meat or seafood? Never / Sometimes / Often
Do you carry lunch daily? No / Sometimes / Yes
Your result:
If you answered Weekly frozen or Over 60 minutes → choose a large Trader Joes insulated bag first.
If you answered Lunch daily and Under 20 minutes → choose a mini tote first.
If you answered Often meat/seafood → consider two bags: one for raw items, one for ready-to-eat items.
Interactive self-test: Do you need extra cold sources today?
Use this Cold Carry Score before hot-weather trips:
Add points for each category:
Total time from checkout to fridge: Under 30 min (1) / 30–90 (3) / Over 90 (5)
Outside temperature or hot-car risk: Cool (1) / Warm (3) / Very hot (5)
Basket sensitivity: Mostly shelf-stable (1) / Dairy + chilled (3) / Frozen + raw protein (5)
Stops after shopping: None (1) / One (3) / Multiple (5)
Score → What to do
4–8: Trader Joes insulated bag alone is usually fine.
9–14: Add two cold sources and pack tight.
15–20: Keep the bag in the A/C cabin, avoid stops, and unload immediately.
How do you clean a Trader Joes insulated bag without mildew?
A Trader Joes insulated bag should usually be wiped and air-dried, not machine washed. The real enemy is trapped moisture in seams and corners.
Make it a short routine: empty → wipe → wash → dry fully.
Trader Joes insulated bag cleaning and drying steps
| Situation | What to do | What to avoid | What it means for you |
|---|---|---|---|
| Small spill | Wipe + mild soap | Closing while damp | Fewer odors |
| Raw meat leak | Full wash + sanitize step | “Quick wipe only” | Safer reuse |
| Strong odor | Repeat wash + longer dry | Masking with scents | Cleaner experience |
Practical tips you can use today
Dry it like a tent: keep it open until fully dry.
Clean seams twice after milk or seafood.
Store unzipped to prevent trapped moisture.
Real example: A shopper eliminated recurring odors by air-drying the Trader Joes insulated bag overnight instead of folding it right away.
Can you use a Trader Joes insulated bag for hot foods?
Yes, but only for short trips—and keep hot and cold separate. Hot food can create condensation, which leads to odor and lining wear.
If you carry hot items, use a sealed container and clean the bag afterward.
Hot-food quick rules
| Scenario | Works well? | Best practice | What it means for you |
|---|---|---|---|
| Frozen items | Yes | Tight pack + zip | Better texture |
| Chilled items | Yes | Separate raw items | Safer routine |
| Hot meals | Sometimes | Seal + short carry | Less odor buildup |
Practical tips you can use today
Use a dedicated mini tote for one hot container.
Do not “hold for hours” just because it feels warm.
Wipe and dry after hot foods to prevent lingering smells.
Real example: A commuter kept soup hotter by using a preheated, sealed container inside a mini insulated tote.
When is a Trader Joes insulated bag not enough?
A Trader Joes insulated bag is for short transport, not validated shipping. If you are mailing perishables, traveling for many hours, or need documented temperature control, you need a tested cooler system with enough cold sources and (often) temperature tracking.
Use a Trader Joes insulated bag for:
Normal grocery runs
Lunch transport with a cold source
Short picnics with strong time control
Don’t rely on it alone for:
Shipping perishable foods by mail
Long beach days without enough ice/cold sources
Anything requiring documented compliance
Real example: A traveler switched from a tote to a hard cooler for a multi-hour drive and saw far fewer “warm arrival” problems.
2025 trends: why the Trader Joes insulated bag matters more now
In 2025, shopping patterns are changing. More people do multi-stop errands, buy more premium frozen items, and care more about “arrival quality.” That makes the Trader Joes insulated bag less like an accessory and more like a simple quality-control habit.
Latest progress snapshot
Function-based packing: one bag for frozen, one for dairy/protein
Small cold-source kits: a ready-to-go pair of packs in the freezer
Cleaner routines: dry storage and faster wipe-down habits
Last-mile awareness: faster unload and less porch time
Market insight: the best upgrade is rarely a new bag. It is a better routine you can repeat every trip.
Frequently asked questions
Q1: How long does a Trader Joes insulated bag stay cold?
It depends on starting temperature, cold sources, and time. Pack cold items fast, keep it zipped, and reduce stops.
Q2: How to pack a Trader Joes insulated bag for frozen food?
Pack frozen items tightly together, reduce air gaps, and use a bottom-and-top cold source layout on hot days.
Q3: Can a Trader Joes insulated bag keep food under 40°F / 4°C?
It helps, but it is not a refrigerator. Use cold sources and shorten time from checkout to fridge.
Q4: Should raw meat go in a Trader Joes insulated bag with produce?
It’s safer to separate. Keep raw items sealed and positioned below ready-to-eat foods.
Q5: What is the best ice pack placement in a Trader Joes insulated bag?
A flat pack on the bottom plus a smaller pack on the side or top works well for most trips.
Q6: How do I clean a Trader Joes insulated bag after seafood?
Use mild soap, wipe seams, then air-dry fully open. Storing it damp is the fastest odor trigger.
Summary and recommendations
A Trader Joes insulated bag works best when you treat it like a temperature stabilizer, not a portable fridge. Choose the smallest size that stays packed tight. Pack frozen last, zip immediately, and isolate raw proteins in a leak barrier. Add cold sources for long or hot trips. Clean and dry fully to avoid mildew and odors.
CTA (your next trip plan):
Bring one Trader Joes insulated bag for frozen items and one for dairy/protein.
Add one flat cold source to the frozen bag.
Aim to get groceries into refrigeration within one hour.
Repeat for three trips, then adjust packs or stop-count—not the bag.
About Tempk
At Tempk, we build practical temperature-control packaging systems and workflows for real-world last-mile conditions. We focus on repeatable pack-out habits, smart cold-source planning, and validation when you move beyond everyday totes. If a Trader Joes insulated bag is enough for your route, we’ll say so. If you need verified cold chain performance, we’ll help you design it.
Next step: Ask for a “Last-Mile Cold Carry Pack-Out Plan,” and we’ll turn your trip time, climate, and basket mix into a one-page checklist.
EPP Insulation Box Bakery Products: Stop Soggy Orders?
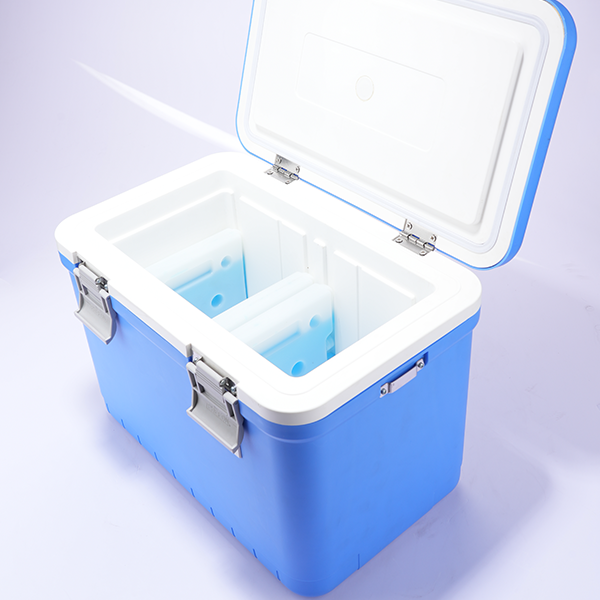
EPP Insulation Box Bakery Products: Stop Soggy Orders?
You can bake perfectly and still lose the customer at the doorstep. Delivery adds heat, humidity, and vibration in minutes. This EPP insulation box bakery products guide shows a workflow that keeps pastries crisp, cakes photo-ready, and chilled fillings stable. Many teams treat cream and custard items as a cold lane and aim to keep them around 41°F (5°C) or colder, while also preventing condensation that turns crust soft.
This article will answer for you
Why last-mile bakery packaging fails and how to fix it
When bakery products temperature control is truly required
How to choose an EPP insulation box bakery products setup by route time
How to control condensation control for bakery delivery packaging
A repeatable pack-out SOP you can train fast
How to validate an EPP insulation box bakery products lane, clean safely, and make reuse pay
A quick EPP insulation box bakery products cost-per-trip mini calculator
Why Bakery Delivery Fails Without an EPP Insulation Box Bakery Products Setup
Direct answer: Bakery delivery fails when moisture condenses, items get crushed, or chilled fillings drift warm. An EPP insulation box bakery products setup reduces heat transfer and absorbs impacts, but packing discipline completes the system.
Bakery products don’t fail like frozen food. They fail emotionally. A smudged cake or soft croissant feels like a broken promise. Temperature swings and trapped moisture are the usual cause.
| Risk | What you see | Why it happens | What it means for you |
|---|---|---|---|
| Condensation | wet box, soggy crust | warm product meets cool air | lower repeat orders |
| Crushing | dents, flattened pastry | stacking and handling pressure | refunds and rework |
| Temperature drift | soft cream, melted chocolate | warm vehicle + long staging | quality complaints |
| Odor transfer | off-smells | mixed loads + weak drying | brand damage |
Condensation control for bakery delivery packaging
Condensation is like fog on a bathroom mirror. Warm moisture meets a cooler surface and turns into droplets. Those droplets land on crust and erase your “fresh-baked” texture fast.
Practical tips for an EPP insulation box bakery products workflow
Cool products before packing. Never pack while steam is visible.
Use inserts so boxes cannot slide and dent corners.
Split warm bread from cold cream desserts on multi-stop routes.
Real-world example: Adding a 20-minute cooling step plus a ventilated inner tray reduced soggy-croissant complaints.
When Do You Need Temperature Control for EPP Insulation Box Bakery Products?
Direct answer: Not every pastry needs refrigeration. The key is whether it is chilled-perishable (often dairy, custard, or cream based). For those items, many programs reference cold holding near 41°F (5°C) or below, and short dwell time matters as much as insulation.
Use lane logic to remove guesswork. Keep “ambient lane” items focused on crush protection and humidity balance. Keep “cold lane” items focused on stable cold holding and minimal staging.
| Category | Examples | Lane choice | What your SOP should focus on |
|---|---|---|---|
| Ambient-stable | bread, many cookies | Ambient lane | crush + humidity balance |
| Quality-sensitive | croissants, glazed donuts | Ambient or cool lane | airflow to avoid sogginess |
| Chilled-perishable | cheesecake, cream pastry | Cold lane | cold packs + time stamps |
| Frozen | ice-cream cake, frozen dough | Frozen lane | prevent thaw spikes |
Bakery products temperature control: the two-lane menu
Ambient lane: ship dry, protect shape, avoid over-sealing.
Cold lane: pre-chill, add refrigerants, and record pack-out time.
Mixed orders: divide lanes inside one EPP insulation box bakery products kit, or use two kits.
What Makes an EPP Insulation Box Bakery Products Program Different?
Direct answer: An EPP insulation box bakery products program protects temperature and structure together. EPP is a closed-cell foam that insulates and also absorbs repeated impacts. That matters when roads are rough and couriers stack loads.
In many datasheets, EPP can show thermal conductivity around 0.037–0.043 W/m·K, which helps slow temperature swings. Think of it as a shock-absorbing thermos for “cold and beautiful.”
EPP insulation box bakery products vs EPS foam shipper
| Container type | Thermal stability | Crush protection | Best fit for you |
|---|---|---|---|
| EPP insulation box bakery products | strong, consistent | strong for repeat impacts | reuse loops + premium delivery |
| EPS foam shipper | strong | medium | one-way shipping |
| Hard plastic cooler | medium–strong | strong | durable but heavier |
How Do You Choose the Right EPP Insulation Box Bakery Products Size?
Direct answer: Choose size for stability and fit, not maximum capacity. Oversized boxes create air voids and movement. Undersized boxes increase crushing and slow packing.
Right sizing keeps products flat, reduces shifting, and makes vans easier to load. Standardizing 2–3 sizes reduces packing errors and speeds dispatch.
How to choose an EPP insulation box bakery products setup (decision tool)
Answer these four questions:
Do you ship tall cakes above 12 cm often?
Do you run multi-stop routes with stacking?
Do you ship mixed ambient + chilled items together?
Do you see corner dents or frosting smears?
If you say “yes” twice, prioritize snug fit, locking trays, and interlocking lids.
| Sizing factor | What to check | Common mistake | Practical meaning for you |
|---|---|---|---|
| Footprint | board + tray dimensions | rubbing sidewalls | smeared edges |
| Height | toppers, domes, piping | lid contact | instant premium damage |
| Refrigerant space | pack placement zones | packs touch product | freezing spots or soggy surfaces |
| Stability space | rails, blocks, dividers | empty voids | sliding and tilt damage |
How Do You Pack an EPP Insulation Box Bakery Products Order?
Direct answer: A reliable EPP insulation box bakery products pack-out uses a repeatable three-zone layout: stability zone, product zone, cooling zone. The product should not move, should not touch refrigerant, and should not see warm air rushing in.
Your biggest ROI often comes from stopping movement, not adding more coolant. This is why photo-based SOPs beat “tribal knowledge.”
Packing SOP (simple, repeatable)
Pre-cool chilled items, packs, and the EPP box when possible.
Add an anti-slip mat and a rigid base board.
Build a no-touch buffer with rails, corner blocks, or a tray.
Place refrigerants on sides and top, with a thin barrier sheet.
Seal, label “keep upright,” and time-stamp pack-out.
| Layer | What to use | Why it helps | What it means for you |
|---|---|---|---|
| Bottom | anti-slip mat + rigid board | stops sliding | fewer tilted cakes |
| Sides | rails or blocks | creates no-touch zone | protects glazing and piping |
| Top | barrier sheet + top pack | reduces lid heat gain | less warm softening |
| Product | inner cake box / tray | keeps presentation clean | better unboxing moment |
Gel packs vs PCM packs for EPP insulation box bakery products
Simple rule: in an EPP insulation box bakery products cold lane, your goal is stable, not “as cold as possible.” Some PCM packs can be chosen to hold closer to a target range, reducing accidental freezing compared with very cold gel packs.
| Refrigerant choice | Best for | What can go wrong | What to do |
|---|---|---|---|
| Gel packs | simple chilled runs | over-cold contact spots | keep a barrier + no-touch zone |
| PCM packs | tighter temperature targets | wrong PCM for the lane | match PCM to your target range |
How Do You Reduce Condensation in EPP Insulation Box Bakery Products Deliveries?
Direct answer: Condensation control is the #1 texture lever for flaky pastries. Pre-cool products, reduce warm air entry, reduce empty air voids, and keep cold packs off crisp crust.
Condensation forms when warm humid air meets a cold surface. So reduce humidity inside the box and avoid cold “hot spots” on the product.
The “Warm Product Trap” self-test (0–5)
Give yourself 1 point for each “yes.”
Warm items enter without a cooling step.
Refrigerants touch the inner box or tray.
Large empty voids remain inside the EPP box.
Lids are opened repeatedly during staging.
High-surface-area crust items ship next to cold packs.
Score guide
0–1: low risk.
2–3: moderate risk—adjust layout.
4–5: high risk—your current SOP will struggle.
| Scenario | What goes wrong | Fix | What it means for you |
|---|---|---|---|
| hot bread packed immediately | condensation builds | add cooling time | crisp crust preserved |
| croissants sealed in plastic | crust softens | ventilated tray | better crunch |
| cake box slides inside | smearing | locking insert | fewer refunds |
How Do You Protect Cakes in EPP Insulation Box Bakery Products for Cake Delivery?
Direct answer: Most cake damage is motion, not temperature. Use a “three-lock” approach: lock cake-to-board, box-to-EPP, and EPP-to-vehicle. This stabilizes decoration during express delivery.
Even small vibrations can smear frosting and shift toppers. The box is the shell, but inserts and handling rules complete the system.
| Stability layer | Tool | What it prevents | What it means for you |
|---|---|---|---|
| Cake to board | non-slip pad | micro-sliding | clean edges |
| Box to EPP | insert tray | corner dents | fewer replacements |
| EPP to van | straps / tote lanes | tip-over | fewer damage claims |
Practical driver rules
Avoid stacking decorated cakes unless the system is proven.
Keep cakes away from direct refrigerant contact to avoid drip.
Add “no hard braking” discipline for cake loads.
How Do You Validate and Monitor EPP Insulation Box Bakery Products Lanes?
Direct answer: You don’t need sensors on every order. You need lane tests, pass/fail rules, and a short checklist. Start with one route, one box size, and one pack-out recipe.
A practical program uses temperature control, time control, or a hybrid. If you use time-only controls, confirm local requirements before rollout.
The 7-day validation plan
Pick one route and one box size.
Use one packout kit every time.
Test mild weather and a worst-case day.
Record pack time, pickup time, delivery time, delays.
Define pass/fail for temperature drift and damage rate.
Update the SOP once, then train everyone.
| Validation item | What you track | Common fail point | What it means for you |
|---|---|---|---|
| staging time | minutes before pickup | orders wait too long | fix cutoffs first |
| temperature drift | simple indicator | doorstep dwell | add scheduled windows |
| condensation score | visual checklist | warm-to-cold swings | add liners + airflow control |
| damage rate | photos at delivery | stacking vibration | improve dividers + handling |
Interactive tool: Delivery Readiness Score (0–10)
Give 1 point for each “yes.”
We classify items as ambient, chilled, or frozen.
We use a photo-based EPP insulation box bakery products layout.
We record pack-out time on cold-lane shipments.
We prevent direct pack contact with products.
We use dividers for mixed orders.
We test lanes in summer and winter.
We have a doorstep-delay plan.
We have a cleaning + drying SOP.
We log exceptions and update recipes.
We track returns and losses.
0–4: fix basics.
5–7: scale carefully.
8–10: ready to grow.
How Do You Clean and Reuse an EPP Insulation Box Bakery Products Fleet?
Direct answer: Reuse works when cleaning is routine, drying is complete, and inspection is simple. A reusable EPP insulation box bakery products fleet pays off only when “yesterday’s smell” never reaches today’s customer.
Drying is often the hidden failure point. Wet stacking creates odors and weakens confidence. A drying rack and a short checklist usually fix more than stronger chemicals.
Cleaning SOP for EPP insulation box bakery products reuse (7 steps)
Remove liners and debris.
Wash seams and lid edges with food-safe detergent.
Rinse to remove residue.
Sanitize with correct concentration and contact time.
Air-dry fully (no wet stacking).
Inspect for cracks, odor, lid fit.
Store clean in a protected area.
Quick reuse readiness score (0–10)
Score 0–2 for each item:
Written cleaning checklist
Controlled drying (not stacked wet)
Return tracking and counting
Pre-reuse inspection
No mixed-odor loads
8–10: ready to scale reuse.
5–7: pilot on limited routes.
0–4: fix basics first.
Food-contact and sanitation documentation (keep it simple)
If you sell across markets, keep a “proof packet”:
EU plastics food-contact documentation aligned with Regulation (EU) 10/2011.
EU framework documentation aligned with Regulation (EC) 1935/2004.
U.S. polypropylene food-contact statement aligned with 21 CFR 177.1520.
Intended use conditions: temperature, contact type, cleaning limits.
Is an EPP Insulation Box Bakery Products Program Worth the Cost?
Direct answer: The right question is cost per successful delivery. An EPP insulation box bakery products program reduces refunds when you control non-returns, cleaning time, and damage rate.
Mini calculator:
Cost per trip = (box cost ÷ expected trips) + cleaning + return logistics + loss allowance
| ROI lever | What moves it most | What you do | What it means for you |
|---|---|---|---|
| Return rate | deposits + reminders | schedule returns | predictable cost |
| Damage rate | dividers + training | “no stack” rules | more reuse cycles |
| Cleaning time | station design | fewer touches | lower labor |
| Loss rate | tracking | QR scan at handoff | protects ROI |
2025 Trends Shaping EPP Insulation Box Bakery Products
In 2025, bakery delivery is judged on consistency, not novelty. Teams are standardizing pack-out recipes, building reusable loops, and validating lanes before promotions.
A clear driver is packaging waste pressure and circular systems. In the EU, PPWR entered into force on February 11, 2025, with broad application scheduled about 18 months later.
Latest progress snapshot
More route-based packaging by route time and product type.
More reuse loops where reverse logistics is realistic.
More “presentation-first” design focused on unboxing.
EPP Insulation Box Bakery Products FAQ
Q1: Do all bakery products need an EPP insulation box bakery products setup?
No. Many breads and cookies can use an ambient lane. Cream-filled items often need a cold lane and tighter controls.
Q2: What temperature should cold-lane items target?
Many programs reference cold holding around 41°F (5°C) or below for perishable foods. Keep staging short and record pack-out time.
Q3: Will an EPP insulation box bakery products setup stop soggy pastries?
It helps, but pre-cooling and airflow matter more. Avoid packing while steaming and use ventilated trays for flaky crust.
Q4: Can I ship bread and cream cakes together?
It’s possible but risky. Warm bread adds moisture that can harm chilled desserts. Use dividers or ship as two lanes.
Q5: How often should I lane-test?
Test in hot months and after any change to couriers, routes, or pack-out recipes. Small tests prevent seasonal refund spikes.
Q6: Are EPP boxes safe to reuse for bakery delivery?
Yes, when you standardize cleaning, sanitizing, drying, and inspection. Odor control usually improves when drying is consistent.
EPP Insulation Box Bakery Products Summary and Recommendations
An EPP insulation box bakery products workflow protects what customers judge: texture and presentation. Classify products by lane, right-size the box, lock products in place, and manage condensation like a KPI. Then validate one lane and scale with proof, not guesswork.
Action plan (next steps)
Pick your top 3 SKUs by revenue.
Assign each SKU to ambient or cold lanes.
Standardize one EPP insulation box bakery products pack-out with photos.
Run a 7-day EPP insulation box bakery products lane test, then train every packer in 15 minutes.
Add a return + cleaning loop before scaling.
About Tempk
At Tempk, we help teams build practical, repeatable EPP insulation box bakery products systems for fragile, temperature-sensitive deliveries. We focus on right-sized EPP boxes, insert layouts that prevent crushing, and lane test plans that fit real routes. The goal is fewer refunds, better reviews, and consistent arrivals for every bakery order.
CTA: Share your product list, delivery window, and weather range. We’ll map an EPP insulation box bakery products recipe you can pilot immediately.
Collapsible EPP Insulation Box Supplier Guide 2025
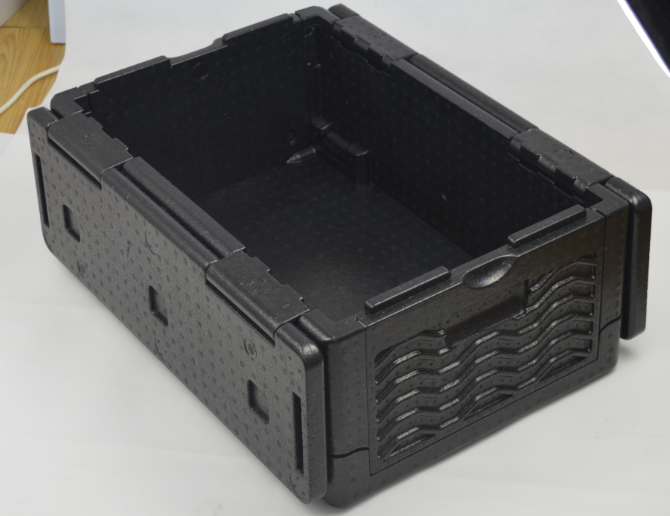
How to Choose a Collapsible EPP Insulation Box Supplier?
If you’re choosing a collapsible EPP insulation box supplier, you’re not buying “a box.” You’re buying repeatable temperature protection, faster returns, and fewer failures. Your fastest win is to treat supplier selection like a mini-validation project: specs → tests → pilot → scale. A good collapsible EPP insulation box supplier will welcome that structure, because it keeps performance stable when volume grows.
This article will help you:
Qualify a collapsible EPP insulation box supplier in weeks, not months
Write RFQ specs for a foldable insulated box for cold chain that get consistent quotes
collapsible EPP insulation box …
Validate hold time with a simple 7-day lane test and clear pass/fail rules
collapsible EPP insulation box …
Protect reuse economics with temperature-controlled packaging returns logistics and nesting ratio planning
collapsible EPP insulation box …
Compare suppliers using a weighted scorecard, not marketing claims
collapsible EPP insulation box …
Why choose a collapsible EPP insulation box supplier instead of rigid boxes?
A collapsible EPP insulation box supplier is a strong choice when empty-return volume and storage space are real costs. Collapsibility reduces “paying to ship air,” and it can simplify peak-season storage. But collapsible designs add hinges, seams, and latches—so supplier engineering and QC matter more than with rigid boxes.
Expanded polypropylene (EPP) is popular because it is lightweight, impact-resistant, and insulating. The catch is simple: material potential is not the same as system performance. Your supplier’s design and process control decide whether you get months of reuse or a fast failure cycle.
When collapsible wins in temperature-controlled packaging returns logistics
| Decision factor | Collapsible option | Rigid option | What it means for you |
|---|---|---|---|
| Empty returns | Lower cube | Higher cube | Lower backhaul pressure |
| Storage between peaks | Smaller footprint | Larger footprint | Less warehouse congestion |
| Failure risk | Higher (moving parts) | Lower (fewer parts) | Supplier quality matters more |
| Training speed | Must be “easy” | Often simpler | Design must guide correct assembly |
Practical tips you can use immediately
If you do returns weekly: choose a collapsible EPP insulation box supplier only if your team will actually fold boxes every time.
If assembly is slow: your staff will skip steps, and insulation will leak at seams.
If you lack a return loop: a rigid shipper may be the safer first step.
Real-world example: A regional chilled-food operator cut empty-return cube after switching to collapsible units and enforcing a “folded return” SOP. Damage dropped again after latch upgrades and a simple fold-cycle check at receiving.
What should you check first in a collapsible EPP insulation box supplier?
Check the supplier’s system, not the sample. A perfect sample can hide weak tooling control, inconsistent density, or hinge fatigue that appears after repeated folding. A reliable collapsible EPP insulation box supplier will show process evidence early, not “trust us” language.
A fast screening approach is: paper screen → prototype + tests → pilot loop. This prevents the classic mistake: buying thousands of units based on appearance.
A 3-stage supplier screening flow (fast and low-drama)
Paper screen (1–2 days): capability, tooling approach, QC checkpoints
Prototype + test (2–4 weeks): thermal + mechanical + hygiene checks
Pilot loop (4–8 weeks): damage rate, cleaning time, return compliance
Supplier fit scorecard (10 minutes)
Score each item 0–2. A strong collapsible EPP insulation box supplier usually scores 14+ quickly.
| Scorecard item | Good looks like | Bad looks like | Your outcome |
|---|---|---|---|
| Material spec clarity | density/tolerance listed | “standard foam” | fewer surprises |
| Collapsible mechanism | locks align every time | loose hinges | fewer assembly errors |
| Seal concept | gap control explained | visible gaps | better hold time |
| QA checkpoints | incoming + in-process | final-only | less batch variance |
| Pilot support | test plan + review | “buy MOQ first” | learn before scaling |
Practical tips and advice
Ask one blunt question: “How do you prevent silent changes in molds or materials?”
Require a pilot-friendly MOQ: learning units beat warehouse units.
Insist on production-representative samples: not “special prototypes.”
Real-world example: A meal-kit brand reduced cracked-corner losses by rejecting a supplier who could not explain hinge fatigue targets.
Which RFQ specs matter most for a collapsible EPP insulation box supplier?
Your RFQ should translate “keep it cold” into measurable specs. If you only ask for “collapsible EPP box,” you will get random interpretations. A good collapsible EPP insulation box supplier actually prefers a strict RFQ, because it prevents disputes later.
collapsible EPP insulation box …
RFQ essentials you can copy/paste
Include these fields to force apples-to-apples quotes: internal volume, assembled and collapsed dimensions, density range, wall thickness tolerances, stack load, fold-cycle target, temperature band, cleaning method, and accessories.
collapsible EPP insulation box …
Two specs matter more than buyers expect:
Fold-cycle requirement (example target: 500–2,000 folds)
collapsible EPP insulation box …
Temperature use case (chilled 2–8°C, CRT 15–25°C, frozen)
collapsible EPP insulation box …
H3: RFQ spec table (what to write and why)
| RFQ spec | What to write | What to verify | What it means for you |
|---|---|---|---|
| Fold cycles | 500–2,000 target | hinge/latch evidence | collapsible survival collapsible EPP insulation box … |
| Temp band | 2–8°C / 15–25°C / frozen | lane validation | avoids “almost safe” deliveries collapsible EPP insulation box … |
| Collapsed size | exact dimensions | nesting stack test | return cost control |
| Stack load | static + dynamic | squareness under load | prevents lid gaps |
| Cleaning method | wipe/wash/sanitizer | surface + odor behavior | faster reuse cycles |
Practical tips and advice
Don’t “over-spec” insulation first. Seal quality often beats thicker walls.
State your coolant ecosystem. If you use gel packs or PCM, the box must support consistent placement.
collapsible EPP insulation box …
Lock tolerance expectations early. Collapsible seams punish sloppy fit.
Real-world example: A city grocer improved outcomes by adding a clear “collapsed size” and “fold-cycle” requirement, which removed weak designs from bidding.
How do you test thermal hold time with a collapsible EPP insulation box supplier?
You validate the full system: box + lid + seams + coolant layout + real handling time. A lab claim can still fail in summer traffic or doorstep dwell. Your collapsible EPP insulation box supplier should support lane-based testing, because that’s what you actually ship.
collapsible EPP insulation box …
A lane-based validation plan you can run in 7 days
Ask your collapsible EPP insulation box supplier to support this simple plan: worst-case day, production pack-out, two sensors, three trips (short/typical/worst), then review excursion minutes and peaks.
collapsible EPP insulation box …
| Test step | Ambient condition | Pass/fail metric | What it means for you |
|---|---|---|---|
| Short run | typical day | no early spikes | quick-turn confidence collapsible EPP insulation box … |
| Normal run | seasonal average | stable slope | everyday reliability collapsible EPP insulation box … |
| Worst run | seasonal extreme | excursion minutes limit | refund risk reduction collapsible EPP insulation box … |
Practical tips and advice
Don’t over-ice. Too much coolant can damage chilled products.
collapsible EPP insulation box …
Test door-open events. Last-mile reality matters.
collapsible EPP insulation box …
Use seasonal pack-outs. Summer and winter should differ.
collapsible EPP insulation box …
Real-world example: A dairy shipper reduced excursions by adjusting summer pack-out and moving coolant away from direct contact.
collapsible EPP insulation box …
Which design features should your collapsible EPP insulation box supplier prove?
A collapsible EPP insulation box supplier must control the weak points: seams, corners, closures, and hinges. That is where heat leaks, cracks start, and assembly fails under speed. Your best shortcut is the “3S” rule: Square, Seal, Stack.
H3: The 3S rule for a foldable insulated box for cold chain
| 3S check | What to look for | Common failure | What it means for you |
|---|---|---|---|
| Square | panels align flush | twisted body | lid gaps and fast heat gain |
| Seal | even lid contact | corner lifting | hotspot leaks at seams |
| Stack | stable under load | sliding/tipping | damage, delays, unsafe handling |
Practical tips and advice
Demand self-guiding alignment. Rushed workers should still “build it right.”
Treat seams like air control. Insulation fails when air moves through gaps.
Choose latch designs that work with gloves. Cold hands and wet hands are real.
Real-world example: A retailer reduced assembly errors after switching to a design with better alignment locks. Workers stopped “half-building” boxes.
How do you validate durability, hinge fatigue, and cleaning with a collapsible EPP insulation box supplier?
Test three things: temperature hold, mechanical survival, and operational speed. If you test only temperature, you miss hinge fatigue. If you test only strength, you miss seam leaks.
collapsible EPP insulation box …
The minimum test bundle (high value, low drama)
Run lane-based thermal hold, drop/vibration checks, fold-cycle fatigue, and hygiene behavior checks like wipe-down time and odor retention.
collapsible EPP insulation box …
H3: Durability and hygiene checks table
| Check | What you do | Pass signal | What it means for you |
|---|---|---|---|
| Drop handling | realistic drop heights | no corner splits | fewer losses collapsible EPP insulation box … |
| Fold-cycle fatigue | repeat fold/unfold | locks still align | stable assembly collapsible EPP insulation box … |
| Seal drift | inspect seam fit | no new gaps | predictable hold time |
| Cleanability | measure wipe-down time | fast and repeatable | more reuse cycles collapsible EPP insulation box … |
| Odor behavior | food-lane trial | low retention | fewer rejected returns collapsible EPP insulation box … |
Practical tips and advice
Create a simple A/B/C grading rule: reuse vs repair vs retire.
Keep one approved cleaning list: the wrong chemical can shorten life.
Add a “fold-cycle spot check” at receiving: you catch bad batches early.
Real-world example: A seafood shipper reduced “mystery cracks” after requiring a fold-cycle test and tightening latch alignment checks.
What quality evidence separates a real collapsible EPP insulation box supplier from a trader?
A real collapsible EPP insulation box supplier can answer process questions clearly and show repeatable evidence. A weak one sends generic brochures and avoids test methods.
collapsible EPP insulation box …
Supplier scorecard (0–100) you can use in procurement
Score each line 0–5, then multiply by weight.
collapsible EPP insulation box …
| Category | What you check | Weight | Why it matters |
|---|---|---|---|
| Tooling control | in-house mold + revision tracking | 15 | prevents silent changes collapsible EPP insulation box … |
| Hinge durability | fold-cycle target + evidence | 15 | collapsible failure point collapsible EPP insulation box … |
| Fit and seal | seam design + tolerance discipline | 10 | prevents heat leaks collapsible EPP insulation box … |
| Thermal validation | lane-based tests + reports | 10 | proves hold time collapsible EPP insulation box … |
| QC system | incoming + in-process + final | 10 | reduces variance collapsible EPP insulation box … |
| Traceability | lot coding + corrective actions | 10 | faster root cause fixes collapsible EPP insulation box … |
| Hygiene readiness | cleanability guidance + finish | 10 | critical for food/pharma collapsible EPP insulation box … |
Practical tips and advice
Ask for one rejected-part example. Good suppliers explain defects fast.
Ask what changes trigger a written notice. Change control protects you.
Ask for spare parts strategy. Latches and lids often fail first.
Real-world example: A shipper avoided a season of failures by catching a silent material change during supplier review.
How do you compare price and MOQ for a collapsible EPP insulation box supplier without being fooled?
Compare total cost per successful delivery cycle, not unit price. A cheap box can be expensive if it breaks early, returns poorly, or adds labor minutes. Your collapsible EPP insulation box supplier should help you model lifecycle cost, because that is how you scale confidently.
H3: Simple TCO model (interactive calculator)
Fill in the blanks and compare suppliers fairly:
Unit cost (box + lid + accessories): ____
Expected cycles before replacement: ____
Damage/loss rate per cycle (%): ____
Cleaning + handling minutes per cycle: ____
Return cost per cycle (driven by nesting ratio): ____
Break-even cycles ≈ (Extra cost of better box) ÷ (Savings per cycle)
| Cost element | What to include | Hidden driver | What it means for you |
|---|---|---|---|
| Unit cost | all parts, labeling, pockets | customization | cash tied up |
| Operating cost | assembly + cleaning | labor minutes | real profitability |
| Loss cost | damage + missing returns | accountability | small losses compound |
Practical tips and advice
Negotiate a pilot MOQ. Learning first prevents big waste later.
Ask for spare latches. You can extend body life.
Price the failure. One warm shipment can erase many “cheap box” savings.
Real-world example: A frozen-food seller paid slightly more per unit, but total cost fell due to fewer failures and better nesting.
How do you optimize returns logistics with a collapsible EPP insulation box supplier?
Returns are where collapsibility pays—or fails. A collapsible EPP insulation box supplier should design for your real return path: who folds, who counts, and how boxes get protected during backhaul. If return steps are vague, you will lose boxes and savings.
H3: Nesting ratio calculator (quick decision tool)
Use this estimator:
Empty boxes returned per week: ____
Truck space per pallet position: ____
Nesting ratio claimed (e.g., 3:1, 4:1): ____
Cost per return trip: ____
A nesting improvement from 2:1 to 4:1 can drop empty-space cost dramatically.
collapsible EPP insulation box …
| Nesting ratio | Empty return volume | Return cost pressure | Your practical outcome |
|---|---|---|---|
| 2:1 | High | Painful | reuse loses its savings collapsible EPP insulation box … |
| 3:1 | Medium | Manageable | stable reuse economics collapsible EPP insulation box … |
| 4:1+ | Low | Strong | easier scale across cities collapsible EPP insulation box … |
Practical tips and advice
Standardize one collapse method. “Everyone does it differently” drives damage.
Make counting easy. Visible IDs and clear handoff ownership reduce loss.
collapsible EPP insulation box …
Protect collapsed boxes. Use return bins to prevent scraping and crushing.
Real-world example: A grocery operator improved driver compliance after switching to a design that folds in one motion and nests cleanly.
collapsible EPP insulation box …
2025 latest developments and trends for collapsible EPP insulation box supplier programs
In 2025, the “best” collapsible EPP insulation box supplier is less about foam alone and more about evidence, operations, and repeatability. Buyers are pushing reusable systems harder, and they expect proof: lane results, cleaning practicality, and change control.
Latest progress snapshot
Operations-first design: faster assembly, clearer alignment, fewer seal leaks
Return-ready systems: better nesting ratio behavior and simpler counting workflows
Audit-friendly documentation: spec control, traceability, and repeatable validation packs
Smarter asset handling: more programs tie returnable assets to tracking and standardized SOPs
Market insight: the supplier who helps you standardize a small “box family system” (shared parts, shared QC rules, shared pack-out SOP) will outperform a supplier who only sells custom shapes.
Frequently asked questions
Q1: How do I know a collapsible EPP insulation box supplier is reliable?
Look for process evidence (QC gates, change control, test methods) and run a pilot that measures damage rate and hold time.
collapsible EPP insulation box …
Q2: What should I test first with a collapsible EPP insulation box supplier?
Start with a lane pilot: temperature stability, assembly time, return success, and visible damage after real deliveries.
collapsible EPP insulation box …
Q3: What fold-cycle target should I put in my RFQ?
Use a measurable requirement (for many programs, 500–2,000 folds is a practical starting range), then validate with fatigue testing.
collapsible EPP insulation box …
Q4: Can a collapsible EPP insulation box supplier support last-mile delivery?
Yes, if the design stays square under load, seals consistently, and survives door-open events and rushed handling.
Q5: What is the biggest hidden cost in reusable collapsible boxes?
Returns logistics. Nesting ratio and loss rate can decide whether reuse saves money or loses money.
collapsible EPP insulation box …
Q6: How do I reduce losses in a reusable program?
Make counting easy and consistent: a simple return SOP, visible IDs, and clear responsibility at each handoff.
collapsible EPP insulation box …
Summary and recommendations
A collapsible EPP insulation box supplier is the right partner when you need insulation, impact protection, and a return-ready workflow. Start by demanding clear RFQ specs, a repeatable collapsible mechanism, and a quality plan you can audit. Then run lane-based validation and a small pilot to measure damage rate, assembly speed, and return compliance. Finally, lock one pack-out recipe and one return SOP so results stay repeatable at scale.
collapsible EPP insulation box …
Next step (CTA): Pick one delivery lane, define your temperature band and route time, and run a 10–30 shipment pilot with measured results to choose your best collapsible EPP insulation box supplier.
collapsible EPP insulation box …
About Tempk
Tempk supports cold chain teams designing reusable packaging systems that fit real operations. We focus on clear specs, repeatable SOPs, and lane-based validation plans that reduce surprises after mass production. We help you compare a collapsible EPP insulation box supplier using measurable criteria—like fold-cycle durability, seam performance, cleanability, and return efficiency—so your program stays stable as volume grows.
collapsible EPP insulation box …
Call to action: Request a supplier scorecard template and a lane validation plan tailored to your routes.
Compact EPP Box Custom Size: 2025 Spec Guide
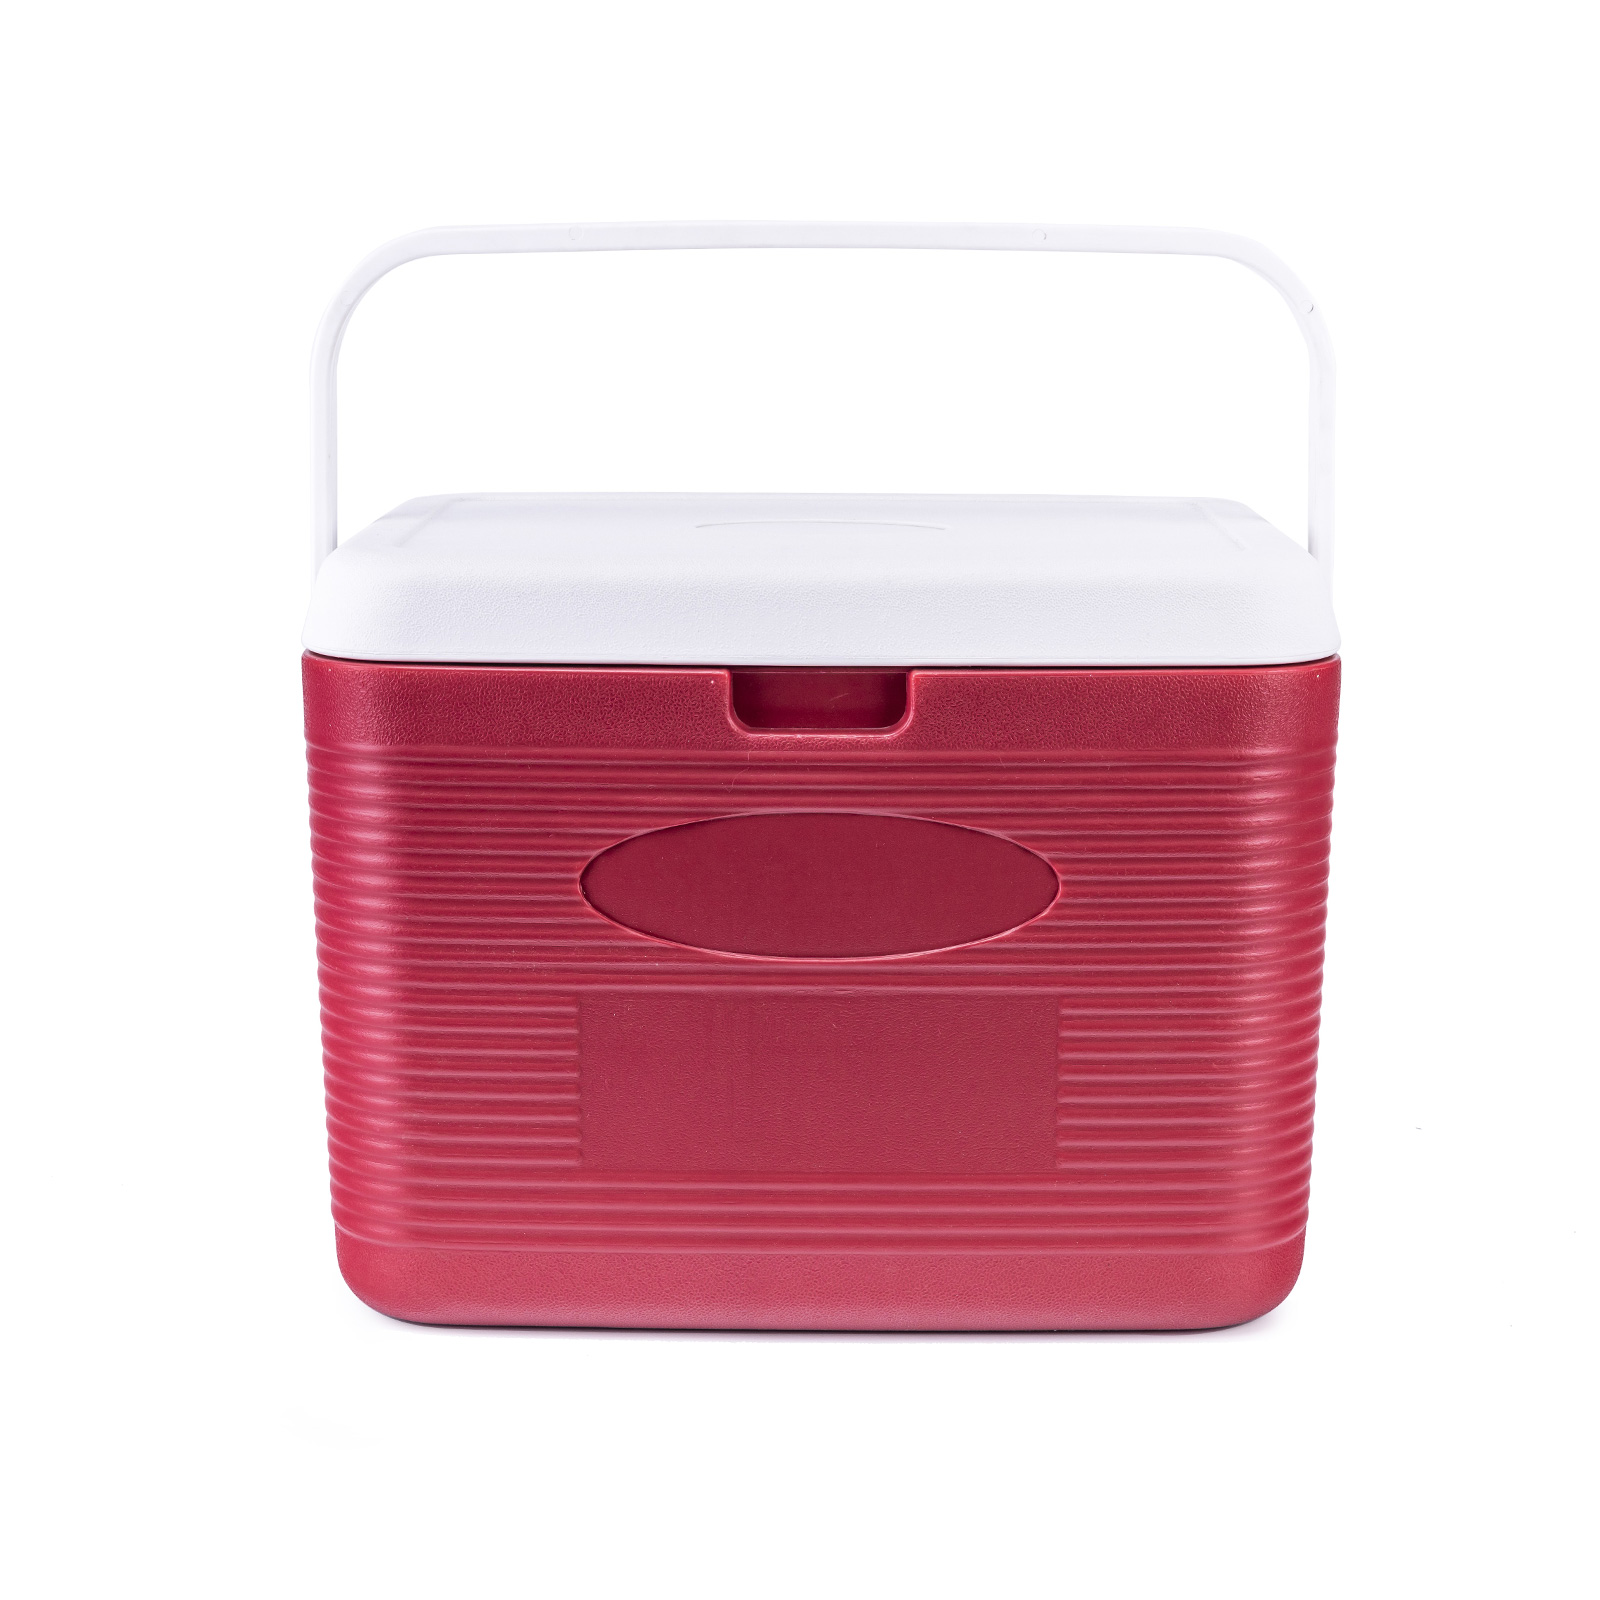
Compact EPP Box Custom Size: How to Spec It?
Last updated: December 17, 2025.
A compact EPP box custom size is the fastest way to stop paying for empty air while protecting temperature and product condition. When the fit is right, you use less coolant and get fewer crushed corners. One brand cut box volume by 12% but learned the hard way that “too tight” increases returns.
compact EPP box custom size
You’ll learn how to size, build, and validate a compact system that packs consistently—even on busy days.
This article will help you answer:
How to define compact using custom EPP insulated box dimensions and tolerance
How to use a fast sizing tool for custom size EPP box for gel packs
How to pick EPP box wall thickness selection without overbuilding
How to improve consistency using inserts, lids, and closure choices
How to validate and run reusable cold chain packaging loops in 2025
Why does a compact EPP box custom size beat standard sizes?
A compact EPP box custom size wins because it makes packing repeatable. Standard sizes are “close enough” for general shipping, not your real payload and coolant layout. When the inside is too loose, product moves and coolant drifts. When it’s too tight, lids bulge and seal gaps appear.
In simple terms, you want a box that packs the same way every time. If your team has three “acceptable” pack-outs, you will get three different outcomes. A practical “compact score” is to confirm the lid closes smoothly, the pack-out stays stable, and stacking feels solid.
compact EPP box custom size
Compact Score (interactive self-check)
Give yourself 1 point for each “yes”:
Product + insert + coolant fits with no deformation
The lid closes with one smooth motion
Pack-out completes in under 60 seconds
Two boxes stack with no rocking
The box fits your crate/shelf with no overhang
compact EPP box custom size
| Compact Score | What it means | What to do next | Your practical benefit |
|---|---|---|---|
| 0–2 | Too tight or too loose | Adjust clearance + coolant “home” | Fewer lid gaps and packing errors |
| 3–4 | Workable | Standardize pack-out SOP | Less variance between shifts |
| 5 | Truly compact | Validate and scale | Lower cost per successful delivery |
Practical tips you can use immediately
If lids bulge: add a small clearance rule (start around single-digit mm) and stop forcing closures.
If product shifts: add an insert pocket before adding more coolant.
If packers improvise: design the inside so “wrong placement” is physically difficult.
Practical case: A kit fit perfectly, but the lid pressed on caps. A small clearance rule stopped leaks and rework.
compact EPP box custom size
How do you calculate compact EPP box custom size dimensions?
Start from the packed-out “core block,” not the empty box. Your compact EPP box custom size should fit product + secondary packaging + insert + coolant + small airflow gaps + tolerance. This prevents the most common failure: a box that fits product, but not the full system.
Use this fast sizing calculator to turn real measurements into a repeatable spec. It uses practical allowances (mm) for protection, airflow, and production variation.
compact EPP box custom size
5-step sizing calculator (interactive)
Measure in mm, then add:
Payload outer size (L×W×H): include lids and seals
Protection allowance: add 5–20 mm each side (fragility-based)
Coolant allowance: reserve space for gel packs (one-side / two-side / top-bottom)
Airflow allowance: add 3–8 mm where you want circulation
Tolerance: add 2–5 mm for production + packing variation
compact EPP box custom size
Inner size = payload + protection + coolant + airflow + tolerance
Outer size = inner size + 2 × wall thickness
compact EPP box custom size
Choose your coolant layout (decision tool)
| Coolant layout | Space impact | Temperature stability | What it means for you |
|---|---|---|---|
| One-side | Low | Low–medium | Smallest box, highest risk |
| Two-side | Medium | Medium | Good compromise |
| Top/bottom | Medium | High | Stable, avoids side crush |
| All-around | High | Highest | Best for long lanes |
Practical tips and suggestions
If you use gel packs: design a flat pocket so packs don’t fold.
compact EPP box custom size
If you use dry ice: plan venting and block direct contact zones.
compact EPP box custom size
If you ship liquids: reserve space for absorbent + leak containment.
Practical case: A lab shipper cut packing time by 30% by adding molded rails that guide coolant placement.
compact EPP box custom size
Which wall thickness and density fit your compact EPP box custom size?
Pick performance based on route risk, not best-case transit. A compact EPP box custom size can still fail if wall thickness is too thin for stacking and reuse. Your goal is the thinnest design that still hits temperature, handling, and cycle-life targets.
A simple rule that reduces costly surprises: validate for one extra day beyond your promised lane time. If delays happen, that extra margin prevents panic reships.
compact EPP box custom size
Mini hold-time estimator (interactive)
Circle one option in each line:
Route time: <6h / 6–24h / 24–72h
Ambient risk: indoor / mixed / hot curbside
Coolant strategy: none / small packs / large packs
Product sensitivity: tolerant / moderate / high
If you choose two or more “high-risk” options, improve insulation and layout before adding extra gel packs.
compact EPP box custom size
| Thickness band | Best for | Tradeoff | What it means for you |
|---|---|---|---|
| Thin | Short routes | Lower insulation | Lower cost, smaller box |
| Medium | Mixed routes | Balanced | Best everyday choice |
| Thick | Long routes | Larger outer size | Less coolant waste |
Practical tips and suggestions
Protect the lid: a small lid gap behaves like a fridge door left cracked open.
compact EPP box custom size
If corners crush after cycles: add ribs/corner columns before blindly increasing size.
compact EPP box custom size
If you stack high: design for stiffness and repeat handling, not “one-time survival.”
How do inserts and coolant lanes stabilize a compact EPP box custom size?
Inserts turn your box into a system. The box gives insulation and impact resistance. The insert controls movement, makes packing faster, and keeps coolant in the same place every time.
When you want fewer temperature complaints and fewer breakage claims, inserts often deliver more improvement than “one more gel pack.” Inserts also reduce training time because the correct placement becomes obvious.
compact EPP box custom size
Insert options that scale
| Insert type | Durability | Packing speed | What it means for you |
|---|---|---|---|
| EPP insert | High | Fast | Best for reuse loops |
| Corrugated divider | Medium | Medium | Good for one-way |
| Pocket tray | High | Medium | Best for fragile/premium |
| Coolant channels | High | Fast | Most consistent temperature |
Practical tips and suggestions
Glass or jars: use a pocket tray and keep a small clearance from outer walls.
compact EPP box custom size
Meal kits: separate wet and dry components with a divider.
compact EPP box custom size
Pharma samples: use coolant channels so packs don’t touch product directly.
compact EPP box custom size
Practical case: A cosmetics shipper reduced cracked jars by switching to a pocket tray and tightening the internal fit slightly.
compact EPP box custom size
How do you design lids and closures for a compact EPP box custom size?
Most real-world failures happen at the lid. Not because EPP is weak, but because lids get forced closed when pack-outs are inconsistent. If a lid doesn’t seat, you lose temperature time fast.
compact EPP box custom size
Design your compact EPP box custom size so closure is effortless. If your closure needs “extra push,” operators will improvise. That creates gaps, damage, and inconsistent results.
Lid and closure choices that operators can repeat
| Closure option | Speed | Security | What it means for you |
|---|---|---|---|
| Friction-fit | Very fast | Medium | Best for internal distribution |
| Tape | Medium | Medium | Adds waste, varies by packer |
| Strap | Fast | High | Strong for external shipping |
| Latches | Fast | High | Great for reusable fleets |
Practical tips and suggestions
Add a lid-fit indicator mark so teams can spot bad closure instantly.
compact EPP box custom size
Design for gloves if packing happens in cold rooms.
compact EPP box custom size
Avoid tape dependency in reusable loops (it creates residue and degrades consistency).
compact EPP box custom size
Practical case: A courier reduced packing mistakes by adding tactile grips that made lid orientation obvious.
compact EPP box custom size
How do you validate a compact EPP box custom size before scaling?
Validation is how you turn packaging into a predictable process. You are proving temperature performance, handling durability, and packing consistency. If you only test the empty box, you are testing the wrong thing.
A simple, fast plan is to time real operators, run worst-case ambient tests, and do drop/vibration checks. Then lock the spec and stop changing variables.
compact EPP box custom size
10-day validation plan (simple and repeatable)
Day 1–2: timed pack-out trials with operators
Day 3–5: temperature trials in worst-case ambient
Day 6–7: drop and vibration handling tests
Day 8–9: wash/sanitation trials (if reusable)
Day 10: review data and lock specifications
compact EPP box custom size
| Test focus | What you measure | Pass/fail example | What it means for you |
|---|---|---|---|
| Temperature | Time in range | ≥X% in band | Fewer quality losses |
| Handling | Corner crush | No structural failure | Fewer replacements |
| Operations | Pack time | Under target seconds | Lower labor cost |
Practical tips and suggestions
Use real products, not water bottles. Thermal behavior changes with mass and packaging.
compact EPP box custom size
Test the full system: box + insert + coolant + strap + label.
compact EPP box custom size
Document pack-out photos and turn them into a one-page SOP.
How do you source and run reusable loops for compact EPP box custom size programs?
Reusable success is logistics, not just material. Your compact EPP box custom size becomes most valuable when it returns reliably, cleans easily, and stays dimensionally stable.
Sourcing goes smoother when your RFQ is specific: dimensions, tolerance, density targets, closure style, inserts, cycle-life goal, and QC proof. You also want change control so suppliers don’t silently swap density or material.
compact EPP box custom size
Supplier scorecard (interactive)
Score each supplier 0–2 (0=no, 1=partial, 2=yes):
Provides density range and part weight targets
Shares first-article dimensional report
Explains tolerance control and shrink risk
Offers insert/layout support
Has clear change-control process
Can provide sample lead times and pilot pricing
compact EPP box custom size
Score guide:
0–4: high risk
5–8: workable
9–12: strong candidate
Reuse loop checklist (quick)
| Reuse step | What you do | How often | What it means for you |
|---|---|---|---|
| Visual inspection | Lid/corners check | Every return | Prevent silent failures |
| Cleaning | Wash + fully dry | As needed | Hygiene and brand trust |
| Fit test | Quick close test | Every return | Confirms seal integrity |
| Retirement | Remove damaged units | Threshold-based | Avoid repeat complaints |
Practical tips and suggestions
Make returns simple: clear instruction card + predictable return method.
Add an ID zone: labels or tags make recovery and auditing easier.
Track three KPIs: loss rate, damage rate, and cycle count.
2025 latest developments and trends for compact EPP box custom size
In 2025, teams treat a compact EPP box custom size as an operational tool, not just insulation. The shift is toward SKU-driven sizing, insert-led standardization, and validation-first rollouts. When packaging saves seconds per pack and reduces failures, it usually beats a slightly cheaper box that causes mistakes.
compact EPP box custom size
Latest progress snapshot
SKU-driven sizing: many programs start with 2–4 optimized sizes instead of one “universal” box.
Insert-led training: molded rails and pockets reduce packing variance and speed onboarding.
Data-driven validation: temperature mapping and handling data are required before scaling.
Hygiene + reuse focus: cleaning-friendly geometry and replaceable components extend cycle life.
Frequently asked questions
Q1: How compact can a compact EPP box custom size be without hurting temperature?
Compact is fine until coolant bends, the lid deforms, or airflow becomes uneven. Keep space for flat coolant contact, a small airflow gap, and tolerance. If closure needs force, it’s too tight.
compact EPP box custom size
Q2: How many sizes should you start with?
Start with two sizes plus inserts. You’ll cover most order patterns without creating inventory chaos. Add a third size only after you confirm stable demand and pack-out repeatability.
Q3: What is the biggest mistake in compact EPP box custom size projects?
Sizing only for the product and forgetting “system space” for coolant, inserts, and tolerance. That mistake creates lid gaps, packing delays, and inconsistent temperature performance.
compact EPP box custom size
Q4: How do you reduce coolant use without increasing risk?
First improve fit and eliminate empty air. Next stabilize coolant with channels or rails. Then adjust wall thickness if routes are unpredictable. Add more coolant last, not first.
Q5: Can one compact EPP box custom size work for chilled and frozen?
It can, but it often forces compromises in layout and coolant placement. Chilled and frozen shipments behave differently. If both are high volume, separate pack-outs (or separate inserts) are usually safer.
Q6: What’s one simple QC check before mass production?
Require a first-article dimensional report and a quick lid-gap test on real pack-outs. Add change control so no silent density or process changes appear after approval.
compact EPP box custom size
Q7: How do you stop gel packs from freezing one side of the payload?
Use top/bottom coolant or add a thin buffer layer so packs don’t touch product directly. Channels and trays also help keep contact flat and consistent across shifts.
Q8: What validation shortcut prevents most reship emergencies?
Design and validate for one extra day beyond promised transit. Delays happen, and that margin prevents panic decisions and refund spikes.
compact EPP box custom size
Summary and recommendations
A compact EPP box custom size works best when it’s compact after pack-out, not just on a drawing. Measure your real shipped payload, define coolant geometry, and include airflow and tolerance. Use inserts to lock placement and speed packing, and treat the lid as the critical seal. Validate with real operators and worst-case conditions, then lock the spec and scale.
Next steps (clear CTA)
List your top 5 order configurations and measure them as shipped.
Choose two candidate sizes and define one standard pack-out for each.
Run a short validation plan (hot ambient + delay + handling).
Send suppliers a complete RFQ package and require first-article + change control.
About Tempk
At Tempk, we help cold-chain teams turn packaging into a repeatable delivery process. We support compact EPP box custom size programs by translating route risk into clear specs: inside clearance, coolant layout, inserts, closures, and validation steps. We focus on measurable outcomes—fewer damages, fewer temperature complaints, and faster packing—so your operation stays stable as volume grows.
CTA: Share your payload dimensions, target temperature band, route time, and expected reuse cycles. We’ll outline two compact EPP box custom size layouts to prototype first.
EPP Transport Box Vaccine Transport Guide (2025)
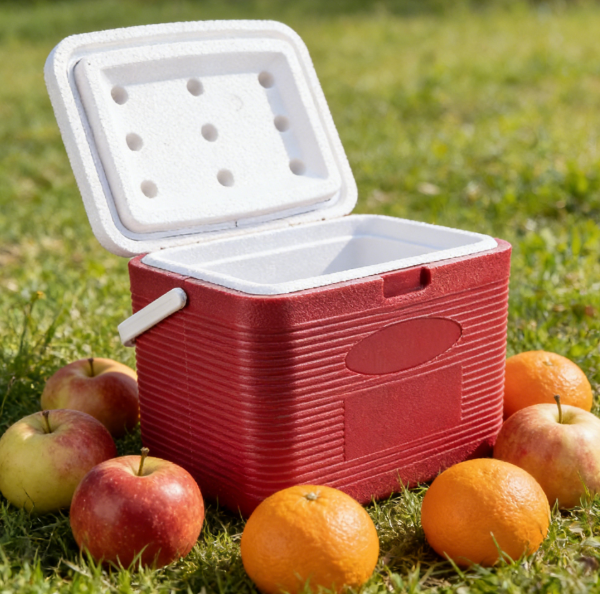
EPP Transport Box Vaccine Transport: Get It Right?
EPP transport box vaccine transport works best when you treat it as a repeatable system, not a one-off cooler. In 2025, the biggest failures still come from small, human steps: the lid not fully sealed, the packout improvised, or the logger placed in the wrong spot. The goal is simple: keep vaccines in-range for your lane time, and prevent invisible freeze damage on 2–8°C routes.
This article will answer for you:
How an EPP transport box vaccine transport system reduces day-to-day variation
Which temperature lanes your EPP transport box vaccine transport SOP must cover (2–8°C, frozen, CTC)
How to prevent vaccine freezing during transport with a “no-contact” packout pattern
Where to place monitoring devices for audit-friendly evidence
A lane decision tool + a 10-minute self-test to find your biggest excursion risk fast
2025 trends: smarter monitoring workflows, reuse programs, and easier audits
Why is EPP transport box vaccine transport a practical choice?
Direct answer: EPP transport box vaccine transport is practical because EPP is durable, lightweight, and stays consistent across repeat handling. That consistency matters because your real enemy is process variation, not just outside heat.
EPP transport box vaccine trans…
Expanded explanation: Think of EPP like a “foam spring.” It absorbs bumps and returns to shape, so the cavity geometry and lid fit don’t drift as quickly over repeated trips. When the shape stays stable, your EPP transport box vaccine transport packout becomes easier to repeat—even when different people pack the box.
EPP transport box vaccine trans…
What should you ask your supplier about EPP design?
| Design check | What to confirm | What it changes | Practical meaning for you |
|---|---|---|---|
| Wall thickness | Standard thickness per model | Hold time | Fewer “surprise” warm-ups |
| Lid seal + latch | Seal feel + latch reliability | Leak points | Fewer hidden excursions |
| Interior geometry | Divider / insert options | Packout repeatability | Less guesswork at peak time |
| Cleanability | Surface + cleaning method | Reuse discipline | Faster reissue without drama |
Practical tips you can use immediately
High-frequency routes: choose reinforced corners and a lid that “clicks” into place.
EPP transport box vaccine trans…
Multi-stop delivery: prioritize latch reliability over maximum capacity.
EPP transport box vaccine trans…
Audit pressure: use box IDs + cleaning records to match reuse cycles.
EPP transport box vaccine trans…
Practical case example: A regional route reduced damage replacements after switching to EPP shippers that kept shape during repeated stacking.
EPP transport box vaccine trans…
How does EPP transport box vaccine transport keep vaccines in range?
Direct answer: EPP transport box vaccine transport protects stability by slowing heat transfer and reducing short temperature spikes during handling. The box does not “make cold,” but it buys you time when doors open, pallets move, or routes run late.
EPP transport box vaccine trans…
Expanded explanation: In real operations, three levers control results: insulation performance, refrigerant strategy, and packout discipline. If you only optimize one lever, your EPP transport box vaccine transport performance still swings with people and weather.
EPP transport box vaccine trans…
Why lid fit and air gaps matter more than you think
| Packout element | Good practice | Bad practice | Practical meaning for you |
|---|---|---|---|
| Lid closure | full seal every time | “almost closed” | hidden warming events |
| Air space | minimal free air | large voids | faster drift |
| Refrigerant contact | buffered | direct contact | freeze risk or hot spots |
| Payload placement | centered | against wall | uneven temperature |
The “air inside the box” behaves like liquid in a cup: if it can slosh, it spreads heat faster. A disciplined EPP transport box vaccine transport packout reduces free air movement and blocks direct cold contact.
EPP transport box vaccine trans…
Practical tips you can use immediately
Center the payload and keep a buffer layer between packs and cartons.
EPP transport box vaccine trans…
Tape a one-page packout diagram to the packing station.
EPP transport box vaccine trans…
Train “close-the-lid” as a critical control step, not a habit.
EPP transport box vaccine trans…
Practical case example: A clinic route improved stability after switching from “packs on top only” to a balanced side-and-top layout with a buffer sheet.
EPP transport box vaccine trans…
Which temperature lanes should EPP transport box vaccine transport support?
Direct answer: EPP transport box vaccine transport must match the lane your vaccines actually run: refrigerated (often 2–8°C), frozen, and special cases like Controlled Temperature Chain (CTC) where labeling allows.
EPP transport box vaccine trans…
Expanded explanation: Build one “main lane” first—your highest-volume route profile—then add specialty packouts only where needed. Most teams fail when they try to support every edge case with one complicated EPP transport box vaccine transport recipe.
Lane map you can standardize across sites
| Lane type | Control goal | Main risk | What you standardize |
|---|---|---|---|
| Refrigerated | 2–8°C band | accidental freezing | buffer + conditioning + spacing |
| Frozen | product-specific | thawing on delays | more thermal capacity + fewer openings |
| CTC (eligible only) | labeled ambient tolerance | misuse on non-CTC | separate SOP + clear checks |
CTC programs are not “anything goes.” They are labeled use cases with specific conditions and indicators.
EPP transport box vaccine trans…
Practical tips you can use immediately
For refrigerated lanes, never let cold packs touch cartons directly.
EPP transport box vaccine trans…
Don’t mix freeze-sensitive and frozen-required SKUs in the same EPP transport box vaccine transport packout.
EPP transport box vaccine trans…
Treat CTC as a separate workflow with separate labels and checks.
EPP transport box vaccine trans…
Practical case example: A team reduced “too cold” events after adding an internal spacer layer and conditioning packs before packing.
EPP transport box vaccine trans…
How do you prevent vaccine freezing during EPP transport box vaccine transport?
Direct answer: In EPP transport box vaccine transport, the most dangerous failures are often “too cold,” because freeze damage can be hard to see. Your packout must prevent direct contact between very cold refrigerants and vaccine cartons.
Expanded explanation: The safest pattern is simple: separation + conditioning + standardized placement. You are not trying to “maximize cold.” You are trying to protect the payload core.
The “no-freeze” packout pattern (simple and repeatable)
| Control | What you do | Why it works | Your benefit |
|---|---|---|---|
| Separation | buffer sheet / spacer layer | blocks cold shock points | fewer hidden losses |
| Conditioning | condition packs per SOP | avoids over-cold starts | less “too cold” risk |
| Consistency | fixed diagram + fixed counts | removes improvisation | fewer packing errors |
Practical tips you can use immediately
Use a fixed-thickness buffer as a rule, not a suggestion.
Ban “packs under vials” on 2–8°C lanes.
If staff rotate roles, use a photo SOP so results stay consistent.
Practical case example: A distributor reduced suspected freeze events after adding a standardized buffer and banning direct contact layouts.
How do you choose the right EPP transport box vaccine transport design?
Direct answer: Choose EPP transport box vaccine transport design based on lane duration, ambient exposure, handling intensity, and the packout you want people to repeat. If you choose only by internal volume, you usually lose performance.
Expanded explanation: A reliable selection flow is: define lane time → define payload + buffer space → choose wall thickness and geometry that fit one standard packout. Repeatability is the hidden KPI.
A checklist you can use today
Hold time target: how long must the payload stay in range?
Ambient exposure: mild, hot season, winter, or mixed?
Handling: one handoff or multi-stop route?
Payload: vials, kits, mixed SKUs?
Monitoring needs: pocket location, seal labels, box ID area?
Box geometry and closure choices that affect repeatability
| Design choice | Helps with | Tradeoff | Practical meaning for you |
|---|---|---|---|
| Thicker EPP walls | longer stability | less internal volume | fewer excursions |
| Strong latches | consistent seal | slightly higher cost | fewer SOP failures |
| Flat lid | easy stacking | gasket care needed | faster routing |
| Dividers/inserts | payload protection | cleaning steps | fewer damage claims |
Practical tips you can use immediately
If turnover is high, choose simpler packouts and stronger latches.
If last-mile stops are frequent, prioritize quick reseal and consistent closure.
If mixed SKUs move inside the box, add dividers to stop shifting.
Practical case example: A multi-clinic route improved after switching to boxes with more reliable latches and a fixed divider layout.
Which refrigerants pair best with EPP transport box vaccine transport?
Direct answer: In EPP transport box vaccine transport, the “best” refrigerant depends on your lane target and your freeze-risk tolerance. Many teams use conditioned gel packs for simple refrigerated lanes, and tuned PCM (phase change material) when they want tighter control.
Expanded explanation: Think of PCM like a thermal battery near your target range. It smooths spikes, but only when conditioned correctly. Dry ice can be useful for ultra-cold needs, but it adds special compliance steps.
Refrigerant comparison table
| Refrigerant | Best for | Main risk | Practical meaning for you |
|---|---|---|---|
| Conditioned gel packs | simple 2–8°C lanes | over-cold contact | needs buffer discipline |
| PCM (tuned) | tighter 2–8°C stability | wrong conditioning | needs standard timing |
| Lower-temp PCM | frozen lanes | thawing on long delays | reduce headspace + add mass |
| Dry ice | ultra-cold lanes | compliance + venting | trained workflow only |
Practical tips you can use immediately
Reduce headspace before adding “more ice.” Air gaps cause drift.
EPP transport box vaccine trans…
Label refrigerants by lane so wrong-pack mistakes drop fast.
If you use dry ice, treat it as a compliance process (trained staff + documented steps).
How do you pack an EPP transport box vaccine transport shipment?
Direct answer: EPP transport box vaccine transport packing should be a recipe, not a craft. When the recipe is fixed, you can scale routes without scaling risk.
Expanded explanation: The winning packout is the one your team can execute on the hardest day. Use a short checklist, a visual diagram, and a consistent logger position.
HowTo: Pack an EPP transport box for vaccine transport (8 steps)
Confirm lane profile (refrigerated vs frozen).
Condition refrigerants to the correct starting state.
Inspect the box: cracks, lid fit, latch function, cleanliness.
Place base refrigerants (if used) with a buffer layer.
Center the payload and keep it off the walls.
Add side/top refrigerants per the standard diagram.
Insert the temperature monitor in its defined position.
Close, latch, label, and record start time + box ID.
What your “standard diagram” must include
| Diagram element | Include this | Why it matters | Practical meaning for you |
|---|---|---|---|
| Refrigerant map | number + positions | stops guessing | fewer packout errors |
| Buffer layer | exact thickness | controls freeze risk | safer outcomes |
| Logger placement | fixed location | comparable data | faster investigations |
| Closure check | latch + seal step | prevents leaks | fewer hidden warms |
Practical tips you can use immediately
Keep a laminated packout diagram at the station.
Photograph the “gold standard” finished packout for training.
Add a two-step closure check: close → latch → tug test.
Practical case example: A warehouse cut packing mistakes after moving from tribal knowledge to a laminated diagram and a two-step closure check.
Where should you place the data logger in EPP transport box vaccine transport?
Direct answer: In EPP transport box vaccine transport, place the logger where it represents product conditions—not against refrigerants and not on the lid. A consistent “core pocket” near the payload is usually the most representative.
EPP transport box vaccine trans…
Expanded explanation: Logger placement errors create fake problems: against PCM reads too cold, near the lid reads too warm. Fixing logger placement often eliminates “mystery excursions.”
EPP transport box vaccine trans…
Logger placement table (easy rule set)
| Placement | What it tends to read | How it misleads you | Better approach |
|---|---|---|---|
| Against refrigerant | cold surface | false “too cold” | spacer + near product core |
| Near lid | boundary air | false “too warm” | mid-core between cartons |
| Core pocket | product-adjacent | most representative | standardize every trip |
Practical tips you can use immediately
Use one standard logger pocket in every packout.
EPP transport box vaccine trans…
Record start time and close time so curves are interpretable.
EPP transport box vaccine trans…
Review excursions with context: ambient heat, delays, and handoffs.
EPP transport box vaccine trans…
Practical case example: A team moved the logger from the lid to the product core and “mystery excursions” disappeared.
EPP transport box vaccine trans…
How do you qualify and validate EPP transport box vaccine transport performance?
Direct answer: EPP transport box vaccine transport qualification proves your packout works on your real lane, not just in a catalog test. Define pass/fail first, test worst-case, and lock the SOP once it is stable.
EPP transport box vaccine trans…
Expanded explanation: The simplest validation approach is: route profile → worst reasonable day simulation → field pilot with loggers → lock SOP. This turns your EPP transport box vaccine transport performance into something you can defend in audits.
EPP transport box vaccine trans…
Minimal validation plan (audit-friendly)
| Step | What you do | What you capture | Practical meaning for you |
|---|---|---|---|
| Route profiling | map time + ambient + handoffs | lane definition | stops “one packout fits all” |
| Stress test | simulate worst day | temperature curve | finds margin early |
| Field pilot | 10–20 real shipments | variability patterns | reveals last-mile risks |
| SOP lock | fix recipe + training | repeatability | scaling becomes safe |
Practical tips you can use immediately
Write acceptance criteria before testing.
EPP transport box vaccine trans…
Test worst-case days (heat waves, long weekends).
EPP transport box vaccine trans…
Keep pilots dense: 10–20 shipments reveal patterns quickly.
EPP transport box vaccine trans…
Practical case example: A team found most drift happened in the final two hours, so they changed delivery sequencing and regained margin.
EPP transport box vaccine trans…
How do you clean and reuse EPP transport box vaccine transport containers?
Direct answer: Reuse is a major benefit of EPP transport box vaccine transport, but only when cleaning, inspection, and release are controlled. Treat each box like an asset with a life record.
EPP transport box vaccine trans…
Expanded explanation: The best reusable programs are boring: receive, inspect, clean, dry, reissue, track cycles. When you skip steps, warped lids and worn latches become temperature leaks.
EPP transport box vaccine trans…
Reuse workflow you can copy
| Step | What you check | Common failure | Practical meaning for you |
|---|---|---|---|
| Receive back | cracks, odor, dents | hidden lid warping | reject early |
| Clean | defined method + contact time | rushed cleaning | use a checklist |
| Dry | no trapped moisture | mold risk | dry fully before storage |
| Reissue | label + cycle count | untracked life | track drift over time |
Practical tips you can use immediately
Track cycle counts; performance can drift if lids deform.
EPP transport box vaccine trans…
Replace seals proactively; it’s cheaper than excursions.
EPP transport box vaccine trans…
Store clean boxes closed to keep dust out and speed packing.
EPP transport box vaccine trans…
Practical case example: A program reduced failures after adding a simple lid-fit test at reissue.
EPP transport box vaccine trans…
Decision tools for EPP transport box vaccine transport
Use these tools to standardize choices across teams and sites.
Tool 1: Lane scoring (2 minutes)
Check and total:
Lane time under 12 hours (1) / 12–36 hours (2) / 36–72 hours (3)
EPP transport box vaccine trans…
Summer ambient often above 30°C (2)
EPP transport box vaccine trans…
Multi-stop handoffs unpredictable (2)
Freeze-sensitive product in the lane (2)
Audit-ready evidence required (2)
Score guide:
0–4: standard EPP + conditioned packs + simple logger
5–8: EPP + tuned PCM + calibrated logger + strict SOP
9+: high-margin system + redundancy + route qualification
Tool 2: 10-minute risk self-test (fast win finder)
Score each 0–2 (0 = not in place, 2 = consistent):
Packout diagram is used every time
Refrigerants are conditioned consistently
Buffer layers are standardized (same thickness each time)
Lid closure is verified with a simple check
Box IDs and cycle counts are tracked
Cleaning is documented and consistent
Logger placement is fixed (same spot each trip)
Payload is centered and protected from contact
Delay rules exist (what to do when routes slip)
Staff can explain “why” the rules matter
Interpretation:
0–7: fix standard work + closure discipline first
8–14: fix conditioning + monitoring consistency
15–20: use logger data for continuous improvement
How do you calculate total cost for EPP transport box vaccine transport?
Direct answer: EPP transport box vaccine transport is usually cheaper when you measure total cost, not purchase price. The best metric is “cost per successful delivery,” not “cost per shipper.”
EPP transport box vaccine trans…
Expanded explanation: Single-use packaging can look cheap until you add repeat purchases, damage, waste handling, and excursion losses. Reusable EPP looks expensive until you count cycles and reduced failures.
EPP transport box vaccine trans…
A cost table you can adapt
| Cost element | Single-use approach | Reusable EPP approach | What changes in practice |
|---|---|---|---|
| Packaging spend | repeats every trip | spread across cycles | predictability improves |
| Handling damage | higher crush risk | lower damage risk | fewer incident reports |
| Temperature failures | depends on packing | depends on SOP + validation | validation saves money |
| Labor time | variable | more standardized | faster training |
Practical tips you can use immediately
Track excursion cost, not just excursion count.
EPP transport box vaccine trans…
Set a target cycles-per-box and simplify returns if messy.
EPP transport box vaccine trans…
Stop custom packouts; standardization cuts labor fast.
EPP transport box vaccine trans…
Practical case example: One program found reusable EPP won after roughly a dozen-plus cycles because packing time and reship losses dropped.
EPP transport box vaccine trans…
2025 trends in EPP transport box vaccine transport
Trend overview: In 2025, the biggest performance gains are coming from clearer SOPs, better monitoring workflows, and stricter lane-based standardization. Teams are also separating special-lane programs (like CTC where labeling allows) from routine refrigerated operations.
EPP transport box vaccine trans…
Latest progress you can use
More freeze-prevention discipline: spacer-first packing patterns are spreading.
EPP transport box vaccine trans…
More performance language: buyers ask for holdover/hold-time definitions and test conditions.
EPP transport box vaccine trans…
More field-ready standardization: fewer kit types, more visual SOPs, faster training.
EPP transport box vaccine trans…
Market insight: The winners “package for the lane, train for the lane, and document for the lane.”
EPP transport box vaccine trans…
Internal link suggestions (3–5)
Frequently asked questions
Q1: What is EPP transport box vaccine transport best for?
It is best for repeat lanes where durability, stable geometry, and reuse make performance more consistent.
Q2: Can EPP transport box vaccine transport handle multi-stop routes?
Yes, if you standardize lid closure checks, packout diagrams, and logger placement on every stop.
Q3: How do I prevent vaccine freezing during transport?
Use separation (buffer layer), conditioned refrigerants, and a fixed layout so cartons never touch very cold packs.
Q4: Do I need monitoring on every shipment?
If you ship frequently, monitoring improves investigations, training feedback, and audit readiness.
Q5: How do I know my reusable box is drifting over time?
Track cycle count, inspect lid fit and latches, and compare temperature curves across trips for faster warm-up patterns.
Summary and recommendations
A strong EPP transport box vaccine transport program is built on repeatability. Standard packouts beat best-effort packing. Lid fit, air gaps, and buffer layers drive real-world stability. Monitoring only helps when logger placement is consistent. Reuse only helps when cleaning, inspection, and cycle tracking are controlled.
Your next step (clear CTA)
Start this week with one lane: pick your highest-volume route, create one gold-standard EPP transport box vaccine transport packout, photograph it, laminate the diagram, and train every packer to match it. Then review logger curves weekly and improve one variable at a time.
About Tempk
At Tempk, we design cold chain packaging systems that teams can run under pressure. We focus on repeatable packouts, durable reusable EPP designs, and audit-friendly workflows that reduce temperature excursions. Our goal is to help you standardize EPP transport box vaccine transport across routes and seasons with fewer surprises.
Next step: Share your lane duration, ambient exposure, payload size, and target temperature band, and we’ll help map a practical packout and monitoring setup you can standardize.
Cold Chain Meat Regulations: 2025 Compliance Guide
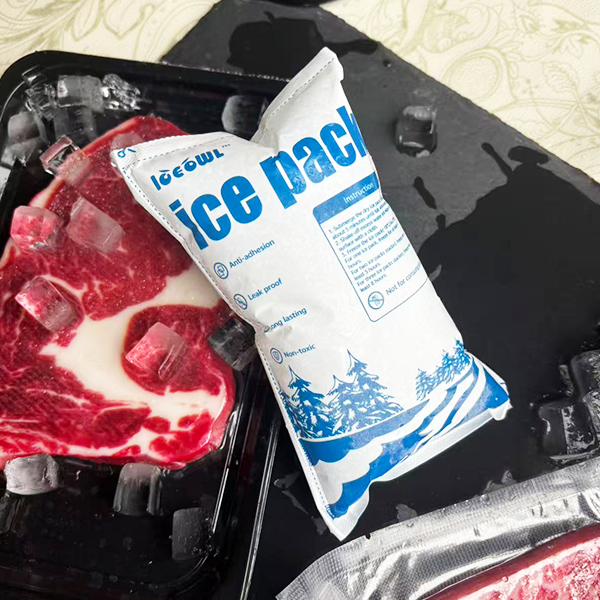
Cold Chain Meat Regulations: Are You Compliant in 2025?
You follow cold chain meat regulations to do three simple things: keep meat cold, keep it clean, and keep it provable. In 2025, that last part—proof—matters more than ever. A 20-minute door-open delay, one missing log, or an unclear handoff can trigger rejected loads and costly claims. This guide turns cold chain meat regulations into practical routines you can run on your busiest day, without adding paperwork your team hates.
This article will answer for you:
How to build a cold chain meat regulations checklist you can use per load
Which temperature requirements for chilled meat transport show up most often
What records belong in an audit evidence pack for meat cold chain compliance
How to reduce risk at handoffs, staging, and last-mile delivery
What to expect from 2025 trends in audits, traceability, and enforcement
What do cold chain meat regulations actually require?
At a high level, cold chain meat regulations require you to control hazards and prove control. The numbers can change by product and country, but the expectation stays consistent. You must prevent time-temperature abuse, avoid contamination, and keep traceability records that can be retrieved fast.
Think of cold chain meat regulations as three doors:
Temperature door: keep the product in a defined “cold lane.”
Hygiene door: prevent contamination during handling and transport.
Evidence door: show what happened, when, and who acted.
If one door fails, the shipment becomes questionable.
The “Big Three” translated into operations
| Compliance focus | What it means in plain language | What you should track | What it means for you |
|---|---|---|---|
| Temperature control | Keep product within defined limits | Product temp + warm minutes | Fewer claims and rejections |
| Hygiene control | Keep surfaces, tools, and hands clean | Sanitation checks + trailer checks | Lower contamination risk |
| Proof and traceability | Prove identity and handling | Lot IDs + timestamps + logs | Faster audits and disputes |
Practical tip
Compliance is not “we usually do it right.”
Compliance is “we can prove we did it right—quickly.”
Which temperatures matter under cold chain meat regulations?
Cold chain meat regulations are temperature-driven because pathogens and spoilage accelerate when meat warms. Most systems separate product into chilled lanes and frozen lanes, then require you to maintain those lanes through storage, loading, transport, and delivery.
The hidden risk is not a single reading. It is temperature stability over time.
Why stability beats “cold enough”
A stable lane keeps quality predictable. Repeated swings create condensation and texture loss. If frozen product partially thaws and refreezes, it can look fine but eat poorly. For chilled product, small warm events can quietly shorten shelf life.
| Meat category | Typical control goal | Common failure mode | Practical impact on you |
|---|---|---|---|
| Chilled meat | Stay in a chilled lane | Warm staging and door time | Shorter shelf life and odor risk |
| Frozen meat | Stay deeply frozen | Partial thaw and re-freeze | Texture complaints and returns |
| Ready-to-eat meat | Tight temp + hygiene | Cross-contact + warm minutes | High safety and brand risk |
Practical temperature controls you can start this week
Measure product temperature, not only truck air temperature.
Track “warm minutes” during staging, loading, and multi-stop delivery.
Limit door-open time with a visible timer and an assigned owner.
Put sensors where heat enters, like door zones and top-front pallets.
Real example: A distributor reduced rejections after enforcing a “no warm loading” gate and logging carton temperatures.
A simple “temperature lane” statement you can copy
Chilled lane: “Product ships and travels in a chilled lane, with controlled door time and documented exceptions.”
Frozen lane: “Product stays frozen end-to-end, with a no-partial-thaw rule and excursion decisions documented.”
These two lanes make cold chain meat regulations easier to train, measure, and audit.
What hygiene rules sit inside cold chain meat regulations?
Cold only slows bacteria. It does not remove contamination. That is why cold chain meat regulations treat hygiene as a core pillar, not an extra step. Inspectors look for clean equipment, controlled employee practices, separation between raw and ready-to-eat items, and routine sanitation evidence.
The most common hygiene failure points
Shared tools crossing zones
Incomplete cleaning between shifts
Leaks and drips contaminating floors and pallets
Cross-contact during loading and mixed loads
| Hygiene control | What inspectors look for | The simplest workable standard | What you gain |
|---|---|---|---|
| Sanitation schedule | Routine + signatures | Daily checklist + verification | Lower audit findings |
| Zone separation | Raw vs ready-to-eat control | Color coding + clear signage | Less cross-contact risk |
| Trailer hygiene | Clean, dry, odor-free | Pre-load trailer check | Fewer rejected loads |
| Leak management | Clean floors and drains | Quick spill response SOP | Better hygiene outcomes |
Practical hygiene habits that hold up in audits
Cold chain meat regulations are easier when hygiene rules are visible, simple, and repeated every shift.
Treat the loading dock like a production area, not a hallway.
Use color-coded tools for different zones and tasks.
Train “touch discipline”: what can touch meat, and what cannot.
Practical case: A small processor cut contamination alarms after adding zone rules and glove-change triggers at transitions.
What records do cold chain meat regulations expect you to keep?
Many teams do the right thing operationally, then fail because proof is missing. Cold chain meat regulations expect records that show identity, conditions, and decisions.
If a buyer asks, “Was this load in spec?” you need more than one temperature screenshot. You need a timeline.
The audit test (use this today)
Can you show last month’s temperature evidence in 5 minutes?
Can you show who owned each handoff and what they checked?
Can you show what you did when something went out of range?
If the answer is “no,” your risk is higher than you think.
Build an “audit evidence pack” for cold chain meat regulations
Keep it small enough that teams maintain it. Make it consistent enough that auditors trust it.
| Evidence item | What it proves | Owner | Your benefit |
|---|---|---|---|
| Lot ID + pack date | Product identity | Production / warehouse | Faster investigations |
| Handoff timestamps | Time out of cold | Receiving / dock | Fewer “unknown gaps” |
| Temperature evidence | Lane performance | Logistics | Stronger claim defense |
| Sanitation check | Hygienic equipment | Ops / driver | Fewer rejections |
| Deviation + corrective action | Control under stress | QA / supervisor | Reduced penalties |
Record-keeping rules that reduce pain
If your team can retrieve proof quickly, cold chain meat regulations audits feel routine, not disruptive.
Use one file name format: date + route + lot range.
Store evidence in one place, not scattered across inboxes.
Write exceptions plainly: what happened, what you did, what changed.
How do cold chain meat regulations affect loading and transport?
Transport is where cold chain meat regulations become real. Many temperature breaks happen at the dock, not on the highway. The risk spikes during staging, door-open loading, cross-docking, and multi-stop delivery.
The “minute matters” rule
A 20-minute delay with open doors can undo hours of cold storage. You cannot “fix it later” without quality loss and audit questions.
| Dock activity | The risk | The compliance fix | What it means for you |
|---|---|---|---|
| Staging pallets | Warming | Stage in cold zone | More stable temps |
| Door-open loading | Temperature spikes | Seals + timer + roles | Less deviation |
| Overstacking | Poor airflow | Load diagram + gaps | Fewer hot spots |
| Mixed loads | Conflicting lanes | Segregation rules | Fewer “wrong spec” disputes |
Practical transport controls you can standardize
When cold chain meat regulations are written into dock routines, temperature breaks drop without extra equipment.
Pre-cool the trailer and document it before loading.
Load in stop order for last-mile lanes to cut search time.
Keep return-air and product-temp checks separate. They answer different questions.
How do cold chain meat regulations differ across regions?
You do not need to memorize every law. You need to recognize the pattern. Cold chain meat regulations across the US, EU, and UK share the same goals: control temperature, prevent contamination, and prove it through HACCP-style documentation.
A quick authority map for your compliance research
Use these sources to confirm the exact numbers and documents for your lane. Keep the list in your internal SOP, not in people’s memories.
United States: USDA Food Safety and Inspection Service (FSIS) expectations, plus HACCP and sanitation programs used by plants and partners.
European Union: Regulations (EC) No 852/2004 and 853/2004, which buyers often reference in specifications.
United Kingdom: Food safety guidance and enforcement practices aligned to UK requirements and buyer audits.
International road transport (ATP countries): The UNECE ATP Agreement, which ties equipment approval to covered perishable lanes.
Note: This article explains operational best practices for cold chain meat regulations. Always confirm local legal requirements for your products and markets.
Cross-border “risk traps” to avoid
| Trap | Why it happens | Prevention | Benefit to you |
|---|---|---|---|
| Mixed-rule assumptions | “We do it this way at home” | Route-specific SOP | Fewer rejected loads |
| Proof format mismatch | Different templates by site | One evidence pack format | Faster audits and customs |
| Label gaps | Lot codes not readable | Standard label placement | Stronger traceability |
EU-facing lanes: why category clarity matters
EU buyers often expect product-category temperature discipline, especially for high-risk items like minced meat. Even when your local rules are broader, customer specifications may use EU temperature limits as hard requirements.
ATP lanes: equipment compliance can be a “go/no-go”
If you run international road transport in ATP countries, equipment approval and documentation become part of cold chain meat regulations for that lane. Treat certificate management like operational readiness, not admin work.
How do you validate equipment and monitoring for cold chain meat regulations?
Cold chain meat regulations implicitly expect that your equipment and monitoring are fit for purpose. That means you validate cold rooms, reefer units, and packaging for the lane you run. It also means sensor placement matters.
If you only monitor the easiest spot, you miss the warmest spot.
Temperature mapping without overcomplicating it
Run a mapping study during real stress: high ambient days, peak volume, multi-stop routes. Then re-map after meaningful changes, like new packaging or new load patterns.
| Mapping focus | What you learn | Common fix | What it means for you |
|---|---|---|---|
| Door zone | Spike frequency | Reduce door time | Fewer deviations |
| Top pallets | Heat rise effect | Adjust stacking | More uniform temps |
| Center pallets | Cooling penetration | Add airflow lanes | Better stability |
Monitoring options comparison (choose what fits your lane)
| Option | What it measures | Best for | What you should save | What it means for you |
|---|---|---|---|---|
| Trailer display only | Return-air trend | Low-risk, short trips | Photo + timestamp | Weak dispute defense |
| Spot probes + checks | Product truth at gates | Most chilled lanes | Probe log + device ID | Stronger “ship-gate” proof |
| Data logger per load | Temperature over time | Multi-stop and exports | Logger export + exceptions | Faster audit responses |
| Risk-based mapping | Warmest-spot reality | New lanes or changes | Mapping summary + actions | Fewer repeat failures |
Use this table to right-size cold chain meat regulations monitoring without overspending.
Calibration and credibility
Calibration is not “paperwork.” It is what makes your evidence believable when someone challenges it. Without calibration records, you may lose disputes even when you did things right.
A decision tool: what should you do when temperatures drift?
Cold chain meat regulations do not expect perfect days. They expect correct decisions on bad days. This decision tree keeps cold chain meat regulations responses consistent across teams.
Temperature deviation decision tree (plain language)
Detect: log time, location, and measurement source.
Contain: isolate affected product and stop mixing.
Decide: accept, rework, downgrade, or discard based on your plan.
Fix: change the process that caused it, not just the outcome.
Verify: re-check the lane and close the loop with evidence.
| Deviation type | Fast containment | Likely root cause | The fix that works |
|---|---|---|---|
| Warm spike at dock | Move to cold zone | Staging delays | Timer + staged-in-cold |
| Repeat door openings | Change loading order | Driver routine | Stop-order loading + training |
| Reefer drift | Swap unit or repair | Maintenance | Preventive service + pre-trip checks |
Your “warm minutes” mini-calculator (interactive)
Warm minutes = staging minutes + loading minutes + door-open minutes + curbside wait minutes
If warm minutes rise week-to-week, claims usually rise next.
Track it for one lane for seven days. Then fix the top driver first.
Self-assessment: are you audit-ready for cold chain meat regulations?
Score each item 0–2 (0 = no, 1 = sometimes, 2 = yes consistently).
We define lane targets by product type and route.
We verify trailer sanitation before loading begins.
We pre-cool and record trailer conditions before loading.
We measure product temperature at ship and at receiving.
We control door-open time with a timer and an owner.
We store an evidence pack per load with timestamps and logs.
We log every excursion and write a corrective action note.
We calibrate thermometers and data loggers on schedule.
We train staff on zone separation and touch discipline.
We review trends monthly and fix repeat drivers.
Score guide
0–8: High risk. Fix handoffs, timers, and evidence basics first.
9–15: Medium risk. Standardize proof packs and deviation decisions.
16–20: Strong baseline. Focus on continuous improvement and exceptions.
2025 latest developments and trends in cold chain meat regulations
Last updated: December 2025. In 2025, cold chain meat regulations are moving toward faster verification and stronger accountability at handoffs. Buyers increasingly behave like auditors, asking for proof packs and exception handling, not just SOPs.
Latest progress snapshot
Exception-first audits: reviewers focus on how you handle deviations under stress.
Faster evidence requests: teams must produce logs quickly during disputes.
More attention on last-mile: multi-stop exposure and curbside waits get scrutiny.
Stronger traceability expectations: clearer lot-to-route visibility is becoming normal.
Market insight (why this helps you)
Compliance is becoming a commercial advantage. When your cold chain meat regulations evidence is clear, buyers argue less and reorder faster.
Internal link suggestions (no external links)
Use these as internal links inside your own content hub:
“Cold chain meat regulations checklist for every load” → /checklists/meat-cold-chain
“Dock staging control: reducing warm minutes” → /sops/dock-staging-control
“Calibration and placement for temperature probes and loggers” → /guides/logger-calibration-placement
“Packaging and pallet airflow for chilled and frozen meat” → /resources/meat-packaging-airflow
“Corrective actions: how to document excursions” → /playbooks/meat-excursion-actions
Common questions about cold chain meat regulations
Q1: Are cold chain meat regulations the same everywhere?
No. The goals are similar, but limits and documentation expectations vary by jurisdiction and product category.
Q2: Is truck air temperature enough as proof?
Usually not. Product temperature and handoff timestamps are stronger proof than a single display reading.
Q3: What records do auditors ask for first?
They usually start with temperature logs, sanitation checks, and corrective actions for any excursions.
Q4: What is the fastest change that improves compliance?
Control dock staging with a timer and a named owner. Many failures start at handoffs.
Q5: How often should we calibrate devices?
Follow your internal policy and local requirements. What matters most is consistent scheduling and proof.
Q6: What should we do after a deviation?
Document detect, contain, decide, fix, and verify. Then re-check within seven days for repeats.
Summary and recommendations
Cold chain meat regulations are easiest when you treat them as a daily system. Define temperature lanes, protect hygiene at every touch, and keep an evidence pack that proves what happened. Focus on the handoffs that create warm minutes: staging, loading, and last-mile delivery. If you standardize timers, logs, and corrective actions, cold chain meat regulations audits get calmer and claims get cheaper.
Your next step (simple plan)
Pick one lane and track warm minutes for seven days (this is a practical cold chain meat regulations KPI).
Add a ship-gate product temperature check and log it every load.
Standardize one evidence pack template and practice 5-minute retrieval.
Write a one-page deviation decision tree and train supervisors to use it.
About Tempk
At Tempk, we help cold chain operators make compliance practical. We focus on real-world temperature control, packaging strategy, and audit-ready routines that teams can run every day. Our approach emphasizes stable temperature performance at handoffs, clear SOPs, and evidence formats that are easy to retrieve and defend.
CTA: If you want a lane-specific checklist and an audit evidence pack template, talk to our team for a practical review.
Cold Chain Meat Efficiency: Win in 2025

Cold Chain Meat Efficiency: How to Win in 2025?
If you want better margins, cold chain meat efficiency is the lever that touches safety, shelf life, labor, fuel, and customer trust. In plain terms, you win when meat stays cold with fewer delays and fewer “touches.” The biggest gains rarely come from “perfect tech.” They come from tighter dock flow, better airflow, lane-matched packaging, and simple proof at handoffs.
This article will help you:
Cut waste by improving temperature-controlled meat transport planning
Find the “invisible minutes” that break cold chain meat efficiency at the dock
Build a simple KPI scorecard using HACCP-style monitoring for meat cold chain
Reduce reefer fuel while protecting product quality
Control doorstep risk in last-mile refrigerated meat delivery (without overpacking)
What does cold chain meat efficiency really mean?
Core answer: Cold chain meat efficiency means delivering meat at the right temperature, on time, with clean handling—using the least time, labor, energy, and rework. Efficiency is not “cheaper at any cost.” It is predictable. When your process is predictable, quality is predictable, and costs stop surprising you.
Think of meat like ice you cannot watch melting. If the chain stays stable, everything looks normal. If the chain breaks, the problem often shows up later as drip loss, discoloration, odor complaints, or a shorter sell window. Cold chain meat efficiency is about preventing those late problems early.
The three pillars behind cold chain meat efficiency
Detailed information: These pillars keep teams aligned because each one is measurable. Use them as your shared language across operations, quality, and finance.
| Pillar | What you improve | What you measure | What it means for you |
|---|---|---|---|
| Time efficiency | Loading speed, dwell time | Door-open minutes | Fewer temperature spikes |
| Thermal efficiency | Packaging, insulation, airflow | Exceptions per route | Longer shelf life, fewer claims |
| Process efficiency | SOPs, proof, training | Rework + disputes | Less labor waste |
Practical tips you can apply today
Start the stopwatch: time dock-to-departure for 3 loads this week.
Treat doors like money: every open door is a cost center.
Standardize “OK to load”: never load warm product into a cold trailer.
Practical example: One distributor improved cold chain meat efficiency mainly by reducing door-open minutes—same trucks, same routes, fewer claims.
Where do cold chain meat efficiency losses really happen?
Core answer: The biggest cold chain meat efficiency losses usually happen during handoffs, not on highways. Meat warms fastest when it is staged, relabeled, queued, or waiting on paperwork near open doors.
Many teams focus on trailer setpoint only. That matters, but it is not the full story. You often lose cold chain meat efficiency in small moments you barely notice.
The “Invisible Minutes” self-assessment (interactive)
Score each item as Yes / Some / No:
You stage meat in a cold area until the truck is ready.
Loaders know the loading order before doors open.
You avoid reopening doors for “one last pallet.”
You have a clear rule for rejecting warm loads.
You record time + temperature at key handoffs.
If you answered “No” to 2+ items: you likely have a fast-payback path to better cold chain meat efficiency.
How loading order protects cold chain meat efficiency
Detailed information: Loading order is a simple rule with a big impact. If sensitive product is loaded early and sits near open doors, warming becomes unavoidable. If you load to minimize door-open time and protect the coldest product, cold chain meat efficiency improves without buying equipment.
| Loading approach | Door-open time | Temperature stability | Meaning for you |
|---|---|---|---|
| Improvised loading | Longer | Unstable | Higher risk of claims |
| Pre-planned loading | Shorter | More stable | More predictable quality |
| Zoned loading by risk | Shortest | Best | Stronger customer trust |
Practical tips you can use on a busy dock
High-volume dock: post a “pallet map” before loading starts.
Mixed SKUs: load the most sensitive items last to reduce exposure.
Peak season: assign a “door captain” to prevent repeated opening.
Practical example: A wholesaler reduced door-open time using a pre-load checklist and clear roles. Cold chain meat efficiency improved mainly through fewer interruptions.
How do you measure cold chain meat efficiency with 5 KPIs?
Core answer: You can measure cold chain meat efficiency using a small KPI set that connects directly to cost and quality. You do not need a giant dashboard. You need numbers that change behavior.
The 5-metric scorecard (HACCP-style, simple)
Detailed information: Think of this as lightweight HACCP-style monitoring for meat cold chain: fewer checks, done consistently, focused on the highest-risk steps.
Door-open minutes per load
Staging dwell time (minutes out of cold zone)
Temperature exceptions per route (count)
Claims/returns rate (%)
Rework hours per week (labor hours)
Track these for 30 days. Your biggest leak will become obvious.
Cold Chain Meat Efficiency Index (interactive)
Start at 100 points each week. Subtract for controllable losses:
Temperature exception event: −5 each
Minutes above your spec: −1 per 10 minutes
Late delivery: −3 each
Damage / contamination incident: −2 each
Unplanned rework (repack, re-ice, rebuild): −3 each
| KPI | What to track | Healthy direction | What it means for you |
|---|---|---|---|
| Door-open minutes | minutes per load | Down | Fewer spikes and disputes |
| Dwell time | minutes per handoff | Down | Better quality with same assets |
| Exceptions | per 100 deliveries | Down | Less reject risk |
| Claims rate | per 1,000 shipments | Down | Direct savings + retention |
| Rework hours | hours per week | Down | Labor returned to value work |
ROI calculator (turn “efficiency” into budget)
Fill in your numbers:
Weekly meat shipped (kg): ____
Gross margin per kg: ____
Current shrink + claims (%): ____
Target shrink + claims (%): ____
Weekly margin recovered = shipped × margin × (current − target)
Add labor:
Rework hours per week: ____
Fully loaded labor cost per hour: ____
Weekly labor recovered = rework hours × labor cost
Total weekly gain = margin recovered + labor recovered
Practical example: A processor tracked only dwell time and rework hours for a month. Fixing one staging bottleneck lifted cold chain meat efficiency and reduced overtime.
Which dock habits improve cold chain meat efficiency fastest?
Core answer: The fastest cold chain meat efficiency gains come from reducing exposure time, enforcing pre-cooling discipline, and protecting airflow. These are high-leverage moves because they work even on busy days.
Dock-to-truck “no-guess” SOP rules
Detailed information: Your SOP should remove debate in the moment. Clear thresholds reduce chaos and speed decisions.
If product arrives above your threshold → hold and verify
If staging exceeds X minutes → re-cool before loading
If door-open exceeds Y minutes → pause, close, reset
Pick X and Y based on your reality. Then enforce them consistently.
Airflow is the silent hero of cold chain meat efficiency
Detailed information: Cold air must reach every case. Pallets packed too tightly create warm pockets even when the trailer is cold. Better airflow means fewer exceptions and better cold chain meat efficiency.
| Airflow habit | What changes | Risk if ignored | Benefit to you |
|---|---|---|---|
| Leave airflow channels | More uniform cooling | Warm pockets | Fewer claims |
| Avoid wall-blocking | Prevents hot zones | Edge warming | Better shelf life |
| Do not over-wrap | Air can circulate | Uneven temps | More stable quality |
Practical tips for stronger dock discipline
Trailer prep: pre-cool the box before loading starts.
Pallet build: keep consistent gaps for air channels.
Wrap smarter: wrap for stability, not for sealing airflow.
Practical example: A facility changed pallet patterns and reduced over-wrapping. Setpoints stayed the same, but cold chain meat efficiency improved through better temperature uniformity.
How does packaging raise cold chain meat efficiency on each lane?
Core answer: Packaging acts like a time buffer. When delays happen (and they will), packaging reduces heat gain and protects meat from swings. That makes cold chain meat efficiency less dependent on “perfect execution.”
Packaging is not only a box. It is a system:
Insulation or thermal barriers
Liners that control moisture swings
Layout that protects airflow
Fit that reduces wasted space and handling
Packaging decision tool (interactive): lane-based, not habit-based
Answer Yes / No:
End-to-end delivery is under 8 hours.
Handoffs are predictable with low dwell time.
Product is highly warming-sensitive (thin cuts, prepared items).
Boxes might sit at delivery (doorstep, backroom).
Weather swings are large on this lane.
If “Yes” on 3+ items: prioritize packaging + handoff controls first.
If “No” on 3+ items: prioritize process + transport changes first.
| Option | Best for | Cost profile | What it means for you |
|---|---|---|---|
| Passive insulation + coolant | Predictable lanes | Low–medium | Better cold chain meat efficiency without new trucks |
| Higher-spec reefer control | Long/volatile lanes | Medium–high | Strong control, higher operating cost |
| Reusable systems | Repeat customers | Medium | Lower cost per trip over time |
| “Overpack everything” | Unknown lanes | Hidden high | You pay for uncertainty every shipment |
Packaging fit vs wasted space (why efficiency suffers)
Detailed information: Wasted space increases handling. Handling increases time out of cold zones. That is how cold chain meat efficiency gets quietly worse.
Oversized packaging → more repacking, more touches, more exposure
Right-sized packaging → faster build, fewer errors, smoother verification
Practical packaging moves that reduce risk
Short lanes: focus on speed + protection from quick spikes.
Long lanes: design for delays, not the best-case timeline.
Mixed loads: use separators and zone by risk level.
Practical example: A last-mile meat service right-sized insulated packaging. Loads became faster to build, easier to verify, and cold chain meat efficiency improved without adding labor.
How do you improve meat cold chain energy efficiency without risking quality?
Core answer: You improve meat cold chain energy efficiency by cutting avoidable heat gains first. Door discipline, staging layout, and defrost/setpoint habits often reduce energy and stabilize temperatures at the same time.
Energy waste usually comes from repeatable “leaks”:
Doors open too long
Warm staging near cold rooms
Poor setpoint discipline
Unnecessary reefer runtime at stops
A quick energy-leak checklist (weekly)
Door seals intact and closing fully
Strip curtains / air curtains used correctly
Staging time out of cold zones is measured and limited
Defrost schedule matches real frost load
Lights and fans are not running unnecessarily
| Energy lever | What it changes | Difficulty | Your practical benefit |
|---|---|---|---|
| Door discipline | Cuts warm infiltration | Low | Lower bills + steadier temps |
| Smarter staging layout | Shortens door-open time | Medium | Faster flow, fewer excursions |
| Reefer runtime control | Reduces pull-down stress | Medium | Lower cost per delivery |
| Preventive maintenance | Avoids drift and leaks | Medium | Better uptime and fewer disputes |
Practical tips to reduce reefer fuel use for meat shipments
Reduce stops: every stop adds door-open minutes and variability.
Cluster routes: fewer multi-stop “drift” routes, more stable runs.
Track a proxy: “reefer hours per route” is often enough to start.
Practical example: A carrier redesigned routes to reduce stops and measured “reefer hours per stop.” Fuel dropped, and cold chain meat efficiency improved with fewer temperature events.
How do you win last-mile refrigerated meat delivery in 2025?
Core answer: Last mile is where cold chain meat efficiency wins or loses because it is the most variable step. Even if your upstream chain is perfect, doorsteps, apartments, and missed handoffs can create warming and refunds.
Think of last mile like the final meters of a race. If you stumble there, the earlier work does not matter.
Doorstep exposure checklist (self-test)
Check the boxes you truly do today:
We send delivery alerts 30–60 minutes before arrival
We provide “safe place” guidance (shade, not direct sun)
We track delivered-to-received time for exceptions
We design packaging for 1–2 hours of worst-case exposure
We have a clear claim policy tied to evidence
The Route Stress Test (interactive)
Fill in the blanks:
Planned route time: ____ hours
Expected door-open events: ____ stops
Average door-open time: ____ seconds
Ambient risk: Low / Medium / High
Acceptable excursion minutes: ____ minutes
How to interpret it:
If stops or door-open time are high → shorten routes and tighten staging.
If ambient risk is high → increase insulation buffer and reduce dwell.
If you cannot measure excursions → your cold chain meat efficiency program is flying blind.
| Last-mile factor | What to measure | Simple improvement | Meaning for you |
|---|---|---|---|
| Customer availability | failed delivery rate | tighter windows | fewer redeliveries |
| Doorstep time | minutes outside | proof + alerts | less refund abuse |
| Stop density | stops per hour | route clustering | better cost + stability |
| Building delays | time per drop | batch buildings | fewer warm events |
Practical last-mile controls that reduce refunds
City routes: batch stops per building to reduce elevator delays.
Suburbs: use fewer, tighter delivery windows to reduce drift.
High-risk customers: confirm readiness before arrival.
Practical example: A brand split one long route into two shorter clustered routes. Meat arrived colder, reviews improved, and cold chain meat efficiency rose without new vehicles.
2025 latest cold chain meat efficiency developments and trends
Trend overview: In 2025, cold chain meat efficiency is shifting from “more hardware” to “better systems.” Leading operators focus on tighter dock flow, lane-based packouts, stronger exception workflows, and cleaner refrigeration planning.
Latest progress snapshot
Efficiency-first SOP design: fewer steps, clearer thresholds, faster decisions
Smarter monitoring habits: focus on handoffs and high-risk lanes
Packaging optimization: right-sizing and modular systems to reduce touches
Energy-aware operations: pre-cooling discipline and reduced door time to cut load
Compliance readiness: better documentation and maintenance planning to protect uptime
Market insight: Customers want reliable quality, not explanations. When your chain is consistent, cold chain meat efficiency becomes a differentiator your competitors cannot copy quickly.
Common questions (FAQ)
Question 1: What is cold chain meat efficiency?
Cold chain meat efficiency is delivering meat with stable temperatures, fewer handling steps, and fewer delays—so you cut shrink, claims, labor waste, and energy use.
Question 2: What is the fastest way to improve cold chain meat efficiency?
Start by reducing door-open minutes and staging dwell time. Then standardize loading order and airflow-friendly pallet builds.
Question 3: Why do complaints happen when the trailer setpoint looks fine?
Because the break often happens at handoffs: staging, doors, cross-docks, and delivery exposure. Track transfer time, not only setpoint.
Question 4: How do I reduce disputes tied to temperature claims?
Use simple proof at each handoff: timestamp, spot-check temperature, environment, and exceptions. Clear proof shortens arguments and improves cold chain meat efficiency.
Question 5: Do I need continuous monitoring on every shipment?
Not always. Baseline your lanes first, then monitor high-risk lanes more heavily. Consistent action beats random data.
Summary and recommendations
Cold chain meat efficiency improves when you manage your time-and-temperature budget instead of reacting to complaints. Focus on the highest-leverage actions first. Cut door-open minutes and staging dwell time. Standardize loading order and airflow-friendly pallet builds. Match packaging to lane risk so delays do less damage. Track five KPIs weekly, and fix one root cause at a time.
Your 14-day action plan (clear and realistic)
Measure door-open minutes on your top 5 loads.
Identify the top 2 delay causes (searching pallets, paperwork, relabeling).
Implement a loading map + door captain role.
Right-size packaging for the highest-claim lane.
Re-measure claims and rework hours and lock in the new SOP.
About Tempk
At Tempk, we build practical temperature-control packaging and cold chain workflows for real operations—busy docks, mixed loads, and unpredictable delays. We focus on solutions that improve cold chain meat efficiency by reducing heat gain, simplifying pack-out, and making handoffs easier to control and prove.
Call to action: Share your route time, stop count, meat type (chilled or frozen), and delivery promise window. We will help you map a lane-based packaging + process setup you can implement in weeks.
Cold Chain Fish Temperature Control Devices 2025?
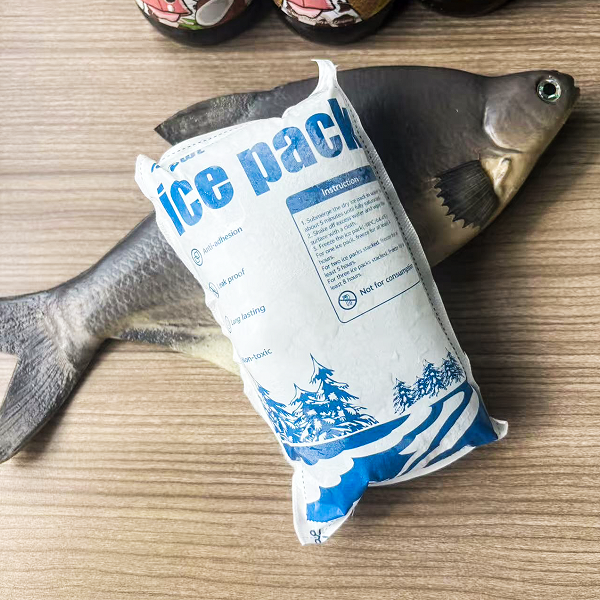
Last updated: December 17, 2025
Cold chain fish temperature control devices keep fish safe, fresh, and sellable from dock to doorstep. In 2025, even short warming events can reduce shelf life and spark expensive claims. The right monitoring setup helps you detect risk early and prove control later. For chilled fish, many programs work near 0–2°C. For frozen fish, many programs anchor around −18°C or colder.
This article will help you:
Pick cold chain fish temperature control devices for fresh lanes vs frozen lanes
Set targets for fish cold chain temperature monitoring without “alarm fatigue”
Apply reefer temperature sensor placement and sensor placement in fish cartons that reflect real risk
Compare seafood time-temperature indicators (TTIs) to a seafood shipment temperature data logger
Validate and calibrate cold chain fish temperature control devices with simple, repeatable tests
Turn device data into actions that cut spoilage and claims
What are cold chain fish temperature control devices?
Cold chain fish temperature control devices are tools that measure, record, and alert you about temperature conditions during fish storage and transport. These tools include probes, infrared checks, data loggers, connected sensors, and TTIs. Good monitoring replaces guesswork with records. It also tells you what to do next when something goes wrong.
Think of your cold chain like a relay race. The baton is your temperature target. Every handoff—dock, warehouse, truck, hub, last mile—can drop it. Cold chain fish temperature control devices act like referees for those handoffs. They show where control slipped, so you can fix the lane.
| What you’re trying to prevent | What causes it | How devices help | What it means for you |
|---|---|---|---|
| Rapid spoilage | Chilled fish warms too long | Detect + alert | Longer shelf life |
| Freezer burn | Frozen temp cycles | Record stability | Better texture and look |
| Claim disputes | No proof of control | Provide logs | Fewer chargebacks |
| Histamine risk | Time + temperature abuse | Track time-in-risk | Lower safety incidents |
Practical tips you can use today
Don’t rely on truck setpoints. Use cold chain fish temperature control devices near the product zone.
Review temperature summaries weekly, not just after a complaint.
Train a clear “If–Then” response so alarms always lead to action.
Practical example: One distributor reduced disputes by attaching a one-page report from cold chain fish temperature control devices to each high-value shipment.
Which cold chain fish temperature control devices do you actually need?
You need the smallest set of cold chain fish temperature control devices that answers three questions:
Was it cold enough? 2) Where did it warm up? 3) What should we do next?
Fresh lanes fail fast and often at transitions. Frozen lanes fail slowly but suffer from repeated warm cycles. Your cold chain fish temperature control devices should match that failure mode. If you cannot intervene mid-route, start with trip loggers to build lane evidence. If you can intervene, add real-time sensors on high-value loads.
Device families for fish cold chain temperature monitoring
| Device family | What it does best | Best for | Weak spot | What it means for you |
|---|---|---|---|---|
| Probe thermometer | Internal checks | Pack-out + receiving | Technique matters | Fast accept/hold decisions |
| Infrared (IR) thermometer | Quick surface scan | Docks and hubs | Surface-only | Screening, not proof |
| Data logger | Full trip record | Most lanes | Post-delivery insight | Claims + lane learning |
| Connected sensor | Real-time alerts | High-value lanes | Setup and coverage | Mid-route intervention |
| TTI label | Simple breach signal | Last mile | Less detail | Fast pass/fail at receiving |
Practical selection rules (fresh vs frozen)
Fresh fish: combine cold chain fish temperature control devices that detect short warming fast with strict handoff timers.
Frozen fish: prioritize continuous logging that proves deep stability over time.
Mixed fleets: standardize one report format across all lanes.
Case insight: A fresh fish retailer improved outcomes more by fixing dock timing than buying new trucks.
What temperature targets should cold chain fish temperature control devices protect?
Cold chain fish temperature control devices should protect quality targets, not just minimum safety limits. Many chilled programs operate close to melting ice temperatures, often near 0–2°C. Many verification routines also watch an upper chilled check around 4–4.4°C (40°F). Many frozen programs use −18°C or colder as the “deep frozen” anchor. Your monitoring program should track both temperature and time above limits.
| Lane type | Practical target | High-risk zone | What to alert on | Why it matters |
|---|---|---|---|---|
| Fresh whole fish (iced) | 0–2°C | >4°C | Minutes above 4°C | Shelf life drops fast |
| Fresh fillets | 0–2°C | >4°C | Repeated spikes | Texture degrades sooner |
| Frozen fish | ≤ −18°C | > −15°C | Duration above limit | Avoid thaw/refreeze |
Practical threshold tips (that reduce false alarms)
Use duration-based alarms in cold chain fish temperature control devices, not peak-only alarms.
Separate warning vs critical levels so teams are not overwhelmed.
Tune thresholds by lane and season after 2–4 weeks of data.
Histamine risk temperature control fish: what changes?
For histamine-sensitive species, time-and-temperature abuse is the core risk. Cold chain fish temperature control devices should support clear accountability at staging, transfer points, and receiving. Track “time out of control,” not only a peak temperature. Then assign one owner to each corrective action, so nothing falls through.
Where should you place sensors for accurate cold chain fish temperature control devices data?
Placement is the difference between useful and misleading cold chain fish temperature control devices data. Put a logger touching ice and the chart looks perfect. Put a logger on the pallet surface and you may see ambient swings, not product risk. You want a repeatable placement that reflects the fish’s true exposure. Cold chain fish temperature control devices should measure risk, not convenience.
Start by mapping warm zones once. Use 3–5 sensors in one load to learn gradients. Then lock one placement for routine monitoring, and keep it consistent. Your monitoring becomes far more valuable when comparisons are clean.
Sensor placement rules you can follow
| Shipping unit | Put the sensor here | Avoid placing it here | Why it matters | What it means for you |
|---|---|---|---|---|
| Carton (iced fish) | Near product core, buffered | Touching ice/gel | Coolant reads colder | Fewer “false safe” readings |
| Pallet | Middle layer, center mass | Outside wrap surface | Surface tracks ambient | Better lane comparisons |
| Reefer | Warm zone + return air (if available) | Coldest corner only | Reefers have gradients | Earlier risk detection |
Practical tips for reefer temperature sensor placement
Use two devices on high-risk lanes: a worst-case and a baseline.
Document placement with one photo per lane so new staff stay consistent.
Label devices with lane + pack-out version to avoid “mystery data.”
Practical example: One shipper discovered only the top layer warmed, then fixed loading pattern and pack-out.
How do you set alarms in cold chain fish temperature control devices without alert fatigue?
Cold chain fish temperature control devices only help if teams believe the alerts. If every trip triggers alarms, people ignore them. Use duration and trend, not every spike. Make alerts action-based, not anxiety-based. Then review outcomes monthly, and keep tuning.
Example alarm logic you can copy
| Scenario | Alert trigger | First action | Why it works |
|---|---|---|---|
| Fresh delay | >4°C for 15–30 minutes | Add ice / accelerate transfer | Focuses on real risk |
| Frozen drift | >−15°C for 60 minutes | Check reefer / reroute | Prevents partial thaw |
| Repeated cycling | 3+ spikes per route | Investigate handoff | Finds weak processes |
| Device failure | No data / low battery | Replace device | Protects coverage |
Practical tips and suggestions
Keep a one-page response checklist next to your monitoring dashboard.
Assign one owner per alert type (ops, QA, or warehouse) to avoid slow decisions.
Treat “yellow” events as a QA hold, then use device data to decide.
How do you validate and calibrate cold chain fish temperature control devices?
Validation proves cold chain fish temperature control devices reflect real shipment risk. Calibration keeps people from arguing about “bad sensors” after a claim. You don’t need a lab mindset for this. You need repeatable checks and simple records.
A practical validation plan (no overkill)
Accuracy check: compare cold chain fish temperature control devices to a trusted reference at stable temperatures.
Placement test: run two placements in the same shipment to learn gradients.
Pack-out test: validate devices with real packaging and routes.
Stress route test: pick the hottest day or longest route as your worst case.
| Step | What you measure | Pass signal | What it means for you |
|---|---|---|---|
| Accuracy | Difference vs reference | Within tolerance | Reliable decisions |
| Placement | Spread between zones | Predictable gradient | Better SOPs |
| Pack-out | Time in safe range | Matches lane promise | Fewer failures |
| Workflow | Retrieve + review time | Fast and repeatable | Higher adoption |
Practical calibration rules teams will follow
Bracket your working range with a two-point check for cold chain fish temperature control devices.
Add a “calibrated until” label so teams trust device status.
Retire drifted devices quickly to protect trust in results.
Seafood TTIs vs data loggers: how do cold chain fish temperature control devices compare?
TTIs and loggers solve different problems. TTIs are simple breach signals. Loggers provide full time-stamped history. Many teams combine both on high-risk lanes: a logger for diagnosis and a TTI for fast receiving decisions.
| Comparison | TTI | Data logger | What it means for you |
|---|---|---|---|
| Output | Visual change | Time-stamped readings | Fast pass/fail vs deep diagnosis |
| Training | Low | Medium | Faster rollout vs more detail |
| Best use | Last-mile decisions | Claims + lane fixes | Hybrid wins on risky lanes |
| Weak spot | Less granular | Needs workflow | Plan process before buying |
Last-mile fish delivery temperature control checklist
| Check | Pass | Fail | What you do next |
|---|---|---|---|
| Package | Dry, intact | Wet, crushed | Hold for QA review |
| Product | Firm, cold | Soft edges | Escalate decision |
| Device signal | Normal | Breach | Apply SOP (hold/reject) |
Interactive tool: choose your cold chain fish temperature control devices stack in 60 seconds
Use this tool to pick a monitoring stack without overbuying. It also aligns devices with your ability to respond. Monitoring only pays back when it changes outcomes.
Quick risk score (5 questions)
Give yourself 1 point for each “Yes”:
Do you ship during hot seasons regularly?
Do you have frequent hub handoffs?
Do you have claims above 1%?
Do you lack stable lane performance data?
Do you ship premium products where appearance matters?
Your result: device stack recommendation
0–1 points: Trip logger + strong SOPs is often enough to start.
2–3 points: Trip logger + Bluetooth handoff checks for hub-heavy lanes.
4–5 points: Real-time sensor on risky lanes + trip logger baseline.
2025 trends in cold chain fish temperature control devices
In 2025, cold chain fish temperature control devices are shifting from passive recordkeeping to actionable visibility. Teams want fewer charts and more decisions. Time-in-range reporting is becoming the default because it is easier to act on. These systems are also integrating into receiving workflows, instead of living in separate apps.
Lane-based sampling is growing too. Stable lanes get fewer devices, while risky lanes get more. This cuts monitoring cost and increases impact. Finally, teams are simplifying device models and standardizing placement photos, so cold chain fish temperature control devices are easier to use in one shift.
Latest progress snapshot
More time-in-risk dashboards: minutes above chilled limits, hours above frozen limits.
Better SOP integration: cold chain fish temperature control devices reports tied to accept/hold/reject.
Lane optimization: use historical profiles to improve carriers and dispatch timing.
Simpler deployment: fewer device models, fewer steps, more consistent use.
Internal link strategy suggestions
Frequently asked questions
Q1: Which cold chain fish temperature control devices are best for fresh fish delivery?
If you can act mid-route, consider real-time alerts. If not, start with a logger and strict handoff checks.
Q2: Is a reefer setpoint enough for fish cold chain monitoring?
No. Setpoint is the trailer’s goal, not the fish’s experience inside packaging.
Q3: How many devices do I need per shipment?
Many lanes start with one device. High-risk lanes often use two cold chain fish temperature control devices: worst-case and baseline.
Q4: Why does device data sometimes look “wrong”?
Placement is usually the cause. Cold chain fish temperature control devices near vents, doors, or coolant contact can mislead.
Q5: How do I reduce false alarms?
Alarm on duration and trend. Tune thresholds by lane, then check if cold chain fish temperature control devices alerts led to better outcomes.
Summary and recommendations
Cold chain fish temperature control devices protect freshness, reduce spoilage, and defend against claims when they are chosen for the lane and tied to actions. In 2025, the winning approach is stable targets, repeatable placement, and duration-based alarms. Validate with real pack-out and review results by lane. Then monitoring becomes a predictable improvement tool, not paperwork.
Action plan you can start this week
Set chilled and frozen limits, plus time-in-risk rules for cold chain fish temperature control devices.
Standardize placement for your top three lanes and train with photos.
Run one worst-case validation route with real packaging and your devices.
Create a one-page alert playbook with owners and actions.
Review the top three root causes monthly and fix one variable at a time.
About Tempk
At Tempk, we help seafood shippers make cold chain control practical. We focus on lane-based monitoring, repeatable placement, and workflows teams can follow on busy days. We also align packaging discipline with monitoring, so you reduce spoilage and improve consistency without overcomplicating operations.
Call to Action: If you want help choosing cold chain fish temperature control devices for your lanes and building a simple validation plan, talk with a cold chain specialist and start a 30-day pilot on one high-risk route.