


Good Insulated Lunch Bag: How to Choose in 2025
Good Insulated Lunch Bag: How to Choose in 2025

Good Insulated Lunch Bag – What Should You Buy in 2025?
A good insulated lunch bag does more than simply keep your lunch cold or warm. It maintains food safety, prevents leaks, and is a convenient, easy-to-carry solution for daily meals. In 2025, many consumers still make the mistake of choosing based on appearance and later regret their choice when insulation fails. This guide provides practical advice and a simple checklist to help you choose the best insulated lunch bag to ensure your food stays fresh and at the proper temperature when needed.

This article will answer:
How a good insulated lunch bag protects food safety and freshness
Which insulation, lining, and zipper details matter most
How to pick the right size for work, school, or travel
A quick decision tool to match your use case
The newest 2025 trends shaping insulated lunch bags
How Does a Good Insulated Lunch Bag Keep Food Safe?
A good insulated lunch bag slows down temperature changes, keeping food at a safer temperature for a longer time. Bacteria grow faster when food stays in the “middle zone” between warm and cold. In simple terms: maintaining a stable temperature helps you avoid soggy sandwiches, warm yogurt, and unsafe leftovers.
Think of the insulation as a “winter coat” for your lunch. A thin coat works a little, but a thick coat with a tight zipper works wonders.
A good insulated lunch bag is not just about being “cold.” It’s about being stable.
What “Insulated” Actually Means for You
Insulation reduces heat transfer, meaning:
Cold items warm up more slowly
Warm items cool down more slowly
Ice packs last longer
If you’re carrying lunch for 4–6 hours, the quality of insulation is the difference between “still fresh” and “I should not eat this.”
| Insulation Factor | What You’ll Notice | What It Means for You |
|---|---|---|
| Thicker insulation | Slower warming | Longer freshness window |
| Tight closures | Less air exchange | Ice packs last longer |
| Reflective inner layer | Better temperature stability | More consistent results |
Practical Tips You Can Use Today
If you pack dairy or seafood: Always use at least one ice pack.
If you pack hot meals: Use a separate container for hot food to hold heat longer.
If your commute is long: Choose a good insulated lunch bag with a firm structure and tight zipper.
Real scenario: A commuter with a 90-minute round trip kept yogurt cold until lunch by switching from a soft, thin bag to a good insulated lunch bag with thicker walls and a tighter zipper.
What Features Make a Good Insulated Lunch Bag Worth It?
A good insulated lunch bag is worth it when it combines insulation, leak resistance, easy cleaning, and comfort. Many bags are “insulated” in name only. The details tell the truth.
You don’t need the most expensive option. What you need is the right design for your routine.
The “4 Core Features” Checklist
A good insulated lunch bag should have:
Reliable insulation thickness
A liner that wipes clean
Leak-resistant seams and zipper design
A shape that fits your containers
If any one of these fails, daily use becomes annoying fast.
Liner Material: The “Make or Break” Detail
The inside liner is where spills happen. A good insulated lunch bag uses a smooth liner that resists stains and odors.
Look for:
Smooth, wipe-clean interior
Sealed edges where crumbs and liquid cannot hide
Odor resistance (practical, not “magic”)
| Liner Detail | Good Sign | Why It Helps You |
|---|---|---|
| Smooth surface | Wipes in 10 seconds | Less daily stress |
| Sealed seams | Fewer leak paths | Cleaner bag, fewer smells |
| Stain resistance | Doesn’t absorb sauce | Looks new longer |
Zippers and Closures: Small Parts, Big Impact
A good insulated lunch bag usually has a zipper that closes fully without gaps. Gaps let warm air in like a door left open.
If you pack liquids, also look for:
Zipper guards
Overlapping flaps
Reinforced corners
What Size Good Insulated Lunch Bag Do You Actually Need?
The best size for a good insulated lunch bag depends on your containers, not your appetite. Many people buy a bag that’s too small and end up carrying extra items outside the bag, defeating the insulation.
Start by thinking: what do you pack most days?
| Typical Use | Recommended Size | Your Benefit |
|---|---|---|
| Office lunch | Medium | Fits meal + drink + ice pack |
| School lunch | Medium | Space for snack and fruit |
| Meal prep | Large | Fits multiple boxes neatly |
| Travel day | Large | Holds food plus extra ice packs |
Is a Good Insulated Lunch Bag Better Than a Lunch Box?
A good insulated lunch bag is often better than a hard lunch box if you want flexibility and comfort. A hard box protects against crushing, but many bags provide enough structure and are easier to carry.
Here is a practical comparison:
| Option | Strength | Weakness | Best For You If |
|---|---|---|---|
| Insulated lunch bag | Flexible, lighter | Can sag if cheap | You commute or carry daily |
| Hard lunch box | Strong protection | Bulky, heavier | You carry fragile items |
How Long Can a Good Insulated Lunch Bag Keep Food Cold?
A good insulated lunch bag can keep food cold for several hours, but performance depends on ice packs, starting temperature, and how often you open it. Insulation slows change but doesn’t create cold.
Think of it like a thermos. If you put warm water in, it stays warm. If you put cold water in, it stays cold.
What Most People Miss
Performance drops when:
You open the bag frequently
Your items start warm
You pack without ice packs
You store the bag in a hot car
A good insulated lunch bag performs best when you pre-chill items.
Quick Performance Boost Steps
Chill your food before packing
Freeze your ice pack fully
Keep the bag in shade
Open only when you need to eat
Practical example: A student kept lunch fresh through a full school morning by freezing a slim ice pack and placing it on top, then opening the bag only once.
Decision Tool: Which Good Insulated Lunch Bag Matches Your Routine?
Use this quick self-check. Pick the first option that fits you.
Step 1: What do you pack most often?
Cold items (yogurt, salad, sushi): prioritize insulation and tight sealing
Hot items (rice, pasta, soup): prioritize structure and container fit
Mixed items: prioritize space and compartment separation
Step 2: How long until you eat?
Under 3 hours: medium insulation is usually fine
3–6 hours: you need a good insulated lunch bag plus ice pack
Over 6 hours: you need strong insulation, larger ice packs, and fewer openings
Step 3: What annoys you most?
Spills → choose sealed seams and wipe-clean liner
Smells → choose stain/odor-resistant liner and easy cleaning
Crushed food → choose firmer structure
What Should You Look For in a Good Insulated Lunch Bag for Work?
A good insulated lunch bag for work should fit your meal containers, look professional, and clean quickly. You’ll use it five days a week, so convenience matters more than fancy features.
Work-Focused Features That Matter
A wide opening (so containers fit without tilting)
A stable base (so it does not tip in your car)
An easy-clean liner (because spills happen)
Practical Tips for Office Lunch Success:
Bring a slim ice pack to save space
Use leak-proof containers for sauces
Keep a spare napkin inside a small pocket
What About a Good Insulated Lunch Bag for Kids?
A good insulated lunch bag for kids should be light, easy to open, and easy to clean. Kids don’t treat bags gently, so durability matters.
Kid-Friendly Priorities
Easy zipper pull
Reinforced handle
Simple compartments
How Do You Clean a Good Insulated Lunch Bag Without Ruining It?
You clean a good insulated lunch bag by wiping daily, deep cleaning weekly, and drying fully. The biggest mistake is closing the bag while damp, which creates a smell.
Simple Cleaning Routine
| Frequency | What to Do | Benefit |
|---|---|---|
| Daily | Wipe the liner with mild soap and water | Stops stains |
| Weekly | Deeper wipe + zipper line cleaning | Reduces odor |
| Monthly | Check seams, corners, and odors | Extends bag life |
2025 Latest Developments and Trends in Good Insulated Lunch Bags
In 2025, the focus is on sustainability and practical features. Lighter materials, better leak resistance, and easy-to-clean designs are in demand. Modular compartments and recycled materials are making lunch bags more functional and environmentally friendly.
FAQ
Q: How long does a good insulated lunch bag keep food cold?
A: It depends on ice packs, ambient heat, and seal quality. For perishables, follow the 2-hour rule unless you can keep food cold.Q: Do you need two ice packs in a good insulated lunch bag?
A: Yes, two cold sources help keep perishables safe for longer.Q: Why does my lunch bag smell even after wiping?
A: Odors often come from trapped moisture and tiny spills in seams. Deep clean weekly and let it dry fully open.
Summary and Recommendations
A good insulated lunch bag is designed to keep your meals safe and fresh. Look for proper insulation, tight seals, and easy cleaning. Use ice packs strategically and ensure your bag fits your meal and commuting routine. Clean it often to keep it odor-free and ready for use.
Insulated Shopping Bags: How to Keep Groceries Cold in 2025
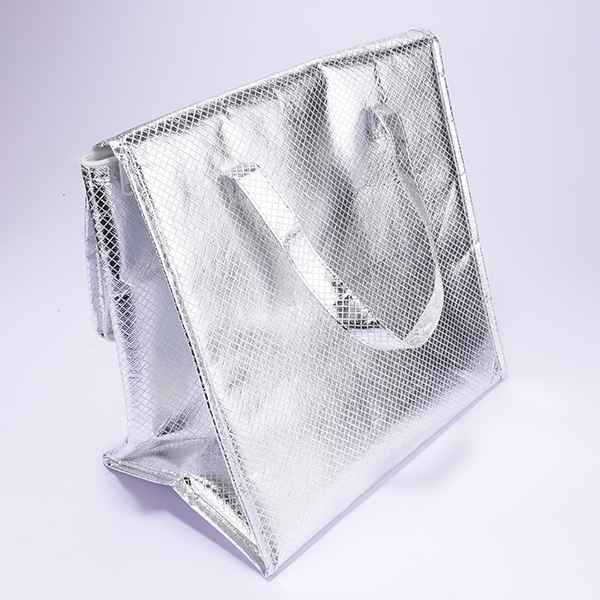
Insulated Shopping Bags: How Do You Keep Food Cold on the Way Home?
Introduction
In today’s fast-paced world, keeping groceries cold on the way home can be a challenge, especially for perishable items like dairy, meat, and frozen foods. Insulated shopping bags are a simple but effective solution. These bags can slow down temperature increases, protecting the freshness of your groceries for a longer period. In this guide, we’ll explore how insulated shopping bags work, the key features to look for, and how you can optimize your shopping trips in 2025 to minimize waste and maximize food safety.
How Do Insulated Shopping Bags Keep Food Cold Longer?
Direct Answer
Insulated shopping bags keep food cold by reducing heat transfer between the outside air and the contents of the bag. They act like a coat for your groceries, trapping cool air inside and minimizing the intrusion of warm air. High-quality insulated bags can keep cold items cool for 1-3 hours, depending on factors like outside temperature, the fullness of the bag, and the addition of cold packs.
Expanded Explanation
Imagine temperature as money in a leaky wallet. The better the insulation, the slower you lose cold air. The insulation in these bags is often made from foam or layered materials that trap air. This reduces the movement of heat from the outside to your groceries, thus maintaining cooler temperatures for a longer period.
What Impacts Cooling Performance Most?
| Factor | Lower Performance | Higher Performance | What It Means for You |
|---|---|---|---|
| Insulation Thickness | Thin walls | Thick walls | Longer cold retention |
| Closure Type | Open top | Zippered lid | Less cold air loss |
| Bag Fullness | Half empty | Full and packed | Less air space to warm |
| Add-on Cooling | None | Ice/gel packs | Stronger temperature control |
Practical Tips for You
Use a zip closure when transporting meat, dairy, or seafood.
Fill bags tightly so cold items “support” each other.
Add one small cold pack for trips longer than 30 minutes.
Real-world case:
A customer reduced ice cream “softening complaints” by switching from an open-top tote to a zippered insulated shopping bag.
Why Do Insulated Shopping Bags Matter for Food Safety?
Direct Answer
Insulated shopping bags are crucial for maintaining food safety by preventing perishable foods from entering the temperature danger zone (40-140°F). When meat, dairy, and prepared foods warm up, bacteria can proliferate, increasing the risk of foodborne illness. By keeping food colder during transit, you reduce this risk and extend its shelf life.
Expanded Explanation
You don’t need to be a food scientist to understand that warm, moist food spoils faster. Shopping after work or running errands means your groceries can warm up in transit, especially on a hot day. Insulated shopping bags create a buffer, helping to ensure that your food stays in a safer temperature range until you get home. For you, this translates to fewer food safety concerns and less wasted food.
Common Perishables That Benefit Most
Fresh meat and poultry
Seafood
Milk, yogurt, cheese
Prepared meals
Frozen foods and ice cream
Practical Tips for You
Pack perishables last at checkout.
Go home first before other errands when it’s hot outside.
Keep bags in the car so you always have them ready.
Practical example:
Shoppers who pack frozen items in insulated shopping bags with a cold pack report noticeably less freezer burn and fewer partially thawed edges.
Which Insulated Shopping Bag Features Should You Look For?
Direct Answer
The best insulated shopping bags combine high-quality insulation, tight closures, and durable, easy-to-clean materials. While size may seem important, it’s the bag’s performance features that will actually ensure your groceries stay cold.
Expanded Explanation
Insulated shopping bags are subjected to a lot of wear and tear. They get spilled on, crammed with heavy items, and exposed to the elements. The ideal bag for you should not only protect your food but also survive daily use. Key features like strong stitching, a wipe-clean liner, and a reinforced base ensure that your bag will be durable and effective for multiple uses.
Feature Checklist You Can Use in 60 Seconds
| Feature | What to Check | Why You Care |
|---|---|---|
| Insulation Layer | Thick foam or multi-layer lining | Keeps cold longer |
| Closure | Zipper or tight flap | Reduces temperature loss |
| Inner Lining | Wipe-clean, leak-resistant | Less odor and mold risk |
| Stitching | Reinforced seams | Handles heavy items safely |
| Base | Flat and firm | Keeps items stable |
Practical Tips for You
Choose leak-resistant linings if you carry meat or seafood.
Pick reinforced handles if you carry drinks or large loads.
Avoid weak Velcro closures for longer trips.
Real-world case:
A family reduced “bag replacement” frequency by upgrading to reinforced-handle insulated shopping bags designed for heavy grocery loads.
How Do You Choose Insulated Shopping Bags for Different Grocery Scenarios?
Direct Answer
Choose insulated shopping bags based on trip length, the types of food you buy, and how you carry groceries. A single “all-purpose” bag can work, but many people get better results using two types: one for frozen, one for chilled.
Expanded Explanation
Your shopping needs can vary from quick errands to larger weekly trips. The right insulated shopping bag can help you manage both frozen and chilled foods without compromising their quality. By matching your bags to your typical shopping routine, you can achieve better temperature control and reduce the chance of spoilage.
Scenario-Based Bag Selection Table
| Your Scenario | Best Bag Type | Add-On | What It Means for You |
|---|---|---|---|
| 10–20 minute commute | Medium insulated tote | Optional | Good daily convenience |
| 30–60 minute commute | Zippered insulated bag | Cold pack | Safer for dairy/meat |
| Frozen bulk shopping | Deep insulated bag | 2 cold packs | Less thawing and refreezing |
| Multiple errands | Two insulated bags | Cold packs | Separates frozen vs chilled |
Practical Tips for You
Use one bag for frozen, one for chilled items.
Carry eggs and produce separately to prevent crushing and moisture issues.
Keep a spare bag for unexpected purchases.
Practical case:
A commuter who shops on the way home improved meat freshness by packing it in a dedicated zippered insulated shopping bag with one cold pack.
How Should You Pack Insulated Shopping Bags for Best Performance?
Direct Answer
Pack insulated shopping bags like you pack a cooler: cold items together, minimal empty air, and the most temperature-sensitive foods in the coldest center zone. Packing order can change performance more than you think.
Expanded Explanation
To get the best performance, treat your insulated shopping bag as a mini cooler. Cold items should support each other, and you want to minimize the air gaps that let warm air circulate. By packing properly, you can maintain better food quality when you unpack at home.
Simple Packing Rules That Work
Frozen items go at the bottom (cold foundation).
Dairy and meat go in the center (most protected zone).
Soft items go on top (prevent crushing).
Close the zipper immediately (don’t “leak” cold air).
Packing Support Table
| Packing Choice | Good Practice | Bad Practice | What It Means for You |
|---|---|---|---|
| Frozen goods | Group together | Spread across bags | Less thawing |
| Cold pack placement | On top or sides | Under warm items | Better cooling coverage |
| Bag fullness | Packed tight | Half empty | Slower warming |
| Separation | Raw meat isolated | Meat touching produce | Better hygiene |
Practical Tips for You
Add a small towel layer between ice packs and delicate produce to prevent freezing spots.
Use a separate small bag for raw meat if you buy it often.
Unpack immediately when you arrive home.
Real-world case:
A shopper reduced “watery frozen berries” by packing frozen items tightly in one insulated shopping bag instead of splitting them across multiple bags.
How Do You Clean and Maintain Insulated Shopping Bags?
Direct Answer
Clean insulated shopping bags regularly to prevent odor, mold, and contamination—especially after carrying meat, seafood, or dairy. A wipe-down after each use and a deeper clean weekly can keep bags hygienic and longer-lasting.
Expanded Explanation
Moisture trapped inside insulated shopping bags can lead to odor and mold. By maintaining a consistent cleaning routine, you can extend the life of your bags while ensuring they remain safe for food contact.
Cleaning and Maintenance Table
| Task | Frequency | How to Do It | Benefit to You |
|---|---|---|---|
| Quick wipe | After each trip | Mild soap + warm water | Prevents odor buildup |
| Deep clean | Weekly | Wash lining + dry fully | Reduces mold risk |
| Drying | Every clean | Air dry with bag open | Extends bag life |
| Inspection | Monthly | Check seams and zipper | Prevents sudden failure |
Practical Tips for You
Dry bags fully before folding or storing.
Avoid harsh bleach smells unless you rinse thoroughly.
Store with the zipper open to reduce trapped humidity.
Practical case:
A household eliminated recurring “sour bag smell” by switching to full air-drying after each cleaning.
Shock-Absorbing EPP Cooler Box (Dec 2025)
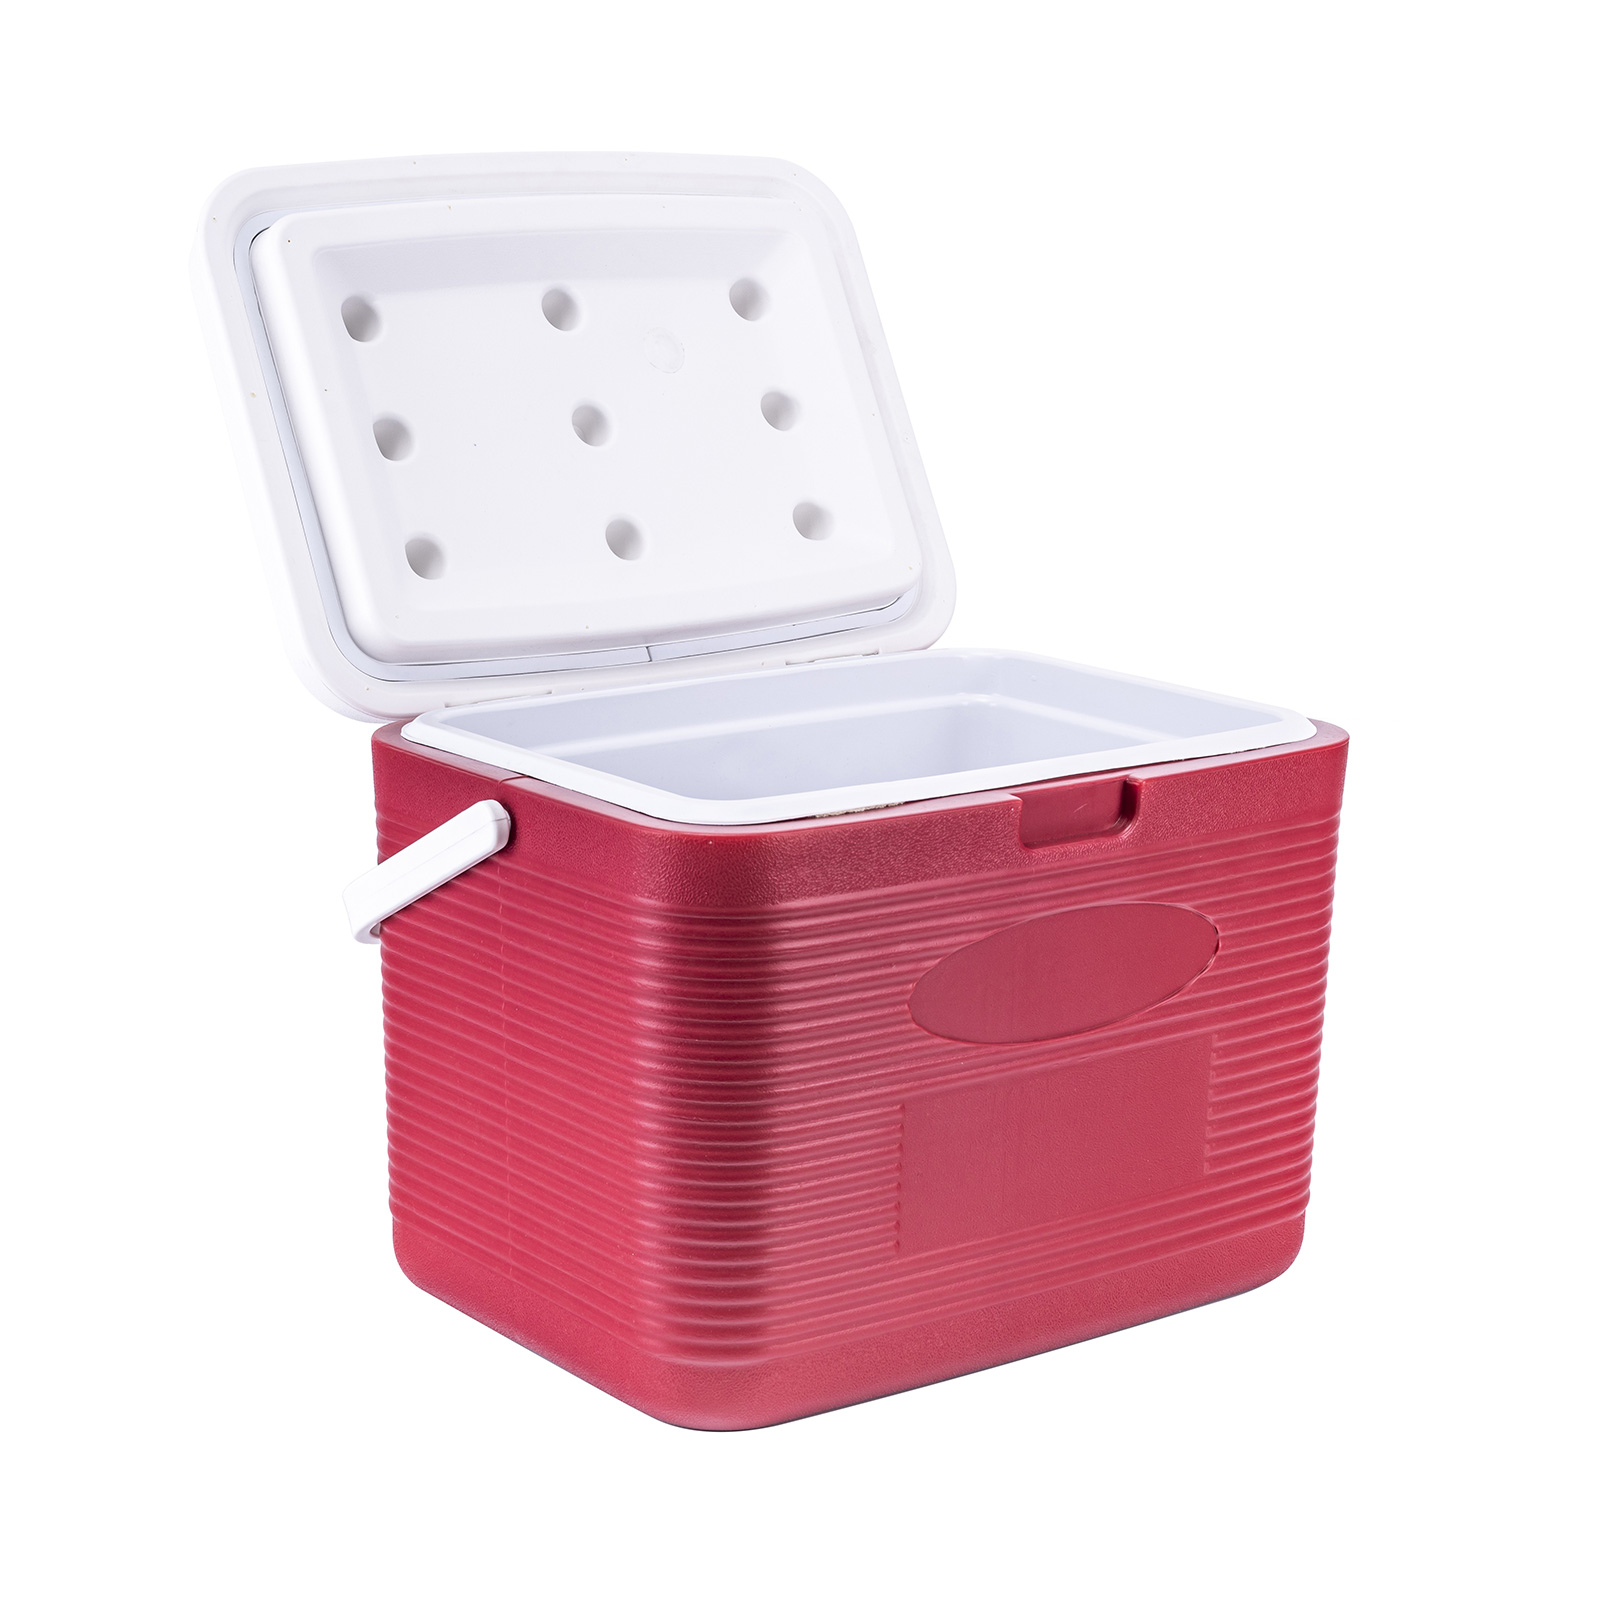
Shock-Absorbing EPP Cooler Box: How to Choose?
Updated on: December 16, 2025.
A shock-absorbing EPP cooler box gives you two things at once: insulation and impact protection. EPP (expanded polypropylene) is a closed-cell bead foam known for energy absorption, multiple-impact resistance, and thermal insulation. BPFC+1 It is also made in a wide density range (about 15–200 g/L), which lets you “tune” protection for your lane risk. BPFC Many EPP systems remain functional across extreme temperatures, often cited around -40°C to +110°C (grade dependent).

This guide will help you:
Choose a reusable EPP insulated box for cold chain without overpaying
Match EPP foam density for impact protection to drops, vibration, and stacking loads BPFC
Understand EPP cooler box thermal conductivity and what it means for hold time FEURER+1
Prove performance with practical testing like ASTM D5276 drop testing and parcel simulations ASTM International | ASTM+1
Avoid compliance surprises with food-contact checks in the EU and US EUR-Lex+1
Prepare for 2025–2030 reuse and recyclability pressure under EU packaging policy Environment+1
Shock-absorbing EPP cooler box: What makes EPP special?
A shock-absorbing EPP cooler box works because EPP behaves like a springy honeycomb. It absorbs energy, then rebounds. That “bounce-back” is why EPP is used where repeated impacts happen. Knauf Industries+1 EPP is also a closed-cell foam, so it resists water uptake better than open-cell foams. BPFC
Here’s the simple picture. If EPS is like a crisp cookie, EPP is more like a sponge cake. The cookie cracks once. The sponge cake compresses and returns.
Density tuning: how a shock-absorbing EPP cooler box matches your risk
EPP can be produced in a wide bead density range (about 15–200 g/L). BPFC Lower density is lighter and often cheaper. Higher density typically improves stiffness, stacking strength, and impact protection.
Use density like a “risk dial,” not a badge of quality.
| Density band (typical) | What it feels like | Best for | What it means for you |
|---|---|---|---|
| 20–35 g/L | Very light, softer | Short local loops | Lower cost, lower stacking margin BPFC |
| 35–60 g/L | Balanced | Most reusable cold chain lanes | Solid durability without heavy weight |
| 60–120 g/L | Stiffer, tougher | Heavy payloads, frequent stacking | Better protection, higher cost/weight |
| 120–200 g/L | Very stiff | Special engineered parts | Only if your use case demands it BPFC |
Practical tips you can use today
If your damage is “corner crush,” you likely need better corner design, not just higher density.
If your damage is “lid pop-open,” focus on closure geometry and seal design first.
If your damage is “repeat dents,” EPP’s multiple-impact behavior is your friend. BPFC+1
Practical case: A meal-delivery operator reduced cracked gel packs by switching from single-use foam to a shock-absorbing EPP cooler box plus a simple internal divider.
Shock-absorbing EPP cooler box: How good is the insulation?
A shock-absorbing EPP cooler box insulates well because EPP has low thermal conductivity and a closed-cell structure. Some molded EPP packaging components cite thermal conductivity around 0.038 W/mK, while other EPP insulation products cite ~0.040 W/mK at 10°C. FEURER+1
That number matters, but it is not the full story. Your hold time is driven by three levers:
Material insulation (k-value)
Wall thickness
Air leaks (lid fit, gaps, warped lids)
Lid seal and wall thickness: simple math without the headache
You do not need complicated modeling to choose thickness. Think in “relative insulation steps.” If you increase wall thickness, you usually reduce heat flow. If your lid leaks, thickness helps less than you think.
| Design lever | What you change | What usually happens | What it means for you |
|---|---|---|---|
| Wall thickness | 20 → 30 → 40 mm | Better insulation | Longer stability, heavier box |
| Lid geometry | Deeper overlap | Less leakage | More reliable temperature lane |
| Seal quality | Tighter fit | Less air exchange | Less “mystery warming” |
A quick “hold-time reality check” (interactive)
Answer these questions and pick your design priority:
Do you ship for 6–12 hours or 24–72 hours? (Longer needs better seal and thickness.)
Do you ship in parcel or on pallets? (Parcel needs shock + seal discipline.)
Does the receiver open immediately? (Fast opening rewards easy access and good lid closure.)
If you answered “longer + parcel + immediate,” your best first upgrade is usually lid seal quality, then thickness.
Practical tips you can use today
Treat the lid like a door on a refrigerator. A small gap can ruin the day.
Standardize packing photos for every lane. Visual standards reduce mistakes.
Add internal spacing so cold media does not slam the product during drops.
Practical case: A seafood shipper stopped “warm-on-arrival” complaints by improving lid overlap, not by adding more gel packs.
Shock-absorbing EPP cooler box: Can it handle hot, cold, and cleaning?
A shock-absorbing EPP cooler box is popular for reuse because many EPP grades remain functional in harsh temperature ranges and resist many chemicals and oils. Several technical sources describe EPP usability around -40°C to +110°C (grade dependent). RUCH NOVAPLAST+1 EPP is also described as having water and chemical resistance, plus buoyancy and strength-to-weight advantages. BPFC
This matters if you run:
Hot summer last-mile routes
Frozen payloads
Regular washing and sanitizing cycles
Cleaning and reuse: what to ask before you buy
Ask these questions once, then file the answers. You will use them again during audits and onboarding.
Which detergents and sanitizers are recommended for the EPP grade?
What is the cleaning method: wipe, spray, or wash tunnel?
How do labels behave after washing? (Peel, smear, or stay readable?)
What is the “retire rule” for damaged boxes?
| Reuse factor | Risk if ignored | Simple control | What it means for you |
|---|---|---|---|
| Cleaning chemistry | Material degradation | Approved chemical list | Stable appearance and performance BPFC |
| Drying | Odor and mold risk | Drying racks + airflow | Better customer experience |
| Damage inspection | Hidden cracks | Quick visual checklist | Fewer leaks and returns |
Practical tips you can use today
Write a 30-second inspection checklist (lid fit, cracks, hinge points, odor).
Keep “wash + dry” time consistent. Consistency beats heroic cleaning.
Use removable inserts for high-mess payloads, not disposable liners everywhere.
Practical case: A pharmacy courier reduced returns by adding a simple “lid fit test” after washing.
Shock-absorbing EPP cooler box: How do you design for drops and stacking?
A shock-absorbing EPP cooler box protects products when the box structure spreads force and the interior stops movement. EPP is known for resilience and reforming after impact. Engineered Foam Products+1 But design choices decide whether that resilience helps your payload or just makes the box “bounce.”
Think in three layers:
Outer structure (corners, ribs, wall thickness)
Closure (lid overlap, latches, seal geometry)
Inner restraint (dividers, inserts, product immobilization)
The “Drop + Stack Risk Score” (self-assessment)
Give yourself points. Higher score means you should prioritize tougher design.
Parcel shipping (multiple handoffs): +3
Stacked more than 3 high in transit: +2
Payload contains glass, vials, or fragile corners: +3
Temperature media is heavy (plates, bricks): +2
Returns and reuse cycles exceed 20 uses: +2
0–3: basic shock-absorbing EPP cooler box is usually enough.
4–7: prioritize lid closure and inner restraint.
8–12: prioritize density band, ribs, and validated testing.
Design features that matter most
| Risk | What fails | Design feature | What it means for you |
|---|---|---|---|
| Corner drops | Corner crush | Rounded corners + thicker corners | Fewer cracks and leaks |
| Vibration | Product rub | Inserts + snug fit | Less scuffing and breakage |
| Stacking | Lid warp | Ribbing + stable lid geometry | Better seal reliability |
| Heavy media | Internal slam | Media pockets + separators | Less product impact |
Practical tips you can use today
Lock media in place. Moving gel packs can act like hammers.
Avoid “empty air pockets.” Air space lets payload accelerate during drops.
Choose handles that don’t tear. Handles often fail before the walls do.
Practical case: A lab courier stopped vial breakage by adding a simple foam insert and fixing media movement.
Shock-absorbing EPP cooler box: How do you prove it works?
The fastest way to defend a shock-absorbing EPP cooler box decision is testing that matches your lane. A common drop-test reference is ASTM D5276, which covers free-fall drop testing of loaded containers. ASTM International | ASTM+1 For parcel environments, ISTA Procedure 3A is designed for individually packaged products shipped through a parcel delivery system. 国际安全运输协会+1
You do not need to run every test on earth. You need the right test for your risk.
A practical validation plan you can run in 2 weeks
Week 1: Define your “worst day.”
Pick the hottest week, the longest lane, and the roughest handling.
Week 1: Choose pass/fail rules.
Examples: lid stays closed, no leaks, payload stays within target temperature band.
Week 2: Run 3–5 repeats.
Repeatability builds confidence. One lucky run does not.
| Test type | What it simulates | Why it matters | Typical pass focus |
|---|---|---|---|
| ASTM D5276 drops | Free-fall shocks | Corner and edge damage | No break, no leak ASTM International | ASTM+1 |
| ISTA 3A sequence | Parcel hazards | Drops + handling patterns | Package integrity 国际安全运输协会+1 |
| Stacking compression | Warehouse loads | Lid warp + seal loss | Lid remains stable |
| Thermal hold check | Lane conditions | Real temperature outcome | Payload stays in spec |
Practical tips you can use today
Test the packed system, not the empty box. Payload changes everything.
Film your drops. Video reveals failure modes you will miss in notes.
Log “exception stories.” A failure teaches more than a pass.
Practical case: A frozen meal shipper passed drops but failed leakage—until they redesigned the lid overlap.
Shock-absorbing EPP cooler box: Is it food-contact compliant?
A shock-absorbing EPP cooler box is often made from polypropylene, but food-contact compliance depends on the exact resin and additives used. In the EU, plastic materials intended to contact food fall under Commission Regulation (EU) No 10/2011. EUR-Lex In the US, olefin polymers for food-contact use are covered under 21 CFR 177.1520 (subject to conditions of use and limitations). 联邦登记册
Here is the key point: “EPP” is a material family, not a compliance certificate. Your supplier should provide paperwork.
Your compliance checklist (ask-and-file)
Request and store:
Declaration of compliance for EU 10/2011 (if you sell into the EU) EUR-Lex
Statement of compliance with 21 CFR 177.1520 (if you sell into the US) 联邦登记册
Additives disclosure status (what is used, and where it is permitted)
Cleaning chemical compatibility list (so your wash process stays safe)
| Compliance need | What you ask for | Who should provide it | What it means for you |
|---|---|---|---|
| EU food contact | EU 10/2011 documentation | Resin or box supplier | Fewer customer audits EUR-Lex |
| US food contact | 21 CFR 177.1520 statement | Resin or box supplier | Easier retail onboarding 联邦登记册 |
| Traceability | Lot and resin batch | Supplier | Faster issue resolution |
Practical tips you can use today
Do not guess. Ask for documents before you scale orders.
Match the document to the exact grade. “Similar material” is not enough.
Store docs per SKU. Future you will thank you.
Practical case: A catering brand avoided a launch delay by pre-collecting food-contact statements for every cooler SKU.
Shock-absorbing EPP cooler box: How does sustainability and reuse affect your choice?
Sustainability pressure is now part of best practice for a shock-absorbing EPP cooler box, especially in Europe. The European Commission describes the shift from the Packaging and Packaging Waste Directive to the Packaging and Packaging Waste Regulation (PPWR) 2025/40, and highlights goals like making packaging recyclable in an economically viable way by 2030. Environment A regulatory summary also notes PPWR reuse targets for transport packaging starting 1 January 2030, including minimum shares for certain transport packaging types. KPMG
This matters even if you do not sell in the EU. Buyers copy EU expectations fast.
Meanwhile, EPP is widely described as recyclable and valued for durability and reuse. BPFC+1 That fits a “reuse-first” direction.
Reuse models that work in real operations
| Reuse model | Best for | Operational must-have | What it means for you |
|---|---|---|---|
| Closed loop | Same depot returns | Reliable reverse logistics | Lowest loss rate |
| Semi-open loop | Partner locations | Tracking + deposit | Manageable shrink |
| Open loop | Consumer returns | Strong incentives | Highest shrink risk |
Practical tips you can use today
Start with a pilot loop. Prove returns before you buy 10,000 units.
Use a simple loss KPI. Loss rate often kills reuse economics faster than cleaning.
Design for repair. Replaceable lids and inserts can extend life.
Practical case: A grocery delivery service improved reuse ROI by adding a deposit and a weekly pickup route.
2025 trends for the shock-absorbing EPP cooler box market
In 2025, the best designs are getting more “system-like.” It is not just a box. It is a repeatable process.
Here are the trends that matter most to your day-to-day results:
Latest progress snapshot
More lane-specific designs: One box for “everything” is losing to fit-for-lane SKUs.
More modular interiors: Inserts are used to stabilize payload and speed packing.
More compliance documentation: Food contact and packaging policy questions arrive earlier in sales cycles. EUR-Lex+1
Market insight: customers reward reliability. A shock-absorbing EPP cooler box that performs the same in July and January reduces refunds, reships, and churn.
Frequently asked questions
Q1: What is a shock-absorbing EPP cooler box, in plain words?
It’s an insulated reusable box made from expanded polypropylene bead foam. EPP is known for energy absorption, multiple-impact resistance, and thermal insulation. BPFC+1
Q2: How do I choose the right EPP density for impact protection?
Start with lane risk. Parcel, heavy media, and stacking usually need higher stiffness. EPP can be produced across a wide density range (about 15–200 g/L), so you can tune it. BPFC
Q3: What thermal conductivity should I expect from an EPP cooler box?
Many EPP insulation components cite values around 0.038–0.040 W/mK (product and test conditions vary). Use it as a guide, then validate hold time in your lane. FEURER+1
Q4: Which drop test should I use to validate packaging strength?
ASTM D5276 is a common reference for free-fall drop testing of loaded containers. Pair it with your real packing method and pass/fail rules. ASTM International | ASTM+1
Q5: What testing fits parcel delivery shipments?
ISTA Procedure 3A is designed for individually packaged products shipped through a parcel delivery system. It helps simulate typical parcel hazards. 国际安全运输协会+1
Q6: Is every shock-absorbing EPP cooler box automatically food-contact safe?
No. EPP is usually polypropylene, but compliance depends on the exact grade and additives. In the EU, look for documentation aligned to Regulation (EU) 10/2011. In the US, look for 21 CFR 177.1520 statements. EUR-Lex+1
Summary and recommendations
A shock-absorbing EPP cooler box is a strong choice when you need repeat use, stable insulation, and protection from real-world handling. EPP is widely described as a closed-cell bead foam with energy absorption, multiple-impact resistance, and recyclability. BPFC+1 Many EPP grades are cited as functional across roughly -40°C to +110°C, which supports cold chain and mixed-temperature operations. RUCH NOVAPLAST+1
Your next steps should be simple:
Pick your lane risk score and set pass/fail rules.
Choose density and design features that solve your actual failure mode. BPFC
Validate with drop and parcel-relevant testing (ASTM D5276, ISTA 3A). ASTM International | ASTM+1
Collect food-contact documents early for EU and US needs. EUR-Lex+1
CTA: If you share your payload type, maximum weight, lane duration, and shipping mode (parcel vs pallet), I can draft a one-page spec for your next shock-absorbing EPP cooler box and a test plan your team can run.
About Tempk
At Tempk, we build cold chain packaging systems that are easy to run every day. We focus on reusable insulation solutions, lane-based packing standards, and testing plans that match real handling. Our goal is practical performance: fewer breakages, fewer temperature claims, and cleaner operations across seasons.
Next step: Ask us for a lane-matched design checklist and a validation template for your shock-absorbing EPP cooler box.
Heavy-Duty EPP Foam Box: 2025 Selection Guide
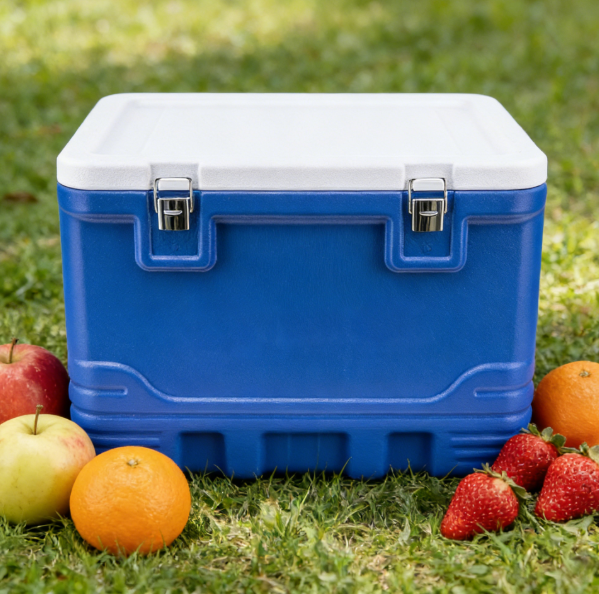
Heavy-Duty EPP Foam Box: What Works in 2025?
Last updated: December 16, 2025
A heavy-duty EPP foam box works when you need insulation and toughness at the same time. It’s made from expanded polypropylene (EPP), a closed-cell bead foam known for energy absorption, multiple-impact resistance, thermal insulation, and water/chemical resistance. BPFC+1 If your shipments get dropped, stacked, or returned and reused, the heavy-duty EPP foam box is designed for that reality.
This article answers:
How a heavy-duty EPP foam box differs from EPS/EPE options (and why it matters)
What EPP foam box thermal conductivity means for your hold time
How to size wall thickness, density, and volume for your lane
How to validate a heavy-duty EPP foam box using ISTA thermal standards
How cleaning, returns, and 2025 sustainability rules change your packaging plan
Heavy-duty EPP foam box basics: What is it really?
Direct answer: A heavy-duty EPP foam box is a reusable insulated container made from molded EPP beads. EPP is widely described as a versatile closed-cell foam with high strength-to-weight, multiple impact resistance, and thermal insulation. BPFC+1 That combination is why it shows up in logistics, cold chain, and protective transport applications.
Expanded explanation: Think of a heavy-duty EPP foam box like a “helmet for your payload.” It doesn’t just slow heat transfer. It also absorbs shock and springs back after bumps that would crack brittle foams. EPP grades come in a wide density range (industry references cite roughly 15–200 g/L overall), letting designers trade weight for strength and insulation. BPFC
Heavy-duty EPP foam box vs EPS: what changes for you?
Detailed info: The biggest operational difference is reuse. A heavy-duty EPP foam box is built for repeated handling cycles, while single-use systems often fail on the “second trip” problem: dents, cracks, wet damage, or messy reverse logistics. Industry sources highlight EPP’s durability and resistance as reasons it stays in circulation for years in returnable systems. EPP-Forum e.v.+1
| Decision factor | Single-use foam shipper | Heavy-duty EPP foam box | What it means for you |
|---|---|---|---|
| Drop/impact behavior | Often cracks or chips | Multiple-impact resistant BPFC+1 | Fewer claims from handling damage |
| Reuse readiness | Low | High (returnable model) EPP-Forum e.v. | Lower “packaging per trip” over time |
| Cleaning + hygiene | Often not designed for it | Many grades are easy to clean/sterilize SpecialChem | Better fit for controlled operations |
Practical tips you can use today
If you run returns: choose a heavy-duty EPP foam box with a lid that seals consistently after many openings.
If you stack loads: prioritize thicker walls and higher-density corners, not just “bigger size.”
If you ship liquids: add an internal liner or absorbent plan so the box stays clean for reuse.
Real-world scenario: If your boxes travel in vans with constant loading/unloading, the “multiple-impact” property becomes a cost lever, not a material detail. BPFC+1
Heavy-duty EPP foam box insulation: How cold can it stay?
Direct answer: A heavy-duty EPP foam box slows heat gain because its closed-cell structure traps air, and air is a great insulator. EPP is widely described as thermally insulating, and technical property sheets show low thermal conductivity values for EPP grades. EPD International+1 When you combine that with the right coolant strategy, you get stable internal temperatures for longer routes.
Expanded explanation: Insulation is not a magic number. It’s a system: box + lid + seams + payload + coolant + how often someone opens it. The box material sets the baseline heat leak, but your process determines the real-world results. That’s why thermal validation standards exist for insulated shippers. 国际安全运输协会
EPP foam box thermal conductivity: What’s a “good” number?
Detailed info: A technical property table for EPP products lists thermal conductivity (ASTM C177) around 0.24–0.26 BTU·in/(ft²·hr·°F) depending on grade. foam-industries.com That converts to roughly 0.035–0.038 W/m·K (approx.), which is in the expected insulation range for bead foams used in temperature-controlled packaging.
| What you measure | Typical EPP reference | What moves it | What it means for you |
|---|---|---|---|
| Thermal conductivity (k) | 0.24–0.26 BTU·in/(ft²·hr·°F) foam-industries.com | Density, molding quality, seams | Lower k usually = longer hold time |
| Water absorption | Very low values shown (<5% vol) foam-industries.com | Cleaning method, damage | Less soggy insulation over reuse |
| Service temperature | Max values listed up to 212°F foam-industries.com | Grade and design | Helps with wash and hot environments |
Practical tips you can use today
Treat seams like “holes”: a great wall doesn’t help if the lid gap leaks air.
Use a simple rule for coolant: colder lanes need more coolant mass, not thicker walls only.
Stop “empty space waste”: voids raise heat flow and can trigger compliance issues in some markets. Environment
Real-world scenario: If drivers open the lid twice per stop, you’ll lose more performance than any small material upgrade could recover.
Heavy-duty EPP foam box strength: Which density actually holds up?
Direct answer: Density matters because it drives mechanical strength. Technical references list EPP grades around 20–60 g/L with compressive strength increasing as density rises. foam-industries.com For a heavy-duty EPP foam box, higher-density corners and ribs often deliver more “real strength” than simply making the box bigger.
Expanded explanation: “Heavy-duty” usually means three things in operations: it survives drops, it survives stacking, and it survives repeated cleaning/handling. You don’t need the highest density everywhere. You need smart reinforcement where failures happen: corners, rim, lid interface, and base.
Density and compressive strength: quick reference table
Detailed info: One EPP properties sheet lists typical values like these across densities (example grades shown). foam-industries.com Use this to sanity-check supplier claims and to write your own spec.
| Property (ASTM) | ~20 g/L | ~30 g/L | ~45 g/L | Your practical meaning |
|---|---|---|---|---|
| Compressive @ 25% (psi) | 14.5 | 23.5 | 42 | Better stacking resistance foam-industries.com |
| Tensile strength (psi) | 38 | 55.5 | 67 | Less cracking at handles foam-industries.com |
| Tear strength (lb/in) | 10 | 13 | 16 | Fewer chips and rim failures foam-industries.com |
Practical tips you can use today
If you stack >3 layers: specify a minimum compressive strength target, not just “EPP box.”
If boxes ride on conveyors: reinforce rim edges and add wear zones where scraping happens.
If you use straps: define strap locations so the box doesn’t “dent” over time.
Real-world scenario: Many breakages happen at the lid lip after thousands of touches, not at the wall center. Design for that.
Heavy-duty EPP foam box sizing: How do you pick volume and wall thickness?
Direct answer: Pick the smallest heavy-duty EPP foam box that fits your payload and coolant plan. Smaller internal air space reduces heat load and movement damage. Then choose wall thickness based on your route duration, ambient conditions, and opening frequency.
Expanded explanation: Oversizing is a quiet budget killer. It increases coolant needs, increases empty space, and raises shipping cost. In the EU, packaging “minimisation” rules also push companies to reduce unnecessary empty space in transport and e-commerce packaging.
A simple heavy-duty EPP foam box sizing “calculator”
Detailed info: Use this quick method before you ask for quotes.
Measure payload volume (L × W × H).
Add coolant volume (your pack-out recipe).
Add 10–15% buffer for safe closure and airflow.
Choose the smallest internal dimension set that meets the result.
| Step | What you enter | What you get | What it means for you |
|---|---|---|---|
| Payload | Product dimensions | Payload volume | Prevents “box too big” waste |
| Coolant | Packs/PCM size | Coolant volume | Drives hold time the most |
| Buffer | 10–15% | Clearance | Helps consistent closure |
Practical tips you can use today
If you ship mixed SKUs: design around the 80% case and use inserts for the rest.
If you ship glass or vials: add corner protection and stop movement first.
If you ship food: choose a layout that keeps cold sources from direct contact where needed.
Real-world scenario: A 10% size reduction can cut coolant needs and improve delivery consistency, especially in hot seasons.
Heavy-duty EPP foam box for cold chain: Which use cases win biggest?
Direct answer: A heavy-duty EPP foam box wins when you have repeat shipments, strict temperature needs, or rough handling. It’s common in food logistics, meal delivery, and sensitive goods where return-and-reuse is realistic. EPP industry references note its use as reusable transport packaging, often kept in circulation for years.
Expanded explanation: If you only ship once a month to random addresses, return logistics may be the hard part. But if you ship daily between depots, hospitals, kitchens, stores, or distribution points, the heavy-duty EPP foam box becomes a predictable asset.
Use-case match table
| Use case | Why EPP helps | Typical “gotcha” | What it means for you |
|---|---|---|---|
| Meal delivery / catering | Durable + insulates + reusable FAO AGRIS | Cleaning and odor control | Requires a wash SOP |
| Pharma / medical transport | Insulation + shock absorption EPP-Forum e.v.+1 | Validation documentation | Plan ISTA-style profiles |
| Depot-to-store food | Stack strength + reuse cycles foam-industries.com+1 | Lid discipline | Train teams on closure |
Practical tips you can use today
Start with one closed loop: one lane, one return path, one owner.
Add tracking early: even simple IDs reduce loss and theft.
Standardize pack-out: same coolant, same placement, same close.
Real-world scenario: A closed-loop route (kitchen → van → drop → return) is the easiest place to prove ROI quickly.
Heavy-duty EPP foam box validation: How do you prove performance in 2025?
Direct answer: Validate a heavy-duty EPP foam box with a repeatable test plan that matches your shipping reality. ISTA provides thermal standards guidance for insulated shipping containers, including ISTA Standard 20 and parcel-focused thermal standards like 7E. Your goal is not a “pretty report.” Your goal is confidence that your box performs on the worst day.
Expanded explanation: Validation is where many teams get stuck. They either test only in perfect conditions, or they test so harshly that no design can pass. You want a realistic worst-case: hottest ambient exposure, longest dwell, and the most openings your route actually sees.
HowTo: Validate a heavy-duty EPP foam box (lane-based)
Detailed info: Use this as your starting structure.
Define your temperature target (chilled vs frozen vs CRT).
Choose worst-case seasons and ambient profiles.
Build your pack-out recipe (payload simulator + coolant).
Run at least 3 repeats (not 1).
Record internal temps and excursions (time above/below limits).
Document results and corrective actions.
| Validation step | What you test | What you record | What it means for you |
|---|---|---|---|
| Thermal profile | Ambient exposure + dwell | Time/temperature curve | Proof for QA and customers |
| Handling | Drops, vibration, stacking | Damage + seal performance | Reduces claims and re-shipments |
| Reuse cycle | Wash + re-pack + repeat | Fit and lid closure | Shows real “heavy-duty” value |
Practical tips you can use today
Don’t test only the box: test the box + pack-out + human steps.
Measure “time out of fridge” during loading: it often dominates failures.
Keep the report short: one page summary + graphs is enough to act.
Real-world scenario: Many failures come from “lid not fully closed,” not from insulation thickness.
Heavy-duty EPP foam box cleaning: How do you keep it hygienic without damage?
Direct answer: Treat cleaning like part of the packaging design, not an afterthought. Some EPP grades are described as easy to clean and sterilize, with low water absorption. SpecialChem+1 A heavy-duty EPP foam box stays “heavy-duty” only if your wash process doesn’t deform lids, damage corners, or leave odors.
Expanded explanation: Cleaning is where reuse programs succeed or fail. If cleaning is slow, inconsistent, or smelly, operations will quietly abandon reuse. Your SOP should make the right behavior the easy behavior.
Cleaning SOP checklist for heavy-duty EPP foam box programs
Detailed info: Keep it simple and consistent.
Pre-rinse to remove debris
Wash with approved detergent (per your product category rules)
Rinse thoroughly
Dry completely before storage
Inspect: lid fit, rim integrity, cracks, odor
Quarantine damaged boxes
| Risk | What causes it | Simple prevention | What it means for you |
|---|---|---|---|
| Odor retention | Incomplete drying | Add drying racks + airflow | Fewer “customer smell” complaints |
| Lid warp / poor fit | Too much heat or force | Set wash limits and handling rules | Maintains seal performance |
| Cross-contamination | Mixed dirty/clean flow | One-way flow lanes | Better hygiene confidence |
Practical tips you can use today
Separate “food only” and “non-food” boxes in your program.
Use visual status labels: “Clean / Needs wash / Quarantine.”
Track the top 3 failure modes: lid, rim, base—fix those first.
Real-world scenario: A 30-second inspection step can prevent a whole day of customer complaints.
Heavy-duty EPP foam box sustainability: Is it actually greener in real life?
Direct answer: It can be—if you reuse it enough times and manage end-of-life responsibly. EPP is described as 100% recyclable and used in long-lived reusable transport systems. BPFC+2EPP-Forum e.v.+2 A life-cycle study summary (food-delivery context) reports an EPP box solution achieved ~37% lower overall impacts versus a common box, using an LCA approach aligned to ISO standards. FAO AGRIS
Expanded explanation: Sustainability is not “plastic vs paper.” It’s trips per box, wash energy, loss rate, and recycling success. If your heavy-duty EPP foam box is lost after two trips, it’s not a win. If it stays in circulation for years and is recycled, it often can be.
2025 regulation pressure: why “right-sizing” matters
Detailed info: In the EU, the Packaging and Packaging Waste Regulation (PPWR) entered into force in February 2025, with application later (timeline depends on provisions). Environment PPWR objectives include packaging minimisation, reuse, and recyclability. Environment That pushes businesses to reduce empty space and adopt systems that can be collected and reused.
| 2025 pressure | What it pushes | How EPP programs respond | What it means for you |
|---|---|---|---|
| Minimisation | Less empty space | Smaller box + smart inserts | Lower freight + better compliance Environment |
| Reuse focus | Return systems | Closed-loop EPP circulation | More predictable packaging cost |
| Recyclability | End-of-life plans | Mono-material pathways | Easier recycling stories EPP-Forum e.v. |
Practical tips you can use today
Set a “minimum reuse target”: define how many trips justify the program.
Add loss control: simple IDs and returns tracking protect sustainability and cost.
Plan end-of-life: store damaged boxes and send them to proper recycling partners.
Real-world scenario: The fastest “sustainability upgrade” is often reducing empty space and preventing box loss. Environment
Interactive decision tool: Should you switch to a heavy-duty EPP foam box?
Direct answer: Switch when your total cost per successful delivery drops and your failure rate improves. A heavy-duty EPP foam box usually wins when you can return it and reuse it many times. EPP reuse systems are commonly described as staying in circulation for several years in logistics contexts.
Self-assessment score (0–20)
Cost-per-trip mini model (simple)
Cost per trip ≈ (Box cost + tracking + washing) ÷ (Expected successful trips before loss)
Compare that to: single-use packaging cost + re-shipments + product loss
Tip: If your box loss rate is high, fix that before you buy a premium box.
2025 heavy-duty EPP foam box trends you should watch
Trend overview: In 2025, heavy-duty EPP foam box programs are evolving from “reusable boxes” into “managed assets.” Companies are pairing reuse with tracking, standard test methods, and packaging minimisation requirements. EU packaging policy direction is pushing reuse and better-designed transport packaging, especially for e-commerce and distribution systems.
Latest progress snapshot
More thermal standardization: ISTA guidance is increasingly referenced for designing and qualifying insulated shipping containers.
More circular design talk: EPP industry groups emphasize reuse-for-years plus recyclability at end of life.
More data-backed sustainability: LCA-based comparisons are being used to justify reusable systems in food delivery.
Market insight: The “best box” is the one your team can run consistently: pack-out, close, deliver, return, wash, repeat.
Frequently Asked Questions
Q1: How long can a heavy-duty EPP foam box stay cold?
It depends on your pack-out, ambient heat, and lid openings. Use lane-based validation and track time out of refrigeration. ISTA thermal standards help structure those tests.
Q2: Is a heavy-duty EPP foam box recyclable?
EPP is commonly described as 100% recyclable, and EPP logistics systems often recycle material at end of life.
Q3: What density should I choose for a heavy-duty EPP foam box?
Higher density generally improves compressive and tear strength. Property tables show strength increasing from ~20 g/L to ~45 g/L grades.
Q4: Does a heavy-duty EPP foam box handle water and cleaning well?
EPP is often described as water resistant with low water absorption, and some grades are described as easy to clean/sterilize.
Q5: Can reusable EPP boxes reduce environmental impact?
A food-delivery LCA summary reported an EPP box option showed ~37% lower overall impacts than a common box in that context. Results depend on reuse cycles and loss rates.
Summary and recommendations
Key takeaways: A heavy-duty EPP foam box is best when you need insulation plus repeated-use durability. EPP is widely described as multiple-impact resistant, thermally insulating, and recyclable. Use density and design reinforcement to survive stacking and daily handling. Validate performance with a lane-based plan that follows recognized thermal testing guidance. Finally, make cleaning and returns part of the design, not an afterthought.
Next steps (CTA): Choose one shipping lane and run a 14-day pilot with a single pack-out recipe. Record internal temperature, handling damage, and return losses. If you share your target temperature range, route duration, and payload size, we can map a heavy-duty EPP foam box spec that fits your real operation.
About Tempk
At Tempk, we build temperature-controlled packaging systems that are practical to run every day. Our heavy-duty EPP foam box solutions focus on repeatable pack-outs, durable reuse in closed-loop programs, and validation-ready performance. We also help teams simplify cleaning, returns, and tracking so your packaging works as an operational asset, not a one-time purchase.
Action: Ask for a pack-out + validation checklist so you can pilot a heavy-duty EPP foam box program with clear pass/fail criteria.
Insulated Food-Grade EPP Cooler Box Guide

How to Choose an Insulated Food-Grade EPP Cooler Box?
If you deliver food, an insulated food-grade EPP cooler box can be the difference between “fresh on arrival” and refunds. Many chilled shipments aim for 0–4°C (32–40°F), while frozen often targets -18°C (0°F) or colder.
Your box won’t “make cold,” but it can protect it. The goal is simple: keep quality stable, even when traffic, porch time, or handling gets messy.
This article will answer for you:
How an insulated food-grade EPP cooler box protects taste and safety in last-mile delivery
What “food-grade” proof you should request (without becoming a compliance expert)
How to choose size, wall thickness, lid fit, and (if needed) density without overpaying
A practical packout guide for chilled, frozen, and mixed loads
A cleaning + reuse SOP that protects hygiene and extends box life
A simple ROI / cost-per-delivery calculator you can run today
Why use an insulated food-grade EPP cooler box in 2025?
Direct answer: An insulated food-grade EPP cooler box is built to reduce heat transfer, protect food-contact safety, and survive repeat handling—so you get fewer temperature swings and fewer damaged deliveries.
insulated food-grade EPP cooler…
It’s especially useful for seafood, meat, dairy, meal kits, and ready-to-eat foods.
EPP works like a “winter jacket” for your product. When the jacket fits well, it performs better. Tight lids and fewer gaps make your insulated food-grade EPP cooler box more consistent.
insulated food-grade EPP cooler…
What problems does it solve in real delivery?
Detailed info: Most failures happen in normal moments—loading delays, stacked vans, and doorstep waits. Your insulated food-grade EPP cooler box helps by resisting crush, resisting moisture, and holding its shape so the lid keeps sealing.
| Real delivery problem | What happens | How EPP helps | What it means for you |
|---|---|---|---|
| Heat exposure | Food warms too fast | Better insulation + tighter fit | Fewer warm-arrival complaints insulated food-grade EPP cooler… |
| Drops + stacking | Corners crack, lids warp | Foam rebounds after impact | Lower replacement spend insulated food-grade EPP cooler… |
| Meltwater | Cartons weaken, labels peel | Low water uptake behavior | Cleaner handling and returns insulated food-grade EPP cooler… |
| Repeat use | Single-use costs pile up | Designed for reuse loops | Lower cost per trip insulated food-grade EPP cooler… |
Practical tips you can apply today
Short routes (0–4 hours): prioritize fast handling and easy cleaning.
insulated food-grade EPP cooler…
Medium routes (4–12 hours): upgrade lid seal and consider thicker walls.
insulated food-grade EPP cooler…
Long routes (12–24 hours): treat it as a system (box + coolant + monitoring).
insulated food-grade EPP cooler…
Real example: One operator reduced packaging replacements by switching from brittle foam to reusable EPP containers that survived stacked van loads.
insulated food-grade EPP cooler…
What does “food-grade” mean in an insulated food-grade EPP cooler box?
Direct answer: “Food-grade” means the material and production controls are appropriate for food contact under intended use—but your cleaning and handling decide day-to-day safety.
insulated food-grade EPP cooler…
In other words: a good box plus a weak SOP is still a risk.
The “Food-Grade Proof Pack” you should request
You don’t need legal training. You need a simple checklist that matches where you sell and how you use the box.
insulated food-grade EPP cooler…
| Proof item | What to request | What to check | What it means for you |
|---|---|---|---|
| EU framework | Statement aligned to Reg. (EC) 1935/2004 | “No harmful migration” principle | Clear baseline compliance logic insulated food-grade EPP cooler… |
| EU plastics | Reg. (EU) 10/2011 DoC | Plastics measure named | Faster EU pathway insulated food-grade EPP cooler… |
| U.S. food-contact | Statement referencing FDA 21 CFR 177.1520 | CFR reference is explicit | Cleaner U.S. pathway insulated food-grade EPP cooler… |
| Intended use | Use conditions (temps, time, cleaning) | Matches your real SOP | Fewer warranty surprises insulated food-grade EPP cooler… |
Practical tips to avoid “food-grade” mistakes
If food touches the box: treat it as direct contact and require documentation.
insulated food-grade EPP cooler…
If you apply heat: confirm your real temperature and cleaning limits.
insulated food-grade EPP cooler…
If you reuse boxes: confirm they are intended for repeated-use cycles, not just one-time contact.
insulated food-grade EPP cooler…
Practical case: A catering brand reduced recall risk by standardizing one documentation packet per insulated food-grade EPP cooler box model.
insulated food-grade EPP cooler…
How well does an insulated food-grade EPP cooler box insulate in real life?
Direct answer: EPP insulates well because heat moves through it slowly. Some industry references commonly report thermal conductivity around 0.036–0.039 W/m·K for typical EPP applications.
insulated food-grade EPP cooler…
But the bigger truth is this: insulation is a system, not a material. Lid fit, wall thickness, load pattern, and starting temperature can matter just as much.
insulated food-grade EPP cooler…
Think “heat budget.” The hotter the outside air, the faster you spend it. Your refrigerant is the battery that absorbs incoming heat.
insulated food-grade EPP cooler…
A fast decision tool: “Will my route stay cold enough?”
Answer these quickly:
insulated food-grade EPP cooler…
Is your product pre-chilled to target temperature before packing?
insulated food-grade EPP cooler…
Will your route see >25°C ambient heat for more than 2 hours?
insulated food-grade EPP cooler…
Will the box be opened during delivery (multi-drop)?
insulated food-grade EPP cooler…
Is doorstep wait risk more than 30 minutes?
insulated food-grade EPP cooler…
If you said “yes” to two or more, upgrade at least one lever: wall thickness / lid seal, coolant mass + placement, or route/loading process.
insulated food-grade EPP cooler…
How long can an insulated food-grade EPP cooler box hold temperature?
Direct answer: There is no universal hour number. Hold time depends on starting product temp, ambient heat, coolant choice, and box design.
insulated food-grade EPP cooler…
Your insulated food-grade EPP cooler box slows heat gain, but your process controls the outcome.
Coolant placement matters more than people expect
Cold air falls. That’s why top placement often improves uniform cooling.
insulated food-grade EPP cooler…
| Coolant placement | What it does | Best for | What it means for you |
|---|---|---|---|
| Top cooling | Cold air falls | Seafood, dairy | More uniform cooling insulated food-grade EPP cooler… |
| Side cooling | Stabilizes edges | Meal kits | Reduces edge warming insulated food-grade EPP cooler… |
| Bottom cooling | Supports base | Frozen items | Protects bottom layer insulated food-grade EPP cooler… |
Practical tips you can use immediately
Pre-chill the box for premium products when possible.
insulated food-grade EPP cooler…
Avoid big air gaps—air can accelerate temperature swings.
insulated food-grade EPP cooler…
Use dividers or barrier sheets to prevent freezing delicate items.
insulated food-grade EPP cooler…
Real example: A seafood retailer reduced texture complaints by moving gel packs from bottom to top and adding a thin separator layer.
insulated food-grade EPP cooler…
How do you choose the right insulated food-grade EPP cooler box size and design?
Direct answer: Choose size based on load density, route duration, and workflow—not just volume. Oversized boxes waste coolant space and increase temperature drift. Undersized boxes slow packing and crush product.
insulated food-grade EPP cooler…
A strong design also supports fast packing, safe stacking, and consistent scanning—especially on multi-stop routes.
insulated food-grade EPP cooler…
Size selection checklist (quick)
Can one person lift it safely when full?
insulated food-grade EPP cooler…
Does it fit your van shelves or tote system?
insulated food-grade EPP cooler…
Can you stack it without lid warping?
insulated food-grade EPP cooler…
Can you standardize it across SKUs?
insulated food-grade EPP cooler…
| Feature | Option A | Option B | What it means for you |
|---|---|---|---|
| Capacity | Smaller, dense load | Larger, mixed load | Smaller often holds temp better insulated food-grade EPP cooler… |
| Lid style | Flat lid | Interlocking lid | Interlocking improves seal insulated food-grade EPP cooler… |
| Handles | Molded grip | Strap support | Better ergonomics reduces drops insulated food-grade EPP cooler… |
A 2-minute sizing tool you can actually use
Answer these and follow the rule:
insulated food-grade EPP cooler…
Food state: chilled / frozen
insulated food-grade EPP cooler…
Route time at the 90th percentile (“bad day” time)
insulated food-grade EPP cooler…
Payload weight (including inner packs)
insulated food-grade EPP cooler…
Refrigerant volume needed: low / medium / high
insulated food-grade EPP cooler…
Can you guarantee fast handoff? yes / no
insulated food-grade EPP cooler…
Rule of thumb: If the box is “almost full,” your center items are at risk because you lose refrigerant placement space.
insulated food-grade EPP cooler…
What refrigerants work best in an insulated food-grade EPP cooler box?
Direct answer: Your insulated food-grade EPP cooler box performs best when refrigerant type and placement match your temperature target. “More is better” is a trap—too much can freeze chilled foods, too little causes warm arrivals.
insulated food-grade EPP cooler…
Most operations use gel packs, PCM packs, wet ice (contained), or dry ice for frozen.
insulated food-grade EPP cooler…
| Refrigerant | Best for | Risk | What it means for you |
|---|---|---|---|
| Gel packs | Chilled foods | Freezing delicate items | Use barriers + correct sizing insulated food-grade EPP cooler… |
| PCM packs | Tight chilled range | Wrong melt point | Match PCM to target temp insulated food-grade EPP cooler… |
| Wet ice | Short chilled routes | Leaks + mess | Use liners + absorbents insulated food-grade EPP cooler… |
| Dry ice | Frozen foods | Handling + venting needs | Train and label clearly insulated food-grade EPP cooler… |
Practical tips for fewer “half-frozen” or “warm” complaints
Meal delivery: PCM packs can reduce partial freezing of chilled items.
insulated food-grade EPP cooler…
Dairy: avoid direct pack-to-product contact inside the insulated food-grade EPP cooler box.
insulated food-grade EPP cooler…
Frozen protein: isolate dry ice and avoid sealing completely airtight.
insulated food-grade EPP cooler…
How do you pack hot, chilled, and frozen foods inside EPP boxes?
Direct answer: Organization beats guesswork. Use a simple 3-layer logic: food at target temp, barrier, and thermal source/sink.
insulated food-grade EPP cooler…
| Food type | Temperature goal | What to use | What it means for you |
|---|---|---|---|
| Chilled meals | Cold, not frozen | Frozen gel packs + liner | Stable freshness insulated food-grade EPP cooler… |
| Frozen foods | Keep frozen | Dry ice or strong cold packs | Less thaw damage insulated food-grade EPP cooler… |
| Hot holding | Keep warm | Heat packs + divider | Better texture insulated food-grade EPP cooler… |
| Mixed hot + cold | Separate zones | Divider + sealed containers | Better experience insulated food-grade EPP cooler… |
Packout self-check (score yourself in 20 seconds)
Give 1 point for each “yes.”
insulated food-grade EPP cooler…
Pre-chilled chilled items before packing?
insulated food-grade EPP cooler…
Pre-froze gel packs fully?
insulated food-grade EPP cooler…
Placed packs around product, not only on top?
insulated food-grade EPP cooler…
Eliminated big air gaps with fit/dunnage?
insulated food-grade EPP cooler…
Protected food from direct extreme cold contact?
insulated food-grade EPP cooler…
Score guide: 0–2 = high variability, 3–4 = workable, 5 = repeatable.
insulated food-grade EPP cooler…
How do you clean and reuse an insulated food-grade EPP cooler box safely?
Direct answer: Reuse safely by standardizing cleaning steps, drying fully, and inspecting for damage. “Wash it sometimes” is not a program.
insulated food-grade EPP cooler…
Your insulated food-grade EPP cooler box becomes a reliable asset only when your SOP is simple enough to follow daily.
The 7-step cleaning SOP you can standardize
Pre-check: remove liners, absorbents, labels
insulated food-grade EPP cooler…
Pre-rinse: warm water rinse to remove visible soil
insulated food-grade EPP cooler…
Wash: food-safe detergent, soft brush on corners
insulated food-grade EPP cooler…
Rinse: remove detergent residue
insulated food-grade EPP cooler…
Sanitize: approved sanitizer at correct concentration
insulated food-grade EPP cooler…
Dry: air dry completely (don’t stack wet)
insulated food-grade EPP cooler…
Inspect: smell, surface check, lid fit, cracks
insulated food-grade EPP cooler…
| SOP step | What to record | Why it matters |
|---|---|---|
| Wash | Time + detergent batch | Fewer hidden soils insulated food-grade EPP cooler… |
| Sanitize | Contact time + log | Stronger audit readiness insulated food-grade EPP cooler… |
| Dry | Drying rack time | Less odor, longer life insulated food-grade EPP cooler… |
Mini self-assessment: is your reuse program ready?
Score each item 0–2 (0 = no, 2 = consistent).
insulated food-grade EPP cooler…
Written cleaning checklist
Inspection step before reuse
Loss/returns tracking
Drying plan (not “air dry someday”)
Clean storage zone
8–10: ready to scale. 5–7: pilot first. 0–4: fix basics before rollout.
How do you decide: insulated food-grade EPP cooler box vs EPS foam shipper?
Direct answer: Choose an insulated food-grade EPP cooler box when you can recover and reuse it. Choose EPS when recovery is difficult or routes are one-way.
insulated food-grade EPP cooler…
Reuse wins only when you control the loop.
Decision matrix (score yourself)
Give 1 point for each “yes.”
insulated food-grade EPP cooler…
Repeat customers or business accounts?
insulated food-grade EPP cooler…
Can schedule returns/pickups?
insulated food-grade EPP cooler…
Space for cleaning + drying?
insulated food-grade EPP cooler…
Team can follow a standard SOP?
insulated food-grade EPP cooler…
Claims/refunds are painful today?
insulated food-grade EPP cooler…
Want fewer packaging SKUs?
insulated food-grade EPP cooler…
Score guide: 0–2 start one-way and test small. 3–4 pilot one lane. 5–6 scale with tracking and SOPs.
insulated food-grade EPP cooler…
What does total cost look like for an insulated food-grade EPP cooler box?
Direct answer: The real cost is cost per delivery, not purchase price. Use this simple model:
insulated food-grade EPP cooler…
Cost per delivery = (Box price ÷ Expected reuse cycles) + Cleaning cost + Return logistics cost + Loss/damage allowance
insulated food-grade EPP cooler…
Quick ROI prompts (answer honestly)
How many cycles do you really achieve before loss or damage?
insulated food-grade EPP cooler…
What is your real cleaning labor cost per turn?
insulated food-grade EPP cooler…
How often do boxes fail to return?
insulated food-grade EPP cooler…
If return rate is weak, cost per delivery spikes. If return rate is strong, EPP often beats disposable systems.
insulated food-grade EPP cooler…
| ROI lever | What improves ROI most | Your next move |
|---|---|---|
| Reuse cycles | Longer box life | Improve handling + choose stronger designs insulated food-grade EPP cooler… |
| Return rate | Less loss | Deposit, reminders, scan-at-handoff insulated food-grade EPP cooler… |
| Cleaning efficiency | Faster turns | Standard SOP + better workstation flow insulated food-grade EPP cooler… |
| Stackability | Cheaper backhaul | Nest/stack design for returns insulated food-grade EPP cooler… |
2025 trends shaping insulated food-grade EPP cooler box buying
In 2025, reusable cold chain packaging is shifting from “nice idea” to “operational advantage.”
insulated food-grade EPP cooler…
Buyers want fewer damaged deliveries, fewer refunds, and packaging that looks professional on arrival.
insulated food-grade EPP cooler…
Latest progress snapshot
Standardized packout recipes: fewer SKUs, more consistency
insulated food-grade EPP cooler…
Simple tracking: QR IDs and scan-at-handoff routines
insulated food-grade EPP cooler…
Hygiene workflow upgrades: faster drying racks + inspection steps
insulated food-grade EPP cooler…
More temperature evidence: lane testing with loggers/indicators
insulated food-grade EPP cooler…
Market reality: Customers may not ask for “EPP,” but they notice “clean, cold, and intact.”
insulated food-grade EPP cooler…
That moment drives repeat orders.
Frequently Asked Questions
Q1: How do I choose an insulated food-grade EPP cooler box for meal delivery?
Pick one size that fits a standard layout and still leaves room for refrigerant. Use a repeatable packout guide and test one lane first.
insulated food-grade EPP cooler…
Q2: How do I prove my insulated food-grade EPP cooler box is food-safe?
Request market-aligned documents (EU 10/2011 + 1935/2004 for EU, and FDA 21 CFR 177.1520 references for the U.S.).
insulated food-grade EPP cooler…
Q3: How do I avoid freezing chilled food inside an EPP box?
Use a separator layer between coolant and product, and avoid direct contact with strong coolants. Adjust placement to product sensitivity.
insulated food-grade EPP cooler…
Q4: Insulated food-grade EPP cooler box vs EPS foam shipper—what’s better?
EPP is better when you can recover and reuse it reliably. EPS can fit one-way lanes where returns are unlikely.
insulated food-grade EPP cooler…
Q5: What’s the best cleaning SOP for an insulated food-grade EPP cooler box?
Wash, rinse, sanitize, and dry fully, then inspect lid fit and odor. Drying is the step most teams underestimate.
insulated food-grade EPP cooler…
Q6: How can I reduce refunds with an insulated food-grade EPP cooler box?
Standardize packout, improve lid seal, add basic monitoring on key lanes, and reduce doorstep dwell time with clear handoff rules.
About Tempk
Tempk focuses on practical cold chain packaging solutions for daily food logistics. We design insulated systems for real handling—stacking, moisture, repeated use, and fast packing lines.
insulated food-grade EPP cooler…
Our goal is simple: help you keep deliveries colder, cleaner, and more consistent with packaging that fits your workflow.
insulated food-grade EPP cooler…
Call to action: If you want a lane-specific packout recipe and SOP for your insulated food-grade EPP cooler box, start with your route profile (time, ambient range, payload). We can help you translate that into a repeatable pilot plan.
High-Density Insulated EPP Box Guide (2025)
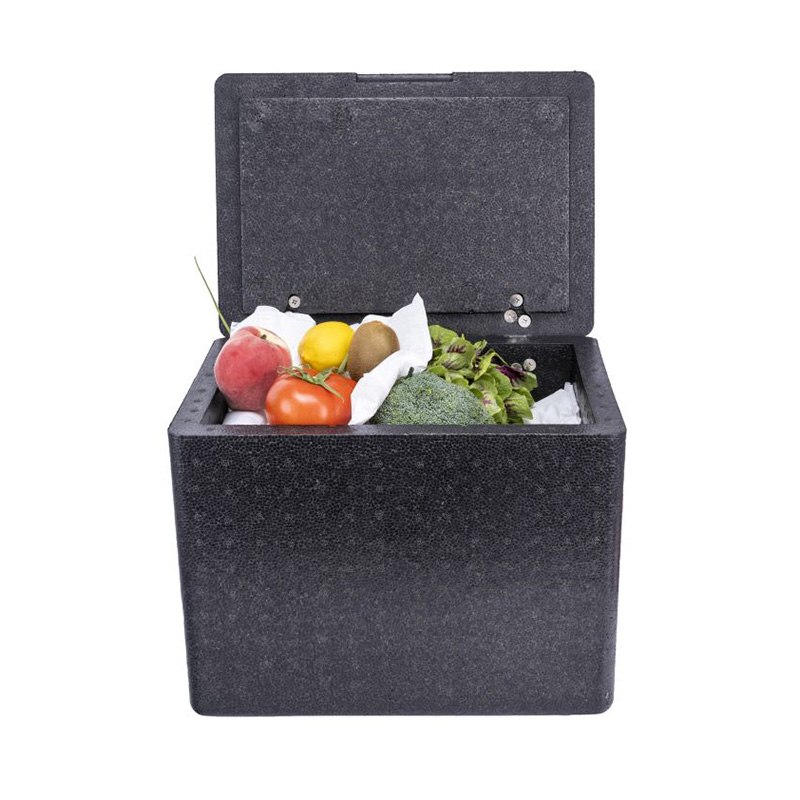
Which High-Density Insulated EPP Box Fits You in 2025?
Last updated: December 16, 2025.
A high-density insulated EPP box is a simple way to keep chilled and frozen goods stable on real routes. It combines insulation with toughness, so your lid keeps sealing after drops, stacks, and returns. Technical data sheets for molded EPP often show thermal conductivity around 0.035–0.041 W/m·K and water absorption below 1 vol-% under test conditions (values vary by grade).
This article will answer for you:
How a high-density insulated EPP box for last-mile delivery prevents temperature drift
What “high density” really changes (and what it doesn’t) in a high-density insulated EPP box
How to size a high-density insulated EPP box for gel packs, PCM, or dry ice
A fast decision tool to choose a high-density insulated EPP box by lane risk
A packing + cleaning workflow you can standardize in 30 days
Why does a high-density insulated EPP box matter for cold chain?
A high-density insulated EPP box matters because temperature loss and handling damage usually happen together. When corners crush or lids lift, warm air leaks in fast. High density improves shape retention, so seals stay consistent and your cold time becomes more repeatable. That means fewer “arrived warm” disputes and fewer crushed-product refunds.
high-density insulated EPP box
In plain language, your box is not just insulation. It is also your “door.” A door that stays square keeps cold air in. A door that warps turns your route into a gamble, especially on multi-stop delivery days.
How does high density change real performance in a high-density insulated EPP box?
High density is not “magic insulation.” It is mostly “toughness insurance.” A tighter foam structure typically resists dents, edge crush, and lid gaps that appear after repeated stacking. If your route includes many stops, every lid-open event is a mini heat shock. Keeping the lid fit tight helps you recover faster after each open.
| What changes in a high-density insulated EPP box | What you see | Why it matters | Practical meaning for you |
|---|---|---|---|
| Stronger edges | Fewer crushed corners | Better seal consistency | Fewer temperature spikes |
| Better stacking stability | Less lid lift | Less air exchange | More predictable hold time |
| Longer reuse life | Fewer “soft boxes” | Lower replacement rate | Lower cost per trip |
Practical tips you can apply today
High-drop-risk routes: pick a high-density insulated EPP box with reinforced corners.
Stacked deliveries: prioritize designs with a deep lid seat and stable rim.
Reusable programs: track trip counts and retire boxes before seal failure.
Field example: A meal-kit operator cut collapse-related returns by switching to a high-density insulated EPP box for same-day multi-stop routes.
high-density insulated EPP box
What is a high-density insulated EPP box in plain language?
A high-density insulated EPP box is a reusable container made from expanded polypropylene (EPP) foam, molded in a higher density so it stays stiff and resilient over many trips. Think “tough gym mat,” not “crumbly foam.” It absorbs bumps, keeps its shape, and still slows heat flow.
high-density insulated EPP box
EPP grades are commonly molded across a wide density range; for example, one manufacturer lists achievable molding densities of 20–100 kg/m³ for its EPP grades. Knauf Industries
What should you expect to see on a high-density insulated EPP box spec sheet?
You don’t need a long lab report. You need a short checklist that predicts daily performance: lid fit, wall thickness, density options, and stacking features.
high-density insulated EPP box
| Spec to ask for | What it tells you | Good sign | Practical meaning for you |
|---|---|---|---|
| Density options | Durability vs weight tuning | Multiple grades offered | Easier lane matching |
| Wall thickness | Hold-time potential | Matches route time | Fewer “late-day” warms |
| Lid design | Air leakage risk | Deep seat + stable rim | Less drift at handoff |
| Stack features | Crush risk | Interlocks / flat stacking | Fewer deformed lids |
Practical tips and suggestions
If your box returns weekly: buy for reuse life, not the lowest upfront price.
If your team packs fast: choose a lid that closes cleanly in one motion.
If you handle wet loads: pick textures and grips that stay safe when damp.
Practical example: A regional grocery program improved chilled compliance by standardizing one high-density insulated EPP box and one validated ice-pack layout.
high-density insulated EPP box
How do you choose a high-density insulated EPP box for your lane?
Choose a high-density insulated EPP box by matching route time, temperature target, and handling intensity. If you optimize only for insulation, you may overpay or create packing errors. If you optimize only for strength, you may lose hold time because you picked the wrong size.
high-density insulated EPP box
A fast way to choose is the 3-Match Rule: time match, temperature match, handling match. If one of these is wrong, your “best” box becomes a bad system.
The 60-second lane risk score for a high-density insulated EPP box
Give each item 0–3 points and add them up.
Route time: <4h (1) · 4–8h (2) · 8–12h (3)
Stops & opens: 1–2 stops (1) · 3–8 stops (2) · 9+ stops (3)
Handling intensity: light (1) · moderate (2) · heavy stacking/returns (3)
Heat exposure: shaded/cool (0–1) · mixed (2) · hot sun/doorstep (3)
Score interpretation:
0–4: standard insulated packaging may work, but a high-density insulated EPP box improves durability.
5–8: a high-density insulated EPP box is a strong fit for repeatability and reuse.
9–12: use a high-density insulated EPP box plus validated pack-outs and monitoring.
high-density insulated EPP box
| Score band | Best starting choice | What to validate | Meaning for you |
|---|---|---|---|
| 0–4 | Mid-wall, mid-density | Basic hold test | Simple, low cost |
| 5–8 | High-density insulated EPP box | Pack-out repeatability | Fewer exceptions |
| 9–12 | High-density insulated EPP box + strict SOP | Worst-day route test | Fewer claims |
Practical tips and clear actions
Avoid “one size fits all”: use 2–3 box sizes that match your SKU families.
Test lid fit under load: stacking can create gaps you won’t see on a bench.
Pilot your worst lane first: if it works there, scaling is easy.
Real-world case: A DTC food brand reduced re-ships after locking one high-density insulated EPP box size per product family.
high-density insulated EPP box
What density and wall thickness should your high-density insulated EPP box have?
Density is about strength and consistency. Wall thickness is about hold time. Higher density usually reduces dents and lid drift over reuse. Thicker walls usually extend cold time but reduce internal volume. The best high-density insulated EPP box is the one your team can pack correctly every day.
high-density insulated EPP box
Use a simple mental model: density protects the seal, and thickness buys time. If you ignore either, your performance becomes unpredictable.
A quick comparison: what changes when you increase density in a high-density insulated EPP box?
| Design choice | Primary benefit | Trade-off | Practical meaning for you |
|---|---|---|---|
| Higher density | Better stacking, fewer cracks | Slightly higher weight | Fewer damaged returns |
| Thicker walls | Longer cold time | Less payload space | May need a larger size |
| Better lid seat | Lower air exchange | Tighter QC needed | Fewer warm spikes |
Practical tips and suggestions
If product value is high: prioritize consistency over minimal cost.
If labor is your bottleneck: pick designs that reduce pack-out steps.
If you run pooling: choose higher density to extend usable life.
Practical example: A pharmacy network stabilized city routes after validating one high-density insulated EPP box pack-out and retiring boxes with rim damage early.
high-density insulated EPP box
How do you pack a high-density insulated EPP box without surprises?
Packing decides results more than the foam does. A high-density insulated EPP box performs best when you use a repeatable layout of product, coolant, and spacing. Your goal is not “as cold as possible.” Your goal is “stable and safe” until handoff.
high-density insulated EPP box
If your team improvises pack-outs, you will get random hot spots. If you standardize one recipe per lane, your temperature curve becomes predictable.
Pack-out recipe builder for a high-density insulated EPP box
Pick your shipment type and follow the matching recipe.
Chilled 2–8°C (most food & pharma):
Condition gel packs/PCM to your SOP temperature
Add bottom coolant + separator sheet
Center payload, avoid direct wall contact
Add top coolant, close lid fast
Frozen (below −18°C):
Increase refrigerant mass and reduce empty air
Use tight dividers so product cannot drift
Minimize open time between stops
Mixed orders:
Separate “freeze-risk” items from coolant zones
Use partitions and label sections clearly
| Pack-out element | Good practice | Bad practice | What it means for you |
|---|---|---|---|
| Coolant placement | Top + sides for warm risk | Random placement | Fewer hot spots |
| Separation layer | Barrier between pack & product | Direct contact | Less product damage |
| Empty air control | Inserts/dividers | Big voids | Less drift over time |
Practical tips and clear actions
Lid discipline rule: close the box between stops, even for 30 seconds.
Photo SOP: one image per SKU kit beats a long text document.
Two-check rule: one packs, one verifies, then seal and dispatch.
high-density insulated EPP box
Operational case: A dark-kitchen network reduced pack-out variation by adding a lid diagram inside every high-density insulated EPP box.
high-density insulated EPP box
How do you validate a high-density insulated EPP box in 2025?
Validate a high-density insulated EPP box by testing worst-case conditions: hottest day, longest route, and the most handling events. Your goal is not a perfect lab number. Your goal is repeatable safety in real operations, with a pass/fail rule your team can follow.
high-density insulated EPP box
Start simple. Run the exact pack-out you plan to use, then measure product temperature at key points: after staging, after mid-route opens, and at final handoff. If you change coolant type, box size, or the packing layout, treat it as a new test.
Validation checklist you can run in one week
| Validation step | What you do | What you record | Practical value |
|---|---|---|---|
| Thermal route test | Simulate the longest lane | Product temps at checkpoints | Confirms hold time |
| Drop/stack check | Handle like real life | Cracks, lid fit, rim gaps | Prevents leak risk |
| Pack-out repeat test | Different workers pack | Layout variation rate | Improves consistency |
Practical tips and suggestions
Always test the “bad day”: heat waves and delays are the real risk.
Use the same materials every test: changing gel packs ruins comparability.
Lock one approved pack-out: if you change it, retest before scaling.
high-density insulated EPP box
Field example: A network validated one high-density insulated EPP box pack-out for city routes and reduced temperature investigation events.
high-density insulated EPP box
How does a high-density insulated EPP box support E-E-A-T?
A high-density insulated EPP box supports E-E-A-T when you can show documented process control and repeatable results. In cold chain, trust comes from proof, not claims.
high-density insulated EPP box
Here are simple ways to demonstrate credibility:
Documented packing SOPs (one-page, photo-first)
Training records for pack-out teams
Validation runs with clear pass/fail criteria
Condition checks of box condition over reuse cycles
high-density insulated EPP box
Practical tip: Provide a “pack-out spec sheet” for each shipment type, and add a quick condition check at pickup and delivery.
high-density insulated EPP box
How do you clean and reuse a high-density insulated EPP box?
Cleaning is not about harsh chemicals. It is about repeatability and drying. A high-density insulated EPP box lasts longer when you protect the rim, dry fully, and remove damaged units early. Most “odor problems” come from trapped moisture, not the foam itself.
high-density insulated EPP box
Treat cleaning like brushing teeth. A simple routine, done every time, beats a complex routine that nobody follows.
A simple cleaning guide for a high-density insulated EPP box
Dry wipe first (removes most odor sources)
Wash with mild detergent and warm water
Rinse fully (residue causes smell later)
Sanitize using your approved method
Dry completely before stacking
Inspect rim + lid fit (15 seconds)
Tag and remove damaged boxes
| Cleaning step | Time | Tools | Practical meaning for you |
|---|---|---|---|
| Dry wipe | 30–60 sec | cloth/paper | Removes residue fast |
| Wash + rinse | 2–4 min | mild soap + water | Keeps reuse stable |
| Dry | 10–30 min | airflow | Prevents musty odor |
| Inspect | 15–30 sec | visual check | Stops leaky boxes early |
Practical tips and suggestions
Do not stack wet boxes: trapped moisture turns into odor quickly.
Protect corners: corner wear often predicts seal failure.
Track trips: a simple QR label helps you retire boxes on time.
Field example: A pooled-delivery program extended high-density insulated EPP box life by adding a 15-second inspection after wash-out.
high-density insulated EPP box
High-density insulated EPP box vs EPS vs VIP: what’s the real trade-off?
Pick the system that reduces your total cost per successful delivery. EPS can be a great single-trip insulator. VIP can deliver extreme insulation in limited space, but it needs careful protection. A high-density insulated EPP box often wins when you control returns and need durability after many cycles.
high-density insulated EPP box
Material numbers can help you sanity-check claims. But your route results still depend on wall thickness, lid seal, and pack-out.
Quick material sanity check (not a promise of hold time)
Molded EPP: thermal conductivity often reported around 0.035–0.041 W/m·K (grade dependent). Knauf Industries
EPS board: measured around 0.028–0.032 W/m·K in heat-flow tests (temperature dependent). 材料与产品数据库
VIP (fumed silica core): about 0.004 W/(m·K) after production (performance changes with aging and edges). VIPA International
The cost-per-use calculator for a high-density insulated EPP box (interactive)
Use this simple formula:
Cost per use = (box cost + average repair cost) ÷ expected trips
True cost per use = cost per use + (average claims cost per trip)
If a high-density insulated EPP box cuts claims, it can become cheaper even with a higher upfront price.
high-density insulated EPP box
| Option | Best for | Weak spot | What it means for you |
|---|---|---|---|
| EPS shipper | Single-trip lanes | Cracks + waste | Low upfront cost |
| VIP build | Space-limited, high value | Fragile edges | Needs careful handling |
| High-density insulated EPP box | Return loops + rough lanes | Needs SOP discipline | Lower cost per trip |
Practical tips and clear actions
If you cannot retrieve packaging: EPS may be the simplest choice.
If you run pooling: a high-density insulated EPP box usually wins on cost per use.
If your space is tiny: VIP can help, but protect it from puncture and crushing.
Real-world example: An operator improved sustainability mainly by reducing damage and re-ships, not by changing materials alone.
2025 latest developments and trends for high-density insulated EPP box programs
In 2025, the biggest shift is “packaging as a system.” Teams are designing for return loops, scanning, and predictable pack-outs, not one-off shipments. Reusable pooling is growing, and boxes are being shaped for conveyors, stacking, and fast lid closure. Modular inserts are also improving pack-out speed and reducing mistakes.
high-density insulated EPP box
high-density insulated EPP box
Regulation is pushing in the same direction. The EU’s Packaging and Packaging Waste Regulation entered into force in February 2025, and its general application date is August 12, 2026. Environment
EU policy also sets the direction that all packaging should be recyclable by 2030, and it highlights restrictions on PFAS (“forever chemicals”) in packaging from August 2026. Environment+1
Latest progress snapshot
Reuse loops scale up: more operators move from single-use foam to managed returns.
high-density insulated EPP box
Traceability grows: QR tracking links each high-density insulated EPP box to trip counts and cleaning cycles.
high-density insulated EPP box
Design gets simpler: fewer voids, clearer labels, more standard sizes. Environment
Market insight: customers judge cold-chain quality by “arrived perfect,” not “arrived fast.”
high-density insulated EPP box
Common questions about high-density insulated EPP box
Q1: How long can a high-density insulated EPP box keep products cold?
It depends on wall thickness, lid seal, pack-out, and ambient heat. For many same-day routes, a validated pack-out can hold chilled ranges for hours with a safety buffer.
high-density insulated EPP box
Q2: Is a high-density insulated EPP box always better than EPS?
Not always. EPS can be excellent for single-trip insulation. A high-density insulated EPP box usually wins when you need stacking durability, washing, and many reuses.
high-density insulated EPP box
Q3: How do I stop product freezing inside a high-density insulated EPP box?
Use separator layers so coolant does not touch the product. Condition packs to your SOP and keep freeze-sensitive items away from cold surfaces.
high-density insulated EPP box
Q4: What’s the fastest way to improve performance without changing the box?
Standardize pack-outs. The same high-density insulated EPP box can perform very differently when workers improvise under time pressure.
high-density insulated EPP box
Q5: How do I know when to retire a high-density insulated EPP box from reuse?
Retire it when lid fit loosens, corners crack, or the rim deforms. Those defects create air leaks that quietly reduce hold time.
About Tempk
At Tempk, we build cold chain packaging systems that work on real routes: repeated handling, condensation, fast turnarounds, and return loops. We support high-density insulated EPP box programs with lane-fit selection, pack-out standardization, and reuse workflows that reduce temperature drift and handling damage.
high-density insulated EPP box
Next step: Share your payload type, temperature band, route time, and stop count. We’ll suggest a starting high-density insulated EPP box size and a pack-out recipe you can pilot.
Walmart Gel Ice Pack for Shoulder Blade Injuries

Walmart Gel Ice Pack for Shoulder Blade Injuries?
Last updated: December 16, 2025. If your upper back hurts near the shoulder blade, you want relief that’s fast and repeatable. A Walmart gel ice pack for shoulder blade injuries can help calm sharp pain and early swelling, especially in the first 24–72 hours. The key is simple: short sessions (10–20 minutes), a cloth barrier, and a routine you’ll actually follow.
Quick note: This is general education, not a diagnosis. If symptoms feel severe or “not normal for you,” get medical advice.
This article will answer for you:
How a Walmart gel ice pack for shoulder blade injuries can help in the first 72 hours
How to pick the best gel ice pack wrap for upper back pain (wrap vs flat vs bead pack)
A 60-second tool for ice or heat for shoulder blade injuries
Exactly how long to ice shoulder blade pain without skin risk
A practical sizing method for the best size gel pack for upper back
A 7-day plan, a 7-minute mobility routine, and red-flag warnings
How does a Walmart gel ice pack for shoulder blade injuries help in the first 72 hours?
A Walmart gel ice pack for shoulder blade injuries helps by lowering tissue temperature and “turning down” pain signals. Think of cold like a volume knob for irritation. When pain is fresh, cold can reduce swelling and make movement feel safer. That matters because fear-based guarding often makes shoulder blade pain stick around longer.
Shoulder blade pain often sits under layers of muscle that move every time you reach, drive, or type. A gel pack works well because it can stay flexible and mold to that curved area. With a Walmart gel ice pack for shoulder blade injuries, your goal is not to “freeze it.” Your goal is controlled relief so you can move normally again.
Why the shoulder blade area feels stubborn
Your scapula glides when your arm moves. That means the sore spot can “hide,” then flare during overhead reach or side sleeping. A Walmart gel ice pack for shoulder blade injuries works best when it covers the sore point plus the surrounding tight muscle band. That wider coverage often reduces next-day tightness.
| What cold therapy can do | What it can’t do | What it means for you |
|---|---|---|
| Reduce sharp pain quickly | Fix posture by itself | Pair cold with small posture resets |
| Calm early swelling (first 72 hours) | Heal a severe tear | Watch warning signs and function |
| Make movement feel safer | Replace rehab work | Add simple mobility after icing |
Practical tips you can use today
Fresh pain (0–72 hours): start with a Walmart gel ice pack for shoulder blade injuries first.
Older stiffness (7+ days): consider gentle heat before mobility, then cold after activity.
If numbness, weakness, or breathing trouble appears: stop DIY care and seek help.
Practical example: After lifting boxes, you feel stabbing pain near the inner shoulder blade. Using a Walmart gel ice pack for shoulder blade injuries for 15 minutes, then doing gentle shoulder rolls, often makes sleep easier by night two.
Which Walmart gel ice pack for shoulder blade injuries should you choose?
The best Walmart gel ice pack for shoulder blade injuries is the one that fits the scapula area and stays put. Shoulder blade placement is awkward because you can’t easily hold a pack there without tensing your arm. So your selection should focus on: coverage, stability, and flexibility when frozen.
Wrap vs flat vs gel beads: what works for upper back placement?
Use this quick comparison to avoid buying the wrong style.
| Pack style (common at Walmart) | Coverage | “Stays put” factor | Best for you if… |
|---|---|---|---|
| Strap-style hot/cold compress | High | High | You need hands-free use all week |
| Flat flexible gel pack | Medium–High | Medium | Your pain is closer to the spine side |
| Gel bead pack (small) | Low–Medium | Low | You want pinpoint relief on a small spot |
| Wearable shoulder wrap | Medium | High | Pain spreads into the shoulder joint area |
Rule of thumb: if you keep “chasing the pain,” go bigger and more stable. A Walmart gel ice pack for shoulder blade injuries that slides off becomes a pack you won’t use.
The “best size gel pack for upper back” quick sizing method
Grab a tape measure and do this:
Measure width from spine to the inner shoulder blade edge where it hurts.
Measure height of the sore band (top to bottom).
Choose a pack that is at least as wide and 2–3 inches taller than the sore band.
Features checklist (score each 0–2)
Score each line: 0 = no, 1 = unclear, 2 = yes.
Strap or wearable design (helps hands-free)
Flexible when frozen (molds to scapula curve)
Dimensions clearly listed (so you can size correctly)
Leak-resistant seams (for repeat use)
Comfort cover included (less “cold shock”)
Easy to clean (so you keep using it)
Total score guide:
0–6: likely frustrating
7–10: workable
11–12: strong everyday option
Practical example: If desk pain flares daily, a strap-style Walmart gel ice pack for shoulder blade injuries is often the easiest to use consistently—consistency beats “perfect specs.”
How long to ice shoulder blade pain with a Walmart gel ice pack?
For most people, a safe starting point is 10–20 minutes per session, with a real break between sessions. A Walmart gel ice pack for shoulder blade injuries is most helpful when you repeat short sessions, not when you do one long session. Long icing can cause numbness, stiffness, or skin injury.
Safe icing time to avoid frostbite: the “20-10-20” rule
Max 20 minutes per session
At least 10 minutes before you re-check skin comfort
Reapply only if skin feels normal (not numb or blotchy)
Timing table you can follow
| Time since pain started | Sessions/day | Session length | Your goal |
|---|---|---|---|
| 0–24 hours | 3–5 | 10–15 min | Calm sharp pain and swelling |
| 24–72 hours | 2–4 | 15–20 min | Maintain comfort and movement |
| 4–7 days | 1–3 | 10–15 min | Control flare-ups after activity |
| 7+ days | As needed | 10–15 min | Manage post-activity soreness |
10-second skin check (before and after)
If you notice any of these, stop and warm the skin gradually:
Whitening or blotchy color
Burning or intense sting
Numbness that lasts after the session
Practical tips that prevent backfires
Always use a thin cloth barrier between skin and pack.
Set a timer—don’t “guess.”
Don’t fall asleep while icing with a Walmart gel ice pack for shoulder blade injuries.
Practical example: If you iced for 40 minutes and feel stiffer, switch to 15-minute sessions. Most people feel better within 1–2 days of safer timing.
Ice or heat for shoulder blade injuries: which one do you need?
Use a Walmart gel ice pack for shoulder blade injuries when pain is new, sharp, warm, or reactive. Use gentle heat when pain is older, stiff, and tight like a knot. You’re not choosing a team. You’re choosing the right timing.
The 60-second ice vs heat decision quiz (interactive)
Choose ICE first if you have (check all that fit):
Pain started in the last 48–72 hours
Area feels warm, irritated, or “puffy”
Pain spikes right after lifting or reaching
You want fast numbing relief
Choose HEAT first if you have:
Pain has lasted more than a week
Stiffness is worse in the morning
Your upper back feels cramped or “knotted”
Gentle movement feels better than rest
If you checked both: try heat before mobility, then a Walmart gel ice pack for shoulder blade injuries after activity if it flares.
Heat-then-cold routine for stubborn tightness
| Goal | Heat timing | Cold timing | Your practical takeaway |
|---|---|---|---|
| Loosen tight muscles | 10–15 min | Later 10–15 min | Heat before mobility work |
| Calm post-activity flare | — | 10–20 min | Cold after activity works well |
| Mixed “stiff + sore” days | 10 min | 10–15 min | Keep both short and track response |
Practical example: Day 4 after a strain, you feel “stuck,” not swollen. Heat briefly, do wall slides, then use a Walmart gel ice pack for shoulder blade injuries after work if soreness rises.
A simple 7-day plan with a Walmart gel ice pack for shoulder blade injuries
This plan fits real life: desk work, commuting, and limited time. If you have red flags (below), skip the plan and get evaluated.
Days 1–2: calm the flare
Cold: Walmart gel ice pack for shoulder blade injuries for 10–20 minutes, up to every 2–3 hours while awake if needed.
Move: gentle shoulder rolls and relaxed breathing.
Avoid: heavy lifts, long overhead tasks, and aggressive stretching.
Days 3–5: add motion back in
Cold: 10–15 minutes after activity if sore.
Optional heat: 10 minutes before mobility if stiffness dominates.
Posture reset: every 60–90 minutes, drop shoulders and “stack” ribs over hips.
Days 6–7: maintain and prevent relapse
Cold: use the Walmart gel ice pack for shoulder blade injuries after long drives or heavy chores.
Strength light: wall slides, scapular squeezes, easy band pulls.
Track: “Is it better than yesterday?” If not, reassess.
The 7-minute routine (no equipment)
Do this right after your Walmart gel ice pack for shoulder blade injuries session:
Shoulder rolls: 10 slow circles back
Wall slides: 8 gentle reps
Scapular squeezes: 8 reps (hold 3 seconds)
Neck side-bend stretch: 20 seconds each side
Deep breathing: 5 slow breaths
Mini scorecard (your progress tracker)
Rate daily (0–10):
Pain level
Sleep comfort
Ability to reach overhead
If pain drops but motion stays stuck, add mobility. If motion improves but pain spikes after work, add another short cold session.
Common mistakes with a Walmart gel ice pack for shoulder blade injuries
Most setbacks come from “too much cold,” “too little movement,” or ignoring warning signs. Fix these and your results are usually smoother.
| Mistake | Why it hurts progress | Better move | Your benefit |
|---|---|---|---|
| Icing too long | Skin irritation and stiffness | 10–20 minutes | Safer relief |
| No cloth barrier | Cold-burn risk | Use a thin towel | Comfort + safety |
| Skipping movement | Muscles stay guarded | 7-minute routine | Faster function |
| Only icing at night | Inconsistent habit | 2–4 short sessions/day | Better results |
Practical “do this” reminders
Keep your Walmart gel ice pack for shoulder blade injuries in a labeled freezer spot.
Use it during short breaks, not only when pain is severe.
Retire a pack if you see leaks, bulges, or odd texture changes.
Practical example: Many people quit because setup feels annoying. A “timer + freezer spot” system removes friction and keeps you consistent.
2025 trends in cold therapy for shoulder blade recovery
In 2025, the biggest improvement isn’t a fancy gadget. It’s better fit and better habits. More people choose hands-free wraps, softer covers, and routine-based use. That’s why a Walmart gel ice pack for shoulder blade injuries with straps and comfort sleeves often wins in real life.
Latest progress snapshot
More wearable designs: straps and wraps are now the default choice for hands-free use
Comfort-first materials: softer sleeves reduce “cold shock”
Routine-driven recovery: short sessions + breaks + movement beats random icing
Dual hot/cold flexibility: one tool can match different phases of soreness
Frequently Asked Questions
Q1: How often should I use a Walmart gel ice pack for shoulder blade injuries?
Most people do well with 2–4 short sessions per day in the first 72 hours. Use 10–20 minutes and protect skin.
Q2: Should I put a Walmart gel ice pack for shoulder blade injuries directly on skin?
No. Use a thin towel or sleeve. Direct contact increases cold-burn risk and numbness.
Q3: How long to ice shoulder blade pain if I’m very sensitive to cold?
Start at 8–10 minutes. Increase only if it feels comfortable and skin stays normal.
Q4: Ice or heat for shoulder blade injuries—what if I’m unsure?
If pain is new or reactive, start with cold. If stiffness dominates after a week, try brief heat before mobility.
Q5: Can a Walmart gel ice pack for shoulder blade injuries hide a serious problem?
Yes. Cold can mask symptoms. If you have chest tightness, breathing trouble, fever, or arm weakness, get checked.
Q6: Why does my gel pack feel too hard to mold?
Some packs freeze stiff. Let it sit 3–5 minutes at room temperature, then use a cloth barrier.
Q7: When should I stop DIY care and see a clinician?
If pain is worsening, not improving within 10–14 days, or you have numbness/weakness, schedule an evaluation.
Summary and recommendations
A Walmart gel ice pack for shoulder blade injuries can be a smart, affordable tool when your pain is strain-like and not showing red flags. Keep sessions short (10–20 minutes), use a cloth barrier, and repeat with real breaks. Choose a pack that fits the scapula area and stays stable, and add a simple mobility routine so your body doesn’t stay “braced.”
Your next-step action plan (CTA)
Tonight, do a 3-day test:
Use a Walmart gel ice pack for shoulder blade injuries for 15 minutes after work.
Do the 7-minute routine right after.
Track pain and sleep (0–10).
If you are not clearly improving—or symptoms feel scary—stop self-treatment and get medical advice.
About Tempk
At Tempk, we focus on temperature-control solutions built for safety and repeatability. We design materials and routines around stable cooling, protective surfaces, and real-world usability. That means fewer surprises, better consistency, and a recovery plan you can actually stick to.
Next step: Tell us where your pain sits (inner shoulder blade vs top shoulder), your daily routine (desk, driving, lifting), and whether it’s new or ongoing. We’ll suggest the most practical Walmart gel ice pack for shoulder blade injuries style and a simple routine.
Shipping gel ice pack for shoulder physical therapy?
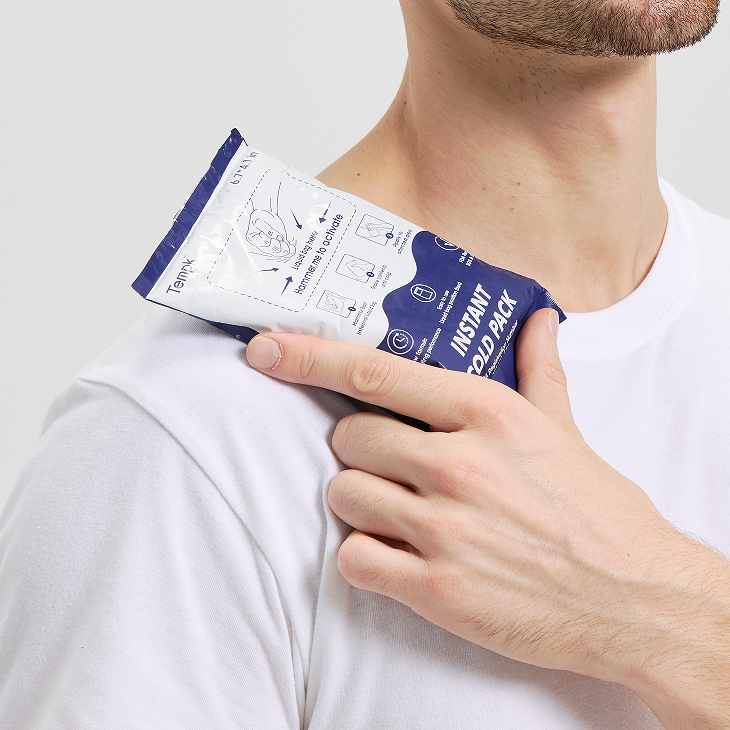
Shipping gel ice pack for shoulder physical therapy?
If you’re planning shipping gel ice pack for shoulder physical therapy, you’re solving a simple problem: make it arrive clean, intact, and easy to use. Shoulder pain is common (a global review reported a median community prevalence of 16%), so buyers are often tired, sore, or post-op. Many trusted care guides also repeat the same safety basics: use a cloth barrier and limit icing to about 15–20 minutes. Your packaging and insert should make those “right moves” effortless.
This article will answer for you:
How shipping gel ice pack for shoulder physical therapy should perform in real parcel handling
Which formats reduce complaints in a gel ice pack kit for physical therapy delivery
A leak-defense packout for leak-proof packaging for gel ice packs
When you should ship ambient vs frozen (and how to set expectations)
A repeatable SOP for how to pack gel ice packs for shipping
A decision tool to match packaging spend to real shipping risk
What does “success” mean in shipping gel ice pack for shoulder physical therapy?
Success in shipping gel ice pack for shoulder physical therapy means “arrives usable,” not “arrives cold.” Most customers will freeze the pack at home. Your job is to deliver a product that looks professional, stays clean, and doesn’t leak.
Think of it like delivering a brand-new white shirt. Even a small stain ruins the first impression. The same is true with gel packs.
Arrive cold vs. arrive ready-to-freeze: what promise can you keep?
| Promise you make | What the customer expects | What usually goes wrong | What it means for you |
|---|---|---|---|
| Ready-to-freeze (ambient shipping) | Clean kit + clear instructions | Confusion (“Do I freeze it?”) | Win with a bold quick-start card |
| Arrives cold (frozen shipping) | Cold on arrival + dry box | Condensation + wet cartons | You must manage moisture aggressively |
| Clinic bulk delivery | Durable units + consistent kitting | Missing parts / mixed SKUs | Add labels + a checklist inside every case |
Practical tips and recommendations
Define “arrives usable” on your product page. Say “ready to freeze and use” unless you truly ship frozen.
Ship a complete experience. Pack + sleeve + quick-start beats a loose gel bag.
Standardize the packout. Variability creates “sometimes good, sometimes bad” reviews.
Practical example: A therapy seller reduced “messy box” complaints by adding a sealed inner bag and a simple “What’s inside” checklist on top.
Which product format reduces returns in shipping gel ice pack for shoulder physical therapy?
The best format for shipping gel ice pack for shoulder physical therapy is the one that fits the shoulder and prevents user error. A shoulder is curved and mobile. A flat pack can slide. A wrap or contoured design tends to stay put.
If the pack freezes “brick hard,” people fight it. If they fight it, they use it less. Then they blame the product.
Flat gel pack vs. shoulder wrap: what changes after delivery?
| Format | Fit on shoulder | Ease of use | Shipping efficiency | Your practical outcome |
|---|---|---|---|---|
| Flat rectangle pack | Medium | Medium | High | Needs better instructions |
| Contoured shoulder pack | High | High | Medium | Fewer “doesn’t fit” returns |
| Strap-on shoulder wrap | Very high | Very high | Lower | Higher satisfaction + repeat use |
Practical tips and recommendations
DTC customers: Add a sleeve or wrap option to reduce “slipping” complaints.
Clinic buyers: Flat packs in bulk can work, but include optional straps.
Sensitive skin users: Include a fabric cover or clearly state “use a cloth barrier.”
Practical example: A brand cut refunds by bundling a sleeve and moving the “how to place it” diagram to the first page.
How do you build leak-proof packaging for shipping gel ice pack for shoulder physical therapy?
Leak-proof packaging for shipping gel ice pack for shoulder physical therapy is a containment system. Assume a seam might fail. Plan for it. One small leak can weaken a carton and trigger damage claims.
Carrier packing guidance for liquids commonly emphasizes watertight containment, absorbent material, and separation to prevent contact damage. FedEx
The 5-layer leak defense you can standardize
| Layer | What it does | Simple material choice | What it means for you |
|---|---|---|---|
| 1) Watertight inner bag | Stops the first leak | Sealed poly bag | “Clean delivery” becomes default |
| 2) Absorbent | Captures seepage | Pads / paper towels | Less soggy cardboard, fewer photos FedEx |
| 3) Secondary bag (optional) | Redundancy | Double-bagging | Cheap insurance for premium SKUs |
| 4) Cushion + puncture protection | Protects seams | Paper padding / foam | Corners stop being failure points |
| 5) Right-sized outer carton | Prevents movement | Strong corrugate | Movement is a hidden leak creator |
If you ship insulated kits, some packing guides also recommend lining with a minimum ~2-mil watertight plastic bag and adding absorbent at the bottom.
Practical tips and recommendations
If straps/buckles are included: Put hardware in its own pouch and add a divider.
If single-unit DTC: Double-bag + absorbent is often worth it.
If multi-pack orders: Separate packs so they don’t rub and abrade.
Practical example: A seller stopped repeat seam leaks by adding one divider between buckles and the gel pack.
Do you need temperature control when shipping gel ice pack for shoulder physical therapy?
Usually, no. In most consumer scenarios, shipping gel ice pack for shoulder physical therapy works best as ambient shipping with “freeze before use” instructions.
You ship frozen only when “cold on arrival” is the product promise (clinics, events, immediate-use programs). If you ship frozen without a reason, you create new failure modes: wet boxes, warped labels, and “arrived warm” arguments.
Ambient vs frozen shipping decision rule
| Your goal | Best shipping mode | Packaging focus | Common complaint |
|---|---|---|---|
| Ready-to-freeze at home | Ambient | Leak + crush protection | “Is it supposed to be cold?” |
| Immediate use on arrival | Frozen | Insulation + moisture control | “Box is wet” |
| Heat-sensitive accessories | Ambient + heat shielding | Reflective liner | “Warped” / “deformed” parts |
Practical tips and recommendations
Ambient shipping: Put “Freeze before use” in large type on the first insert line.
Frozen shipping: Treat condensation like a leak. Line, absorb, and seal well.
Offer both: Use clear SKUs (“ready-to-freeze” vs “cold on arrival”).
Practical example: A clinic stopped demanding frozen arrival once the supplier shipped an extra unit per case for rotation.
How to pack a kit for shipping gel ice pack for shoulder physical therapy in 7 steps
This SOP makes shipping gel ice pack for shoulder physical therapy repeatable. It reduces “one warehouse good, another warehouse bad” outcomes.
Inspect the gel pack (seams, corners, weak spots).
Seal the pack in a watertight inner bag.
Add absorbent inside or around the inner bag (especially for premium SKUs).
Protect corners and edges with targeted cushioning.
Control movement with inserts or right-sizing (no empty space).
Pack accessories separately (straps, buckles, Velcro parts).
Place the quick-start + safety insert on top so it’s seen first.
An “ISTA 3A mindset” checklist (without overcomplicating it)
ISTA describes Procedure 3A as a test for individual packaged-products shipped through a parcel delivery system (typical small-parcel distribution). You don’t need a lab to copy the mindset.
| Stress type | What you do in-house | Pass signal | What it means for you |
|---|---|---|---|
| Drop thinking | Controlled corner drops | No leaks, no burst | Confidence before scaling |
| Vibration thinking | Shake / vibration simulation | No abrasion holes | Fewer “mystery leaks” |
| Compression thinking | Simple stack/weight check | Carton holds shape | Lower crushed-box refunds |
Practical tips and recommendations
Don’t ship gel packs in poly mailers. Use a box.
If you change film thickness or supplier: Re-test your packout.
Add a packout diagram for pick/pack teams. Consistency wins.
Practical example: One brand found most failures came from corner crush. Right-sizing fixed it faster than paying for faster shipping.
What should your insert card say after shipping gel ice pack for shoulder physical therapy?
Your insert card is a safety tool. People will use the product when they’re sore or distracted. Keep it short and bold.
Many clinical sources emphasize a cloth barrier and short sessions (about 15–20 minutes) to reduce cold injury risk.
Copy template you can adapt (plain language)
Before first use: Freeze the pack as directed (many prefer overnight).
Barrier rule: Always place a thin cloth between pack and skin.
Timing rule: Use 15–20 minutes, then remove. Don’t fall asleep icing.
Stop signs: Stop if skin turns very pale/red or feels numb/tingly.
If you have reduced sensation/circulation: Ask a clinician before use.
Safety rules table (what it prevents)
| Safety item | Best practice | Your benefit |
|---|---|---|
| Session length | 15–20 minutes | Fewer misuse complaints |
| Skin barrier | Thin cloth/towel | Lower cold-burn risk |
| Stop signs | Remove if numb/tingly | Fewer “scary” support tickets |
Practical tips and recommendations
Use icons: a clock + a towel icon beats paragraphs.
Put the card on top: don’t hide it under the product.
Add a simple placement diagram: shoulder cap + upper arm coverage.
Practical example: A seller replaced long text with three rules (cloth, 15–20 minutes, stop signs). Reviews improved within weeks.
Decision tool: What’s your shipping gel ice pack for shoulder physical therapy risk score?
Use this quick self-check to match packaging cost to real risk. No guessing.
Step 1: Add your points
Transit time
1–2 days (1)
3–4 days (2)
5+ days (3)
Order type
Bulk clinic case (1)
DTC parcel (2)
Marketplace fulfillment (3)
Leak impact
Low (1)
Medium (2)
High (3)
Accessories included
Pack only (1)
Pack + sleeve (2)
Pack + sleeve + straps/buckles (3)
Step 2: Match your score to a packaging level
4–6 points: Single bag + right-sized carton + basic insert
7–9 points: Add absorbent + stronger corner protection
10–12 points: Double-bag + absorbent + divider/inner tray + stricter QC
Step 3: One rule that always applies
No matter your score, always include the safe-use insert. It protects the user and reduces refunds.
2025 developments and trends in shipping gel ice pack for shoulder physical therapy
In 2025, the winners aren’t only “colder.” They’re cleaner, clearer, and more repeatable. Home rehab keeps growing, and customers expect a “premium unboxing” even for therapy basics.
Latest progress snapshot
Instruction-first packaging: shorter inserts, clearer icons, fewer misuse cases
Right-sized cartons: less void space, less corner crush, lower dimensional costs
More wrap-style designs: better fit drives better compliance
Simple validation habits: teams adopt parcel-test thinking (drop/vibe/compression) ista.org
Sustainability with purpose: less material, but smarter protection
Market insight you can act on
Customers don’t judge your gel formula. They judge outcomes: “Did it arrive clean, usable, and easy?” If your packout removes surprises, returns drop.
Internal link suggestions (3–5)
Common questions (FAQ)
Q1: Should shipping gel ice pack for shoulder physical therapy be cold chain shipping?
Usually no. Most customers freeze the pack after delivery. Focus on clean, leak-proof arrival.
Q2: What’s the biggest cause of leaks in shipping gel ice pack for shoulder physical therapy?
Movement plus abrasion. Empty space lets packs bounce and stresses seams.
Q3: How long should a user apply a shoulder gel pack?
Common guidance recommends about 15–20 minutes and using a cloth barrier.
Q4: Do I really need absorbent material if the gel pack is “leak-proof”?
It’s smart insurance. Many shipping guidelines for liquids recommend absorbent material to manage spills.
Q5: How do I reduce costs without increasing refunds?
Right-size cartons, control movement, and reserve upgrades for high-risk lanes.
Summary and recommendations
Shipping gel ice pack for shoulder physical therapy works when you ship cleanliness, durability, and clarity. Use a leak-defense system (watertight bag + absorbent + movement control). Choose a shoulder-friendly format when you can, and put the safe-use rules on top: cloth barrier + 15–20 minutes + stop signs.
CTA: If you want fewer replacements this month, run a 7-day packaging sprint: standardize the SOP, right-size the carton, and upgrade your insert card first.
About Tempk
At Tempk, we build temperature-related packaging systems that prioritize repeatable packouts, leak prevention, and clean unboxing for high-expectation deliveries.
shipping gel ice pack for shoul…
We help you choose the right containment layers, reduce movement damage, and create simple inserts that lower support load.
Next step: Share your gel pack dimensions, typical transit time (1–5 days), and whether you ship DTC or clinic bulk. We’ll outline a practical packout and insert structure for shipping gel ice pack for shoulder physical therapy.
Cold Chain Meat Technology: Keep Meat Safe in 2025

Cold Chain Meat Technology: How Do You Keep Meat Safe?
Last updated: December 16, 2025
Cold chain meat technology is the simplest way to protect meat safety, freshness, and profit at the same time. Most chilled programs aim for about 0–4°C, while frozen programs typically stay at -18°C or colder.
cold chain meat technology
When you keep product in range at every handoff, you reduce spoilage, drip loss, and “mystery” claims that show up days later.
This article will answer for you:
How cold chain meat technology works across processing, storage, and delivery
Which meat cold chain temperature requirements matter most for chilled and frozen meat
How meat cold chain monitoring (loggers, RFID, and TTIs) prevents surprises
Which packaging technology protects color, texture, and yield on longer routes
How to build HACCP-friendly SOPs buyers trust and auditors can follow
A quick self-test and an excursion impact calculator you can use today
Cold chain meat technology: what is it really?
Cold chain meat technology is the full system that keeps meat in a controlled temperature range, with proof. It includes equipment (chillers, cold rooms, reefers), packaging (vacuum, MAP, insulated liners), monitoring (loggers, sensors, alerts), and the routines your team repeats every day. If any one part fails, the whole chain weakens, even if your trucks are “set to the right number.”
Think of cold chain meat technology like a relay race. Your meat quality is the baton. Every handoff—cut room, blast chill, dock, trailer, DC, last mile—can drop it. The goal is not “cold somewhere.” The goal is “stable everywhere,” plus records that show what happened when conditions changed.
The three levers you must control
Cold chain meat technology gets easier when you focus on three levers: temperature, time, and touch.
cold chain meat technology
| Control lever | What usually fails | What cold chain meat technology adds | What it means for you |
|---|---|---|---|
| Temperature | Warm docks, door events, hot spots | Sensors, airflow rules, alarms | Fewer quality swings and safer product |
| Time | “Only 15 minutes” repeated all day | Staging limits, timed loading | Longer shelf life and less waste |
| Touch | Cross-contact, wet cartons, dirty tools | Hygienic SOPs, dry zones, checks | Fewer claims and fewer rework events |
Practical tips you can use today
Name the owner: One person per shift owns cold chain meat technology alarms and actions.
Make airflow visible: Mark “do not block vents” zones on the floor.
Turn habits into rules: “When the door opens, the timer starts.”
Cold chain meat technology temperature targets: what should you run?
Cold chain meat technology works best when you set targets by product state, not by habit. Chilled fresh meat often targets roughly 0–4°C, while frozen meat typically stays at -18°C or colder. Ground products usually need tighter time control because they have more exposed surface area. If you use one setpoint for “all meat,” you create hidden risk at the edges.
As a simple reference point, many food safety programs treat about 4°C (40°F) as the upper limit for chilled storage and about -18°C (0°F) for frozen storage.
A helpful mental model is this: every degree of warming is like taking time off your shelf life. You may not see it on day one. Your customer will see it on day four.
Meat cold chain temperature targets by category
| Product category | Practical target | Common risk | What it means for you |
|---|---|---|---|
| Chilled fresh meat | 0–4°C | Warm staging, hot spots | Focus on stability and fast loading |
| Frozen meat | -18°C or colder | Thaw during transfers | Prevent thaw–refreeze damage |
| Vacuum-packed chilled meat | 0–4°C | Seal damage, condensation | Handle gently; avoid wet cartons |
| Ground meat | 0–4°C (often tighter in practice) | Higher spoilage sensitivity | Minimize time outside refrigeration |
cold chain meat technology
Decision tool: should you ship chilled or frozen?
Use this quick check before you change your whole cold chain meat technology design. If you match more items in the right column, plan a frozen (or deeper-chill) strategy for that lane.
| Decision point | Chilled strategy fits when… | Frozen / deeper-chill fits when… |
|---|---|---|
| Route time | Short and predictable delivery windows | Long routes or unpredictable delays |
| Door events | Few stops and brief door-open time | Many drops, long door-open time |
| Selling window | Fast turnover at destination | Buffer inventory and longer shelf-life needs |
| Handling control | Strong staging discipline and fast loading | Staging discipline is hard to enforce today |
Quick rule: If your biggest risk is warm staging, fix staging first. Changing product state cannot “heal” slow handoffs in cold chain meat technology.
Chilled storage: what “stable” looks like in real life
Cold chain meat technology is not “set it colder.” Stable means:
Fewer door openings beat a colder thermostat.
Even airflow beats “cold corners and warm centers.”
Short staging beats “temporarily on the dock.”
Practical tips and suggestions
Separate staging lanes: If you ship mixed chilled and frozen, build two lanes, not one compromise lane.
Pre-cool the trailer: A reefer cools air fast, but it cannot remove product heat quickly.
Measure time-out-of-range: Averages hide spikes. Spikes cost shelf life.
Cold chain meat technology monitoring: how do you prove control?
Cold chain meat technology becomes trustworthy when you can prove temperature control, not just assume it. Monitoring should answer three questions: What is happening now? What happened yesterday? Who acts when an alarm happens? You do not need “more data.” You need the right signals in the right places.
If you only log a single air point, you may miss the warm pocket inside a pallet. That is where quality fails first.
Monitoring tools that fit real operations
| Tool | Best use | Strength | Limitation | What it means for you |
|---|---|---|---|---|
| Single-use data logger | Shipment proof | Low cost, simple | No live alerts | Great for disputes and audits |
| Reusable logger | Repeat lanes | Better accuracy over time | Needs retrieval | Best for stable routes |
| Wireless room sensor | Facility stability | Live visibility | Placement matters | Catch door-zone excursions |
| RFID temp sensor | DC scanning | Fast, low-touch checks | Infrastructure needs | Good for high volume |
| Time-temperature indicator (TTI) | Box-level screening | Shows cumulative exposure | Needs calibration | Helps spot hidden abuse |
The 3-point sensor plan for meat
Cold chain meat technology monitoring works best with three points:
Door zone: Where warm air enters.
Far corner: Where airflow often weakens.
Product-representative point: One pallet position matching your highest-risk loads.
cold chain meat technology
KPIs to track weekly (simple but powerful)
Cold chain meat technology gets easier when you manage a few KPIs your team can influence daily in cold chain meat technology.
| KPI | Target example | Why it matters | Simple way to collect |
|---|---|---|---|
| Time-out-of-range | <30 min per load | Predicts shelf-life loss | Logger or sensor reports |
| Door-open duration | trending down | Creates warm spikes | Door sensor, camera review, or manual logs |
| Pre-chill compliance | >95% loads | Prevents warm loading | Dispatch probe + record |
| Seal failure rate | <0.5% cartons | Drives odors and wet packs | Receiving checks |
| Claims per 1,000 shipments | trending down | Measures customer pain | QA and customer service logs |
Practical tips you can use today
Place sensors where problems happen: Do not hide them near evaporators “because it looks good.”
Assign alert ownership: One person responds; one person closes out the event.
Log the why: Every alarm gets a cause and an action note in plain language.
Practical example: One team stopped repeat excursions by moving a sensor closer to the door and enforcing a staging timer.
Cold chain meat technology packaging: what protects color and yield?
Cold chain meat technology is not only cold air—packaging is the last protective layer. The right pack slows oxygen exposure, controls drip, and prevents handling damage. The wrong pack can make your cold chain look “fine” while customers see grey color, wet cartons, and off-odors.
Packaging is like a rain jacket. Cold air is the weather. If the jacket leaks, you still get wet.
Packaging options compared for chilled meat
| Packaging type | What it protects | Main tradeoff | Best for | What it means for you |
|---|---|---|---|---|
| Vacuum pack | Oxidation, odor | Darker color look | Primal cuts, export | Strong shelf-life stability |
| Vacuum skin pack | Appearance, drip | Film damage if abused | Retail-ready cuts | Cleaner presentation |
| MAP (modified atmosphere) | Color + selling days | Needs gas and seal discipline | Retail display | Better inventory control |
| Overwrap tray | Speed and cost | Short shelf life | Very local routes | Requires tight timing |
Insulated shipping: simple rules that work
Cold chain meat technology for parcel or last mile often needs insulation and coolants.
| Shipping element | Helpful when | Risk if misused | Practical takeaway |
|---|---|---|---|
| Insulated liner | Short routes, last mile | False confidence | Still limit dock time |
| Gel packs | Warm ambient days | Surface freezing | Separate with a barrier layer |
| PCM packs | Tight control needed | Wrong melt point | Match PCM to your target |
Practical tips and suggestions
If cartons arrive wet: Fix condensation sources before changing packaging.
If color varies load to load: Check seal integrity and oxygen exposure first.
If refunds spike in last mile: Add a barrier between coolant and product to avoid edge-freezing.
Practical example: A DTC brand reduced refunds after adding a simple barrier layer between gel packs and chilled meat.
Cold chain meat technology SOPs: how do you make it repeatable?
Cold chain meat technology succeeds when your process is designed for humans, not perfect conditions. The best SOP is the one your team can repeat at 6 a.m. on a busy day. Your goal is to reduce “decision fatigue” by turning key steps into defaults.
Below is a simple workflow you can adapt. It targets the most common breakpoints: receiving, chilling, staging, loading, and delivery.
A simple cold chain meat technology workflow
Receive and verify: check temperature and packaging condition.
Stabilize in cold room: stack for airflow, not for maximum density.
Pick and pack: batch picks to reduce door openings.
Stage cold, load fast: minimize dock exposure with timed windows.
Transport with proof: log temperature and exceptions.
Handover checks: confirm conditions at destination.
| Process step | Typical failure | Easy fix | What it means for you |
|---|---|---|---|
| Receiving | Warm loads blend into stock | Isolation lane | Stops “warming the whole room” |
| Cold storage | Hot spots inside pallets | Airflow channels | More even product temps |
| Picking | Doors open too long | Batch picks | Better room stability |
| Loading | Long dock time | Timed windows | Fewer temperature spikes |
| Delivery | “No data” handoff | Proof pack | Faster dispute resolution |
The clean handoff checklist (your “touch” control)
Cold chain meat technology fails when cold product meets dirty or wet conditions. Use this simple handoff checklist at receiving, packing, and loading.
Keep raw and ready-to-eat flows separated, even in small spaces.
Use a clean-to-dirty tool flow (fresh gloves and tools for new tasks).
Sanitize high-touch surfaces on a timer, not “when it looks dirty.”
Control condensation: water droplets spread microbes and weaken cartons.
Quarantine returns and questionable pallets in a labeled isolation zone.
Dock discipline tip: Aim for a short, repeatable handoff. If your dock is warm, treat every extra minute as shelf-life loss.
Blast chilling after processing
Blast chilling removes heat quickly so meat reaches stable cold faster.
It reduces time spent in risky warm ranges.
It improves consistency across pallets.
It supports predictable dispatch timelines.
Practical tips you can use today
Use time stamps: receiving time, into-cooler time, out-of-cooler time.
Adopt a “no exceptions” rule: chilled meat never waits on a warm dock.
Train with pictures: show correct pallet spacing and airflow gaps.
Practical example: One plant improved on-time dispatch by creating a cold staging buffer inside the facility.
Cold chain meat technology transport: how do you avoid reefer hot spots?
Cold chain meat technology in transport is mostly airflow and loading discipline. Reefers can cool air well, but they cannot cool a blocked pallet core quickly. If you load wrong, the trailer becomes a moving hot-spot generator and you learn it too late.
A reefer is like a fan-cooled fridge. Air must circulate. If you block the path, the back corners warm first.
Reefer loading habits that create hot spots
| Loading habit | What it causes | What to do instead | Benefit to you |
|---|---|---|---|
| Tight wall stacking | Trapped warm pockets | Leave airflow gaps | More uniform temps |
| Mixed pallet heights | Short-circuit airflow | Standardize or separate rows | Fewer corner failures |
| Over-wrapping | Poor air exchange | Wrap for stability, not sealing | Better cooling response |
| Blocking return air | Uneven circulation | Keep returns clear | Less variability |
Cross-docking: where cold chain meat technology often breaks
Cross-docks are high risk because time pressure wins. Two practices cut risk fast:
Cold-to-cold transfer lanes: Keep product in cold zones until the last moment.
Exception labeling: Mark pallets that had extra warm exposure.
Practical tips you can use today
If setpoint looks fine but quality fails: map the failing pallet positions.
If trailers “never reach setpoint”: check door discipline and loading speed first.
If last mile is your model: treat staging as the main battlefield, not driving time.
Cold chain meat technology troubleshooting: symptoms to root causes
Cold chain meat technology improves fastest when you connect what you see to what likely caused it. This table helps you stop guessing and fix the repeatable failure point.
| What you see | What it often means | Fast check | Practical fix |
|---|---|---|---|
| Grey or dull color | Oxygen exposure or temp swings | Inspect seals and dock time | Improve seal checks; shorten staging |
| Excess purge (drip) | Warm exposure + compression | Compare pallet core temps | Improve airflow channels; reduce stacking pressure |
| Off-odor complaints | Time + temperature abuse | Review excursions by lane | Tighten loading windows; improve alarm response |
| Wet cartons | Condensation events | Check door cycles and humidity | Add curtains; reduce swings; keep dry zones |
| Uneven quality across a load | Hot spots from airflow blocks | Map failure positions | Adjust loading pattern; move sensors to risk zones |
Practical tips you can use today
Start with one lane in cold chain meat technology: fix your worst route first, then copy the win.
Measure before you change: one week of simple logs beats one day of opinions.
Separate safety from quality: both matter, but they use different indicators.
Cold chain meat technology self-check tools: score + calculator
Cold chain meat technology improves fastest when you stop guessing and start scoring. Use the tools below to find your biggest weakness today, then fix only that item first.
Interactive tool 1: Cold Chain Meat Technology Readiness Score
Score each line 0–2 (0 = no, 1 = sometimes, 2 = yes). Total 0–20.
We verify receiving temperature on every load. (2)
We have an isolation lane for warm or questionable pallets. (2)
We limit chilled meat dock time with a timer rule. (2)
We keep vents and returns clear with floor markings. (2)
We monitor door-zone and far-corner temperatures. (2)
We close out every alarm with cause and action. (2)
We pre-cool trailers before loading starts. (2)
We train handlers on airflow-safe pallet patterns. (2)
We check packaging seals and damage at receiving. (2)
We keep a simple proof pack buyers can review quickly. (2)
Score meaning
0–6: High risk. Cold chain meat technology is likely failing silently.
8–14: Medium risk. You have controls, but gaps cause surprises.
16–20: Low risk. You are stable and scalable.
Interactive tool 2: Excursion impact estimator for chilled meat
This is a simple way to estimate “how bad was that warm exposure?” It is not a lab model. It helps you decide where to focus.
Step 1: Calculate Warm Exposure Points (WEP)
WEP = (Temperature above your target band) × (Hours exposed)
cold chain meat technology
Example:
Your target is 0–4°C.
A pallet sat at 8°C for 3 hours.
Temperature above band is 4°C.
WEP = 4 × 3 = 12
Step 2: Interpret WEP (rule of thumb)
WEP 0–5: Low impact. Improve process, but likely manageable.
WEP 6–15: Medium impact. Investigate handling and re-check product.
WEP 16+: High impact. Consider hold/release decisions and root cause.
Practical tips you can use today
Track WEP by route: your worst lane becomes obvious quickly.
Use WEP in training: it turns “be careful” into a measurable habit.
Pair WEP with packaging checks: seal failures plus high WEP are high risk.
2025 cold chain meat technology trends you should watch
In 2025, cold chain meat technology is shifting from “keeping it cold” to “keeping it consistently cold with proof.” Teams are moving from data collection to decision support. Buyers also want simpler, auditable evidence that your process is controlled.
Here are the trends that matter because they change your daily work.
Latest progress snapshot (2025)
Smarter alerting: fewer alarms, better prioritization by risk zones.
Predictive analytics: earlier warnings that a lane is drifting toward failure.
More intelligent indicators: wider use of TTIs for box-level exposure screening.
Packaging optimization: stronger focus on seal quality, barrier performance, and drip control.
Lower-emission refrigeration planning: more attention to energy, refrigerants, and uptime.
Proof-first selling: traceability and stability are becoming contract advantages.
Market insight you can use
Consistency is now a feature. Many customers accept premium pricing when quality is predictable. Cold chain meat technology supports that by reducing variability, not just meeting minimum limits.
Frequently asked questions about cold chain meat technology
Q1: What is cold chain meat technology in plain terms?
Cold chain meat technology is the equipment, packaging, monitoring, and SOPs that keep meat in range with proof. When you control temperature, time, and clean handling at every handoff, you reduce spoilage and claims.
Q2: What temperatures should I target for chilled and frozen meat?
Many operations target about 0–4°C for chilled meat and -18°C or colder for frozen meat. Your product specs and safety plan should define your exact limits and actions.
Q3: Why do hot spots happen even when the trailer is cold?
Hot spots usually come from blocked airflow, mixed pallet heights, or return-air paths being blocked. Cold chain meat technology depends on loading patterns that let air circulate around pallets.
Q4: Do I need real-time monitoring on every lane?
Not always. Use real-time monitoring on high-risk routes and tight timelines. For stable lanes, shipment loggers can still give you strong proof, if you have a clean retrieval process.
Q5: Which packaging is best: vacuum, skin pack, or MAP?
It depends on route time and selling window. Vacuum often improves shelf-life stability for longer storage. Skin packs can improve presentation and reduce leaks. MAP can help with retail color, but needs seal discipline.
Q6: What is the fastest way to cut spoilage claims?
Fix staging and dock time first. Many failures come from warm exposure during handoffs, not from the cold room thermostat setting.
Summary: your next steps for cold chain meat technology
Cold chain meat technology works when you run it as one system: targets, airflow, monitoring, packaging, and response. If you want fast improvement, focus on the handoffs.
Key takeaways
Cold chain meat technology is a system, not a gadget.
Temperature stability beats “colder setpoints” almost every time.
Monitoring works when sensors sit in risk zones and alarms have owners.
Packaging protects quality, but only when staging and seals are controlled.
Transport quality depends on airflow-safe loading patterns.
A simple action plan
This week: add receiving checks, an isolation lane rule, and a dock timer.
Next 2 weeks: audit airflow and fix your top two hot-spot locations.
This month: deploy the 3-point monitoring plan and review exceptions weekly.
About Tempk
At Tempk, we support cold chain meat technology with practical tools that help you keep operations stable and auditable. We focus on monitoring plans, usable SOP workflows, and evidence-ready reporting that fits real shift work. Our goal is to help you reduce avoidable excursions, improve consistency, and strengthen buyer confidence without overcomplicating your day.
Next step: If you share your product types, packaging formats, and dispatch schedule, we can outline a monitoring and SOP checklist you can implement quickly.
Best Fish Cold Chain Guidelines: 2025 Playbook
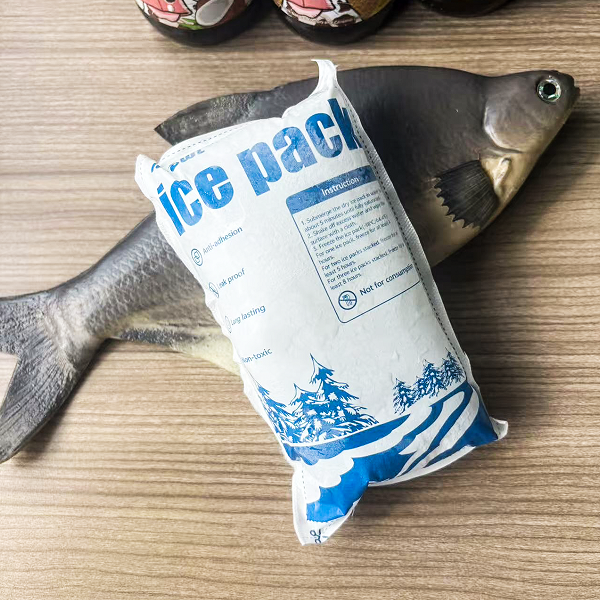
Best Fish Cold Chain Guidelines: How to Win in 2025?
You can follow the best fish cold chain guidelines and still lose money if one handoff gets warm. In 2025, “mostly cold” is not good enough. You need fish kept near melting ice (often 0–2°C) when fresh and ≤–18°C when frozen, plus proof that those targets held.
If you run seafood logistics, this guide gives you a simple playbook to cut spoilage, reduce claims, and pass audits without drowning in paperwork.
This article will help you:
Keep fresh fish storage temperature 0–2°C stable, not “on average”
Protect frozen fish transport temperature -18°C from edge-thaw and door abuse
Use seafood HACCP time temperature control without scary jargon
Reduce risk for preventing histamine formation in tuna and similar species
Build seafood cold chain monitoring data logger proof that wins disputes
Prepare for FSMA 204 seafood traceability requirements with a “lot story” drill
best fish cold chain guidelines
Best fish cold chain guidelines: what do they really mean?
Direct answer: The best fish cold chain guidelines are the daily rules that keep fish cold, clean, and fast-moving, while making the results traceable and provable.
best fish cold chain guidelines
Fish starts changing the minute it is harvested. A small temperature rise can speed spoilage fast. That is why the best fish cold chain guidelines focus on three basics: temperature targets, time limits, and handling hygiene. If any one of those breaks, the whole chain feels it later as odor, drip loss, soft texture, or returns.
Best fish cold chain guidelines: the “3C” rule you can train in 5 minutes
Cold: keep product inside target temperature at every handoff.
Clean: reduce contamination and cross-contact every day.
Confirm: record what happened, so you can defend quality later.
| The “3C” | What you control | What you record | The practical meaning for you |
|---|---|---|---|
| Cold | temps + handoff time | min/max, spot checks, logger summaries | fewer claims on hot lanes |
| Clean | surfaces + people + tools | sanitation checks, training logs | fewer odor/appearance rejects |
| Confirm | lots + timestamps + exceptions | receiving + excursion actions | faster audits and less arguing |
Practical tips you can apply today
Use one temperature story: “Fresh stays near ice; frozen stays ≤–18°C.”
best fish cold chain guidelines
Treat handoffs as critical points: docks and staging areas cause most failures.
Write one simple exception rule: “When in doubt, hold and investigate.”
best fish cold chain guidelines
Real-world pattern: Teams that standardize unloading and staging reduce disputes fast, because the “unknown time warm” problem shrinks.
best fish cold chain guidelines
Best fish cold chain guidelines: what temperatures should you target?
Direct answer: The best fish cold chain guidelines target 0–2°C for fresh fish whenever possible and ≤–18°C for frozen fish, and they treat long exposure above safe thresholds as an excursion.
best fish cold chain guidelines
Your targets should be stricter than your minimum legal baseline. Legal language often sets the floor, but buyers judge you on consistency. If you can hold fresh fish close to the melting-ice zone, you protect texture and shelf life.
best fish cold chain guidelines
Fresh fish storage temperature 0–2°C: why it wins
When fish sits close to melting ice, it “ages slowly.” That means firmer flesh and less odor.
best fish cold chain guidelines
The jump from 0–2°C to 3–5°C may feel small, but outcomes change.
| Temperature zone | What happens | Risk level | What it means for you |
|---|---|---|---|
| 0–2°C | spoilage slows | Low | longer sellable life |
| 3–5°C | spoilage speeds up | Medium | tighter dock control needed |
| >5°C | rapid quality loss | High | quarantine and assess |
Frozen fish transport temperature -18°C: what “stable” really means
Frozen fish fails most often due to edge thaw, not a full thaw. One warm corner can create “random” complaints weeks later.
best fish cold chain guidelines
Your frozen goal: stable deep cold, minimal door-open time, and airflow that reaches pallet edges.
Practical temperature control advice
Pre-chill containers before loading to prevent “warm box shock.”
best fish cold chain guidelines
Stop “average temperature thinking.” One warm pocket can spoil a lot.
best fish cold chain guidelines
Label lanes clearly: Fresh-Iced vs Frozen-18, so no one guesses.
best fish cold chain guidelines
Practical takeaway: If your team cannot say the lane in one breath, the lane is not controlled.
Best fish cold chain guidelines: how do you control time, not just temperature?
Direct answer: The best fish cold chain guidelines treat time like a second temperature. Cold slows spoilage, but time still “spends” freshness.
best fish cold chain guidelines
Even perfect refrigeration cannot undo long delays. That is why many strong operations manage “dwell time” like a KPI, not a nuisance.
The handoff targets that protect quality
Use these as internal SOP targets. They are simple and easy to measure.
| Stage | Target | Risk if delayed | Your benefit |
|---|---|---|---|
| Harvest to chilling | ≤30 minutes | fast spoilage | longer shelf life best fish cold chain guidelines |
| Processing | same day | texture loss | better appearance best fish cold chain guidelines |
| Transport handover | ≤15 minutes | temp rise | consistent quality best fish cold chain guidelines |
Practical time controls (simple, not fancy)
Create a “cold-first lane” at receiving: fish moves first, paperwork second.
best fish cold chain guidelines
Use a dock timer: if product sits, you log it and act on it.
Schedule loading before arrival: don’t let trucks become waiting rooms.
best fish cold chain guidelines
Real example idea: Teams that shrink dock dwell see fewer “soft fish” complaints in warm seasons.
best fish cold chain guidelines
Best fish cold chain guidelines: what receiving checks prevent returns?
Direct answer: The best fish cold chain guidelines start at receiving because you cannot “fix” fish that warmed upstream. You detect early, then decide fast.
best fish cold chain guidelines
Receiving is where hidden failures become visible: weak ice, missing lot IDs, damaged packs, or early off-odors. Your goal is fast screening that protects your whole inventory.
The 8-step receiving checklist (copy into your SOP)
Truck condition: clean, no strong odors, no leaks
Lane label: Fresh-Iced or Frozen-18 (no “mixed condition”)
best fish cold chain guidelines
Ice coverage: fresh fish fully supported, not just topped
Drainage: no standing meltwater in contact with fish
Packaging integrity: no punctures, no crushed corners
Lot + date: readable and complete, before you put it away
best fish cold chain guidelines
Temperature evidence: spot probe or logger summary when used
Decision: accept / hold / reject (no “we’ll see later”)
Quick decision table for common receiving problems
| Issue | What you do now | What you record | Why it saves you |
|---|---|---|---|
| Ice half-melted | Hold + inspect | photos + time + lot | reduces chain-wide shrink best fish cold chain guidelines |
| Labels unclear | Stop line | corrected lot ID | keeps traceability intact best fish cold chain guidelines |
| Fish smells “off” early | Quarantine | disposition decision | prevents cross-contamination best fish cold chain guidelines |
Real-world habit: “Hold any pallet with weak ice or missing lot labels” is one of the highest-ROI rules you can add.
best fish cold chain guidelines
Best fish cold chain guidelines: how do you prevent histamine risk?
Direct answer: The best fish cold chain guidelines prevent histamine by controlling the clock as tightly as the thermometer. Once histamine forms, you cannot “cool it away.”
best fish cold chain guidelines
Histamine risk is highest in tuna-type and similar species. The mistake most teams make is relying on “we kept it on ice later.” The correct approach is strict time-and-temperature discipline during exposure points.
Preventing histamine formation in tuna: the “two-clock” rule
Run two clocks every day:
Warm-time clock: total time above your chilled target during handling
Process clock: harvest → chill, then chill → sale
best fish cold chain guidelines
Your SOP must define what happens if warm-time is unknown. The safest default is hold and investigate.
best fish cold chain guidelines
| Clock | What you track | Trigger to act | What it means for you |
|---|---|---|---|
| Warm-time | minutes out of cooler | unknown exposure | hold + investigate |
| Process | total hours in chain | long dwell | tighten scheduling |
Seafood HACCP time temperature control (plain language)
“HACCP” is just a plan that says: identify your biggest hazards, then control them with checks. For histamine risk, the check is time + temperature during exposure points.
best fish cold chain guidelines
Practical tips your team will actually follow
Put one visible timer at the cut room exit. You start it when fish leaves cold.
Map the warmest zone. Monitor there, not “in the middle where it is safe.”
Stagger deliveries so fish never waits outside cold rooms.
best fish cold chain guidelines
Story to train by: Heat creates a risk you can’t undo later. Cold only slows damage.
Best fish cold chain guidelines: what packaging and icing prevent warm spots?
Direct answer: The best fish cold chain guidelines use packaging as a control tool: it slows heat gain, manages moisture, and protects hygiene across handoffs.
best fish cold chain guidelines
Many seafood failures are packaging failures in disguise. Ice melts too fast, meltwater sits against fish, or insulation is mismatched to the lane.
Decision tool: choose your pack-out in 60 seconds
Answer these three questions:
Is the product Fresh-Iced or Frozen-18?
best fish cold chain guidelines
Is transit <24h, 24–48h, or 48–72h?
Is the lane mild, hot, or very hot ambient?
Then choose a pack-out standard and stick to it.
| Lane profile | Suggested pack-out | Monitoring level | What it means for you |
|---|---|---|---|
| <24h, mild | ice + basic insulation | spot checks | lowest-cost control |
| 24–48h, hot | more insulation + planned ice/PCM | logger on samples | fewer soft-fish complaints |
| 48–72h, very hot | high-performance insulation + contingency | logger on every load | protects brand promise |
Practical packing tips (high impact, low complexity)
Fresh fish: build a drainage plan so fish does not sit in warm meltwater.
Frozen fish: design airflow gaps; do not block vents.
best fish cold chain guidelines
Use one “good pack” photo SOP: one picture reduces daily mistakes.
Real-world pattern: Standard pack-outs reduce refunds because customers receive the same result every time.
Best fish cold chain guidelines: how do you prove control with monitoring?
Direct answer: The best fish cold chain guidelines are only “best” if you can prove them with simple, time-stamped records. That proof prevents disputes and improves consistency.
best fish cold chain guidelines
You do not need a complex system. You need a consistent one that your team will actually use.
Seafood cold chain monitoring data logger: when to use what
| Monitoring method | Coverage | Accuracy | Best use |
|---|---|---|---|
| Manual checks | spot | low | small sites, low risk |
| Trip data loggers | trip-based | medium | risky lanes, claims defense |
| Continuous sensors | real-time | high | high-value or regulatory pressure |
The “audit-ready” proof stack (3 layers)
Storage proof: daily min/max for coolers and freezers
Shipment proof: dispatch + receiving evidence (spot or logger)
Exception proof: what you did when something drifted (hold → assess → decide → record)
best fish cold chain guidelines
Mini self-assessment: Cold Chain Proof Score
Score each 0–2 (0 = no, 1 = partly, 2 = yes):
We have written targets for Fresh-Iced and Frozen-18 lanes.
best fish cold chain guidelines
We document receiving checks every delivery.
We can link any shipment to a lot ID in 30 minutes.
We have an excursion SOP and use it every time.
best fish cold chain guidelines
We use loggers on at least our hottest or longest lanes.
Score guide:
0–4: high risk (one heat event becomes waste)
5–7: medium risk (stable until peak season)
8–10: low risk (audit-ready, dispute-proof)
Traceability quick tool: do you have the “lot story”?
Pick one case in your cooler. Can you answer in 10 minutes?
Lot identifier
Supplier + receive date
Storage location + movement timestamps
Ship date + customer
Temperature evidence supporting the lane
best fish cold chain guidelines
If the answer is “mostly,” your best fish cold chain guidelines are not complete yet.
best fish cold chain guidelines
Best fish cold chain guidelines: what breaks in the last mile?
Direct answer: The best fish cold chain guidelines often fail at the last handoff because control is weakest there. Your SOP must cover staging, delivery windows, and doorstep dwell time.
best fish cold chain guidelines
A perfect reefer trip can still end with a box sitting in the sun. That is not a logistics detail. It is a quality event.
Last-mile playbook (simple but effective)
Appointment windows: reduce waiting time for business customers
Cold handoff rules: stage in cold zones, not ambient areas
Clear customer instructions: “Do not leave in sun” and “refrigerate immediately”
High-heat lanes: add monitoring or shorten promised delivery windows
Training line: “The last 10 meters can ruin the last 10 hours.”
2025–2026 latest developments and trends
In 2025, the best fish cold chain guidelines are shifting from “temperature control” to “temperature control plus proof.”
best fish cold chain guidelines
Buyers expect you to show what happened, not just describe your process. Traceability expectations are also rising, especially across seafood categories.
best fish cold chain guidelines
What’s changing fast (and why it matters to you)
More lane validation: worst-case summer routes tested seasonally
best fish cold chain guidelines
More “quarantine by default” discipline: fewer “maybe it’s fine” decisions
best fish cold chain guidelines
Simpler automation: digital logs replacing clipboards in busy sites
best fish cold chain guidelines
Traceability runway awareness: compliance timelines and expectations are evolving, so building clean records now reduces later pain
best fish cold chain guidelines
Common questions about best fish cold chain guidelines
Q1: What is the #1 rule in best fish cold chain guidelines?
Keep fish cold continuously and prove it with simple records.
best fish cold chain guidelines
Q2: What is the best target for fresh fish storage temperature 0–2°C?
Aim as close to 0–2°C as your process allows, especially during receiving and staging.
best fish cold chain guidelines
Q3: What is the frozen fish transport temperature -18°C rule in practice?
Keep frozen product ≤–18°C and prevent door-open and edge-warming events.
best fish cold chain guidelines
Q4: Do best fish cold chain guidelines require data loggers?
Not always, but loggers make disputes easier. Start with your hottest or longest lanes.
best fish cold chain guidelines
Q5: What’s the simplest way to improve seafood HACCP time temperature control?
Track warm-time at exposure points with one timer and one simple log.
best fish cold chain guidelines
Q6: What receiving checks prevent most returns?
Ice condition, packaging integrity, lot labels, odor, and temperature evidence—then decide fast.
Summary and recommendations
The best fish cold chain guidelines work when you control temperature, time, hygiene, and proof together. Keep fresh fish close to ice temperatures (often 0–2°C), keep frozen fish stable at ≤–18°C, and treat handoffs like critical points.
best fish cold chain guidelines
Use a receiving checklist that catches weak ice and missing lot labels early, and adopt monitoring that matches lane risk.
What you should do next (CTA)
Define two lanes: Fresh-Iced and Frozen-18, and label every shipment.
best fish cold chain guidelines
Fix your worst lane first: hottest route or longest transit.
best fish cold chain guidelines
Add one proof upgrade: logger on that lane + a simple exception log.
Run one mock trace monthly: practice the “lot story” until it’s boring.
About Tempk
At Tempk, we help seafood brands and cold chain teams make best fish cold chain guidelines operational with lane-based pack-out standards, monitoring plans that teams actually follow, and documentation that stays readable during audits.
best fish cold chain guidelines
We focus on practical temperature-risk planning, packaging performance, and simple workflows that reduce shrink and claims.
Next step: Share your fish type (fresh/frozen), typical transit time, and peak summer ambient temperature. We’ll outline a lane-based SOP + packaging + monitoring approach you can implement fast.
best fish cold chain guidelines