


Where to Buy Gel Cold Compress for Foot (2025)
Where to Buy Gel Cold Compress for Foot (2025)
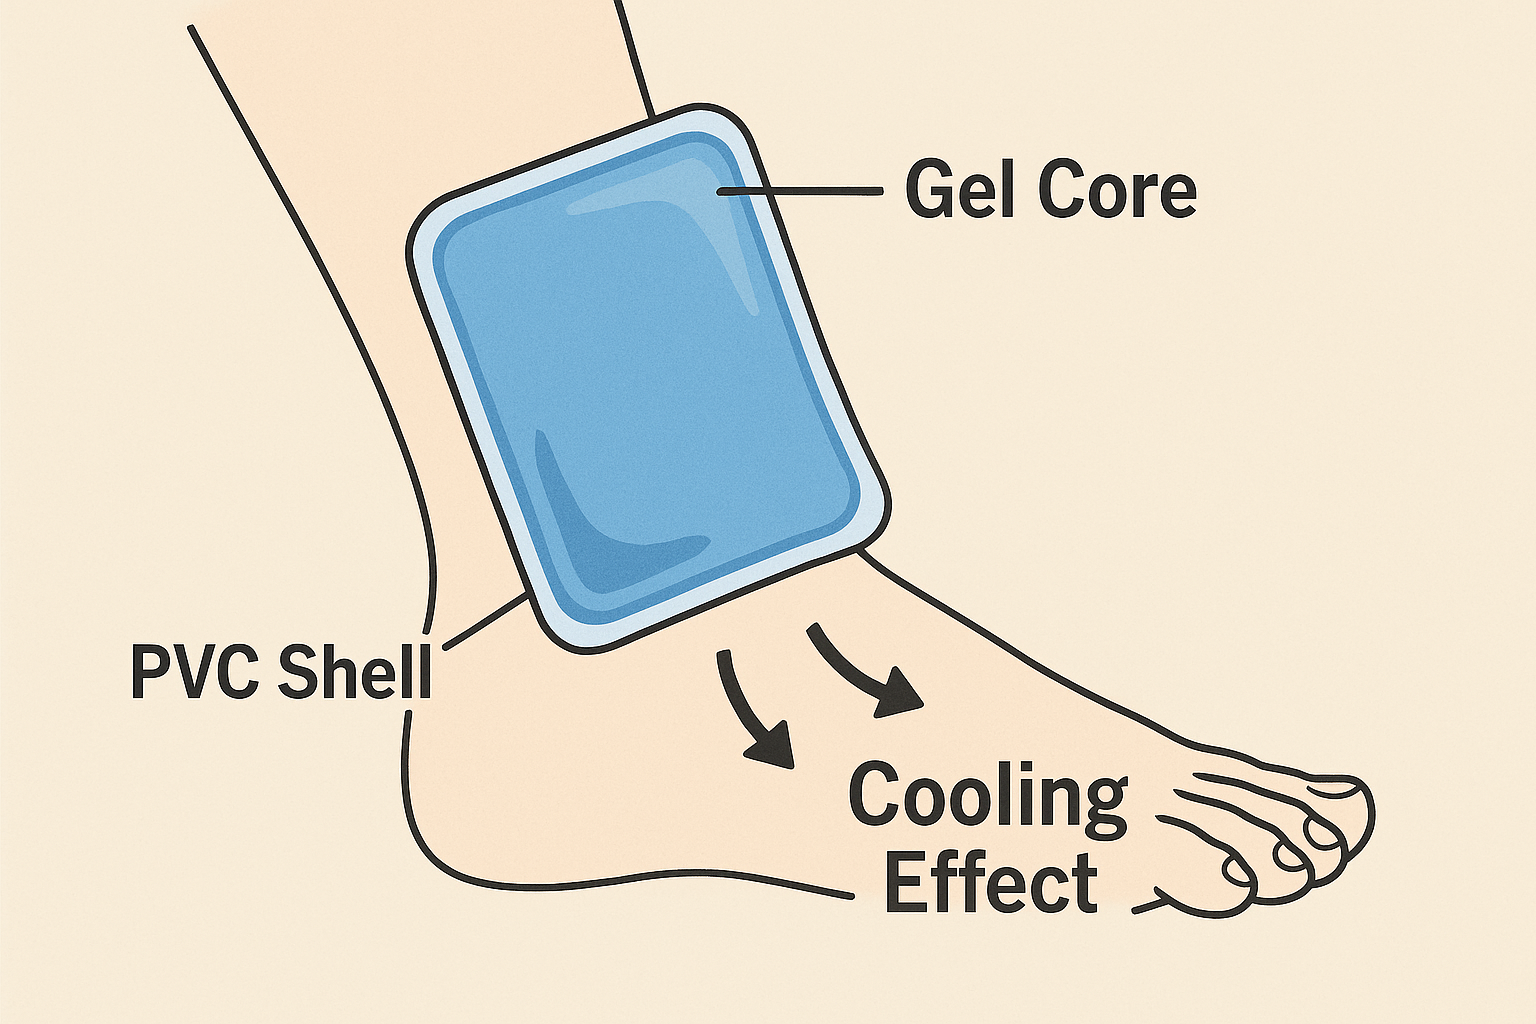
Where to Buy Gel Cold Compress for Foot in 2025?
If you’re searching where to buy gel cold compress for foot, start with one simple rule: buy local for same-day relief, buy online for the best fit and wrap options. For safer cold use, many first-aid routines keep sessions around 10–20 minutes with a thin barrier, and avoid going past 20 minutes. This guide helps you pick the right wrap, size, and material so you stop guessing and start feeling relief.
This guide will answer for you:
Where to buy gel cold compress for foot near me when you need it today
Where to buy gel cold compress for foot online without sizing regrets
How to choose the best gel cold compress for foot swelling and comfort
What to check so your pack stays flexible when frozen and doesn’t leak
A quick decision tool + self-test so you buy once, not twice
Where to buy gel cold compress for foot near me today?
Direct answer: If you need it today, where to buy gel cold compress for foot near me is usually a pharmacy, big-box retailer, sporting goods store, or medical supply shop. Local buying wins on speed, easy returns, and letting you check strap feel in your hands. If your foot pain is urgent, same-day access can matter more than perfect specs.
Local buying is like buying an umbrella when it’s already raining. You want something that works tonight, not in three days. Use local stores when you need quick relief or you’re unsure about sizing. Save online shopping for when you already know the coverage you need.
Fastest local buying channels (what you’ll actually get)
| Buying channel | Typical quality | Typical selection | What it means for you |
|---|---|---|---|
| Pharmacy / drugstore | Medium | Basic gel packs, simple wraps | Quick relief, easy exchange |
| Big-box retailer | Medium–High | More wraps + multi-packs | Better variety at a fair price |
| Sporting goods store | High | Sport-style ankle/foot wraps | Better straps for active users |
| Medical supply store | High–Very high | Rehab-oriented wraps | Best durability and fit guidance |
Practical tips before you pay
Check strap width: wider straps feel less pinch-y and hold tension better.
Look for a sleeve: a fabric layer improves comfort and reduces “shock cold.”
Confirm coverage: heel/arch pain needs different coverage than ankle swelling.
Real scenario: A buyer with heel pain tried a flat pack first, then switched to a strap wrap that stayed in place.
Where to buy gel cold compress for foot online with confidence?
Direct answer: Where to buy gel cold compress for foot online is best when you need a specific shape (heel/arch wrap, foot+ankle wrap) or you want better sizing choices. Online shopping gives you more coverage styles and “feature filtering,” especially for gel cold compress for foot with compression strap options.
Online shopping is like ordering shoes: you win on options only if you measure first. The biggest online mistake is buying “one size fits all” and hoping it hugs your arch. Your safest approach is to shop listings that show dimensions, strap range, and clear return rules.
The 7-filter online checklist (copy/paste)
When you’re deciding where to buy gel cold compress for foot online, confirm:
Pack dimensions (length × width)
Coverage type (heel/arch, foot-only, foot+ankle)
Strap range (fits your foot/ankle circumference comfortably)
Sleeve included (or plan a thin cloth barrier)
“Flexible when frozen” claim with real photos
Leak resistance (reinforced seams / double-sealed edge)
Clear return policy (especially if you’re between sizes)
Online channel comparison
| Online channel | Best for | Watch-outs | What it means for you |
|---|---|---|---|
| Large marketplaces | Huge selection | Mixed quality listings | Filter hard and verify sizing |
| Brand-direct stores | Clear specs | Fewer models | Best if you value consistency |
| Medical supply e-stores | Rehab gear | Higher cost | Great post-injury reliability |
Real scenario: Someone with wide feet ordered two sizes online, returned one, and avoided weeks of trial-and-error.
Where to buy gel cold compress for foot after injury or surgery?
Direct answer: For recovery needs, where to buy gel cold compress for foot is often best through medical supply channels or clinic-recommended options. Post-injury routines usually demand repeatable cooling, better seams, and straps that don’t slip when swelling changes day to day.
Think of recovery like a routine you repeat for weeks. If the wrap leaks, freezes stiff, or feels awkward, you stop using it. For post-injury buying, prioritize comfort, durability, and clear safety instructions over “coldest possible.”
What matters most in recovery purchases
| Recovery goal | Feature to prioritize | What to buy | What it means for you |
|---|---|---|---|
| Reduce swelling | Compression strap + full contact | Cold wrap with strap | Less slipping, more consistent cooling |
| Improve comfort | Sleeve + smooth seams | Soft-lined wrap | Easier to tolerate daily |
| Repeat use | Reinforced seams | Reusable gel cold compress | Lower long-term cost |
Practical recovery tips
Choose “easy to apply” over “fancy.” The simple one gets used.
Avoid rigid packs that freeze into a hard block and create pressure points.
Track what works: time, strap tightness, and pain location for 7 days.
Real scenario: A post-sprain user improved consistency by keeping one wrap freezing while using the other.
Where to buy gel cold compress for foot for plantar fasciitis or heel pain?
Direct answer: If heel/arch pain is your main issue, where to buy gel cold compress for foot usually shifts toward heel/arch-focused wraps—often easier to find online than in-store. A general flat pack can cool the area, but heel pain improves faster when cold lands exactly on the tender spot.
Heel pain behaves like a “hot точка” under your foot. If your pack cools the top of the foot instead, you waste time and comfort. For plantar-style pain, look for coverage that reaches heel + arch and stays there.
Heel/arch buying strategy table
| Heel pain pattern | Best style | Best place to buy | What it means for you |
|---|---|---|---|
| Morning “first step” pain | Heel/arch wrap | Online specialty selection | Better chance of correct coverage |
| Post-workout heel soreness | Wrap with strap | Sporting goods or online | Hands-free and stable |
| Heel + ankle irritation | Foot+ankle wrap | Big-box or online | One wrap covers both zones |
Practical heel-pain tips
Target the heel and arch, not your whole foot.
Don’t overtighten straps: compression should feel supportive, not painful.
Pair cold with rest habits: cold helps symptoms, not the root cause.
Real scenario: A retail worker stopped buying flat packs after switching to a heel wrap that stayed under the arch.
What should you check before buying a gel cold compress for foot?
Direct answer: Before you decide where to buy gel cold compress for foot, make sure the product does four things: fits your pain area, stays comfortable, stays flexible when frozen, and includes safe-use guidance. If any one fails, you’ll likely stop using it.
This is like buying a seatbelt. If it doesn’t fit well, you won’t wear it. Your best pack is the one you can apply quickly, tolerate easily, and repeat consistently.
Quick spec check (buy/no-buy)
| Feature | Good sign | Red flag | What it means for you |
|---|---|---|---|
| Straps | Wide, adjustable, holds tension | Thin strap that slips | Constant re-tightening |
| Fit | Clear size chart | “One size” only | Misses heel/arch coverage |
| Comfort | Sleeve/cover included | Bare plastic on skin | More “too cold” shock |
| Instructions | Clear time guidance | No safety notes | Higher risk of overuse |
| Seams | Reinforced edges | Weak sealing | Higher leak risk |
Practical buying mistakes to avoid
Don’t buy “ultra-thin” packs for heel pain—they warm too quickly.
Don’t ignore returns—fit matters more than brand.
Don’t chase extreme cold—controlled cold feels better and gets used more.
How do you use a gel cold compress for foot safely?
Direct answer: Use a thin barrier (sleeve or cloth) and keep sessions short and controlled, often 10–20 minutes, avoiding longer single sessions. If you have diabetes, circulation problems, or reduced sensation, talk with a clinician before routine icing.
Cold therapy works like a dimmer switch, not an on/off button. More time is not always better. The goal is comfort and consistency, not numbness.
A simple 5-step cold routine you can repeat
Wrap the pack with a thin cloth or use the included sleeve.
Apply for 10–15 minutes if your foot is very bony or sensitive.
Avoid exceeding 20 minutes in one session.
Check skin every 5 minutes (color change or burning means stop).
Let skin return to normal temperature before repeating.
Practical safety signals (don’t ignore these)
White patches, blue tone, blistering: stop immediately and warm gently.
Numbness that lingers: extend your break before the next session.
Sharp cold pain: add a thicker barrier and shorten time.
Real scenario: A sensitive-skin user got better results with two 12-minute sessions than one long session.
2025 trends in where to buy gel cold compress for foot
Trend overview: In 2025, searches for where to buy gel cold compress for foot are rising with home-based recovery routines. Buyers are choosing foot-specific designs, comfort sleeves, and reusable systems more than “cheapest possible.” Fit and usability are now driving reviews and repeat purchases.
Latest developments at a glance (and what they mean for you)
More foot-contoured wraps: fewer generic rectangles, more heel/arch coverage.
Better strap ergonomics: easier one-hand fastening and less slipping.
Comfort-first materials: softer sleeves and smoother seams for daily use.
Reusable value: people keep one pack freezing and one in rotation.
Market insight (simple and practical)
Buy local when you need it today.
Buy online when you need exact coverage and sizing.
A wrap is often worth it if you ice more than twice weekly.
Decision tool: choose where to buy gel cold compress for foot in 3 minutes
Step 1 — Urgency:
Need it today → pharmacy / big-box / sporting goods
Can wait 1–3 days → online marketplace or brand-direct
Post-injury routine → medical supply channel first
Step 2 — Pain location:
Heel/arch → heel/arch wrap (often easiest online)
Foot + ankle → foot+ankle wrap (local or online)
General soreness → flat reusable gel pack (any channel)
Step 3 — Do you need compression?
Yes (swelling) → choose gel cold compress for foot with compression strap
No → choose comfort sleeve + flexible gel
Quick self-score (0–10)
Give yourself 1 point for each “yes”:
I know my pain location (heel/arch/ankle/full foot)
I know my shoe size and foot width
I can do short sessions consistently
I will avoid long single sessions
I need a strap so it stays in place
I have sensitive skin and need a sleeve
I want an easy return policy
I prefer washable covers
I want two packs (one freezing, one in use)
I have freezer space to store it flat
Score guide:
0–3: buy local and simple.
4–7: buy online for better fit options.
8–10: build a small system (two packs + better wrap).
Frequently Asked Questions
Q1: Where to buy gel cold compress for foot near me the fastest?
Pharmacies and big-box stores are usually fastest. Sporting goods stores often have better strap wraps.
Q2: Where to buy gel cold compress for foot online if I’m between sizes?
Choose a retailer with easy returns. Filter by dimensions, strap range, and real on-foot photos.
Q3: What is the best gel cold compress for foot swelling?
A wrap that covers your swollen area and includes a compression strap usually stays put and cools evenly.
Q4: Is a gel cold compress for plantar fasciitis wrap worth it?
If heel/arch pain is your main issue, a heel/arch wrap improves targeting and reduces slipping.
Q5: Can I put a gel cold compress directly on skin?
It’s safer to use a thin barrier like a sleeve or cloth to reduce skin irritation and over-cooling.
Q6: Who should be extra careful with cold therapy?
If you have diabetes, circulation issues, or reduced sensation, get clinician guidance before frequent icing.
Summary and Recommendations
If you’re deciding where to buy gel cold compress for foot, start with your timeline and pain location. Buy local for same-day relief and easy returns. Buy online when you need the right coverage shape and strap style, especially for heel/arch pain. Choose medical supply channels for post-injury routines that demand durability.
Your next step (CTA): Pick one product today—flat pack for spot relief or strap wrap for hands-free use—then follow a simple routine for 7 days. Consistency beats intensity.
Insulated Pizza Bag: Keep Pizza Hot in 2025
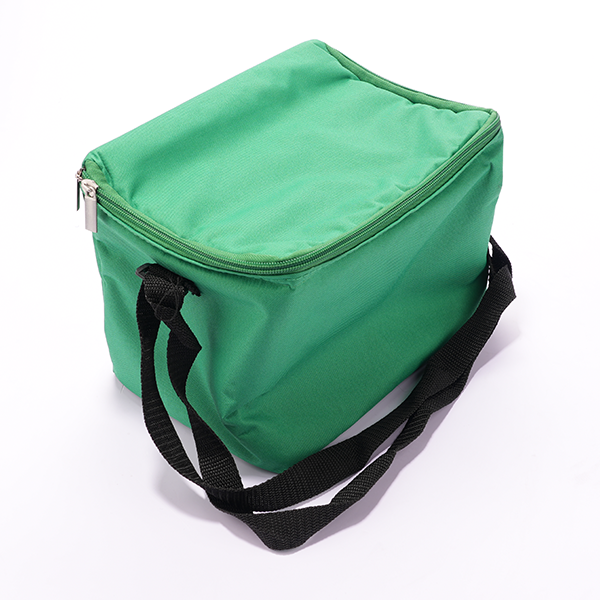
Insulated Pizza Bag: How Do You Keep Pizza Hot in 2025?
Last updated: December 15, 2025 (PT)
Pizza cools quickly during handoffs, traffic, and multi-stop runs. An insulated pizza bag slows that heat loss and helps you deliver a better first bite. You are not trying to “add heat.” You are trying to keep heat in, keep steam controlled, and keep the bag closed with a routine your team can repeat.
This article will help you:
Choose the best pizza-bag size without wasting “air space”
Prevent soggy crust with simple moisture habits
Pick durable materials that survive rain, stairs, and daily cleaning
Run a pizza bag cleaning checklist drivers actually follow
Decide when insulation is enough and when heating is justified
How does an insulated pizza bag keep pizza hot during delivery?
It traps warm air around the boxes and blocks cold drafts, so the pizza cools much slower. Think of it like a windbreaker for your pizza box. The biggest temperature drops usually happen while loading, when the bag is open.
Once you teach drivers one habit—load fast and seal fully—you’ll see more consistent results. Customers feel the warmth in the box, and they rate you for that moment.
Insulated pizza bag heat-loss checklist you can teach in 5 minutes
| Heat-loss path | What you see at the door | Fix in your delivery SOP | What it means for you |
|---|---|---|---|
| Conduction | Cold corners | Better insulation + snug fit | More even warmth |
| Convection | Rapid cooling while loading | Load fast, seal fully | Fewer complaints |
| Evaporation | Steam + soft crust | Moisture-control habits | Better texture |
Practical tips you can apply today
Pre-warm the bag: keep it closed in the car between stops.
Load once, close once: avoid reopening to “check” the order.
Keep boxes flat: tilt makes toppings slide and moisture pool.
Real example: One store reduced refunds after drivers stopped reopening the bag during multi-stop runs.
What temperature should your insulated pizza bag protect?
Your bag supports a process that keeps hot food out of risky temperature ranges. Many safety programs use 135°F (57°C) as a reference hot-holding target and 41°F (5°C) as a common cold-holding reference. Local rules vary, so treat these as planning numbers and confirm your local requirements.
For delivery, time matters as much as temperature. If pizza waits on a counter for ten minutes before bagging, you lose your best advantage. Your highest ROI “upgrade” is often reducing waiting time.
Insulated pizza bag temperature + time rule for your team
| Delivery moment | What can go wrong | What insulation helps with | What it means for you |
|---|---|---|---|
| After boxing | Fast heat drop | Slows cooling immediately | Better first bite |
| Waiting for pickup | Cooling on racks | Limits loss | Fewer complaints |
| Multi-stop routes | Late orders arrive lukewarm | Buys time | Higher ratings |
| Doorstep delay | Slow handoff | Buffers the drop | Lower refund risk |
Practical tips and advice
“Bag in hand” rule: pizza goes into the bag at pickup.
Spot-check the worst lane: one quick check per shift is enough to learn.
Treat long delays as exceptions: reroute, split stops, or remake when needed.
How do you prevent soggy crust in an insulated pizza bag?
Heat retention is only half the job. You also need steam control. Prevent soggy crust in an insulated pizza bag by balancing heat retention with controlled moisture release. If steam is trapped too tightly, the crust softens. If you vent too much, the pizza cools faster.
Your routine matters more than fancy features. Keep boxes flat, avoid crushing stacks, and separate hot pizzas from cold drinks. Drinks pull heat away and create condensation inside the same space.
Insulated pizza bag moisture control playbook
| Moisture problem | Likely cause | Fix | What it means for you |
|---|---|---|---|
| Soggy crust | Steam trapped | Vent habits + stable stacks | Better reviews |
| Cold but crisp | Over-venting | Seal better, reduce openings | Better warmth |
| Wet box bottom | Oil + condensation | Keep flat, separate drinks | Cleaner handoff |
Practical tips and advice
Let the “steam burst” settle: wait a short moment, then seal.
Don’t overstack: too many boxes trap steam and bend lids.
Carry drinks separately: keep hot boxes together, cold items elsewhere.
Real example: A team reduced soggy-crust complaints after separating drinks and limiting stack height.
What size insulated pizza bag fits your menu in 2025?
The best insulated pizza bag size fits your most common box with minimal empty space. Too small and you crush corners. Too large and you pay an “air tax,” because extra warm air cools quickly. If you sell 18-inch pizzas, you need an extra large insulated pizza bag for 18 inch pizza that fits without bending.
Sizing is not only width and length. Height matters for stacking. If the bag compresses boxes, toppings shift. If it is too tight, drivers leave it half-open, and performance collapses.
Insulated pizza bag sizing guide you can use immediately
| Bag class | Typical fit | Best for | Risk if you choose wrong |
|---|---|---|---|
| Small | 12–14 inch boxes | Small menus, short routes | Limits large orders |
| Medium | 14–16 inch boxes | Most daily delivery | Corners bend on 18 inch |
| Extra large | 18 inch boxes | Family pies, large orders | Heat loss on small orders |
| Tall/stack | Multi-box runs | Peak rush batching | Crush risk without board |
Practical tips and advice
Buy for your largest box first: then add smaller bags for tighter fits.
Use two medium bags at peak: it often beats one oversized bag.
Standardize per store: one or two sizes reduce loading mistakes.
Real example: A multi-store operator improved consistency after standardizing sizes by top-selling box.
Which materials make an insulated pizza bag durable and easy to clean?
A strong delivery bag is a three-layer system: outer shell, insulation core, and inner liner. The outer layer fights rain and abrasion. The core slows heat loss. The liner decides how fast you can clean and how long odors linger.
If you want a waterproof pizza bag, focus on seams, zippers, and corners. Those fail first. Also choose a liner that does not absorb grease. When cleaning is easy, it actually happens.
Foam vs reflective vs hybrid insulation
| Insulation type | Heat retention | Weight | Best use case | What it means for you |
|---|---|---|---|---|
| Foam | High | Medium | Longer routes | More consistent warmth |
| Reflective | Medium-High | Light | Short, fast runs | Less driver fatigue |
| Hybrid | Very high | Medium | Premium promise lanes | Best overall balance |
Practical tips and advice
Stairs and urban routes: reinforced corners save replacements.
Bike and scooter delivery: lighter designs reduce fatigue and wobble.
Grease-heavy menus: smooth liners cut wipe time dramatically.
How do you pack and stack pizza in an insulated pizza bag safely?
Your insulated pizza bag works best when boxes stay flat, stacks stay stable, and the closure stays sealed. Packing mistakes create two problems: heat loss and presentation loss. Most “ugly pizza” complaints come from poor stacking.
Use a rigid bottom board. Load the largest box first. Keep the stack square. If you need more than your safe stack count, use a second bag instead of forcing one.
Insulated pizza bag stacking rules for multi-order runs
| Choice | Good practice | Bad practice | What it means for you |
|---|---|---|---|
| Stack height | Low and stable | Tall, leaning stacks | Better presentation |
| Box orientation | Always flat | Boxes on edge | Fewer topping shifts |
| Order mixing | Hot-only in the bag | Drinks inside the bag | Less condensation |
| Loading order | Largest at the bottom | Random loading | Faster handoffs |
Practical tips and advice
Multi-stop rush: load everything, close the bag, then don’t reopen.
Rainy days: keep it off wet car floors and wipe the shell later.
Overflow rule: two bags beat one overstuffed bag, every time.
How to clean an insulated pizza bag safely: a driver-proof routine
How to clean an insulated pizza bag safely is about consistency, not complexity. Grease, crumbs, and sauce turn into odor fast. If you share bags across shifts, cleaning protects your brand in a way customers can literally smell.
The biggest rule is simple: dry it completely before storage. Damp bags develop mildew smell, even when you “cleaned” them.
Insulated pizza bag 5-minute cleaning checklist
| Step | What to do | When | What it means for you |
|---|---|---|---|
| Empty + shake out | Remove crumbs, inserts | Every shift | Less odor buildup |
| Wipe liner | Mild soap wipe, then clean wipe | Daily | Cleaner deliveries |
| Spot-clean shell | Remove spills and grime | Daily | More professional look |
| Dry fully | Leave open, air dry | Daily | Prevents mildew smell |
| Inspect zipper/seams | Check gaps and tears | Weekly | Stops heat leaks early |
Practical tips and advice
End of shift: store the bag open so it dries overnight.
Spill event: clean immediately, then extend drying time.
Weekly deep clean: remove boards and wipe corners before drying.
Real example: One shop reduced “bag smell” complaints after enforcing overnight open-dry.
Insulated pizza bag vs heated delivery box: what should you choose?
For most stores, an insulated pizza bag is the best default because it is fast, simple, and low-cost. A heated delivery box adds active heat, but it adds cost, charging, checks, and failure points. A smart strategy is “insulate first, then heat only where needed.”
If your routes are short, strong SOP usually solves the problem. If you run long suburban lanes, extreme winter peaks, or multi-stop batching, heated support may help on those specific lanes.
Insulated pizza bag decision tool: score your heat risk (0–12)
Give yourself points and total them.
Average delivery time
Under 15 minutes (0)
15–30 minutes (2)
30–45 minutes (4)
Over 45 minutes (6)
Stops per run
Single drop (0)
Two drops (2)
Three or more (4)
Weather exposure
Mild (0)
Cold or hot season (1)
Extreme season + rain (2)
Pick your setup
0–3: One high-quality bag + basic loading rules.
4–7: Two bags per driver + rigid boards + “bag stays closed” SOP.
8–12: Lane-based approach: premium insulation everywhere, heating only for the highest-risk lanes.
Insulated pizza bag self-test: is your delivery system strong?
Score 0–2 for each item (0 = no, 1 = sometimes, 2 = yes).
We know our worst route time and review it monthly.
We use the right bag size for our largest box.
Drivers keep the bag closed between stops.
We manage steam to prevent soggy crust.
Bags are cleaned and dried daily, not “when we remember.”
We avoid long staging time before pickup.
We have a backup bag for zipper failures.
We separate hot pizza from cold drinks every run.
New drivers get a 5-minute bag demo.
We track complaints by route and shift.
16–20: strong, consistent delivery quality.
10–15: good, but you likely have delay leaks.
0–9: your process is costing you ratings.
2025 insulated pizza bag trends you should care about
In 2025, delivery teams are more “ops-driven.” The insulated pizza bag is treated like equipment with routines, not an optional accessory. Customers judge “hot” instantly, and they rate you accordingly.
Latest developments that affect your daily work
More SOP training: stores standardize loading, stacking, and closing habits.
More steam control focus: teams separate hot pizza from cold items to protect crust.
More bike and scooter routes: demand grows for lighter, stable designs.
More durability-first buying: longer-life bags reduce replacements and waste.
More simple validation: teams do quick spot checks on worst lanes.
Frequently asked questions about insulated pizza bag use
Q1: How long can an insulated pizza bag keep pizza hot?
Most teams see 30–60 minutes of useful protection, depending on weather and openings.
Q2: Do routines matter more than bag thickness?
Yes. A great bag still fails if you leave it open during loading.
Q3: What size insulated pizza bag fits an 18-inch pizza?
Choose an extra large insulated pizza bag for 18 inch pizza that closes fully without bending corners.
Q4: Can an insulated pizza bag prevent soggy crust?
Yes, if you manage steam, keep boxes flat, and reduce open time between stops.
Q5: Should drinks go inside the insulated pizza bag?
No. Drinks pull heat away and increase condensation. Carry them separately.
Q6: How often should you clean an insulated pizza bag?
Wipe daily, dry overnight, and do a deeper clean weekly.
Q7: When is an insulated pizza bag vs heated delivery box worth it?
Use the heat-risk score. Heat only the lanes where insulation plus SOP is not enough.
Q8: How many insulated pizza bag units does one driver need?
Many drivers do best with two medium bags during peak hours to prevent overstacking.
Summary and recommendations
An insulated pizza bag protects quality by slowing heat loss and controlling moisture. Match the bag size to your top boxes to avoid wasted air space. Train a “load once, close once” habit to reduce heat loss at handoffs. Separate hot pizza from cold drinks to reduce condensation. Clean and fully dry daily to prevent odor and maintain trust.
What you should do next
Audit your top three box sizes and choose the smallest bag that fits them.
Add rigid boards and set a safe stacking limit per bag.
Train a 5-minute driver routine: bag immediately, seal fully, open only at the door.
Implement a daily cleaning checklist and an overnight open-dry rule.
Use lane scoring to decide if any routes need premium insulation or heated support.
About Tempk
We are Tempk, and we build practical temperature-controlled packaging solutions for food logistics and last-mile delivery. Our focus is repeatable performance in real routes, not complicated theory. We help teams choose insulated transport gear, design driver-friendly SOPs, and improve day-to-day consistency.
Next step: If you share your pizza box sizes and typical route times, we can outline an insulated pizza bag sizing plan and a simple SOP checklist for your workflow.
Insulated Food Delivery Bags: 2025 Operating Guide
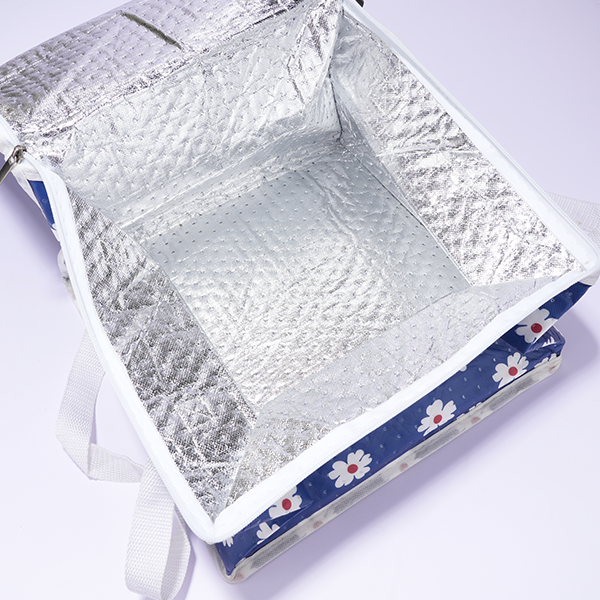
Insulated Food Delivery Bags: How to Choose in 2025?
Last updated: December 2025
Insulated food delivery bags help you protect taste, texture, and safety during the messiest part of delivery: the last mile. In real routes, a small delay can turn fries limp, soups leaky, and cold desserts soft. With insulated food delivery bags, you slow temperature change, reduce “arrived cold” complaints, and make packing more repeatable. Many operators see the biggest wins in the first 30–60 minutes—when customer expectations are highest.
This guide will help you understand:
How insulated food delivery bags keep meals hot or cold longer (without adding power)
Which insulated food delivery bags work best for pizza, soups, and stacked orders
A simple insulated food delivery bags sizing guide that reduces wasted air space
How long do insulated delivery bags keep food hot on your routes (test method included)
An insulated food delivery bags cleaning routine that stops odors and callbacks
Why are insulated food delivery bags essential in 2025?
Insulated food delivery bags are essential because they turn unpredictable delivery time into consistent food quality. When quality is consistent, you get fewer refunds, fewer remakes, and better repeat orders.
insulated food delivery bags
Think of insulated food delivery bags like a “thermos for your menu.” They don’t cook food or chill food. They simply slow heat transfer so your meal arrives closer to “just served.” That extra buffer time matters when drivers face traffic, elevators, or stacked stops.
How insulated food delivery bags reduce refunds and remakes
| Where you lose money | What happens in delivery | What insulated food delivery bags change | What it means for you |
|---|---|---|---|
| Refunds + chargebacks | “Arrived cold/melted” | Slower temperature swing | Fewer disputes, steadier margin |
| Remakes during rush | Quality varies by route | More predictable outcomes | Less chaos at peak time |
| Bad reviews | Texture fails fast | Better hot/cold separation | Higher ratings, more repeats |
Practical tips you can use today
Treat insulated food delivery bags as a quality-control tool, not a “nice-to-have.”
Stage orders inside the bag at handoff to reduce “door-open time.”
Replace worn bags before they fail—zippers and liners usually go first.
insulated food delivery bags
Real-world example: One operator reduced temperature complaints after upgrading insulated food delivery bags and enforcing “bag closed between stops.”
insulated food delivery bags
How do insulated food delivery bags protect temperature and texture?
Insulated food delivery bags protect food by reducing heat transfer using layered materials that trap air. Air is a poor heat conductor, so trapped air slows temperature change.
insulated food delivery bags
In simple terms, insulated food delivery bags create a small “micro-environment.” The outer layer blocks wind and weather. The middle layer slows heat flow. The inner layer often reflects heat and resists moisture so cleanup is easier.
Insulation layers explained without the physics
| Layer or material | What it does | Best for | What it means for you |
|---|---|---|---|
| Foam padding | Slows heat transfer | Short to medium routes | Light, affordable performance |
| Reflective lining | Reflects radiant heat | Hot meals | Better heat stability when sealed |
| Multi-layer composite | Higher overall insulation | Longer routes / mixed loads | Better consistency, slightly bulkier |
Practical tips and recommendations
Thicker insulation = longer hold time, but packing can be slower.
Tighter closures = better temperature control, but can trap steam for fried food.
Structure matters: stiff walls protect pizza boxes and stacked bowls.
insulated food delivery bags
Real-world example: Pizza programs improved presentation by switching to stiffer insulated food delivery bags with flat bases.
insulated food delivery bags
What temperature targets should insulated food delivery bags support?
Your insulated food delivery bags should support clear “hot stays hot, cold stays cold” targets—especially for time/temperature control foods. Many operators use common benchmarks like cold near 41°F (5°C) or below and hot near 135°F (57°C) or above, then confirm local requirements for their region.
insulated food delivery bags
The practical point is not the number—it’s the habit. Delivery is full of tiny delays. Insulated food delivery bags buy you time, but only if you pack and close them consistently.
Quick decision tool: temperature control or time control?
Use this simple rule for your delivery lanes:
If you can reliably keep items hot or cold with insulated food delivery bags → use temperature control + spot checks.
If you cannot hold temperature reliably → consider time-based controls only if your local rules allow it, and discard after the allowed limit.
| Control strategy | What you manage | Best for | What it means for you |
|---|---|---|---|
| Temperature control | “Stay hot or stay cold” | Most delivery programs | More consistent quality |
| Time control | “Serve/discard by time” | Planned service windows | Requires written procedures |
Practical tips you can use today
Hot foods: pre-warm the insulated food delivery bags in a warm staging area (not on a heater).
Cold foods: use cold sources and keep them away from engine heat.
Mixed orders: use two insulated food delivery bags (one hot, one cold) whenever possible.
insulated food delivery bags
Which insulated food delivery bags are best for pizza, soups, and mixed orders?
The best insulated food delivery bags match your menu’s “failure mode.” Pizza fails when boxes bend and steam collapses the crust. Soups fail by tipping and leaking. Fried foods fail when steam gets trapped.
insulated food delivery bags
If you buy one “universal” option, you often overpay and still lose quality. Instead, match bag style to your most common order patterns.
Bag type comparison for your delivery model
| Bag type | Best for | Weak spot | What it means for you |
|---|---|---|---|
| Backpack insulated bag | Bike delivery, stairs | Can crush delicate items | Fast movement, hands-free |
| Soft-sided zip bag | Mixed hot meals | Can sag if overloaded | Great starter option |
| Pizza-specific carrier | Flat boxes | Less flexible | Best insulated food delivery bags for pizza |
| Hard-shell insulated box | Catering, longer holds | Higher upfront cost | Maximum stability |
| Hybrid designs | Mixed fleets | Needs training | Flexible across routes |
Practical tips and recommendations
Pizza: choose stiff walls + flat base + minimal headspace.
Soups and sauces: prioritize rigid structure and upright packing rules.
Mixed hot/cold: don’t “share air.” Two bags beat one mega-bag.
insulated food delivery bags
Real-world example: A ramen brand reduced spills after adding rigid inserts and enforcing a no-tilt loading rule.
insulated food delivery bags
How to right-size insulated food delivery bags with a simple sizing guide
Right-sizing insulated food delivery bags is one of the fastest upgrades you can make. Extra air space is wasted money because it accelerates temperature change and encourages sloppy stacking.
insulated food delivery bags
A smaller bag that fits well often outperforms a larger bag holding the same food. You also pack faster when items “lock in” neatly.
Insulated food delivery bags sizing guide (3 steps)
Measure your top containers (length × width × height).
Add 10–15% clearance for quick loading and removal.
Standardize two sizes max for daily operations.
insulated food delivery bags
Decision tool: pick your size in 60 seconds
Answer these:
Are orders mostly flat (pizza) or tall (bowls, soups)?
Do you often carry two orders at once during rush?
Do drinks travel in the same trip?
If flat: pizza carrier + small side bag
If tall: medium vertical bag with a firm base
If stacked routes: two medium insulated food delivery bags (hot + cold)
How long do insulated delivery bags keep food hot?
Most insulated food delivery bags maintain usable quality for roughly 30–90 minutes, depending on insulation, closure discipline, and weather. For many hot meals, the “45–60 minute” window is realistic when bags stay closed. Cold items often need extra cold sources and strict separation.
insulated food delivery bags
Instead of guessing, test your real lanes. This turns insulated food delivery bags into a repeatable system.
HowTo: the 7-step route test for insulated food delivery bags
Pick one common hot item and one common cold item.
Record starting condition (temperature if possible, or photo + notes).
Pack exactly like a real dispatch.
Run a 30-minute route simulation (car or bike).
Record end condition (photo + notes).
Repeat with a different bag or packing layout.
Choose the setup that meets quality goals at the lowest cost.
insulated food delivery bags
Route Test Log (copy/paste)
Date/time:
Ambient conditions:
Bag type/size:
Closure used (zip/flap/hybrid):
Hot item outcome (steam, crispness, texture):
Cold item outcome (melt, condensation, firmness):
Notes:
| Test category | What you check | “Good” looks like | What it means for you |
|---|---|---|---|
| Heat retention | fries, rice, pizza base | still enjoyable | better ratings |
| Moisture control | soggy boxes, coatings | minimal soggy bottom | fewer complaints |
| Cold protection | desserts, salads | no melt puddles | less waste |
| Handling speed | load/unload | fast, no fumbling | more orders/hour |
How to pack insulated food delivery bags to prevent spills and sogginess
Packing insulated food delivery bags is a skill, not an afterthought. Your goals are stability (no tipping), separation (hot vs cold), and smart airflow control (reduce heat loss without trapping steam).
insulated food delivery bags
The stacking order that saves meals
Flat, heavy base: sturdy bowls and sealed containers
Leak-prone items centered: soups upright, supported by rigid inserts
Crisp items away from steam: fried items on top or in a vent-friendly zone
Cold items isolated: desserts/salads/sushi in a cold-only bag
| Packing mistake | What happens | Better move | What it means for you |
|---|---|---|---|
| Soup on the edge | tips and leaks | center + rigid base | cleaner delivery |
| Fries under hot bowls | steam damage | separate/vent | better texture |
| Cold dessert with hot meal | warms/melts | two bags | better reviews |
Practical tips and recommendations
Close the bag between stops. Open air rides kill performance.
Separate drinks. Drinks ruin presentation faster than temperature does.
Use dividers only if staff truly uses them. Otherwise, they slow packing.
insulated food delivery bags
Real-world example: A chicken shop improved crispness by using “no stacking on fried items” rules inside insulated food delivery bags.
insulated food delivery bags
How to clean insulated food delivery bags and stop odors
Insulated food delivery bags often fail because of hygiene, not insulation. A bag can hold temperature well and still damage your brand if it smells. Odor usually comes from trapped moisture and residue.
insulated food delivery bags
Your goal is a routine that is quick, consistent, and easy to enforce.
Insulated food delivery bags cleaning routine: a simple SOP
Remove crumbs, packets, and inserts.
Wipe the liner with warm soapy water (or approved cleaner).
Wipe handles, seams, and zippers.
Air-dry fully with the bag open.
Log damage (cracked liner, torn seams, sticky zipper).
insulated food delivery bags
| Cleaning habit | Good practice | Bad practice | What it means for you |
|---|---|---|---|
| Drying | open + airflow | closed overnight | odor and mold risk |
| Spill response | wipe immediately | “later” cleaning | stains and smells |
| Inspection | weekly seam check | ignore small tears | shorter bag life |
Real-world example: Odor complaints dropped after a team added an “open-dry rack” near dispatch.
insulated food delivery bags
How to standardize insulated food delivery bags for scale
Scaling insulated food delivery bags means making outcomes predictable across people and shifts. Fewer options, clearer rules, fewer “personal styles.”
insulated food delivery bags
Start with three standards:
Bag assignment: who carries what (hot vs cold)
Packing layout: heavy bottom, liquids upright, crisp protected
Exceptions: what to do for oversized orders (no improvising)
Self-test: Are your insulated food delivery bags “system-ready”?
Give yourself 1 point for each “yes”:
You use separate insulated food delivery bags for hot and cold items.
Bags stay closed between stops.
You have a spill-proof standard for soups and sauces.
You follow a cleaning schedule and dry bags open.
New hires can pack correctly after 15 minutes of training.
insulated food delivery bags
Score:
0–2: High refund risk
3–4: Solid program
5: Scalable program
How to budget and calculate ROI for insulated food delivery bags
ROI from insulated food delivery bags comes from fewer failures, not cheaper purchase price. A “cheap” bag becomes expensive if it causes refunds. A higher-quality bag can be cheaper if it lasts longer and reduces complaints.
insulated food delivery bags
A simple cost-per-delivery model
Cost per delivery (bag only) =Bag cost ÷ expected deliveries before replacement
Then estimate value:
Savings per delivery =(old refund rate − new refund rate) × average refund cost
If savings exceed cost-per-delivery, the upgrade pays for itself.
| Input | Lower case | Higher case | What it means for you |
|---|---|---|---|
| Bag lifespan | 300 deliveries | 800+ deliveries | longer life lowers unit cost |
| Refund rate | 2% | 5%+ | higher failure lanes benefit more |
| Avg refund cost | small | large | premium menus justify better gear |
2025 trends in insulated food delivery bags
In 2025, operators are optimizing insulated food delivery bags for speed, separation, and reuse. The winning teams treat the bag as part of an operating system: packing rules, hot/cold split, wipe-down routines, and route testing.
insulated food delivery bags
Latest developments to watch
Lighter insulation foams: similar performance with less driver fatigue
Modular compartments: faster hot/cold separation for mixed orders
Cleaner liners: faster wipe-down, fewer odor complaints
More “two-bag workflows”: one hot, one cold for reliable outcomes
insulated food delivery bags
Frequently Asked Questions
Q1: How long do insulated delivery bags keep food hot?
Often 45–60 minutes when bags stay closed, but route time, weather, and packaging change results. Run the 7-step route test to be sure.
insulated food delivery bags
Q2: Do I need separate insulated food delivery bags for hot and cold items?
If you deliver mixed orders often, yes. Separation reduces melt, sogginess, and complaints.
Q3: Are insulated food delivery bags waterproof?
Some are. Look for a wipe-clean liner and leak-resistant seams to reduce odors and turnaround time.
insulated food delivery bags
Q4: What are the best insulated food delivery bags for pizza?
Choose a pizza carrier with stiff walls and a flat base so boxes stay flat and presentable.
insulated food delivery bags
Q5: What size insulated food delivery bags should I buy first?
Start with two sizes based on your top orders. Right-sized bags often outperform oversized bags.
Q6: How do I stop insulated food delivery bags from smelling?
Wipe after spills, clean daily, and dry open every time. Smell usually means trapped moisture.
insulated food delivery bags
Summary and recommendations
Insulated food delivery bags help you protect temperature, texture, and safety during last-mile delivery. Your biggest wins come from right-sizing, hot/cold separation, closing discipline, and a cleaning routine that keeps liners dry and odor-free. Use the route test to turn “bag opinions” into real results.
insulated food delivery bags
What to do next (CTA)
Standardize two insulated food delivery bag sizes for daily operations.
Run the 7-step route test on your worst-performing menu items.
Enforce one hot bag + one cold bag during peak hours.
Implement the dry-open cleaning SOP and track complaints by category.
About Tempk
At Tempk, we focus on practical temperature-control solutions for food delivery and cold chain logistics. We design insulated systems that balance performance, durability, and real-world usability—so your team packs faster, spills less, and delivers more consistent quality.
insulated food delivery bags
Next step: Share your menu type, average delivery time, and top order sizes, and we’ll help you map a simple insulated food delivery bags standard your staff can follow this week.
Cooler Bag Insulated: Keep Items Cold Longer (2025)

Cooler Bag Insulated: Keep Items Cold Longer (2025)
A cooler bag insulated setup helps you protect groceries, seafood, and temperature-sensitive items during travel or delivery. Your goal is simple: keep cold items in a safe range, and reduce time in warm conditions. When you get it right, you see fewer leaks, fewer “arrived warm” complaints, and better product quality.
Last updated: December 15, 2025
This article will help you:
Understand how a cooler bag insulated design slows heat gain (without jargon)
Hit practical temperature targets for food and sensitive items
Choose the best insulation material for cooler bags (and avoid common traps)
Learn how to pack an insulated cooler bag with ice packs for longer hold time
Use quick decision tools for groceries, food delivery, and medicine transport
Prevent leaks, odors, and condensation that shorten bag life
Why does a cooler bag insulated design work at all?
A cooler bag insulated product does not “make cold.” It slows warming. That is the whole game. If you expect a thin bag to perform like a freezer, you’ll be disappointed.
Think of your bag like a winter jacket. A thicker jacket helps you longer. But if you keep unzipping it, warm air rushes in and your advantage disappears.
The 3 heat paths you can control
| Heat path | What usually causes the problem | What to do now | What it means for you |
|---|---|---|---|
| Through the walls | Thin foam or crushed insulation | Choose consistent thickness + avoid collapse | Longer cold time |
| Through the opening | Weak zipper path, corner gaps | Use tight zipper + flap + “close fast” habit | Fewer temperature spikes |
| Through frequent access | You open it “just to check” | Stage items by stop order | More stable delivery window |
Practical tips you can use today
Close it like a refrigerator door: open, grab, close—no browsing.
Keep it full: a packed cooler bag insulated load warms slower than a half-empty one.
Pre-chill the liner: even 10–15 minutes helps when conditions are hot.
Real-world example: One delivery operator cut “arrived warm” complaints after upgrading insulation and fixing loading order.
What temperature should your cooler bag insulated setup hit?
For most perishable foods, aim for 40°F (4°C) or below. Some processes use 41°F (5°C) as a cold-holding limit, but 40°F gives you a buffer.
The big risk is time spent in the “danger zone.” The longer food sits warm, the faster quality drops—and safety risk rises. Hot weather shrinks your safe window even more.
A simple thermometer habit (no guessing)
If you carry perishables often, add a small thermometer inside the load. It turns “it felt cold” into proof.
| Checkpoint | What to look for | What to do if you miss it | Your benefit |
|---|---|---|---|
| Start of trip | Load is cold before packing | Chill items first | Less early heat load |
| Midway (long trips) | Temp is stable | Reduce openings + add top cooling | Fewer spikes |
| End / handoff | Temp stayed in range | Shorten exposure time next route | Fewer claims/refunds |
Practical tips you can use today
Cool items first. The bag slows warming; it does not “create cold.”
Use the “alarm clock” rule: don’t let cold items sit warm for long.
Separate warm items. A warm rotisserie chicken can push everything warmer fast.
Which materials make a cooler bag insulated bag perform better?
A cooler bag insulated system is a stack of choices, not one magic layer. Foam thickness matters. But so do seams, corners, liner quality, and the zipper line.
Here’s the simple model:
Inner liner: controls spills and moisture
Insulation layer: slows heat movement
Outer shell: handles damage and sun exposure
Best insulation material for cooler bags (in plain terms)
Basic foam: light and affordable, best for short trips
Closed-cell foam: holds shape better, more reliable for delivery work
Reflective layer: helps in sun, but it’s not enough by itself
Panel inserts / structured walls: better stability and fewer “warm corners”
Buyer checklist: what matters vs. what’s mostly marketing
| Feature | Good sign | Bad sign | What it means for you |
|---|---|---|---|
| Insulation thickness | Even, firm panels | Thin sheet that collapses | Predictable hold time |
| Closure | Tight zipper + flap | Gaps at corners | Fewer heat leaks |
| Liner | Waterproof, easy wipe | Absorbs moisture | Easier cleaning, less odor |
| Shape | Boxy, stable | Slumps when carried | Better packing control |
| Structure | Semi-rigid walls | Crushed corners | Fewer “warm spots” |
Practical tips you can use today
Test the zipper path: if it “waves and gapes,” performance drops.
Check corners: corners are where liners fail and heat enters.
Size to your load: oversized bags create dead air space that warms quickly.
How long does a cooler bag insulated stay cold in real life?
“How long” depends on five variables you can control:
Insulation quality
Ice / gel pack mass
How full the bag is
How often you open it
Outdoor temperature
Here’s the key idea: every opening is a heat injection. Even a short open can erase the benefit of an extra pack.
60-second cold-time decision tool
Answer these three questions:
Trip time: under 2 hours, 2–6 hours, or 6–12 hours?
Outside air: mild, warm, or extreme heat?
Openings: one time, a few times, or many stops?
Quick recommendation
Under 2 hours + few openings: a standard cooler bag insulated bag + basic gel packs often works.
2–6 hours + many stops: upgrade closure + add side/top cooling + reduce “open time.”
6–12 hours + heat: treat it like a system: pack plan, staging, and checks.
| Scenario | Typical risk | Best packing focus | What it means for you |
|---|---|---|---|
| Grocery run | Warm car + short drive | Full bag + top/bottom packs | Easy wins |
| Meal delivery | Many openings | Speed + tight closure | Stops matter more than distance |
| Beach/picnic | Sun exposure | Shade + reflective layer + top control | Sun can beat weak zippers fast |
| Medicine carry | Overcooling risk | Stability + separation layer | Too cold can be as bad as too warm |
How do you pack a cooler bag insulated with ice packs for longer hold time?
Packing is where a cooler bag insulated plan is won or lost. Two identical bags can perform very differently based on your routine.
Think of cold packs as ice batteries. You want them close to heat entry points and close to the most sensitive items.
A simple packing method you can repeat
Pre-chill the bag (10–15 minutes if possible).
Put a cold pack on the bottom (bases warm faster than you think).
Load the most sensitive items in the center.
Add side packs if you need more time.
Add a top pack last to protect the zipper zone.
Fill dead space (towel or dunnage) so air cannot churn.
Close fast and fully. Treat this as a performance feature.
Packing layouts by use case
| Packing goal | Cold pack placement | Space strategy | What it means for you |
|---|---|---|---|
| Short trip | Bottom + top | Keep it full | Simple and reliable |
| Delivery route | Bottom + sides | Reduce air gaps | Longer stability |
| Premium seafood | Bottom + sides + top | Use dividers | Better texture protection |
| Mixed orders | Separate raw + ready-to-eat | Use inner bins | Cleaner + safer handoffs |
Practical tips and advice
Groceries: seal raw meats and keep them separate from ready-to-eat foods.
Delivery routes: pack by stop order so you don’t “hunt” inside the bag.
Hot weather: keep the bag out of direct sun, even inside a car.
Practical example: Teams have reduced warm arrivals by changing loading order and adding top cooling—without changing the route.
Cooler bag insulated for food delivery vs medicine transport: what changes?
A cooler bag insulated setup for food is mostly about staying cold enough. For medicine transport, stability becomes the priority.
Many medical cold-chain products target 2–8°C. Going too cold can damage sensitive items. That means you must avoid direct contact between frozen packs and the product.
Coolant options (simple and useful)
| Coolant type | Behavior | Main risk | Best use |
|---|---|---|---|
| Frozen gel packs | Strong cold early | Overcooling/freezing | Long food routes, not direct-contact medicine |
| Conditioned gel packs | Gentler cooling | Shorter duration | Short medicine trips |
| PCM packs | Holds a stable band | Higher cost | Best for controlled medicine transport |
| No coolant | Only insulation | Very short duration | Mild conditions only |
Practical tips you can use today
Never place medicine directly on a frozen pack. Use a barrier layer or pouch.
Minimize openings and keep the bag in shade.
If your workflow needs proof, add a simple temperature indicator.
Real-world example: A caregiver prevented accidental freezing by adding a barrier sleeve between medicine and frozen packs.
How do you prevent leaks, odors, and condensation in a cooler bag insulated bag?
Leaks and smells are why people stop using their cooler bag insulated bag. The good news: these problems are preventable.
Condensation happens when warm air meets cold surfaces. Water pools, odor builds, and liners degrade.
Fast prevention rules
Use sealed containers for liquids and raw items.
Add absorbent pads for meat or seafood transport.
Dry the bag fully after every use (storage while wet is the #1 odor trigger).
| Problem | Most likely cause | Fix | Benefit to you |
|---|---|---|---|
| Leaks | Poor liner or spills | Waterproof liner + tray/bin | Cleaner transport |
| Odor | Moisture + residue | Wipe + wash + dry open | Longer bag life |
| Condensation | Warm air enters | Reduce opening time | Better quality retention |
A cleaning routine you can actually stick to
After each use: wipe liner, remove standing liquid, air dry fully.
Weekly (heavy use): mild soap wipe + rinse cloth wipe + dry open.
Monthly: inspect seams, zipper teeth, and corners.
2025 cooler bag insulated trends you should know
In 2025, cooler bag insulated designs are moving from “picnic accessory” to real last-mile tool. The market is pushing for predictable performance, easier cleaning, and better structure.
Latest developments (practical, not hype)
Rigid hybrid designs: soft outside, structured inside for stability
Improved liners: more durable, faster cleaning, better odor resistance
Smarter pack compatibility: bags designed around common gel pack sizes
More proof tools: indicators that help teams spot risk early
Sustainability upgrades: longer-life components and more reusable systems
Market insight: The winning design is not the thickest foam. It’s the best system for your opening pattern.
Frequently Asked Questions
Q1: How long does an insulated cooler bag stay cold?
It depends on insulation quality, how full the bag is, pack size, and how often you open it. Fewer openings can extend cold time more than one extra pack.
Q2: What is the best insulation material for cooler bags?
Closed-cell foam with consistent thickness performs well in real use. Seal quality and corners often matter as much as foam type.
Q3: How do I pack an insulated cooler bag with ice packs?
Use a bottom pack, add side packs for longer trips, and finish with a top pack to protect the zipper zone. Fill air gaps and close fast.
Q4: Is a cooler bag insulated option safe for meat and seafood?
Yes, if you seal raw items, prevent leaks, and separate them from ready-to-eat foods. Add absorbent pads and clean the liner after.
Q5: Can I use dry ice in a cooler bag insulated bag?
Dry ice can be too cold and may create safety and freezing risks. Avoid direct contact with food or medicine, and use careful handling.
Q6: What changes for cooler bag insulated for medicine transport?
Stability matters most. Avoid direct frozen-pack contact, use a barrier layer, and consider stable-temperature coolants for sensitive items.
Summary and recommendations
A cooler bag insulated system works when you treat it like a simple temperature tool: strong insulation, tight closure, smart pack placement, and fewer openings. Focus on wall consistency, zipper discipline, leak control, and a repeatable loading order. When you do that, quality stays predictable and complaints drop.
Your next-step action plan (simple)
Pick one cooler bag insulated size that matches your typical load.
Standardize a pack layout: bottom + sides + top.
Add a “close fast” rule and pack by stop order.
Clean and dry the bag open after use.
Upgrade structure only when your data shows repeated warm spots.
About Tempk
Tempk develops practical cold chain packaging and temperature-control solutions for last-mile delivery and daily transport. We focus on stable performance, easy handling, and real-world reliability—so your insulated workflows stay consistent across seasons.
Next step: If you share your use case (groceries, meal delivery, seafood, or medicine), your trip time, and your hottest-season conditions, we can recommend a cooler bag insulated configuration and packing layout that fits your lane.
Cooler Bag Insulated: 2025 Buyer & Packing Guide
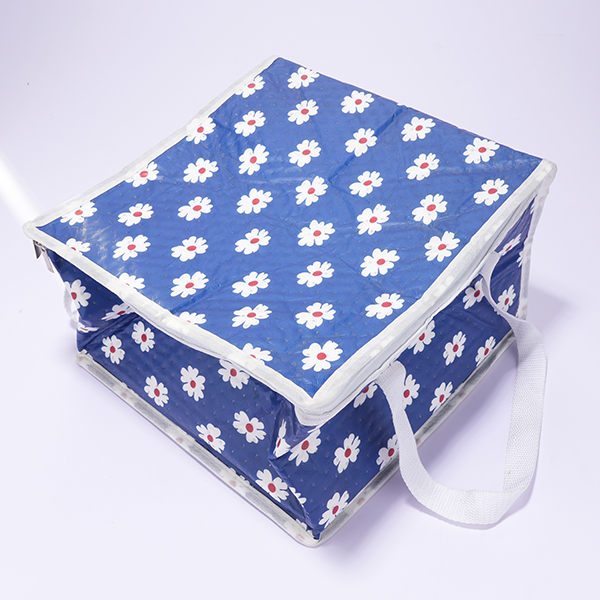
Cooler Bag Insulated: Choose the Right One in 2025?
Last updated: December 15, 2025
A cooler bag insulated setup can keep food cold for hours—or fail fast—depending on the seal, insulation, and how you pack it. In the U.S., FDA/USDA food-safety guidance commonly uses ≤40°F / 4°C as a practical target for cold foods, and a 5–10°C (9–18°F) rise can push sensitive items into a risky range quicker than you expect. In real errands, most cooler bag insulated bags deliver about 2–6 hours of useful cold time when you use enough cold packs and keep openings low.
This article will answer for you:
How a cooler bag insulated design slows heat gain in real life (not marketing claims)
How long a cooler bag insulated bag can stay under 40°F / 4°C in common routines
The best insulation material for cooler bag insulated designs in 2025
Exactly how to pack ice packs in a cooler bag insulated system for even cooling
A grocery and delivery checklist to reduce leaks, odors, and crushed items
A quick self-test + decision tool to choose the right cooler bag insulated tier
What does a cooler bag insulated design really mean?
Direct answer: A cooler bag insulated product is a soft-sided bag built to slow heat transfer with an insulation core, a moisture barrier liner, and a closure that limits warm-air leaks. It does not create cold like a fridge. It protects the cold you pack inside, buying you time.
In plain language, insulation is a “temperature raincoat.” A great cooler bag insulated bag is not only thick. It is also sealed, shaped, and packed tightly. If the zipper leaks, it is like leaving a window open on a hot day.
Cooler bag insulated vs ordinary tote: the simple test
A real cooler bag insulated build usually has three layers: outer shell, insulation core, and wipe-clean liner. A normal tote is mostly fabric and air space, so it warms quickly.
| What you check | Cooler bag insulated | Regular tote | What it means for you |
|---|---|---|---|
| Insulation layer | Foam or multi-layer core | Little to none | Longer cold time |
| Liner | Wipe-clean, leak resistance | Fabric absorbs spills | Less odor + mess |
| Closure | Tight zipper/roll-top | Open top | Fewer heat spikes |
Practical tips you can use today
If you carry perishables: Use a cooler bag insulated bag with a tight closure to reduce warm-air exchange.
If you hate odors: Use a wipe-clean liner and dry it fully after cleaning.
If you want quick wins: Fix the seal and packing before buying a bigger bag.
Real-world example: One meal-prep customer improved results by switching to a tighter zipper track, not thicker walls.
How long does a cooler bag insulated bag stay cold under 40°F?
Direct answer: Most cooler bag insulated designs give about 2–6 hours of useful cold time in typical errands if you start with cold items, add enough cold packs, and avoid repeated opening. In hot weather or frequent “check-ins,” effective time can drop by 30–60%.
Many public food-safety guides also use two simple guardrails: 40–140°F (4–60°C) is often described as a “danger zone” where bacteria can grow faster, and time matters when cold foods warm up. A common rule of thumb is 2 hours max at room temperature, and 1 hour max when it’s above 90°F / 32°C. Use these as training defaults, then follow your local regulations.
This is why “how long does an insulated cooler bag stay cold” has no single answer. Hold time depends on cold supply (your gel packs/ice mass) and heat leaks (sun, warm air, warm surfaces, and openings). If you need a pass/fail line, use a thermometer and check the center of the load.
Hold-time drivers you can control
| Driver | Lower-risk choice | Higher-risk choice | What it means for you |
|---|---|---|---|
| Starting temperature | Pre-chilled items | Warm items loaded | Cold time collapses early |
| Cold mass | 2–4 packs + good placement | One small pack | Warm corners form fast |
| Open frequency | 1–2 opens | 10+ opens | Big temperature swings |
| Sun/heat exposure | Shade + airflow | Hot car, direct sun | Heat spikes even in good bags |
Practical tips you can use today
Use “start cold” as a rule: Put cold food into your cooler bag insulated bag, not room-temp food.
Use two cold sources: Use a bottom pack and a top pack to reduce hot spots.
Use “first-out” staging: Put first-stop items at the top to cut open time.
Real-world example: Many “my bag failed” stories come from warm items, empty space, and repeated opening—not from the bag itself.
Which cooler bag insulated materials work best in 2025?
Direct answer: The best cooler bag insulated performance usually comes from closed-cell foam plus a reflective layer (for sun) and a strong moisture barrier liner. For premium lanes, structured foams (EPP-style builds) or thin high-performance panels (VIP-style builds) can boost results.
You don’t need to memorize acronyms. You need to know what each layer does: the shell protects, the insulation slows heat, the liner stops leaks, and the closure blocks airflow. If one layer is weak, the whole cooler bag insulated system feels unreliable.
Best insulation material for cooler bag insulated designs: simple comparison
| Material/Layer | What it’s good at | Watch-outs | What it means for you |
|---|---|---|---|
| Closed-cell foam | Good thermal hold, resists moisture | Can be bulkier | Better for longer errands |
| Reflective film layer | Reduces radiant heat in sun | Thin films can tear | Helps in hot cars |
| Structured foam (EPP-style) | Holds shape, durable | Often thicker | Fewer crushed corners |
| High-insulation thin panels (VIP-style) | Strong insulation with thin walls | Higher cost, careful handling | More hold time without bulk |
| Liner (barrier grade) | Leak control + wipe-clean | Cheap liners can smell | Hygiene + fast cleanup |
Quick “touch test” for cooler bag insulated build quality
Wall pinch test: springy and uniform beats “collapses to nothing.”
Base test: insulated base beats thin fabric base (warm surfaces matter).
Seam scan: smooth corners beat wrinkled corners (leaks hide here).
Closure check: aligned zipper/roll-top beats gaps and snagging.
Practical tips you can use today
If your bag collapses: Choose a more structured cooler bag insulated build to keep insulation stable.
If you work in sun: Choose reflective coverage plus shade habits.
If you carry raw protein: Prioritize liner quality and seam strength over extra pockets.
Real-world example: A small delivery team reduced odor complaints after switching to a liner that wiped clean easily.
How to pack ice packs in a cooler bag insulated system?
Direct answer: The best cooler bag insulated performance comes from a repeatable “cold sandwich”: cold pack on the bottom + product in the center + cold pack on top, with minimal air gaps. Random placement can cut cold time in half.
Packing is where most systems win or lose. Cold works best by contact and by reducing warm air inside. If you want reliability, use a routine you can repeat every time.
How to pack ice packs in a cooler bag: step-by-step
Start cold: Pre-chill food and drinks before packing.
Bottom pack: Put one cold pack flat on the base.
Center load: Place the coldest items (meat, dairy, seafood) in the middle.
Side support: Add slim packs on the walls if you have them.
Top pack: Place a second pack on top before closing.
Fill gaps: Use a towel/filler to reduce empty air space.
Seal + shade: Close fully and keep the bag out of direct sun.
| Packing method | Cold pack placement | Best for | What it means for you |
|---|---|---|---|
| “Sandwich” pack | Bottom + top (+ sides) | Hot days, long errands | Even cooling, fewer hot spots |
| “Side-wall” pack | Sides + top | Bottles, tall loads | Fewer warm corners |
| “Minimal” pack | One top pack | Short trips only | Works in mild conditions |
Practical tips you can use today
Use cold contact: Place items so they touch cold packs, not warm air.
Use a filler to reduce air: Use a small towel to stop “warm-air pockets.”
Separate raw items: Use a sealed bin inside your cooler bag insulated bag for safety.
Real-world example: Two smaller packs placed top and bottom often outperform one large pack tossed in randomly.
Best cooler bag insulated for groceries: what should you prioritize?
Direct answer: The best cooler bag insulated for groceries balances insulation, a wipe-clean liner, a stable base, and comfortable carry. Grocery loads are mixed, so organization matters as much as wall thickness.
Groceries fail when frozen items sit too long, warm items share space with cold, or heavy bottles crush soft foods. Your bag should make sorting easy, so you don’t “pay” cold to protect warm items.
Cooler bag insulated for grocery delivery checklist
| Grocery scenario | Main risk | Bag feature that helps | What it means for you |
|---|---|---|---|
| Frozen + chilled mixed | Softening + drip | Divider or two bags | Better texture, less mess |
| Long checkout line | Time out of cold | Better insulation + more packs | Bigger safe window |
| Heavy bottles | Crushing produce | Structured walls + flat base | Fewer bruises |
| Summer car ride | Heat spike | Reflective shell + tight seal | Less sweating and melt |
Practical tips you can use today
Use two bags: Use one cooler bag insulated bag for frozen and one for chilled.
Load frozen last: Keep frozen items cold until the final moment.
Keep it closed in the trunk: Avoid a sunny back seat when possible.
Real-world example: Most “my ice cream melted” stories happen because frozen items went in first and sat through the whole trip.
Cooler bag insulated for meal delivery: what changes on multi-drop routes?
Direct answer: A cooler bag insulated delivery setup must handle frequent opening, stacking, and fast handoffs. You need seal strength, structure, and a route workflow that limits open time.
Delivery is like opening your fridge all afternoon. Each stop invites warm air in. The fix is not only thicker insulation. It is also discipline: staged packing, fast access, and strict hot/cold separation.
Insulated cooler bag for meal delivery: route-ready table
| Delivery factor | Best practice | Common mistake | What it means for you |
|---|---|---|---|
| Door openings | Batch stops | Open every drop | Faster warming |
| Bag structure | Rigid walls/base insert | Collapsing bag | Less stable insulation |
| Access strategy | Top-layer sorting | Digging deep | Longer open time |
| Hot/cold split | Two-bag or two-zone | One mixed compartment | Lower food quality |
Practical tips you can use today
Use a two-bag rule: One cooler bag insulated bag for cold, one for hot.
Target “under 20 seconds open”: Plan your order so you unzip once, not three times.
Standardize pack order: Use the same layout every shift for fewer mistakes.
Real-world example: Delivery teams often gain more by reducing open time than by buying thicker insulation.
Leakproof liner for cooler bag insulated bags: how do you clean without odors?
Direct answer: Clean your cooler bag insulated liner after every spill and at least weekly with mild soap, then air-dry fully. Odor usually comes from residue plus trapped moisture in seams.
The inside is your “food environment.” Cleaning only the outside is a common mistake. Drying is the real secret, because moisture left inside becomes smell and hygiene risk.
Leakproof liner maintenance for insulated cooler bags
| Cleaning step | How often | Why it matters | What it means for you |
|---|---|---|---|
| Quick wipe | After each use/spill | Stops residue buildup | Bag stays “ready” |
| Full wash | Weekly or after leaks | Removes film | Fewer stains |
| Dry open | Every time | Prevents trapped moisture | Less odor |
| Inspect seams/zipper | Monthly | Finds early damage | Prevents big leaks |
Practical tips you can use today
Use mild soap + warm water: Strong chemicals are rarely needed for routine use.
Dry with the bag open: Store unzipped so air can circulate.
Fix seam problems early: A cracked liner defeats the point of a leakproof bag.
Real-world example: A delivery operator reduced odor complaints after enforcing a “dry completely” rule.
Interactive decision tool: which cooler bag insulated level do you need?
Direct answer: Choose your cooler bag insulated tier based on trip time, heat exposure, opening frequency, and product sensitivity—not on the biggest capacity you can afford.
Use this fast scoring tool to match the bag to your real behavior.
Step 1: Score your risk (add points)
Trip duration: under 1 hour (1) · 1–3 hours (3) · over 3 hours (5)
Outside heat: mild (1) · warm (3) · hot/direct sun (5)
Open frequency: 0–1 times (1) · 2–4 times (3) · many times (5)
Item sensitivity: drinks/produce (1) · dairy/meals (3) · raw meat/seafood/medicine (5)
Step 2: Pick a tier (with realistic expectations)
| Tier (generic) | Typical routine it fits | What you must do | Your practical win |
|---|---|---|---|
| Basic | Lunch, short errands | 1–2 cold packs, keep closed | Lightweight daily use |
| Workhorse | Groceries, warm-weather runs | Sandwich packing, structured base | Fewer melted items |
| Pro | Multi-drop delivery, high-risk items | More cold mass, strict workflow, optional monitoring | More repeatable results |
Step 3: Run a 60-minute self-test (fast reality check)
Pre-freeze two cold packs overnight.
Put them in your cooler bag insulated bag with a sealed water bottle.
Leave it in a warm room or car trunk for 60 minutes.
Open once at the 60-minute mark and check cold pack firmness.
Interpretation
Packs mostly solid + bottle cold: workable for your current use.
Packs soft + bottle only cool: shorten trip time or upgrade packing.
Packs nearly melted: do not use for high-risk perishables in heat.
Practical tips you can use today
Test your worst day: hot weather and longer routes reveal weaknesses.
Upgrade one variable at a time: change packing, then packs, then bag.
Add a thermometer for sensitive lanes: measure, don’t guess.
Real-world example: Many users gain 1–2 extra hours just by changing pack placement, not buying a new bag.
2025 latest cooler bag insulated developments and trends
In 2025, cooler bag insulated products are becoming more lane-specific. Instead of one bag doing everything, designs are more purpose-built for groceries, delivery, and daily lunches. Buyers are also pushing for easier cleaning, more sustainable materials, and more predictable performance.
Latest progress snapshot
Better seals: smoother zipper tracks and less leakage at corners.
Improved liners: lower-odor, easier wipe-down barriers for daily use.
Sustainability push: more reusable builds, recycled fabrics, and fewer disposable inserts.
Modular organization: removable dividers and two-zone layouts for delivery routines.
Performance transparency: more teams use simple tests and thermometers instead of claims.
Market insight: the “best” cooler bag insulated setup is the one you can repeat every day—same pack-out, same cleaning habit, same results.
Frequently asked questions
Q1: How long does a cooler bag insulated bag stay cold?
With cold starting items, enough cold packs, and minimal opening, many cooler bag insulated setups work for several hours. Hot weather and frequent opening shorten that window.
Q2: What is the biggest mistake with a cooler bag insulated bag?
Leaving too much empty space. Warm air inside heats food quickly. Pack tight and fill gaps.
Q3: How to pack ice packs in a cooler bag insulated setup for best results?
Use a bottom-and-top “sandwich,” put cold items in the center, and open the bag less often.
Q4: Is a leakproof liner necessary for a cooler bag insulated bag?
If you carry meat, seafood, dairy, or melting ice, yes. A leakproof liner reduces mess, odors, and cross-contamination risk.
Q5: What is the best insulation material for cooler bag insulated performance?
There is no single best. Closed-cell foam is a strong baseline. Structured foam improves durability, and thin high-insulation panels can help when space is tight.
Q6: How do you clean an insulated cooler bag safely?
Wipe spills quickly, wash with mild soap, rinse, and air-dry fully. Odor usually comes from trapped moisture in seams.
Q7: Can I use a cooler bag insulated bag for medicine?
Often yes, but validate the target temperature range and test your pack-out. Use monitoring when contents are sensitive.
Summary and recommendations
A cooler bag insulated system works when insulation, seals, and packing strategy work together. Start cold, add enough cold mass, and keep the bag sealed and shaded. Choose a size that fits your typical load with minimal air gaps, then use the cold sandwich packing method every time. If you deliver meals, focus on workflow: fewer openings, better organization, and fast cleaning.
What you should do next
Write down your typical duration, heat exposure, and how often you open the bag.
Choose a cooler bag insulated size that reduces empty air space.
Standardize your ice placement (bottom + top, fill gaps).
Run one realistic test and record the result for repeat use.
Build a simple cleaning routine that ends with full air-drying.
CTA: If you want fewer spoiled groceries and fewer customer complaints, pick one cooler bag insulated setup, test it once, and repeat the same pack-out every time.
About Tempk
At Tempk, we design temperature-control packaging and insulated solutions for real logistics conditions—not just showroom specs. We focus on consistent insulation coverage, easy sanitation, and durable materials that stand up to repeat daily use. If you need a cooler bag insulated setup for lunch, grocery delivery, or last-mile cold chain operations, we help you match the right structure, liner, and pack-out method to your route and risk level.
Next step: Share your route time, ambient temperature range, and what you carry. We’ll help you turn this guide into a one-page packing spec with a simple pass/fail check.
Compact Foldable EPP Insulation Box Guide (2025)

Compact Foldable EPP Insulation Box: Worth It?
A compact foldable EPP insulation box is worth it when you need reliable cold protection and you’re tired of paying to move “empty air.” Many programs see major empty-return volume reductions, sometimes up to ~70–84% depending on the folding design and how consistently teams actually fold.
You also keep temperature stability for real routes, with typical designs commonly supporting 24–48 hours with standard cooling packs (route and packout dependent).
This article will help you answer:
How a compact foldable EPP insulation box reduces empty-return costs on repeat routes
compact foldable EPP insulation…
What “closed-cell insulation” means for your temperature results (in plain language)
compact foldable EPP insulation…
How to size a compact foldable EPP insulation box for your lane without guesswork
compact foldable EPP insulation…
Which specs matter most so your compact foldable EPP insulation box survives stacking and reuse
compact foldable EPP insulation…
How to clean and reuse a compact foldable EPP insulation box safely with a simple SOP
compact foldable EPP insulation…
How to validate and scale a foldable program with fewer surprises
compact foldable EPP insulation…
What is a Compact Foldable EPP Insulation Box?
Direct answer: A compact foldable EPP insulation box is a reusable insulated container made from expanded polypropylene (EPP) that collapses when empty to reduce storage and return volume.
compact foldable EPP insulation…
It’s like a “warm jacket” for your product that can fold down into a smaller footprint.
Expanded explanation: The value is not just insulation. It’s system efficiency: fewer trucks for empties, less warehouse congestion, and fewer damaged containers over time. If you control the return loop, a compact foldable design turns packaging from a cost center into a measurable asset.
compact foldable EPP insulation…
Why foldability changes your cost math
| Cost driver | Rigid insulated box | Foldable design | What it means for you |
|---|---|---|---|
| Empty-return volume | High | Much lower | You stop paying for “air” compact foldable EPP insulation… |
| Storage footprint | Large | Compact | More usable dock + racking space |
| Handling time | Variable | Faster when standardized | Fewer bottlenecks at the dock |
| Replacement rate | Medium | Lower (durability dependent) | Better lifecycle cost |
Practical tips you can use right now
If you do repeat routes: treat folding as a required dock step, not a “nice feature.”
If you do last-mile delivery: standardize 1–2 sizes first to reduce mistakes.
compact foldable EPP insulation…
If you do retrieval: add simple ID labels so you can measure loss by lane.
Real example: Teams often recover costs faster when reuse cycles rise; one case reached full recovery after 14 reuse cycles.
compact foldable EPP insulation…
How Does a Compact Foldable EPP Insulation Box Hold Temperature?
Direct answer: A compact foldable EPP insulation box holds temperature by slowing heat transfer through its closed-cell foam walls. Typical EPP property sheets report thermal conductivity around 0.24–0.26 BTU-in/ft²-hr-°F (test-method dependent).
compact foldable EPP insulation…
It doesn’t create cold—it helps your cold last longer.
compact foldable EPP insulation…
Expanded explanation: Your results depend on three controllable things: lid fit, empty air space, and coolant placement. Even the best box loses fast if it’s half empty and loosely closed. Measure one real lane with a logger and you’ll learn more than opinions.
compact foldable EPP insulation…
Typical temperature-hold expectations (route dependent)
| Box type | Typical temperature hold | Best use case | What it means for you |
|---|---|---|---|
| Rigid EPP box | 24–48 hours | Longer lanes | Strong baseline compact foldable EPP insulation… |
| Compact foldable EPP insulation box | 24–36 hours | Express + regional | Space saving with solid packout compact foldable EPP insulation… |
| Single-use foam | 12–24 hours | One-way shipping | Low upfront, higher waste compact foldable EPP insulation… |
Moisture matters more than most people think
Closed-cell foam generally resists water uptake better than open-cell foam. Some EPP sheets list water absorption as <5% (vol) under specific tests.
compact foldable EPP insulation…
That helps reuse, but “low” is not “zero,” so drying still matters.
compact foldable EPP insulation…
Practical tips and suggestions
Warm corners? Check lid flatness and closure pressure first.
Chilled (not frozen) products? Avoid direct coolant contact to prevent freeze damage.
compact foldable EPP insulation…
Inconsistent results? Reduce empty headspace before buying more coolant.
compact foldable EPP insulation…
Real example: Operators reduced “arrived warm” issues after switching to a compact foldable EPP insulation box and tightening hub dwell rules.
compact foldable EPP insulation…
Which Specs Define a Compact Foldable EPP Insulation Box You Can Trust?
Direct answer: You can trust a compact foldable EPP insulation box when its specs match your handling reality: stacking load, impacts, wash cycles, and fold cycles. EPP grades vary by density (examples include 20, 30, 45, 60 g/L), and higher density usually increases durability and stacking strength.
compact foldable EPP insulation…
Expanded explanation: “Strong” is not a spec. Corners fail first. Hinges fail next. Your RFQ should force measurable requirements so you can compare suppliers fairly.
compact foldable EPP insulation…
Specs that matter most for cold chain handling
| Spec | What it affects | What “too low” looks like | What it means for you |
|---|---|---|---|
| Density (g/L) | Durability + stiffness | Dents, poor sealing | More replacements compact foldable EPP insulation… |
| Compressive strength | Stacking under load | Crushed corners | Higher damage risk compact foldable EPP insulation… |
| Thermal conductivity | Hold time | Faster warming | More coolant needed compact foldable EPP insulation… |
| Water absorption | Reuse stability | Odor + wet performance | Harder cleaning results compact foldable EPP insulation… |
Procurement language that prevents “compact” confusion
Write requirements like:
Folded height (mm/in)
Folded-to-open volume ratio
Maximum stack height (open + folded)
Target reuse cycles (50 / 100 / 200 loops)
compact foldable EPP insulation…
Practical tips and suggestions
Ask for test methods: numbers without methods are just marketing.
compact foldable EPP insulation…
Protect corners: specify reinforcement if you stack high.
compact foldable EPP insulation…
Demand stable folded stacking: if stacks slip, staff stops folding.
compact foldable EPP insulation…
Real example: One DC reduced cracked boxes after specifying density grade and corner reinforcement in the RFQ.
compact foldable EPP insulation…
How to Size a Compact Foldable EPP Insulation Box for Your Lane?
Direct answer: Size a compact foldable EPP insulation box around your lane risk, not your product photo. Too large traps warm air. Too small crushes payload and ruins sealing.
Expanded explanation: Use a simple scoring tool so your team can repeat decisions. When you standardize sizing rules, you also reduce training errors and returns chaos.
Interactive tool: 5-minute “Lane Fit” score (0–10)
Give yourself 0, 1, or 2 points for each:
Transit time: under 2h (0) / 2–6h (1) / 6h+ (2)
Ambient exposure: mild (0) / seasonal extremes (1) / hot & unpredictable (2)
Doorstep dwell risk: low (0) / medium (1) / high (2)
Product sensitivity: tolerant (0) / moderate (1) / fragile (2)
Return storage pressure: low (0) / medium (1) / severe (2)
Total score → box direction
0–3: smaller compact foldable EPP insulation box, minimal inserts
4–6: tighter fit + dividers + optional coolant
7–10: validated packout + monitoring + strict SOPs
Practical tips and suggestions
If product shifts: add separators before increasing box size.
If coolant crushes product: use side channels or a top tray.
If you run mixed loads: standardize 2–3 sizes, not ten.
Real example: Teams often improve temperature consistency after downsizing and reducing empty air space.
compact foldable EPP insulation…
Is a Compact Foldable EPP Insulation Box Food-Grade and Compliant?
Direct answer: A compact foldable EPP insulation box is “food-grade” only when the material grade and manufacturing controls match the food-contact rules where you sell. EU principles under Regulation (EC) No 1935/2004 focus on preventing harmful migration and unacceptable changes to food.
compact foldable EPP insulation…
In the U.S., food-contact compliance is often supported with references like 21 CFR 177.1520 for certain olefin polymers.
compact foldable EPP insulation…
Expanded explanation: Don’t accept a vague one-page claim. Ask for a packet that matches your actual use: direct contact vs bagged contact, temperature exposure, and cleaning chemicals.
compact foldable EPP insulation…
What to request from suppliers (a clean compliance packet)
| Document | What it should include | Why it matters | What it means for you |
|---|---|---|---|
| Food-contact statement | market scope + intended use | aligns to your region | faster approvals compact foldable EPP insulation… |
| Additives control | resin family + allowed additives | reduces unknowns | fewer audit surprises compact foldable EPP insulation… |
| Migration approach (EU plastics) | overall migration approach | supports safe use | stronger compliance story compact foldable EPP insulation… |
| Traceability basics | batch/lot traceability | supports recalls | lower risk exposure compact foldable EPP insulation… |
Practical note: Some references point to an overall migration limit of 10 mg/dm² under EU plastics rules (context dependent).
compact foldable EPP insulation…
Practical tips and suggestions
Define the contact type: direct food contact vs bagged product contact.
compact foldable EPP insulation…
Align cleaning chemicals: your SOP can change odor and performance.
compact foldable EPP insulation…
Avoid mystery coatings: if coated, demand coating compliance evidence.
compact foldable EPP insulation…
Real example: A brand avoided retail rejection by requesting the food-contact packet before the first PO.
compact foldable EPP insulation…
How to Clean and Reuse a Compact Foldable EPP Insulation Box?
Direct answer: A compact foldable EPP insulation box stays safe only when cleaning is consistent and drying is non-negotiable. If you nest damp boxes, you create odor—and odor becomes complaints.
compact foldable EPP insulation…
Expanded explanation: Your team doesn’t need a perfect lab process. You need a repeatable routine that works on busy shifts.
The 5-step cleaning SOP you can post on the wall
Pre-rinse: remove debris, especially corners and lid grooves.
compact foldable EPP insulation…
Wash: measured detergent concentration + defined contact time.
compact foldable EPP insulation…
Rinse: rinse until there’s no slick feel.
compact foldable EPP insulation…
Dry: air-dry fully before folding and stacking.
compact foldable EPP insulation…
Inspect: quick visual + smell check before release.
compact foldable EPP insulation…
| Cleaning risk | What causes it | Fix in one sentence | What it means for you |
|---|---|---|---|
| Residue smell | weak rinse | rinse to “no slick feel” | fewer complaints compact foldable EPP insulation… |
| Mold spots | stacking wet | dry before nesting | longer box life compact foldable EPP insulation… |
| Cross-contact | mixed product flows | separate flows | fewer safety risks compact foldable EPP insulation… |
Practical tips and suggestions
Use a red-tag rule: if it smells, it’s not ready.
compact foldable EPP insulation…
Separate raw proteins: don’t rely on memory for separation.
compact foldable EPP insulation…
Define retirement rules: damaged seals and deep dents should be removed.
compact foldable EPP insulation…
How to Run a Return Loop for a Compact Foldable EPP Insulation Box?
Direct answer: A compact foldable EPP insulation box program succeeds when someone owns the box, folding is enforced, and loss is measured. Treat boxes like reusable assets, not disposable supplies.
compact foldable EPP insulation…
Expanded explanation: Most failures are operational, not material. If staff don’t fold and dry consistently, ROI disappears.
Choose one return-loop model (don’t mix at the start)
| Model | Best for | What you must control | What it means for you |
|---|---|---|---|
| Deposit / incentive | consumer delivery | customer behavior | reduces loss |
| Closed-loop B2B | store/DC routes | driver discipline | highest ROI |
| Hybrid | mixed operations | two SOPs | more complexity |
Interactive self-assessment: “Return Loop Readiness” (score 0–10)
Give yourself 0, 1, or 2 points for each:
We know where each compact foldable EPP insulation box is within 48 hours.
We have fold-and-stack instructions with photos at the dock.
We have a cleaning SOP and a dry-check step.
compact foldable EPP insulation…
We track loss rate by lane and have an action threshold.
We use one standardized size for the pilot lane.
Score guidance
0–4: pilot first, track manually, keep it simple
5–7: add basic tracking and tighten SOPs
8–10: scale lanes and sizes confidently
Practical tips and suggestions
Create a “fold-only zone” at the dock so folding isn’t skipped.
Add a fold-time KPI (seconds per box) and keep it realistic.
Do weekly random audits for fold compliance and cleanliness.
How to Validate a Compact Foldable EPP Insulation Box Before Scaling?
Direct answer: Validate a compact foldable EPP insulation box in your real conditions: heat, handling, folding, and wash cycles. Testing saves money by preventing “surprise redesign” after rollout.
compact foldable EPP insulation…
Expanded explanation: Your hinges, folds, and seals are design-specific. Property sheets help, but pilots prevent expensive regret.
compact foldable EPP insulation…
Minimum test plan (simple and repeatable)
Temperature hold test: worst-case packout, worst-case ambient.
compact foldable EPP insulation…
Drop and corner impact: realistic handling height.
compact foldable EPP insulation…
Fold cycle test: repeated fold/unfold count vs target loops.
compact foldable EPP insulation…
Wash cycle trial: your real chemicals + real drying time.
compact foldable EPP insulation…
Stack stability: open and folded stacking under expected load.
compact foldable EPP insulation…
| Test | Pass indicator | Common failure | What it means for you |
|---|---|---|---|
| Hold test | stays in band | lid leak | redesign seal compact foldable EPP insulation… |
| Fold cycle | hinge stable | crack at fold | reinforce geometry compact foldable EPP insulation… |
| Wash cycle | no odor buildup | damp nesting | fix drying SOP compact foldable EPP insulation… |
Practical tips and suggestions
Test summer and winter: winter can trigger freeze damage for chilled goods.
compact foldable EPP insulation…
Photograph packouts: repeatability beats tribal knowledge.
compact foldable EPP insulation…
Write a one-page report: make it easy to share internally.
compact foldable EPP insulation…
2025 Latest Trends for Compact Foldable EPP Insulation Box Programs
In 2025, the biggest shift is that reusable packaging is evaluated as a system: box + SOP + tracking + cleaning + proof. The market is moving toward standardized footprints, improved hinge designs, and lighter grades that maintain performance with less material.
compact foldable EPP insulation…
Latest progress snapshot
Return efficiency becomes a KPI: folding reduction is tracked, not assumed.
compact foldable EPP insulation…
Right-sizing pressure grows: shipping “air” is treated as avoidable waste.
compact foldable EPP insulation…
Food-contact documentation expectations rise: more buyers want packets upfront.
compact foldable EPP insulation…
Reusable pooling expands: operators standardize sizes to simplify reverse logistics.
compact foldable EPP insulation…
Cleanability design matters more: hinges and folds must be wash-friendly.
compact foldable EPP insulation…
Common Questions (FAQ)
Q1: How much space can a compact foldable EPP insulation box save when empty?
Design dependent, but many systems report large reductions, often up to ~70–84%. Use conservative assumptions until you test.
compact foldable EPP insulation…
Q2: How long can a compact foldable EPP insulation box keep items cold?
Route and packout dependent, but typical guidance shows 24–36 hours for foldable designs and 24–48 hours for rigid EPP baselines.
compact foldable EPP insulation…
Q3: Does a compact foldable EPP insulation box absorb water?
EPP is often described as closed-cell, and some sheets list low water absorption under test conditions. Drying SOP still matters.
compact foldable EPP insulation…
Q4: How do I prove food-contact compliance for a compact foldable EPP insulation box?
Request a region-matched packet. EU principles reference Regulation (EC) 1935/2004, and U.S. support often includes 21 CFR 177.1520 references.
compact foldable EPP insulation…
Q5: What is the biggest failure mode for foldable programs?
Operational discipline. If folding, drying, and inspection aren’t consistent, ROI collapses.
compact foldable EPP insulation…
Summary and Recommendations
A compact foldable EPP insulation box is most valuable when you run repeat routes and control returns. Foldability can dramatically cut empty-return volume, while EPP supports durable insulation for daily handling.
compact foldable EPP insulation…
The real win comes from system thinking: correct sizing, consistent packout, fast drying, and simple tracking.
compact foldable EPP insulation…
Your next steps (simple action plan):
Pick one lane and one box size for a pilot.
compact foldable EPP insulation…
Run hold + fold-cycle + wash trials and document results.
compact foldable EPP insulation…
Post a one-page fold-and-clean SOP at the dock.
compact foldable EPP insulation…
Track loss rate and fold compliance before scaling.
compact foldable EPP insulation…
About Tempk
At Tempk, we help you make reusable cold chain packaging work in real operations. We focus on clear specs, repeatable SOPs, and practical testing so your compact foldable EPP insulation box program stays reliable after the pilot.
compact foldable EPP insulation…
We also help teams build simple documentation packs that speed up customer approval.
compact foldable EPP insulation…
Call to action: Share your lane duration, ambient risk, and return method. We’ll help you turn that into a pilot plan, cleaning SOP, and fold-compliance checklist.
Collapsible EPP Cooler Box Distributor Guide 2025
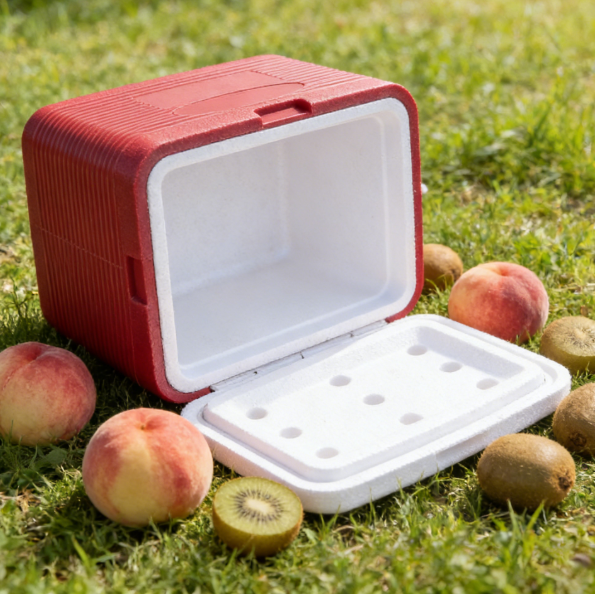
Collapsible EPP Cooler Box Distributor: 2025 Fit?
You’re not really shopping for “a box.” You’re shopping for repeatable cold-chain outcomes. A collapsible EPP cooler box distributor helps you protect chilled or frozen goods, reduce damage, and keep returns predictable. In many reuse programs, folding containers cut empty-return volume by up to about half, and teams often see 20–40% storage savings after standardizing a foldable system. Treat your collapsible EPP cooler box distributor like an operations partner, not a one-time supplier.
This article will help you:
Choose faster with a how to choose a collapsible EPP cooler box distributor scorecard
Avoid surprise delays by checking collapsible EPP cooler box distributor MOQ and lead time
Pass audits with collapsible EPP cooler box distributor compliance documents you can request upfront
Prove ROI using foldable EPP cooler box space-saving return logistics math you can copy
Reduce risk by testing a collapsible EPP cooler box before bulk order with simple pass/fail checks
What does a collapsible EPP cooler box distributor do?
A collapsible EPP cooler box distributor supplies foldable EPP insulated boxes and helps you run them like an operational system. EPP stands for expanded polypropylene, a lightweight foam that insulates well and absorbs impacts. “Collapsible” means the box folds down when empty, so returns and storage take less space.
A capable collapsible EPP cooler box distributor supports more than delivery. They help you standardize sizes, reduce SKUs, plan returns, and keep replacement parts available. That’s why the distributor you pick directly affects daily packing speed, damage rates, and on-time service.
Why EPP matters for reusable cold-chain work
EPP acts like a “springy helmet” around your goods. It cushions bumps, resists moisture, and keeps its shape across repeated trips. When you combine EPP with gel packs or phase change materials, you can hold target temperatures longer with fewer “warm spots.”
| What you compare | Disposable foam box | Collapsible EPP cooler box | What it means for you |
|---|---|---|---|
| Typical lifespan | 1–3 trips | 50+ trips (with care) | Lower cost per trip |
| Damage tolerance | Low | High | Fewer replacements mid-season |
| Storage when empty | Fixed size | Foldable | Less warehouse clutter |
| Reverse logistics | Costly | More efficient | Lower return freight volume |
| Cleaning suitability | Limited | Better (with SOP) | Easier reuse loop |
Practical tips you can use today
If you run returns: ask your collapsible EPP cooler box distributor for the folded height and “stack-stable” folded design.
If your team is small: reduce to 1–2 standard sizes before you chase minor unit-price savings.
If deliveries vary: choose inserts, dividers, or liners instead of adding many box sizes.
Real case: A fresh-food operator moved from fixed boxes to a foldable system and freed staging space by about a third, simply by folding empties immediately after unloading.
Why does a collapsible EPP cooler box distributor beat a standard supplier?
A collapsible EPP cooler box distributor is built for repeatability. A standard supplier often sells “a box” and leaves you to figure out folding life, cleaning, returns, and replacements. In a reusable program, that gap turns into hidden costs.
When you work with a specialized collapsible EPP cooler box distributor, you get an application-based approach: box family design, spare parts, QC checks, and a clear warranty path. That makes your cold-chain packaging behave more like a managed asset than a consumable.
The “distribution advantage” in plain language
Think of boxes like delivery vans. You don’t buy random vans each week. You standardize so drivers, racks, and maintenance all work smoothly. A collapsible EPP cooler box distributor helps you standardize your “box fleet,” so your team stops improvising.
| Topic | Standard supplier | Collapsible EPP cooler box distributor | Your daily benefit |
|---|---|---|---|
| Selection | Generic SKU list | Use-case mapping | Faster packing, fewer errors |
| Quality control | Minimal | Folding + lid-fit checks | Fewer field failures |
| Parts | Rare | Latches/hinges/gaskets | Lower downtime |
| Reuse guidance | Not included | Cleaning + cycle guidance | Longer usable life |
| Scaling | Unpredictable | Stock + replenishment plan | Fewer stockouts |
Practical tips and advice
If they only talk price: ask how they handle failures, replacements, and spare parts.
If they dodge proof: treat it as risk, not “sales style.”
If your routes change often: prioritize a distributor that can help you re-optimize sizes quickly.
Real case: A buyer chose the cheapest supplier, then learned spare parts took eight weeks. The “cheap” option stalled the whole rollout.
How to choose a collapsible EPP cooler box distributor in 30 minutes?
You can shortlist a collapsible EPP cooler box distributor quickly when you score three things: fit, proof, and operations. The goal is not perfection. It’s avoiding the obvious traps.
Interactive decision tool: Distributor Fit Score (0–20)
Score each line 0–2 (0 = no, 2 = strong yes). Total /20.
They explain EPP and collapse mechanics in plain language.
They provide consistent specs (density range, wall thickness tolerance, lid fit).
They have stock or reliable lead times in your region.
They provide compliance documents for your market (food-contact, hygiene, traceability).
They support pilot sampling and test guidance.
They provide spare parts and repair guidance.
They can quantify return-space savings for your lanes.
They offer cleaning compatibility and reuse-cycle guidance.
They support batch/lot traceability (especially for repeat orders).
They can share references in similar use cases (grocery, meal kits, catering, seafood).
Score meaning
0–8: High-risk collapsible EPP cooler box distributor → don’t scale.
9–14: Possible fit → pilot + document checks first.
15–20: Strong candidate → negotiate program terms and scale.
A fast “first call” script (copy/paste)
Real case: One distributor looked perfect until the buyer asked for a folding-cycle target. No answer. That single question prevented a bad contract.
What specs should a collapsible EPP cooler box distributor explain?
A strong collapsible EPP cooler box distributor should treat specs like operational controls, not brochure bullets. You want specs that predict what happens after week 6—when boxes have been folded, stacked, and washed many times.
The five spec buckets that decide real performance
Fit: internal dimensions, payload, insert compatibility
Thermal logic: wall thickness, lid seal, air gaps
Fold system: hinge strength, locks, cycle durability
Stacking: rim strength, anti-slip features, loaded stability
Hygiene: surface finish, drainage, cleaning compatibility
Collapsible EPP cooler box distributor MOQ and lead time—how to read it
MOQ and lead time are not “procurement details.” They decide whether you can scale without service failures. Ask for a lane-based plan: what can ship now, what needs production, and what buffer stock is recommended.
| Commercial detail | What to ask | Risk if you ignore it | What it means for you |
|---|---|---|---|
| MOQ per size | MOQ + price breaks | Too many SKUs | Cash tied up in the wrong sizes |
| Lead time range | min/typical/worst | Peak-season delays | Missed launches and stockouts |
| Safety stock | suggested buffer | “panic orders” | Stable weekly operations |
| Parts lead time | latches/hinges | Box downtime | Higher loss rate |
Foldable EPP cooler box space-saving return logistics—prove it with simple math
Space savings only matter if folding is fast and stable. Test the fold system like your team will use it: gloves, speed, and real stacking.
Pass/fail fold checks
Can one person fold it in under 15 seconds without tools?
Does it lock open with no wobble?
Does it stay closed when folded and stacked?
Can it be folded with gloves?
After 50 cycles, do joints feel as tight as day 1?
Real case: A meal kit team learned the weak point was a latch, not insulation. They switched latch design before scaling.
Practical tips and suggestions
If boxes get tossed: prioritize fold-point reinforcement and rim strength.
If boxes get washed daily: prioritize easy-clean surfaces and odor resistance.
If boxes stack high: demand compression/stacking proof for loaded pallets.
Which compliance documents should your collapsible EPP cooler box distributor provide?
If your box touches food (directly or indirectly), compliance is part of sourcing—not an afterthought. A professional collapsible EPP cooler box distributor should provide a clean evidence packet aligned with your market.
Two common compliance themes show up across regions:
Note: Always confirm local requirements with your compliance team. This is operational guidance, not legal advice.
A disciplined document packet also makes your collapsible EPP cooler box distributor easier to approve internally.
Food-contact safety (materials are suitable for contact and don’t contaminate goods)
Sanitary transport expectations (equipment can be cleaned and can maintain safe conditions)
The document checklist you can paste into your RFQ
| Document | What it proves | When you need it | Practical meaning for you |
|---|---|---|---|
| Declaration of Compliance (DoC) | food-contact statement | EU supply chains | smoother audits and onboarding |
| GMP-style statement | controlled manufacturing | recurring orders | fewer “unknown batch” risks |
| Traceability statement | batch/lot tracking | pooling programs | faster investigations |
| Material spec sheet | density, additives | always | fewer performance surprises |
| Cleaning guidance | safe cleaning & drying | reuse loops | fewer odors and hygiene issues |
| QC checklist | lid-fit + fold checks | collapsible designs | fewer field failures |
Food-grade collapsible EPP cooler box—hygiene that actually works
Reusable packaging only saves money if cleaning is consistent. Your collapsible EPP cooler box distributor should explain what cleaners to avoid, what temperatures are safe, and how long drying usually takes.
Good guidance is specific: “Use a mild detergent, rinse, dry completely.”
Bad guidance is vague: “Clean as needed.”
Real case: A retailer accepted a new container program faster when the distributor provided a one-page cleaning sheet plus a QC checklist.
Practical tips and advice
If your distributor says “no documents”: treat it as a stop sign.
If you sell to retailers: align docs to their vendor onboarding checklist.
If you pool assets: traceability is survival, not an optional “nice-to-have.”
How to test and buy from a collapsible EPP cooler box distributor without surprises?
A collapsible EPP cooler box distributor quote is not a decision. Your pilot data is the decision. You don’t need a lab. You need a simple plan, real routes, and clear pass/fail rules.
Testing a collapsible EPP cooler box before bulk order (7–14 days)
Pilot Test Pack
Choose 1–2 sizes only (keep it controlled).
Use your real coolant and packing method.
Run 10–30 deliveries per size under worst conditions.
Track failures and near-failures (lid gaps, wobble, odors).
Change one variable at a time.
| Test | What you measure | Simple pass/fail | What it means for you |
|---|---|---|---|
| Temperature hold | time in target range | meets route window | fewer spoilage claims |
| Drop/impact | corner damage + lid fit | still seals | fewer replacements |
| Compression | stack stability | no wobble | safer trucks and racks |
| Cleaning | odor + stain retention | meets SOP time | lower labor cost |
| Fold-life | joint tightness | no looseness | stable returns and handling |
Collapsible EPP insulated box bulk order—hidden cost checklist
Unit price is not your real cost. Your real cost is cost per trip. Before you scale, clarify these “quiet costs.”
Replacement parts pricing and availability
Custom tooling fees (one-time vs per-unit)
Inbound packaging and pallet plan (to prevent freight damage)
Seasonal lead-time variability
Warranty terms and acceptable defect rates
Asset ID options (labels, sleeves, QR-ready zones)
Practical tips you can apply immediately
Negotiate a pilot + scale contract: validate first, then lock pricing.
Define defect tolerance: prevent arguments after delivery.
Buy a spare-parts starter kit: reduce downtime in the first month.
Real case: A distributor improved early success rates by bundling spare latches and a simple repair guide with every first order.
2025 latest developments and trends for collapsible EPP cooler box distributor programs
In 2025, two things are changing buyer expectations: reuse pressure and asset-management maturity. More teams now treat packaging as a tracked asset with planned returns, cleaning, and repairs.
Latest developments at a glance
Faster folding mechanisms: less wear, quicker setup on the dock
Modular box families: fewer SKUs, more insert options
Repair-first mindset: swap parts instead of scrapping whole boxes
Data-ready workflows: label zones and IDs designed into the mold
Hygiene SOP upgrades: clearer “clean / hold / reissue” controls
Market insight (plain-language)
If you choose a collapsible EPP cooler box distributor in 2025, you’ll be asked the same questions your customers ask you: “How many trips does it survive?” and “How do we keep it clean?” The distributor who can answer those with proof will win the long game.
Frequently Asked Questions
Q1: How do I choose a collapsible EPP cooler box distributor fast?
Use the Distributor Fit Score, then require specs, documents, spare parts, and a pilot plan before scaling.
Q2: Do collapsible EPP cooler boxes lose insulation performance?
Not when designed well. The bigger risk is lid gaps from worn hinges or latches, which your pilot will reveal.
Q3: What is the biggest hidden cost with a collapsible EPP cooler box distributor?
Reverse logistics. If folding is slow or boxes return damaged, your space savings disappear.
Q4: Which documents should a collapsible EPP cooler box distributor provide for food-contact use?
Request a compliance packet: food-contact statement, traceability, material spec sheet, QC checklist, and cleaning guidance.
Q5: Should I buy one size or multiple sizes?
Start with one “main size” and one optional size. Too many sizes increase errors and inventory cost.
Q6: How many pilot shipments should I run before bulk purchasing?
A practical range is 10–30 deliveries per size under real conditions. Focus on failures, not marketing claims.
Summary and recommendations
A collapsible EPP cooler box distributor can reduce storage pressure, stabilize delivery outcomes, and cut lifecycle cost—if you buy a program, not a SKU. Focus on proof (documents and traceability), operations (fold speed, returns, spares), and real testing (route pilots). Standardize sizes early, track box condition, and contract using cost-per-trip logic.
Your next step is simple: pick two lanes, request pilot samples from one collapsible EPP cooler box distributor, run a 7–14 day test, and scale only after your data looks clean.
About Tempk
At Tempk, we build and support reusable temperature-controlled packaging systems, including foldable EPP solutions designed for real handling. We focus on durability, stable insulation behavior, and practical workflows for cleaning, returns, and redeployment. If you need a distributor-ready rollout, we can help you define standard sizes, set pilot criteria, and reduce risk before you scale.
Next step: Share your product type (grocery, meal kits, catering, seafood), typical route hours, and how empties return. We’ll recommend a pilot plan and a box configuration that fits your operation.
Eco-Friendly EPP Foam Box: How to Choose in 2025
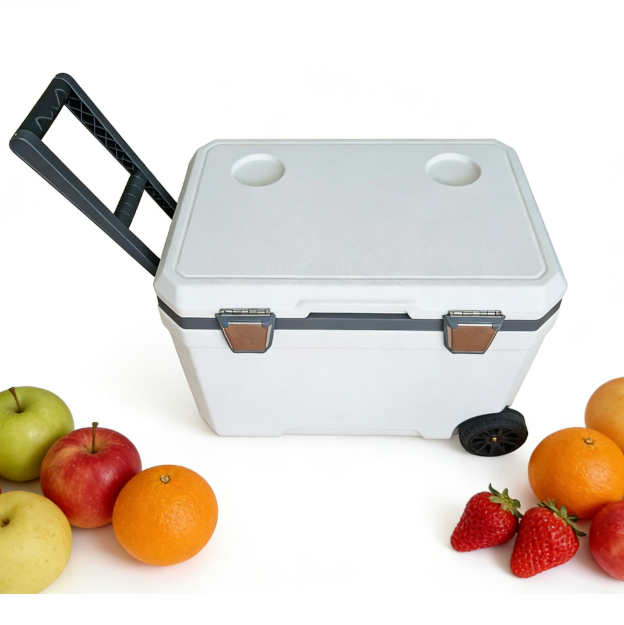
Eco-Friendly EPP Foam Box: How to Choose in 2025?
Last updated: December 15, 2025
An eco-friendly EPP foam box is a smart 2025 choice only when you can reuse it reliably and retire it responsibly. You’re not just buying a box. You’re building a simple loop: return, clean, inspect, reuse, and eventually recycle. In Europe, packaging pressure is rising fast, and 2025 rules are pushing companies toward real recyclability and proof—not slogans.
This article will help you understand:
How to define “eco-friendly” for an eco-friendly EPP foam box without greenwashing
How to compare eco-friendly EPP foam box vs EPS cooler using a simple decision table
How to run a washable eco-friendly EPP foam box reuse loop without slowing operations
How to build an eco-friendly EPP foam box recycling program that works in real life
How to prove your reuse claim in 2025 with simple, auditable metrics
What makes an eco-friendly EPP foam box truly eco-friendly?
Core answer: An eco-friendly EPP foam box is “eco-friendly” when it is reused enough times and has a clear end-of-life path. If your boxes don’t come back, the “eco” claim collapses. If cleaning is slow, the loop jams. Think of it like a refillable bottle: the bottle matters, but the refill habit matters more.
eco-friendly EPP foam box
In plain terms, you’re choosing both a material and a system. EPP is a closed-cell foam, meaning it has sealed bubbles that resist soaking up water. It stays light, tough, and stable through repeat handling. Some EPP structures are about 95% air and 5% polymer, which helps explain why insulation can be strong without heavy weight.
eco-friendly EPP foam box
EPP basics in plain English: what are you buying?
You’re buying shape + wall thickness + closure quality, not just foam. Density matters because it changes strength, stacking, and weight.
eco-friendly EPP foam box
| Design choice | Lower density EPP | Higher density EPP | What it means for you |
|---|---|---|---|
| Weight | Lighter | Heavier | Lower freight cost vs stronger structure |
| Feel | Softer | Firmer | Better cushioning vs better stacking strength |
| Durability | Good | Excellent | More reuse cycles with tougher designs |
| Insulation | Often strong | Still strong | Lane length decides what’s “enough” |
Practical tips for you
Set a reuse target first: Decide the minimum trips your eco-friendly EPP foam box must reach.
Match the box to your real process: A perfect box fails if nobody returns it.
Define end-of-life now: “Recyclable” is not the same as “recycled in your region.”
eco-friendly EPP foam box
Real-world example: One repeat-route distributor standardized packing faster after switching to reusable EPP boxes.
eco-friendly EPP foam box
Eco-friendly EPP foam box vs EPS cooler: what should you choose?
Core answer: Choose an eco-friendly EPP foam box when you can run a return loop. Choose EPS (often single-use) when returns are unrealistic and you need low upfront cost. But beware: “easy today” can become “wasteful tomorrow” if damage, spoilage, or rule pressure increases.
This decision is not about insulation alone. It’s about operations: returns, cleaning time, loss rate, and handling intensity.
Comparison table you can use in sourcing meetings
| Feature | Eco-friendly EPP foam box | EPS cooler | What it means for you |
|---|---|---|---|
| Reuse potential | High | Low to medium | EPP supports circular systems better |
| Impact resistance | Strong | More brittle | Fewer corner breaks in rough handling |
| Water resistance | Strong | Varies | Less soggy packaging in wet lanes |
| Temperature support | Strong | Strong | Design matters as much as material |
| End-of-life | PP-based route possible | Region-dependent | Both depend on local acceptance |
Practical choice rules (simple and honest)
Choose eco-friendly EPP foam box when: you have repeat routes, retail returns, or scheduled backhauls.
Avoid eco-friendly EPP foam box when: you can’t recover boxes and can’t store returns.
Run a 2-week pilot: Track return rate, damage rate, and packing time before scaling.
eco-friendly EPP foam box
Real-world example: A frequent-lane distributor improved outcomes after switching to a simpler latch design.
eco-friendly EPP foam box
How does an eco-friendly EPP foam box improve temperature control?
Core answer: An eco-friendly EPP foam box slows heat transfer and stabilizes internal temperature during handling and last-mile delivery. That matters most when doors open, pallets wait, or drivers hit delays. Even short temperature spikes can reduce product quality.
Because EPP traps air evenly, insulation performance can remain consistent even after repeated use.
eco-friendly EPP foam box
Thermal performance compared simply
| Packaging type | Insulation stability | Typical use case | What it means for you |
|---|---|---|---|
| Cardboard + liner | Low | Short, low-risk trips | Low cost, higher variability |
| EPS foam | Medium | One-way shipments | Good insulation, brittle risk |
| Eco-friendly EPP foam box | High | Reusable cold chain | More consistent holds across trips |
| VIP systems | Very high | Long-haul, premium | Best performance, higher system cost |
Practical tips for you
Pack cold-to-cold: Don’t use the box to “fix” warm product.
Minimize lid-open time: Write one simple rule and train it.
Use inserts for fragile goods: Less breakage means less waste and fewer reships.
Real-world example: Teams often see fewer complaints when insulation stays stable through rough last-mile handling.
eco-friendly EPP foam box
How many reuses make an eco-friendly EPP foam box worth it?
Core answer: There is no single number. Break-even depends on return rate, washing cost, damage/loss rate, and what single-use packaging you replace. The simplest truth is this: every additional reuse spreads the “make” impact across more deliveries.
eco-friendly EPP foam box
Quick reuse break-even calculator (fill-in tool)
Use this simple model:
Reusable cost per shipment = (Box cost ÷ Expected rotations) + Cleaning/return cost per trip + Loss allowance per trip
Break-even happens when reusable cost per shipment ≤ your single-use packaging cost per shipment.
Fill in:
Single-use packaging cost per shipment = $A
Eco-friendly EPP foam box purchase cost = $B
Expected rotations (average trips per box) = R
Cleaning + return handling per trip = $C
Loss/damage allowance per trip (small buffer) = $D
Then:
Reusable cost per shipment = (B ÷ R) + C + D
Fast decision shortcut: If you can’t track rotations, you can’t prove the win.
| Rotations (R) | B ÷ R (box cost per trip) | What usually happens in real life | What it means for you |
|---|---|---|---|
| 1–3 | High | Feels like expensive single-use | Don’t scale yet |
| 5–10 | Medium | Pilot becomes meaningful | Improve returns + cleaning |
| 20+ | Low | Reuse program starts “printing savings” | Standardize + track IDs |
Practical tips to increase rotations fast
Standardize sizes: Fewer SKUs means fewer packing errors.
Design for stacking: Lower damage reduces early retirement.
Use a simple retirement rule: If the latch fails, retire it.
eco-friendly EPP foam box
Real-world example: Meal-prep style routes often win quickly because boxes return daily on repeat lanes.
eco-friendly EPP foam box
How do you clean and reuse an eco-friendly EPP foam box fast?
Core answer: Cleaning is the hidden make-or-break step for an eco-friendly EPP foam box. You need a routine that is fast, safe, and consistent. If cleaning becomes complicated, training fails. If drying is skipped, odor and label failure follow.
Think of it like dishwashing in a busy restaurant. If it slows down, everything backs up.
eco-friendly EPP foam box
A simple 6-step reuse SOP you can implement
Collect: Schedule pickups or capture returns at delivery points.
Sort: Separate “ready to wash” from “needs inspection.”
Wash: Use a consistent detergent and time setting.
Dry: Dry fully to prevent odor and mold issues.
Inspect: Check cracks, hinge zones, and lid fit.
Re-issue: Return to inventory with a visible “ready” status.
eco-friendly EPP foam box
| Step | Time goal | Common failure | What it means for you |
|---|---|---|---|
| Inspect | 15–30 sec | Nobody checks lids | Hidden failures repeat every trip |
| Wash | Short + repeatable | Over-complicated chemicals | Training becomes impossible |
| Dry | Must be complete | Wet stacking | Odor, mold risk, label loss |
| Re-issue | Simple labeling | No status control | Dirty boxes slip into use eco-friendly EPP foam box |
Practical tips to prevent cleaning bottlenecks
Create a drying zone: A basic rack speeds turnaround.
Use visual status tags: “clean / hold / retire” stops confusion.
Don’t debate broken hardware: Retire fast and keep performance consistent.
eco-friendly EPP foam box
Real-world example: Adding a drying rack and a quick inspection routine often stabilizes reuse loops immediately.
eco-friendly EPP foam box
How to build an eco-friendly EPP foam box recycling program that works
Core answer: “Recyclable” must mean recyclable in practice. For an eco-friendly EPP foam box, that means the box is collected, kept clean, densified when possible, and sent to a real partner or take-back route.
eco-friendly EPP foam box
You don’t need a perfect network. You need a repeatable plan that your team can actually follow.
Eco-friendly EPP foam box recycling program: 5 steps
| Step | What you do | What you track | What it means for you |
|---|---|---|---|
| Collection | Return bin / pallet position | Return rate (%) | Return rate drives “eco” fast |
| Sorting | Keep EPP clean + separate | Contamination notes | Clean material is easier to process |
| Densifying | Compact / bale if possible | Volume reduction | Lowers transport + storage pain |
| Partnering | Recycler or take-back loop | Proof of recycling | Stronger compliance story |
| Feedback | Review monthly | Fail reasons | Fix the process, not the box eco-friendly EPP foam box |
Practical tips that make recycling realistic
Label for your team, not marketing: “Return to Dock A” wins every time.
Avoid mixed-material add-ons: Fewer glued layers means fewer recycling headaches.
Treat damage as data: Cracked corners show where lanes need reinforcement.
eco-friendly EPP foam box
Real-world example: Deposit-style internal policies can raise return rates because the rule is simple.
eco-friendly EPP foam box
Reusable EPP cooler box for cold chain: which specs matter most?
Core answer: Choose the specs that prevent failure, not the specs that look premium. If teams can’t close the lid correctly every time, insulation performance drops. If latches frustrate operators, compliance drops.
Focus on what changes outcomes: closure, wall thickness matched to lane, easy cleaning, and tracking surfaces.
eco-friendly EPP foam box
Buyer checklist (simple, operator-friendly)
| Spec | What to look for | Why it matters | What it means for you |
|---|---|---|---|
| Lid seal | Tight fit, repeatable closure | Reduces warm air exchange | Longer hold time with less coolant |
| Wall thickness | Matched to lane duration | Balances weight + insulation | Avoid overpaying on short routes |
| Latches | Glove-friendly, simple | Prevents “half-closed” lids | Fewer temperature surprises |
| Drainage/cleaning | Smooth corners, low traps | Faster wash + dry | Less labor, less odor retention |
| Label zone | Flat panels, scannable IDs | Enables tracking | Better returns + proof eco-friendly EPP foam box |
Practical tips for you
Ask “how many handlings per trip?” It clarifies stacking and drop needs.
Pick the simplest latch teams will use correctly. Fancy latches fail under rush.
Plan basic tracking from day one. Even simple IDs improve return rates.
eco-friendly EPP foam box
Real-world example: A simple latch swap can reduce closure errors quickly on high-volume lanes.
eco-friendly EPP foam box
How do you prove eco-friendly EPP foam box claims in 2025?
Core answer: In 2025, “eco-friendly” is moving from marketing to auditable proof. You prove an eco-friendly EPP foam box claim with reuse data, material clarity, and end-of-life documentation. EU packaging policy updates in 2025 are pushing companies toward stronger lifecycle accountability.
eco-friendly EPP foam box
eco-friendly EPP foam box
The “proof folder” checklist you can keep simple
Return rate: % of shipments where the box comes back
Average rotations per box: trips per box (even estimates help at first)
Loss rate: boxes missing per month
Damage rate: retirements per 100 trips
End-of-life path: where retired boxes go and what happens next
eco-friendly EPP foam box
Practical tips to avoid greenwashing
Say what you can prove: “Reusable in our program” beats “planet-saving.”
Avoid absolute claims: “100% recycled” is risky without verified data.
Track “recycled in practice”: Can you actually collect and process it locally?
eco-friendly EPP foam box
Real-world example: Programs get stronger when recycler receipts and return-rate KPIs are part of audits.
eco-friendly EPP foam box
Decision tool: Is an eco-friendly EPP foam box right for you?
Score each line 0–2 (0 = no, 1 = partly, 2 = yes).
You can recover boxes on at least 60% of shipments (0–2)
You have a place to clean and fully dry boxes (0–2)
Your routes repeat (same customers, same lanes) (0–2)
Your team can inspect and retire damaged boxes fast (0–2)
You have a recycling or take-back option for retired EPP (0–2)
You can track box IDs, even simply (0–2)
eco-friendly EPP foam box
Interpretation:
0–4: Fix returns and cleaning first.
5–8: Pilot-ready (one lane, one design).
9–12: Scale-ready (standardize sizes + tracking).
eco-friendly EPP foam box
2025 eco-friendly EPP foam box trends and what to do next
In 2025, the biggest shift is simple: buyers want proof, not promises. That means rotation tracking, end-of-life planning, and documented cleaning routines.
eco-friendly EPP foam box
Latest developments you’ll see more in 2025
Improved foam density: Better insulation without extra weight
Modular designs: Easier stacking and storage
Tracking-ready surfaces: Label zones built for IDs and scanning
eco-friendly EPP foam box
Market insight you can act on
Reusable packaging wins when it reduces labor. If packing becomes faster and damage drops, adoption becomes easy. If cleaning is slow and returns are messy, the system collapses.
Frequently Asked Questions
Q1: Is an eco-friendly EPP foam box biodegradable?
No. Its sustainability comes from long reuse and end-of-life recycling paths, not biodegradation.
eco-friendly EPP foam box
Q2: Can I recycle an eco-friendly EPP foam box in curbside bins?
Sometimes no. Local acceptance varies, so many programs require drop-off or take-back partners.
Q3: How long can an eco-friendly EPP foam box be reused?
With proper handling, it can be reused dozens or even hundreds of times. Inspect regularly to protect insulation performance.
eco-friendly EPP foam box
Q4: What’s the biggest operational risk with an eco-friendly EPP foam box?
Returns and cleaning. If boxes don’t come back—or come back wet and dirty—benefits drop quickly.
eco-friendly EPP foam box
Q5: Is an eco-friendly EPP foam box safe for food delivery?
Often yes, but “safe” depends on intended use, cleaning SOP, and supplier documentation. Align it with your hygiene plan.
eco-friendly EPP foam box
Q6: What should I track to prove my eco-friendly EPP foam box program works?
Return rate, rotations per box, loss rate, damage rate, and where retired boxes go. Simple data beats perfect claims.
eco-friendly EPP foam box
Summary and recommendations
An eco-friendly EPP foam box is worth it when you can reuse it many times, clean it quickly, and retire it responsibly. Your biggest wins come from higher return rates, fewer damaged shipments, and more repeatable packing. Start with one lane, one box size, and a simple cleaning + inspection SOP. Then scale only after your loop stays stable for several weeks.
Your next steps (fast and practical)
Pick one repeat lane for a 2-week pilot.
Choose one eco-friendly EPP foam box size with a simple latch.
Track return rate + damage rate daily.
Fix cleaning and drying flow before expanding.
eco-friendly EPP foam box
About Tempk
At Tempk, we focus on eco-friendly EPP foam box solutions designed for real cold chain operations. We help you balance insulation performance, durability, and sustainability without adding unnecessary complexity. We also support practical rollout steps like size selection, reuse-loop planning, and simple inspection rules.
eco-friendly EPP foam box
Next step: Share your lane duration, payload size, and return scenario, and we’ll recommend a practical eco-friendly EPP foam box approach you can pilot quickly.
Chemical-Resistant EPP Storage Container (2025)
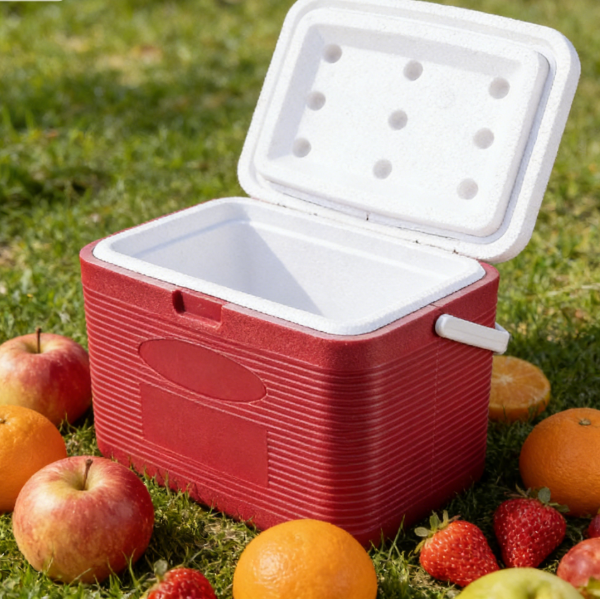
Chemical-Resistant EPP Storage Container in 2025?
A chemical-resistant EPP storage container helps you protect products in places where spills, wash-downs, and disinfectants are part of normal work. In real operations, a reusable EPP tote can often last hundreds of cycles, while EPS and basic plastics may fail much sooner under cleaning and handling pressure. You do not need perfect chemistry knowledge to choose well. You just need a practical method that matches your chemicals and workflow.
This article will help you answer:
How a chemical-resistant EPP storage container resists splashes in daily handling
How to run a quick chemical compatibility for EPP foam containers check
How to choose density, wall thickness, and lids that fit your workflow
How to plan cleaning and sanitizing EPP storage containers without damage
How to validate performance with EPP container testing (immersion, wipe, splash)
What 2025 trends are changing returnable packaging decisions
What makes a chemical-resistant EPP storage container different?
A chemical-resistant EPP storage container is made from expanded polypropylene (EPP), a closed-cell foam that resists liquid uptake and absorbs impact. That “closed-cell” detail matters. It helps most splashes stay on the surface instead of soaking in. This makes cleaning faster and reduces odor traps.
Here is the key idea you should remember: chemical resistance is not a label—it’s a fit. It depends on chemical family, concentration, temperature, and contact time. Think of EPP like a rain jacket, not a submarine. It handles splashes well when you wipe and rinse on time.
Closed-cell behavior in plain language
EPP is full of tiny sealed pockets. Liquids do not “drink in” quickly like open-cell foams. So your container stays more stable after repeated wash-downs. That stability is why many teams use a chemical-resistant EPP storage container in cold chain staging, food rooms, labs, and industrial storage.
| What you care about | What EPP does well | Where to be careful | What it means for you |
|---|---|---|---|
| Splash exposure | Liquids bead on the surface | Don’t leave spills sitting | Faster cleaning, less residue |
| Impacts and drops | Rebounds instead of cracking | Sharp metal edges can gouge | Fewer broken corners |
| Temperature swings | Insulates and stays stable | Bad lid fit hurts results | More predictable temperatures |
| Wash-down routines | Handles many mild cleaners | Avoid harsh solvent habits | Longer service life |
Practical tips you can use today
Wash-down zones: Wipe and rinse quickly to reduce contact time.
Forklift zones: Add simple rack guards to prevent sharp scrapes.
Mixed-chemical areas: Color-code containers by zone to reduce mistakes.
Real-world example: A site that used one tote everywhere reduced damage after placing a chemical-resistant EPP storage container near the sanitation sink, where exposure was highest.
Which chemicals can a chemical-resistant EPP storage container handle?
A chemical-resistant EPP storage container often performs best with water-based cleaners, detergents, and many mild acids or mild alkalis used in routine sanitation. Problems usually start with long soaking, high heat, or strong solvent-type chemicals. Strong oxidizers can also be risky, especially with heat and long dwell time.
You can make this simple by asking four questions:
What chemical family is it?
How strong is it (concentration)?
How hot is it (temperature)?
How long does it touch the container (time)?
If any answer is “high,” your risk rises fast.
A fast chemical compatibility for EPP foam containers check
Use this quick decision tool before you standardize a chemical-resistant EPP storage container across a facility:
Is contact mostly splashes and wipe-downs (minutes, not hours)?
If yes, EPP is often a strong candidate.
Is the chemical mostly water-based (detergent, sanitizer, mild cleaner)?
If yes, run a short pilot test.
Is it a strong solvent or fuel-like liquid?
If yes, treat it as high risk and use a barrier or different material.
Is contact hot or long (heated wash or soak tank)?
If yes, increase caution and test under worst-case conditions.
| Chemical category (examples) | Typical risk for EPP | Common mismatch sign | What you should do |
|---|---|---|---|
| Water-based detergents | Low | Little change | Standardize with routine rinsing |
| Dilute alkaline cleaners | Low–Medium | Surface dulling | Short contact time + thorough rinse |
| Dilute acids (light descalers) | Low–Medium | Slow surface change | Test repeated exposure cycles |
| Oils and greases | Medium | Staining, odor | Improve rinse + drying discipline |
| Strong solvents / fuels | High | Swelling, softening | Avoid or add a barrier liner |
| Strong oxidizers | High | Brittleness, surface damage | Validate carefully before rollout |
Practical tips and suggestions
Test your exact product: Brand and additives can change results.
Reduce contact time: Two minutes of wiping beats two hours of soaking.
Use barriers when needed: A thin liner can separate high-risk liquids.
Real-world example: A team using strong solvent for label residue saw softening near the cleaning station. Switching to a milder approach restored reliable use.
How does a chemical-resistant EPP storage container perform in cold chain staging?
A chemical-resistant EPP storage container for cold chain staging wins when your environment combines three stresses at once: moisture, temperature swings, and aggressive cleaning. Cold chain operations are tough because the container is not only “cold.” It is also wet, handled fast, stacked high, and washed often.
EPP typically stays stable under those combined conditions. It resists cracking and does not soak up liquids the way weaker materials can. That helps you control hygiene and reduce unexpected failures.
Cold chain performance comparison you can use
This type of comparison matters because it links material choice to real operating cost:
| Feature | Standard plastic | EPS foam | Chemical-resistant EPP | What it means for you |
|---|---|---|---|---|
| Insulation stability | Medium | High | High | Better temperature consistency |
| Chemical durability | Low | Very low | High | Safer wash-down routines |
| Moisture resistance | Medium | Low | Very high | Less contamination risk |
| Typical reuse cycles (range) | 50–100 | 20–30 | 300+ | Lower replacement burden |
Chemical-resistant returnable packaging for cold chain: where it pays back
A chemical-resistant EPP storage container usually pays back in three ways:
Fewer breakages: Less cracking means fewer emergency replacements.
Faster cleaning: Non-absorbing surfaces rinse and dry more predictably.
More stable audits: Cleaner equipment reduces “mystery odor” and residue issues.
Practical tips for cold rooms
Use lids when odors matter: Lids reduce drip exposure and cross-contact.
Avoid “freezer-to-hot-wash shock”: Let totes equalize before harsh cleaning.
Set stacking rules: High stacking magnifies small deformations over time.
Operational story: A cold chain team reduced cleaning time per tote after improving rinse discipline and using lidded EPP near high-splash areas.
How do you choose the right chemical-resistant EPP storage container?
Choosing the right chemical-resistant EPP storage container starts with workflow, not the catalog photo. Ask where it lives, how it is cleaned, what chemicals touch it, and how it is stacked. Then pick the structure: density, wall thickness, lid style, and labeling.
A simple analogy: it is like choosing work gloves. Thin gloves feel cheaper at first. Heavy-duty gloves feel easier after a long shift. In harsh environments, “easy after a month” beats “cheap on day one.”
Key specs that matter (without the jargon)
EPP density: Higher density usually improves strength and durability.
Wall thickness: Thicker walls improve insulation and reduce warping risk.
Design: Reinforced corners and stable stack ribs reduce collapse issues.
Surface and hygiene details: Smooth interiors clean faster and hold less residue.
Decision helper: which container fits you?
| Your scenario | Recommended EPP feature | Why it matters |
|---|---|---|
| Frequent cleaning | Higher-density EPP | Better chemical and impact tolerance |
| Long cold storage | Thicker walls | More stable insulation performance |
| Automated handling | Reinforced edges | Reduces damage from repeated impacts |
| Food contact zones | Smooth inner surfaces | Easier sanitation and faster drying |
Selection scorecard: your 60-second self-test
Give yourself 1 point for each “yes.” The higher the score, the more you should prioritize stronger specs.
We have wash-down zones with frequent spray.
Containers stack more than three high.
Forklifts or pallet jacks touch containers daily.
We use more than one chemical type in one area.
Containers move between hot and cold environments.
We need lids to prevent drips, odors, or dust.
We require traceability (labels, barcodes, tags).
We cannot tolerate staining or odor retention.
Score guidance:
0–3: A basic chemical-resistant EPP storage container is usually enough.
4–6: Prioritize lids, smooth interiors, and stronger corner protection.
7–8: Consider higher density, stricter zone control, and barrier liners.
Practical buying tips you can use immediately
Ask about exposure testing: Don’t accept “it’s polypropylene” as proof.
Check reuse expectations: Total cost beats unit price.
Validate sanitizer fit: Your cleaning chemistry decides real lifespan.
Real-world scenario: A site reduced mis-sorts by using one color per zone. Clear rules reduced damage and rewashing time.
How to run EPP container testing (immersion, wipe, splash) in 2025
If you want confidence, do not guess. Test. A chemical-resistant EPP storage container should be validated the way you actually use it: splash, wipe, repeat, and sometimes short soak. Full immersion testing alone can be unrealistic. Wipe-only testing can be too gentle.
A balanced approach gives you usable answers fast.
A simple 7-day shop-floor test you can run
Follow this mini plan before buying at scale:
Label three sample containers with date and chemical name.
Apply chemical by your real method (spray, wipe, splash).
Hold contact for your real time (example: 5–15 minutes).
Rinse and dry using your real SOP.
Repeat daily for 7 days.
Check for softness, swelling, cracking, odor, or tackiness.
Do a stress check: stack weight and handle like a normal shift.
| Test type | What you do | What you look for | What it tells you |
|---|---|---|---|
| Splash-and-wipe | Apply, wait, wipe off | Surface change | Matches daily reality |
| Short soak | 15–30 minutes | Softening, swelling | Finds hidden risks |
| Repeated cleaning | Clean daily | Odor, staining | Predicts long-term usability |
Pass/fail checklist for chemical compatibility testing for EPP containers
Stop and investigate if you see:
Surface feels tacky or unusually soft
Corners show gouges from metal contact
Persistent odor after cleaning
Lid fit becomes loose or uneven
Stacking becomes unstable due to warping
Practical tips to make testing meaningful
Test the hottest case: Warm chemical + longer contact is your risk peak.
Use real tools: Same brushes and cloths your team uses daily.
Record simple notes: Photos + pass/fail beats vague opinions.
Real-world example: Two samples looked similar on day one. After repeated cleaning, one retained odor. The other became the standard.
Cleaning and sanitizing EPP storage containers without damage
Cleaning and sanitizing a chemical-resistant EPP storage container works best when you control three levers: chemical strength, contact time, and rinse quality. Over-strong mixes can shorten lifespan. Under-rinsing can leave residue that attracts dirt and odor.
Consistency beats intensity. Think brushing teeth, not power washing a wall.
Cleaning SOP template for repeatable results
Dry removal: Remove debris before wet cleaning.
Pre-rinse: Rinse with water to remove loose residue.
Clean: Apply approved cleaner at the right dilution.
Dwell: Let it work briefly, then lightly scrub if needed.
Rinse: Rinse until the surface feels clean, not slick.
Sanitize (if required): Follow your contact time rules.
Dry: Air dry in a clean zone before reuse.
| Step | Purpose | Common mistake | What it causes |
|---|---|---|---|
| Pre-rinse | Removes loose residue | Skipping it | More scrubbing later |
| Correct dilution | Protects material | Over-strong mix | Faster wear and odor |
| Thorough rinse | Removes chemicals | Quick rinse only | Residue and staining |
Cleaning and sanitation for EPP storage bins: common mistakes to avoid
| Mistake | Why it happens | Better practice | Your benefit |
|---|---|---|---|
| Long chemical soak | “Set and forget” cleaning | Short contact + rinse | Lower swelling risk |
| Strong solvent use | Fast stain removal | Safer remover + liner | Longer container life |
| Cross-zone reuse | Convenience | Zone color coding | Lower contamination risk |
Practical tips you can use today
Use measured dilution tools: Guessing is how damage starts.
Separate “dirty” and “clean” racks: Don’t re-contaminate cleaned totes.
Avoid sharp scraping: Use soft brushes to protect surface skin.
Real-world scenario: A “mystery odor” issue was solved by improving rinsing and drying, not by using stronger chemicals.
Special scenario: anti-static EPP container for electronics handling
If you ship electronics, the “chemical” risk may be only half the story. Static can be the other half. An anti-static EPP container for electronics handling helps you reduce static discharge risk in picking, staging, and return loops.
Here is the simple rule: if static damage is expensive, treat packaging as a safety system. Your container choice should align with your ESD (electrostatic discharge) procedures, labeling, and handling methods.
Practical tips for electronics workflows
Use anti-static grades only where you need them (avoid over-spec costs).
Keep cleaning chemistry consistent (mixed cleaners can create surprises).
Add traceability labels so anti-static totes do not “drift” into other zones.
2025 trends for chemical-resistant EPP storage container decisions
In 2025, teams are treating returnable packaging as a performance system, not “just a box.” That means chemical resistance is evaluated together with cleanability, traceability, and reuse cycles. Fast adopters are building simple site-level tests and locking a short list of approved chemicals and approved models.
Latest progress you should watch
Site-level testing playbooks: Short, repeatable checks before scaling
Cleaner designs: Smoother interiors and better drainage features
More tracking: IDs and scan zones to reduce loss and support audits
Market pressure is making this practical. Labor is expensive. Downtime is painful. A chemical-resistant EPP storage container that cleans faster can pay back through lower rework, not only lower replacement spend.
Frequently Asked Questions
Q1: Is a chemical-resistant EPP storage container safe for food areas?
It can be, if the grade is suitable and your hygiene rules are followed. Keep food and maintenance totes separate to reduce cross-contamination.
Q2: Can a chemical-resistant EPP storage container handle disinfectants every day?
Often yes, when dilution and rinse steps are controlled. Problems usually come from over-strong mixes, long dwell, or poor rinsing.
Q3: What is the solvent exposure risk for polypropylene foam?
Strong solvent-type chemicals can soften or swell polyolefin foams. If you must use them, test first and consider barrier liners.
Q4: What is the simplest way to validate chemical compatibility?
Run a splash-and-wipe test using your real chemical, time, and temperature for 7 days. Watch for softening, odor, warping, and lid fit issues.
Q5: Why does odor happen even when the container “looks clean”?
Odor often comes from chemical film, oils, or incomplete drying. Improve rinsing, separate odor-prone uses, and air-dry fully before stacking.
Q6: Should I choose lids for chemical resistance or hygiene?
Choose lids for both. Lids reduce drip exposure, block dust, and support zone control. Match lid style to your cleaning process.
Summary and recommendations
A chemical-resistant EPP storage container helps you control spills, survive wash-downs, and reduce failures in tough workflows. You get the biggest benefit when you match the tote to real exposure, not guesses. Use chemical family + time + temperature as your decision base. Then validate with a simple 7-day test. Finally, protect performance with consistent dilution, thorough rinsing, and clear zone rules.
Your next step (CTA)
Pick one high-exposure area and pilot two options for 7 days. Track surface feel, odor, lid fit, and stacking stability. Then standardize the winning chemical-resistant EPP storage container with a one-page SOP your team can follow fast.
About Tempk
At Tempk, we work with cold chain and industrial teams that need packaging to survive real conditions—handling, cleaning, stacking, and return loops. We focus on practical details like cleanability, durability, and workflow fit. If you are evaluating a chemical-resistant EPP storage container, we can help you define exposure profiles, choose the right specs, and build a simple validation plan.
Next step: Share your chemical list, cleaning routine, and stacking requirements, and we’ll help you map a container spec and a 7-day test plan you can run on-site.
Cold Chain Insulation Solutions for Seafood Products
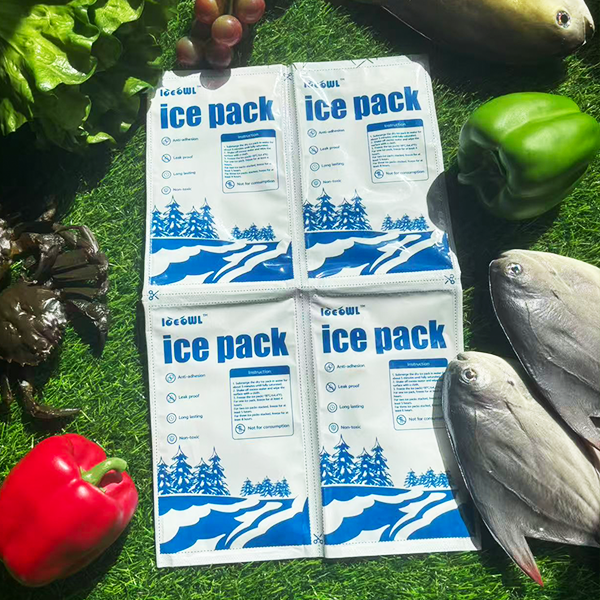
Cold Chain Insulation Solutions for Seafood Products?
You need cold chain insulation solutions for seafood products when “mostly cold” is not good enough. If a box warms for even a short window, seafood can lose texture, smell, and trust. In 2025, most programs design for fresh seafood near melting ice (~0°C) or chilled 0–4°C, and frozen seafood at ≤ -18°C, with buffer for delays. This guide shows you how to choose materials, pack consistently, and validate performance with simple data.
This article will help you answer:
How cold chain insulation solutions for seafood products protect fresh vs frozen lanes
How to pick EPS vs EPP vs VIP insulation for seafood products without overspending
How meltwater drainage seafood shipping packaging prevents leaks and odor
How to right-size insulated box for fresh seafood delivery to stop shipping air
How a last-mile cold chain insulation strategy for seafood reduces porch-time failures
How to validate insulated packaging for seafood cold chain with a repeatable test plan
What are cold chain insulation solutions for seafood products?
Cold chain insulation solutions for seafood products are packaging systems that slow heat gain and stabilize temperature from packout to receipt. Think of insulation like a winter coat: it does not create cold, but it helps you keep the cold you packed. A complete system includes the outer carton, insulation, liner, coolant, containment, and a consistent closure method.
In real shipping, the weakest link usually wins. A loose lid, big air gaps, or messy meltwater can ruin strong insulation. That is why cold chain insulation solutions for seafood products must work in hubs, vans, and doorsteps—not just in lab specs.
The seafood failure map (temperature + water + time)
Seafood is wet and odor-sensitive. So your system has to manage temperature, moisture, and containment together. If you fix only one, you still lose.
| Failure risk | Typical cause | Fix you can standardize | What it means for you |
|---|---|---|---|
| Temperature spike | Thin insulation, air gaps | Tighter fit + better closure | Fewer spoilage claims |
| Meltwater leakage | Weak bagging, no drainage | Double-bag + absorbents/drain layer | Cleaner delivery, fewer carrier issues |
| Odor transfer | Poor seals, trapped air | Tight liner + sealed inner bags | Better unboxing experience |
| Crush damage | Weak carton, soft structure | Stronger carton + rigid liner | Fewer refunds and reships |
Practical tips you can use this week
Short lanes (≤24h): prioritize sealing, tight fit, and moisture control first.
Mid lanes (24–48h): upgrade insulation or add balanced coolant coverage (sides + top).
Long lanes (48–72h+): redesign the whole system, not just “add more ice.”
Practical reality: Many failures come from small gaps—lid not tight, packs placed wrong, or liners too loose.
What temperature targets should cold chain insulation solutions for seafood products hit?
Your cold chain insulation solutions for seafood products must match the product state, not the marketing promise. Fresh seafood often aims for melting-ice conditions (~0°C) or a controlled 0–4°C band. Frozen seafood typically targets ≤ -18°C to avoid thaw-refreeze damage. If you ship histamine-risk fish, tighter time–temperature control is critical.
Don’t guess your “temperature truth.” Define a target band, a max excursion rule, and a time assumption. Then train and audit against that standard.
A simple target table your team can follow
| Seafood type | Practical target | Typical coolant | Key watch-out | What it means for you |
|---|---|---|---|---|
| Fresh seafood (iced) | ~0°C (melting ice) | Flake/slurry ice | Meltwater contact | Drainage and containment are mandatory |
| Chilled seafood (no wet ice) | 0–4°C | Gel packs / PCM | Edge-freezing risk | Avoid direct coolant contact on delicate SKUs |
| Frozen seafood | ≤ -18°C | Dry ice / frozen PCM | Thaw-refreeze cycling | Insulation + buffer time matter most |
| Histamine-risk fish (example) | <4.4°C with minimal warm time | Ice/PCM + strict SOP | “small warm-ups” | Monitoring matters more than you think |
| Superchilled (advanced) | -3 to -1°C (tight control) | Tuned PCM | Partial freezing risk | Use only with validated SOPs |
Practical tips to avoid common traps
Separate fresh and frozen packouts. One “universal” packout causes silent failures.
Design for the last 2–6 hours. Doorstep time can be worse than linehaul.
If quality complaints persist, log the route. “Arrives cold” can hide mid-route spikes.
Real scenario: One shipper reduced complaints by splitting SOPs: one for fresh-on-ice, one for hard frozen.
Which insulation materials work best for cold chain insulation solutions for seafood products?
The best cold chain insulation solutions for seafood products are the ones that hold temperature and survive wet, heavy, rough handling. Thickness helps, but fit and closure often matter more. For seafood, you also need moisture tolerance and compression strength.
Start with lane difficulty (hours + heat + last-mile exposure), then choose the smallest upgrade that removes your top failure mode.
EPS vs EPP vs VIP insulation for seafood products
| Insulation option | Typical strengths | Typical trade-offs | Best-fit lanes | What it means for you |
|---|---|---|---|---|
| EPS foam | Low cost, solid thermal value | Fragile, disposal varies | One-way lanes | Good starter option, needs waste plan |
| EPP foam | Durable, reusable, impact resistant | Higher upfront cost | Closed-loop, repeat lanes | Lower waste over many trips |
| PU foam panels | Strong insulation per thickness | Damage/disposal complexity | Mid–long lanes | Stable performance, higher friction |
| VIP panels | Very high insulation in thin walls | Cost, needs protection | Premium/long lanes | Longer hold time without huge boxes |
| Reflective liners | Reduce radiant heat | Not enough alone | Add-on layer | Works best as a “booster,” not a core |
Practical tips for better insulation performance
Close air gaps. A loose lid can erase thick insulation gains.
Right-size before you upgrade materials. Smaller air volume holds longer.
Choose ruggedness first in wet programs. A collapsed box fails faster than a thinner box.
Real example: Some teams gain hours of performance by improving closure and liner fit—without changing insulation thickness.
Which coolants pair best with cold chain insulation solutions for seafood products?
Cold chain insulation solutions for seafood products work when insulation slows heat and coolant absorbs it—together. For fresh seafood, wet ice is naturally stable around melting temperature, but it creates meltwater. For chilled (0–4°C), gel packs or PCMs often reduce mess. For frozen, dry ice or frozen-range PCMs usually provide the strongest buffer.
Choose coolant based on the target band, then validate placement. “Top-only” coolant placement commonly creates hot corners.
Coolant selection table (simple and practical)
| Coolant | Best around | Best for | Watch-out | What it means for you |
|---|---|---|---|---|
| Wet ice | ~0°C | Fresh-on-ice programs | Meltwater leakage | Requires drainage + containment discipline |
| Gel packs | 0–5°C (varies) | Short–mid chilled lanes | Uneven cooling | Needs conditioning + balanced placement |
| PCM (tuned) | Specific setpoint | Stable chilled control | Higher cost | Reduces swings and edge-freezing risk |
| Dry ice | Deep frozen | Frozen lanes, long duration | Venting/label rules | Powerful, but requires training and SOPs |
meltwater drainage seafood shipping packaging that actually works
Your meltwater plan should be designed, not improvised. Treat moisture like a second product.
| Packing element | Best practice | Why it matters | Your benefit |
|---|---|---|---|
| Bagging | Double-bag + tight seals | Prevent leaks and odor | Fewer carrier issues |
| Drain layer | Raised tray or drain channel | Keeps product out of meltwater | Better texture and smell |
| Absorbents | Pads sized for worst-case | Captures leakage | Cleaner unboxing |
| Closure | Same tape pattern every time | Stops “lid leaks” | Repeatable results |
Practical tips and suggestions
Use side + top coolant for coverage. Corners fail first.
Avoid direct coolant contact when partial freezing hurts quality.
If you use dry ice, document handling rules and keep it consistent.
Practical case: A shipper improved customer trust by making boxes arrive clean and dry—without changing temperature targets.
How do you right-size cold chain insulation solutions for seafood products to stop shipping air?
Right-sizing is the fastest cost and performance win in cold chain insulation solutions for seafood products. When you ship air, you pay freight for empty space and you pay coolant to control it. A smaller, tighter shipper often holds temperature longer with less refrigerant.
Think “thermos, not suitcase.” Tight fit reduces air movement and hot spots.
The “3 measurements” right-size tool (5 minutes)
Measure product footprint (L×W×H) including inner bags/trays
Measure coolant footprint (packs/ice/dry ice space)
Add buffer space only for crush protection and void control
| Factor | What to measure | Simple rule | Common mistake | What it means for you |
|---|---|---|---|---|
| Product footprint | Packed product size | No rattling | Oversized “just in case” | Higher heat gain, higher cost |
| Coolant footprint | Volume + placement | Surround, don’t float | Top-only placement | Hot corners and warm ends |
| Buffer space | Void fill + protection | Enough to prevent crush | Too much empty space | You end up “shipping air” |
Practical tips you can use today
Use a fit gauge (simple template) so packers pick the right size fast.
Standardize packout layouts by SKU family (photos beat paragraphs).
Keep a seasonal “hot-day” packout, not year-round overspec.
Real example: Many programs cut freight spend and reduce excursions after shrinking box size one step.
How should you pack seafood using cold chain insulation solutions for seafood products?
Packing is where cold chain insulation solutions for seafood products succeed or fail. Your design must be repeatable at peak volume. If packout varies by person, results vary by day.
Below are two SOP-friendly flows you can train in minutes.
Packing flow for chilled seafood (0–4°C or ~0°C)
Pre-chill product to the target range before packing
Pre-condition gel packs/PCM to a consistent setpoint
Add a bottom absorbent or drain layer
Double-bag seafood and seal tightly
Place coolant sides + top, then fill voids
Close liner fully and seal carton with a consistent tape pattern
Packing flow for frozen seafood (≤ -18°C)
Confirm product core is fully frozen before packout
Use insulation matched to duration + ambient risk
Add dry ice/frozen PCM with safe separation and venting approach
Reduce void space to limit convection
Close and seal consistently, then label per your SOP
Practical tips and suggestions
Time matters: set a hard “max staging time” between packout and pickup.
Placement matters: make coolant placement a diagram, not a guess.
Clean matters: a dry outer carton improves carrier handling and customer trust.
Actual outcome: Teams often gain reliability by standardizing closure and placement—before buying premium insulation.
How do you validate and monitor cold chain insulation solutions for seafood products in 2025?
In 2025, cold chain insulation solutions for seafood products should be proven with data, not hope. Start small: a sampling plan with low-cost temperature loggers, consistent placement, and clear pass/fail rules. This reduces disputes, improves SOPs, and prevents overspending.
Validation also helps you upgrade the right variable. If warming happens late, fix closure or top coverage. If it warms early, upgrade insulation level.
A validation plan you can run this week
| Test | What you simulate | What to record | Pass/fail idea | What it means for you |
|---|---|---|---|---|
| Average day | Normal route time | Max temp + time above limit | Stays in target band | Confident baseline |
| Hot day | High ambient + sun risk | Temperature curve | No long warm plateau | Summer readiness |
| Delay scenario | +12–24h hold | End temp + trend | Still safe at receipt | Fewer surprise failures |
Seafood cold chain monitoring checklist (copy into SOP)
| Step | What you check | Example standard | What you do next |
|---|---|---|---|
| Pre-pack | Product temp | Meets target band | Re-chill or reject |
| Packout | Layout photos | Matches standard | Retrain if drift |
| Transit | Logger peak | No spikes above limit | Adjust process/coolant |
| Receipt | Condition | No leak, no softening | Root-cause review |
Quick self-test: are you under-protected?
Give yourself 1 point for each “yes”:
Do excursions happen mostly near delivery time?
Do failures cluster on hot days or Mondays?
Do you “add more ice” instead of fixing closure?
Does your liner fit loosely inside the carton?
Do you lack consistent pre-conditioning steps?
Score 3–5: you likely need a system upgrade.
Score 1–2: process and placement may fix it first.
How do you reduce last-mile risk with cold chain insulation solutions for seafood products?
Cold chain insulation solutions for seafood products often fail in the last mile, not the linehaul. Porch time, missed delivery, and hot-vehicle dwell can “spend” shelf life quickly. Your best lever is operational: attended delivery rules, alerts, and lane segmentation.
Treat last mile like a relay race. If handoffs break, insulation cannot save the lane.
last-mile cold chain insulation strategy for seafood (simple rules)
| Last-mile risk | What it looks like | Best control | Packaging implication | What it means for you |
|---|---|---|---|---|
| Doorstep exposure | Box in sun | Delivery windows + alerts | You can reduce “overkill” | Lower cost, fewer refunds |
| Missed delivery | Retry next day | Signature/pickup | Less dwell time | Higher success rate |
| Hot van dwell | Long route delay | Routing rules | Stronger insulation needed | Consistency on peak days |
Practical tips you can implement fast
Use earlier delivery windows for fresh seafood and premium kits.
Create two delivery modes: attended vs unattended (validated only).
Upgrade only risky lanes, not every order.
Real-world pattern: The final 2–6 hours can be the most dangerous window.
How do you cut total cost and carbon without sacrificing quality?
The lowest-cost cold chain insulation solutions for seafood products are the ones that prevent failures. Refunds, reships, and brand damage are the hidden budget killers. After that, right-size, simplify materials, and consider reuse only when returns are real.
The most “eco-friendly” move is often fewer replacement shipments. Waste prevention beats perfect materials.
Cost and sustainability levers (in the right order)
| Lever | What you change | Why it works | Risk to watch | What it means for you |
|---|---|---|---|---|
| Fewer failures | Better SOP + last-mile control | Avoids reships and waste | Needs discipline | Biggest impact fast |
| Right-sizing | Smaller cartons | Lower freight + better hold | SKU complexity | Lower cost per order |
| Material simplification | Fewer mixed parts | Easier disposal | Performance variance | Better customer compliance |
| Reuse programs | Reusable EPP systems | Lower waste per trip | Return rates | Best long-term option |
Practical tips
Track replacement rate like a KPI (it is cost and carbon).
Keep a summer packout that prevents seasonal claim spikes.
Write disposal instructions in plain language customers will follow.
2025 latest developments and trends in seafood cold chain insulation
In 2025, cold chain insulation solutions for seafood products are moving from “thicker is safer” to “validated, right-sized, lane-specific.” Teams are adopting two-tier packouts (standard + hot-risk), improving moisture-tolerant liners, and using lightweight monitoring to reduce disputes. High-performance insulation is also trending where dimensional weight penalties are painful.
Latest progress at a glance
Lane-based packouts: fewer “one box for everything” policies
Moisture-smart designs: better drainage layers and leak-resistant containment
Smarter monitoring: sampling loggers and clear pass/fail standards
Thinner high-performance builds: stronger hold time without oversized boxes
Selective superchilling: only where SOP control is tight and validated
Frequently asked questions
Q1: What are cold chain insulation solutions for seafood products in simple terms?
They are packaging and SOP choices that keep seafood in its target temperature range during real shipping delays.
Q2: Do fresh and frozen seafood need different packouts?
Yes. Fresh needs near-ice stability and moisture control, while frozen needs deep cold and minimal thaw-refreeze cycling.
Q3: Is thicker insulation always better?
No. Right-sizing, tight closure, and consistent placement often beat thicker insulation in oversized boxes.
Q4: What is the easiest first improvement to make?
Standardize packout layout (photos), tighten closure, and add a drain/absorbent plan for wet programs.
Q5: How often should I test packaging?
At least seasonally, and any time you change lanes, box sizes, coolants, or carriers.
Summary and recommendations
Cold chain insulation solutions for seafood products work best as a complete system: insulation, coolant, containment, and repeatable packing steps. Start by defining targets (fresh vs frozen) and segmenting lanes by difficulty. Then fix the basics: tight fit, strong closure, balanced coolant placement, and moisture control. Finally, validate with a simple hot-day and delay test so you upgrade only what the data proves.
Your next-step action plan (simple and fast)
Define one target band per SKU family (fresh vs frozen).
Build two packouts: standard and hot-risk.
Right-size cartons using the “3 measurements” method.
Run 3 tests (average / hot / delay) with one logger placement standard.
Add last-mile controls for high-risk lanes and seasons.
About Tempk
At Tempk, we build cold chain insulation solutions for seafood products as practical, repeatable systems. We focus on insulation selection, coolant strategy, moisture control, and packout SOPs your team can follow at speed. We also help you validate performance with a simple seasonal test plan, so you reduce claims without overspending on packaging.
Next step: Share your product state (fresh or frozen), lane duration, and last-mile risk (attended vs unattended). We’ll outline a lane-specific system direction and a validation checklist you can run this week.