


Cold Chain Requirements for Handling Fresh Seafood
Cold Chain Requirements for Handling Fresh Seafood
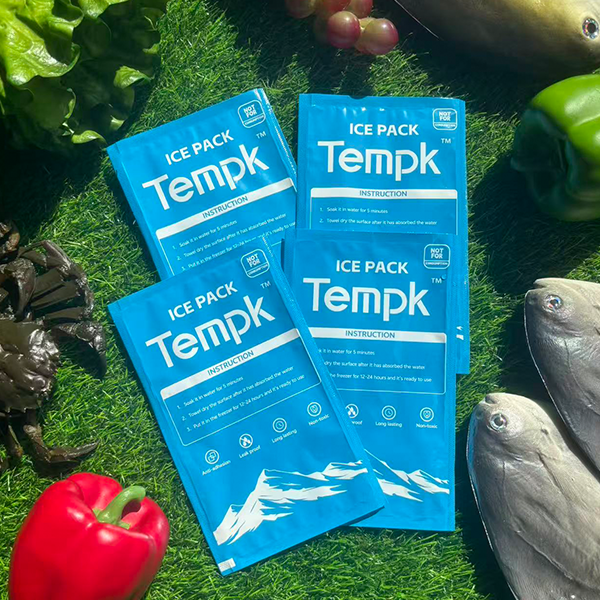
Cold Chain Requirements for Handling Fresh Seafood?
Fresh seafood is fragile. When cold chain requirements for handling fresh seafood slip, quality drops fast and risk rises. A single temperature failure can cut value by up to 30%, and better routines can reduce spoilage 15–30%. Use this guide as a practical baseline, and always follow local rules. Done right, cold chain requirements for handling fresh seafood keep products cold, clean, and traceable from dock to door.
Cold chain requirements for handling fresh seafood: what you’ll learn
What “cold enough” really means for fresh seafood cold holding temperature 41°F (5°C) and near-melting-ice handling
How to pass receiving every time so cold chain requirements for handling fresh seafood don’t fail at the door
How to control histamine risk with practical histamine control time temperature seafood rules
How to keep shellfish records simple with molluscan shellfish tag retention 90 days habits
How to prevent disputes and shrink using seafood transport temperature monitoring logs
Cold chain requirements for handling fresh seafood: What temperature targets work?
Direct answer: Cold chain requirements for handling fresh seafood work best when you set one clear “operating target” and one hard ceiling. Most teams succeed with 0–4°C (32–39°F) as the daily target and never above 5°C (41°F) in cold-holding zones. In many U.S. retail settings, the FDA Food Code model uses 41°F (5°C) as a practical cold-holding benchmark. This approach makes cold chain requirements for handling fresh seafood easier to train and easier to audit.
Seafood is like fresh milk, but more sensitive. It has high moisture and enzymes that keep working after harvest. Cold chain requirements for handling fresh seafood slow those processes, but only when temperatures stay stable. Your goal is not “as cold as possible.” Your goal is consistent cold you can repeat every shift.
Fresh seafood cold holding temperature 41°F (5°C): set an operating target
Use a two-line rule. It keeps cold chain requirements for handling fresh seafood clear on busy days:
Operating target: 0–4°C (32–39°F) for fresh seafood on ice or in cold storage
Compliance ceiling: ≤5°C (41°F) in any cold-holding zone
| Temperature goal | What it looks like | What it protects | What it means for you |
|---|---|---|---|
| 0–4°C (32–39°F) | Seafood nestled in draining ice | Texture + shelf life | Fewer “soft fish” complaints |
| ≤5°C (41°F) | Cold holding stays stable | Safety margin | Lower regulatory and recall risk |
| “Melting ice” ~0°C | Ice contact + drainage | Consistency | Easier training and fewer swings |
Practical tips you can apply today
To meet cold chain requirements for handling fresh seafood, probe the thickest part of the fish, not the surface.
Treat display like a refrigerator: lids closed, ice rotated, meltwater drained.
Separate working bins from backup stock so handling heat does not warm everything.
Real-world case: A fish counter reduced end-of-day waste after switching to “fish in draining ice,” not “ice on top.”
Cold chain requirements for handling fresh seafood at receiving: what to check in 3 minutes?
Direct answer: Receiving is the cheapest control point in cold chain requirements for handling fresh seafood. You want three proof points: the load arrived cold, the cooling media is still working, and the shipment shows no clear abuse. Tight receiving discipline makes cold chain requirements for handling fresh seafood easier everywhere else.
Receiving is where borderline product sneaks in. Many operations use 40°F (4.4°C) as a simple internal fish temperature target at the core within cold chain requirements for handling fresh seafood. Warm fish can look fine at first and collapse later. Treat receiving like a gate.
A 3-minute receiving checklist you can run every delivery
Run the same order every time. It reduces debate and speeds training for cold chain requirements for handling fresh seafood.
| Receiving check | Pass standard | Fail signal | What it means for you |
|---|---|---|---|
| Truck condition | Clean, cold, organized | Strong odors, pooling water | Higher contamination and dispute risk |
| Ice/coolant | Seafood surrounded by ice | Wet cartons with little ice | Shorter shelf life |
| Product condition | Firm texture, clean sea smell | Sour or ammonia notes | Likely spoilage |
| Core temperature spot-check | ≤4.4°C (40°F) at the core (sample plan) | Warm centers | Faster spoilage and safety risk |
| Traceability | Lot/invoice readable | Missing or unclear IDs | Recall and complaint pain |
Practical tips you can apply immediately
Use a “hold rack”: questionable deliveries stay isolated until approved.
Standardize rejection reasons: staff should not argue on every load.
Photograph exceptions: one photo often ends supplier disputes fast.
Real-world case: A distributor reduced claims by logging temperature and taking a quick ice photo at receiving.
Cold chain requirements for handling fresh seafood: how to chill fast after harvest?
Direct answer: Cold chain requirements for handling fresh seafood start with speed. Your goal is to remove heat right after harvest, before bacteria and enzymes accelerate spoilage. Ice, slurry ice, or chilled seawater can work. The “best” method is the one that makes cold chain requirements for handling fresh seafood repeatable.
Heat is a countdown clock. The longer seafood stays warm, the more shelf life you lose. That is why cold chain requirements for handling fresh seafood are really “time + temperature.” You cannot re-chill your way back to peak freshness.
Cooling method comparison: crushed ice vs slurry ice vs chilled seawater
| Cooling method | Cooling speed | Cost level | Best use case |
|---|---|---|---|
| Crushed ice | Medium | Low | Small-scale handling and short turns |
| Slurry ice | Fast | Medium | High-value seafood and tighter specs |
| Chilled seawater | Very fast | High | Larger vessels with steady throughput |
Practical tips for rapid chilling
To meet cold chain requirements for handling fresh seafood, replace melted ice often.
Monitor core temperature. Surface readings miss warm centers.
Avoid tight stacking. Crowding traps heat and slows cooling.
Real-world case: A premium processor gained extra selling time after switching from crushed ice to slurry ice.
Cold chain requirements for handling fresh seafood in storage: how to hold near melting ice?
Direct answer: For cold chain requirements for handling fresh seafood, stability matters more than extreme cold. A reliable range is 0–4°C, and many workflows aim for conditions close to melting ice (~0°C) without freezing. This keeps quality high and makes cold chain requirements for handling fresh seafood easier to maintain.
Many teams try to over-chill and end up freezing edges. That mistake is common when cold chain requirements for handling fresh seafood are not written as simple daily targets. Freezing edges damages texture and increases drip loss.
Temperature of melting ice seafood: the two rules (contact + drainage)
Ice works when it does two things:
Touches the seafood (air gaps leak heat)
Drains meltwater away (standing water ruins quality)
| Storage setup | Best for | Weak spot | What it means for you |
|---|---|---|---|
| Whole fish in draining ice | Whole fish, short turns | Drainage discipline | Best texture retention |
| Covered trays + gel packs | Fillets, retail prep | Warm edges if packs thaw | Cleaner handling, less mess |
| Refrigerated room | Higher volume | Door-open heat spikes | Stable output if traffic is controlled |
Practical storage tips
Use racks or perforated inserts so fish sits above meltwater.
Calibrate thermometers weekly so “cold enough” stays true.
Store raw below ready-to-eat to prevent drips and contamination.
Real-world case: A retail counter improved smell and appearance after adding drainage channels and tray covers.
Histamine control time temperature seafood: how strict do you need to be?
Direct answer: If you handle histamine-prone species, cold chain requirements for handling fresh seafood must include clear time-and-temperature discipline. Histamine risk is not a smell test problem. Fish can look fine and still be unsafe if it spent too long warm. A simple “small batches + fast return to cold” rule keeps cold chain requirements for handling fresh seafood realistic.
You do not need complicated math. You need one house rule your team follows under pressure. Treat time out of cold like cash on the counter. You track it because you cannot get it back.
Decision tool: do you need histamine-level controls?
Answer Yes/No:
Are you handling common histamine-risk species (for example, tuna-family and similar fish)?
Will product sit unrefrigerated during trimming, filleting, or packing?
Are you shipping beyond same-day delivery without refrigerated transport?
If you answer “Yes” to two or more, treat histamine as a key hazard in your cold chain requirements for handling fresh seafood program.
| Workflow step | Best practice | What goes wrong | What it means for you |
|---|---|---|---|
| Receiving | Check core temp fast | Warm loads sneak in | Spoilage accelerates |
| Filleting | Small batches, quick return to cold | Long bench time | Quality drops fast |
| Re-icing | Ice contact + drainage | Meltwater pooling | Off-odors and soft texture |
Practical tips that cut risk without raising cost
To meet cold chain requirements for handling fresh seafood, batch your prep: 10–15 minutes, then back to cold.
Pre-chill trays and tools. Warm metal steals cold capacity.
Use a visible timer on prep tables to change behavior.
Real-world case: A sushi kitchen reduced complaints after limiting filleting batch size and re-icing immediately.
Cold chain requirements for handling fresh seafood: how to prevent cross-contamination?
Direct answer: Cold chain requirements for handling fresh seafood are not only about cold. They are also about clean. Cold slows bacteria, but it does not kill it. If raw juices spread, you create risk even when temperatures look perfect. Clean layout and drip control protect your cold chain requirements for handling fresh seafood program.
Make the system easy to follow. When staff are rushed, they follow the easiest path. If your layout forces separation, your cold chain requirements for handling fresh seafood hold up on busy days.
Set 3 zones so your team can win during rush
Use zones your team can remember:
Zone 1 (raw handling): scaling, gutting, cutting
Zone 2 (pack and store): clean containers, labeling, cold storage
Zone 3 (ready-to-eat): sushi, cooked seafood, sampling
| Control | What to standardize | What can fail | What it means for you |
|---|---|---|---|
| Separation | Color-coded tools | Tool mixing in a rush | Higher contamination risk |
| Sanitizing | Set schedule + test strips | “Looks clean” thinking | Hidden microbial load |
| Drip control | Leak-proof pans and liners | Juices in coolers | Odor and quality issues |
Practical hygiene tips
Sanitize on a timer (for example, every 2 hours during active prep).
Store raw below ready-to-eat. Gravity is not your friend.
Train with one sentence: “Raw tools never touch ready-to-eat surfaces.”
Real-world case: A seafood shop improved customer perception after switching to leak-proof pans and enforcing raw-only tools.
What monitoring logs and records prove cold chain requirements for handling fresh seafood?
Direct answer: If you can’t prove it, you didn’t control it. Cold chain requirements for handling fresh seafood become real when you log key control points and record corrective actions. Good records protect you in disputes, audits, and recalls. This is also where many Seafood HACCP-style programs focus: hazards, limits, checks, and records.
Do not drown in data. Keep it focused: receiving, cold holding, loading, delivery, and shellfish traceability. Those points decide whether cold chain requirements for handling fresh seafood hold under pressure.
Molluscan shellfish tag retention 90 days: make it painless
Use a simple routine:
Keep the tag with the container until it is empty
Write the last service/sale date on the tag
File tags by date in a dedicated binder
Keep for at least 90 days, then discard
| Record type | Minimum habit | Who owns it | What it means for you |
|---|---|---|---|
| Temperature logs | 2–4 checks per day | Shift lead | Faster issue detection |
| Receiving records | Every delivery | Receiver | Supplier accountability |
| Shellfish tags | File by last-use date | Manager | Traceability protection |
| Corrective actions | Every deviation | Supervisor | Proof you fixed issues |
A 2-minute self-audit (score yourself)
Give yourself 1 point for each “Yes”:
Do you log cold-holding temps at least twice daily?
Do you record delivery exceptions with photos?
Can you trace each lot to a supplier invoice fast?
Do you keep shellfish tags organized for 90 days?
Do you have a “hold and release” process for questionable product?
Score 4–5: strong.
Score 2–3: exposed during busy weeks.
Score 0–1: fix logs first before you scale volume.
Real-world case: A market avoided a broad recall by tracing one supplier lot quickly and pulling only affected product.
Cold chain requirements for handling fresh seafood during transport: how to avoid temperature abuse?
Direct answer: Transport is where cold chain requirements for handling fresh seafood break most often. Movement adds time, door openings, vibration, and weather. Your best defense is fast loading, pre-chilled vehicles, correct insulation, and a monitoring routine that makes cold chain requirements for handling fresh seafood provable.
Do not assume refrigeration solves everything. Many failures happen at the door: staging, loading, and delivery handoff. Cold chain requirements for handling fresh seafood survive when exposure time is minimized and proof is captured.
Seafood transport temperature monitoring logs: start simple, then scale
Start with three data points per lane:
Dispatch time and product condition
Ice/coolant layout and amount
Arrival temperature and condition check
| Transport style | Best for | Biggest risk | What it means for you |
|---|---|---|---|
| Insulated totes + ice | Short local drops | Meltwater soaking | Add drainage layer |
| Refrigerated vehicle | Higher volume | Door-open warming | Use strip curtains and fast loading |
| Overnight shipping | Longer lanes | Delays + heat | Stronger packout and proof needed |
Dry ice vs gel packs for seafood: quick reality check
| Cooling option | Works for fresh seafood? | Main risk | Best use |
|---|---|---|---|
| Flaked/crushed ice | Yes | Meltwater mess | Fresh, short to medium lanes |
| Gel packs | Sometimes | Warm edges when thawed | Cleaner fillet handling, short lanes |
| Dry ice | Usually no for “fresh” | Freezing damage + CO₂ handling | Frozen seafood or validated cases |
Practical transport tips
To meet cold chain requirements for handling fresh seafood, pre-cool vehicles before loading.
Plan route order: deliver the most fragile items first.
Add one low-cost logger per risky lane to find your worst route fast.
Real-world case: A distributor cut “arrived warm” claims after changing route order and adding arrival checks.
Cold chain requirements for handling fresh seafood: do you need HACCP and parasite controls?
Direct answer: If you process, repack, or manufacture seafood, cold chain requirements for handling fresh seafood often require HACCP-style control and records. HACCP means you define hazards, set limits, monitor, and document. In the U.S., FDA Seafood HACCP requirements are detailed in 21 CFR Part 123, and they push you to prove control with records. If you sell fish intended for raw or undercooked consumption, parasite controls must be backed by records.
Keep it lightweight. The best plan is the one your team actually uses. Cold chain requirements for handling fresh seafood become reliable when hazards, limits, checks, and corrective actions match your workflow.
Parasite destruction freezing requirements: a simple rule for raw-intended fish
Use one clear message for staff:
If it will be eaten raw, it must meet your validated parasite-freezing control or an equivalent documented control.
| Question | If “Yes” | If “No” | What it means for you |
|---|---|---|---|
| Will it be served raw? | Apply parasite control records | Standard chilling is fine | Avoid risky marketing claims |
| Is it a thick cut? | Validate time and temperature | Standard schedule may work | Thick cuts need careful control |
| Do you outsource freezing? | Require supplier records | Keep in-house logs | Traceability protects liability |
Practical tips for HACCP-style simplicity
Write controls as checklists, not essays. Lists survive busy days.
Define “reject vs hold.” Not every issue needs disposal.
Review one log weekly. Small reviews prevent big failures.
Real-world case: A small processor passed an audit by showing consistent receiving checks and corrective actions, not a giant manual.
2025 latest developments and trends
In 2025, cold chain requirements for handling fresh seafood are shifting toward proof, traceability, and repeatable routines. Buyers want evidence-backed handling, not verbal promises. Many teams are moving from random checks to lane-based monitoring (one low-cost logger per route) and cleaner documentation. These trends make cold chain requirements for handling fresh seafood more standardized and more measurable. For example, the FDA’s Food Traceability Rule (FSMA 204) compliance timing has been discussed as shifting from January 20, 2026 to July 20, 2028, so it is smart to prepare traceability fields now.
Latest progress at a glance
More evidence-heavy audits: logs, photos, and corrective actions matter more.
Route-based monitoring: one logger per lane beats guessing across all routes.
Reusable cold chain assets: lower long-term costs and more predictable packouts.
“Superchilling” interest: holding product slightly below 0°C without freezing solid can reduce ice needs on some validated lanes.
Market reality is simple: customers don’t reward average cold. They reward predictable quality. If you make cold chain requirements for handling fresh seafood boring and repeatable, you earn trust and longer contracts.
Cold chain requirements for handling fresh seafood FAQs
Q1: What is the ideal temperature for cold chain requirements for handling fresh seafood?
Most operations target 0–4°C (32–39°F) for daily handling, with a common ceiling of ≤5°C (41°F) in cold-holding zones.
Q2: What does “temperature of melting ice seafood” mean in practice?
It means seafood stays close to 0°C through direct ice contact, and meltwater drains away instead of soaking product.
Q3: Can ice alone meet cold chain requirements for handling fresh seafood?
Yes, if ice surrounds the seafood and you follow cold chain requirements for handling fresh seafood by replenishing ice and draining meltwater.
Q4: How long can fresh seafood stay out of refrigeration?
As a working rule, keep it under 20 minutes during handling, and use small batches so product returns to cold fast.
Q5: How long should I keep shellfish tags?
Many teams use molluscan shellfish tag retention 90 days as a simple traceability rule. File by last-use date.
Q6: Do I need a HACCP plan?
If you process or repack seafood, a HACCP-style plan is often expected. If you sell raw-intended fish, parasite controls must be documented.
Cold chain requirements for handling fresh seafood: summary and next steps
Cold chain requirements for handling fresh seafood come down to five repeatable habits. If you build your day around cold chain requirements for handling fresh seafood, you reduce shrink and protect your reputation:
Receive cold: check core temperature, ice, and traceability every delivery.
Store near melting ice: keep 0–4°C stable and drain meltwater away.
Control time out of cold: small batches, visible timers, fast return to storage.
Stay clean: separate zones, sanitize on schedule, prevent drips.
Prove it: logs, photos, and corrective actions that show control.
What you should do next (CTA)
Run the 2-minute self-audit today to stress-test your cold chain requirements for handling fresh seafood. Pick your lowest score area—receiving, icing/drainage, transport proof, or shellfish tags—and fix that first. If you want faster results, standardize one golden packout for your riskiest lane and train it in one shift.
Internal link suggestions (no external links)
About Tempk
At Tempk, we help seafood teams turn cold chain requirements for handling fresh seafood into routines that are easy to run and easy to prove. We support practical insulation and packout design, reusable cold chain assets, and monitoring workflows that fit your lane time and budget. Our focus is stable temperature control, cleaner handling, and clearer documentation so you reduce spoilage without adding chaos.
Next step: Share your seafood type, lane time, and current packout. We’ll help you build a repeatable plan your team can learn in a day.
Cold Chain Meat Storage: Keep Meat Safe in 2025
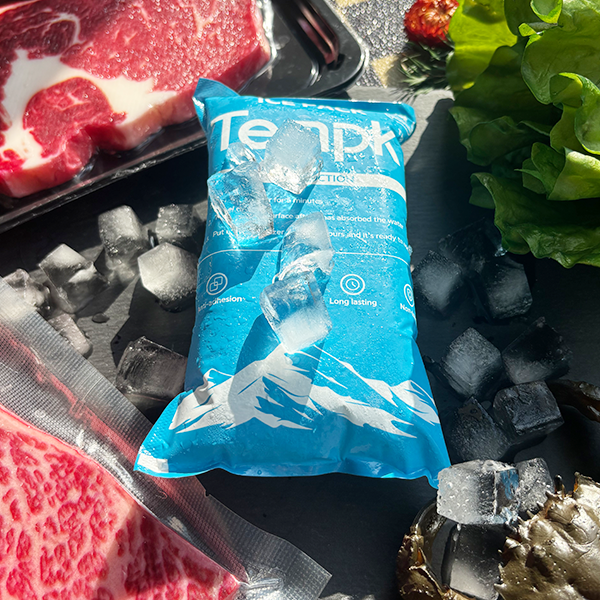
Cold Chain Meat Storage: How Do You Keep Meat Safe?
Cold chain meat storage keeps your meat safe by holding chilled meat at 0–4°C and frozen meat at ≤ -18°C, without swings during busy hours. If those numbers drift, risk rises fast. You might not see damage right away, but you will feel it later as leaks, odor complaints, discoloration, and write-offs. This guide turns cold chain meat storage into simple habits your team can follow, audit, and repeat.
Last updated: December 15, 2025
This article will help you understand:
How to set the ideal temperature for refrigerated meat storage by product and process
How cold room humidity for meat yield control reduces shrink without causing condensation
How warehouse zoning makes cross-contamination harder to happen
How to use a receiving inspection checklist for meat shipments that teams actually follow
How to apply a temperature excursion decision tool for meat storage when alarms trigger
Cold chain meat storage temperature targets: what should you set?
For cold chain meat storage, use a simple baseline: 0–4°C for chilled meat and ≤ -18°C for frozen meat. Then focus on keeping it stable, not perfect. Your biggest enemy is usually not the setpoint. It is the daily spikes from door openings, slow loading, and staging on a warm dock.
A useful mindset is this: temperature is a “speed limit,” and alarms are “guardrails.” You want early warnings before product is harmed. You do not want alerts that only confirm damage after it happens.
Product temperature vs air temperature: which matters more?
Air temperature is what your system controls. Product temperature is what your customer experiences. Product changes slower than air, like a large pot heating slowly. That gives you time, but it can also hide problems in warm corners.
| What you measure | What it tells you | What it misses | What it means for you |
|---|---|---|---|
| Air temperature | Room control and drift | Warm pockets near doors | Tune refrigeration and alarm thresholds |
| Product surface temp | Fast exposure during handling | Core temp lag | Quick checks during receiving and picking |
| Core temp spot checks | True product condition | Slow to change | Best for decisions after an alarm event |
Practical tips you can apply today
Busy dock periods: set “door-open rules” with a timer and a clear owner.
High-velocity picking: stage in a cold buffer zone, not in ambient air.
Mixed loads: keep chilled and frozen flows separate, so one does not harm the other.
Practical case: One site reduced repeat alarms by moving label printing into a chilled anteroom, cutting door-open minutes.
Cold chain meat storage humidity and airflow: how do you protect yield?
Cold chain meat storage is not only about temperature. Humidity and airflow decide how much sellable weight you keep. If the room is too dry, surfaces dehydrate and you lose yield. If the room is too wet, cartons soften, condensation forms, and hygiene risk increases.
Think of airflow like wind on your skin. Even at the same temperature, stronger airflow can dry meat faster. You want even circulation, not a “wind tunnel” aimed at one rack.
Cold room humidity for meat yield control: a practical approach
Use symptoms as your guide. Your goal is “high enough to reduce drying, low enough to avoid wet surfaces.”
| Symptom you see | Likely cause | What to change first | What it means for you |
|---|---|---|---|
| Dry edges or darkening | Low humidity or direct airflow | Reduce drafts on exposed product | Less trim loss and better appearance |
| Wet cartons (“sweating”) | Warm air infiltration + cold surfaces | Door discipline, curtains, gaskets | Fewer rejects and cleaner handling |
| Odor in corners | Dead zones + weak sanitation rhythm | Fix airflow pattern and cleaning | Fewer complaints and better audits |
Practical tips and advice
If cartons feel damp: fix door control before blaming packaging.
If surfaces are drying: reduce direct airflow, then review humidity setpoints.
If frost builds fast: treat it as a door-time problem, not “normal winter.”
Practical case: A simple strip curtain and a door timer reduced “wet box” complaints without changing refrigeration equipment.
Cold chain meat storage zoning: how do you stop cross-contamination?
Cold chain meat storage gets easier when your warehouse layout does the work for you. Zoning reduces mistakes, reduces temperature shock, and improves traceability. It also lowers cross-contamination risk by design, not by hope.
A simple zoning model most teams can run:
Receiving + quarantine (nothing releases until checks pass)
Chilled storage (fresh and thawed flows)
Frozen storage (long hold and buffer stock)
Cold buffer pick/pack (fast handling, short dwell)
Dispatch staging (protected handoff to trucks)
A simple “one-way flow” zoning rule
Make it easy to do the right thing and hard to do the wrong thing.
| Zone | Purpose | Key rule | Practical benefit for you |
|---|---|---|---|
| Quarantine | Hold until verified | No mixing with released stock | Faster root-cause tracing |
| Chilled storage | Short–medium hold | Protect doors and airflow | Better shelf life consistency |
| Frozen storage | Long hold | Limit staging time | Fewer thaw-refreeze issues |
| Cold buffer | Picking and packing | Short dwell time only | Lower warm exposure during peaks |
| Dispatch staging | Loading control | Pre-cool + speed | Fewer dock warm-up incidents |
Practical tips and advice
Put quarantine where it cannot be skipped. If it is inconvenient, it will be ignored.
Color-code tools by zone. It reduces training time and mistakes.
Isolate returns. Returns bring unknown risk into cold chain meat storage.
Practical case: One team reduced mixed-lot errors after moving printers and tape into the cold buffer zone.
Cold chain meat storage packaging: what prevents leaks and freezer burn?
Packaging is your silent quality partner in cold chain meat storage. It protects meat from oxygen, dehydration, and accidental contact. It also protects your brand from leaks, odors, and “looks old” complaints.
Use packaging that matches the hold time and the handling style.
| Packaging type | Protection level | Best use case | What it means for you |
|---|---|---|---|
| Vacuum sealed | Very high | Longer chilled storage | Better color stability and fewer odors |
| Modified atmosphere | High | Retail display needs | Better shelf presentation |
| Loose wrapping | Low | Short handling only | Higher risk of drip and oxidation |
How to prevent freezer burn on meat in storage
Freezer burn is dehydration plus oxygen exposure. It often comes from seal failures, air gaps, and temperature cycling.
| Freezer burn driver | What causes it | Packaging fix | Process fix | Your benefit |
|---|---|---|---|---|
| Air gaps | Loose inner pack | Tight barrier + good fit | Better carton sizing | Fewer quality claims |
| Seal leaks | Handling damage | Stronger seals | Gentler stacking rules | Less rework |
| Temperature cycling | Door time + staging | — | “No staging” for frozen | Better texture after thaw |
Practical tips and advice
If you see freezer burn: check seal integrity and storage time first.
If you see leaks: check drops, stacking pressure, and carton fit.
If you smell cold-room odor: separate strong-smell items and improve airflow.
Practical case: A distributor reduced leak claims by right-sizing cartons and adding simple corner protection.
Cold chain meat storage monitoring: what should you measure daily?
Cold chain meat storage becomes controllable when you can see problems early. Monitoring is not about collecting fancy data. It is about catching the few patterns that cause most losses.
Start with a small set of signals you can review every day:
Temperature at multiple points (especially warm corners)
Humidity (trend, not just a number)
Door opening frequency and recovery time
Alarm response time (who reacted, how fast, what action)
Your 10-point cold chain meat storage readiness score
Give yourself 1 point for each “yes”:
Sensors cover the warmest spot, not only the easiest spot.
You review temperature trends weekly, not only when something breaks.
Each alarm threshold has a clear action step.
Calibration is scheduled and documented.
You track alarm response time as a KPI.
You monitor door-open minutes by shift.
Chilled and frozen dashboards are separated.
Peak-season checks are planned in advance.
Backup power procedures are tested, not assumed.
Quarantine flow is clear and consistently used.
Score guide
0–3: High risk. Fix staging and warm corners first.
4–7: Medium risk. Improve response speed and sensor coverage.
8–10: Strong control. Optimize costs and reduce waste confidently.
KPI dashboard you can track weekly
| KPI | Better looks like | Why it matters | Next step you can take |
|---|---|---|---|
| Door-open minutes | Down week over week | Predicts spikes | Add a door timer and owner |
| Alarm response time | Faster | Limits damage | Route alerts to one role |
| Hold rate | Lower | Reduces rework | Improve receiving rules |
| Shrink / dehydration | Lower | Protects yield | Balance airflow and humidity |
| Excursion count | Lower | Reduces claims | Fix the top one root cause |
Practical case: Real-time alerts plus clear actions reduced repeat incidents in one warehouse, because staff reacted faster.
Cold chain meat storage receiving checklist: what should you check in 3 minutes?
Receiving is where cold chain meat storage wins or loses the day. If you accept warm product, you inherit the risk. If you skip checks, you trade speed today for losses tomorrow.
Keep the checklist short so teams actually use it.
Receiving inspection checklist for meat shipments
| Check item | Pass criteria | If it fails | What it protects |
|---|---|---|---|
| Trailer condition | Clean, no strong odors | Hold and document | Hygiene and audit readiness |
| Packaging integrity | Seals intact, no leaks | Quarantine | Prevents spread and rework |
| Temperature spot check | Within your SOP limits | Use excursion tool | Avoids hidden warm risk |
| Labels and lots | Clear and scannable | Manual trace + fix | Traceability and rotation |
| Carton dryness | No wet boxes | Inspect condensation | Flags door-time or handling issues |
Practical tips and advice
Train with photos of pass/fail examples. It makes checks consistent.
Sample across the load. Hot corners often hide near doors.
Move product immediately to the right zone. Staging is where drift starts.
Practical case: Switching to FEFO rotation and tightening receiving checks reduced surprise holds.
Cold chain meat storage excursion response: what do you do when alarms trigger?
Excursions happen. Your advantage is a fast, consistent response. A good response protects safety, protects quality, and protects your brand promise.
Use a simple triage every time:
Confirm: is the sensor accurate and placed correctly?
Contain: stop exposure and isolate the likely affected lots.
Assess: time + peak temperature + product type + packaging barrier.
Decide: release, hold, rework, or discard based on your SOP.
Prevent: fix root cause and update training.
Temperature excursion decision tool for meat storage
Answer these four questions in order:
How warm did it get (peak)?
How long did it last (duration)?
Which product was exposed (chilled vs frozen, high-risk items)?
What packaging barrier existed (sealed vs exposed)?
| Excursion pattern | Likely impact | Default action | Why this helps you |
|---|---|---|---|
| Short spike + fast recovery | Often surface-only | Hold + verify | Prevents needless waste |
| Sustained drift | Higher risk | Quarantine lots | Protects customers and audits |
| Door-related warming | Localized | Check door-zone pallets | Focuses work where it matters |
| Sensor error | False alarm | Verify + recalibrate | Keeps trust in alarms |
Practical tips and advice
Do not decide from memory. Use time and temperature every time.
Quarantine early, release later. It prevents risk from spreading.
Document with photos and timestamps. It speeds claims and reviews.
Practical case: A facility reduced discard volume by isolating door-zone pallets instead of the whole room.
Cold chain meat storage cost control: how do you improve without over-packaging?
Better cold chain meat storage does not always mean more cost. Often it means fewer workflow mistakes. When stability improves, you can often reduce “just in case” practices.
Focus on cost drivers you can actually control:
Door-time energy loss
Holds and rework labor
Shrink and dehydration
Claims and customer churn
Packaging waste from overprotection
14-day improvement sprint plan
Pick one cold room and run a short sprint that forces learning.
| Day range | What you measure | What you change | What success looks like |
|---|---|---|---|
| Days 1–3 | Door minutes + warm corner trend | Add timer + assign owner | Spikes become smaller |
| Days 4–7 | Recovery time after peaks | Add curtain / fix gasket | Faster return to setpoint |
| Days 8–10 | Alarm response time | Clear action cards | Fewer “silent” alarms |
| Days 11–14 | Hold rate + shrink signals | Update one SOP + retrain | Lower holds and fewer complaints |
Practical case: Teams often see the biggest gain simply by reducing door-open minutes during loading peaks.
2025 cold chain meat storage developments and trends
In 2025, cold chain meat storage is shifting from “reactive fixing” to “predictive control.” That means you prevent drift before it becomes a loss event.
Latest progress you should know
Predictive temperature control: systems adjust before deviations occur.
Energy-efficient insulation: better stability with lower operating cost.
Integrated data platforms: one view for safety, quality, and audit evidence.
Market insight: customers reward consistency. If you can prove stable cold chain meat storage with clean records, disputes drop and trust rises.
Frequently Asked Questions
Q1: What is the ideal temperature for refrigerated meat storage?
A practical baseline is 0–4°C for chilled meat. If you need longer shelf life, tighten stability and reduce door-time spikes.
Q2: What is the frozen cold chain meat storage temperature target?
Keep frozen meat at ≤ -18°C continuously, and prevent thaw-refreeze cycles during loading.
Q3: How do I prevent freezer burn on meat in storage?
Use strong moisture barriers, protect seals, reduce air gaps, and avoid long holds in weak packaging.
Q4: What is the most common reason for temperature alarms?
Doors and staging cause many alarms. Long open times and slow recovery create repeated warm events.
Q5: What should I do first during a temperature excursion?
Confirm the reading, contain exposure, and quarantine likely affected lots. Then assess time, peak, product, and packaging.
Summary and recommendations
Cold chain meat storage works when you keep temperature stable, manage door time, and enforce simple receiving rules. Use 0–4°C chilled and ≤ -18°C frozen as your baseline, then protect warm zones near doors. Control humidity and airflow to reduce shrink, and use zoning to reduce cross-contamination. Monitor trends, respond fast to alarms, and document decisions using one clear excursion tool.
Your next action steps (simple and effective)
Post chilled and frozen targets in receiving and dispatch.
Track one KPI: door-open minutes per load.
Add warm-corner sensors and review trends weekly.
Train one shift using the receiving checklist and excursion tool.
Run a 14-day sprint, then standardize what worked.
About Tempk
At Tempk, we focus on practical cold chain solutions for meat storage and transport. We design temperature-controlled packaging and workflow-friendly approaches that support stability, monitoring, and repeatable SOPs. Our goal is to help you reduce spoilage, protect quality, and operate with confidence across seasons and lanes.
Next step: Share your product mix (chilled vs frozen), room size, and busiest dock hours, and we’ll help you map a simple zoning plan, alarm thresholds, and a 14-day improvement sprint.
Cold Chain Meat Quality Control: 2025 Playbook
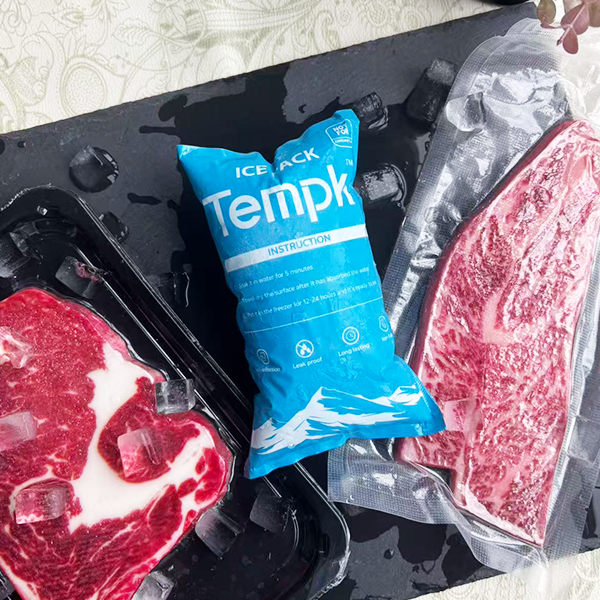
Cold Chain Meat Quality Control: What Works in 2025?
Last updated: December 15, 2025
Cold chain meat quality control is how you keep meat safe, fresh-looking, and saleable from plant to customer. Chilled meat usually targets 0–4°C, while frozen meat targets -18°C (0°F) or colder.
When meat drifts into the “danger zone” (about 40°F to 140°F), bacteria can multiply fast.
In warm conditions, some bacteria can double in roughly 20 minutes, so small delays become big losses.
This article will help you:
Set enforceable targets for meat cold chain temperature (chilled vs frozen)
cold chain meat quality control
Use meat shipment temperature monitoring to prove control and reduce disputes
cold chain meat quality control
Run a cold chain meat receiving checklist that teams learn in one day
cold chain meat quality control
Reduce spoilage during meat delivery by fixing the real weak points
cold chain meat quality control
Prevent cross-contamination with simple zoning and habits
cold chain meat quality control
Standardize SOP + CAPA so every excursion improves your system
cold chain meat quality control
Why is cold chain meat quality control non-negotiable in 2025?
Direct answer: Cold chain meat quality control protects safety, shelf life, and appearance by keeping meat consistently cold at every handoff.
cold chain meat quality control
If you miss temperature targets, you do not just “lose a little quality.” You often lose customer trust, yield, and margin at the same time.
Meat is sensitive because it changes quickly when warmed, even briefly. It does not “bounce back” after temperature abuse, especially when warming repeats.
cold chain meat quality control
In 2025, buyers expect proof, not promises. That means your cold chain meat quality control must be measurable and repeatable.
What fails first: warm spikes and freeze–thaw cycling
Warm spikes usually happen at staging, loading, or delivery doors. Freeze–thaw cycling happens when frozen product softens, then refreezes later. Both problems show up as drip loss, discoloration, off-odors, and claims.
| Failure signal | Typical trigger | What you see | What it means for you |
|---|---|---|---|
| Warm spike | Long door-open time | Shorter shelf life | More rejections at receiving |
| Freeze–thaw cycling | Delay + poor insulation | Soft texture, purge | Lower yield after thaw |
| Hidden warm pocket | Blocked airflow | Uneven temps | “Random” claims that repeat |
Practical tips you can use
Chilled meat: treat repeated small excursions as a root-cause problem, not “normal.”
Frozen meat: avoid partial thawing at all costs; refreezing destroys texture and yield.
cold chain meat quality control
High-value cuts: monitor more often and tighten dock discipline first.
Practical example: Teams often reduce claims fastest by fixing cross-dock holds and door-open time, not by buying new trucks.
Cold chain meat quality control temperature targets: what should you set?
Direct answer: Cold chain meat quality control starts with two targets you can train and audit: chilled meat at 0–4°C, and frozen meat at or below -18°C (0°F).
cold chain meat quality control
cold chain meat quality control
The goal is not “colder.” The goal is stable.
Averages can mislead you. Meat responds to peaks, not the weekly average. One warm loading event can erase days of careful storage.
Best temperature for refrigerated meat transport (chilled meat)
Chilled meat behaves like fresh flowers. Too warm and it deteriorates fast. Too cold and you risk surface freezing and quality damage.
| Meat type | Practical chilled target | Main risk if you miss | What it means for you |
|---|---|---|---|
| Fresh red meat | 0–4°C | Odor, discoloration | Shorter sell-by window |
| Poultry | 0–4°C (often tighter) | Faster spoilage risk | Higher rejection probability |
| Processed chilled meats | 0–4°C | Texture and purge | Brand damage and returns |
| Frozen meats | ≤ -18°C | Freeze–thaw damage | Purge + texture complaints |
Practical tips and advice
Pre-cool the trailer before loading, not after the doors close.
Separate chilled and frozen zones in mixed loads, or split shipments.
Pick one “action line” above your target where teams investigate immediately.
Practical example: Many operators cut “mystery” rejections by switching from air-temp checks to quick product checks at receiving.
Cold chain meat quality control excursion rules: how much time out of range is too much?
Direct answer: Cold chain meat quality control becomes enforceable when you define pass/fail limits for both temperature and time. You need an excursion rule that triggers action, not debate.
Real operations always have delays. The win is making the decision predictable. You decide what happens before the alarm happens.
Decision tool: build your excursion rule in 5 questions
Answer these and you will know how strict your cold chain meat quality control rule must be:
Is the product chilled or frozen?
Is it raw or ready-to-eat (higher consequence)?
Is transit <24 hours, 1–3 days, or >3 days?
How many handoffs exist (direct, one cross-dock, multiple transfers)?
What is worst-case exposure (summer dock, customs delay, porch time)?
Simple rule design (keep it trainable):
Target range: your chilled/frozen spec.
Action line: a temperature that triggers investigation.
Time limit: how long you allow beyond the action line.
Disposition: accept / hold / reject / rework decision path.
Practical tips and advice
Use two triggers: “out of range” and “out of range too long.”
Assign one owner for disposition, so decisions do not stall.
Keep corrective actions binary: hold, review data, document fix.
Practical example: Brands often cut claims by requiring logger review before releasing any load that crosses the action line.
Meat shipment temperature monitoring for cold chain meat quality control: what actually works?
Direct answer: Cold chain meat quality control is reliable when you measure temperature where the product is, not only at the thermostat.
cold chain meat quality control
Monitoring turns “we think it stayed cold” into “we can show it stayed cold.”
Monitoring also reveals patterns. Maybe Monday cross-docks run late. Maybe Door #3 warms faster. Data makes the fix obvious.
How to monitor meat shipments with data loggers (without overcomplicating it)
| Monitoring method | What it tells you | Best use | What it means for you |
|---|---|---|---|
| Single-use data logger | Temp over time | Audits, disputes | Proof for customers |
| Real-time sensor | Live alerts | High-risk lanes | Faster containment |
| Truck telematics | Air temp + alarms | Fleet oversight | Early warning signs |
| Probe/spot checks | Instant product temp | Receiving triage | Faster accept/hold calls |
| Time–temp indicator | Exposure signal | Last-mile | Quick screening tool |
Practical tips and advice
Place loggers near product, away from doors and direct vents.
Calibrate on a schedule, or your decisions drift over time.
Review weekly on risky lanes, and monthly on stable lanes.
Track exceptions, not perfection; trends are more valuable than raw data.
Practical example: Teams often find their biggest heat leak is staging time, not truck setpoint.
Dock-to-truck handoffs: where cold chain meat quality control fails most often?
Direct answer: Cold chain meat quality control breaks during “in-between” moments: staging, loading, and receiving. These are human-speed processes inside a biology-speed problem.
A good dock process is boring. Boring is profitable. Your goal is fewer door-open minutes and fewer “searching for pallets” minutes.
Cold chain meat receiving checklist (trainable in one shift)
Verify trailer pre-cool and setpoint before doors open
Keep door-open time short; stage in a cold area
Check product temperature, not only air temperature
Inspect packaging integrity and leaks
Record results and decide: accept / hold / reject
Quick table: dock risks you can control this week
| Dock step | What goes wrong | Simple control | What it means for you |
|---|---|---|---|
| Staging | Product warms quietly | Cold staging + time limit | Fewer hidden excursions |
| Loading | Doors open too long | Load plan + roles | More consistent outcomes |
| Receiving | “Looks fine” bias | Probe checks + records | Less dispute later |
Practical tips and advice
Use a visible timer at each door. Behavior changes fast.
cold chain meat quality control
Move paperwork away from the dock, so doors can close sooner.
Train airflow with photos: “blocked vents” vs “clear channels.”
Practical example: Many fleets reduce rejections after enforcing a door-open limit and staging-by-route.
Packaging choices that support cold chain meat quality control: what should you change?
Direct answer: Packaging supports cold chain meat quality control by slowing temperature change, containing leaks, and protecting labels and handling. It does not “create cold.” It protects cold.
Packaging is also a dispute reducer. When cartons are dry, sealed, and intact, receiving is faster. Traceability is cleaner too.
Packaging elements that reduce purge and handling damage
| Packaging element | What it does | When to use | What it means for you |
|---|---|---|---|
| Absorbent pads/liners | Captures purge | Fresh cuts | Cleaner presentation |
| Secondary liner | Contains leaks | Mixed loads, long routes | Fewer contamination events |
| Insulated liners | Slows heat gain | Hot lanes | More stable delivery temps |
| Strong outer cartons | Prevents crushing | E-commerce/last mile | Fewer damaged units |
Practical tips and advice
Right-size cartons; excess air warms faster and increases movement.
Protect labels; wet labels create delays and traceability gaps.
Validate hold time for worst-case delays, not average transit time.
Avoid over-insulating chilled meat if it risks surface freezing.
Practical example: A simple secondary liner often reduces leaking-box claims on long routes.
Hygiene and segregation: cold chain meat quality control beyond temperature
Direct answer: Cold chain meat quality control is also clean handling that prevents cross-contamination, especially in mixed environments. If you only control temperature, you still leave risk on the table.
Treat hygiene like a traffic system. Clear lanes prevent crashes. The biggest wins come from simple separation.
Preventing cross-contamination in meat cold chain: simple rules
Separate raw and ready-to-eat products (and store ready-to-eat above raw).
Use dedicated tools and carts (color-coding helps).
Clean on a schedule, not “when it looks dirty.”
Verify quickly when needed (for example, ATP swabs for residue discipline).
Practical tips and advice
Seal containers during transfer; open trays spread odor and risk.
Audit the dock; contamination often starts where speed is highest.
Train new staff first; new hands touch the most product.
Practical example: Simple color-coded carts often cut misloads and hygiene incidents within weeks.
SOP + CAPA: how to make cold chain meat quality control repeatable
Direct answer: Cold chain meat quality control improves fastest when you standardize five things: targets, timing, placement, proof, and actions. You want a one-page SOP that every shift follows.
If your SOP needs a meeting to explain, it is too long. Make it visual, binary, and easy to audit.
A one-page refrigerated meat transport SOP blueprint
| SOP component | What to write | Who owns it | What it means for you |
|---|---|---|---|
| Temperature targets | Chilled vs frozen ranges | QA + Ops | Clear pass/fail calls |
| Time limits | Staging + door-open limits | Warehouse lead | Fewer warm spikes |
| Monitoring plan | Logger placement + frequency | QA | Proof for customers |
| Corrective actions | What to do if out of range | Supervisor | Faster containment |
| Records | Where and how to record | Ops admin | Easier audits |
CAPA template (copy/paste)
Practical tips and advice
Use pictures: “good vs bad” loading patterns for airflow.
Train with scenarios: delayed truck, broken door, power alarm.
Review monthly: small SOP updates prevent seasonal losses.
Practical example: Many teams improve audits by requiring CAPA completion within 24 hours of any excursion.
cold chain meat quality control
Profit levers: how cold chain meat quality control improves yield and margin
Direct answer: Cold chain meat quality control reduces shrink, claims, and markdowns by protecting appearance and shelf life. That is why it is a profit tool, not just compliance.
A simple way to see the money: fewer warm events means less purge. Less purge means more sellable weight. More sellable weight means higher margin on the same volume.
A simple “1% shrink” reality check (example math)
If you ship 100,000 kg of meat per month, and you reduce shrink by 1%, you save 1,000 kg. If your net value is $4/kg, that is $4,000/month recovered. Even small improvements can fund better monitoring and training.
Practical tips and advice
Track reasons for returns, not just return totals.
Separate “temperature” claims from “handling” claims in your reports.
Fix the dock first; it is usually the fastest ROI.
cold chain meat quality control
Practical example: A visible dock timer and staged-by-route layout often reduce excursions without changing equipment.
Interactive self-audit: is your cold chain meat quality control strong enough?
Use this two-minute score to find your weakest link. Answer honestly and total your points.
Cold Chain Meat Quality Control Risk Score (5–25)
1) Lane duration (door to door)
Under 12 hours (1)
12–24 hours (3)
Over 24 hours (5)
2) Ambient exposure risk
Mild (1)
Mixed (3)
Hot or highly variable (5)
3) Handoff complexity
Direct delivery (1)
One cross-dock (3)
Multiple transfers (5)
4) Monitoring maturity
Loggers on risky lanes + weekly review (1)
Sometimes + monthly review (3)
No consistent monitoring (5)
5) Dock discipline
Door-open and staging limits enforced (1)
Limits exist but not enforced (3)
No limits (5)
Score interpretation
5–9 (Low risk): Keep consistency; tighten documentation and training.
10–17 (Medium risk): Fix dock timing, logger placement, and CAPA first.
18–25 (High risk): Redesign lane policy, packaging, and handoffs before scaling.
What to do next (decision guide)
If High risk: reduce handoffs, shorten exposure, add monitoring on every critical route.
If Medium risk: fix dock behavior and airflow loading first; it is the fastest win.
If Low risk: standardize supplier alignment and keep trend reviews.
Practical example: Many “high risk” scores come from uncontrolled staging and missing receiving checks.
2025 cold chain meat quality control trends you should watch
Cold chain meat quality control is shifting from “temperature compliance” to proof of control.
cold chain meat quality control
Buyers want faster dispute resolution and cleaner traceability. That pushes you toward clearer SOPs, better exception handling, and risk-based monitoring.
Latest progress snapshot
Smarter alerts: more teams use real-time alarms to stop excursions early.
Predictive planning: lane + weather risk scoring helps choose packaging up front.
More standardization: indirect refrigerated delivery is adopting clearer process rules.
cold chain meat quality control
Right-sized sustainability: lighter materials and reusables grow only when validated.
Market reality is simple: customers pay for consistency, not explanations. When you can prove cold chain meat quality control, renewals get easier.
Frequently asked questions
Q1: What is the “danger zone” temperature for meat?
Food safety guidance commonly describes a danger zone around 40°F to 140°F, where bacteria grow rapidly.
cold chain meat quality control
Keep exposure short and documented.
Q2: What is the best temperature for refrigerated meat transport?
Most programs target 0–4°C for chilled meat.
cold chain meat quality control
Stability and short dock time matter more than “extra cold.”
Q3: What temperature should frozen meat be kept at during transport?
A common target is -18°C (0°F) or colder to keep product solidly frozen.
cold chain meat quality control
Avoid freeze–thaw cycling whenever possible.
Q4: Should I monitor air temperature or product temperature?
Air temperature shows equipment performance. Product temperature drives acceptance and quality. Use both on high-risk lanes.
Q5: How do I reduce spoilage during meat delivery quickly?
Shorten warm exposure, enforce dock timing, and use monitoring to catch recurring issues.
cold chain meat quality control
Cold chain meat quality control is disciplined basics.
Q6: Is frozen meat safe if it warms and refreezes?
Safety may not be obvious, but quality often suffers from freeze–thaw cycling.
cold chain meat quality control
Strong cold chain meat quality control aims to prevent refreezing cycles.
Q7: What is the biggest operational mistake in meat cold chains?
Long door-open time and uncontrolled staging.
cold chain meat quality control
Fixing these usually gives the fastest improvement.
Summary and recommendations
Cold chain meat quality control protects shelf life, appearance, and customer trust by keeping meat cold, stable, and clean. Start with clear chilled and frozen targets, then control the weak points: staging, door-open time, and airflow blocking.
cold chain meat quality control
Add monitoring that matches lane risk, and use SOPs with simple corrective actions. When you standardize behavior, you reduce claims, shrink, and urgent rework.
A practical 7-day action plan
Write chilled/frozen targets and your excursion action line.
Train the receiving checklist and rejection rules.
Run 10 monitored shipments on your riskiest lane.
Fix the biggest heat leak (usually staging/loading).
Standardize CAPA so every excursion improves the system.
Review results weekly and lock the new SOP on the dock wall.
CTA: Choose one high-volume lane and upgrade cold chain meat quality control there first. Then scale the proven SOP.
Cold Chain Express Delivery for Food: 2025 Playbook
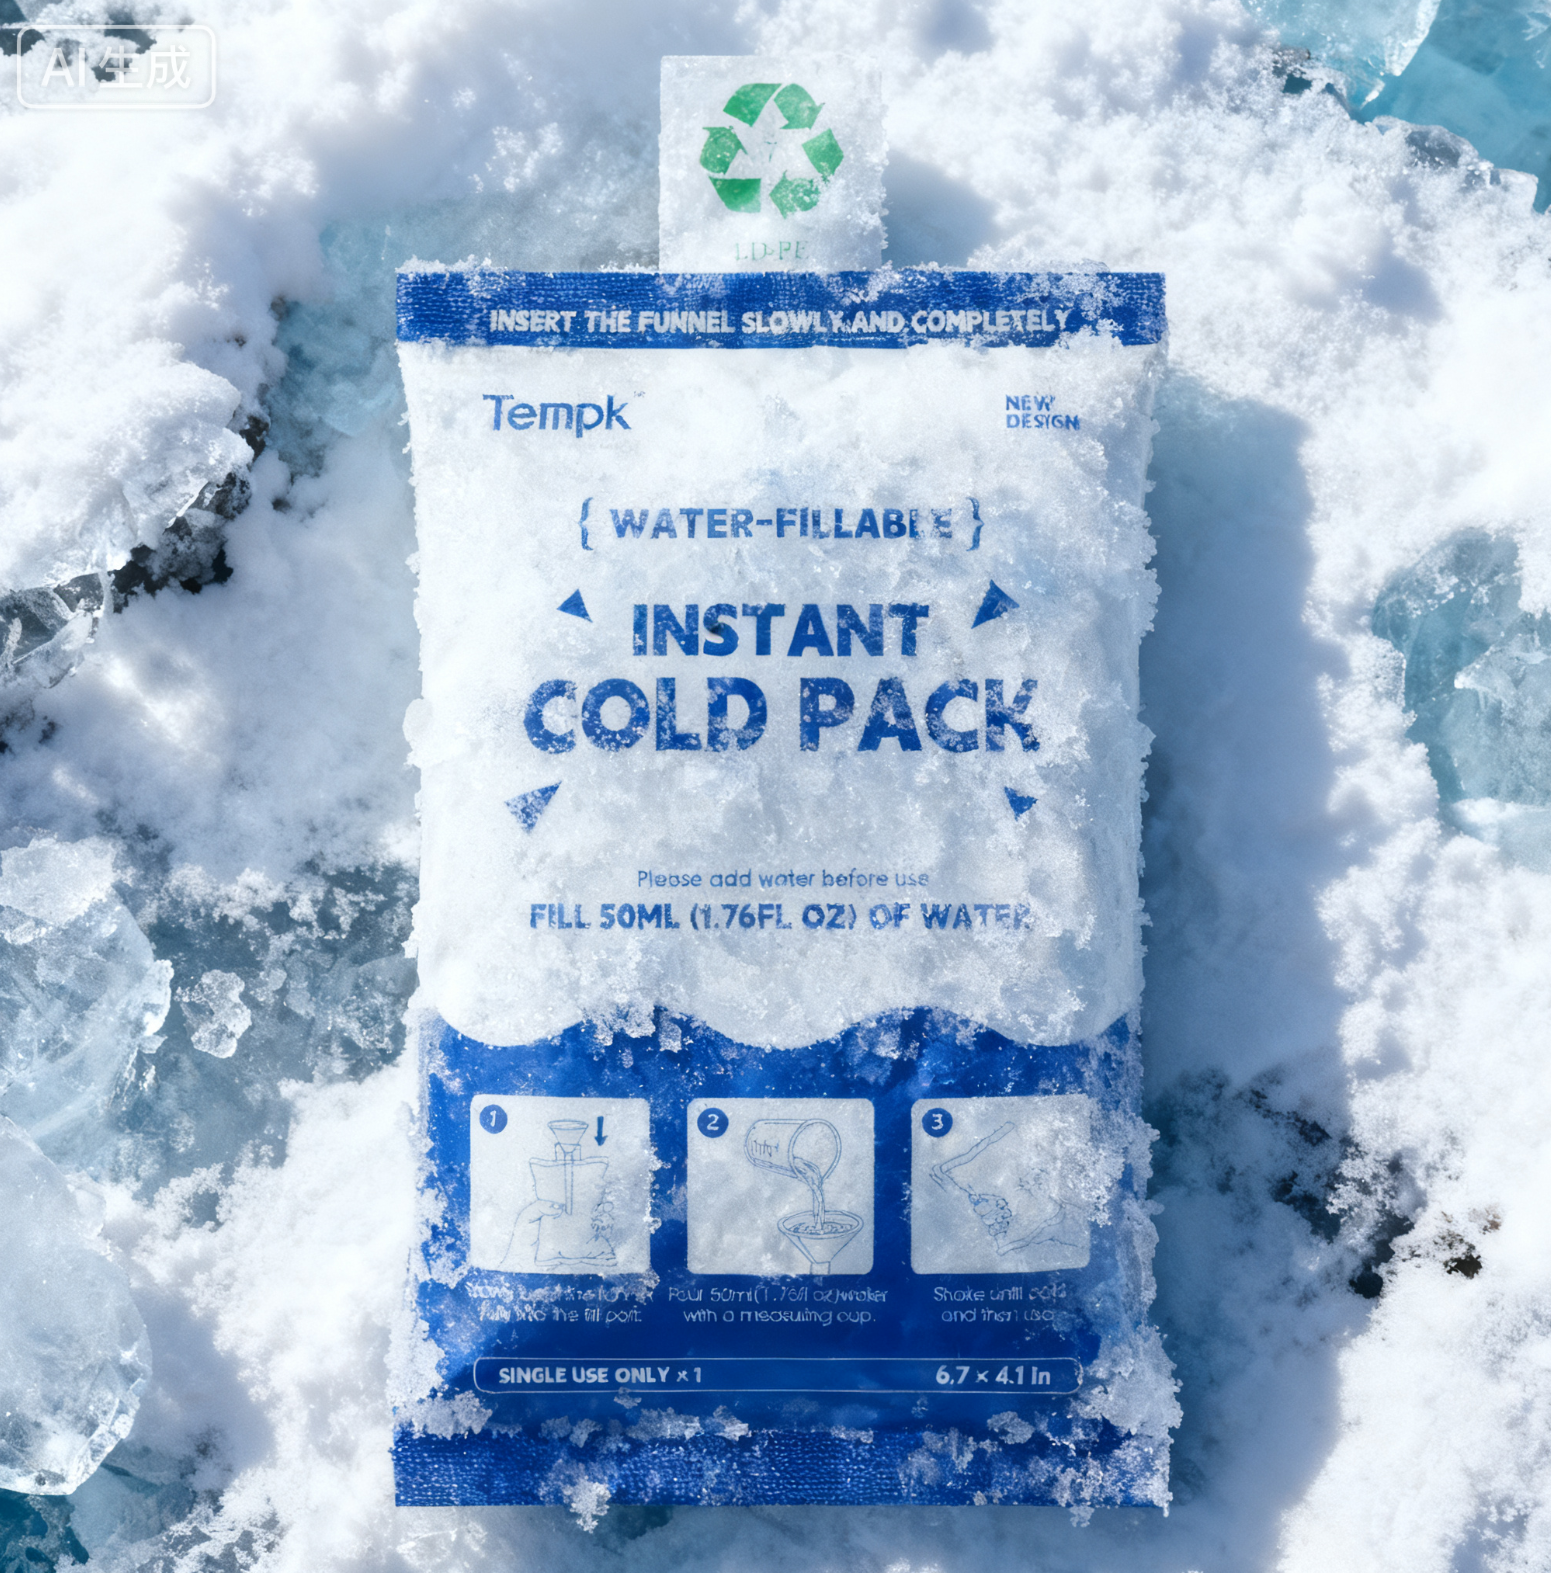
Cold Chain Express Delivery for Food: 2025 Playbook
You use cold chain express delivery for food when you need speed and temperature control to land quality at the doorstep. That matters because food safety risk rises fast when products warm up in the “danger zone,” and your customers feel the damage as taste changes, leaks, and refunds. CDC estimates 48 million people in the U.S. get sick from foodborne illness each year, so “probably fine” is not a strategy.
What you’ll learn in this guide
How cold chain express delivery for food stays safe during overnight and same-day lanes
Which temperature targets reduce risk for chilled, frozen, and controlled-ambient foods
How to pack cold chain express delivery for food with a repeatable 6-step method
When to choose gel packs vs dry ice for food shipping (without guesswork)
How to cut last-mile risks in cold chain express delivery for food with simple SOPs
How to prove performance with monitoring, records, and acceptance rules
2025 trends you can act on now (traceability, sustainability, and smarter packaging)
What is cold chain express delivery for food, really?
Cold chain express delivery for food is fast shipping built to keep food inside a safe temperature range from pack-out to handoff. It is not “ship faster and hope.” It is a connected system: product pre-chill, insulated packaging, refrigerants, handling rules, and proof. Think of it as a moving fridge that also survives messy real life: delays, warm docks, and missed deliveries.
In practice, most failures come from small gaps, not big disasters. A warm product packed “on time.” A gel pack that was never frozen. A box left on a sunny porch. If you standardize the process, you remove these silent leaks and your results become predictable.
Passive vs active options for cold chain express delivery for food
In cold chain express delivery for food, passive systems use insulated packaging + refrigerants (gel packs, dry ice, or phase-change materials). Active systems use powered refrigeration (reefers or powered containers). Passive is common for DTC and shorter express lanes. Active is common for longer lanes and tight temperature precision.
| Decision factor | Passive (insulated + refrigerant) | Active (powered refrigeration) | The practical value for you |
|---|---|---|---|
| Best fit | short express lanes | longer or strict lanes | match method to lane risk |
| Cost profile | lower per shipment | higher, more predictable | avoid overpaying on low-risk lanes |
| Operational load | pack-out discipline | equipment + maintenance | choose what your team can run |
| Temperature precision | good if designed well | strongest when managed well | monitoring still matters |
If you are early-stage: start passive, validate lanes, then upgrade only where needed.
If you ship premium frozen: consider active for longer routes or high summer risk.
The Time–Temp–Touch model you can use today
Time, temperature, and “touch” (every handoff) decide success. Faster shipping helps, but extra handoffs add risk.
| Model element | What it means | What you control | The practical value for you |
|---|---|---|---|
| Time | Door-to-door hours | Cutoffs, lane choice, buffers | Fewer warm windows |
| Temperature | Starting temps | Pre-chill, staging, coolant prep | More repeatable outcomes |
| Touch | Handling points | SOPs, labels, no-drop rules | Fewer last-mile failures |
Practical tips you can apply now
If you ship DTC: design for a missed first attempt at least once per season.
If you ship mixed items: separate chilled and frozen into different shippers first.
If you are scaling: lock one “pack-out recipe” before adding more SKUs.
Real example: One meals brand reduced “arrived warm” claims after enforcing a simple rule: seal every box within 3 minutes of loading.
Which temperature targets make cold chain express delivery for food safer?
Cold chain express delivery for food works best when your targets match your product’s real failure mode. Some foods fail by safety first (meat, seafood, dairy). Others fail by quality first (chocolate bloom, soggy produce). Your plan should protect both.
A common U.S. food-safety guideline describes a “danger zone” around 40°F to 140°F, where bacteria can multiply quickly. In that range, USDA notes bacteria can double in as little as 20 minutes. 美国农业部食品安全和检查服务 You do not need to memorize regulations to act on this. You just need clear targets by product bucket. A simple mental model is time in the danger zone: CDC advises never leaving perishable food out for more than 2 hours (or 1 hour if temperatures are above 90°F). 疾病控制与预防中心
Simple temperature buckets (no jargon)
| Product bucket | Typical target | Common examples | What it means for you |
|---|---|---|---|
| Chilled | ~0–5°C (32–41°F) | dairy, fresh meals, seafood, produce | Insulation + gel/ice + fast handoff |
| Frozen | ≤ -18°C (0°F) | frozen meals, ice cream, frozen meat | Deep cold + tight sealing + buffers |
| Controlled ambient | product-specific | chocolate, bakery, oils | Avoid heat spikes and moisture swings |
Practical tips and advice
If you are unsure: treat the item as chilled and monitor your first 20 shipments.
If you ship dairy: avoid “cool but not cold” pack-outs in warm lanes.
If you ship chocolate: do not over-chill into condensation, then warm later.
Practical case: A dessert seller stopped sticky labels by switching from heavy ice to controlled-ambient liners and lower moisture.
How do you pack cold chain express delivery for food in 6 steps?
Cold chain express delivery for food packing should be repeatable, not creative. The goal is to reduce warm air, prevent direct coolant contact, and seal fast. You are building a “cold sandwich” around your product: coolant outside, product protected inside.
Most pack failures come from two causes: (1) the product starts warm, or (2) air gaps let heat circulate. Fix those first before you buy “better” materials.
The 6-step pack-out method you can train in one day
Pre-chill the product to its target range before packing.
Pre-condition the coolant (frozen gel packs, bagged ice, or dry ice handled safely).
Build a cold base on the bottom and sides, not only on top.
Add a barrier layer so food does not touch coolant directly.
Load tight and right-size to reduce air pockets and shifting.
Seal fast and label clearly for the receiver.
| Pack-out factor | Good practice | Bad practice | The practical value for you |
|---|---|---|---|
| Product start temp | packed cold | packed warm | Less coolant waste |
| Air gaps | tight fit | empty space | Longer hold time |
| Contact control | barrier layer | direct contact | Less freezing/sogginess |
| Seal time | fast closure | long open time | Fewer warm spikes |
Practical tips and advice
Soups/sauces: add a leak-proof secondary container before insulation.
Produce: isolate humidity-sensitive items in a dry inner bin.
Frozen desserts: keep dry ice away from items that crack or over-dry.
Real example: A meal-kit operator eliminated “warm corner” complaints by adding side coolant instead of adding more top coolant.
Gel packs vs dry ice in cold chain express delivery for food: what should you choose?
In cold chain express delivery for food, gel packs are usually best for chilled lanes, and dry ice is usually best for frozen lanes. The mistake is treating them as interchangeable “cold weight.”
Gel packs absorb heat slowly and are easier to handle. Dry ice is colder and lasts longer, but it can freeze or dry out sensitive products. Use the option that matches your product state and your maximum door-to-door time.
Quick chooser: coolant decision tool
Answer these two questions:
Is the product chilled (0–5°C / 32–41°F) or frozen (≤ -18°C / 0°F)?
Is your “worst day” lane ≤24 hours, 24–36 hours, or 36–72 hours?
Then start here:
Chilled + ≤24 hours: gel packs + tight insulation + no-drop rule.
Chilled + 24–36 hours: more gel + thicker insulation + monitoring sample.
Frozen + 24–72 hours: dry ice (or frozen-range PCM) + tight sealing + buffer.
Practical tips and advice
If you see sogginess: add a moisture barrier and separate melt water.
If you see freezing: add a barrier layer and move coolant off direct contact.
If you see partial thaw: increase insulation before increasing dry ice.
Real example: A dairy shipper cut gel packs after right-sizing the box and removing headspace.
How do you cut last-mile risks in cold chain express delivery for food?
The last mile is the most common break point in cold chain express delivery for food because boxes sit in warm places. A van, lobby, and sunny porch can undo a strong pack-out. You cannot assume the receiver is ready. You must design for real behavior.
The fix is simple and operational: clear delivery rules, better timing, and exception handling. Your packaging is armor. Your SOP is your battlefield plan.
Lane Risk Score (0–10): a fast self-check
Score each item 0–2 and add them up:
Delivery window control (appointment or tight window)
First-attempt success rate (signature, secure handoff, or reliable access)
Weather exposure (heat, sun, or long outdoor waits)
Handoff clarity (driver knows “do not leave” expectation)
Receiver readiness (can refrigerate immediately)
0–4: high risk lane
5–7: medium risk lane
8–10: low risk lane
| Risk band | What to change first | The practical value for you |
|---|---|---|
| 0–4 | upgrade packaging + enforce no-drop rules | fewer refunds |
| 5–7 | add monitoring + tighten handoff messaging | faster troubleshooting |
| 8–10 | optimize cost and weight | better margins |
Practical tips and advice
High-risk lanes: require signature or secure pickup for perishables.
Office deliveries: avoid Friday unless receiving is guaranteed cold.
Home deliveries: use SMS alerts and bold “refrigerate immediately.”
Practical case: A subscription brand reduced spoilage by shifting deliveries to earlier-in-day routes.
What monitoring proves cold chain express delivery for food stayed in range?
Monitoring turns cold chain express delivery for food from a guess into a controlled process. It helps you learn where failures happen and defend decisions when customers dispute quality.
Start with a simple rule: you do not need to monitor every box forever in cold chain express delivery for food. You need to monitor enough to map risk by lane and season. Then you standardize what works.
Monitoring options that fit different budgets
| Level | Tool type | Best use | The practical value for you |
|---|---|---|---|
| Basic | time/temperature indicator | low-risk lanes | quick proof for customers |
| Standard | single-use temperature logger | medium-risk lanes | better root-cause learning |
| Advanced | real-time sensor + alerts | high value/high risk | intervene before loss |
Simple acceptance rules your team will actually follow
Chilled: set a max temperature and max time above it.
Frozen: set “softening risk” thresholds and time limits.
Controlled ambient: set max heat exposure windows.
Example rule format: Accept if excursions stayed under X minutes. Escalate if excursions exceeded X minutes.
How do you meet 2025 compliance expectations in cold chain express delivery for food?
Compliance in cold chain express delivery for food is about documented control, not perfect shipping. You show you have a plan, you follow it, and you improve it. Keep it practical: a one-page checklist beats a forgotten binder.
FDA’s FSMA Sanitary Transportation rule is designed to prevent transportation practices that create food safety risks, including failure to properly refrigerate food. U.S. Food and Drug Administration
In U.S. regulations, vehicles and transport equipment for foods requiring temperature control must be equipped as needed to provide adequate temperature control. eCFR
If you are planning for traceability, note that FDA has proposed a 30-month extension for the Food Traceability Rule compliance date to July 20, 2028, and Congress directed FDA not to enforce the rule before that date. You have time, but you do not have less responsibility. U.S. Food and Drug Administration
The shipment documentation checklist (simple but strong)
Product identity: SKU, lot, quantity
Pack-out recipe used: shipper + coolant layout
Time stamps: pack-out and pickup times
Monitoring record: indicator/logger ID (if used)
Exception notes: delays, failed attempts, damage
Receiver instructions: what to do on arrival
Practical tips and advice
If you ship cross-border: build a lane document packet once, reuse it.
If you ship to retailers: align receiving rules with their cold storage flow.
If you ship DTC: include a one-card “what to do on arrival” guide.
How do you control cost in cold chain express delivery for food without losing quality?
Cost control in cold chain express delivery for food comes from lowering variability, not cutting corners. The cheapest box is expensive if it creates reships. The most expensive box is wasteful if your lane is stable.
Use a total-cost view, then optimize by lane in cold chain express delivery for food. Your goal is the lowest cost per successful delivery, not the lowest packaging line item.
The delivered-cost equation (use this monthly)
Delivered Cost per Successful Shipment =
( Packaging + Freight + Labor + Claims Cost ) / Successful Shipments
The levers that actually move cost
Right-sizing: smaller box, less void, lower dimensional weight
Lane timing: better cutoffs reduce hub delays and warm windows
SKU grouping: separate chilled and frozen to reduce mixed failures
Pack-out training: faster sealing reduces warm exposure
Rule of thumb: If claims exceed 2–3%, fix lanes before you cut packaging.
2025 trends shaping cold chain express delivery for food
In 2025, cold chain express delivery for food is being reshaped by proof, reuse, and smarter lane design. Customers want speed, but they also want evidence in cold chain express delivery for food. Operations teams want growth, but they need repeatability.
Latest progress you can act on
Proof-of-temperature expectations are rising for premium categories.
Right-sizing tools and better insulation designs are cutting freight waste.
Exception workflows are getting faster: detect delays before quality drops.
Reusable/returnable packaging programs are expanding in repeat-customer models.
Market insight (plain language)
If your product value goes up, your tolerance for failure goes down. That is why lane-based pack-outs and sampling monitoring are becoming a competitive advantage.
Interactive element: Cold Chain Express Delivery for Food Readiness Score
Answer Yes/No. Give yourself 1 point per “Yes.”
We have lane-specific pack-outs for summer vs winter.
We enforce a maximum doorstep time for chilled/frozen items.
We log pack-out time and pickup time for express shipments.
We run routine temperature logging (not only after complaints).
We have written SOPs for staging, handoff, and exceptions.
We can explain our temperature targets in simple ranges.
We have a traceability and record-sharing plan for key SKUs.
Score 0–2: High risk. Fix basics before scaling.
Score 3–5: Stable but leaky. Expect losses in heat waves and peaks.
Score 6–7: Strong foundation. Now optimize cost and customer experience.
Common questions about cold chain express delivery for food
Q1: What is cold chain express delivery for food in one sentence?
It is fast delivery designed to keep food within safe temperatures across every handoff, especially last mile.
Q2: Is express always safer than standard shipping?
No. Express cuts time, but it can add variability. Safety comes from packaging + SOPs + monitoring.
Q3: How long should I design for in overnight cold chain express delivery for food?
Design for 24–36 hours so your packaging survives delays, not only clean days.
Q4: Do I need temperature loggers for every shipment?
Not always. Sample by lane first, then increase monitoring on high-loss lanes and premium SKUs.
Q5: Can I ship chilled and frozen together in cold chain express delivery for food?
It is risky unless you have validated a dual-zone pack-out. Separate shippers are often safer.
Summary and practical recommendations
Cold chain express delivery for food succeeds when you set clear targets, pack with repeatable recipes, and design for last-mile reality. Right-size your shipper to reduce warm air. Choose coolant that matches the product state. Seal fast and label clearly so the receiver acts quickly. Add a lane risk score and sampling monitoring so you improve by data, not by guesswork.
Your next steps (CTA)
These steps help you run cold chain express delivery for food as a repeatable system, not a daily fire drill.
Pick one lane and one product family.
Run 10–30 test shipments using a single pack-out recipe.
Review exceptions weekly and update your recipe by season.
Upgrade only what the data demands (insulation, coolant, SOP, or monitoring).
About Tempk
At Tempk, we support cold chain express delivery for food with practical insulated packaging systems, coolant strategies, and shipment-ready workflows. We focus on repeatability: validated pack-outs, lane assumptions you can explain, and monitoring-friendly designs that perform when handling gets rough. Our goal is simple: help you deliver better food quality with fewer exceptions and less waste in cold chain express delivery for food.
Next step: Share your product type (chilled, frozen, or controlled ambient), your lane time goal, and your delivery region. We will recommend a pack-out recipe and a testing plan you can apply immediately.
Refrigerated Express Delivery: How Do You Make It Work?
Last updated: December 15, 2025
Refrigerated express delivery is how you move chilled goods fast and keep them within spec. In 2025, “on time” is not enough if temperature drifts. Many teams use simple cold targets like ≤40°F (4°C) for refrigerators and ≤41°F (5°C) for cold holding as practical safety anchors. Your real win is fewer handoffs, less waiting, and clear proof at delivery.
This article will help you:
Understand what refrigerated express delivery really means (beyond “fast shipping”)
Set clear temperature targets, including do-not-freeze rules and buffers
Choose packaging and service models that match your lanes and budget
Build a refrigerated express delivery SLA that prevents disputes
Control last-mile risk so “porch time” does not ruin the shipment
Use a simple decision tool + readiness self-test before you scale
What Is Refrigerated Express Delivery in 2025?
Refrigerated express delivery is fast delivery that keeps product within a defined cold range from pickup to handoff. It is built for same-day, overnight, or 24–48 hour windows. Unlike standard cold chain shipping, it reduces waiting time and handling points. That is how it lowers temperature shock risk.
Think of it as a “cold corridor” with fewer doors to open. Less time parked means less time warming up. Fewer stops also means fewer places to lose accountability. If you cannot prove conditions stayed acceptable, speed alone will not save the shipment.
Refrigerated express delivery vs standard cold chain
| Feature | Standard cold chain | Refrigerated express delivery | What it means for you |
|---|---|---|---|
| Transit time | 2–7 days | Same-day to 48 hours | Lower spoilage exposure |
| Handling points | Multiple hubs | Minimal handoffs | Fewer temperature shocks |
| Visibility | Periodic checks | Continuous or frequent data | Faster accept/reject decisions |
| Typical use | Bulk flows | Time-critical lanes | Better customer outcomes |
| Cost style | Lower upfront | Higher per shipment | Often lower total loss cost |
Practical tips you can use today
Start with your top 3 SKUs: Pilot refrigerated express delivery rules before scaling.
Design for the worst hour: Lunch rush and evening doorsteps are the risky windows.
Measure before you change: One week of basic logging reveals your true weak points.
Real example: A regional seafood seller moved metro orders to refrigerated express delivery and saw fewer “arrived warm” refunds within one quarter.
When Should You Use Refrigerated Express Delivery?
Use refrigerated express delivery when product value drops fast and the customer will not wait. Fresh seafood, ready-to-eat meals, dairy, chilled bakery fillings, and temperature-sensitive health products are common fits. Your biggest gain is less time in risky places. Think docks, sorting areas, and doorsteps.
If you ship through standard parcel networks, your box may sit in warm facilities. Even great packaging cannot erase long, uncontrolled dwell. Refrigerated express delivery makes sense when you want fewer hubs, tighter delivery windows, and a clearer chain of custody.
Food vs pharma: same tool, different priorities
| Use case | Typical risk | Control focus | What it means for you |
|---|---|---|---|
| Chilled food | Spoilage + food safety | Time out of refrigeration | Reduce returns and complaints |
| Chilled pharma/health | Potency loss + compliance | Documentation + monitoring | Reduce deviations and rework |
| Meal kits | Porch exposure | Delivery window + packout | Fewer “warm on arrival” tickets |
A quick “Is this worth it?” filter
If you answer “yes” to two or more, refrigerated express delivery is usually justified:
A single failure costs more than faster shipping.
Customers complain about “warm on arrival” today.
Your product cannot tolerate hub delays or porch time.
You need evidence for audits, not just promises.
You ship do-not-freeze items in winter.
How Cold Should Refrigerated Express Delivery Be?
Refrigerated express delivery should match your product requirement, not a generic “cold” claim. For many chilled foods, teams use ≤41°F (5°C) as a common cold-holding reference point. For general refrigerator safety, ≤40°F (4°C) is a widely used target. But your SKU may need something else.
Treat temperature targets like speed limits. “Careful driving” is not a number. Your refrigerated express delivery spec must define pass/fail. It should also define what happens when data shows an excursion.
A simple temperature target map you can reuse
| Product group | Common target zone | Typical failure mode | What it means for you |
|---|---|---|---|
| Chilled foods (many) | ≤41°F / 5°C | Warming in last mile | Tight windows matter |
| Refrigerator safety anchor | ≤40°F / 4°C | Warm staging and delays | Fix handling first |
| 2–8°C chilled | Many biologics/diagnostics | Excursions during handoffs | Add monitoring |
| Controlled ambient | 15–25°C | Heat exposure | Heat protection matters |
| Frozen | ≤-20°C (often) | Slow transit + thaw | Higher coolant + speed |
Practical tips for setting targets
Write one sentence: “Must remain ≤5°C for full transit.”
Add a buffer: If your limit is 8°C, aim lower to absorb small delays.
Define do-not-freeze: Winter failures are often silent and expensive.
Refrigerated Express Delivery Models: Active, Passive, or Hybrid?
A refrigerated express delivery model is simply where your cold control lives. You usually choose between active refrigeration (a fridge on wheels) and passive packaging (a well-packed cooler). Many teams end up hybrid. They use active for dense city routes and passive for long-tail addresses.
Active models handle frequent door openings better. Passive models are faster to start and scale per parcel. Your best choice depends on stop count, route density, and proof needs.
Decision tool: choose your refrigerated express delivery model in 60 seconds
Answer A or B:
Many multi-stop routes with doors opening often? A → Active
Small parcels to many addresses? B → Passive
Customers demand live visibility? A → Active or hybrid
Strong reverse logistics (reuse/returns)? A → Active or reusable passive
Apartments with delays? A → Active + appointment windows
| Choice factor | Active refrigerated | Passive insulated shipper | What it means for you |
|---|---|---|---|
| Door-open frequency | Handles better | Loses cold faster | Last mile is the battleground |
| Setup speed | Needs fleet | Easy to start | Passive wins pilots |
| Consistency | High if maintained | Depends on packout | Training is your ROI |
| Cost profile | Route-based | Per-parcel | Match your order pattern |
Practical tips for model selection
Start hybrid: Active in metro lanes, passive for rural next-day.
Do not guess stop counts: Your route data already knows the truth.
Plan for failure: Missed delivery hurts passive shipments most.
How Do You Pack for Refrigerated Express Delivery Without Freezing Product?
The #1 packaging failure in refrigerated express delivery is overcooling a product that should stay chilled. The #2 failure is too much empty space. That empty air becomes a warm engine. Your goal is controlled chill, not “maximum ice.”
Packing is like making an iced drink. Too much ice can crack the glass. Too little ice makes it warm. You need the right coolant, the right placement, and the right box fit.
Packout design rules staff can follow
| Packout element | What “good” looks like | What to avoid | What it means for you |
|---|---|---|---|
| Coolant choice | Gel packs or PCM matched to range | Random freezer packs | Fewer surprise freezes |
| Product buffering | Divider or air gap layer | Direct coolant contact | Fewer “frozen corners” defects |
| Void control | Snug fit, low headspace | Half-empty boxes | Longer hold time |
| Lid discipline | Closed during staging | Open lids “for speed” | Hidden warming risk |
Packaging decision tool: pick the right protection fast
Score each line 0–2 and add them up:
Transit time: same-day (0) / overnight (1) / 48h (2)
Handoffs: 0–1 (0) / 2–3 (1) / 4+ (2)
Ambient risk: mild (0) / seasonal extremes (1) / hot or unpredictable (2)
Product sensitivity: tolerant (0) / moderate (1) / fragile or regulated (2)
Total score → your packout direction
0–3: Light insulation + simple indicator
4–6: Stronger insulation + PCM/gel + data logger
7–8: Heavy-duty passive + redundancy or active solution + real-time alerts
| Score band | Typical setup | What you gain | What to watch |
|---|---|---|---|
| 0–3 | Light passive shipper | Low cost, quick start | Limited delay tolerance |
| 4–6 | PCM + logger | Proof and better stability | Needs packout discipline |
| 7–8 | Active or redundant passive | Fewer surprises | Higher cost and reverse logistics |
Step-by-step: a simple packout workflow
Confirm the lane window: same-day, overnight, or 48 hours.
Condition the coolant: match it to your target range.
Add a buffer layer: especially for do-not-freeze products.
Fill the voids: stop air pockets from circulating heat.
Seal and label fast: stage late, load last, deliver first.
Real example: A ready-to-eat meals brand reduced “ice crystal” complaints by adding a divider and switching to a 5°C PCM.
How to Write a Refrigerated Express Delivery SLA That Reduces Claims
A refrigerated express delivery SLA should define temperature performance, time limits, and the proof you get back. Without proof, every issue becomes an argument. A strong SLA also controls “silent dwell,” where a shipment sits warm for hours without anyone noticing.
Most teams only specify delivery time. For refrigerated express delivery, you also need pickup cutoff, max hub dwell, first-attempt success, and an exception protocol. This is where claims rates usually drop.
Refrigerated express delivery SLA checklist
| SLA clause | What to specify | Why it matters | What it means for you |
|---|---|---|---|
| Temperature band | Exact limits + tolerance | Removes “close enough” | Faster accept/reject decisions |
| Max dwell | Hub, dock, vehicle limits | Dwell drives warming | Fewer excursions |
| Delivery attempt rule | Appointment or signature | Avoids porch time | Fewer complaints |
| Data & reporting | Logger return + timestamps | Proof beats opinions | Easier audits |
| Exception protocol | Who calls, when, what action | Rescue is time-sensitive | Fewer write-offs |
Practical SLA language you can copy (edit to fit)
Temperature: “Shipment must remain 2–8°C for full transit.”
Time out of cold: “No single dwell >60 minutes outside refrigeration.”
Last-mile: “High-risk items require first-attempt success or return.”
Evidence: “Carrier provides scan events and temperature report within 24 hours.”
How Do You Control Last-Mile Risk in Refrigerated Express Delivery?
Last mile is where refrigerated express delivery wins or fails. Doorsteps, missed calls, traffic, and building access can turn a perfect plan into a warm box. You cannot “package your way out” forever. You need rules that shrink exposure time.
Think of the last mile like the final five minutes of cooking. Most damage happens fast. Many public health guides use simple rules like “do not leave perishables out for more than 2 hours” (and 1 hour in very hot conditions) as a practical guardrail. Use the same logic to limit doorstep time. Your best protection is predictability and clear handoff design.
A last-mile playbook for refrigerated express delivery
| Last-mile control | What it looks like | What it prevents | What it means for you |
|---|---|---|---|
| Appointment windows | 2–4 hour slot | Porch warming | Fewer refund tickets |
| Signature / secure handoff | Verified receipt | Unattended exposure | Better traceability |
| Customer pre-alert | Message before arrival | Failed first attempt | Higher success rate |
| Delivery sequencing | Chilled items first | Warm stops | More consistent temps |
Practical tips you can apply this week
Give drivers a “cold first” rule: high-risk stops go early.
Use building notes: gate codes reduce waiting time.
Track failed deliveries as defects: they are not “bad luck.”
Real example: A specialty dairy brand improved outcomes by adding pre-alerts and a strict “no unattended drop” policy on hot days.
Monitoring Refrigerated Express Delivery: Proof, Not Promises
Monitoring turns refrigerated express delivery from a promise into proof. It also shows where failure really happens: packing, hubs, or doorstep. You do not need perfect monitoring on day one. You need consistent monitoring on the lanes that matter.
Start with your highest-value SKUs and riskiest routes. Use the data to tighten SOPs and SLAs. Over time, you can reduce overpacking because you know your real risk.
A simple monitoring plan (pick by risk tier)
| Shipment risk | Monitoring method | Evidence you get | What it means for you |
|---|---|---|---|
| Low | Indicator + receiving temp check | Pass/fail snapshot | Quick decisions |
| Medium | Single-use data logger | Full trip profile | Clear root-cause reviews |
| High | Real-time tracker + alerts | Live exception handling | Stop losses before delivery |
Interactive self-test: your Refrigerated Express Delivery Readiness Score
Give yourself 0, 1, or 2 points for each statement:
We define the temperature band for every SKU in writing.
We can show proof data for at least 80% of chilled shipments.
We have a winter packout for do-not-freeze products.
We track failed delivery attempts as a KPI.
We have an excursion rule: accept, quarantine, or reject.
Score guidance
0–4: You are running on hope. Start with SOPs and basic loggers.
5–7: You are stable. Add seasonal tests and stronger last-mile rules.
8–10: You are ready to scale refrigerated express delivery confidently.
Practical monitoring tips
Place sensors where risk lives: near doors and warm spots, not only the center.
Name one decision owner: excursions need one accountable person.
Use trends, not blame: fix repeat causes, not people.
What Does Refrigerated Express Delivery Cost, Really?
Refrigerated express delivery is expensive when you measure the wrong thing. The right metric is cost per successful, in-spec delivery, not cost per shipment. One warm delivery can erase profit from dozens of successful ones. That is why smart teams segment lanes by risk.
Hidden costs often come from re-ships, refunds, disposal, and support time. When you include those, a slightly higher-priced lane can be cheaper overall. It also protects brand trust, which is real even if it is hard to invoice.
A simple cost model you can run internally
| Cost driver | What increases it | What controls it | What it means for you |
|---|---|---|---|
| Packaging | Thick insulation, more coolant | Right-size + seasonal packouts | Avoid over-pack spend |
| Service level | Same-day + narrow windows | Lane segmentation | Spend where needed |
| Monitoring | Real-time devices | Risk tiering | Proof where it matters |
| Failures | Missed deliveries, warm arrivals | SLAs + last-mile rules | Lower refunds and claims |
Mini calculator: “in-spec delivery cost”
Use this quick formula for each lane:
(Shipping + Packaging + Monitoring + Avg failure cost) ÷ Successful deliveries
If the number drops after you upgrade service, you made a profitable change.
Which Regulations Shape Refrigerated Express Delivery for Food and Pharma?
Direct answer: refrigerated express delivery is easier when your process matches the rules your product lives under. Food programs usually focus on preventing temperature abuse during transport. Pharma programs focus on keeping products within acceptable limits and proving it with documentation. If you treat compliance as a checklist, you reduce rework and surprise audits.
Expanded explanation: you do not need to memorize every regulation to run refrigerated express delivery well. You need a repeatable system that covers the same control points regulators care about: vehicles/equipment, handling steps, training, records, and deviation management. In practice, this looks like clear temperature specs, packout diagrams, monitoring, and an excursion playbook that your team can follow under pressure.
A practical compliance checklist (run before every pickup)
Product spec: target range, max duration, and do-not-freeze rule
Packaging spec: packout diagram, coolant conditioning, and sealing steps
Carrier SOP: service level, handling rules, and handoff scan events
Monitoring plan: device type, placement, and who reviews results
Deviation plan: accept/quarantine/reject criteria and documentation steps
Training + records: packout photos, batch IDs, and shipment logs
| Compliance area | What to standardize | What to store as proof | What it means for you |
|---|---|---|---|
| Food transport hygiene | Clean vehicle + cold control | Training + logs | Fewer safety disputes |
| Pharma temperature control | Defined limits + monitoring | Trip data + deviation notes | Faster QA release |
| Air healthcare (if used) | Labels + documentation | Booking + handoff records | Fewer handoff errors |
Real example: A frozen seafood shipper reduced chargebacks by adding a written “arrival acceptance rule” and a clear exception protocol.
2025 Refrigerated Express Delivery Trends You Should Watch
In 2025, refrigerated express delivery is getting more data-driven and lane-specific. Teams want fewer temperature surprises and fewer manual steps. Customers also want proof and predictability, not speed alone. This is pushing operations toward simpler SOPs and stronger last-mile controls.
Latest developments snapshot (what’s changing)
More hybrid networks: active in dense cities, passive for long-tail delivery.
More “do-not-freeze” protection: winter packouts become standard, not optional.
More temperature proof: medium-risk lanes increasingly use data loggers by default.
Smarter route planning: fewer handoffs and shorter dwell times.
Better coolants: more PCM options tuned to 2–8°C and 15–25°C ranges.
What this means for you
If you can show consistent, repeatable outcomes, you reduce claims and support tickets. You also gain pricing power because customers pay for certainty. The winners make the cold chain boring. They remove surprise steps and tighten handoffs.
Frequently Asked Questions
Q1: What is refrigerated express delivery in one sentence?
Refrigerated express delivery is fast delivery that keeps product within a defined cold range from pickup to handoff.
Q2: How long can refrigerated express delivery stay in range?
Most passive setups target 24–48 hours. With optimized insulation and packout, it can last longer. Your lane risk matters more than the label.
Q3: Can refrigerated express delivery fail in winter?
Yes. Do-not-freeze products can be damaged by overcooling. Use buffer layers and winter-conditioned coolants.
Q4: Do I need real-time tracking for refrigerated express delivery?
Not always. Many lanes succeed with passive packaging plus a data logger. Use real-time alerts only where failure cost is high.
Q5: What is the fastest way to reduce “arrived warm” complaints?
Fix last mile first. Add appointment windows, pre-alerts, and a first-attempt success rule.
Q6: What should we do when temperature data shows an excursion?
Follow a written playbook. Decide accept, quarantine, or reject based on your product rule and evidence.
Summary and Recommendations
Refrigerated express delivery works when you control targets, handoffs, and last-mile time. Define your temperature band per SKU, then choose an active, passive, or hybrid model that fits your order pattern. Build seasonal packouts, enforce delivery windows, and require evidence. When you measure in-spec delivery cost, you will see why speed plus proof beats cheap shipping.
Your next steps (a simple 7-step plan)
Choose 3 high-value SKUs and write pass/fail temperature rules.
Pick 2 lanes and run a short pilot with basic logging.
Create summer and winter packouts with photos for training.
Add a first-attempt success last-mile rule for high-risk items.
Write an SLA addendum for dwell time, proof, and exceptions.
Review KPIs weekly for 4 weeks, then monthly.
Scale only after the pilot is stable and repeatable.
Frozen Foods Cold Chain Transportation in 2025
Frozen Foods Cold Chain Transportation in 2025?
Last updated: December 15, 2025
Frozen foods cold chain transportation works when you treat temperature like a product feature, not a logistics detail. Your baseline target is simple: keep frozen goods hard-frozen, usually around 0°F (-18°C) or colder, from dock to doorstep. The hidden risk is not one “bad truck.” It’s repeated warm–cold cycling during handoffs, which can wreck texture, taste, and shelf life. This guide shows you exactly where frozen foods cold chain transportation fails, and how you can fix it with repeatable steps.
This guide answers
How to set a frozen food shipping temperature range that fits your products
Where frozen foods cold chain transportation breaks during docks, cross-docks, and last-mile
How to choose packaging and coolant (including dry ice vs gel packs for frozen foods)
How to build reefer trailer temperature monitoring that catches issues early
How to create a simple HACCP plan for frozen transportation without paperwork overload
What 2025 trends are changing frozen foods cold chain transportation—and how you can benefit
Frozen foods cold chain transportation: what temperature do you really need?
Core answer: For frozen foods cold chain transportation, aim to keep product at or below 0°F (-18°C) and minimize warm spikes. What matters most is stability, because repeated thaw–refreeze cycles create larger ice crystals that damage texture. If you ship mixed frozen products, set your plan for the most sensitive SKU, not the average. When you can’t control everything, control the handoffs—because that’s where most warming happens.
Frozen foods cold chain transportation is like keeping ice cream in your freezer during a power flicker. One brief rise is bad, but multiple flickers are worse. The same thing happens inside a pallet when doors open repeatedly. Your goal is a steady “hard-frozen” state, not a perfect number on paper.
Frozen food shipping temperature range: a practical table
| Frozen category | Practical target | First quality loss you’ll notice | What it means for you |
|---|---|---|---|
| Ice cream & premium desserts | Colder is safer (often ≤ -18°C) | Grainy texture, ice crystals | Tight handoffs + stronger packaging buffer |
| IQF fruits & vegetables | ≤ -18°C | Softening after thaw, freezer burn | Better seals + reduce temperature cycling |
| Frozen seafood | ≤ -18°C | Drip loss, odor changes | Faster transfers + strict excursion rules |
| Frozen meat & poultry | ≤ -18°C | Surface dehydration, purge | Stable airflow + shorter dock dwell |
| Frozen bakery & dough | ≤ -18°C | Condensation, inconsistent bake | Moisture control + avoid warm staging |
Practical tips you can apply today
If you control one thing: control time out of cold at loading, cross-dock, and last-mile.
Pre-cool before you load: a warm trailer “steals” cold from product right away.
Write the target in plain language: “Keep product hard-frozen; no soft edges.” Your team will act faster.
Practical case: A frozen meal shipper reduced customer complaints by tightening dock dwell times and standardizing “hard-frozen” receiving checks—without changing carriers.
Where does frozen foods cold chain transportation break most often?
Core answer: Frozen foods cold chain transportation usually breaks in the “in-between” moments: staging, door-open events, cross-docking, and last-mile stop density. You can run a perfect linehaul and still lose the load at the dock. The fix is not complicated, but it must be consistent: max time out of cold, repeatable loading, and clear ownership for exceptions.
Think of frozen foods cold chain transportation like a relay race. You don’t lose because one runner is slow. You lose because the handoffs are messy. Every handoff is a chance for warm air to enter and refreeze later as frost, dehydration, and texture damage.
The most common failure points (and your fastest fixes)
| Risk point | What goes wrong | Early warning sign | Fast fix you can enforce | Benefit to you |
|---|---|---|---|---|
| Ambient staging at dock | Product warms at edges | Soft corners, wet cartons | Set a max staging time + use insulated staging bins | Fewer “mystery” quality claims |
| Door-open events | Warm air + moisture enters | Frost build-up later | Track door-open time; keep stops tight | Less cycling and freezer burn |
| Cross-dock transfers | Unplanned waiting | Logger spikes, uneven thaw | Pre-book doors; FIFO; enforce dwell limits | Better consistency across hubs |
| Airflow-blocked loading | Hot pockets inside load | Center pallets drift warmer | Maintain air channels; don’t over-pack | Fewer rejected pallets |
| Returns / re-delivery loops | Refreeze artifacts | Texture complaints | Treat returns as quality-risk, not inventory | Lower refund + re-ship costs |
Cross-dock temperature excursions you can control
In frozen foods cold chain transportation, cross-docks are high-risk because you often lose power continuity and time control. If your network requires cross-docking, treat it like a critical control point:
Use a handoff timer (visible, simple, enforced).
Move cold-to-cold wherever possible (even a chilled anteroom helps).
Instrument the lane with a few loggers so you stop guessing.
Practical case: A frozen bakery stabilized quality by staging cold-to-cold during peak season and assigning one supervisor to enforce transfer timing.
Which packaging stack best supports frozen foods cold chain transportation?
Core answer: Packaging in frozen foods cold chain transportation is your thermal “shock absorber.” It buys you time during real-world problems: traffic, dock delays, missed appointments, and last-mile stops. The best packaging is not the fanciest option—it’s the one you can run repeatably, with a simple pack recipe your team follows every shift.
If a reefer is your “engine,” packaging is your “seatbelt.” You don’t plan to crash, but you design for the moments when reality happens. In 2025, frozen foods cold chain transportation is often won or lost by lane-specific packaging recipes.
Dry ice vs gel packs for frozen foods: choose by lane
Dry ice is around -109°F (-78.5°C), which is why it can hold frozen conditions longer. But it adds handling steps and safety requirements. Gel packs are easier and more repeatable, but may struggle in hot lanes or long durations. Use this comparison to choose your coolant strategy for frozen foods cold chain transportation.
| Coolant option | Strengths | Limits | Best use case for you |
|---|---|---|---|
| Dry ice | Very cold, strong hold time, compact | Handling, ventilation, sublimation variability | Long parcel lanes, hot weather, premium desserts |
| Gel packs | Easy, flexible, repeatable | Less extreme cold; can underperform in heat | Short/medium lanes, dense products, stable workflows |
| PCM plates | Stable “plateau” temperature | Heavy; needs conditioning equipment | Regional distribution, predictable docks |
| Hybrid (dry ice + gel/PCM) | Balanced cold + stability | More steps and variables | Mixed SKUs, variable lane duration |
Packaging layers that reduce risk
| Layer | What it does | When you need it | What it means for you |
|---|---|---|---|
| Liner + seal | Reduces moisture loss | Long exposure, dry environments | Better texture and appearance |
| Insulated shipper | Slows heat gain | Parcel, last-mile, hubs | More time to recover from delays |
| Pallet cover/shroud | Buffers door openings | Multi-stop routes | Fewer edge-pallet losses |
| Void control | Reduces convection inside box | Parcel shipments | More predictable performance |
| Coolant placement | Defends likely heat entry points | Hot lanes, long lanes | Higher “real-world” hold time |
Interactive: the 2-minute packaging recipe builder
Answer these four questions and pick a recipe you can standardize:
Lane duration: 0–8h / 8–24h / 24–48h / 48h+
Ambient risk: mild / warm / hot (summer last-mile)
Stops & handoffs: low (0–2) / medium (3–6) / high (7+)
Product sensitivity: low / medium / high (ice cream, premium seafood)
Rule of thumb outputs (starting points):
0–8h, mild, low stops: insulated tote or basic insulation + minimal coolant
8–24h, warm or medium stops: stronger insulation + gel or PCM + strict sealing
24–48h, hot or high stops: hybrid approach (insulation + higher buffer + monitoring)
48h+, hot lanes: design like a “network shipment” with redundancy and clear exception rules
Practical tips for packaging consistency
Create 2–3 lane-based pack recipes, not 12 SKU-based variations.
Use placement photos: one photo prevents ten inconsistent packs.
Validate on your worst-case day, not your average day.
Practical case: A DTC frozen brand stopped “adding more gel packs” and switched to two lane recipes (short vs long). Performance improved and packing became faster.
How do you monitor frozen foods cold chain transportation without data overload?
Core answer: Monitoring makes frozen foods cold chain transportation predictable. Your monitoring system should answer two questions: Did we stay frozen? and Where did we warm up? Use layered monitoring based on risk: reefer telematics for operations, independent loggers for proof, and dock checks for discipline. The goal is fewer surprises, not more spreadsheets.
Think of monitoring like a smoke alarm. If it’s too sensitive, people ignore it. If it’s too quiet, it’s useless. Good frozen foods cold chain transportation monitoring uses clear thresholds and clear actions.
Reefer trailer temperature monitoring: where to measure
| Monitoring point | What it measures | What it tells you | Practical meaning for you |
|---|---|---|---|
| Supply air | Unit output temperature | Reefer performance | Confirms equipment, not product |
| Return air | Air coming back warmer | Airflow + loading issues | Helps find blocked circulation |
| Near-product probe | Approx product environment | Product risk proxy | Better link to quality outcomes |
| Door event sensor | Door open/close duration | Handoff behavior | Explains warm spikes |
| In-box logger | Package experience | True parcel reality | Validates packaging + lane |
Practical alert rules that reduce noise
Use temperature + time, not temperature alone.
Set two thresholds: warning (watch) and action (intervene).
Escalate by role: driver → dispatch → dock lead → QA.
Interactive: 10-minute excursion response playbook
When an alert hits, your team needs a script. Use this simple playbook:
| Situation | First action | Allowed fix | Evidence to save | What it protects |
|---|---|---|---|---|
| Door-open spike | Close and stabilize | Shorten stop; add buffer next run | Door time + temp graph | Prevents repeat behavior |
| Traffic delay | Confirm setpoint + airflow | Reroute, reduce stops | ETA + temp trend | Avoids slow warming |
| Cross-dock hold | Move cold-to-cold | Priority transfer | Dwell time + photo | Stops cycling damage |
| Equipment alarm | Verify power + unit status | Swap trailer or add cold storage | Alarm log + inspection | Saves high-value loads |
Practical tips for you
Place sensors where you expect the warmest conditions, not the easiest access.
Review exceptions weekly, but update SOPs monthly to avoid chaos.
Don’t try to monitor everything at once—start with your highest-claim lanes.
Practical case: One distributor discovered that “reefer failures” were actually airflow-blocked loads. Sensor placement exposed the pattern and claims dropped.
How do you build a HACCP plan for frozen transportation that people follow?
Core answer: A HACCP plan for frozen transportation should match how your operation really runs. Keep it lightweight: define hazards, define critical points (handoffs), monitor them, and document corrective actions. For frozen foods cold chain transportation, the most practical critical points are time out of cold, loading discipline, and equipment readiness. If your plan is readable in five minutes, it gets used.
Compliance should feel like guardrails, not bureaucracy. Many food safety programs focus on preventing temperature abuse and maintaining sanitary conditions in transportation. Your job is to translate that into simple, repeatable checks.
HACCP-lite (frozen transport version)
Hazards: temperature abuse, cross-contamination, packaging failure
Critical points: dock staging, cross-dock transfers, last-mile handoff
Limits: max time out of cold, trailer pre-cool verified, seal integrity checked
Monitoring: checklist + logger review by lane risk
Corrective actions: isolate lot, document, retrain, update SOP
FSMA-ready records in one page (what to keep)
| Record | Frequency | Owner | What it proves | What it means for you |
|---|---|---|---|---|
| Trailer pre-cool verification | Every load | Loader | Cold start readiness | Prevents early drift disputes |
| Loading checklist | Every load | Dock lead | Door time + sealing steps | Reduces variation by shift |
| Temperature log / logger | By lane risk | QA / Ops | Excursions + location | Claims defense + root cause |
| Sanitation / prior-load check | Scheduled | Carrier / Ops | Clean and suitable equipment | Buyer confidence |
| Corrective action log | As needed | QA | Learning loop | Stops repeat failures |
Practical tips for documentation that actually helps
Make exception reporting easy (photo + 2 bullets beats a long form).
Store one “gold standard” pack photo per recipe and train to it.
Run a short monthly review: top two root causes, two fixes.
Practical case: A frozen meat shipper reduced audit stress by turning their loading SOP into a one-page checklist and a 10-minute training huddle.
How can you reduce cost without weakening frozen foods cold chain transportation?
Core answer: The cheapest shipment is the one you don’t have to re-ship. In frozen foods cold chain transportation, cost savings come from right-sizing packaging, qualifying lanes with data, and eliminating repeat exceptions. Avoid “saving” money by removing buffer blindly. Instead, cut uncertainty first—because uncertainty is what makes you over-pack and over-cool.
Cost cutting should be a scalpel, not a chainsaw. When you improve predictability, you can reduce coolant, reduce box size, and reduce labor rework safely.
A simple cost-versus-risk matrix
| Lane type | Typical risk | Smart investment | What you can usually reduce safely |
|---|---|---|---|
| Short, predictable (0–8h) | Low | Simple SOP + spot checks | Extra coolant “just in case” |
| Medium, variable (8–24h) | Medium | Stronger recipes + loggers | Packaging variants and labor |
| Long or networked (24h+) | High | Redundancy + real-time alerts | Emergency rework and claims costs |
Cost levers that don’t gamble with quality
| Cost lever | Common waste | Smart adjustment | Benefit to you |
|---|---|---|---|
| Right-size packaging | Oversized boxes, void | Match box to lane recipe | Lower freight + steady performance |
| Standardize pack recipes | Too many SKUs/variants | Keep 2–3 recipes | Faster packing, fewer errors |
| Improve dock flow | Time out of cold | Appointments + timers | Lower claim rate |
| Reduce returns loops | Re-ships | Clear delivery windows | Lower total shipping cost |
| Lane qualification | Guesswork buffer | Test worst-case lanes | Reduce over-pack safely |
Practical tips for quick savings
Measure claims as a percent of revenue so trade-offs are visible.
Identify “repeat offenders” (one hub or route causes most problems).
Validate changes on the worst lane before rolling out broadly.
Practical case: A frozen snack brand created two pack recipes (short vs long lanes). Coolant use dropped, and complaint volume fell.
How do you win last-mile frozen foods cold chain transportation?
Core answer: Last-mile is the most fragile stage of frozen foods cold chain transportation because it combines multiple stops, traffic variability, and door-open events. Treat last-mile as its own cold chain, with its own packaging buffer and timing rules. If long-haul is your backbone, last-mile is your hands—where most damage happens.
Even perfect linehaul can fail in the final miles. The fix is to reduce uncontrolled time: shorter delivery windows, route zoning, and packaging that buys time when drivers are delayed.
Last-mile frozen delivery packaging: the repeatable method
| Last-mile challenge | What to do | Why it works | Practical meaning for you |
|---|---|---|---|
| Many stops | Zone routes | Fewer door events per route | More stable temps |
| Unpredictable traffic | Add buffer time + insulation | Reduces warm spikes | Fewer refunds |
| Doorstep delays | Short delivery windows | Less exposure at the end | Better “arrives hard-frozen” rate |
| Mixed temp products | Separate frozen from chilled | Prevents compromise | Cleaner receiving decisions |
Last-mile checklist you can hand to a team today
Pre-stage frozen orders in cold storage, not ambient staging.
Use insulated totes for multi-stop routes.
Track door-open time as a KPI (simple timer works).
Place one logger in the highest-risk tote/box each run.
Define “success” as temperature + condition, not just delivered.
Practical case: A frozen seafood seller reduced re-ships by holding parcels cold until the final dispatch wave and tightening delivery windows on hot days.
2025 trends shaping frozen foods cold chain transportation
In 2025, frozen foods cold chain transportation is being shaped by three practical forces: growing direct-to-consumer volume, higher customer expectations (“hard-frozen on arrival”), and stronger pressure to prove temperature control during disputes. The winners are not the teams with the most gadgets. They are the teams with repeatable processes and fast dock decisions.
What’s changing—and how you benefit
More lane-specific packaging: fewer “one box fits all,” more recipes tied to delivery windows.
More real-time visibility downstream: monitoring expands from linehaul into cross-docks and last-mile.
More focus on reusables: sustainability pressure pushes right-sizing and reusable systems.
More disciplined exception handling: faster playbooks reduce total loss cost.
Frequently asked questions about frozen foods cold chain transportation
Q1: What is the safest frozen food shipping temperature range for most products?
For most shipments, a practical target is 0°F (-18°C) or colder, with minimal warm spikes. The real goal in frozen foods cold chain transportation is stability, because repeated cycling damages texture. Always align with your product spec and buyer acceptance rules.
Q2: Is dry ice always better than gel packs for frozen foods?
Not always. Dry ice is powerful for long or hot lanes, but it adds handling steps and variability. Gel packs are easier and more repeatable for short to medium lanes. Choose based on lane duration, stops, and your team’s ability to execute consistently.
Q3: How do I know where temperature excursions happen?
Start with a lane qualification run using a few in-box loggers and at least one trailer measurement point. Then line up spikes with timestamps for loading, cross-docking, and last-mile stops. Frozen foods cold chain transportation improves fastest when you fix the single biggest spike source first.
Q4: How long can frozen food sit on a dock during loading?
There is no universal number because products, packaging, and ambient conditions vary. Set a max time based on lane tests and enforce it with a timer-based SOP. If your team cannot measure it, they cannot control it.
Q5: What’s the biggest hidden risk in frozen foods cold chain transportation?
Unplanned “in-between time.” Docks, cross-docks, missed appointments, and repeated door-open events usually do more damage than highway miles. Control handoffs before you buy more coolant.
Q6: Do I need data loggers for every frozen shipment?
Not always. Use a risk-based approach: loggers for new lanes, high-value SKUs, networked routes, and dispute-heavy customers. Once a lane is validated, you can reduce logger frequency while keeping spot audits.
Q7: What should I do when an excursion happens?
Record the event, isolate the affected lot, and follow your corrective action rules. Focus on preventing repeat causes: dock dwell, sealing errors, airflow-blocked loading, or stop density. A simple response playbook beats improvisation every time.
Q8: How can I reduce claims without increasing packaging cost?
Fix handoffs first. Clear staging limits, pre-cooling, pack recipe discipline, and targeted monitoring usually reduce claims faster than adding insulation. Once performance is stable, you can right-size cost safely.
Summary and recommendations
Frozen foods cold chain transportation is reliable when you control handoffs, keep products hard-frozen (often 0°F / -18°C or colder), and standardize packaging and monitoring by lane. Most losses come from repeated warm–cold cycling, not one single failure. Start by setting a max time out of cold at each handoff, then validate your highest-risk lanes with simple monitoring. Once stability improves, reduce cost by right-sizing packaging and cutting re-ships.
Your next step (simple 7-day action plan)
Day 1–2: Create two pack recipes (short lane, long lane).
Day 3: Add max time out of cold for loading and cross-dock.
Day 4–5: Run a lane test with a few loggers and review spikes.
Day 6: Update SOPs with photos and a short training huddle.
Day 7: Review top two root causes and pick one fix for next week.
About Tempk
At Tempk, we support frozen foods cold chain transportation with practical thermal packaging and workflow guidance. We help you match insulated shippers, reusable containers, and coolant strategies to your lane length, ambient risk, and product sensitivity. We also emphasize repeatable pack recipes and monitoring-ready designs, so your team can reduce temperature surprises and simplify claims resolution.
Next step: Share your lane profile (route time, stops, ambient conditions, and target temperature). We’ll help you map packaging + monitoring so your frozen foods cold chain transportation stays stable, auditable, and cost-smart.
Frozen Foods Cold Chain Predictive Analytics (2025)
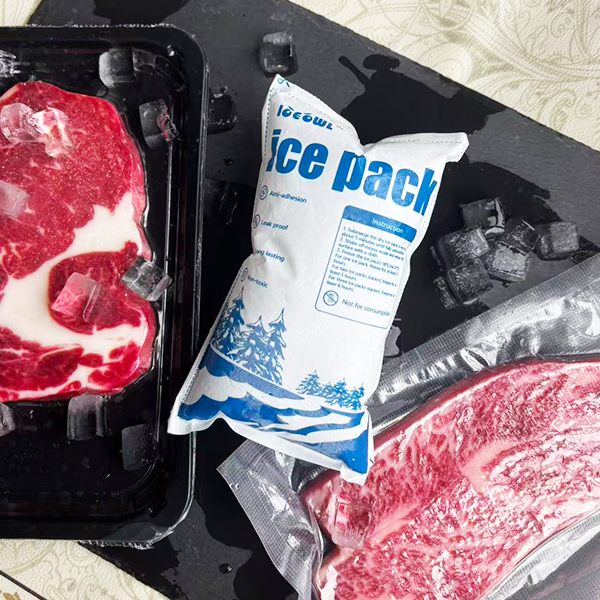
Frozen Foods Cold Chain Predictive Analytics in 2025?
Frozen foods cold chain predictive analytics helps you prevent temperature loss before it shows up in a log. You turn shipment history, dwell time, and equipment signals into a risk forecast you can act on today. Frozen storage is commonly managed around 0°F (-18°C) or below, so small time-and-temperature mistakes can become expensive fast. In 2025, the advantage is simple: fewer surprises, fewer claims, and fewer last-minute expedites.
This article will help you answer:
How frozen foods cold chain predictive analytics predicts real risk (not just charts)
How temperature excursion prediction for frozen food works in daily operations
How reefer ETA and dwell-time forecasting reduces missed delivery windows
How predictive maintenance for refrigerated equipment prevents mid-route failures
How shelf-life and inventory forecasting for frozen foods protects margin
How to implement frozen foods cold chain predictive analytics in 90 days
What is frozen foods cold chain predictive analytics, really?
Frozen foods cold chain predictive analytics is the practice of forecasting future cold-chain outcomes—temperature risk, time risk, and demand risk—using historical and real-time data. Think of it as a weather forecast for your frozen network. You do not only record what happened. You estimate what is likely to happen next, and you decide earlier.
In day-to-day operations, frozen foods cold chain predictive analytics usually answers three questions. Will this shipment arrive on time? Will it stay within spec? Will inventory be in the right place? When it works, the output feels simple: a risk score, a risky time window, and a recommended action.
The three forecasts you can start with today
| Forecast Type | What it predicts | Typical inputs | What it means for you |
|---|---|---|---|
| Temperature risk | Excursion probability | Temp trend, dwell, packaging, touches | Fewer rejects and write-offs |
| Time risk | Late arrival or missed appointment | ETA history, dwell, carrier performance | Fewer chargebacks and re-deliveries |
| Demand risk | Over/under stocking | Orders, seasonality, promotions | Less cash frozen in inventory |
Practical tips you can use immediately
Start small: pick one “problem lane” that already creates claims.
Keep outputs simple: one risk badge beats ten dashboards.
Act early: define “intervene when you still can,” not after arrival.
Real-world example: A frozen meal team flagged loads with long cross-dock dwell as high risk and rerouted only the top 10–15%. They avoided customer rejects without changing the whole network.
Frozen foods cold chain predictive analytics: which signals matter most?
Frozen foods cold chain predictive analytics becomes trustworthy when you combine temperature data with context data. Temperature tells you the symptom. Context tells you the cause. When you merge both, predictions feel stable enough to use in real decisions.
You do not need perfect data to start. You need consistent data. If your timestamps and IDs are reliable, you can get value quickly. If they are not, even “smart AI” will guess wrong.
Minimum viable dataset checklist
| Data category | Examples | Where it lives | Why it matters to you |
|---|---|---|---|
| Shipment plan | lane, appointment window, stops | TMS / ERP | Sets the baseline expectations |
| Handling time | pickup dwell, cross-dock dwell | TMS / WMS | Dwell drives warming risk |
| Temperature | 5–10 min readings | loggers / telematics | Shows drift and trend speed |
| Equipment | reefer model, setpoint notes | carrier systems | Explains recurring failures |
| Outcomes | rejects, claims, late flags | QA / customer service | Teaches “good vs bad” |
What “good data” looks like (in plain language)
Your logs should answer four questions quickly. When did it happen? Where did it happen? Which shipment was it? What was the rule? If any of those are unclear, people argue instead of acting.
Practical tips to fix data without a big IT project
Standardize timezones across sensors, TMS, and WMS.
Use one shipment ID rule and refuse duplicates.
Define “excursion” clearly (limit + duration) so teams agree.
Practical example: One distributor improved forecast accuracy just by fixing timezone drift and duplicate IDs. The alerts became actionable within weeks.
Frozen foods cold chain predictive analytics for temperature excursion prediction for frozen food
Temperature excursion prediction for frozen food works best when you predict the drivers of warming, not just the warming itself. In frozen operations, risk often spikes during long dwell, door-open events, weak pre-cooling, and overloaded staging. Your model should look for these patterns early.
A prediction is a probability, not a guarantee. That is fine. Your goal is lead time, so you can intervene before product quality degrades.
Build a risk score your team can explain in one minute
If a score is a black box, it gets ignored. If a score is explainable, it becomes a habit.
| Risk driver | Example trigger | What you do | What you gain |
|---|---|---|---|
| Dwell spike | +45 minutes vs baseline | rebook dock, switch node | prevents “silent warming” |
| Fast temp rise | sharp upward trend | check doors/airflow | fixes root cause early |
| Repeated door opens | >6 opens in 30 minutes | tighten staging discipline | reduces handling damage |
| Weather + delay | heat + congestion | reroute, add buffer | fewer late arrivals |
Practical tips and recommendations
Set early warnings: trigger at 20–30% before the critical limit.
Use “minutes-to-risk,” not “degrees-only.” Time is easier to act on.
Reduce alert noise: alert only when you can still change the outcome.
Real-world example: A frozen seafood shipper acted on high-risk dwell alerts and added one hub intervention step for only the top 15% risky loads. Exceptions dropped without adding trucks.
Frozen foods cold chain predictive analytics for reefer ETA and dwell-time forecasting
Reefer ETA and dwell-time forecasting is often the fastest win because time is the biggest risk multiplier. The longer a load sits, the more chances it has to warm up. Even strong packaging has limits when dwell stretches unexpectedly.
Frozen foods cold chain predictive analytics helps you predict late arrivals and long dwell early enough to reroute, adjust appointments, or plan a controlled handoff. This is how you stop “discovering problems at delivery.”
The dwell points that usually matter most
Yard dwell at origin and destination
Cross-dock dwell between carriers
Appointment waiting at retail DCs
Border or inspection dwell (when applicable)
| Dwell point | What to track | Trigger you can use | Action you can take |
|---|---|---|---|
| Origin yard | check-in/out timestamps | escalate at 60–90 minutes | fix staging, resequence loading |
| Cross-dock | dwell minutes by shift | top 10% dwell events | add capacity, change cutoff rules |
| Retail DC | appointment adherence | repeated misses | rebook windows, change carrier mix |
Practical tips and recommendations
Choose one threshold: “escalate at 90 minutes” beats vague guidelines.
Track one metric: “minutes out of controlled environment” is clear.
Make ownership obvious: a named owner + a short SLA prevents drift.
Real-world example: A frozen dessert company shifted pickups earlier by one shift on peak days. Late arrivals dropped without adding equipment.
Frozen foods cold chain predictive analytics for predictive maintenance for refrigerated equipment
Predictive maintenance for refrigerated equipment prevents breakdowns by detecting performance drift before failure. Think of it like noticing your car’s fuel efficiency dropping before the warning light turns on. In cold chain, drift often shows up as unstable cycles, frequent alarms, or slow pull-down.
Frozen foods cold chain predictive analytics is especially useful here because equipment failures tend to repeat. If you catch “repeat offenders,” you avoid the worst events.
Maintenance signals that are easy to start tracking
| Signal | What it suggests | Where you get it | What it changes for you |
|---|---|---|---|
| Repeat alarms | early fault pattern | reefer alarm history | fewer roadside events |
| Setpoint drift | controller or airflow issues | telematics/logs | fewer warm loads |
| Slow pull-down | efficiency drop | facility logs | earlier interventions |
| Unusual fuel/energy | strain or leaks | driver checks / meters | fewer shutdowns |
Practical tips and recommendations
Start with repeat offenders: fix the top 10% most incident-prone units.
Schedule service windows: plan around peak season, not during it.
Close the loop: log repairs and verify risk drops next month.
Real-world example: A 3PL used pull-down anomalies to schedule repairs at night during low volume. Weekend failures fell without expanding staff.
Frozen foods cold chain predictive analytics for shelf-life and inventory forecasting for frozen foods
Shelf-life and inventory forecasting for frozen foods protects margin because frozen inventory is expensive to store and slow to move. Even when food is “still safe,” quality can decline through dehydration, freezer burn, and long holding. Better forecasting reduces both stockouts and overproduction.
Frozen foods cold chain predictive analytics connects demand signals with operational limits. That helps you stop freezing the wrong inventory “just in case.”
A simple forecasting stack that does not require a data science team
| Forecast input | Simple method | What you use it for | Benefit to you |
|---|---|---|---|
| Weekly sales history | moving average (8–12 weeks) | baseline demand | fewer panic runs |
| Promo calendar | uplift factor | pre-build the right SKUs | higher fill rate |
| Seasonality | same-week last-year adjust | peak planning | fewer surprises |
| Service levels | safety stock targets | buffer sizing | less cash stuck frozen |
Practical tips and recommendations
If you sell to retail: plan around DC order cycles and appointment windows.
If you run DTC: include carrier cutoffs as real demand constraints.
If you have many SKUs: start with the top 20% that drive 80% volume.
Real-world example: A frozen vegetable team used weekly forecasts plus promo uplifts. Emergency production runs dropped while on-shelf availability improved.
Frozen foods cold chain predictive analytics implementation roadmap: a 90-day plan
Frozen foods cold chain predictive analytics succeeds when you pilot narrow, prove value, then scale with standards. Your first goal is not perfect prediction. Your first goal is better decisions that reduce exceptions.
Interactive decision tool: choose your first use case
Score each statement 0–2 (0 = not true, 2 = very true):
We have frequent late deliveries that cause chargebacks.
We have frequent temperature excursions or customer rejects.
We carry high frozen inventory and still see stockouts.
We see recurring reefer/freezer failures or setpoint issues.
We run repeatable lanes (same routes weekly).
Your score:
0–3: start with lane dashboards + basic dwell rules.
4–6: start with reefer ETA and dwell-time forecasting.
7–10: start with temperature excursion prediction + playbooks.
90-day plan (practical and realistic)
Days 1–14: pick one use case + one KPI (not five).
Days 15–30: clean the minimum dataset (IDs, timestamps, dwell).
Days 31–60: deploy 2–3 explainable models (lane risk + dwell + temp trend).
Days 61–75: operationalize alerts (owners, SLAs, playbooks).
Days 76–90: prove ROI, then expand to two more lanes or one more site.
KPI dashboard that proves ROI (track weekly)
| KPI | How to calculate | Target direction | What it means for you |
|---|---|---|---|
| Excursions per 1,000 shipments | count / volume | down | fewer quality risks |
| Minutes-to-intervene | alert → action time | down | faster prevention |
| Claims rate | claims / shipments | down | lower cost and waste |
| Lane risk accuracy | predicted vs actual | up | better planning trust |
| PM compliance | done / scheduled | up | fewer breakdowns |
Frozen foods cold chain predictive analytics for compliance and audit reporting
Frozen foods cold chain predictive analytics supports compliance by turning control into repeatable, auditable behavior. Regulators and customers do not only want “a temperature log.” They want evidence that you manage risk and take corrective action consistently.
You can make audits easier by storing monthly risk summaries and linking interventions to alerts. This also reduces internal finger-pointing because the decision logic is visible.
Compliance-focused best practices
Archive risk reports monthly (simple summaries beat raw logs).
Link each intervention to an alert (who acted, when, what happened).
Standardize excursion rules so QA and ops speak the same language.
2025 trends: what’s new in frozen foods cold chain predictive analytics?
In 2025, frozen foods cold chain predictive analytics is shifting from “prediction only” to decision support. Systems are getting better at recommending actions you can take now. Teams are also embedding risk into daily workflows, not separate dashboards.
Latest progress snapshot (2025)
Hybrid models: rules + machine learning, so outputs stay explainable.
Faster anomaly detection: trend-based alerts that reduce noise.
More workflow integration: risk badges in dispatch, WMS, and QA routines.
Energy-aware operations: predicting risk while reducing power waste.
Better data standardization: clearer event records across partners.
Market insight you can act on
Most preventable loss is concentrated. If you focus on the top 10% riskiest lanes and nodes, you usually capture most of the early ROI. That focus also improves team adoption because the wins are obvious.
Frequently Asked Questions
Q1: What is frozen foods cold chain predictive analytics?
It forecasts temperature risk, delay risk, and equipment failure risk using shipment history and real-time signals. You act earlier, so you lose less.
Q2: What is the fastest win for frozen foods cold chain predictive analytics?
Reefer ETA and dwell-time forecasting is often the fastest because time data is easy to capture and actions are clear.
Q3: Do I need AI to start predictive analytics?
No. Start with lane risk scoring and dwell thresholds. Add machine learning after your data is stable.
Q4: Do I need sensors on every pallet?
No. Shipment-level temperature plus node timestamps can work well. Add sensors only when ROI is proven.
Q5: How quickly can I see results?
Many pilots see measurable improvement in 30–90 days, especially in exceptions and response time.
Q6: How does predictive analytics help audits?
It creates time-stamped risk reports and links alerts to corrective actions, making control easier to prove.
Summary and Recommendations
Frozen foods cold chain predictive analytics helps you move from reaction to prevention. You predict excursions, delays, and failures early enough to change outcomes. Start with one painful use case, clean the minimum dataset, and launch explainable risk scores. Track a small KPI set weekly, then tune monthly.
Your next step (CTA): Pick your most frequent loss scenario and run a 30-day pilot on one lane or one cold room. Define the playbook first, then let the model support decisions.
About Tempk
At Tempk, we help teams make frozen foods cold chain predictive analytics practical in daily operations. We combine cold-chain expertise with monitoring, risk scoring, and audit-friendly reporting so your team knows what to do when risk rises. We focus on measurable outcomes: fewer temperature exceptions, fewer customer rejects, and less last-minute expediting.
Next step: Ask our team for a 90-day pilot blueprint with KPIs, thresholds, and an intervention playbook your operators can run.
Temperature-Controlled Gelato Eco-Friendly Logistics

Temperature-Controlled Gelato Eco-Friendly Logistics?
If you want temperature-controlled gelato eco-friendly logistics, you need two wins at once: keep gelato consistently frozen and reduce waste and emissions. In early transport, even a 2°C swing can damage gelato structure.
temperature-controlled gelato e…
Your fastest path is simple: reduce “melt-risk moments,” then right-size packaging and routes so you stop paying for refunds, re-ships, and overpacking.
This article will help you answer:
How eco-friendly packaging for gelato shipping can stay cold and reduce waste
How to pick dry ice vs PCM for gelato delivery without guessing
How to build a gelato cold chain monitoring checklist that reduces disputes
How to run frozen dessert last-mile logistics with fewer delays and fewer melts
What does temperature-controlled gelato eco-friendly logistics mean in practice?
Temperature-controlled gelato eco-friendly logistics means you design packing, handoffs, transport, delivery, and returns to keep gelato inside a safe frozen band while reducing waste and emissions.
temperature-controlled gelato e…
“Eco-friendly” is not a label. It’s measurable outcomes: fewer failed first attempts, less single-use material, better energy efficiency, and fewer re-shipments.
A key reason this matters: research summarized in your drafts highlights that agrifood cold chains were estimated at 1.32 Gt CO₂e in 2022, with energy-use emissions outweighing refrigerant emissions.
temperature-controlled gelato e…
In plain language: every avoidable melt claim is both a quality problem and a climate problem.
Where risk happens in temperature-controlled gelato eco-friendly logistics
| Risk point | What you see | What usually fixes it | What it means for you |
|---|---|---|---|
| Packing bench | Soft edges, sticky lids | Pre-chill + faster packout | Fewer “warm-start” failures |
| Carrier handoff | Random melt pockets | Tight cutoff times | More consistent outcomes |
| Last-mile delay | “Half-melted” complaints | Delivery windows + routing rules | Higher on-time rate |
| Doorstep exposure | Melted top layer | Cold-drop SOP + notifications | Fewer refunds and photos |
Practical tips you can use today
Pack to a clock: set a maximum “out-of-freezer” time during packing.
temperature-controlled gelato e…
Design for the worst 20%: heat waves and delays drive most failures.
Tag every claim: delay vs packing vs doorstep exposure, so fixes are obvious.
temperature-controlled gelato e…
Real-world pattern: Teams often get the biggest win from fewer failed first attempts, not from thicker insulation.
temperature-controlled gelato e…
What temperature targets keep temperature-controlled gelato eco-friendly logistics stable?
Temperature-controlled gelato eco-friendly logistics stays on track when you set a clear frozen target and enforce it at every handoff. Most producers target -20°C to -22°C during distribution because gelato’s tolerance is narrow.
temperature-controlled gelato e…
Even short exposure above -18°C can accelerate ice-crystal growth and texture loss.
temperature-controlled gelato e…
The simplest operating upgrade: set two targets—one for gelato core and one for air-in-box—then track time-above-threshold, not just “max temp.”
temperature-controlled gelato e…
Product core vs. box air: a simple target map
| Target | Typical use | KPI to track | What it means for you |
|---|---|---|---|
| Product core target | Quality + safety | Core temp at delivery | Fewer “grainy” complaints |
| Box air target | Excursion control | Minutes above threshold | Earlier warning signals |
| Time-above-threshold | Lane control | Minutes over limit | Easier carrier accountability |
Practical tips for temperature-controlled gelato eco-friendly logistics
Create a “no-touch thaw rule”: if gelato exceeds your limit, don’t refreeze and reship.
temperature-controlled gelato e…
Use a warm-day packout: summer packouts need faster handoffs and more buffer.
temperature-controlled gelato e…
Standardize freezer setpoints: “almost cold” causes invisible quality drift.
temperature-controlled gelato e…
Real case: A brand reduced customer complaints by 38% after switching to high-insulation containers that held stable -20°C performance for 24 hours.
temperature-controlled gelato e…
How do you build packaging for temperature-controlled gelato eco-friendly logistics without waste?
Temperature-controlled gelato eco-friendly logistics fails when packaging looks sustainable but can’t hold the lane. The winning order is: right-size first, then choose materials. Empty air and overboxing are the enemies.
temperature-controlled gelato e…
Packaging is your “portable freezer.” Reusable and recyclable options can match high performance when designed correctly, including EPP insulated boxes, fiber-based insulation, and hybrids.
temperature-controlled gelato e…
Packaging options for eco-friendly packaging for gelato shipping
| Packaging approach | Thermal holding power | Waste profile | Best use case | What it means for you |
|---|---|---|---|---|
| Reusable EPP shipper | High | Low waste per use | Repeat routes | Lower long-run cost |
| Fiber-based liners | Medium–High | Often recyclable/compostable | Short–mid lanes | Strong brand signal |
| rPET-style liners | High | Recycled-content | Volume shipping | Better cube efficiency |
| VIP + secondary insulation | Very high | Higher upfront impact | Premium lanes | Smaller box, same hold |
| Hybrid systems | High | Balanced | Mixed lanes | Flexible scaling |
Practical tips and advice
Split lanes into two packouts: standard lane vs hot-risk lane, instead of one “overkill” setup.
temperature-controlled gelato e…
Downsize cartons: shaving one inch per side often beats swapping liner material.
temperature-controlled gelato e…
Use modular cold blocks: tune refrigerant mass by season.
temperature-controlled gelato e…
Practical case: A gelato company cut packaging spend by switching from one universal shipper to two lane-based packouts.
temperature-controlled gelato e…
Dry ice vs PCM for temperature-controlled gelato eco-friendly logistics
Dry ice vs PCM for gelato delivery is a lane decision, not a philosophy. Dry ice is powerful for deep-freeze resilience, but it adds handling and marking requirements and must allow venting.
temperature-controlled gelato e…
PCMs can hold tighter bands and can be reusable, but they must match a frozen setpoint (often a -20°C class) and need consistent conditioning.
temperature-controlled gelato e…
Refrigerant choice cheat sheet
| Cooling method | Temperature behavior | Operational note | Best for you |
|---|---|---|---|
| Dry ice | Very cold, robust | Venting + compliance SOPs | Long lanes, high heat risk |
| Frozen-range PCM | Stable band control | Conditioning “recipe” matters | Predictable lanes, reuse-ready ops |
| Hybrid (PCM + insulation) | Balanced stability | More parts, more control | Mixed lanes, delay-prone carriers |
| Active cooling | Precise for pallets | Energy efficiency matters | Wholesale, long routes |
Practical tips you can use today
Never seal dry ice airtight: it needs venting to avoid pressure buildup.
temperature-controlled gelato e…
Treat PCM packout like a recipe: exact mass and placement beat “more is better.”
temperature-controlled gelato e…
Use dry ice only for “long-lane hot days”: avoid the expensive habit of using the heaviest solution everywhere.
temperature-controlled gelato e…
Real case pattern: Brands reduce waste when they stop applying the “maximum” packout to every order.
temperature-controlled gelato e…
How do you prevent last-mile failures in temperature-controlled gelato eco-friendly logistics?
Last-mile failures are where temperature-controlled gelato eco-friendly logistics is won or lost. Reduce exposure time, door-open events, and missed handoffs. Route optimization is one of the fastest ways to cut emissions without changing equipment.
temperature-controlled gelato e…
Think of route planning as choosing the smoothest road, not just the shortest. Fewer stops and fewer delays mean fewer temperature spikes.
temperature-controlled gelato e…
Low-carbon last-mile playbook for frozen dessert last-mile logistics
Deliver in cooler windows: early morning or late evening during heat waves.
temperature-controlled gelato e…
Use micro-distribution hubs: shorten last-mile distance in dense cities.
temperature-controlled gelato e…
Consolidate drops: fewer stops reduce door-open time and idling.
temperature-controlled gelato e…
Set a doorstep rule: “deliver only when someone can receive” for high-risk lanes.
temperature-controlled gelato e…
| Lever | Impact on gelato | Impact on sustainability | What to do next |
|---|---|---|---|
| Fewer stops | Less temp fluctuation | Lower fuel use | Consolidate routes |
| Predictable timing | Stable cold chain | Less idling | Time-window delivery |
| Weather-aware routing | Avoids heat spikes | Efficient energy use | Heat-index service tiers |
Real case: A distributor cut fuel use by 22% after switching to weather-aware route planning.
temperature-controlled gelato e…
How does monitoring make temperature-controlled gelato eco-friendly logistics easier?
Monitoring technology supports temperature-controlled gelato eco-friendly logistics because it prevents overcooling, reduces disputes, and shows you where heat enters your process. Overcooling wastes energy; real-time or sampled data helps you apply only what you need.
temperature-controlled gelato e…
Start simple. You do not need a complex system to see value. Compact sensors can track temperature deviations, exposure duration, and shock events.
temperature-controlled gelato e…
Gelato cold chain monitoring checklist (copy/paste)
Before packout: freezer setpoint confirmed + product fully hardened
During packout: start timer (“out-of-freezer” limit) + photo of placement
At handoff: record pickup time + box seal check
In transit (sampled): peak temp + minutes above threshold
At delivery: doorstep time + customer notification sent
After delivery: claims tagged (delay / packing / doorstep)
temperature-controlled gelato e…
| KPI | What to track | What it reveals | Fastest fix |
|---|---|---|---|
| Excursions per 100 shipments | By lane + season | “Bad lanes” vs “bad days” | Split packouts |
| Minutes above threshold | Not just max temp | Door-open + delay impact | Tight cutoffs |
| Claim rate vs excursion rate | Quality vs perception | False-claim patterns | Proof + messaging |
| Packout adherence | Recipe followed? | Training gaps | Standard work |
Practical tips you can use today
Start with sampling: log 5–10% before instrumenting everything.
temperature-controlled gelato e…
Write an “excursion playbook”: what happens when a threshold is crossed.
temperature-controlled gelato e…
Use proof to improve, not punish: teams hide problems if data is only disciplinary.
temperature-controlled gelato e…
Decision tool: choose your temperature-controlled gelato eco-friendly logistics setup
Use this quick scoring tool to pick the right packout and service level. (Total = 0–30)
Lane time (door close → customer freezer)
Same-day (0) / Next-day (2) / 2 days (5) / 3+ days (8)
Heat risk (peak season)
Mild (0) / Warm (2) / Hot (5) / Heatwave-prone (8)
Delivery certainty
Scheduled handoff (0) / Sometimes unattended (4) / Often unattended (7)
Returns available (for reusables)
Yes (0) / No (4)
Failure cost
Low (0) / Medium (2) / High (5)
Interpretation (what to do next):
0–8: Light-to-mid insulation + routing rules + doorstep controls
9–18: Strong insulation + validated refrigerant mass + monitoring sampling
19–30: Premium packout (dry ice or validated frozen PCM) + strict delivery rules + higher-touch monitoring
How can you balance cost and sustainability in temperature-controlled gelato eco-friendly logistics?
Balancing cost and sustainability is achievable through reuse and efficiency. Eco-friendly upgrades often lower total cost of ownership after you stabilize your process.
temperature-controlled gelato e…
If you can run high-volume routes, reusable systems become predictable. If you are still testing lanes, hybrids help you scale without locking into one extreme.
Cost comparison over time
| Solution | Year 1 cost | Year 3 cost | What it means for you |
|---|---|---|---|
| Single-use foam | Low | High | Waste fees and inconsistency rise |
| Reusable EPP | Medium | Low | Stable costs + repeatable lanes |
| Hybrid system | Medium | Medium | Flexibility for growth and seasonality |
Practical guidance
Growing brands: start with hybrids, then standardize two packouts.
temperature-controlled gelato e…
High-volume routes: invest in reusable containers and make returns frictionless.
Seasonal spikes: scale with modular insulation and lane rules, not random “more ice.”
2025 trends in temperature-controlled gelato eco-friendly logistics
In 2025, temperature-controlled gelato eco-friendly logistics is shifting toward precision, reuse, and transparency.
temperature-controlled gelato e…
Customers increasingly care how products are delivered, not just how they taste.
temperature-controlled gelato e…
Latest progress snapshot
Ultra-light insulation: same performance with less shipping weight
temperature-controlled gelato e…
AI route planning: faster responses to heat events and delays
temperature-controlled gelato e…
Reusable-as-a-service models: reduced upfront investment
temperature-controlled gelato e…
Market insight: Sustainability-driven logistics decisions increasingly influence purchasing behavior in premium dessert markets.
temperature-controlled gelato e…
Frequently Asked Questions
Q1: What is temperature-controlled gelato eco-friendly logistics in plain terms?
It’s a delivery system that keeps gelato consistently frozen while cutting avoidable waste, re-ships, and energy use across packing, transport, and last mile.
temperature-controlled gelato e…
Q2: What temperature is best for gelato transport?
Many producers target -20°C to -22°C for distribution because gelato is sensitive to small temperature changes.
temperature-controlled gelato e…
Q3: Do I need dry ice for temperature-controlled gelato eco-friendly logistics?
Not always. Dry ice is strong for long or hot lanes, but adds handling steps. Frozen-range PCMs can work for stable lanes when you validate the packout recipe.
temperature-controlled gelato e…
Q4: How do I make eco-friendly packaging for gelato shipping safer without adding weight?
Start by right-sizing the carton and removing void space. Then split lanes into standard vs hot-risk packouts, and validate insulation choices with monitoring.
temperature-controlled gelato e…
Q5: What’s the biggest hidden cause of melt complaints?
Doorstep exposure and delayed handoffs. Tight cutoff times, delivery windows, and customer alerts usually beat “more refrigerant” as a fix.
temperature-controlled gelato e…
Q6: What single metric improves both quality and sustainability?
First-attempt delivery success. When fewer boxes sit outside, you need less overkill insulation and you reduce refunds and re-ships.
temperature-controlled gelato e…
Summary and Recommendations
Temperature-controlled gelato eco-friendly logistics works when you control the moments that create melt risk: packout time, handoffs, last-mile delays, and doorstep exposure. Gelato’s narrow tolerance makes stability critical, with many producers targeting -20°C to -22°C.
temperature-controlled gelato e…
The most practical strategy is to right-size packaging, split lanes into standard vs hot-risk packouts, and use monitoring to stop guessing.
Your next steps (simple plan)
Set core + box-air targets and a clear excursion rule.
temperature-controlled gelato e…
Build two packouts (standard vs hot-risk) and standardize the recipe.
temperature-controlled gelato e…
Sample-monitor 5–10% of shipments and track minutes above threshold.
temperature-controlled gelato e…
Tighten last-mile rules (time windows + doorstep controls) and re-measure.
About Tempk
At Tempk, we support teams building temperature-controlled gelato eco-friendly logistics with practical cold-chain execution: packout SOPs, lane-based packaging strategy, and monitoring routines that reduce “mystery melts.”
temperature-controlled gelato e…
We focus on repeatable systems you can run every day—so quality improves while waste, refunds, and overpacking go down.
CTA: If you want a lane-specific packout recommendation and a simple monitoring plan you can run this week, talk with our team and turn your cold chain into a repeatable system.
Temperature-Controlled Frozen Dessert Cheap Business
Temperature-Controlled Frozen Dessert Cheap Business?
If you’re building a temperature-controlled frozen dessert cheap business, your biggest challenge is staying cold without letting logistics costs eat your margin. In 2025, cold chain expenses can reach 20–35% of operating costs, and frozen desserts often need -18°C to -25°C (0°F to -13°F) stability to protect texture. This guide helps you reduce melt claims, cut waste, and keep quality consistent—using lane-based decisions you can apply this week.
This article will help you answer:
How gelato shipping temperature control protects texture (and reviews)
Which low-cost insulated packaging for frozen dessert shipping is “enough” for your lanes
How to choose a frozen dessert last-mile delivery model that keeps refunds low
How to price with a simple frozen dessert shipping cost calculator
What to track in a temperature monitoring checklist for frozen desserts (without over-spending)
Why does temperature control make or break a temperature-controlled frozen dessert cheap business?
Direct answer: A temperature-controlled frozen dessert cheap business survives on repeatable texture. Even small warm–cool swings can turn “creamy” into “icy,” increasing complaints and refunds. Most frozen desserts perform best when you hold a stable frozen range (often -18°C / 0°F or colder), especially during handoffs and last-mile delivery.
Frozen desserts are like a snow sculpture in a backpack. It might look fine at first, but a short warm-up weakens the structure. Customers notice grainy texture and ice crystals before they see a full melt, and your brand pays the price in low ratings and chargebacks.
What temperature range is practical for transport?
| Frozen Dessert Type | Ideal Range | Risk if Too Warm | What This Means for You |
|---|---|---|---|
| Ice cream | -20°C to -25°C | Ice crystals form | Higher complaint and refund rates |
| Gelato | -18°C to -22°C | Texture collapses | “Premium” perception drops fast |
| Sorbet | -18°C to -20°C | Water separates | Shorter shelf life on arrival |
Practical tips you can apply now
Local delivery: Use tight windows + insulated totes instead of powered freezers.
Regional overnight: Use hybrid protection (insulation + matched coolant).
Longer lanes: Only upgrade to stronger systems when order value and reliability justify it.
Real example: One regional gelato brand reduced spoilage by 28% after tightening last-mile temperature range monitoring and packout discipline.
How do you keep a temperature-controlled frozen dessert cheap business cheap without losing quality?
Direct answer: A temperature-controlled frozen dessert cheap business stays profitable by balancing time + insulation + coolant, not by buying the cheapest materials. “Cheap” means optimized and repeatable—not fragile.
When you standardize one packout and one operating rule set, you stop paying for heroics. You also reduce the hidden cost nobody budgets for: re-makes, refunds, and support tickets.
The “Cold Chain Triangle” decision tool (interactive)
Score each lever from 1 (weak) to 5 (strong). Add your total.
Time Control: cutoffs, dispatch speed, delivery window reliability
Insulation Control: box fit, seal quality, void-fill discipline
Coolant Control: type, quantity, placement accuracy
Total 12–15: You can run lean packaging.
Total 8–11: Keep packaging moderate and narrow your delivery zone.
Total ≤7: Fix operations first, or refunds will erase your margin.
Cost mistakes that quietly destroy margins
Over-insulating short routes “just in case”
Using too many box sizes (training errors = melt claims)
Measuring temperature only after customers complain
Operational insight: One dessert retailer cut packaging cost by 22% by removing unnecessary secondary insulation layers and standardizing box sizing.
Which packaging is best for a temperature-controlled frozen dessert cheap business in 2025?
Direct answer: The best packaging for a temperature-controlled frozen dessert cheap business is right-sized, repeatable, and tested. Consistency is cheaper than “premium everything.”
A simple packaging stack (that most teams can execute fast):
Primary pack: sealed tub/wrap (leak-resistant)
Barrier layer: liner bag (protects insulation from moisture)
Coolant: gel packs, PCM, or dry ice (lane-based)
Insulation: EPS/EPP-style shipper, insulated liner, or reusable tote
Outer carton: protects, labels, stacks cleanly
Insulation options (what to buy first)
| Insulation Type | Cost Level | Thermal Hold | Weak Spot | Best Use |
|---|---|---|---|---|
| Insulated liner (foil/bubble) | Low | Medium | Gaps kill performance | Short lanes, tight packing |
| Foam shipper (EPS/EPP-style) | Medium | High | Bulky storage | Standard overnight lanes |
| Reusable insulated tote | Medium | High | Reverse logistics | Local routes, subscriptions |
| VIP panels | High | Very high | Higher cost/handling | Premium lanes only |
“Cheap” wins that matter more than thicker foam
Use the smallest box that fits. Air is the enemy.
Pre-chill product and packaging. Warm cardboard steals cold fast.
Standardize 1–2 packouts. Fewer variants = fewer mistakes.
Real example: A small gelato brand reduced melt complaints by tightening box sizing and using one consistent gel-pack layout—without buying a “better box.”
Gel packs vs PCM vs dry ice: what is cheapest for you?
Direct answer: The “cheapest” coolant depends on lane time + season + how controlled your handoff is. Gel packs are operationally simple, PCM helps texture stability, and dry ice delivers strong hold time but needs stricter handling and labeling discipline.
Dry ice is -78.5°C (-109.3°F)—powerful, but it can add friction (carrier rules, training, customer handling). PCM is like “smart ice” that melts at a chosen temperature band, helping reduce texture swings.
| Coolant | Best Use Case | Cost Control Lever | What It Means for You |
|---|---|---|---|
| Gel packs | Local / short routes | Standardize pack count | Lowest hassle, repeatable SOP |
| PCM | Texture-sensitive items (gelato) | Match PCM temp to product | Better texture, less over-freezing |
| Dry ice | Longer lanes / hot seasons | Tight cutoffs + labeling | Strong performance, more process steps |
Your 60-second coolant chooser (interactive)
Answer Yes/No:
Is the lane reliably ≤2 days?
Will it sit outside on arrival?
Is the order value high enough to absorb upgrades?
If “No” to #1: treat it as premium (upgrade packout) or decline it.
If “Yes” to #2: add a porch buffer layer or require attended delivery/pickup.
If “No” to #3: keep your promise narrower (shorter zones, earlier cutoff).
What delivery model fits a temperature-controlled frozen dessert cheap business?
Direct answer: A temperature-controlled frozen dessert cheap business wins by choosing the delivery model that matches your control level. If you can’t control handoffs, shorten the route. If you want distance, budget for stronger packaging and stricter cutoffs.
| Model | Best For | Risk Level | What It Means for You |
|---|---|---|---|
| Same-day courier | City launches | Medium | Lighter packout, tighter windows |
| Your route fleet | Subscriptions | Low | Highest control, lowest refund rate |
| Regional overnight | Growth | Medium–High | Needs realistic delay protection |
| B2B drops | Repeat lanes | Low–Medium | Margin improves with repeatability |
Cutoff times: the hidden profit switch
Set a cutoff that includes packout + staging + pickup buffer.
Avoid risky end-of-week shipments that can trigger weekend holds.
In hot months, shrink zones or upgrade only the hottest lanes.
Practical last-mile upgrades (cheap, effective)
Offer 2-hour windows instead of “all day.”
Send delivery-day reminders so customers are ready.
Define a safe drop policy to prevent doorstep heat exposure.
Real example: A mochi seller cut refunds after adding delivery-day SMS reminders and restricting “no-contact drop” during high-heat days.
Pricing and unit economics: a frozen dessert shipping cost calculator
Direct answer: You keep a temperature-controlled frozen dessert cheap business profitable by making costs predictable, then pricing around the worst realistic day, not the best. Underpricing is the fastest way to “grow” into losses.
Quick cost model (copy this)
True Cost per Order =
(Product + Labor)
Packaging
Delivery
(Refund Rate × Average Refund Cost)
Overhead Allocation
Target Price = True Cost per Order ÷ (1 − Target Margin)
Underpricing self-check (interactive)
Answer “Yes” or “No”:
Do you know packaging cost per order to the dollar?
Do you include a refund buffer in pricing?
Do you adjust packout rules by season or lane?
Can you explain your cutoff logic in one sentence?
Do you track outcomes for your worst lane?
4–5 Yes: priced like a real business.
2–3 Yes: exposed—fix tiering and tracking.
0–1 Yes: likely selling volume at a loss.
Tiered packouts keep “cheap” truly cheap
Tier A (local): lighter insulation + gel packs
Tier B (regional): stronger insulation + more coolant/PCM
Tier C (hot lanes): upgrade only when needed (not for everyone)
Real example: One startup improved margin by separating local courier pricing from regional overnight pricing. Customers accepted it because the promise was clearer.
Monitoring that protects a temperature-controlled frozen dessert cheap business
Direct answer: A temperature-controlled frozen dessert cheap business doesn’t need enterprise monitoring everywhere. You need proof on the lanes that lose money. Start simple and scale monitoring only where failures happen.
Temperature monitoring checklist for frozen desserts
Track these three points:
Product temp at packout (meet your internal standard)
Time out of freezer (keep it short and repeatable)
Arrival condition (firmness + melt pooling + package integrity)
A monitoring ladder (choose your level)
Level 0: freezer thermometer + daily log
Level 1: one low-cost logger per week on your worst lane
Level 2: one logger per batch per carrier lane
Level 3: real-time monitoring + exception alerts
For most small brands, Level 1 delivers the best ROI.
A simple 30-day scaling plan
Week 1 (Standardize): 1 SOP, 2 box sizes max, 1 coolant layout per size
Week 2 (Measure): lane outcomes, ambient band, refund reasons
Week 3 (Optimize): upgrade only the worst lane, tighten cutoffs
Week 4 (Expand): add one new zone, repeat measurement
Real-world result: One distributor cut energy costs by 19% after shifting from full refrigeration to a hybrid approach matched to delivery distance.
Dry ice rules (UN 1845) and safety basics
Direct answer: Dry ice can protect long lanes, but it demands discipline. Many shipments require “Dry Ice, UN 1845” marking, net weight, and mode/carrier-specific labeling steps. You must also avoid sealing packages airtight because CO₂ gas needs to vent.
Practical dry ice checklist (print and post)
Use a shipper design that vents gas (don’t seal airtight).
Mark Dry Ice / UN 1845 and net weight (kg) as required.
Apply the required label(s) for your carrier/mode when needed.
Train staff on safe handling: gloves, ventilation, storage rules.
Real example: A startup reduced carrier refusals by standardizing one dry-ice workflow and training every packer to follow it exactly.
How do you reduce refunds and chargebacks in a cheap model?
Direct answer: Refunds drop when your promise is realistic, your packout is repeatable, and your customer guidance is clear. You don’t need “perfect delivery.” You need fewer surprises.
Refund-reduction playbook
Publish simple delivery instructions (shade, doorbell, pickup options).
Add “hot-week rules” (pause risky lanes or upgrade temporarily).
Use a consistent claim flow: timestamp + photo + response standard.
Optional: take a quick packout photo for high-risk lanes.
Customer experience that saves orders (without sounding defensive)
“Frozen desserts may arrive frozen or semi-firm depending on weather.”
“If semi-firm, freeze 30–60 minutes before serving.”
“If warm or leaking, contact us with a photo within X hours.”
Real example: A brand cut support tickets by inserting a simple card: “If semi-firm, freeze 45 minutes.” Customers felt guided, not dismissed.
2025 trends shaping the temperature-controlled frozen dessert cheap business
Direct answer: In 2025, the winners are using lane-specific packaging, lighter right-sized systems, and selective monitoring. Customers expect reliability and transparency, while brands face cost pressure and rising sustainability scrutiny.
Latest progress to watch
Lane-based packouts: less waste, fewer refunds, better margins
Reusable packaging (local lanes): better unit economics where returns are easy
Smarter “just enough” data: simpler logs, faster root-cause fixes
Seasonal rules become normal: customers accept “summer packout” when explained
Market insight you can use now
Your cheapest growth lever is predictability: fewer box sizes, clear promises, and measured upgrades only where the data proves weakness.
Frequently Asked Questions
Q1: What freezer baseline should I use for a temperature-controlled frozen dessert cheap business?
Most operators treat 0°F (-18°C) or colder as a practical baseline. What matters most is consistency. Use a thermometer, log daily, and avoid frequent door-open cycles during packing.
Q2: Can gel packs work for a temperature-controlled frozen dessert cheap business?
Yes for short, controlled lanes—especially same-day or next-day. Keep the box tight, pre-chill everything, and use clear delivery windows. For hotter or longer lanes, tier up insulation or consider PCM.
Q3: When should I use dry ice for frozen desserts?
Use dry ice when you need longer hold time or you ship through hot conditions. It performs well but adds handling, labeling, and ventilation requirements. Only use it when the lane economics justify it.
Q4: How do I ship ice cream cheaply in summer without wrecking quality?
Sell a reliable window (often ≤2 days), ship early in the week, and add a seasonal booster only on hot lanes. Don’t upgrade every order—upgrade the risky lanes.
Q5: Do I need sensors in every shipment?
Not always. Start with a freezer log and a weekly sample logger on your worst lane. Add more monitoring only where it reduces refunds or resolves recurring disputes.
Q6: What’s the fastest way to reduce melt refunds without spending more?
Tighten cutoffs, reduce empty space in the box, and set clear arrival expectations (“frozen or semi-firm”). Communication and repeatability often beat thicker insulation.
Summary and Practical Recommendations
A temperature-controlled frozen dessert cheap business becomes profitable when you control time, heat protection, and proof. Keep boxes tight, tier your packouts by lane and season, and measure only where you lose money. Most importantly, sell a promise customers understand and you can consistently deliver—because consistency is cheaper than refunds.
Your next step (CTA): Pick one “core lane,” one standard packout, and one monitoring level. Run a 7-day test, log outcomes, and upgrade only the single worst lane first.
About Tempk
At Tempk, we build practical cold chain packaging and workflows for real budgets. We help you match insulation, coolant, and packout rules to your delivery lanes, so your frozen desserts arrive consistently—without overpaying for protection you don’t need.
Call to action: Share your product type, delivery zones, and promise window, and we’ll help you design a lane-based packout plan you can scale.
Cold Chain Dark Chocolate Quality Control (2025)
Cold Chain Dark Chocolate Quality Control?
You want your bars to arrive glossy and on-spec. Cold chain dark chocolate quality control keeps chocolate stable, not icy. Cocoa butter can soften in the low 30s °C and melt around 32–34°C, so one hot van can undo your work.
cold chain dark chocolate quali…
Aim for 15–18°C with 45–55% RH, then add rules for excursions and sealed acclimation at handoffs.
cold chain dark chocolate quali…
Cold chain dark chocolate quality control protects your brand.
This article will answer:
How cold chain dark chocolate quality control prevents bloom and soft bars during last mile delivery
What dark chocolate shipping temperature and ideal humidity for storing dark chocolate should look like in 2025
Which passive packaging for dark chocolate delivery works without overcooling
How to run cold chain monitoring for food with practical data logger settings for chocolate cold chain
How to use a receiving inspection checklist for chocolate shipments and a simple “keep / hold / rework” decision tool
What does cold chain dark chocolate quality control mean in plain English?
Cold chain dark chocolate quality control means you control temperature, humidity, time, and handling so quality stays stable.
cold chain dark chocolate quali…
It is not “make it as cold as possible.” It is “keep it comfortable and consistent.” Think of chocolate like a candle: heat and sweat both change the surface.
In practice, cold chain dark chocolate quality control has three pieces:
A target band (your comfort zone)
An excursion rule (what short spikes are acceptable)
A handoff routine (how you avoid condensation between climates)
The defects you should prevent first
Your customers judge quality in seconds. Start with the defects they notice fastest.
| Customer-visible defect | Typical trigger | Fast field check | What it means for you |
|---|---|---|---|
| Fat bloom (smooth white haze) | Warm spike + long warm dwell | Rub lightly; haze may smear | Looks “old,” increases returns |
| Sugar bloom (dusty, gritty) | Condensation + humidity swings | Feels gritty; may not smear | Looks “dirty,” hurts premium perception |
| Softening / deformation | Sustained warmth | Corners dent easily | Smears and breakage during unwrapping |
| Cracks / breakage | Drops + vibration | Fracture lines | More replacements and negative reviews |
| Odor pickup | Strong-odor storage | Smell test | “Warehouse taste” complaints |
These triggers and quick checks are the practical heart of cold chain dark chocolate quality control.
cold chain dark chocolate quali…
Practical tips you can apply today
If you see bloom, check temperature history before blaming temper.
If you see sugar bloom, fix transitions first. Condensation is the enemy.
If bars crack, fix cushioning and void space before changing box size.
Real-world case: A shipper saw bloom complaints mainly in coastal cities. The root cause was humid air plus cold packaging, not the recipe.
cold chain dark chocolate quali…
Cold chain dark chocolate quality control temperature: what shipping temperature and humidity should you use?
For most lanes, cold chain dark chocolate quality control works best at 15–18°C and 45–55% relative humidity.
cold chain dark chocolate quali…
This range keeps texture stable and lowers condensation risk. The goal is consistent “mid-teens,” not refrigerator cold.
If you go warmer, you raise softening and fat migration risk. If you go much colder, you raise dew-point risk during handoffs.
A simple target + alarm approach
Use one target and one alert band you can actually run.
| Lane type | Suggested target | Practical alert band | Your benefit |
|---|---|---|---|
| Climate-controlled storage | 16–18°C | 15–20°C | Stable gloss and snap |
| Controlled linehaul | 15–18°C | 12–20°C | Fewer hot spikes at hubs |
| High-risk last mile | 15–18°C | 12–20°C | Fewer doorstep failures |
Practical tips you can apply today
Write time limits, not just temperature limits. Carriers can manage time.
Keep staging short. “Just 20 minutes” repeats all day.
cold chain dark chocolate quali…
Offer cooler delivery windows in hot seasons when you can.
Real-world case: After enforcing “no sun staging” and adding a pallet cover, one team saw fewer soft bars on the same route.
cold chain dark chocolate quali…
Cold chain dark chocolate quality control: how to prevent fat bloom during chocolate transport?
In cold chain dark chocolate quality control, fat bloom is your most visible heat-related failure.
To prevent fat bloom during chocolate transport, reduce heat spikes and long warm dwell times. Bloom is often caused by temperature fluctuations that disturb cocoa butter crystals. When warm-cool cycles repeat, the surface can “reset” like candle wax.
Cold chain dark chocolate quality control wins here by focusing on repeatability. You do not need perfect weather. You need fewer surprises.
The “heat spike” checklist
Use this as a quick audit of your lane.
Are cartons staged in warm areas before loading?
Do hubs expose cartons to sun on docks?
Does last mile include porch exposure and delays?
If you answered “yes” to any, your cold chain dark chocolate quality control plan needs stronger handoffs and packaging.
Practical tips you can apply today
Cut dock dwell time first. It is often the biggest win.
Label cartons “Keep out of direct sun.” Behavior beats packaging.
Track peak temperature plus duration. That is what bloom “feels.”
cold chain dark chocolate quali…
Real-world case: A brand found most failures happened at a sorting hub dock, not on the road. After tightening the handoff rule, complaints dropped fast.
cold chain dark chocolate quali…
Cold chain dark chocolate quality control: ideal humidity for storing dark chocolate and stopping sugar bloom
In cold chain dark chocolate quality control, sugar bloom is usually a moisture-and-transition problem, not a recipe problem.
Ideal humidity for storing dark chocolate is moderate and stable—often around 45–55% RH—so cartons stay dry and don’t “sweat.”
cold chain dark chocolate quali…
Sugar bloom is usually a moisture problem, not a heat problem.
Here is the trap: you can run a “good temperature” and still fail cold chain dark chocolate quality control if you open a cool carton in warm, humid air.
The 30-second “sealed acclimation” rule
If cartons feel cool to the touch:
Keep them sealed.
Let them warm slowly.
Open only after the carton is near room conditions.
This one habit prevents many sugar bloom claims, and it costs almost nothing.
| Transition moment | What can go wrong | What you do | What you gain |
|---|---|---|---|
| Cool truck → warm dock | Condensation forms fast | Hold sealed cartons | Cleaner surfaces |
| Cold room → packing area | Moist air hits cold product | Keep packaging closed | Fewer “dusty” bars |
| Fridge “just to be safe” | Moisture + odor risk | Avoid; if used, seal airtight | Better aroma and texture |
Practical tips you can apply today
Dehumidify where you pack, not only where you store.
Avoid loading during rain or fog if you can.
Use a moisture barrier liner inside the shipper.
Real-world case: One team reduced “white dust” complaints after switching from frozen packs to conditioned packs and adding a sealed barrier.
cold chain dark chocolate quali…
Cold chain dark chocolate quality control: passive packaging for dark chocolate delivery that actually works
In cold chain dark chocolate quality control, packaging is your portable climate buffer.
Passive packaging for dark chocolate delivery works when it slows temperature change without overcooling. Your box is a small climate buffer. If it swings slowly, chocolate stays stable.
Cold chain dark chocolate quality control packaging has four jobs:
Buffer heat
Block moisture
Reduce odor pickup
Prevent breakage
Gel packs, PCM, or dry ice?
For most dark chocolate lanes, dry ice is too cold. It can create cold spots and later condensation. Conditioned gel packs can work, but only if they are not “ice cold.” Cool-range PCM can be ideal because it sits near a setpoint.
cold chain dark chocolate quali…
| Cooling option | How it behaves | Risk level | Best fit |
|---|---|---|---|
| Conditioned gel packs | Cold sink that warms over time | Medium | Short lanes with good barriers |
| Cool-range PCM | Holds near target band | Low | Premium lanes and summer shipping |
| Dry ice | Extreme cold | High | Usually avoid for chocolate |
| Insulation only | Slows heat gain | Medium-High | Mild season, short routes |
Packaging design checklist (the “no surprises” build)
Barrier first: moisture-resistant inner liner
No direct contact: put a layer between coolant and product
Tight fit: reduce air gaps
Cushioning: protect corners and stop vibration cracks
Labeling: “keep out of sun” + “keep sealed until warm”
cold chain dark chocolate quali…
Practical tips you can apply today
If you see sugar bloom at receiving, your coolant may be too cold.
If you see fat bloom in summer, you may need more insulation or better handoffs.
If bars crack, fix void space before adding more coolant.
Real-world case: A team reduced bloom by switching from very cold gel packs to cool-range PCM and adding a sealed barrier.
cold chain dark chocolate quali…
Cold chain dark chocolate quality control: cold chain monitoring for food and data logger settings
In cold chain dark chocolate quality control, monitoring is how you prove stability and learn fast.
Cold chain monitoring for food turns cold chain dark chocolate quality control from guesswork into proof. You do not need fancy dashboards first. You need consistent data you can act on.
Start with the three numbers that explain most outcomes:
Max temperature (the worst spike)
Time above your limit (how long it lasted)
Humidity / condensation risk marker (RH or dew-point proxy)
cold chain dark chocolate quali…
A 5-question quiz: do you need loggers on every lane?
Give yourself 1 point for each “yes”:
You need proof for claims or chargebacks.
You ship through hot or humid zones seasonally.
You have handoffs you don’t fully control.
You sell premium bars where defects hurt trust.
You want fast feedback to optimize packaging.
Score:
0–1: low-risk lane (spot checks may be enough)
2–3: standard loggers (routine verification)
4–5: richer monitoring + stronger SOPs
Data logger settings for chocolate cold chain (simple defaults)
Keep settings consistent so lanes are comparable:
Sampling interval: frequent enough to catch spikes
Thresholds: match your spec tier (target / alert / reject)
Start/stop: measure the real trip, not warehouse storage
Practical tips you can apply today
Place sensors at product level, not on the box wall.
Review data after every shipment for your first test month.
Change the process first, then the packaging.
cold chain dark chocolate quali…
Real-world case: After adding dock dwell time as a KPI, a shipper fixed staging, not insulation, and reduced excursions.
cold chain dark chocolate quali…
Cold chain dark chocolate quality control: receiving inspection checklist for chocolate shipments
In cold chain dark chocolate quality control, receiving is your last chance to catch defects before customers do.
A receiving inspection checklist for chocolate shipments keeps bad lots from reaching customers. It also reduces arguments with carriers because decisions are consistent.
Cold chain dark chocolate quality control at receiving has three steps:
Visual + packaging check
Temperature/history review
Release, hold, or escalate decision
cold chain dark chocolate quali…
A 15-minute receiving checklist for busy teams
| Step | Time | Pass criteria | Action if fail |
|---|---|---|---|
| Outer carton check | 2 min | No crush, no wet marks | Hold + photo record |
| Seal and barrier check | 3 min | Inner barrier intact | Hold + inspect deeper |
| Logger review | 5 min | Within spec or allowed excursion | Escalate if outside |
| Quick sensory check | 5 min | Gloss + snap acceptable | Quarantine if suspicious |
This checklist is designed to keep cold chain dark chocolate quality control fast and repeatable.
cold chain dark chocolate quali…
Practical tips you can apply today
If cartons feel cool, do sealed acclimation before opening.
Record three facts: arrival time, condition notes, temperature summary.
Sample high-risk SKUs first (thin bars, high gloss finishes).
Real-world case: A receiver stopped opening cartons immediately in summer. Sugar bloom complaints fell within weeks.
cold chain dark chocolate quali…
Cold chain dark chocolate quality control: corrective action when the lane fails
When cold chain dark chocolate quality control fails, your next move should be calm and repeatable.
You need a calm playbook. Without it, teams guess, argue, and waste product.
Use a simple CAPA flow:
Contain the lot
Review temperature/humidity history
Decide: release, hold, rework, downgrade, discard
Find root cause
Prevent recurrence (SOP, packaging, carrier rules)
Keep / hold / rework: a 60-second decision tool
If peak temperature stayed within allowed excursion: check snap and gloss, then release.
If peak temperature exceeded the limit briefly: hold 24 hours; release if no haze appears.
If temperature stayed high for long: hold and evaluate downgrade or rework.
If condensation is confirmed: hold and assess sugar bloom risk versus your brand standard.
cold chain dark chocolate quali…
Practical tips you can apply today
Write your “brand tolerance” for cosmetic haze vs rejection.
Document with photos and timestamps to reduce disputes.
Fix the handoff, not just the box. Many failures are operational.
Cold chain dark chocolate quality control in 2025: latest developments and trends
In 2025, cold chain dark chocolate quality control is getting more data-driven and more customer-visible. Teams are moving from reactive claims to predictable lane performance. They also want less packaging waste without more risk.
cold chain dark chocolate quali…
What’s changing right now
Smarter lane qualification: seasonal tests and tighter lane segmentation
Better passive systems: designs that reduce swings without extreme cold
Faster exception response: standard alarm rules and reports
Sustainability pressure: right-sizing and more reusable components
Customer experience focus: fewer doorstep failures through delivery-window tactics
Frequently Asked Questions
Q1: What is the ideal temperature for cold chain dark chocolate quality control?
Most brands target a stable cool band like 15–18°C with defined short excursions.
cold chain dark chocolate quali…
Q2: How do I prevent fat bloom during chocolate transport?
Reduce heat spikes and long warm dwell times. Track peak temperature plus duration.
Q3: What is the ideal humidity for storing dark chocolate?
Aim for moderate RH (often 45–55%) and avoid cold-to-warm opening that causes condensation.
Q4: Should I use dry ice for dark chocolate shipping?
Usually no. Dry ice can overcool and increase moisture-shock risk later.
Q5: What is the fastest receiving inspection checklist for chocolate shipments?
Check carton condition, review temperature history, and do a quick snap/gloss spot-check.
Summary and recommendations
Cold chain dark chocolate quality control works when you control the few things that truly change chocolate. Cold chain dark chocolate quality control is a lane system, not a single box: heat spikes, moisture shocks, and rough handling. Keep a realistic spec with time limits, choose packaging that stabilizes instead of overcooling, and monitor the first and last mile. Use a fast receiving checklist and a calm corrective action plan.
cold chain dark chocolate quali…
Your next step (simple plan)
Pick one high-risk lane (hot season + long last mile) and define cold chain dark chocolate quality control success.
Set a target band and excursion rules.
Run 10 test shipments with loggers.
Fix the biggest handoff first (staging, shade, sealed acclimation).
Then right-size packaging based on real lane data.
About Tempk
At Tempk, we build practical tools for temperature-sensitive shipments, including insulated packaging systems and shipment monitoring support. We help you turn cold chain dark chocolate quality control into a repeatable routine. Cold chain dark chocolate quality control becomes easier when your SOPs and packaging match the lane.
Call to action: Share your lane length, peak summer conditions, and delivery model (B2B or D2C). Strong cold chain dark chocolate quality control starts with lane reality, not guesswork. We’ll map a spec tier, packaging approach, and monitoring plan you can run without unnecessary cost.