


Cold Chain Gourmet Chocolate Safety: 2025 Guide
Cold Chain Gourmet Chocolate Safety: 2025 Guide
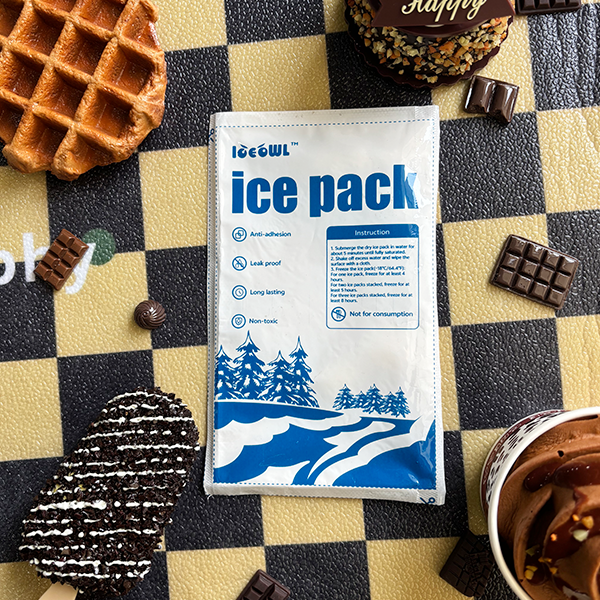
Cold Chain Gourmet Chocolate Safety: What Works in 2025?
Last updated: December 15, 2025
Cold chain gourmet chocolate safety keeps premium chocolate glossy, snappy, and gift-ready during shipping. A reliable starting target is 15–18°C (59–64°F) with relative humidity below ~50%. Temperature swings and humid unboxing can trigger bloom and soft corners. In 2025, your best advantage is repeatability: a documented pack-out, lane-specific packaging, and simple validation. Use this playbook to make cold chain gourmet chocolate safety routine, not seasonal luck.
This article will answer for you:
How cold chain gourmet chocolate safety keeps a stable gourmet chocolate shipping temperature
How to prevent chocolate bloom during shipping with simple, repeatable steps
How humidity control for chocolate cold chain reduces condensation and “sweating”
How to choose lane-matched packaging without over-freezing
How a temperature logger for chocolate shipments turns hope into proof
What does cold chain gourmet chocolate safety really mean?
Cold chain gourmet chocolate safety means you keep chocolate in its “comfort zone” from pack-out to unboxing, so quality and safety stay intact.
cold chain gourmet chocolate sa…
It is not about shipping chocolate “as cold as possible.” It is about shipping chocolate steady, with clean handling and correct allergen control.
Think of chocolate like a candle in sunlight. It may not melt right away, but heat changes it forever.
cold chain gourmet chocolate sa…
Cold chain gourmet chocolate safety prevents that quiet damage.
Quality vs. food safety: what risks do you actually manage?
Cold chain gourmet chocolate safety protects quality first, but it also supports food safety controls. Chocolate is low-moisture, so it often looks “safe,” even when something went wrong. That is why you need a simple plan for allergens, foreign material, and odor pickup.
| Risk type | Typical trigger | What customers notice | What it means for you |
|---|---|---|---|
| Quality defect (bloom) | Humidity or temperature cycling | White haze, rough mouthfeel | Refunds, “stale” perception |
| Quality defect (softening) | Heat spikes on docks/vans | Bent bars, smears | Broken presentation, returns |
| Odor transfer | Strong-smelling storage/loads | “Off” flavor | Premium trust damage |
| Allergen mistake | Cross-contact or label swap | Sometimes invisible | High-impact safety risk |
| Foreign material | Damaged trays or fragments | Visible contamination | Immediate complaints |
Practical tips you can use today
Write down your “comfort zone.” Put the target band on a packing SOP poster for cold chain gourmet chocolate safety.
Separate “quality checks” from “safety checks.” One is about bloom, the other is about risk.
Treat filled chocolates as higher risk. They leak and deform sooner than solid bars.
cold chain gourmet chocolate sa…
Real-world case: A gift brand had “safe” product, but customers still refunded it. The issue was bloom and presentation, not microbes. They fixed cold chain gourmet chocolate safety by stabilizing temperature and adding a moisture barrier. Complaints dropped, and repeat orders returned.
What temperature range supports cold chain gourmet chocolate safety?
For cold chain gourmet chocolate safety, aim for a steady 15–18°C (59–64°F) for most premium shipments.
cold chain gourmet chocolate sa…
Keep humidity low, and avoid big swings during transfers. Stability beats “colder is better,” because over-chilling can create condensation later.
cold chain gourmet chocolate sa…
Chocolate softens long before it fully melts. That is why “refrigerator cold” can be a trap. You do not want a box that arrives icy, then sweats in warm air.
Why stability beats “as cold as possible”
Cold chain gourmet chocolate safety fails when you create a warm → cold → warm cycle. That cycling pushes fats or sugars to the surface. It can look like mold, even when it is not.
Use this simple rule: If your coolant is much colder than your target, you increase condensation risk at delivery.
cold chain gourmet chocolate sa…
| Product type | Practical target band | Why it helps you |
|---|---|---|
| Dark chocolate bars | Stable cool in the 15–18°C zone | More tolerant, fewer texture surprises |
| Milk/white chocolate | Same band, tighter stability | More sensitive to excursions and bloom |
| Filled bonbons/pralines | Same band + strict handling | Fillings deform and leak with swings |
| Gift assortments | Same band + humidity protection | Presentation is the “product” |
Practical tips you can use today
Pre-condition product and packaging to the same target temperature before packing.
cold chain gourmet chocolate sa…
Avoid direct contact between chocolate and very cold packs.
Plan your handoffs. Loading docks are where most spikes happen.
Real-world case: A chocolatier used frozen gel packs “to be safe.” Boxes arrived cold, then bloomed overnight on the customer’s counter. They switched to a 15–18°C control approach and the “white haze” complaints dropped quickly.
cold chain gourmet chocolate sa…
How to prevent chocolate bloom during shipping with cold chain gourmet chocolate safety?
Cold chain gourmet chocolate safety prevents bloom by controlling two enemies: heat spikes and temperature cycling.
cold chain gourmet chocolate sa…
Bloom is usually a quality issue, but customers read it as “not fresh.” That makes bloom prevention a business priority.
You are fighting two bloom types:
Fat bloom: caused by temperature swings that move cocoa butter crystals.
Sugar bloom: caused by moisture and condensation that dissolve sugar, then dry.
The four common triggers (and what to do)
The table below turns cold chain gourmet chocolate safety into clear actions.
cold chain gourmet chocolate sa…
| Risk trigger | What happens | What to do | What it means for you |
|---|---|---|---|
| Hot spike | Softening, smearing, bloom later | Add insulation + lane-appropriate coolant | Fewer “melted corners” refunds |
| Temp cycling | Fat bloom haze | Choose stable 15–18°C control | Keeps shine and snap |
| Over-chilling | Condensation → sugar bloom | Use mid-temp PCM, not ice-cold gel | Stops “dusty” surfaces |
| Humid unboxing | Sweating and sticky boxes | Add barrier bag + humidity control | Better gift presentation |
Quick dew point check (no math anxiety)
Condensation happens when cold chocolate meets warm, humid air. If your chocolate is colder than the “dew point,” moisture can appear fast.
| Room RH (at ~20°C) | Approx dew point | What it means for you |
|---|---|---|
| 40% | ~6°C | Low condensation risk |
| 50% | ~9°C | Watch rapid warm-up |
| 60% | ~12°C | Condensation likely if over-chilled |
| 70% | ~14°C | High risk without barriers |
| 80% | ~16°C | Very high risk during unboxing |
Practical tips you can use today
Reduce empty air space. Air heats fast and drives swings.
cold chain gourmet chocolate sa…
Avoid warm docks and vans. A short delay can be a long problem.
cold chain gourmet chocolate sa…
Use a short unboxing note. “Rest 20–30 minutes before unwrapping” supports cold chain gourmet chocolate safety and prevents sweat.
cold chain gourmet chocolate sa…
Real-world case: A brand added a barrier liner plus a one-line unboxing note. Sticky lids and sweaty trays dropped, even with the same carrier and lane.
Which packaging layers deliver cold chain gourmet chocolate safety at scale?
Packaging is the first physical defense in cold chain gourmet chocolate safety. It slows heat gain and protects against humidity during delays. If packaging is weak, logistics “perfection” will not save the product.
Use a simple four-layer stack:
Primary protection: sealed inner wrap and tray.
Moisture + odor barrier: a sealed bag or liner.
Insulation: right-sized shipper for the lane.
Temperature control: coolant that matches your target band.
Gel packs vs PCM vs dry ice: what fits chocolate?
For most premium chocolate, dry ice is usually the wrong tool. It is extremely cold and can over-chill product, increasing condensation risk later.
cold chain gourmet chocolate sa…
Mid-temp control is usually the better match for cold chain gourmet chocolate safety.
| Coolant choice | Typical behavior | Chocolate fit | What it means for you |
|---|---|---|---|
| Frozen gel packs | Very cold at start, warms unevenly | Risky for bloom/condensation | Can create “sweat” issues cold chain gourmet chocolate sa… |
| Mid-temp PCM (15–18°C) | Holds near target longer | Excellent match | More consistent arrivals cold chain gourmet chocolate sa… |
| Refrigerated gel packs | Closer to target, shorter hold | Good for short lanes | Lower cost, lower risk cold chain gourmet chocolate sa… |
| Dry ice | Extremely cold | Usually poor fit | Overcooling + condensation risk cold chain gourmet chocolate sa… |
A 3-minute packaging decision tool (choose your lane)
Answer three questions to pick the right build for cold chain gourmet chocolate safety:
How long is your lane? (≤24h, 24–48h, 48–72h)
cold chain gourmet chocolate sa…
How hot is the worst day? (Under 20°C, 20–28°C, above 28°C)
cold chain gourmet chocolate sa…
What are you shipping? (bars, gift boxes, filled assortments)
cold chain gourmet chocolate sa…
Now match your answers to a build:
| Lane reality | Packaging approach | Your practical benefit |
|---|---|---|
| ≤24h, mild weather | Light insulation + refrigerated gel packs | Simple, low risk |
| 24–48h, mixed weather | Better insulation + mid-temp PCM + barrier bag | Fewer bloom complaints |
| 48–72h, hot weather | High insulation + mid-temp PCM + logger | Stable delivery with proof |
| Filled assortments, any lane | Add trays + crush protection + barrier | Better presentation and fewer leaks |
Practical tips you can use today
Gift boxes: prioritize cushioning and presentation protection.
cold chain gourmet chocolate sa…
Bars: prioritize temperature stability and corner protection.
cold chain gourmet chocolate sa…
Assortments: treat them as fragile, with trays and crush resistance.
cold chain gourmet chocolate sa…
Real-world case: A fulfillment team reduced packing errors by switching from “any frozen pack” to a labeled, lane-specific coolant kit. Cold chain gourmet chocolate safety improved because the process became consistent.
cold chain gourmet chocolate sa…
How do you validate cold chain gourmet chocolate safety before peak season?
Validation makes cold chain gourmet chocolate safety predictable instead of hopeful.
cold chain gourmet chocolate sa…
You do not need a lab. You need a repeatable test that tells you whether the box stays in range.
Use this five-step validation plan:
Build a test shipper exactly like production.
cold chain gourmet chocolate sa…
Put a logger beside the product, not beside the coolant.
cold chain gourmet chocolate sa…
Simulate your worst heat exposure for the lane.
cold chain gourmet chocolate sa…
Open and inspect after a rest period.
cold chain gourmet chocolate sa…
Repeat with one change at a time.
cold chain gourmet chocolate sa…
Interactive self-test: Cold Chain Gourmet Chocolate Safety Score
Use this quick score to decide how serious your redesign needs to be.
cold chain gourmet chocolate sa…
1) Peak outside temperature on route
Under 20°C: +1
20–28°C: +3
Above 28°C: +5
2) Total transit time
Under 24h: +1
24–48h: +3
48–72h: +5
3) Coolant strategy
Mid-temp control near 15–18°C: +1
Refrigerated gel packs: +3
Frozen packs / dry ice: +5
4) Humidity controls
Barrier + unboxing note: +1
Barrier only: +2
None: +4
5) Monitoring
Logger on every lane test + spot checks: +1
Occasional logger use: +2
No monitoring: +4
Your score and what it means
5–8 (Low risk): Cold chain gourmet chocolate safety is likely stable.
9–14 (Medium risk): Improve coolant placement, humidity control, or insulation.
15+ (High risk): Redesign packaging or lane policy before scaling.
Practical tips you can use today
Test before your busiest weeks. Peak season hides mistakes until it is too late.
Write pass/fail limits. Your team needs a simple “yes/no” definition.
Keep a failure log. Fix the top two causes first.
Real-world case: A brand logged ten summer shipments and learned most failures happened in the last six hours. They improved last-mile buffers and saw the biggest gains.
Last-mile delivery: where cold chain gourmet chocolate safety usually breaks
Last-mile delivery is the wildcard in cold chain gourmet chocolate safety. The box may sit in a lobby, on a porch, or inside a parcel locker. Even perfect line-haul control can be lost at the finish line.
Design for reality, not for perfect timing. Your buffer time is part of cold chain gourmet chocolate safety.
The last-mile playbook (simple, repeatable)
Ship earlier in the day. Morning delivery reduces heat exposure.
Avoid weekend holds. Ship early-week to reduce “stuck” time.
Use “sun-proof” outer packaging. A reflective sleeve buys time.
Add a doorstep buffer. Build hold time for 1–2 hours outside.
| Last-mile scenario | Risk | Fix | Your benefit |
|---|---|---|---|
| Porch in sun | Heat spike | Reflective outer + better insulation | Better appearance |
| Lobby pickup delays | Warm soak | Longer hold-time design | Fewer soft pieces |
| Parcel lockers | Hot box effect | Avoid lockers in summer lanes | Fewer refunds |
| Delivery van delays | Cycling | Mid-temp control + barrier bag | Less bloom |
A customer-friendly unboxing script (reduces sweat)
Use one simple card inside the box:
“Keep the box sealed for 20–30 minutes after delivery.”
cold chain gourmet chocolate sa…
“Then open the inner wrap and enjoy.”
“If the box feels warm, refrigerate after unwrapping and re-sealing.”
This supports cold chain gourmet chocolate safety without confusing customers.
Real-world case: A DTC brand shifted dispatch to avoid afternoon peaks and added a “do not leave in sun” label. Summer complaints dropped without changing recipes or carriers.
Sanitation and allergen controls inside cold chain gourmet chocolate safety
Cold chain gourmet chocolate safety is not only temperature. It also includes sanitation for low-moisture foods and allergen management. In January 2025, the U.S. FDA issued draft guidance on sanitation programs for low-moisture ready-to-eat foods, and chocolate is listed as an example category.
cold chain gourmet chocolate sa…
Low moisture slows bacterial growth, but it does not eliminate risk. Research shows Salmonella can persist in chocolate for long periods, so prevention matters.
cold chain gourmet chocolate sa…
Cold chain gourmet chocolate safety should therefore include clean zoning, packaging control, and clear corrective actions.
Allergen control you cannot skip in gourmet chocolate
Chocolate often shares lines with milk and nuts, and inclusions add complexity. FDA lists major food allergens as milk, eggs, fish, Crustacean shellfish, tree nuts, peanuts, wheat, soybeans, and sesame.
cold chain gourmet chocolate sa…
One wrong inner wrap can turn a quality issue into a high-impact incident.
Practical allergen and sanitation steps for your SOP
Physical separation: store allergen inclusions separately, label clearly.
cold chain gourmet chocolate sa…
Line scheduling: run non-allergen first, allergen later, or use dedicated lines.
cold chain gourmet chocolate sa…
Cleaning validation: verify with swabs where it matters, not “everywhere.”
cold chain gourmet chocolate sa…
Label verification: use a two-person check at every SKU changeover.
cold chain gourmet chocolate sa…
Protect the label: a “safe” product with a damaged allergen label is still a business risk.
cold chain gourmet chocolate sa…
These checks belong in your cold chain gourmet chocolate safety SOP, even for short lanes.
Real-world case: A “dairy-free” dark bar triggered complaints because the outer label was correct but the inner wrap was swapped. Allergen controls include packaging control—not only recipes.
cold chain gourmet chocolate sa…
2025 latest trends in cold chain gourmet chocolate safety
In 2025, cold chain gourmet chocolate safety is moving from reactive fixes to predictable control. Customers share photos fast, so small defects travel further than ever. Brands are improving quality systems, not just packaging.
Latest developments you should watch
Mid-temperature control becomes the default. 15–18°C control reduces bloom and sweat.
cold chain gourmet chocolate sa…
Cheaper monitoring makes lane testing normal. Loggers are now part of standard QA.
Sustainability pressure reshapes packaging. Lighter insulation and reusable shippers are growing.
Process beats heroics. Clear SOPs reduce the “busy day” packing errors.
Market insight you can act on
Premium chocolate buyers expect store-level perfection at home. Cold chain gourmet chocolate safety becomes a competitive edge when you can deliver consistency. The brands that win are not the ones that ship colder. They are the ones that ship steadier.
Internal link suggestions
Use descriptive anchor text and keep links on your own site:
Frequently Asked Questions
Q1: What is the best temperature range for gourmet chocolate delivery?
For cold chain gourmet chocolate safety, start with 15–18°C and avoid swings.
cold chain gourmet chocolate sa…
Stability matters more than “extra cold.”
Q2: How to prevent chocolate bloom during shipping in summer?
Use insulation, mid-temp control, and a moisture barrier. Avoid warm docks and reduce last-mile exposure time.
cold chain gourmet chocolate sa…
Q3: Do I need dry ice for gourmet chocolate shipments?
Usually no. Dry ice is extremely cold and can raise condensation risk later.
cold chain gourmet chocolate sa…
Mid-temp PCM is a better match for most lanes.
Q4: Why does chocolate arrive with a white haze if it didn’t melt?
That haze is often bloom from temperature cycling or condensation. Cold chain gourmet chocolate safety prevents swings, not only melting.
Q5: Should I use a temperature logger for chocolate shipments?
Yes for lane testing and spot checks. A logger beside the product shows what the chocolate experienced.
cold chain gourmet chocolate sa…
Q6: What is the biggest last-mile risk for premium chocolate boxes?
Doorstep heat exposure. Design a buffer, add sun-proof packaging, and include a short unboxing rest note.
Summary and recommendations
Cold chain gourmet chocolate safety is a repeatable system, not a lucky outcome. Keep chocolate steady near 15–18°C, control humidity, and avoid rapid warm-up.
cold chain gourmet chocolate sa…
Match packaging to your lane, then validate with a simple logger test. When you reduce spikes, cycling, and condensation, you protect gloss, snap, and brand trust.
What you should do next (simple plan)
Define your target range for cold chain gourmet chocolate safety.
Choose lane-specific insulation and mid-temp control.
Add a barrier bag and a 20–30 minute unboxing rest note.
cold chain gourmet chocolate sa…
Run 10 lane tests with a logger beside the product.
Standardize pack-out so every box matches your best build.
About Tempk
Tempk (Shanghai Huizhou Industrial Co., Ltd.) is a cold chain packaging company established in 2011. We focus on R&D, production, and service for cold chain products. Our offerings include phase change cold storage materials, cold chain packaging solutions, and temperature control verification services, plus products such as gel ice packs, dry ice packs, insulated bags, and EPP/VIP insulated boxes.
cold chain gourmet chocolate sa…
We apply cold chain gourmet chocolate safety principles in packaging design and verification.
Next step: Share your lane (origin → destination, transit time, summer peak temperatures, and product type). We can help you turn cold chain gourmet chocolate safety into a one-page packing specification and a pass/fail test plan tailored to your route.
VIP Insulated Container for Dry Ice Shipping (2025)
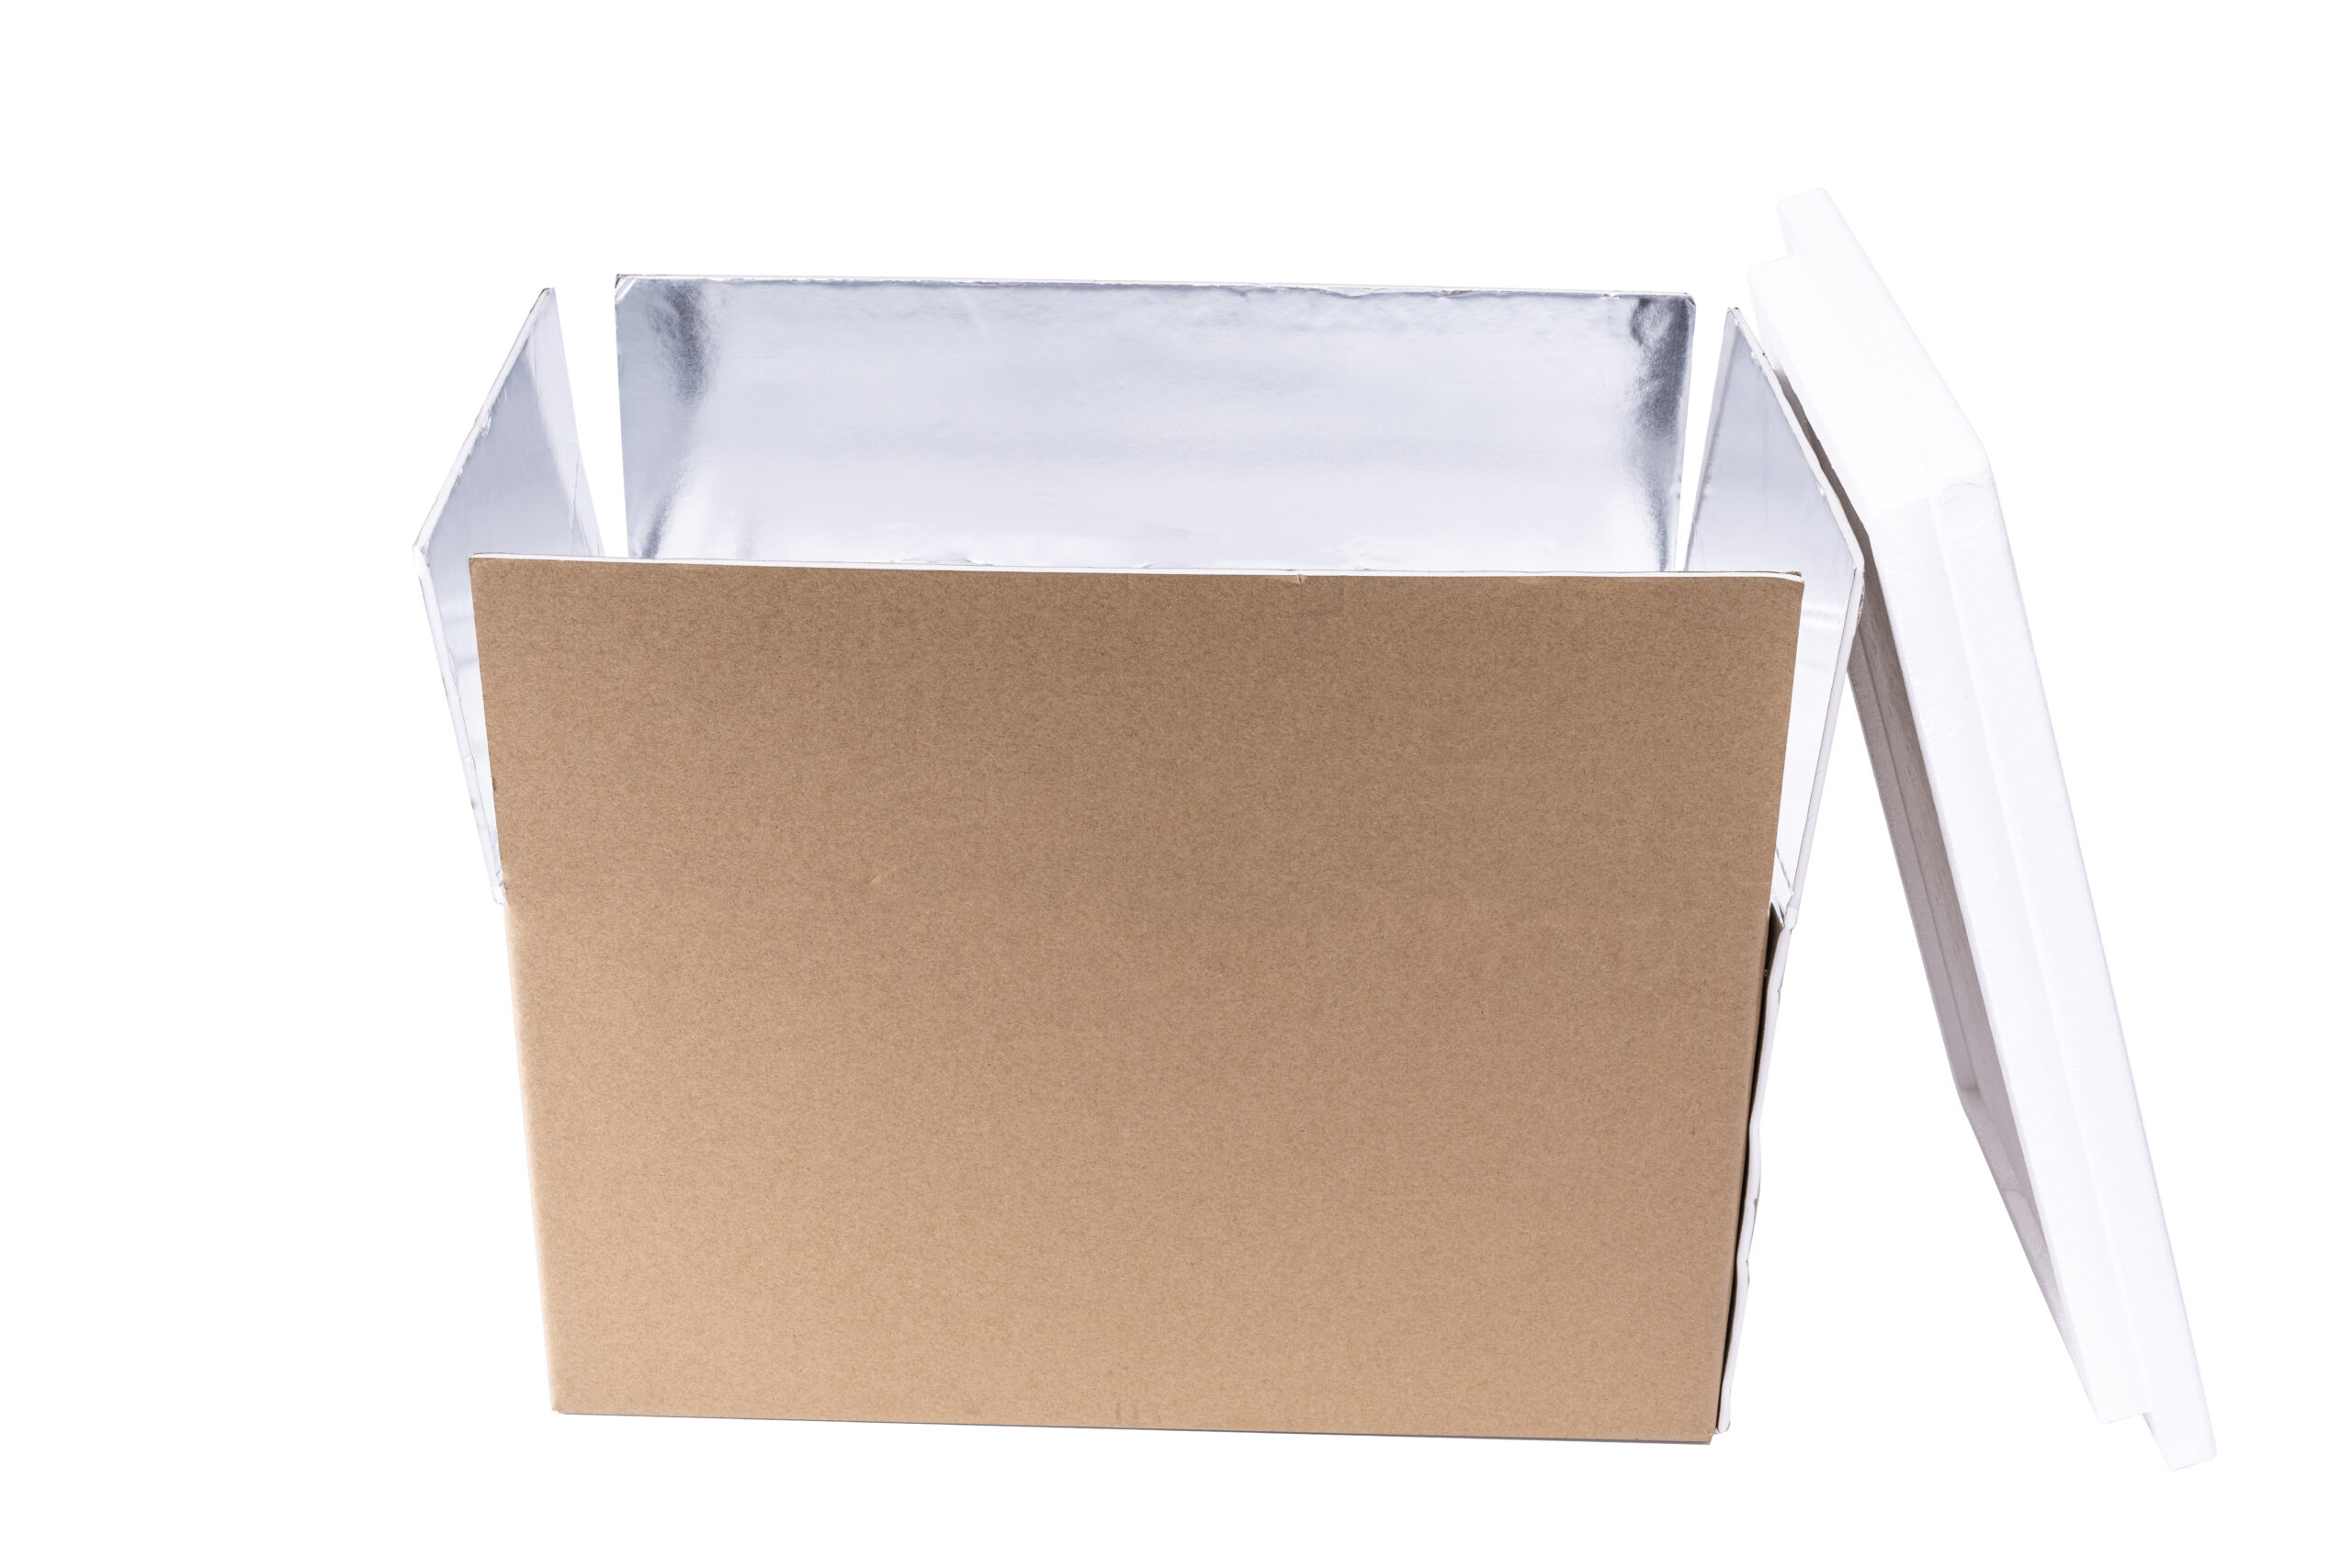
VIP Insulated Container for Dry Ice Shipping (2025)
You use a VIP insulated container for dry ice shipping when you need frozen or ultra-cold deliveries to survive real-world delays. VIP panels slow heat gain far more than common foams, so dry ice lasts longer and your product stays stable. That matters because dry ice becomes gas, not liquid—about 250 liters of CO₂ can come from 1 lb if it fully sublimates. Your goal is simple: buy time, stay safely vented, and avoid costly re-ships.
This article will help you answer:
How a VIP insulated container for dry ice shipping extends hold time without oversizing your box
How to keep a dry ice shipper safely vented (without ruining performance)
What markings are typically expected for UN1845 dry ice shipping
How to estimate how much dry ice you need for 24–72 hours and then validate it
How to prevent VIP puncture and thermal bridging that quietly kills performance
How to build a repeatable pack-out SOP your team can execute fast
What is a VIP insulated container for dry ice shipping, and why does it matter?
A VIP insulated container for dry ice shipping is a thermal shipper that uses vacuum insulated panels to block heat far better than standard foam. In plain terms, it’s like putting your shipment in a “thermal vault,” so outside heat has a much harder time getting in. When heat gain slows down, dry ice sublimates more slowly. That often means fewer temperature excursions and fewer emergency interventions.
VIP matters most when your lane is unpredictable. Think hot docks, missed scans, weekend holds, and warm last-mile vans. If you are tired of “it worked in winter” failures, insulation efficiency is usually the first lever.
How is VIP insulation different from foam insulation?
VIP panels are “super-insulation” because the vacuum limits heat transfer. Many published studies report VIP conductivity in the ~0.004–0.008 W/m·K range, while common EPS foam is closer to ~0.03–0.04 W/m·K. You don’t need to memorize those numbers. Just remember this: VIP can deliver similar protection with thinner walls, which often improves payload space.
| Insulation type | Typical thermal performance | Wall thickness need | What it means for you |
|---|---|---|---|
| EPS foam shipper | Medium | Thick | You compensate with more dry ice |
| PU foam shipper | High | Medium | Solid baseline, heavier bulk |
| VIP insulated container | Very high | Thin | Longer hold time + more payload room |
Practical tips you can use immediately
If delays are your #1 risk: start with a VIP insulated container for dry ice shipping on your longest lanes.
If dimensional weight is killing you: VIP can reduce outer size for the same thermal target.
If product value is high: don’t “guess and pray”—validate one pack-out and standardize it.
Real-world example: A team reduced “dry ice replenishment events” after switching to a VIP insulated container for dry ice shipping on lanes with frequent handoffs.
How does a VIP insulated container for dry ice shipping really work?
A VIP insulated container for dry ice shipping works by slowing heat entry. Dry ice is basically a heat sponge. The less heat that enters, the less dry ice must disappear to absorb it. This is why “adding more dry ice” often feels expensive and inconsistent, while “reducing heat leak” feels stable. It also helps your payload experience fewer hot spikes during rough handling.
The key is that VIP performance must survive operations. The panel can be amazing in a lab, but your dock is not a lab. If edges are damaged or the lid fit is sloppy, you lose the VIP advantage fast.
What “hidden heat” should you design for?
Most teams plan for weather. Fewer plan for the ugly hours that actually cause failures. Heat load often comes from:
Warm sorting hubs and loading docks
Delivery vans and vehicle cabins
Sun exposure on ramps and tarmacs
Repeated handling and short “lid-open” events
A VIP insulated container for dry ice shipping gives you more margin against these spikes, but only if your closure and pack-out are consistent.
Practical tips you can use immediately
Treat the lid seam like a critical component, not an afterthought. Small gaps leak heat.
Avoid “air cavern” pack-outs. Big air gaps increase convection and inconsistency.
Use a simple closure check. One quick press test can catch bad seals.
Real-world example: A frozen specialty shipper improved arrival consistency after adding a closure check step on every VIP insulated container for dry ice shipping pack-out.
Why venting is non-negotiable in a VIP insulated container for dry ice shipping
A VIP insulated container for dry ice shipping must be insulated and vented. Dry ice turns into CO₂ gas, so airtight sealing can create pressure and safety risk. Many safety rules and carrier acceptance checks focus on one simple idea: packaging must allow CO₂ to escape. If someone “helpfully” tapes every seam shut, you can get bulging cartons, pop-open events, or rejected shipments.
Venting does not mean “let warm air flow freely.” It means controlled gas release. You want CO₂ out, while keeping air exchange low.
What does “vented” mean in plain language?
Think of it like a jacket with a breathable zipper. You still stay warm, but pressure cannot build. In operations, “vented” usually means:
A designed vent path that is never blocked
An inner liner that is not fully sealed airtight
A closure method that keeps the lid tight while still allowing gas escape
| Venting approach | How it works | What to watch | What it means for you |
|---|---|---|---|
| Built-in vent port | Dedicated vent channel | Don’t tape over it | Predictable CO₂ release |
| Not fully sealed inner liner | Liner left unsealed | Needs clear training | Lower pressure risk |
| Breathable gasket path | Limits drafts but vents | Requires consistent closure | Better repeatability |
Practical tips you can use immediately
Create a “DO NOT TAPE OVER VENT” rule and print it near the vent zone.
Handle dry ice in ventilated work areas. CO₂ displaces oxygen in enclosed spaces.
If you add shrink wrap for tamper control, keep vents clear and validate the result.
Real-world example: A team reduced “bloated box” incidents after adding a visible vent rule to their VIP insulated container for dry ice shipping SOP.
What labels are typically expected for UN1845 dry ice shipping?
If you ship dry ice, teams typically mark the package so carriers and handlers know what’s inside. In many common workflows, you will see expectations such as:
Proper shipping name (often shown as “Dry ice” or “Carbon dioxide, solid”)
UN1845 marking
Net quantity of dry ice on the outside (commonly shown in kilograms)
A Class 9 hazard label in many air and carrier processes
Rules differ by mode, country, and carrier. Your safest approach is to build a lane-specific checklist and keep it boringly consistent.
A 60-second labeling checklist your team can follow
| Marking item | What it should include | Why it matters | Your quick check |
|---|---|---|---|
| Proper shipping name | Dry ice / Carbon dioxide, solid | Clear identification | Present + readable |
| UN number | UN1845 | Standard recognition | Present on outer box |
| Net quantity | Net dry ice mass (often kg) | Acceptance + handling | In kg, not estimates |
| Class label | Class 9 (where required) | Hazard communication | Correct placement |
Practical tips you can use immediately
Treat labeling as part of pack-out, not “after packing.” That prevents misses.
Keep markings visible after handling. Don’t place them where straps will cover them.
Use a one-minute “label check” step before cartons leave the bench.
Real-world example: A fulfillment team cut carrier rejections after standardizing UN1845 marking and net dry ice mass on every VIP insulated container for dry ice shipping shipment.
How much dry ice do you need with a VIP insulated container for dry ice shipping?
A VIP insulated container for dry ice shipping often lets you use less dry ice for the same time window, but you should not guess. Dry ice need depends on duration, ambient stress, headspace, and how many “bad hours” your lane contains. The best operational answer is: estimate once, then validate on your real routes.
Use a repeatable worksheet, not tribal knowledge. Your goal is to avoid two expensive mistakes: underpacking (risk) and overpacking (cost + handling burden).
Dry Ice Budget Worksheet (simple and repeatable)
Fill this in for your lane test:
Target duration: ____ hours (include a delay buffer)
Risk tier: Mild / Normal / Harsh (summer vans, long holds, rural delivery)
Pack-out style: Top / Sides / Surround (keep venting clear)
Dry ice form: Blocks / Pellets / Mixed (validate your choice)
Measure outcomes: internal temps + remaining dry ice at delivery
| Planning input | Option A | Option B | What it means for you |
|---|---|---|---|
| Duration | 24–48h | 48–72h+ | Drives total dry ice budget |
| Risk tier | Normal | Harsh | Drives buffer size |
| Container | VIP | Non-VIP | VIP usually lowers burn-off rate |
| Validation | One pilot | Seasonal pilots | Stops “summer surprise” failures |
Blocks vs pellets: what tends to last longer?
In many real pack-outs, blocks often last longer than pellets because they have less surface area exposed. Pellets can be great for quick cooling and tight packing, but they may sublimate faster in some designs. The right choice depends on your layout and venting path. That’s why lane tests beat arguments.
Practical tips you can use immediately
Pre-chill product and shipper so dry ice isn’t wasted cooling warm mass.
Reduce empty space with inserts, but never block venting paths.
Validate once per season (summer and winter behave differently).
Real-world example: A team reduced dry ice mass after three lane pilots with a VIP insulated container for dry ice shipping—without increasing excursions.
How do you prevent puncture and thermal bridging in a VIP insulated container for dry ice shipping?
The biggest silent failure mode for a VIP insulated container for dry ice shipping is damage. VIP panels can lose performance if punctured, and “edge effects” can create fast lanes for heat called thermal bridges. This is why the best VIP shippers don’t just use VIP. They also protect it with smart structure.
Think of VIP like a smartphone screen. It’s powerful, but it needs a case. Your design and SOP should keep sharp tools away from the panel and protect corners from conveyors.
Where thermal bridges usually hide
Thermal bridges often show up at:
Lid seams and closure interfaces
Panel edges and corners
Any hard fastener or exposed seam
Areas where inserts press against walls unevenly
| Risk area | What goes wrong | What to do | Practical meaning for you |
|---|---|---|---|
| Panel edges | Higher heat flow | Cover edges, reduce seams | More stable dry ice burn |
| Puncture points | VIP performance drops | Protective skin + handling SOP | Fewer “random” failures |
| Lid seam | Leakage + bridging | Gasket + consistent closure | Fewer top-warm events |
Practical tips you can use immediately
Use a “no-blade zone” rule. Box cutters never touch VIP walls.
Add edge and corner guards where carts and belts make contact.
Avoid staples or hard fasteners near VIP zones, even for labels.
Real-world example: A team stabilized performance after adding protective layers and banning box cutters near VIP panels in every VIP insulated container for dry ice shipping pack-out area.
How do you validate a VIP insulated container for dry ice shipping in 2025?
Validation turns a VIP insulated container for dry ice shipping from a marketing claim into an operational promise. In 2025, more teams use lane-like testing, seasonal profiles, and multi-point monitoring. Many also reference structured approaches like ISTA thermal test methods to make results comparable. The real win is repeatability across packers, shifts, and peak season.
A good validation plan is not complicated. It is consistent. It measures time-to-threshold, checks venting, and audits markings.
Time-to-threshold explained (in one sentence)
Time-to-threshold is how long your shipment stays safe before it crosses a temperature risk line. This is more useful than averages. Quality loss often happens when you cross a boundary.
A one-week lane validation plan you can run
Pick your worst lanes (longest time + most handoffs).
Run 3 pack-outs (baseline, reduced dry ice, buffered).
Log multiple probe points to detect gradients.
Record remaining dry ice at delivery when possible.
Lock the SOP only after repeat success.
| Validation item | What you measure | Your pass rule | Why it matters |
|---|---|---|---|
| Thermal hold | Payload temperature | Stay in spec | Product safety and quality |
| Venting integrity | Not airtight | CO₂ can release | Prevents pressure risk |
| Packaging condition | No damage | VIP intact | Protects real performance |
| Markings | UN1845 + net mass | Always readable | Reduces delays and rework |
Practical tips you can use immediately
Test a “new packer” scenario. That exposes hidden complexity fast.
Include worst-case dwell time (weekend hold or missed attempt).
Revalidate after any major change (shipper size, inserts, closure method, dry ice form).
Real-world example: A retailer stopped “random failures” after validating one VIP insulated container for dry ice shipping configuration and locking the SOP with photos.
When is a reusable VIP insulated container for dry ice shipping worth it?
A reusable VIP insulated container for dry ice shipping is worth it when you can control returns and loss rates. Reuse can lower cost per trip, but only if turnaround is fast and damage is managed. If containers don’t come back, your ROI leaks away. Start with one repeat lane and measure it.
This is a systems decision, not just a packaging decision. If you can scan, track, clean, and reset quickly, reuse becomes realistic.
Reuse ROI Self-Test (2 minutes)
Score 1 point for each “Yes”:
Do you ship to repeat locations weekly or monthly?
Can you scan containers out and back in?
Can you clean/reset in under 3 minutes?
Do you have storage space for empties?
Is your loss rate target realistic and enforced?
Do you have a plan for damaged VIP panels?
Score guide:
0–2: Single-use may be safer operationally
3–4: Pilot reuse on one controlled lane
5–6: Reuse is likely a cost and quality upgrade
| ROI lever | What to measure | What “good” looks like | What it means for you |
|---|---|---|---|
| Return rate | % containers returned | High and stable | Predictable cost per trip |
| Reset time | minutes per unit | Fast and repeatable | Scales without labor spikes |
| Damage rate | % needing repair | Low | Protects thermal performance |
Real-world example: A program made reuse work by scanning each VIP insulated container for dry ice shipping at dispatch and return, then standardizing inspection.
2025 developments and trends in VIP insulated container for dry ice shipping
In 2025, the biggest shift is not “more insulation.” It’s more discipline: lane-based validation, vent-aware SOPs, and repeatable pack-outs. Teams are also moving toward multi-point monitoring, because gradients can ruin good designs. Finally, more operations care about packaging efficiency and empty space, because freight costs and sustainability reviews are tougher.
Latest progress snapshot
More protected VIP structures: edge guards and hybrid shells to reduce damage
More SOP-driven compliance: checklists for venting and UN1845 marking
More lane-style testing: seasonal validation instead of “one test forever”
More multi-point monitoring: teams track gradients, not just one sensor
Market insight (plain language)
Your customer doesn’t care that you used VIP. They care that the shipment arrives cold, safe, and consistent. A VIP insulated container for dry ice shipping helps you win when you treat it like a system: design + SOP + compliance + validation.
Internal Link Suggestions (No External Links)
Use descriptive anchor text like this on your own site:
Suggested Rich Media (Use Your Own Hosted Assets)
Common Questions and Answers
Q1: Can I fully seal a VIP insulated container for dry ice shipping?
No. Dry ice becomes CO₂ gas, so the package must stay safely vented to avoid pressure buildup.
Q2: What should be written on the outside for UN1845 dry ice shipping?
Common expectations include the proper shipping name, UN1845, and net dry ice mass (often in kilograms), plus hazard labeling where required.
Q3: Does VIP insulation mean I can always use less dry ice?
Often yes, but only after validation. Start with pilots, then reduce dry ice gradually while monitoring outcomes.
Q4: What is the #1 reason VIP dry ice shipments fail?
Operational issues: blocked vents, lid gaps, inconsistent pack-out layout, or unexpected dwell time.
Q5: Do blocks or pellets work better in a VIP insulated container for dry ice shipping?
Blocks often last longer in many pack-outs, but pellets can be useful for tight layouts. Validate for your lane.
Q6: How should I validate a VIP insulated container for dry ice shipping in 2025?
Run lane-like tests with temperature logging, multiple probe points, and repeat pack-outs across shifts or packers.
Q7: Is VIP only for pharmaceuticals?
No. It also helps frozen foods, diagnostics, enzymes, and any high-value sub-zero shipment with long or risky transit.
Summary and Recommendations
A VIP insulated container for dry ice shipping helps you extend hold time by slowing heat gain, which slows dry ice loss and stabilizes payload temperature. Your best results come from three basics: controlled venting, consistent closure, and validated pack-out layouts. If you want fewer escalations, fewer emergency fixes, and more predictable arrivals, start with one worst lane. Pilot three loads, log data, and lock the SOP.
Next step (clear action plan): Choose one route, one shipper size, and one pack-out layout. Validate in summer-like conditions first. Then standardize labeling, venting rules, and closure checks across your team.
About Tempk
At Tempk, we build practical cold-chain packaging systems for sub-zero logistics, including solutions aligned with a VIP insulated container for dry ice shipping. We focus on real operational problems: delay resilience, pack-out repeatability, vent-aware designs, and reusable durability. We also help teams create validation workflows that support audits and scaling without slowing fulfillment.
Call to Action: If you share your target duration (24/48/72+ hours), shipping mode (parcel/air/freight), and temperature requirement, we can help you map a pack-out plan and a validation checklist your team can run consistently.
VIP Insulated Box for 2–8°C Shipping (2025)
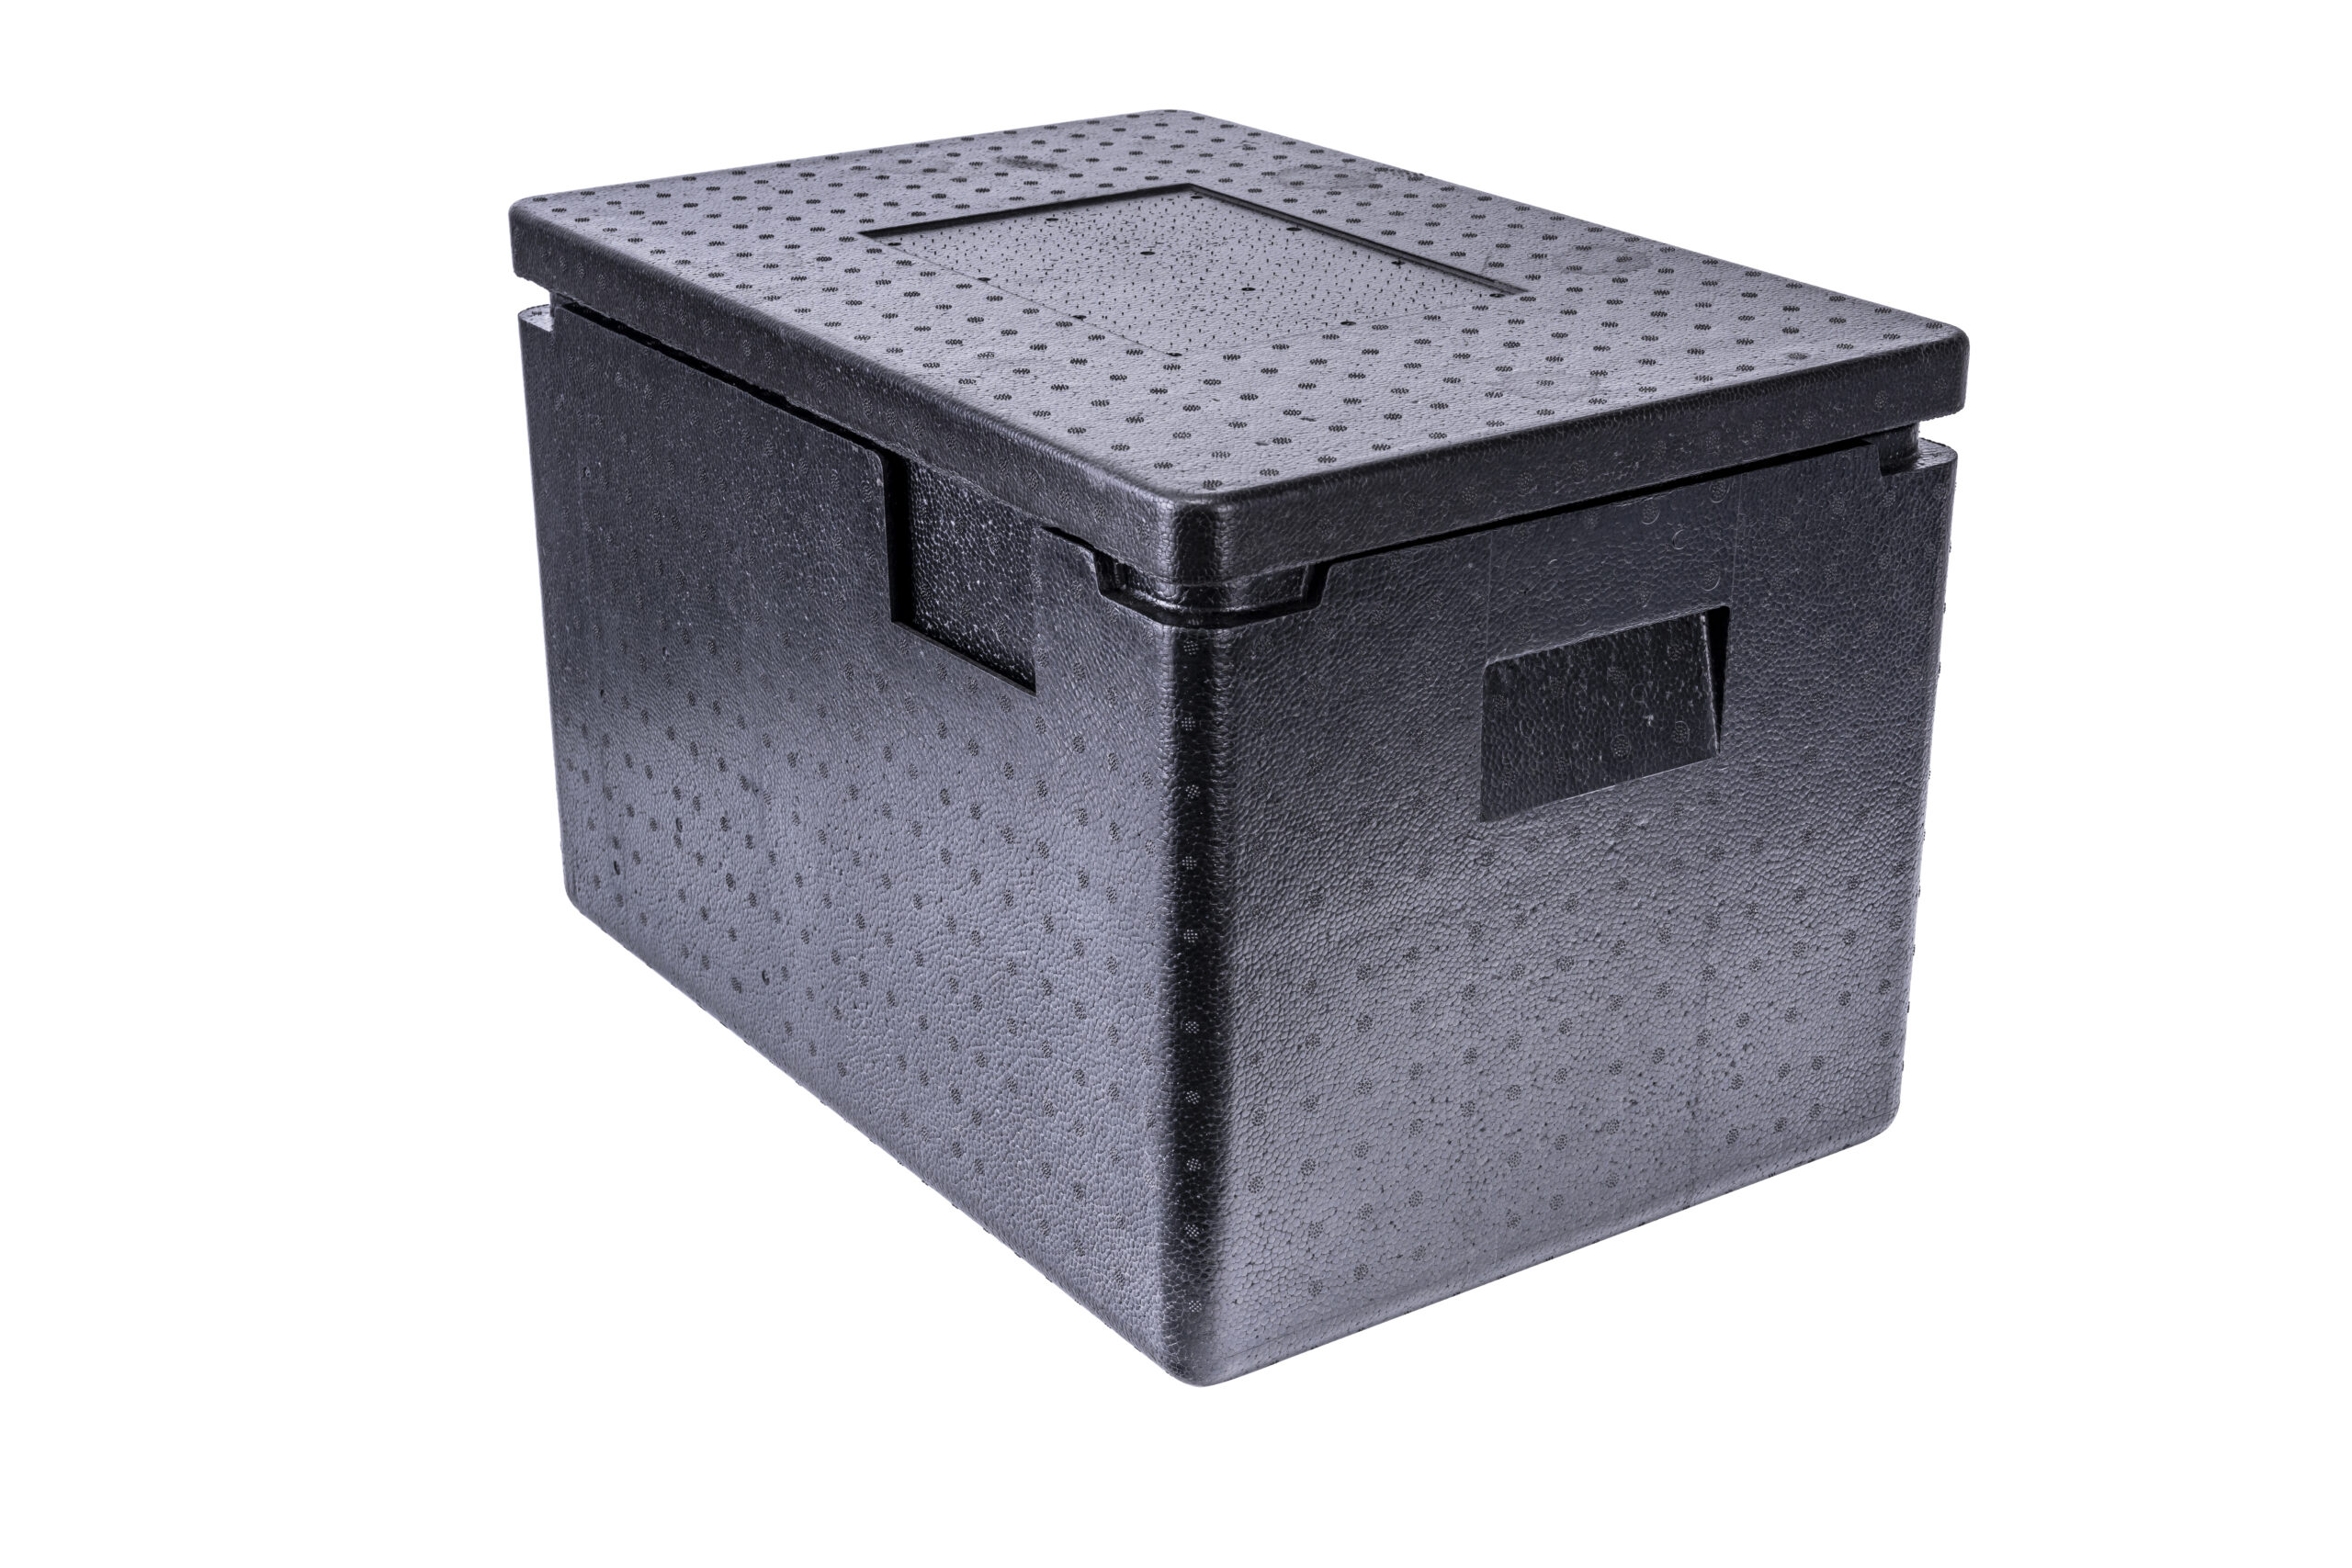
VIP Insulated Box for 2–8°C Shipping (2025)
Last updated: December 12, 2025
A VIP insulated box for 2-8 degree shipping helps you keep refrigerated products inside the 2–8°C band when real-life shipping gets messy. In 2025, “it usually works” is not enough—your customers and QA teams want repeatable packouts, credible qualification, and retrievable temperature evidence. The biggest upgrade isn’t only better insulation; it’s building a system your team can assemble correctly every time.
This article will answer for you
How to define success for a VIP insulated box for 2-8 degree shipping (not “it felt cold”)
How to prevent freezing risk with smarter PCM and placement
How to qualify a VIP insulated box for 2-8 degree shipping using lane-realistic profiles
Where to place temperature loggers so your data is defensible
What to do after an excursion—fast, written, and consistent
How to estimate cost-per-success and ROI without guesswork
What does 2–8°C shipping really require in practice?
A VIP insulated box for 2-8 degree shipping succeeds only when your product stays between 2°C and 8°C from release to receipt. The trap is thinking heat is the only enemy. In 2–8°C lanes, the coldest spot can be just as dangerous as the warmest spot, especially if the payload can be damaged by brief freezing.
Think of 2–8°C shipping as two guardrails:
Warm drift above 8°C
Freeze dips below 2°C
Your packaging must protect both ends, not just one.
2–8°C “failure moments” you can actually control
| Risk moment | What happens | What you do | What it means for you |
|---|---|---|---|
| Coolant touches payload | Local freeze spot | Add buffer layer + spacing | Fewer “silent failures” |
| Long hot-dock dwell | Slow warming drift | Cut dwell time + add buffer hours | More predictable arrivals |
| Winter lane + strong insulation | Overcooling risk rises | Use a season-specific packout | Protects freeze-sensitive SKUs |
| Logger in the wrong place | False confidence | Standardize high-risk placement | Better dispute defense |
When should you choose VIP vs foam vs active?
Choose a VIP insulated box for 2-8 degree shipping when your lane has uncertainty: delays, multiple handoffs, seasonal extremes, or high cost of failure. VIP insulation slows heat gain dramatically, buying you time when conditions get ugly—but it also demands tighter packout discipline.
Interactive decision tool: VIP, foam, or active?
Score each line 0–2, then add them up:
Transit time: <24h (0) / 24–72h (1) / 72h+ (2)
Handoffs: 0–1 (0) / 2–3 (1) / 4+ (2)
Seasonal exposure: mild (0) / moderate (1) / harsh (2)
Payload sensitivity: stable (0) / moderate (1) / fragile (2)
Cost of failure: low (0) / medium (1) / high (2)
| Total score | Best choice | Why it fits | Practical meaning for you |
|---|---|---|---|
| 0–3 | High-quality foam | Predictable lanes | Lowest cost per shipment |
| 4–7 | VIP insulated box for 2-8 degree shipping | Uncertainty buffer | Fewer “surprise excursions” |
| 8–10 | Active or premium validated system | High exposure risk | Maximum protection for critical loads |
How does a VIP insulated box for 2-8 degree shipping work?
A VIP insulated box for 2-8 degree shipping is a passive shipper that uses vacuum insulated panels (VIPs) to slow heat transfer, helping the payload stay inside 2–8°C longer. A simple mental model: foam is a winter jacket; VIP is a thermos wall. Both help, but VIP buys more time per centimeter of wall thickness.
VIP insulated box for 2-8 degre…
Here’s the key: VIP panels don’t replace process control. They amplify it. If your coolant is too cold, VIP can make freezing last longer. If your seal is sloppy, VIP can’t save you.
VIP insulated box for 2-8 degre…
What “system design” really means
A reliable VIP insulated box for 2-8 degree shipping is a system:
VIP shell (insulation + protection)
PCM/coolant (holds range, absorbs heat)
Packout layout (spacing + layers + void control)
SOP discipline (conditioning, timing, sealing, labeling)
Proof (qualification + monitoring + excursion handling)
How do you prevent freezing in a VIP insulated box for 2-8 degree shipping?
Freezing is the most common “quiet failure” in 2–8°C shipping—because the shipper can look fine from the outside. Many freezing events come from coolant state + contact + time, not from weather.
The freeze-risk triangle (simple and practical)
Coolant temperature (too cold = danger)
Contact risk (touching payload = local freeze)
Dwell time (long contact = higher damage chance)
| Freeze trigger | What it looks like | Why it happens | Practical meaning for you |
|---|---|---|---|
| Coolant touches payload | One corner dips below 2°C | Layout drift | Add a buffer layer + spacing |
| Wrong pack type/state | Too aggressive cooling | “One pack fits all” | Use validated PCM + conditioning |
| Reuse not controlled | Mixed “frozen” vs “ready” packs | No separation system | Separate, label, and track packs |
Practical tips you can apply today
No-contact rule: coolant never touches primary packs—use a thin barrier layer.
Season lock: run two versions (Summer v1 / Winter v1). Don’t rely on memory.
Fast close: long “lid-open time” destroys consistency—make closure a timed step.
Real-world pattern: The fastest stability gains usually come from fixing repeatable human variation: PCM conditioning, spacing, seal checks, and seasonal version control.
How do you pack a VIP insulated box for 2-8 degree shipping step by step?
A VIP insulated box for 2-8 degree shipping only performs as well as your packout discipline. Your goal is repeatability: the same build produces the same result.
Packout checklist (copy/paste for your SOP)
PCM type + season version confirmed (Summer/Winter)
Product pre-conditioned to 2–8°C before packing
No direct product-to-PCM contact (buffer layer installed)
Correct liner orientation + lid seal check
Logger started, ID recorded, positioned per SOP
Ship time + courier handoff time recorded
Packout table your operators will actually use
| Packout step | What to verify | Common mistake | What it means for you |
|---|---|---|---|
| PCM conditioning | Correct temperature window | “Colder is safer” | Prevents freeze damage |
| Product staging | Product already 2–8°C | Packing warm product | Avoids early warm drift |
| Spacing | No contact points | Tight compression | Stops cold spots |
| Sealing | Fast closure | Long open time | Protects stability margin |
| Labeling | Lane + season + version | No version control | Prevents assembly drift |
Practical tips and advice
Training rule: teach with photos of “wrong placement” and make it pass/fail.
Reuse rule: physically separate “ready PCM” and “not ready PCM.”
Layout rule: center the payload and control voids to reduce hot/cold pockets.
Practical case: Teams often stop “mystery excursions” by standardizing one packout map and locking two seasonal versions, then auditing build quality weekly for one month.
VIP insulated box for 2-8 degre…
How do you qualify a VIP insulated box for 2-8 degree shipping for audits?
Qualification is how your VIP insulated box for 2-8 degree shipping becomes defensible. You are proving performance under defined conditions, then tying that performance to a controlled packout version your team can repeat.
VIP insulated box for 2-8 degre…
What should you demand from a vendor test report?
Ask for details that match your reality—not a generic marketing pass.
VIP insulated box for 2-8 degre…
External profile (summer/winter)
Payload mass + configuration
Sensor placement + logger calibration status
Pass/fail criteria (2–8°C for the full duration)
| Report element | Why it matters | What good looks like | Meaning for you |
|---|---|---|---|
| Profile | Defines stress | Seasonal cycles stated | Fewer wrong assumptions |
| Payload | Changes thermal inertia | Your payload class matched | Predictable performance |
| Sensor map | Avoids cherry-picking | Worst-case points covered | Better risk control |
| Acceptance criteria | Defines “pass” | Clear 2–8°C rules | Cleaner QA decisions |
Simple qualification framework (audit-friendly)
Define duration + acceptance band (2–8°C).
Choose worst-case seasonal profiles for your lane.
Run multiple trials per configuration (consistency beats luck).
Document packout photos, weights, and logger map.
Lock the packout as “Summer v1 / Winter v1” under change control.
Field lesson: A VIP insulated box for 2-8 degree shipping can “pass” in the lab and still fail in the field if packout steps are not repeatable.
VIP insulated box for 2-8 degre…
Where should you place temperature loggers in a VIP insulated box for 2-8 degree shipping?
In 2025, customers increasingly want proof you can retrieve. Logger placement is how you avoid “pretty data” that misses the failure point. Place the logger where failure is most likely.
VIP insulated box for 2-8 degre…
Placement rule (easy to train)
Warm risk point: near lid edge / warm-side exposure
Cold risk point: near PCM boundary (without touching PCM)
High-value shipments: use two loggers, not one
VIP insulated box for 2-8 degre…
| Logger placement | Best for | Risk it catches | What it means for you |
|---|---|---|---|
| Near warm wall | Summer lanes | Heat gain drift | Fewer warm excursions |
| Near PCM boundary | Winter lanes | Sub-2°C dips | Less freeze damage |
| Center payload | Stable lanes | Baseline trend | Simple verification |
“Proof packet” you should keep short and consistent
Packout version + timestamps
Logger ID + calibration record reference
Temperature trace (or exception summary)
Excursion form (what happened, what you did, who approved)
VIP insulated box for 2-8 degre…
What should you do after an excursion?
Your excursion response must be written, fast, and consistent—because “maybe it’s fine” is not a system. Your process should define investigation and disposition steps and capture evidence.
VIP insulated box for 2-8 degre…
4-step excursion response (no panic, no guessing)
Quarantine (stop release on hope)
Secure data (download trace, capture timestamps)
Assess severity (time + magnitude + location of logger)
Decide with evidence (stability allowances, QA approval, CAPA)
Interactive 5-minute triage tool
Answer Yes/No:
Did temperature go below 2°C at any point?
Did temperature go above 8°C beyond a brief spike?
Was the logger placed at a recognized high-risk spot (per SOP)?
VIP insulated box for 2-8 degre…
Was there an abnormal event (hub delay, missed flight, second attempt)?
Do you have written guidance on acceptable excursion time?
If you get 2+ Yes, treat as high risk and escalate to QA immediately.
| Excursion type | First action | Evidence to capture | What it means for you |
|---|---|---|---|
| Sub-2°C dip | Freeze-risk hold | Contact points, packout photos | Protects freeze-sensitive goods |
| Above-8°C drift | Heat-risk hold | Delay timeline, ambient notes | Prevents silent potency loss |
| Data gap | Treat high risk | Missing logger reason | Stops “unprovable releases” |
How do you calculate ROI for a VIP insulated box for 2-8 degree shipping?
ROI is usually about avoiding one expensive failure, not shaving pennies off coolant. Think “cost per successful delivery,” not “cost per box.”
VIP insulated box for 2-8 degre…
Mini cost-per-success calculator (use your numbers)
Packaging cost per shipment = ___
Logger cost per use = ___
Labor minutes per packout × wage = ___
Failure cost (reship + product + admin) × failure rate = ___
Total cost per successful delivery = (packaging + logger + labor) + expected failure cost
| Cost driver | How to reduce it | What to measure | What it means for you |
|---|---|---|---|
| Overpacking | Packout optimization | PCM mass vs pass rate | Lower freight weight |
| Labor | Standard assembly | Minutes per packout | Faster operations |
| Failures | SOP + monitoring | Excursion rate | Fewer reships |
| Returns | Lane redesign | Delay reasons | Less firefighting |
2025 developments and trends in 2–8°C shipping
In 2025, the shift is more “proof-driven”: the market rewards teams that can prove 2–8°C, without freezing, under delays. Expect more lane-specific qualification, stronger intermediate controls, and more focus on freeze prevention through trained assembly and consistent packouts.
VIP insulated box for 2-8 degre…
Latest progress snapshot
More lane realism: qualification increasingly matches parcel-like environments and real seasonal swings
VIP insulated box for 2-8 degre…
Stronger hub discipline: tighter dwell controls and better intermediate monitoring
VIP insulated box for 2-8 degre…
More freeze prevention focus: no-contact placement rules + trained assembly practices
VIP insulated box for 2-8 degre…
Frequently asked questions
Q1: How long can a VIP insulated box for 2-8 degree shipping hold 2–8°C?
Many lanes target 48–120 hours depending on payload, season, and handling risk. Validate for your lane profile, not a generic claim.
Q2: Why do 2–8°C shippers fail even with VIP panels?
Most failures come from variation: wrong PCM conditioning, contact points that cause freezing, long open-lid time, or a packout that drifts from the qualified version.
VIP insulated box for 2-8 degre…
Q3: Where should I place my logger?
Place it where failure is most likely: warm-wall risk for summer lanes, and near coolant boundary (without contact) for winter freeze risk; standardize it in the SOP.
VIP insulated box for 2-8 degre…
Q4: What should be inside a vendor qualification report?
Seasonal profiles, your payload class, sensor map, calibration status, and clear pass/fail criteria for 2–8°C across the full duration.
VIP insulated box for 2-8 degre…
Q5: What do I do if there’s an excursion?
Quarantine, download data, assess time+magnitude, and document a decision with QA approval and CAPA when needed.
VIP insulated box for 2-8 degre…
Summary and recommendations
A VIP insulated box for 2-8 degree shipping is most valuable when your lane includes delays, handoffs, and seasonal stress. The winning formula is not “better insulation only.” It’s VIP + validated seasonal packouts + disciplined assembly + defensible monitoring + written excursion handling. If you standardize those five pieces, you reduce excursions, reduce disputes, and make audits easier.
VIP insulated box for 2-8 degre…
Your next-step action plan (CTA)
Pick your top two high-risk lanes (delays + extremes).
Pilot a VIP insulated box for 2-8 degree shipping with Summer v1 / Winter v1 packouts.
Standardize logger placement at a high-risk point.
VIP insulated box for 2-8 degre…
Run a controlled qualification plan and lock the version.
VIP insulated box for 2-8 degre…
Track excursion rate, re-ships, and labor minutes for 30 days—then scale what works.
Insulated Tote Bags: How to Choose in 2025
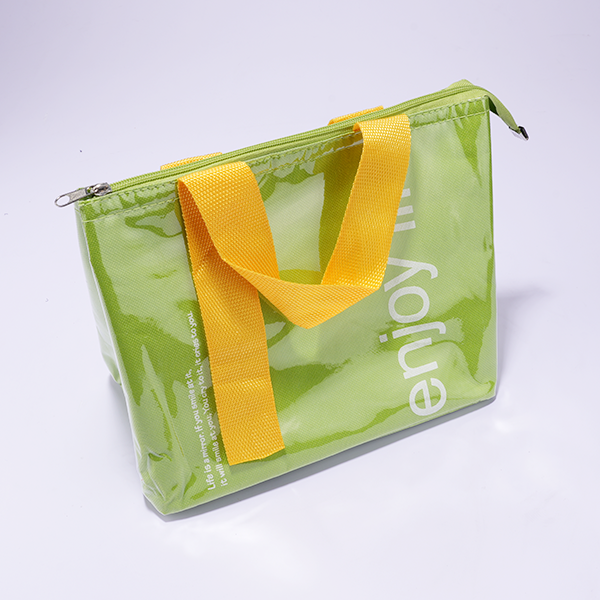
Insulated Tote Bags: How to Choose in 2025?
Last updated: December 12, 2025
If you carry groceries, meal kits, or takeout, insulated tote bags help you keep food safer and tastier during real-life delays. Food safety matters because bacteria grow fastest in the “Danger Zone” (40°F–140°F), and common public guidance warns against leaving perishables out more than 2 hours (or 1 hour above 90°F).
This guide shows you how to choose insulated tote bags that match your routine, not just your aesthetic.
What you’ll learn in this guide:
How insulated tote bags actually work (and what they can’t do)
How long insulated tote bags keep food cold using simple time-and-temperature rules The best build details for insulated tote bags for food delivery and grocery runs
How to pack insulated tote bags with ice packs so cold lasts longer
How to clean insulated tote bags without odors or cross-contamination
2025 trends: reuse pressure, material scrutiny, and documentation expectations Environment+2SGSCorp+2
What do insulated tote bags actually do?
Direct answer: Insulated tote bags slow heat transfer, buying you time when checkout lines, traffic, or elevators steal minutes. They don’t create cold by themselves—think of them like a jacket for your food.
Expanded explanation:
When you move chilled food through warm air, heat tries to rush in from every direction. Insulated tote bags slow that rush by trapping air (insulation) and limiting airflow (closure). That “buffer time” helps you reach a fridge or customer faster with fewer temperature swings.
How insulated tote bags block heat
| Heat-control piece | What it does | What it means for you |
|---|---|---|
| Insulation layer (foam/air) | Slows heat flow | Cold stays cold longer |
| Reflective liner (optional) | Reduces radiant heat gain | Helps in sun and hot cars |
| Tight closure (zip/flap) | Limits warm air exchange | Fewer “heat dumps” each opening |
| Seams + structure | Prevents leaks + gaps | Less mess, steadier temps |
Practical tips you can use today
If your bag is floppy and gappy: expect faster warming. Choose more structure.
If you open the bag repeatedly: temps swing faster. Open once, close fast.
If your trip is unpredictable: treat insulated tote bags like mini coolers—use cold sources.
Real-world case: If your dairy arrives “sweaty” after errands, the problem is usually air gaps + repeat openings, not just “thin insulation.”
How long do insulated tote bags keep food cold safely?
Direct answer: There isn’t one perfect “hours” number. Safety depends on starting temperature, weather, and cold sources. What you can rely on is the public health framework: keep food out of the 40°F–140°F danger zone, and limit time unrefrigerated to 2 hours (or 1 hour above 90°F).
Expanded explanation:
Think in “buffer time,” not “magic insulation.” Insulated tote bags buy time, but time still wins if you delay too long. Hot cars can erase your buffer quickly. Your goal is simple: start cold, pack tight, close well, and shorten the route.
A simple safety table you can follow
| Your situation | Best target | Biggest mistake | Better move |
|---|---|---|---|
| Short trip home | Stay cold; move fast | Leaving bags in the car | Take bags inside immediately |
| Multiple stops | Reduce time + add cold sources | Opening bag at each stop | Pack once; open only at home |
| Hot day (>90°F) | Use the 1-hour rule mindset | Trunk storage in sun | Keep bag shaded in the cabin |
| Delivery route | Consistency + fewer openings | Mixing hot and cold | Use two insulated tote bags |
Practical tips you can use today
Shop cold/frozen last. It improves your starting temperature buffer.
Avoid the trunk in warm weather. Cabin shade helps more than you think.
If you deliver food often: consider a small thermometer routine for your longest route.
Reality check: The safest strategy is not “better claims.” It’s better routine aligned with time-and-temperature guidance.
Which insulated tote bags are best for grocery shopping vs delivery?
Direct answer: The best insulated tote bags match your load shape, trip length, and handling style. Grocery runs need wide access and comfort. Delivery needs fast open/close, durability, and spill control.
Expanded explanation:
Most people buy too big (extra warm air) or too flimsy (gaps + crushed food). Choose for your “real load,” not your “once-a-month mega haul.”
Use-case comparison table
| Use case | Best bag shape | Typical capacity | What it means for you |
|---|---|---|---|
| Weekly groceries | Wide base, structured | 25–40L | Faster packing, fewer crushed items |
| Meal kits | Boxy rectangle | 20–30L | Better fit for cold packs + flat items |
| Delivery driving | Tall + zip top | 30–50L | Less heat loss from frequent handling |
| Office lunches | Slim vertical | 10–18L | Light carry, enough for 1–2 meals |
Practical tips you can use today
If you carry bottles: choose taller insulated tote bags with a stable base.
If you carry eggs/pastries: choose wider insulated tote bags with structure.
If you deliver liquids: prioritize liners + seams before “extra thickness.”
Real-world case: Many “leak” complaints come from seam gaps, not from the liner material.
What materials and build details make insulated tote bags work better?
Direct answer: Performance comes from a system: shell + insulation + liner + seams + closure. If one part is weak, the whole bag underperforms.
Expanded explanation:
A shiny liner can help with radiant heat, but it can’t replace insulation thickness or a tight closure. For daily use, “easy to clean” often matters as much as “holds cold.”
Material checklist (plain-English)
Outer shell: choose abrasion resistance if you carry heavy loads.
Insulation core: thicker, consistent walls usually hold steadier temperature.
Inner liner: smooth and wipeable reduces odors and cleanup time.
Seams: reinforced or sealed seams reduce leaks and heat exchange.
Closure: a zipper usually beats an open top for temperature retention.
| Build feature | What to look for | Simple test | What it means for you |
|---|---|---|---|
| Zipper strength | Thick teeth + smooth track | Open/close 30 times | Fewer failures on busy weeks |
| Liner wipeability | Smooth, non-absorbent | Wipe sauce with tissue | Faster cleanup, less smell |
| Base structure | Rigid insert or firm panel | Stand it up empty | Less tipping and crushing |
| Handles | Reinforced stitching | Carry heavy bottles | Less break risk |
Practical tips you can use today
If you want daily use: pick “wipe clean” over “pretty fabric.”
If you want fewer replacements: prioritize handle stitching and base panel.
If you carry raw proteins: leak control is a safety habit, not a luxury.
How to pack insulated tote bags with ice packs so cold lasts longer?
Direct answer: Pack tight, reduce air gaps, and place cold sources above and below perishables. Keep the bag closed until you unload.
Expanded explanation:
Air gaps behave like little heat highways. When insulated tote bags are half-empty, warm air circulates inside faster. A tighter pack holds temperature more steadily.
The “Two Cold Sources” packing plan
| Trip pattern | Cold-source plan | Bag setup | What it means for you |
|---|---|---|---|
| Direct trip home | 1–2 cold sources | Full bag, zipped | Enough buffer for most shoppers |
| Multiple stops | 2+ cold sources | Minimize opening | Better protection for dairy/meat |
| Hot weather | 2+ cold sources + shade | Keep in cabin | Your buffer shrinks faster in heat |
Step-by-step pack-out (copy this)
Pre-chill the bag for 10–15 minutes if you can.
Put one cold source on the bottom (flat pack or frozen bottle).
Add perishables in the center (dairy, meat, seafood).
Put one cold source on top (top-down cooling helps).
Fill gaps with cold-friendly items (frozen veggies work well).
Zip it closed and open only when you unload.
Practical tips you can use today
Use flat packs on the sides for longer errands.
Separate hot and cold into two insulated tote bags to stop “temperature fighting.”
Don’t overstuff zippers. A broken closure ruins performance.
Real-world case: One simple rule—“open once, unload fast”—often reduces warm dairy complaints more than buying a new bag.
How do you clean insulated tote bags without odors or cross-contamination?
Direct answer: Clean fast, consistently, and dry completely. Odors usually come from tiny spills that stay damp. Public guidance commonly recommends washing reusable bags after use and wiping insulated bags with disinfecting solution, especially along seams.
Expanded explanation:
Treat your bag like a cutting board: quick cleaning beats occasional deep cleaning. If raw meat or seafood touches the inside, do a same-day disinfect and dry. This supports safer handling habits around the danger zone guidance.
Cleaning schedule that feels realistic
| What you carried | Cleaning level | When to do it | What it means for you |
|---|---|---|---|
| Packaged pantry items | Light wipe | Weekly | Prevents grime build-up |
| Produce + dairy | Wipe + mild soap | After each trip | Less residue, fewer smells |
| Raw meat/seafood | Disinfect + full dry | Same day | Lower cross-contamination risk |
| Sauce spill | Immediate deep clean | Immediately | Avoid stains + lingering odor |
Practical tips you can use today
Wipe first, then dry. Moisture left inside is odor fuel.
Air-dry fully with the bag open. Closed damp bags smell fast.
Pay attention to seams. Seams hold residue more than flat panels.
Real-world case: The “mystery smell” usually disappears when you add one rule: no storage until fully dry.
Do insulated tote bags need EU food-contact compliance documents?
Direct answer: If the inner materials are intended to contact food directly, EU food-contact rules matter. The EU framework requires food-contact materials not to release constituents into food at harmful levels or change food taste/odor unacceptably. Food Safety+1
Expanded explanation:
Most grocery use involves packaged food, which lowers direct-contact risk. But if your operation uses liners that may touch unwrapped food, compliance expectations rise. For plastics intended for food contact, EU rules include specific measures and documentation expectations (like a Declaration of Compliance for certain plastics). EUR-Lex+1
EU good manufacturing practice (GMP) rules also apply to materials intended for food contact.
What to request (simple and practical)
| Your use case | Risk level | What to request from suppliers | What it means for you |
|---|---|---|---|
| Packaged food only | Lower | Material + cleaning guidance | Focus on hygiene + durability |
| Liner may touch unwrapped food | Higher | Food-contact statement; DoC if plastics apply | Stronger buyer confidence |
| B2B food operations | Highest | DoC + supporting docs + GMP alignment EUR-Lex+1 | Better audit readiness |
Practical tips you can use today
Decide first: Will food touch the liner directly?
If yes: ask for food-contact documentation and process controls.
If no: still enforce cleaning SOPs, because spills cause cross-contamination.
A 60-second decision tool: which insulated tote bag fits you?
Answer quickly (no overthinking). Give yourself 1 point for each “Yes.”
Do you expect trips longer than 45 minutes at least weekly?
Do you carry dairy/meat/seafood most trips?
Do you shop or deliver in hot weather often?
Do you carry soups/sauces or spill-prone items?
Will multiple people use the same bag (higher mess risk)?
Do you need the bag to survive daily handling (delivery work)?
Your match
0–1 points: Basic insulated tote bags with a zipper + 1 cold source
2–3 points: Mid-tier insulated tote bags with thicker walls + rigid base + room for 2 cold sources
4–6 points: Heavy-duty insulated tote bags (strong zipper, sealed seams, wipe-clean liner) + a “two cold sources” rule
Your “buyer sanity checklist”
Does it close tightly (zipper or tight flap)?
Does it stand up and keep food stable?
Is the liner easy to wipe and quick to dry?
Are the seams reinforced where weight pulls hardest?
2025 insulated tote bags trends and what they mean for you
Trend overview: In 2025, insulated tote bags are influenced by two strong forces: reuse pressure and material scrutiny. The EU’s Packaging and Packaging Waste Regulation entered into force on 11 February 2025, with a general application date 18 months later, pushing more reuse-minded packaging decisions.
Latest progress snapshot (2025)
More reuse programs: Retailers and brands push durable reusables as waste rules tighten. Environment
More “what’s in the coating?” questions: PFAS scrutiny continues in both the EU and parts of the U.S.
More documentation for food-contact and recycled plastics: EU amendments continue to evolve for plastics intended for food contact.
Market insight (plain-English):
Customers trust what looks clean and smells neutral. If your insulated tote bags arrive stained or damp, trust drops fast. Hygiene is branding now, not just safety.
Frequently Asked Questions
Q1: How long do insulated tote bags keep food cold?
It depends on starting temperature, weather, and cold packs. Use insulated tote bags to buy time, but follow the 2-hour rule (1 hour above 90°F) for perishables.
Q2: Do insulated tote bags work without ice packs?
Yes for short trips, but ice packs extend your buffer. For errands and stops, cold sources reduce guessing.
Q3: How should I place ice packs in insulated tote bags?
Use a top-and-bottom approach: one cold source under perishables and one on top. Keep the bag tightly packed knowing air gaps warm faster.
Q4: How do I clean insulated tote bags without odors?
Wipe after use, disinfect when raw foods were carried, and air-dry fully before storage. Wiping insulated bags with disinfecting solution is commonly recommended.
Q5: Can insulated tote bags keep hot food safe too?
They slow heat loss, but they don’t add heat. Keep hot foods hot, limit lukewarm time, and don’t mix hot and cold in one bag.
Q6: Do insulated tote bags need EU food-contact documents?
If the liner is intended to contact food directly, EU framework rules apply and plastics may require documentation (like a DoC), supported by GMP expectations.
Summary and recommendations
Insulated tote bags help you protect food quality by slowing temperature change during everyday transport. You get the best results when you start cold, pack tight, close well, and keep trips short—especially because public guidance warns against extended time in the 40°F–140°F danger zone.
If you want fewer spoiled groceries and fewer delivery complaints, focus on closure, liner cleanliness, seam quality, and a repeatable packing routine.
What you should do next
Choose insulated tote bags by your real route (time, heat, stops).
Adopt a “two cold sources for perishables” habit on longer trips.
Clean and dry the bag consistently—especially after raw foods.
If you sell into the EU and food may touch the liner, align on documentation early
About Tempk
At Tempk, we build temperature-control packaging for real workflows—grocery retail, meal kits, and last-mile delivery. We focus on durable insulated tote bags, easy-to-clean liners, and repeatable pack-out methods that help you reduce spoilage and complaints—without making your daily process complicated.
Next step: Share your typical trip time, product mix (chilled/frozen/hot), and ambient conditions. We’ll help you choose an insulated tote bag setup and a simple packing-and-cleaning routine your team can repeat.
Best Insulated Lunch Bag: How Do You Choose in 2025?
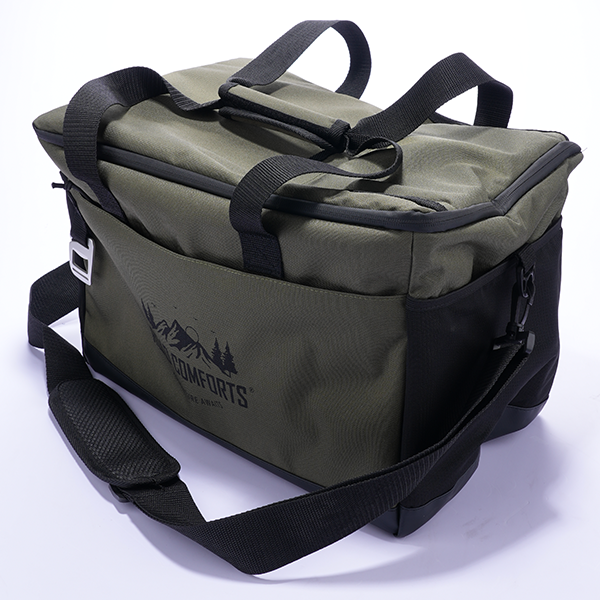
Best Insulated Lunch Bag: How Do You Choose in 2025?
Last updated: December 12, 2025
The best insulated lunch bag is not the cutest tote—it’s the one that keeps your food tasting good and staying safe until you actually eat it. Public food-safety guidance warns that perishable foods should not sit at room temperature for more than 2 hours (or 1 hour when it’s very hot), and bacteria grow fastest in the 40°F–140°F “danger zone.” In the U.S., foodborne illness affects tens of millions of people each year, so small temperature habits matter more than most people expect. If your day is long, your commute is warm, or you meal prep often, choosing the right bag and packing method makes a real difference.
What You’ll Learn About the Best Insulated Lunch Bag
How the best insulated lunch bag slows heat transfer in real life
How long an insulated lunch bag can keep food cold or hot, without marketing hype
Which insulation, lining, and zipper details actually reduce leaks and odors
A simple packing blueprint for a lunch bag with ice pack safety
A 30-second sizing tool to match the best insulated lunch bag to your containers
The 2025 trends changing what “best” means (materials, cleaning, sustainability)
What Makes the Best Insulated Lunch Bag Actually Work?
Core answer: The best insulated lunch bag works because it reduces three “temperature leaks”: heat moving through the walls, warm air swapping in through gaps, and moisture that breaks down insulation over time. When insulation, lining, and closure work together, your lunch changes temperature more slowly—so cold stays cold and hot stays warm for longer.
Think of it like a jacket for your meal. A thin jacket looks fine, but wind gets through the zipper and cold wins fast. Lunch bags are the same: a great insulation layer can still fail if the zipper corners leak or the lining soaks up spills and smells.
Best Insulated Lunch Bag Insulation: The 3-Layer Model
Most high-performing designs follow a simple pattern: foam + reflective layer + protective shell. That’s not a brand secret—it’s basic thermal physics made practical.
| Layer in the bag | Common examples | What it does | What it means for you |
|---|---|---|---|
| Inner liner | PEVA / TPU-style smooth liner | Stops leaks, blocks moisture | Faster cleaning, less odor, fewer stains |
| Insulation core | Closed-cell foam (EVA/PE) | Traps air to slow heat transfer | Longer cold time on commutes and long shifts |
| Outer shell | Polyester / coated fabric | Reduces abrasion and water exposure | Better durability in backpacks and daily carry |
Practical Tips You Can Use Today
If your food often feels “lukewarm”: Choose a best insulated lunch bag with thicker foam and a tighter zipper seal.
If spills are your pain point: Prioritize a smooth, wipe-clean liner and a stable base.
If your bag gets crushed in a backpack: Semi-rigid walls protect insulation and containers better.
Real-life example: A commuter stopped “warm yogurt” by switching from a thin tote to a structured, best insulated lunch bag that didn’t flatten in a crowded backpack.
How Long Does the Best Insulated Lunch Bag Keep Food Cold?
Core answer: A best insulated lunch bag can keep food cold for 4–8 hours in real life when you pair it with frozen cold sources and pack it tightly. Without cold sources, even a high-quality bag is mostly a “slow warmer,” not a mini fridge.
Cold time depends on four things you can control: starting temperature, cold-source size, how full the bag is, and how often you open it. The bag matters, but your routine matters more.
Best Insulated Lunch Bag Cold-Time Expectations (Not Marketing Claims)
| Your day length | Typical packing plan | What usually works | Your practical outcome |
|---|---|---|---|
| 3–4 hours | 1 meal + 1 slim pack | One frozen gel pack | Low stress, easy routine |
| 6–8 hours | Meal + snack + drink | Two medium packs (top + bottom) | Stable lunch temperature |
| 10–12 hours | Two meals / travel | 2–3 packs + tight fill | Less temperature swing across the day |
| Hot lunch goal | Thermal container inside bag | Pre-heated container | Better taste and texture at lunch |
Cold-Time Decision Tool (30 Seconds)
Answer these three questions:
Time out of the fridge: 0–4 hours / 4–8 hours / 8+ hours
Heat exposure: mostly indoors / warm commute / outdoor or hot car
Perishables today: dairy/meat/eggs/cut fruit? yes / no
Your result:
If 0–4 hours + indoors, a medium best insulated lunch bag with 1 pack is often enough.
If 4–8 hours or warm commute, use a best insulated lunch bag that fits 2 packs (top + bottom).
If 8+ hours or outdoors, treat the system like a mini cold chain: structured bag + 2–3 packs + tight packing.
Best Insulated Lunch Bag Retention Test You Can Do at Home
You don’t need lab equipment to compare bags. You only need consistency.
Chill your food overnight in the refrigerator.
Freeze your gel packs fully (no “half-frozen” packs).
Pack your best insulated lunch bag the way you normally would.
Place a small thermometer in the air space (not touching a pack).
Check the temperature at 2 hours and 4 hours.
If the air temperature rises quickly, upgrade your cold sources and packing first. Many “bag problems” are really “pack routine problems.”
Real-life example: A field technician gained consistent cold lunches by adding one extra pack and choosing a best insulated lunch bag that sealed better at the corners.
Which Materials Make a Best Insulated Lunch Bag Worth Buying?
Core answer: The best insulated lunch bag usually uses closed-cell foam for insulation and a smooth, sealed liner for cleaning and leak control. Performance comes from thickness, coverage, and seam quality—not buzzwords.
Closed-cell foam is effective because it traps tiny air pockets and resists water. Reflective liners help most when the bag sits in sun or a hot car. The outer shell matters for durability, but it’s not the main driver of cold time.
Best Insulated Lunch Bag Liner Check: Leakproof vs Water-Resistant
Many bags are “water-resistant” outside but not leakproof inside. If you pack sauces, soups, yogurt, or fruit, this difference decides whether your bag stays fresh or becomes a smell trap.
| Feature | Good sign | Risk sign | What it means for you |
|---|---|---|---|
| Inner seams | Welded / taped | Exposed stitching holes | Less soaking, fewer odors |
| Corners | Smooth + rounded | Deep corners and folds | Easier wipe-clean cleanup |
| Base panel | Removable rigid insert | Soft base only | Less tipping, fewer spills |
| Zipper corners | Closes flush | Gaps at corners | Less warm air + fewer leaks |
Material Tips You Can Use Today
Meal prep with glass containers: Choose a best insulated lunch bag with semi-rigid walls to reduce break risk.
You hate cleaning: Avoid complicated pockets inside the main compartment.
You pack “wet foods”: Leakproof liner first, insulation second.
Real-life example: A parent reduced recurring odors by switching to a best insulated lunch bag with a sealed liner and drying it open overnight.
What Size Best Insulated Lunch Bag Fits Your Routine?
Core answer: The best insulated lunch bag is “just big enough” for your containers plus cold sources, without being half empty. Extra air space warms faster than solid food, so oversized bags often underperform.
Start with your containers, not the bag. If your largest container doesn’t sit flat, spills and crushed food become routine.
Sizing Tool (Pick One Answer)
I pack one main meal + one snack.
Choose a compact-to-medium best insulated lunch bag that fits 1–2 containers and 1–2 slim packs.I pack a meal + drink + two snacks.
Choose a medium best insulated lunch bag with a wide base and room for 2 packs.I pack two meals or share food.
Choose a large, structured best insulated lunch bag that stays upright when full.I carry it inside a backpack.
Choose a rectangular shape that stacks cleanly and doesn’t bulge.
Best Insulated Lunch Bag Size and Shape Guide for Real Containers
| Bag size feel | What fits comfortably | What becomes awkward | Your practical benefit |
|---|---|---|---|
| Compact | 1–2 containers + slim packs | Large salad bowls | Lighter carry, quick access |
| Medium | 2 containers + drink + packs | Oversized bottles | Best “daily driver” balance |
| Large | 2 meals + larger packs | Half-empty setups | Best for long shifts and travel |
Real-life example: A meal prepper stopped crushed salads by moving to a wide-base best insulated lunch bag that held one large container flat.
Do Closures and Structure Change a Best Insulated Lunch Bag’s Performance?
Core answer: Yes. The best insulated lunch bag is often the one with the tightest closure and the most stable structure—because air leaks and crushed insulation shorten cold time quickly.
A perfect insulation wall can’t help if the zipper leaves corner gaps. And a soft bag can lose performance when it gets crushed, because the foam thins and air circulates more.
Best Insulated Lunch Bag Build Styles Compared
| Build style | Typical insulation approach | Typical strength | Best for you if… |
|---|---|---|---|
| Soft-sided bag | Foam + reflective liner | Light and packable | You eat within 3–6 hours and want low weight |
| Semi-rigid box | Thicker foam + structure panels | Better crush protection | You meal prep or commute with a backpack |
| Hard mini cooler | Thick insulation + rigid shell | Best temperature hold | You are away from a fridge all day |
Closures: What to Look For
Standard zipper: Fast, good for daily office use.
Sealed zipper / storm flap: Better retention, fewer corner gaps.
Roll-top: Strong for outdoor days, slower to access.
Real-life example: An office worker tested two bags at home. The “winner” wasn’t bigger—it sealed better and fit two full packs.
How Do You Pack the Best Insulated Lunch Bag With Ice Packs?
Core answer: The safest, easiest routine is cold source + food + cold source, packed tight. If you want the best insulated lunch bag to stay out of the danger zone longer, ice-pack placement matters as much as insulation thickness.
Insulation slows warming. Cold sources create the cold reserve. Together they form a simple “mini cold chain” you can run every day.
Packing Blueprint (3 Steps)
Start cold: Chill food overnight (don’t pack warm leftovers).
Add cold sources: Use frozen gel packs or frozen water bottles.
Pack tight: Reduce air gaps and close the zipper fully.
Best Insulated Lunch Bag Ice Pack Placement
| Ice pack placement | Best for | Not great for | Your practical benefit |
|---|---|---|---|
| Top pack | You open the bag often | Very tall items | Protects the lid area from warming |
| Side pack | Long commute / hot car | Overstuffed bags | More even cooling across containers |
| Bottom pack | Long “sit time” | Leaky containers | Keeps the base layer colder longer |
Best Insulated Lunch Bag Self-Check Quiz (Score Yourself)
Give yourself 1 point for each “yes”:
I pack cold food straight from the fridge.
I use at least one fully frozen cold source.
I use two cold sources when my day is 6+ hours.
I minimize empty air space in the bag.
I keep the bag out of direct sun and hot cars.
I separate hot and cold foods into separate containers.
I wipe the liner at least weekly.
I dry the bag fully with the zipper open.
I don’t reuse half-melted packs for long days.
I have a backup plan (office fridge or extra pack).
Score meaning:
0–4: Your bag is working harder than you are. Fix packing first.
5–7: You’re solid. Upgrade features if you need more time.
8–10: You’re optimizing. Focus on comfort and durability next.
Real-life example: A warehouse worker fixed “lukewarm lunch” by fully freezing packs and switching to a best insulated lunch bag that could fit two packs properly.
Best Insulated Lunch Bag for Work, Kids, Meal Prep, and Travel—What Changes?
Core answer: The best insulated lunch bag changes with your routine. Kids need simple and light. Office workers need easy cleaning and a stable base. Meal preppers need structure and durability. Long-shift and travel users need capacity for multiple cold sources.
Scenario Cheat Sheet
| Your scenario | Top priority | Second priority | What to look for |
|---|---|---|---|
| Kids / school | Easy open + easy clean | Correct size | Smooth liner, simple zipper pull, lighter weight |
| Office + commute | Daily reliability | Leak control | Wide base, wipe-clean liner, fits 1–2 packs |
| Meal prep | Structure + durability | Space efficiency | Semi-rigid walls, reinforced handles, upright base |
| Long shift / travel | Cold time | Comfort carry | Fits 2–3 packs, tight closure, shoulder strap |
Tips by Scenario
For kids: Choose “wipeable and simple” over extra pockets.
For adults without a fridge: Pick a best insulated lunch bag that fits two packs above and below perishables.
For travel: Pack what you’ll eat first near the zipper to reduce open time.
Real-life example: A nurse stopped end-of-shift “warm food” by using two packs (top + bottom) and a structured best insulated lunch bag.
2025 Trends Shaping the Best Insulated Lunch Bag
In 2025, “best” is no longer only about staying cold. The best insulated lunch bag also reduces daily friction so you actually use it: easier cleaning, better structure without bulk, and materials that match rising safety expectations.
Trends You’ll Notice in 2025
More structured soft bags: Soft outside, internal frame inside, less crushing.
Better wipe-clean liners: Smoother surfaces, fewer odor traps, faster cleanup.
Smarter organization: Fewer pockets, better-shaped main compartment for containers.
More “PFAS-free” language: More brands highlight finishes and coatings with fewer persistent chemicals.
Bundles over bag-only: More buyers choose systems (bag + cold packs) rather than bag alone.
Market Insight That Helps You Choose
Most people buy the best insulated lunch bag in 2025 for two reasons:
To spend less on takeout.
To eat more consistently on busy days.
So the best choice is the one you will carry, clean, and repack without hating it.
Best Insulated Lunch Bag FAQs
Q1: How do I choose the best insulated lunch bag for my schedule?
Start with your “time out of the fridge.” Longer time means thicker insulation, tighter packing, and more cold sources.
Q2: How long does an insulated lunch bag keep food cold in real life?
Many people get 4–8 hours when they use frozen packs and pack tightly. Without packs, cold time drops quickly.
Q3: Do I really need ice packs in the best insulated lunch bag?
If you pack perishables like dairy or meat, a frozen cold source is the easiest way to stay safer longer.
Q4: What’s the best insulated lunch bag for meal prep containers?
Look for a wide base, semi-rigid walls, and a liner you can wipe clean in seconds.
Q5: How do I stop my lunch bag from smelling?
Wipe spills the same day, clean weekly, and dry fully with the zipper open overnight.
Q6: Is a bigger insulated lunch bag always better?
Not always. If it’s half empty, extra air warms fast. Right-sizing often improves performance.
Q7: Can the best insulated lunch bag keep food hot too?
Yes, but hot food works best inside an insulated container. The bag mainly slows heat loss.
Summary and Next Steps
The best insulated lunch bag is the one that matches your day: it fits your containers, fits enough cold sources, seals tightly, and cleans easily. If you remember one rule, remember this: insulation slows warming, but cold sources and packing decide real-life results. Choose a structure that won’t crush, a liner you’ll actually clean, and a size that stays mostly full when packed.
Action Plan
Measure your biggest container first.
Choose a best insulated lunch bag that fits the container plus cold sources.
Freeze two packs fully for 6+ hour days (top + bottom).
Run one at-home temperature check with a simple thermometer so you stop guessing.
Build the habit: wipe, dry, repeat.
CTA: Tell us your commute time, whether you have a fridge, and your typical containers. We’ll recommend a best-fit best insulated lunch bag setup and packing plan.
Internal Link Suggestions
About Tempk
At Tempk, we build temperature-control packaging systems inspired by industrial cold chain practices. We apply the same thinking—stable temperature, smart packing, and simple verification—to everyday food carry. Our focus is practical: durable insulation design, leak-resistant liners, and routines that help you reduce spoiled lunches and daily mess.
Next step: Share your routine (office, school, travel, or long shift). We’ll help you map a simple, low-effort setup that keeps food stable and stress low.
Insulated Lunch Bags for Women: What to Buy in 2025?
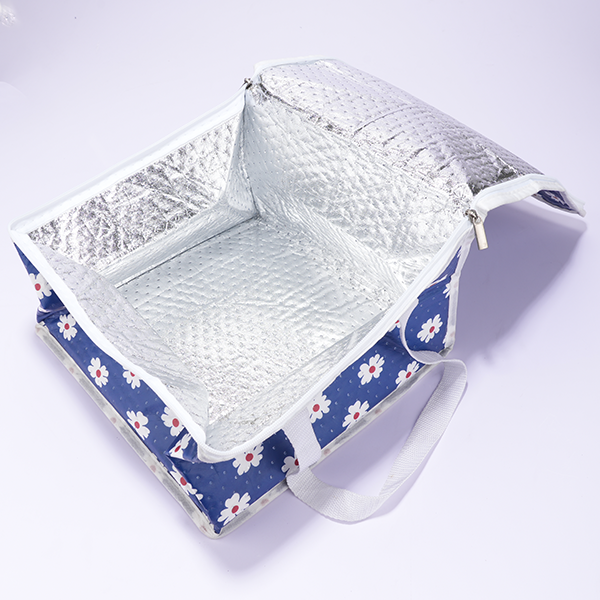
Insulated Lunch Bags for Women: What to Buy in 2025?
If you want safer, better-tasting lunches, insulated lunch bags for women are one of the easiest upgrades you can make. They help slow warming, which matters because bacteria can grow fastest in the common “danger zone” of 40°F–140°F. Most food-safety guidance also recommends a simple timer rule: don’t leave perishables out longer than 2 hours (or 1 hour if it’s very hot). In 2025, the best bags also look polished and feel effortless to carry.
This guide will help you:
Pick insulated lunch bags for women for work that match your commute, not just your outfit
Choose the right size and shape so containers fit without tipping
Prioritize leak resistance + easy cleaning so you actually use the bag daily
Pack insulated lunch bags for women with ice packs the right way (no soggy surprises)
Use a 60-second decision tool to find your “best-fit” bag style fast
Why Do Insulated Lunch Bags for Women Matter for Food Safety?
Direct answer: Insulated lunch bags for women help reduce how long your food spends warming up, especially when you pair them with a cold source like gel packs. They don’t “create cold,” but they slow heat transfer, giving you a bigger safety buffer when your day runs late.
Expanded explanation: Think of insulation like a “slow-motion button” for temperature change. Your lunch will still warm up over time, but it warms more slowly, so you have more predictable freshness. This is most important for lunches with dairy, eggs, meat, seafood, cooked rice, or cut fruit.
What time-and-temperature rules are easiest to remember?
| Rule you can actually follow | What it means | Why it matters to you |
|---|---|---|
| Danger zone: 40°F–140°F | Bacteria can multiply faster | Risk rises if lunch sits warm too long |
| 2-hour rule (1 hour in heat) | Limit time unrefrigerated | Helps you plan ice packs and timing |
| Cold goal: ~40°F or below | Colder slows spoilage | Better taste + fewer “is this safe?” doubts |
Practical tips you can use today
If it needs a fridge, it needs a cold pack. Don’t negotiate with mayo.
Keep the bag closed. Every “peek” swaps cold air for warm air.
Avoid sun + hot cars. Heat loads jump fast, even on mild days.
Real-life scenario: You pack yogurt and chicken salad at 7:00 a.m., eat at 1:00 p.m., and your office runs warm. A thicker insulated tote plus two slim ice packs (top + bottom) makes lunch feel far less risky.
Which Insulated Lunch Bags for Women Size Fits Your Routine?
Direct answer: The best insulated lunch bags for women fit your containers first, then your snacks and drink. If your containers don’t sit flat and upright, you’ll fight the zipper daily.
Expanded explanation: Most lunch-bag regret is a size mismatch. The bag is either too small to close comfortably, or too large and awkward to carry. A simple way to choose is to think in container count, not liters.
Quick sizing guide (choose your “lunch personality”)
| Your day type | Typical contents | Best bag style | What you gain |
|---|---|---|---|
| Minimalist | 1 container + snack | Slim tote | Light carry, fits tight spaces |
| Balanced workday | 2 containers + fruit + drink | Structured tote | Less squishing, better organization |
| Long day + gym | 3 containers + extras | Larger capacity bag | One bag instead of two |
Practical tips you can use today
Measure your main container (width + height). This prevents daily frustration.
Leave room for ice packs. Overstuffing reduces cooling performance.
Choose a stable base if you walk a lot or carry liquids.
Real-life scenario: If your lunch tips over inside your work tote, it’s usually not “bad luck.” It’s a base-and-structure problem.
What Features Matter Most in Insulated Lunch Bags for Women?
Direct answer: Start with three non-negotiables: insulation, leak-resistant lining, and easy cleaning. Then choose comfort and organization features that match your day.
Expanded explanation: Insulated lunch bags for women are a mini “personal cold chain.” If the inside is annoying to wipe, you’ll skip cleaning. If it leaks once, you won’t trust it again. The best features reduce daily friction.
Feature checklist (fast scan)
Insulation thickness: slows temperature change
Liner: smooth, wipeable, odor-resistant
Seams: fewer seams = fewer leak points
Zipper: strong, wide opening, closes cleanly
Structure: helps containers stay flat
Carry comfort: handle + shoulder/crossbody option
| Feature | Good option | Better option | Your practical benefit |
|---|---|---|---|
| Lining | Wipeable liner | Seam-sealed liner | Faster cleanup, fewer odors |
| Carry | Top handle | Handle + crossbody strap | Easier commuting |
| Structure | Soft sides | Structured walls/base | Less crushed food |
| Storage | One pocket | Simple multi-pocket layout | Keys/utensils stay organized |
Practical tips you can use today
If you pack soups: prioritize upright stability + leak control.
If you pack salads: prioritize structure so greens don’t get crushed.
If you hate clutter: choose one good pocket, not five tiny ones.
Real-life scenario: A “cute” lunch bag you avoid using is not stylish. It’s just closet decor.
How Do You Keep Food Cold or Hot in Insulated Lunch Bags for Women?
Direct answer: Insulated lunch bags for women work best when you combine insulation with smart habits: start cold, add ice packs, and minimize opening. For hot lunches, use a real insulated food jar and avoid mixing hot and cold.
Expanded explanation: Insulation is a barrier, not a refrigerator. If you put warm food into a lunch bag, you trap warmth. If you pack cold food with frozen packs, you slow warming and buy time.
HowTo: Pack insulated lunch bags for women like a mini cold chain
Chill the food first (overnight is best).
Freeze ice packs solid (flat packs give better surface contact).
Put one cold pack at the bottom.
Add your main container (sealed and upright if liquid).
Add a second cold pack on top (top + bottom is a simple win).
Close the bag and keep it closed until you eat.
| Pack-out method | Ice placement | Best for | What it means for you |
|---|---|---|---|
| Top + bottom | Above + below | Workdays | More stable cooling |
| Side walls | Along sides | Tall jars | Less warm “edge” |
| Wrap the core | Surround main item | Long shifts | Maximum buffer time |
Practical tips you can use today
Short day: 1 slim ice pack can be enough.
Workday: 2 slim ice packs (top + bottom) is safer.
Long day: 2–3 packs + thicker insulation helps most.
Real-life scenario: If you pack hot pasta next to a cold salad, both lose. Separate them so each stays enjoyable.
Which Materials and Linings Make an Easy-Clean Lunch Bag?
Direct answer: Choose materials that match real life: durable outer fabric and a smooth, wipe-clean interior. If it’s annoying to maintain, you won’t maintain it.
Expanded explanation: Lunch bags get tossed into cars, squeezed into totes, and exposed to spills. You want a bag that survives daily use without becoming a “smell project.”
Material decision table
| Material | What it feels like | Best for | Your real benefit |
|---|---|---|---|
| Nylon / polyester | Light, flexible | Commuters | Easy carry, easy wipe |
| Canvas | Structured, classic | Office style | Holds shape, looks polished |
| Vegan leather-style | Smooth, dressy | Business settings | Matches outfits, wipes clean |
| Neoprene-style | Soft, stretch | Minimalists | Compact and simple |
Practical tips you can use today
Choose darker interiors if stains bother you.
Avoid deep seams that trap residue.
Prioritize a zipper that runs smoothly—daily usability beats fancy hardware.
How Do You Choose Stylish Insulated Lunch Bags for Women for Work?
Direct answer: You can get style and performance by choosing a tote-like silhouette with structure, strong closure, and an interior you’ll actually clean.
Expanded explanation: In 2025, many insulated lunch bags for women for work are designed to look like everyday bags. The trick is picking “handbag energy” without “fashion-only thin walls.”
Simple “style + function” rules
Structured silhouette = looks premium and protects food
Minimal seams = easier cleaning and fewer leak points
Neutral colors = matches outfits without effort
Wide opening = faster mornings, less container wrestling
Real-life scenario: You should be able to set it on a desk without it collapsing like a paper bag.
Interactive Tool: Which Insulated Lunch Bags for Women Should You Choose?
60-second decision tool (score yourself)
Give yourself 1 point for each “Yes”:
Do you go 6+ hours without fridge access?
Do you pack dairy, eggs, meat, or seafood often?
Do you commute 30+ minutes each way?
Do you carry liquids (soups, yogurt, dressings)?
Do you want your lunch bag to look office-appropriate?
Your match
0–1 points: Compact insulated lunch bags for women are enough.
2–3 points: Medium structured insulated lunch bags for women fit best.
4–5 points: Larger, thicker insulated lunch bags for women are your safest bet.
Quick comparison (bag styles)
| Bag style | Best for | Trade-off | What you gain |
|---|---|---|---|
| Compact tote | Short days | Less space for packs | Light and simple |
| Structured tote | Workdays | Slightly heavier | Better organization + protection |
| Cooler-style | Long days/heat | Bulkier | Longer cooling buffer |
How Do You Clean and Maintain Insulated Lunch Bags for Women?
Direct answer: Clean quickly, dry fully, and you avoid 90% of odor problems. A wipeable lining makes consistent cleaning realistic.
Expanded explanation: Lunch bags often “fail” because people stop cleaning them. Then smells settle in, and the bag feels gross even if it looks fine.
Cleaning routine you can actually follow
Empty crumbs and remove ice packs.
Wipe inside with mild soap + warm water.
Clean seams and corners with a small brush or cloth.
Wipe again with clean water.
Air-dry fully before zipping shut.
Practical tips you can use today
Clean the same day as spills. Dried sauce becomes “forever smell.”
Never zip closed while damp. Moisture is odor’s best friend.
Deep clean weekly if you use it daily.
Real-life scenario: If you zip a damp lunch bag closed overnight, odors build fast. Air-drying is half the cleaning.
2025 Trends in Insulated Lunch Bags for Women
Trend overview (December 2025): In 2025, insulated lunch bags for women are trending toward workwear styling, lighter carry comfort, and smarter organization. People want bags that feel normal in an office, on transit, or at the gym—without looking like a kid’s lunch box.
Latest developments you’ll see more of
More tote-like designs that pass as everyday carry
Cleaner interiors that wipe fast and resist stains
More structured bases to prevent tipping and crushing
Modular organization (simple snack zones, bottle pockets, dividers)
Market insight: Buyers are treating lunch bags like “daily essentials,” not occasional picnic gear. That raises expectations for comfort, cleanup, and design polish.
Frequently Asked Questions
Q1: Do insulated lunch bags for women keep food safe without ice packs?
They help, but ice packs add a real safety buffer for perishables like dairy, eggs, and meat.
Q2: How long can food stay in insulated lunch bags for women?
It depends on starting temperature, insulation, and heat exposure. Follow the 2-hour rule (1 hour in hot conditions).
Q3: What size insulated lunch bags for women fit meal prep containers?
Most people do best with a medium structured tote that fits containers flat and upright.
Q4: How do I stop leaks in insulated lunch bags for women?
Use sealed containers, keep liquids upright, and choose a bag with a leak-resistant lining and stable base.
Q5: How do I reduce odors inside my lunch bag?
Wipe after use, deep clean weekly, and air-dry fully before closing.
Q6: Can insulated lunch bags for women keep hot food hot?
Yes, if you use an insulated food jar and avoid mixing hot and cold foods in one space.
Internal Link Suggestions (No URLs)
Food safety temperature rules for packed lunches and commuting
Ice pack placement guide for insulated lunch bags for women
Leakproof lunch bag lining materials and easy-clean checklist
Meal prep container sizing chart for lunch totes
Passive cooling vs active cooling: what your lunch actually needs
Summary and Recommendations
Insulated lunch bags for women work best when you treat them as a simple system: the right bag, the right ice packs, and the right habits. Choose a size that fits your containers without tipping, and prioritize leak resistance and easy cleaning. Pack cold food cold, use top-and-bottom ice placement for longer days, and keep the bag closed. You’ll get better taste, less waste, and fewer “emergency lunch buys.”
Your next step (CTA): Pick your longest “no-fridge” day and build for that. Then run a 3-day test—same lunch, same route, note what stays cold—and adjust your ice pack plan.
About Tempk
At Tempk, we build temperature-control packaging solutions inspired by real cold chain principles—simple, practical, and performance-focused. We design systems that help keep temperature-sensitive items stable, using structures and materials that prioritize reliable insulation and everyday usability. We also help teams translate “cold chain thinking” into user-friendly buying guides and packing routines.
Next step: If you want help turning your audience’s routines (commute time, climate, lunch type) into a clear “best-fit” lunch bag spec, consult a temperature-control specialist and build a practical selection checklist.
Insulated Lunch Bags for Adults: 2025 Guide
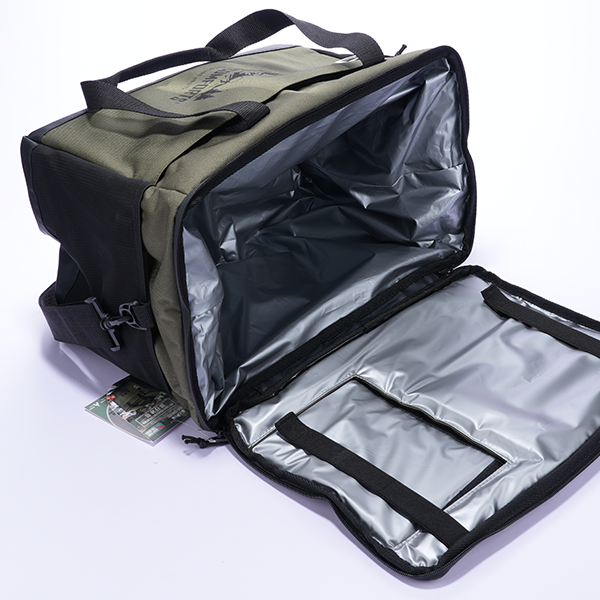
Insulated Lunch Bags for Adults: What to Buy in 2025?
Last updated: December 12, 2025
If you’re choosing insulated lunch bags for adults, you’re not just buying “a nicer tote.” You’re building a mini routine that protects taste and safety. Globally, unsafe food is linked to 600 million illnesses each year, and the U.S. CDC estimates 48 million people get sick annually.
That’s why a bag that stays cold longer—and packs correctly—matters. Food safety guidance warns about the 40°F–140°F “Danger Zone” and limiting time unrefrigerated.
This article will answer for you:
How insulated lunch bags for adults protect food safety using a simple “mini cold chain” mindset
insulated lunch bags for adults
How long insulated lunch bags for adults keep food cold—and how to extend it without guessing
What to buy in a leakproof insulated lunch bag for adults so spills don’t ruin your day
insulated lunch bags for adults
What size works best (from “light lunch” to large insulated lunch bag for adults)
A 60-second tool for how to keep lunch cold without a fridge
2025 trends (materials, cleanability, and PFAS-free sourcing signals)
insulated lunch bags for adults
Why do insulated lunch bags for adults matter in 2025?
Insulated lunch bags for adults matter because they reduce “temperature risk,” prevent leaks, and make meal prep more realistic on long days. If you work 8–12 hours, commute, or stop in a hot car, your lunch is battling heat the whole time.
Think of insulation like a winter jacket. A jacket doesn’t create body heat—it slows heat loss. Your lunch bag works the same way: it doesn’t “make cold,” it slows warming. That’s why packing habits and ice packs matter as much as the bag itself.
insulated lunch bags for adults
Practical tip for real workdays
If you can refrigerate at work: prioritize leak control + easy cleaning
If you can’t refrigerate: prioritize insulation + ice-pack space
If your lunch sits in a car: prioritize structure + “keep it closed” rules
Real-world case: A night-shift team improved lunch safety by using two cold sources and only opening the bag at meal time.
insulated lunch bags for adults
How long do insulated lunch bags for adults keep food cold?
Most insulated lunch bags for adults keep food cold long enough only when you use cold sources and limit openings. Food safety guidance highlights the 40°F–140°F Danger Zone, and advises not leaving perishables out more than 2 hours (or 1 hour above 90°F).
Instead of guessing “hours,” use a simple planning rule: match the bag + ice pack plan to your time away from refrigeration.
| Time away from a fridge | Bag strategy for adults | Cold-source plan | What it means for you |
|---|---|---|---|
| Under ~3 hours | Standard insulation can work | 1–2 slim packs | Good for short office mornings |
| ~3–6 hours | Better insulation + tight closure | 2 cold sources | Safer for errands + long meetings |
| 6+ hours / hot car risk | Highest insulation + fewer opens | 2+ cold sources + no-peek rule | Best for long shifts and travel days |
Why two cold sources keeps showing up: USDA food safety guidance for packed meals commonly advises using at least two cold sources around perishable foods to keep them colder longer.
Quick extension trick (that actually works)
Pre-chill the food and containers before packing
Put one cold source on top and one on bottom
Fill empty space (empty air warms fast)
Which insulation works best in insulated lunch bags for adults?
The best insulated lunch bags for adults use layered systems that balance insulation, structure, and cleanability. You don’t need “the thickest” bag—you need the right insulation for your routine.
| Insulation style | Typical performance (real life) | Best for | What it means for you |
|---|---|---|---|
| Foam insulation | Solid for short days | office + fridge access | Simple, affordable, easy to use |
| Reflective foil layers | Good for mid days | commuting + light travel | Lightweight, flexible, packs well |
| High-density panels | Strong for long days | long shifts + job sites | Better cold retention, more structure |
| Hybrid systems | Best overall balance | mixed routines | Consistent results with fewer surprises |
Foam vs “hybrid”: what you’ll notice
Foam-only bags can work—but they lose faster if the bag is half empty
Hybrid systems feel more “cooler-like” and crush less in backpacks
Structure reduces tipping, which reduces leaks
Reality check: If you routinely need 6+ hours cold time, your ice-pack plan matters as much as insulation thickness.
insulated lunch bags for adults
What size of insulated lunch bags for adults fits work and travel?
Choose insulated lunch bags for adults by your containers first, then by liters. Adults don’t pack “a sandwich.” You pack meal-prep boxes, drinks, snacks, and utensils.
| Your typical day | Recommended bag size | Interior shape | What it means for you |
|---|---|---|---|
| One container + drink | 5–6 L | slim rectangle | lighter carry, fewer spills |
| Two containers + snacks | 7–9 L | boxy base | best “daily driver” size |
| Three containers + drinks | 10–12 L | wide opening | best for long shifts |
30-second “container fit test” (interactive)
Answer these three questions:
How many containers? (1 / 2 / 3+)
Tall drink bottle? (Yes / No)
Do you hate “container Tetris”? (Yes / No)
Your match:
1 container + no bottle → compact bag
2 containers + bottle → medium, boxy base
3+ containers or “I hate Tetris” → large + wide opening
What makes a leakproof insulated lunch bag for adults actually leakproof?
A leakproof insulated lunch bag for adults needs three things: a sealed liner, protected seams, and a closure that truly closes. Water-resistant fabric alone won’t stop soup or dressing from escaping.
insulated lunch bags for adults
| Leak feature | What “good” looks like | What “bad” looks like | Your real benefit |
|---|---|---|---|
| Inner liner | smooth + wipeable | fabric interior | less odor, faster cleanup |
| Seams | taped/heat-sealed | stitched through liner | less “hidden seep” into foam |
| Zipper/closure | full coverage | gaps at ends | fewer surprise leaks |
| Base | rigid/flat | floppy | containers stay upright |
Practical tips you can use today
Check corners first: corners fail before the center
insulated lunch bags for adults
Check zipper coverage: gaps beat “leakproof lining” claims
insulated lunch bags for adults
If you’re rough on gear: choose designs that clean fast and hold shape
Real-world case: A worker stopped daily mess by switching to sealed inner seams and a rigid base.
insulated lunch bags for adults
How to pack insulated lunch bags for adults like a mini cold chain
Packing is the hidden upgrade that makes insulated lunch bags for adults work better—even before you spend more.
insulated lunch bags for adults
Use official safety rules as your guardrails: keep cold foods cold, stay out of the Danger Zone, and limit time unrefrigerated.
The “Two Cold Sources” method (top + bottom)
USDA guidance for packed meals commonly recommends at least two cold sources (gel packs or frozen bottles), placed around perishables.
Do this:
Cold source #1 on top
Food containers in the middle
Cold source #2 on the bottom
60-second lunch bag decision tool (interactive)
Check one answer in each row:
Time until you eat: under 3h / 3–6h / 6h+
Heat exposure: mild / warm / hot car risk
How often you open it: once / a few times / many times
Perishables inside: yes / no
Your packing plan:
Under 3h + mild → 1 pack + keep closed
3–6h or warm → 2 cold sources + wide opening bag
6h+ or hot car → 2+ cold sources + minimize openings + test once with a thermometer
Table: packing choices that change outcomes
| Packing choice | Better | Worse | What it means for you |
|---|---|---|---|
| Ice placement | top + sides | bottom only | top protects warmest exposure insulated lunch bags for adults |
| Food order | coldest items near packs | cold items in center | contact improves cooling insulated lunch bags for adults |
| Open frequency | once at lunch | every hour | openings inject heat insulated lunch bags for adults |
Practical tips and advice
Start cold: pack straight from the fridge (insulation can’t “fix” warm food)
Avoid trunk storage: a hot trunk destroys cold time fast
Test once: use a simple thermometer one day; it ends the guessing game
How to clean insulated lunch bags for adults without odors
Cleaning insulated lunch bags for adults is about speed and consistency, not deep scrubbing. A two-minute reset keeps liners from holding smells and prevents damp “closed-bag” odor.
The 2-minute reset routine
Empty crumbs and wrappers
Wipe liner with mild soap + warm water
Wipe again with clean water
Air-dry fully with the zipper open
Don’t store the bag closed while damp
insulated lunch bags for adults
Practical tips and advice
Wipe daily if you carry perishables
insulated lunch bags for adults
Deep clean weekly, then dry completely
insulated lunch bags for adults
Avoid soaking foam walls; it can degrade structure over time
insulated lunch bags for adults
2025 trends for insulated lunch bags for adults: materials and sourcing signals
In 2025, insulated lunch bags for adults are trending toward three things: work-first design, faster cleaning, and clearer material claims.
Trend 1: Two cold sources is becoming “default guidance”
USDA’s guidance repeatedly emphasizes two cold sources for perishable packed meals, including 2025 reminders.
Trend 2: PFAS-free claims are becoming more common
If you’re sourcing lunch bags at scale (teams, routes, staff programs), coatings matter. New York prohibits selling new apparel with intentionally added PFAS after January 1, 2025.
Washington adopted PFAS restrictions for apparel and accessories on Nov. 20, 2025, with restrictions taking effect Jan. 1, 2027.
Colorado describes phased PFAS restrictions and disclosures, including for “textile articles,” with timelines beginning mid-decade.
What this means for you: even if lunch bags aren’t “apparel,” many suppliers share materials and coating chemistry across product lines—so asking for PFAS-free options is becoming a normal sourcing question.
insulated lunch bags for adults
| Question to ask suppliers | What to look for | Why it matters to you |
|---|---|---|
| “Is the liner easy to wipe?” | smooth liner, minimal folds | fewer odors and mold risk insulated lunch bags for adults |
| “Is it PFAS-free?” | clear PFAS-free statement | aligns with 2025 direction |
| “Do seams protect the foam?” | taped/heat-sealed seams | leaks don’t seep into insulation insulated lunch bags for adults |
Trend 3: Structured soft bags (less crushing, fewer spills)
More adult-focused designs now prioritize upright stability and wide openings, which makes daily use easier and reduces “I stopped using it” drop-off.
Frequently Asked Questions
Q1: How long do insulated lunch bags for adults keep food cold?
It depends on ice packs, heat, and openings. Follow guidance on the 40°F–140°F Danger Zone and limit time unrefrigerated for perishables.
Q2: Do I really need two ice packs?
For perishables, USDA guidance commonly recommends at least two cold sources placed around food for safer cold holding.
Q3: What’s the simplest “safe rule” for packed lunches?
Don’t leave perishables out more than 2 hours (or 1 hour above 90°F).
Q4: Do insulated lunch bags for adults keep food warm too?
They can slow cooling, but hot foods cool faster than cold foods warm. Use insulated containers and keep them closed.
Q5: What makes a leakproof insulated lunch bag for adults truly leakproof?
A sealed liner, protected seams, and a closure that fully closes—fabric water resistance is not enough.
insulated lunch bags for adults
Q6: How do I stop lunch bag smells?
Wipe daily, then air-dry fully with the zipper open. Damp + closed creates odors fast.
insulated lunch bags for adults
Q7: Should I care about PFAS-free coatings in 2025?
If you care about coatings, ask for PFAS-free claims. Regulations and supplier practices are shifting quickly in some regions.
Q8: What’s the best insulated lunch bag for work if I commute?
Choose a medium, boxy base that fits containers flat, plus room for two cold sources and a wipeable liner.
Summary and recommendations
Insulated lunch bags for adults work best when you match the bag to your day and pack it like a mini cooler. The most practical wins are simple:
Choose the right size based on your containers (not just liters)
Prioritize leakproof design: liner + seams + closure
Use two cold sources for perishables, placed top and bottom
Reduce openings, avoid hot-car storage, and test once with a thermometer
Clean fast and dry fully to prevent odors
insulated lunch bags for adults
About Tempk
At Tempk, we work on temperature-control packaging and cold-chain thinking—then translate it into everyday routines people can actually follow. We focus on practical performance details: insulation that behaves consistently, wipe-clean liners, and packing workflows that reduce leaks and waste. If you’re choosing insulated lunch bags for adults for staff programs, routes, or daily commuting, we can help you define specs and a simple packing SOP that’s easy to standardize.
CTA: Tell us your “time away from a fridge,” heat exposure (car or indoor), and whether leakproof is critical. We’ll suggest a practical setup you can use every day.
EPP Transport Box Outdoor Camping: How to Choose?
EPP Transport Box Outdoor Camping: How Do You Choose?
An EPP transport box outdoor camping setup can be the difference between safe, fresh meals and a cooler full of warm surprises. Food safety gets risky in the 40°F–140°F “danger zone,” and when it’s above 90°F, your safe window for perishables can shrink to about one hour. If you want repeatable results, treat your cooler like a tiny cold chain: control temperature, control handling, and measure what matters.
This article will help you:
- Choose an EPP transport box outdoor camping size that fits your trip without wasting space
- Hit safer temperature targets (including seafood-friendly ranges) with simple habits
- Decide gel packs vs ice for outdoor camping box use—without soggy food
- Pack an EPP transport box outdoor camping kit using a layered method that reduces lid-open time
- Use quick tools (Trip Fit Score + self-test) to build a “micro cold chain” you can repeat
Why is an EPP transport box outdoor camping box better than a regular cooler?
Direct answer: An EPP transport box outdoor camping box is often better when you want light carry + strong insulation + impact resistance in one reusable package. EPP (expanded polypropylene) is a closed-cell bead foam with properties like thermal insulation, water and chemical resistance, and a high strength-to-weight ratio.
Expanded explanation: Outdoors, coolers get dragged, stacked, rattled in trunks, and opened too often. When materials crack or lids stop fitting tightly, cold performance drops even if you add more ice. EPP’s “bounce-back” behavior helps the box keep its shape, which helps the lid keep sealing.
| Cooler type | Shock resistance | Weight feel | What it means for you |
|---|---|---|---|
| EPP transport box outdoor camping | High | Light | Fewer cracks, better long-term lid fit |
| Hard plastic cooler | Medium | Heavy | Strong, but tiring when full |
| Soft cooler bag | Low–Medium | Light | Best for short, mild-weather trips |
Practical tips you can use today
- If you move camp often: prioritize handles and a firm rim over “more liters.”
- If you stack gear: choose a lid that closes snugly with minimal wobble.
- If you reuse a lot: pick a smooth interior you can wipe quickly.
What temperature should an EPP transport box outdoor camping target in 2025?
Direct answer: Aim to keep your EPP transport box outdoor camping temperature at 40°F (4°C) or below, and don’t let food sit in the danger zone for long—especially on hot days. A simple thermometer beats guessing every time. ()
Expanded explanation: Most outdoor food problems are not “bad ice.” They’re warm time and cross-contamination. That’s why official guidance keeps repeating the same basics: keep cold foods cold, minimize time in heat, and separate raw items from ready-to-eat foods. ()
A simple temperature cheat sheet (camping + seafood + work)
| What you’re carrying | Practical target | Why it matters | How your EPP transport box outdoor camping setup should change |
|---|---|---|---|
| Deli food, dairy, cooked meals | ≤ 40°F / 4°C | Core safety control line | Add a thermometer + keep packed tight |
| Fresh seafood (chilled) | 32–39°F / 0–4°C | Better texture + slower spoilage | Seal it, keep it low, keep openings rare |
| Frozen products | ≤ 0°F / −18°C | Prevents thaw/refreeze damage | Stronger cold source + strict opening control |
The seafood targets above align with common cold-chain practice in your drafts and with public guidance that emphasizes keeping seafood very cold (near 32°F) and keeping frozen foods at 0°F (−18°C) or below.
Practical tips you can use today
- Use the “two-cooler habit”: drinks in one box, food in another if you open often.
- Keep raw proteins separate: sealed and kept away from ready-to-eat foods.
- Shade is a multiplier: it reduces constant heat load without extra cost.
What cold-chain equipment should you add to an EPP transport box outdoor camping setup?
Direct answer: Your EPP transport box outdoor camping box is only one piece of your system. To make results predictable, pair it with a cold source, a thermometer, and separation tools (watertight containers and inner bins). For outdoor food work (pop-ups, sampling, field service), consider a simple data logger so you can prove conditions later.
Expanded explanation: Professionals treat cooling as a system: insulation + cooling + monitoring + handling. The same logic scales down to camping. When you add even one monitoring tool, you stop guessing and start controlling.
| Add-on to your EPP transport box outdoor camping kit | What it does | When it’s worth it | What it means for you |
|---|---|---|---|
| Appliance/cooler thermometer | Shows if you’re staying ≤ 40°F | Always | Fewer “surprise warm” events |
| Watertight food containers | Blocks meltwater contact | If using ice | Cleaner food + lower cross-contamination risk |
| Inner bins / dividers | Creates “zones” | Groups, families, pop-ups | Faster grabs, less lid-open time |
| Basic data logger | Records temperature history | Outdoor retail, events, delivery | Evidence for QA and disputes |
These add-ons reflect the same “equipment + monitoring” approach used in professional cold chains, scaled down for camping and outdoor work. (美国农业部)
What size EPP transport box outdoor camping box do you actually need?
Direct answer: The right EPP transport box outdoor camping size is the smallest box that fits your food + cold source with minimal air gaps. Empty air warms quickly every time you open the lid. A full, tight-packed box stays colder longer than a half-empty one.
Expanded explanation: Oversizing is the most common mistake. Bigger creates more air space, and air heats fast. Your goal is density: cold items touching cold items, with gaps filled by sealed bottles or extra cold packs.
Trip Fit Score (interactive decision tool)
Add points, then match your score:
- People: 1 point per person per day
- Hot weather: +2 points if daytime is above 90°F
- Frequent opening: +2 points if you expect 10+ opens/day
- Raw proteins (meat/seafood): +2 points
- Long drive: +1 point per hour after the first hour
Score guide:
- 0–4: small box (day trip, low risk)
- 5–8: medium box (weekend, moderate risk)
- 9+: two-box strategy (food box + drink box)
| Trip style | Suggested internal volume | What it means for you |
|---|---|---|
| Solo, 1–2 days | 15–25 L | Small box cools fast and stays stable |
| 2 people, weekend | 25–45 L | Best all-around size for most campers |
| Family, 2–3 days | 45–70 L | Use food box + separate drink box |
| Outdoor work / pop-up | 45–70 L | Better consistency + fewer complaints |
The volume ranges above and the Trip Fit Score logic come directly from your draft set, which emphasized tight packing and behavior-based sizing.
How long does an EPP transport box outdoor camping setup keep food cold?
Direct answer: Cold time in an EPP transport box outdoor camping setup depends on cold mass, lid seal, sun exposure, and opening behavior. In real life, your habits can cut cold time in half—or extend it—without changing the box.
Expanded explanation: Every warm item you add is a “heat sponge.” Every long lid-open moment is a heat dump. If you want predictable cold, control these four levers: pre-chill, pack tight, use shade, and open fast.
A quick “cold hold” checklist
- Pre-chill food overnight
- Add a top cold layer (gel packs or frozen bottles)
- Fill gaps with sealed bottles or extra packs
- Keep the box shaded or covered with a light towel
- Create a grab bag for snacks so you stop opening the main box
Gel packs vs ice for EPP transport box outdoor camping: what should you use?
Direct answer: In an EPP transport box outdoor camping plan, ice cools aggressively and refills easily, while gel packs stay cleaner and reduce soggy-food problems. A hybrid setup is usually the easiest win.
Expanded explanation: Ice creates meltwater. Meltwater is not just annoying—it can spread juices if raw proteins leak. That’s why official cooler-packing guidance emphasizes watertight containers and separation. (美国农业部)
| Cooling option | Best for | Biggest downside | What it means for you |
|---|---|---|---|
| Ice cubes | Short trips, easy refills | Meltwater mess | Needs watertight containers |
| Block ice | Longer holds | Harder to source | Slower melt than cubes |
| Gel packs | Clean organization | Needs freezer | Best for repeat trips |
| Frozen bottles | Simple + useful later | Shape limits packing | Cold + drinking water |
| Hybrid | Most campers | Requires planning | Balanced cold + clean |
How to pack an EPP transport box outdoor camping setup without soggy food
Direct answer: To avoid soggy food in an EPP transport box outdoor camping setup, use separation + a barrier layer + a predictable layout. This reduces lid-open time and keeps meltwater away from dry foods.
The 5-layer pack-out method
- Cold base: block ice or frozen bottles
- Barrier layer: tray, rack, or sealed liner
- Heavy cold items: meats, dairy, dense meals
- Quick-grab layer: lunch items and snacks
- Top shield: gel packs on top
Practical tips you can use today
- Label zones: “Day 1” on top, “Day 2” deeper—so you stop searching.
- Seal raw proteins twice: leaks create both odor and contamination risk.
- If you carry seafood: keep it sealed and low; clean the box promptly. (FoodSafety.gov)
How do you manage frequent opening in an EPP transport box outdoor camping system?
Direct answer: If your EPP transport box outdoor camping box gets opened constantly for drinks, separate “traffic” from “storage.” Use a drink cooler and a food cooler. (美国农业部)
Expanded explanation: This is one of the fastest performance upgrades. Your food stays colder because it’s not exposed to warm air every time someone wants a drink.
One-minute rule set for groups
- Drinks go in the drink cooler (opened often)
- Food stays in the food cooler (opened a few times)
- The food cooler lid should open for seconds, not minutes
2025 trends shaping EPP transport box outdoor camping (why cold-chain thinking wins)
In 2025, outdoor cooling is shifting toward reusability, less food waste, and more temperature proof. At a global scale, the International Institute of Refrigeration highlights that 12% of global food production is lost due to insufficient cold chains, and expanding cold-chain infrastructure could save hundreds of millions of tonnes annually—so “cooling that works” is increasingly seen as a value, not a detail. (国际制冷研究所)
Mini self-test: Are you running a safe “micro cold chain”?
Give yourself 1 point for each “yes”:
- Do you pack food cold (from fridge/freezer), not room temperature?
- Do you keep the box under 40°F with a thermometer? (FoodSafety.gov)
- Do you separate raw proteins from ready-to-eat foods? (美国农业部)
- Do you use a barrier layer to prevent meltwater contact?
- Do you limit lid-open time with zones and a grab bag?
Score guide: 0–2 high risk • 3–4 solid • 5 pro-level
Internal link suggestions (descriptive anchor text)
- EPP Cooler Box Packing Checklist for Outdoor Trips (suggested URL: /blog/epp-cooler-box-packing-checklist)
- Gel Packs vs Ice: Cooling Strategy for Camping Food Safety (/blog/gel-packs-vs-ice-camping)
- Food Thermometer Guide for Cooler Temperature Control (/blog/cooler-thermometer-guide)
- How to Choose Reusable Cold Chain Packaging for Consumers (/blog/reusable-cold-chain-packaging)
- Last-Mile Temperature Control Basics for Perishable Foods (/blog/last-mile-temperature-control)
Frequently Asked Questions
Q1: What is an EPP transport box outdoor camping box used for?
It keeps food and drinks colder for longer while staying lightweight and tough for repeat trips.
Q2: How long does an EPP transport box outdoor camping setup keep food cold?
It depends on cold mass, packing density, opening frequency, and heat. Pre-chilling and fewer openings matter a lot.
Q3: Is ice or gel better for an EPP transport box outdoor camping plan?
Ice is powerful but messy. Gel packs are clean and reusable. Hybrid setups often work best.
Q4: How do I stop food from getting soggy?
Use a barrier layer, keep foods sealed, and put dry foods above meltwater zones.
Q5: Can I carry seafood safely in an EPP transport box outdoor camping setup?
Yes. Keep seafood sealed, low, and cold, and aim for 0–4°C (32–39°F).
Summary and recommendations
An EPP transport box outdoor camping setup works best when you choose the right size, pack tightly, and control lid openings. Aim for 40°F (4°C) or below, use ice/gel/hybrid based on your trip, and separate drinks if your group opens constantly. If you treat your cooler like a micro cold chain—measure temperature, reduce warm time, and separate high-risk items—your food stays safer and your trips feel easier. ()
About Tempk
At Tempk, we design and supply reusable insulated packaging that supports predictable temperature performance in real handling conditions. Our EPP transport box outdoor camping solutions focus on sturdy structure, stable insulation, and easy cleaning—so you can build a repeatable cooling workflow for camping, outdoor work, and temperature-sensitive deliveries.
CTA: Share your trip style (car camping, hiking, boat), typical duration, and hottest expected weather. We’ll recommend an EPP transport box outdoor camping size, cold-source strategy, and packing layout you can test on your next outing.
Foldable EPP Cooler Box: Worth Switching in 2025?
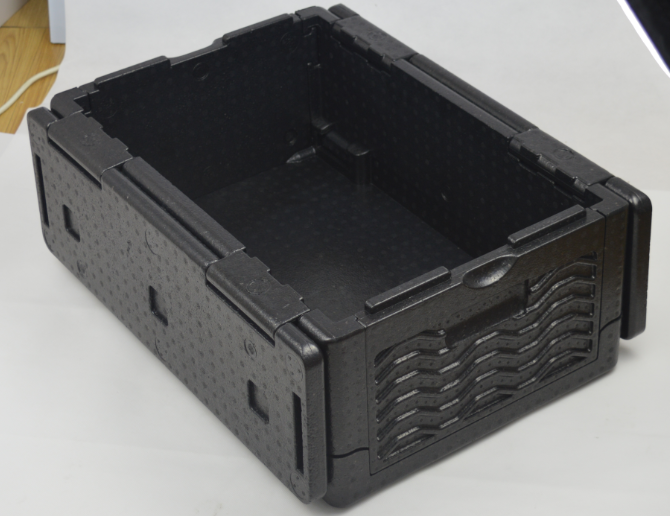
Foldable EPP Cooler Box: Worth Switching in 2025?
Last updated: December 12, 2025.
A foldable EPP cooler box can help you keep chilled or frozen goods safe and stop wasting money on empty space. In many real programs, teams report meaningful backhaul and storage gains—some operators cite around 40% space savings on reverse transport, while some folding systems claim up to ~80% return-volume reduction when collapsed. If your trucks come back with “air,” this guide is built for you.
This article will answer for you:
How a foldable EPP cooler box reduces reverse logistics tote costs and warehouse clutter
How to improve temperature retention tips without buying the thickest box
How to choose size, lid, and seal details that prevent “mystery warm” deliveries
How to clean, dry, and reuse an EPP insulated box without damaging hinges or seals
How to estimate foldable cooler box ROI for last-mile cold chain using a simple calculator
Why does a foldable EPP cooler box save money in reverse logistics?
A foldable EPP cooler box matters because cold chain costs are not only “cooling costs.”
They are often empty-return and storage costs hiding in plain sight.
foldable EPP cooler box
If your containers travel full one way and empty the other way, a rigid box wastes the same cube both directions. A foldable design shrinks that cube after delivery, so you can move more empties per truck and store more units per rack.
foldable EPP cooler box
How much space does a foldable cooler box save when returned?
Some programs report strong improvements, including ~40% reverse-transport space savings in practice, and up to ~80% return-volume savings as a common claim for folding systems—depending on footprint and fold height.
foldable EPP cooler box
foldable EPP cooler box
| Return/Storage Factor | Rigid Container | Folded Container | What it means for you |
|---|---|---|---|
| Empty trailer cube | Stays “full size” | Drops sharply | Fewer backhaul trips or more capacity |
| Store backroom clutter | Piles up fast | Denser stacks | Fewer emergency pickups |
| DC staging space | Hard to scale | Easier to plan | Faster sorting and less labor pressure |
| Closed-loop operations | Costly if bulky | Built for loops | Easier standardization and KPI tracking |
Quick interactive decision tool: “Is foldability worth it for you?”
Count your YES answers:
You return empties on 30%+ of trips.
foldable EPP cooler box
Your empties take noticeable staging space every week.
Stores or customers have tight backroom space.
Your team spends time breaking down or stacking empties.
You’ve paid for extra pickup runs mainly to clear empty packaging.
Score:
0–1 YES: Foldability is optional. Fix insulation and handling first.
2–3 YES: Pilot a foldable solution on one lane.
4–5 YES: Foldability is strategic. Design your loop around it.
Practical tips you can apply right now
High-frequency routes: prioritize foldability to cut “empty miles.”
foldable EPP cooler box
Urban distribution: store more containers without expanding space.
foldable EPP cooler box
Asset control: track fold cycles and damage reasons like you track pallets.
Practical example: One regional distributor reduced empty return volume after switching from rigid containers to foldable designs.
foldable EPP cooler box
How does a foldable EPP cooler box protect temperature on route?
A foldable EPP cooler box protects temperature by slowing heat transfer and limiting warm air exchange.
Think of heat like water—it finds the smallest gap. Your lid fit and seal are often as important as wall thickness.
Many material tables for molded EPP commonly show low thermal conductivity (about 0.036–0.046 W/m·K) and very low water absorption (often under 1% by volume)—which helps insulation stay consistent even with frequent washing.
foldable EPP cooler box
Foldable EPP cooler box temperature retention tips for last-mile delivery
Reduce “lid-open time.” Treat your route as short heat attacks.
Pre-chill the payload. A box can’t “fix” warm product fast.
Right-size the box. Empty air warms quickly when you open the lid.
Create pack-out rules. Put coolants where they protect, not where they crush.
Add a summer rule: shade at pickup and drop-off whenever possible.
How to choose wall thickness for an EPP cooler box (without overbuying)
Wall thickness helps, but it’s not the only lever. Match insulation to your real risk:
Longer routes: thicker walls usually help more.
More door openings: lid and seal matter more than extra thickness.
Hotter ambient conditions: thickness + good packing discipline win together.
| Design choice | What it controls | What to check | What it means for you |
|---|---|---|---|
| Wall thickness | Heat gain rate | Consistency by batch | Predictable temperature buffer |
| Lid overlap depth | Leak path length | Seating under load | Fewer warm corners near the top |
| Seal style | Air exchange | Compression set over time | Less drift on multi-stop routes |
| Inserts/dividers | Mixed-temp accuracy | Added cleaning steps | Fewer packing mistakes |
Practical tips and advice
If stacking is common: confirm lids still seal when loaded.
If routes are messy: choose closures that “click” into place clearly.
If wash cycles are daily: protect seams and seals with gentle tools.
Real-world pattern: Many “temperature issues” are actually lid-fit issues. Fixing closure discipline can outperform buying thicker walls.
Foldable EPP cooler box vs EPS vs rigid totes: what should you use?
A foldable EPP cooler box is usually chosen when you need three things at once:
Insulation
Durability for reuse
Collapsed returns for closed-loop logistics
EPS can insulate well, but it’s often fragile across many cycles. Rigid plastic totes are strong, but usually need liners or inserts for long cold holds. EPP sits in the middle: insulating like foam, tough like a reusable asset, and fold-friendly when designed well.
foldable EPP cooler box
| Option | Typical strength in daily handling | Insulation behavior | Best for you when… |
|---|---|---|---|
| EPS foam shipper | Often chips/cracks | Good insulation | One-way shipments and low handling stress |
| Rigid PP/HDPE tote | Strong structure | Needs inserts/liners | Dry transport or short cold holds |
| EPP insulated solution | Resilient + reusable | Strong insulation | You need repeatable cold chain operations |
| PU insulated shippers | Strong insulation potential | Often bulkier | Long holds, but less fold-friendly in many designs foldable EPP cooler box |
Practical tips and advice
If you do closed-loop distribution, foldability can fund the upgrade.
foldable EPP cooler box
If you do one-way export, rigid may be simpler (foldability adds less value).
foldable EPP cooler box
If your pain is cleanup and damage, choose a tougher reusable system.
Field note: A foldable system wins only if your team uses one standard fold method.
foldable EPP cooler box
How to clean and sanitize an EPP insulated box without damaging it
Cleaning is not just hygiene—it is life extension. You should treat cleaning like a routine, not a rescue.
foldable EPP cooler box
Industry guidance highlights the risk of harsh chemicals and the importance of consistent cleaning practices for transport equipment.
foldable EPP cooler box
A 3-zone cleaning SOP your team can repeat
Zone A (touch + spill): interior base and corners
Zone B (seal area): lid lip and closure points
Zone C (handling): exterior handles and fold joints
foldable EPP cooler box
| Step | What to do | What to avoid | Meaning for you |
|---|---|---|---|
| Remove debris | Wipe and brush | Sharp scraping | Prevents surface damage foldable EPP cooler box |
| Wash | Mild detergent + warm water | Over-strong chemicals | Protects seals and surfaces foldable EPP cooler box |
| Sanitize | Food-safe sanitizer as needed | Corrosive “just in case” use | Less odor and cross-contact risk foldable EPP cooler box |
| Dry | Air dry with lid open | Folding wet | Fewer odor problems foldable EPP cooler box |
Practical tips and advice
Dry-before-fold rule: odor often comes from trapped moisture.
foldable EPP cooler box
Seal-first habit: wipe + sanitize the seal area every shift change.
foldable EPP cooler box
Audit-friendly: keep a simple log showing consistency, not perfection.
foldable EPP cooler box
Real-world example: Some teams reduced odor complaints after moving from occasional deep cleans to short, frequent seal-area cleaning.
foldable EPP cooler box
Foldable cooler box ROI for last-mile cold chain
You don’t need perfect finance math. You need a repeatable way to compare “cost per trip.”
The fastest win usually comes from return cube savings, not from colder walls.
foldable EPP cooler box
Mini ROI calculator: your cost per trip (3 minutes)
Fill in your numbers:
Box cost = ___
Expected trips before replacement = ___
Cleaning cost per trip = ___
Empty return handling + transport cost per trip = ___
Avoided damage/claims per trip (estimate) = ___
Cost per trip = (Box cost ÷ trips) + cleaning + return handling − avoided damage
| Variable | Conservative | Aggressive | What it means for you |
|---|---|---|---|
| Trips (life) | 80 | 200 | Longer life drives payback |
| Return cost saved | Low | High | Fold savings matter most in closed loops foldable EPP cooler box |
| Damage reduced | Small | Large | Premium goods benefit most |
Practical tips and advice
Pilot on one stable lane first. Measure real returns, not guesses.
foldable EPP cooler box
Track repairable vs scrap. Small fixes can extend life cheaply.
Train folding steps. Many failures come from wrong folding habits.
foldable EPP cooler box
Practical example: Some teams extended usable life by standardizing folding and inspection procedures.
foldable EPP cooler box
What tests and standards should you use before scaling?
A foldable system should be validated like any thermal packaging: by route profile and acceptance limits.
foldable EPP cooler box
The International Safe Transit Association (ISTA) publishes thermal testing standards and profiles used to compare packaging performance under realistic conditions.
foldable EPP cooler box
A “good enough” validation plan for small teams
Run three tests per common route:
Hot day test: worst-case summer exposure
Door-open stress test: repeated opens like real delivery
Wash-and-reuse test: after cleaning cycles, confirm seals still work
foldable EPP cooler box
Practical tips and advice
Don’t chase perfect numbers. Chase repeatable results you can train.
foldable EPP cooler box
Test in “real packing.” Empty space changes outcomes fast.
foldable EPP cooler box
Write one pass/fail line per product category.
Practical example: Some couriers reduced disputes by creating simple route validation reports per box type.
foldable EPP cooler box
Common failures in foldable insulated boxes and how to fix them
Most failures are process failures, not material failures.
If you fix habits, your packaging “gets better” without changing the box.
| Symptom | Likely cause | Fast fix | What you gain |
|---|---|---|---|
| Warm corners | Lid not seating | Retrain closure sequence | Fewer temperature surprises |
| Seal cracking | Harsh chemicals / abrasion | Adjust chemicals + replace seals early | Longer fleet life foldable EPP cooler box |
| Hinge fatigue | Wrong folding force | Add folding arrows + 10-sec demo | Lower scrap rate foldable EPP cooler box |
| Stack collapse | Wrong return stacking | Standardize stack height | Fewer reverse-logistics damages |
| Odor issues | Folded while wet | Enforce dry-before-fold | Cleaner customer experience foldable EPP cooler box |
Practical tips and advice
Make folding idiot-proof: arrows, color cues, and one method only.
foldable EPP cooler box
Inspect seals weekly. Small cracks create big drift.
Record failure reasons. Fix the root cause, not the symptom.
2025 trends you should watch before buying again
In 2025, the biggest shift is not “a new foam.” It is how reuse programs are operated: cleaning, inspection, documentation, and traceability are becoming standard expectations.
foldable EPP cooler box
What you’ll see more often in 2025
Fewer SKUs, higher utilization: standardize sizes and pack-outs.
foldable EPP cooler box
Better traceability: IDs, scan-to-return, clearer accountability.
foldable EPP cooler box
More route-based testing: validation tied to real lanes, not lab-only claims.
foldable EPP cooler box
Market insight (in plain language)
The “best” solution is the one your team can use correctly every day.
foldable EPP cooler box
Consistency beats complexity, especially with high turnover teams.
Frequently asked questions
Q1: How much space can a foldable cooler box save on return trips?
Some folding systems claim up to about 80% return-volume savings when collapsed, depending on design and fold height.
foldable EPP cooler box
Q2: Does foldable design reduce insulation performance?
It can if seams or hinges create leak paths. Prioritize lid fit, seal compression, and consistent folding alignment.
Q3: What insulation number should I care about when comparing materials?
Thermal conductivity helps, but lid sealing and pack-out discipline often decide field results. Published tables often list molded EPP around 0.036–0.046 W/m·K.
foldable EPP cooler box
Q4: How often should I clean and sanitize an EPP insulated box?
Set frequency by risk and usage. Short, frequent cleaning of seal areas usually prevents odor and hygiene issues.
foldable EPP cooler box
Q5: What should I measure during a pilot?
Track damage rate, temperature events, cleaning time, lost rate, and total cost per trip.
foldable EPP cooler box
Q6: What is a fair testing reference for thermal packaging?
ISTA thermal standards are commonly used to compare thermal packaging performance under representative conditions.
foldable EPP cooler box
Summary and recommendations
A foldable EPP cooler box is most valuable when your operation has frequent empty returns, tight storage space, or high damage sensitivity.
foldable EPP cooler box
To win long-term, standardize sizes, reduce empty air pockets, protect seals with gentle cleaning, and validate performance on real routes.
foldable EPP cooler box
Your next step (CTA): run a 14-day pilot
Pick one high-frequency lane.
Standardize folding and return stacking.
foldable EPP cooler box
Record cleaning time and failure reasons.
foldable EPP cooler box
Compare cost per trip against your current packaging.
foldable EPP cooler box
Scale based on measured ROI, not opinions.
foldable EPP cooler box
Internal link suggestions (no URLs)
EPP Insulated Box Selection Guide (Size + Wall Thickness)
Reusable Cold Chain Packaging ROI Calculator (Cost per Trip)
Reverse Logistics SOP for Returnable Totes (Scan + Stack Rules)
Thermal Packaging Validation Playbook (Route-Based Testing)
Cleaning and Sanitation SOP for Reusable Containers (3-Zone Method)
About Tempk
At Tempk, we design reusable cold chain packaging systems that work in real operations—not just on paper. We focus on durability, insulation stability, and fold-and-return workflows that reduce backhaul cube, simplify cleaning routines, and improve daily handling consistency.
foldable EPP cooler box
Next step: Share your route time, stop count, and target temperature band. We’ll outline a simple selection and pilot plan your team can execute immediately.
High-Density Shock-Absorbing EPP Box Guide (2025)
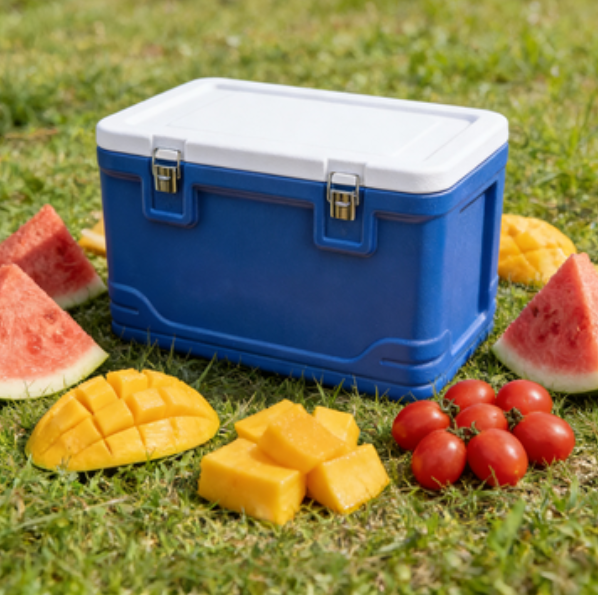
High-Density Shock-Absorbing EPP Box: Why Use It?
A high-density shock-absorbing EPP box helps you stop transit damage before it becomes refunds, rework, and broken customer trust. If you ship cold goods, fragile electronics, or medical devices, you’re fighting two enemies at once: temperature drift and rough handling. Meanwhile, food loss remains a real global issue—FAO reports 13.2% of food is lost between harvest and retail.
This article will help you:
Choose the right high-density shock-absorbing EPP box using density, fit, and lane risk.
Reduce damage and “lid pop” problems with practical design and packing steps.
Validate performance using a simple test plan (including ISTA-style thinking).
Decide if a reusable loop makes sense for your business in 2025.
What Is a High-Density Shock-Absorbing EPP Box?
A high-density shock-absorbing EPP box is a reusable foam container that absorbs impact and resists crushing while also insulating the payload. EPP (expanded polypropylene) is a closed-cell bead foam known for energy absorption and multiple-impact resistance, and it can be produced across a wide density range. BPF
That matters because real shipping is messy. Parcels get dropped. Loads get stacked. Vans vibrate for hours. A high-density shock-absorbing EPP box is built to keep protecting your product even after repeated hits.
Why EPP is different (in plain language)
EPP behaves like a good running shoe midsole. It compresses when it must, then “springs back.” That rebound helps maintain shape, so your lid alignment and fit stay consistent over repeated uses.
| What you’re trying to prevent | What usually causes it | How EPP helps | What it means for you |
|---|---|---|---|
| Cracks, dents, micro-damage | Drops + corner impacts | Spreads impact energy | Fewer damage claims |
| “Lid doesn’t seal anymore” | Crush + permanent deformation | Better shape recovery | More consistent temperature control |
| Unstable pack-out | Vibration + internal movement | Inserts hold position | Fewer packing mistakes |
Practical tips you can use
If customers report “crushed corners,” you need higher density and stronger corners.
If customers report “arrived warm,” check lid fit and seal stability after impacts.
If packing errors happen, add keyed inserts that only fit one way.
Real case: Teams often see fewer “mystery failures” once a high-density shock-absorbing EPP box replaces brittle, single-use foam that cracks early.
How Does a High-Density Shock-Absorbing EPP Box Absorb Impact?
A high-density shock-absorbing EPP box protects by turning sharp impacts into controlled compression. Instead of passing the full force to the product, the foam deforms, spreads the load, and then recovers.
Think “car suspension,” not “hard shell.” A hard shell can look fine, while the product inside takes the hit.
The 4 most common impact forces (and what to do)
| Impact source | Risk level | What a high-density shock-absorbing EPP box should do | Your practical takeaway |
|---|---|---|---|
| Drop impact (corner/edge) | High | Reinforce corners + allow controlled compression | Design for corners first |
| Sorting/handling shocks | Medium | Prevent lid shift + maintain closure geometry | Test lid interface after drops |
| Vehicle vibration | Medium | Dampen micro-movement | Control internal clearance |
| Stack pressure | High | Resist crushing over time | Add ribs + density where loads sit |
Practical tips and recommendations
Parcel lanes: focus on corners and lid-lock geometry.
Retail DC stacking: prioritize compressive resistance and ribbing.
Long routes: prioritize internal stability so products don’t “walk” inside.
Real case: One common hidden failure is a small lid gap after a hit, which increases heat gain and leakage risk.
What Density EPP Foam Is Best for a High-Density Shock-Absorbing EPP Box?
The “best” density depends on weight, drop risk, and stacking pressure—higher density is stronger, but fit still controls peak force. EPP can be produced in a wide density range (often cited 15–200 g/L for EPP). BPF
To make this real, here is a reference dataset showing compressive strength rising with density under standardized testing methods. ARPRO
Density numbers you can actually use
| Density (g/L) | Compressive strength @25% strain (MPa) | @50% strain (MPa) | What it means for you |
|---|---|---|---|
| 30 | 0.15 | 0.22 | Better for light payloads, lower crush risk |
| 60 | 0.39 | 0.53 | Strong “all-around” option for tough parcel lanes |
| 90 | 0.65 | 0.88 | Best for heavy payloads, stacking, reuse loops |
A simple selection rule (no lab needed)
Light + fragile: medium density + more controlled clearance (avoid “too stiff”).
Medium weight + mixed handling: high density + smart inserts.
Heavy + stacked: very high density zones + ribs + load pads.
Real case: A lot of overpaying happens when teams buy “max density” instead of fixing insert geometry and clearance first.
High-Density Shock-Absorbing EPP Box vs EPS vs EPE: What Changes?
A high-density shock-absorbing EPP box usually wins when you need repeat protection and reuse. EPS can crack and crumble. EPE can cushion, but often lacks structural strength for stacking and reuse.
What fails first (the useful way to compare)
| Material | Shock behavior | Typical failure mode | Reuse reality | What it means for you |
|---|---|---|---|---|
| EPS | Brittle | Cracks, crumbles | Low | Damage can spike suddenly |
| EPE | Softer | Permanent deformation/tearing | Medium | Cushioning is OK, stacking is weaker |
| EPP (high density) | Elastic | Recovers shape | High | More stable protection across trips |
Practical tips and recommendations
If your network is rough: avoid brittle materials that crack early.
If you stack: prioritize compressive strength and corner geometry.
If you plan reuse: EPP durability reduces replacement churn.
Real case: Many “random damage” patterns disappear when the packaging stops changing shape after the first few hits.
How Do You Size a High-Density Shock-Absorbing EPP Box for Real Drops?
Sizing is not “tightest fit.” It’s controlled space + controlled contact points. If your fit is too tight, the foam cannot compress correctly. If it’s too loose, the product builds momentum and hits harder.
The 3 sizing rules your team can remember
Clearance: give the foam room to do its job.
Contact points: support the product at strong zones, not weak faces.
Energy path: guide impact forces through foam geometry, not into the product.
A quick sizing guide
| Product situation | Clearance strategy | Insert approach | What it means for you |
|---|---|---|---|
| Light + fragile (screens) | More clearance | Corner blocks / cradle | Lower peak force |
| Heavy + robust | Moderate clearance | Load pads + ribs | Prevent bottoming out |
| Kits (multiple parts) | Controlled spacing | Dividers + partitions | Prevent internal collisions |
Practical tips and recommendations
Center the mass: off-center payloads amplify corner failures.
Protect the weak face: design around the most fragile side.
Prevent sliding: don’t rely on tape to “fix” internal movement.
Real case: Switching from “full-face clamp” to corner-block support often reduces screen and edge cracks.
Which Insert Design Works Best in a High-Density Shock-Absorbing EPP Box?
Insert geometry is where performance is won or lost. Smart inserts spread force, prevent pressure points, and keep the product stable through vibration.
Corner blocks vs cradle vs full-wrap (fast comparison)
| Insert type | Best for | Risk if misused | What it means for you |
|---|---|---|---|
| Corner blocks | Fragile housings, screens | Too small = pressure points | Fast packing, strong protection |
| Cradle (2–4 point) | Balanced loads | Wrong alignment = wobble | Great repeatability |
| Full-wrap | Clean control, dust protection | Too tight = force transfer | Works, but needs careful fit |
Practical tips and recommendations
Use rounded contact: sharp edges create stress spikes.
Add alignment features: keyed inserts reduce “wrong-way” packing.
Separate “position control” from “shock control”: geometry should do both.
Real case: Keyed cradles can improve pack speed while reducing damage, because packers stop improvising.
How Do You Test a High-Density Shock-Absorbing EPP Box (ISTA/ASTM)?
Testing turns “we think it’s safe” into “we can ship it with confidence.” For parcel lanes, ISTA procedures are commonly used to simulate parcel delivery hazards. ista.org+1
For distribution simulation planning, ASTM D4169 provides a structured approach using hazard sequences representative of distribution environments. ASTM International | ASTM
Minimum test set (simple, repeatable)
| Test type | What it reveals | What to watch | Pass/fail idea |
|---|---|---|---|
| Drops (edge/corner/face) | Impact protection | Lid alignment, corner crush | No product damage + lid still seals |
| Vibration | Loosening + drift | “Walking” parts, wear | No internal shift beyond tolerance |
| Compression | Stacking performance | Permanent set, collapse | No functional deformation |
| Closure/seal check | Leak + heat gain risk | Gaps after impacts | Full closure with no gaps |
Practical tips and recommendations
Test the worst pack-out, not the best.
Include new packers in validation to expose real errors.
Retest after compression + drops to see cumulative damage effects.
Real case: Many teams find failures cluster in one corner. Fixing that corner geometry can remove repeat claims.
Can a High-Density Shock-Absorbing EPP Box Support Reuse and Compliance?
Yes—if you control returns, loss rate, and cleaning speed. If you can’t control those, reuse becomes a slow money leak.
high-density shock-absorbing EP…
Reuse also matters more in Europe because Regulation (EU) 2025/40 sets reuse targets for transport packaging: 40% reusable by 2030 (and an “endeavour” level of 70% by 2040) for listed transport packaging formats. EUR-Lex
The same regulation also focuses on reducing “empty space” and sets a maximum empty space ratio of 50% for grouped/transport/e-commerce packaging (with exemptions for reusable packaging within a reuse system). EUR-Lex
Reuse Readiness Scorecard (quick self-test)
Give yourself 1 point for each “yes.”
high-density shock-absorbing EP…
Do you ship to repeat destinations with predictable returns?
Can you bundle returns weekly or monthly?
Do you have space to store empties?
Can you scan containers in and out?
Can you clean or wipe containers in under 2 minutes?
Do you know your acceptable loss rate?
Do you have a backup plan if returns are late?
Score guide (simple):
0–2: Focus on single-trip protection first.
3–5: Pilot reuse on one lane with tracking.
6–7: Scale the reusable high-density shock-absorbing EPP box program.
high-density shock-absorbing EP…
Practical reuse tips (that reduce loss)
Add a visible ID zone for scan-in/scan-out.
high-density shock-absorbing EP…
Design for nesting/stacking of empties.
Replace closures or labels instead of replacing full containers.
Real case: Programs improve fast once scan-in/scan-out becomes non-optional.
high-density shock-absorbing EP…
How Does a High-Density Shock-Absorbing EPP Box Cut Total Cost?
The unit price can be higher, but the cost-per-use can be lower. The real savings come from fewer damages, fewer re-ships, and less packaging replacement.
This matters in cold chain. FAO highlights that 13.2% of food is lost before retail globally. FAOHome
Food loss and waste are also tied to 8–10% of annual global greenhouse gas emissions. 联合国气候变化框架公约秘书处
In the U.S., ReFED reported surplus food rebounded to 31% of the food supply (2023 data) in one recent analysis. Refed
Cost-per-use table (what finance teams understand)
| Packaging type | Typical reuse cycles | Common hidden cost | What it means for you |
|---|---|---|---|
| Single-use foam | 1 | Breakage + repack labor | Cheap upfront, expensive over time |
| Corrugated only | 1–2 | Crush, moisture, inconsistency | High failure variance |
| High-density shock-absorbing EPP box | 50–200+ (lane-dependent) | Loss control + cleaning | Predictable cost per shipment |
Mini calculator: “Damage Cost Reality Check” (3 minutes)
Fill in the blanks:
Monthly shipments: ____
Current damage/spoilage rate: ____ %
Cost per failed shipment (product + labor + re-ship): ____
Target reduction using a high-density shock-absorbing EPP box: ____ %
Estimated monthly savings =Shipments × Failure rate × Cost per failure × Reduction
Real case: Many pilots “pay back” once you stop paying for the same failure twice (replacement + re-ship).
2025 High-Density Shock-Absorbing EPP Box Trends to Watch
In 2025, the best high-density shock-absorbing EPP box designs are built for speed, reuse, and proof—not just thickness. Three forces are shaping decisions:
Automation: faster sorting and handling increases impact exposure.
Compliance pressure: reuse targets and space-efficiency rules are clearer in some markets.
Waste pressure: food loss and waste remain significant globally.
Latest progress snapshot (practical, not hype)
Density zoning: higher density at corners and load paths, lower density elsewhere.
Modular inserts: one outer box, multiple insert sets.
Traceability: IDs and scanning built into reuse programs.
Space efficiency: reduced filler dependency aligns with “empty space” constraints (50% cap in EU rule).
| 2025 trend | What changes in the warehouse | What you should do next |
|---|---|---|
| Faster handoffs | More drops, more corner hits | Reinforce corners, validate lanes |
| Reuse targets | More pressure to run loops | Start with one lane + tracking |
| Less “air in the box” | Less filler allowed/desired | Improve fit + insert geometry |
Common Questions (FAQ)
Q1: What density EPP foam is best for a high-density shock-absorbing EPP box?
Match density to weight and crush risk. Data shows compressive strength rises with density (e.g., 30 vs 60 vs 90 g/L). ARPRO
Q2: Is a high-density shock-absorbing EPP box always better than medium density?
No. If fit is too tight, higher density can transmit peak forces. Fix clearance and insert geometry first.
Q3: What are the most useful drop test standards for a high-density shock-absorbing EPP box?
For parcel-style risks, ISTA Procedure 3A is commonly used for individual parcels.
Q4: Do I still need an outer carton with a high-density shock-absorbing EPP box?
Often yes—for labeling, scuff protection, and tamper control. You may reduce void fill if fit is better.
Q5: How do I reduce packing mistakes fast?
Use keyed inserts and a quick “rock test.” If it rocks, it’s not packed right.
high-density shock-absorbing EP…
Q6: How do reuse rules affect transport packaging decisions in the EU?
Regulation (EU) 2025/40 sets reuse targets for certain transport packaging (40% by 2030; 70% by 2040 as an endeavour). EUR-Lex
Summary and Recommendations
A high-density shock-absorbing EPP box helps you protect products in rough lanes by absorbing impacts, resisting crushing, and staying consistent across repeated handling. The biggest wins come from basics you can repeat: right density, right clearance, smart inserts, and a simple test plan.
What to do next (simple plan)
Identify your top 2 damage patterns (corner drop, crush, vibration drift).
Pilot one high-density shock-absorbing EPP box size with modular inserts.
Standardize pack-out with a photo SOP and a “rock test.”
high-density shock-absorbing EP…
Validate with drops + compression + seal checks.
Scale only after results are consistent across packers.
CTA: If damage and re-ships are eating margin, stop “adding padding everywhere.” Start using a tested, repeatable high-density shock-absorbing EPP box system.
About Tempk
At Tempk, we build packaging systems that are practical for real warehouses and real delivery lanes. We support high-density shock-absorbing EPP box programs with a focus on repeatable pack-out, durable inserts, and lane-based validation. We also help teams plan reuse loops with simple tracking and loss-control steps, so performance stays consistent across cycles.
Next step: Share your product type, weight range, shipping mode (parcel/air/pallet), and top damage pattern. We’ll map a high-density shock-absorbing EPP box concept and a validation plan your team can run quickly.