


Quarantine Dry Ice Packs: 2025 Safe‑Use Playbook
Quarantine Dry Ice Packs: 2025 Safe‑Use Playbook
Quarantine Dry Ice Packs: How to Size, Pack, and Comply in 2025
Quarantine dry ice packs help you protect temperature‑sensitive goods during customs holds, QA quarantine, or controlled storage. In this 2025 guide, you’ll learn when to choose dry ice over gel, how to size dry ice for 24–120 hours, and how to label, ventilate, and validate packaging to stay compliant and cost‑effective. You’ll also see practical checklists, a quick calculator, and trends that matter this year.
Pick the right quarantine dry ice packs for the lane and hold time
Use a simple formula to compute dry ice mass for 24–120 hours
Label and document shipments that contain quarantine dry ice packs
Compare gel packs vs. dry ice for quarantine conditions
Validate packaging and monitoring for audit‑ready records
Track 2025 trends that change how you deploy quarantine dry ice packs
What are quarantine dry ice packs and when should you use them?
Answer in brief: Quarantine dry ice packs are dry‑ice based refrigerants used to maintain deep‑cold conditions (around −78.5 °C) during inspection delays, customs holds, or QA release. Use them when product needs sub‑zero protection beyond gel packs and when quarantine time is uncertain or extended.
Explanation: In quarantine scenarios, you don’t control the clock. Dry ice sublimates to CO₂ gas and keeps the payload far below freezing for longer than gel packs. That buffer helps you ride out unpredictable holds. Choose quarantine dry ice packs for biologics, advanced therapies, and frozen foods that cannot tolerate thawing. In contrast, use gel when the set point is 2–8 °C or 15–25 °C and quarantine windows are tight and predictable.
Quarantine cold chain vs. routine shipping: what’s different?
Key point: Quarantine adds uncertainty, so your packout must tolerate longer dwell times, multiple handoffs, and ventilation constraints. Build that resilience into quarantine dry ice packs planning.
| Factor | Routine Shipping | Quarantine Shipping | What it means for you |
|---|---|---|---|
| Time certainty | Planned transit | Unplanned holds | Add 25–60% buffer dry ice |
| Handling | Single SOP | Mixed processes | Clear “open only in vented area” note |
| Docs | Standard labels | Extra status tags | Add quarantine identifier on outer box |
| Monitoring | Single logger | Redundant loggers | Place at core and near wall |
| Escalation | Fixed contacts | Multi‑agency | Include 24/7 contact on carton panel |
Practical tips for early wins
Quarantine location: Ask the receiver where holds occur. Plan ventilation there.
Access path: Design packouts so staff can add quarantine dry ice packs without exposing the payload.
Status control: Use bright quarantine decals and a checklist sleeve on the outer wall.
Real‑world case: A cell‑therapy site facing 36‑hour customs holds added 30% more quarantine dry ice packs and a vented over‑carton. Release rates improved and excursions dropped to zero in the next five lots.
How do you size quarantine dry ice packs for 24–120 hours?
Answer in brief: Estimate heat load, add safety for quarantine uncertainty, then convert to dry ice mass using a simple rule of thumb. For many insulated shippers, plan 0.7–1.0 kg per 24 hours per 6–8 L of internal space, then adjust for insulation quality and ambient extremes.
Explanation: Heat intrusion depends on insulation (EPS, EPP, VIP), box geometry, and ambient swing. Quarantine adds time variance, so increase the buffer. Keep quarantine dry ice packs off the product using trays or “donut” layouts that let CO₂ vent upward.
A rule‑of‑thumb calculator for dry ice mass
Use this starter formula to plan quarantine dry ice packs:
What to do next: Round up to the nearest 0.5 kg. If ambient exceeds 30 °C or the route is highly variable, add another 10–20%. Use test boxes to validate for your product.
| Scenario | Payload Volume | Hold Time | Insulation | Starting Dry Ice | Why it matters |
|---|---|---|---|---|---|
| Entry‑level EPS | 10 L | 48 h | EPS | ~1.2–1.6 kg | Add 30% for quarantine variability |
| EPP mid‑tier | 15 L | 72 h | EPP | ~2.0–2.6 kg | Better R‑value lowers mass |
| VIP hybrid | 20 L | 96 h | VIP+EPP | ~2.6–3.4 kg | Efficient wall reduces sublimation |
Tips to reduce mass without risking excursions
Pre‑condition the payload to target temperature before adding quarantine dry ice packs.
Use divider boards so dry ice never contacts vials or cartons.
Keep void space minimal. Air volume increases heat load.
Place quarantine dry ice packs above and around the payload, with a vent path to the top.
Compliance for quarantine dry ice packs: labels, documents, and safe handling
Answer in brief: Mark cartons with “UN 1845 Carbon dioxide, solid (Dry ice)” and the net dry ice weight in kilograms. Ensure vented packaging, add operator variations if flying, and include instructions that quarantine dry ice packs must be handled in a well‑ventilated area.
Explanation: For air transport, dry ice is a Class 9 dangerous good (UN 1845). When used only as a refrigerant for non‑dangerous goods, a full dangerous goods declaration is often not required, but the air waybill must show dry ice and the net weight per package. Many carriers also require a phone number and special handling codes. For passengers, the common limit is 2.5 kg in baggage with vented packaging and approval from the operator.
Minimum marks, labels, and documents to prepare
Proper shipping name and UN number: UN 1845, Dry ice.
Net weight of dry ice (e.g., “Dry ice 6.0 kg”).
Class 9 hazard label and handling note for quarantine dry ice packs.
Air waybill entry for dry ice with per‑package weight.
SDS available to handlers; do not seal the package airtight.
| Compliance Element | What to include | Where to place | What it means for you |
|---|---|---|---|
| UN marking | UN 1845, Dry ice | Outer carton panel | Meets air rules and speeds acceptance |
| Net weight | Total kg of dry ice | Near the UN marking | Enables safe stowage and audit |
| Vent path | Not airtight; vent holes | Lid/over‑carton | Reduces CO₂ buildup risk |
| Quarantine ID | “Quarantine Hold” sticker | Top and side | Clear status on arrival |
| 24/7 contact | Phone number/email | Main label cluster | Faster problem resolution |
Real‑world case: A biologics shipper added UN 1845 marks and a bold quarantine tag to the master carton. Customs cleared faster because handlers knew exactly what the quarantine dry ice packs needed for safe storage.
Packaging design: building quarantine dry ice packs that breathe
Answer in brief: Use an insulated shipper with controlled venting, keep quarantine dry ice packs separated from product, and arrange ice on top and sides to let CO₂ escape upward. Add an over‑carton with cutouts if local rules require visible venting.
Explanation: Dry ice sublimates to CO₂ gas that displaces oxygen in confined spaces. Your design must never be airtight. Layer trays or mesh racks above the payload to keep cartons dry and prevent freeze damage. Use foam spacers to create a gas chimney.
Gel packs as a quarantine backup: when to combine
Sometimes you want a hybrid packout: quarantine dry ice packs for deep‑cold, plus gel in a separate sleeve to buffer the payload if staff must open the shipper. This “fail‑soft” design gives you time to re‑charge with dry ice without shocking the product.
| Insulation Type | R‑Value (relative) | Weight | Impact on Dry Ice Mass | For you |
|---|---|---|---|---|
| EPS | Low | Light | Highest mass | Low cost, short holds |
| EPP | Medium | Medium | Medium mass | Good balance for quarantine |
| VIP hybrid | High | Medium | Lowest mass | Best for 72–120 h holds |
Do‑this‑now build tips
Add a rigid quarantine dry ice packs tray with drain slots.
Print “Open in Ventilated Area Only” on the inner lid.
Use foil liners to reduce radiant heat near the lid.
Add a re‑icing window (removable plug) on long quarantine lanes.
Monitoring and release: proving the chain of custody
Answer in brief: Pair quarantine dry ice packs with at least two temperature loggers—one at the core, one near the wall—and record re‑icing events. Define acceptance criteria before shipping so quarantine teams know when to release.
Explanation: In quarantine, proof matters as much as performance. Set clear start/stop timestamps, place serial numbers on the carton label, and synchronize logger clocks. Define who can re‑ice and what to record: time, mass added, ambient conditions, and initials.
Quarantine documentation set
Packout diagram showing quarantine dry ice packs locations
Pre‑shipment checklist with ice mass and logger IDs
Re‑icing log sheet (time, mass, person, reason)
Final report with time‑temperature curve and pass/fail decision
Real‑world case: A vaccine distributor added a second logger near the lid and a re‑icing log. After a 60‑hour quarantine, auditors accepted the run in minutes because the quarantine dry ice packs records were complete.
Common mistakes and how to fix them with quarantine dry ice packs
Airtight boxes: Dry ice inside sealed containers can cause pressure buildup. Fix with vent holes or vented lids.
Ice touching product: Direct contact can crack vials. Fix with trays and corrugated sleeves.
Under‑estimating time: Quarantine is unpredictable. Fix by adding a 30–60% buffer to quarantine dry ice packs mass.
Single logger: One sensor can hide edge warming. Fix with two loggers and a CO₂ hazard note.
No re‑icing plan: Staff guesswork leads to variability. Fix with a standard “add X kg every Y hours” chart.
When are quarantine dry ice packs better than gel, and when not?
Answer in brief: Choose quarantine dry ice packs for frozen and deep‑frozen products, or when holds exceed 24–48 hours. Choose gel packs for 2–8 °C or CRT lanes and short, predictable quarantines.
Explanation: Gel caps set at +5 °C or +20 °C are ideal for last‑mile holds at controlled temperatures. They are easier to handle and not regulated as dangerous goods. But when you must keep the product far below freezing during uncertain quarantine, quarantine dry ice packs provide stronger thermal headroom.
Quick decision guide
Target temperature: If ≤ −20 °C, prefer quarantine dry ice packs.
Hold time: If > 24 h with uncertainty, prefer dry ice.
Lane complexity: If air transport + customs, assume delays and choose dry ice.
Product sensitivity: If freeze shock risk, use trays and staged re‑icing or hybrid with gel.
A hands‑on checklist to reduce risk today
Confirm ambient: Ask for quarantine room temperature range before shipping.
Document venting: Add a “vented packaging” statement near the UN 1845 mark.
Standardize mass: Pre‑bag quarantine dry ice packs in 1 kg increments for accuracy.
Train re‑icing: Teach staff to open from the short side and keep the lid on a few centimeters.
Post‑event review: After every quarantine, update the plan with time and mass used.
A simple self‑assessment quiz (5 quick checks)
Do you state net quarantine dry ice packs weight (kg) on the label?
Can staff re‑ice without touching the product?
Do you have two loggers and synchronized clocks?
Is the package vented and clearly marked as vented?
Is there a phone number on the case for after‑hours quarantine?
Score yourself: 4–5 “Yes” = audit‑ready. 2–3 “Yes” = improve packout and SOPs. 0–1 “Yes” = redesign before next shipment.
2025 trends shaping quarantine dry ice packs
Trend overview: In 2025, extended‑duration shippers and hybrid solutions are mainstream. VIP‑lined cartons and reflective liners reduce dry ice mass. CO₂‑aware safety practices are becoming part of facility SOPs. Battery‑free data loggers with QR retrieval speed quarantine release.
Highlights at a glance
VIP mini‑kits: Lower mass requirements for quarantine dry ice packs by improving wall efficiency.
Hybrid buffering: Gel sleeves added inside dry‑ice shippers to cushion product during lid‑open events.
Digital release: QR‑based loggers let quarantine teams download data without cable hassles.
Market insight: More lanes include re‑icing stations near inspection areas, and shippers add over‑cartons with visual vents. Teams standardize ice additions in 1 kg bags to cut variability. Packaging libraries add pre‑validated 72–120 hour designs for accelerated rollout.
Frequently Asked Questions
Q1: How much dry ice do I need for a 72‑hour quarantine hold?
Start with the rule of thumb in this guide, then add 30–60% depending on ambient and uncertainty. Always validate the mass with a lane test before go‑live.
Q2: Can I put quarantine dry ice packs directly on cartons?
Avoid direct contact. Use trays, corrugate, or mesh to create a standoff and prevent freeze damage.
Q3: Do I need a dangerous goods declaration for quarantine dry ice packs?
Often not if dry ice is only a refrigerant for non‑dangerous goods, but you must mark UN 1845, show net weight, and follow operator rules.
Q4: What is the passenger baggage limit for dry ice?
Typically up to 2.5 kg with operator approval and vented packaging. For cargo, follow the carrier’s variations and packaging instruction requirements.
Q5: What if quarantine lasts longer than planned?
Train staff to re‑ice with pre‑bagged amounts and log the time, mass, and initials. Keep spare quarantine dry ice packs on site.
Q6: How do I prove compliance after release?
Provide the packout diagram, ice mass records, and logger data with a simple pass/fail summary tied to acceptance criteria.
Summary and recommendations
Key takeaways: Quarantine dry ice packs protect high‑risk products when holds are long or uncertain. Size mass using a clear rule of thumb, add a quarantine buffer, and design vented packouts with separation from the payload. Label UN 1845, list net weight, and monitor with two loggers to enable fast, audit‑ready release.
Next steps: Map your quarantine points, pick a shipper class (EPS, EPP, VIP), and pilot the packout for 72–120 hours. Standardize re‑icing in 1 kg increments, pre‑print labels, and train teams for vented handling. If you need help, run one lane test, then scale the validated design across products.
Internal link ideas (suggested, non‑clickable)
Cold chain packaging validation guide — /packaging/validation
Dry ice handling and CO₂ safety checklist — /safety/dry‑ice
Gel packs vs. dry ice: decision matrix — /coolants/selection
Temperature logger placement best practices — /monitoring/placement
VIP shipper buy‑vs‑build analysis — /packaging/vip‑strategy
Recommended schema markup
Use these types: Article, FAQPage, HowTo.
About Tempk
Tempk helps organizations plan, validate, and monitor cold chain packaging—especially when quarantine holds are part of the route. We provide packout design templates, data‑driven sizing tools for quarantine dry ice packs, and easy reporting that turns logger data into audit‑ready summaries. Our customers cut excursions and reduce coolant costs with standardized, validated designs.
Call to action: Talk to Tempk about your quarantine lane. Share your lane map and current packout, and receive a tailored quarantine dry ice packs plan within one project cycle.
Dry Ice Cubes vs Dry Ice Pack: Which Keeps Cold?
Dry Ice Cubes vs Dry Ice Pack: Which Keeps Cold?
If you’re choosing between dry ice cubes and a dry ice pack for time‑critical shipping, here’s the short answer: pick cubes for fast pull‑down and deep freeze, pick packs for cleaner handling and controlled release. In cold chain work, those choices decide hold time, safety, cost, and compliance. This guide shows you exactly when to use each, with 2025‑ready workflows you can apply today.
When to use dry ice cubes vs a dry ice pack for vaccines, biologics, and frozen foods
How to size dry ice for 24–72 hour lanes with real‑world assumptions
Pack‑out designs that balance hold time, cost, and condensation risk
Safety and compliance for CO₂ venting, labeling, and documentation
2025 trends in dry ice production, greener options, and reusable carriers
How do dry ice cubes and a dry ice pack differ for cold‑chain shipping?
Direct answer
Dry ice cubes deliver rapid cooling and long hold when massed; a dry ice pack delivers cleaner handling, lower dust, and steadier release. Use cubes for fast pull‑down below −40 °C; use packs when you need tidy, repeatable pack‑outs and easier SOP training. Expect higher surface contact (and frost risk) with cubes; expect gentler ramp rates with a dry ice pack.
Why this matters
In practice, you care about a shipment’s temperature curve, not just “cold.” Dry ice cubes expose more surface area and drive quick temperature drops—great for rapid stabilization, but they can create cold spots. A dry ice pack is pre‑formed CO₂ ice inside a sleeve or film that sublimates in a more uniform way. For diagnostic kits or last‑mile deliveries where techs rotate quickly, packs standardize the process and reduce handling errors. Both options must vent CO₂; neither is “sealed.” For complex lanes, labs often combine them: dry ice cubes for initial pull‑down, dry ice pack bricks for stability during transit.
How much dry ice pack or cubes do you need per shipment?
Details you can use
Estimate by balancing heat gain against sublimation. Typical field assumptions for insulated shippers: ambient 20–25 °C; 24‑hour heat ingress of ~6–12 W for a 12–18 L shipper; dry ice sublimation rates around 2.5–4.5 kg per 24 h depending on insulation and venting. For short lanes and smaller payloads, a dry ice pack set (pre‑formed bricks) keeps handling simple. For longer lanes, add dry ice cubes mass to push hold time past 48–72 h.
| Decision Factor | Dry Ice Cubes | Dry Ice Pack | What it means for you |
|---|---|---|---|
| Cooling speed | Fast pull‑down (high surface area) | Moderate, more even | Faster stabilization vs smoother curve |
| Dust/handling | Higher dust; scoop or bag required | Low dust; tidy bricks | Easier training and SOP adherence |
| Pack‑out repeatability | Variable if hand‑filled | High—brick counts | Fewer packing errors |
| Hold time per mass | Strong when massed | Strong, more predictable | Both work; packs reduce variability |
| Cold spots risk | Higher if touching vials | Lower with spacing | Use trays/dividers with cubes |
Practical tips and suggestions
Biologics in vials: Use a divider or tray. Keep dry ice cubes from direct vial contact to avoid brittle fractures.
Kits and e‑commerce: Standardize on a dry ice pack count (e.g., four 500 g bricks) to cut training time and returns.
Weekend risk: Add a 25–30% buffer mass if a lane might slip from 48 to 72 h due to handoff delays.
Real‑world case: A reference lab switched from loose dry ice cubes to a 4‑brick dry ice pack SOP for 36‑hour regional lanes. Breakage dropped, pack errors fell 60%, and the lab extended safe time by ~8–10 hours thanks to more consistent sublimation and better venting.
When should you choose a dry ice pack vs dry ice cubes?
Direct answer
Choose dry ice cubes for deep‑freeze pull‑down, international air cargo, and heavy payloads. Choose a dry ice pack for clinic returns, small kits, and repeatable last‑mile routes. If the route is long and uncertain, combine both: cube bed on the bottom, dry ice pack bricks along the payload walls.
Scenario mapping
Frozen seafood export: Build mass with dry ice cubes; add a top layer of dry ice pack bricks to smooth the curve and reduce cold‑spot complaints.
Genetic testing kits: Use a fixed count of dry ice pack bricks. Include a clear SOP image in the carton.
Temperature‑sensitive reagents: Start with dry ice cubes for pull‑down, then switch to packs in a mid‑mile hub if you re‑ice.
Safety and compliance for dry ice pack and dry ice cubes
Essential points
Dry ice (solid CO₂) vents gas as it warms. Both dry ice pack and dry ice cubes need breathable space; never tape a shipper shut without vent paths. On air shipments, dry ice is a regulated dangerous good (UN 1845). Packages require correct net mass declaration and hazard marking. In workspaces, manage CO₂ build‑up with ventilation and alarms per occupational safety practices.
| Topic | Dry Ice Cubes | Dry Ice Pack | Your takeaway |
|---|---|---|---|
| Venting | Essential; avoid sealed liners | Essential; film must vent | Always include vent channels |
| Labeling | Declare net mass of dry ice | Same requirement | Document the exact kilograms |
| Handling | Scoops, gloves, dust mask | Gloves; low dust | Packs reduce housekeeping load |
| Training | More variable | Easier to standardize | Faster onboarding with packs |
Pack‑out that avoids condensation and cold shock
What to do
Use a liner bag that’s not airtight, add a paper spacer or corrugate between the payload and dry ice cubes, and position dry ice pack bricks along walls to even the temperature field. For glass vials, target a gentle ramp: cubes at the base, bricks on the sides, payload tray above a mesh or perforated board.
Micro‑trial tip: Before you roll out site‑wide, run two 24‑hour dummy shipments—one all cubes, one mixed with a dry ice pack. Compare probe curves and returns data. Pick the design with the fewest out‑of‑spec minutes, not just the longest hold time.
How do you size dry ice for 24–72 hours without guesswork?
Direct answer
Start from heat load, not from “how many bricks.” Estimate watts of heat leak from the container, convert to kJ over time, divide by dry ice latent plus sensible load. Then round up and add a weekend buffer. This works for both dry ice cubes and a dry ice pack design.
A quick, practical estimator (rule‑of‑thumb)
Find shipper loss: Good EPS shipper: ~8–12 W; premium VIP: ~2–4 W.
Pick duration: 24, 48, or 72 hours.
Compute energy:
Watts × hours × 3.6 = kJ.Dry ice capacity: ~570–650 kJ per kg usable in real pack‑outs.
Mass needed:
kJ ÷ 600 ≈ kilograms. Add 20–30% safety stock.
Example
A 10 W shipper for 48 h needs: 10 × 48 × 3.6 = 1728 kJ.1728 ÷ 600 ≈ 2.88 kg, plus 30% buffer ≈ 3.7 kg of dry ice. Use 2 kg dry ice cubes under the tray and four 500 g dry ice pack bricks around the sides.
Sizing table you can adapt
| Shipper Class | Heat Leak (W) | 48 h Mass (kg) | What to load |
|---|---|---|---|
| EPS good | 10–12 | 3.5–4.5 | 2–3 kg dry ice cubes + 2 kg dry ice pack |
| PUR / mid | 6–8 | 2.5–3.5 | 1.5–2 kg cubes + 1–1.5 kg packs |
| VIP premium | 2–4 | 1–2 | 0.5–1 kg cubes + 0.5–1 kg packs |
Quick safety margins that work
Uncertain pickup time: Add 0.5–1 kg.
Hot lane (30 °C+): Add 25%.
Large payload >8 kg: Prefer more dry ice cubes mass to control pull‑down.
Cost, waste, and sustainability: which is better?
Direct answer
Dry ice cubes are often cheaper per kilogram, especially when delivered in bulk. A dry ice pack can reduce hidden costs: faster training, less dust cleanup, and fewer damaged payloads. If you measure cost per successful delivery (not per kilogram), packs often win on short and mid routes.
Reducing CO₂ footprint while staying cold
Right‑size the shipper first. Lower heat leak means less CO₂ needed.
Use mixed loads. A cube base plus dry ice pack bricks keeps curves tight with less total mass.
Re‑ice at a hub. Split long routes into 2×36 h with a documented re‑icing SOP.
Source renewable CO₂ when available. Some suppliers now recover CO₂ from biogenic streams.
Customer story: A seafood exporter cut total dry ice mass by ~22% after moving to a cube‑plus‑pack design in VIP shippers, while complaint rates about “frozen outer fillets” dropped to near zero.
Step‑by‑step: pack with a dry ice pack (repeatable SOP)
Stage the payload in a tray with dividers; pre‑cool components.
Place two dry ice pack bricks on opposite walls; leave vents unobstructed.
Add a cube bed (if needed) under a perforated tray for faster pull‑down.
Insert the payload; add remaining dry ice pack bricks to fill wall channels.
Close the liner loosely so CO₂ can vent; never hermetically seal.
Record net dry ice mass (kg) on docs and carton.
Apply hazard mark and arrows; include the SOP diagram on the inner flap.
2025 trends in dry ice cubes and dry ice pack solutions
Trend overview
In 2025, more shippers are switching to hybrid pack‑outs—dry ice cubes for early stage pull‑down, dry ice pack bricks for steady release and simpler training. Re‑icing programs at mid‑mile hubs are rising, enabled by IoT probes and lane analytics. Suppliers are expanding biogenic CO₂ recovery and offering standardized brick sizes to match common cavity designs.
What’s new at a glance
Standardized brick formats: 250 g, 500 g, and 1 kg dry ice pack sizes align with common 12–18 L shippers.
Cleaner handling: Lower dust films and glove‑friendly textures reduce GMP housekeeping load.
Thermal modeling tools: Easier calculators turn hours and ambient into a dry ice mass recommendation for both dry ice cubes and packs.
Market insight
Healthcare and seafood lanes still dominate dry ice demand, but direct‑to‑consumer frozen products continue to grow. The winning pack‑outs emphasize repeatability, simple SOPs, and fewer cold‑spot incidents. As premium insulation spreads, total dry ice mass per shipment drops, but consistency and documentation standards rise.
Frequently Asked Questions
Q1: How long will a dry ice pack keep my shipment cold?
Most mid‑size shippers with four 500 g dry ice pack bricks hold 24–48 h at room temperature. Add bricks or dry ice cubes to reach 72 h. Venting and insulation quality decide the final number.
Q2: Are dry ice cubes colder than a dry ice pack?
Both are −78.5 °C. Cubes feel “colder” because they expose more surface area and speed pull‑down. A dry ice pack spreads cooling more evenly.
Q3: Can I use dry ice pack bricks on passenger aircraft?
Yes, dry ice (UN 1845) is allowed with limits and markings. Declare net mass and follow airline rules. Venting and labeling are mandatory.
Q4: Will dry ice damage vials or packaging?
Direct contact can cause brittle fracture or cracking. Add a tray or corrugate spacer. Place dry ice pack bricks along walls to avoid cold spots.
Q5: How do I prevent CO₂ buildup in vehicles or small rooms?
Ventilate. Keep shippers in airy spaces, use CO₂ monitors where required, and train staff. Both dry ice cubes and dry ice pack designs release gas as they warm.
Q6: What’s the best layout for mixed payloads?
Try a cube bed below a perforated tray with dry ice pack bricks on the sides. This balances pull‑down and uniformity.
Q7: How do I calculate net dry ice mass for paperwork?
Weigh the shipper empty, weigh again loaded, subtract payload and packaging. Record the dry ice cubes and dry ice pack totals in kilograms.
Interactive worksheet: 5‑minute dry ice sizing check
Your inputs
Shipper type (EPS / PUR / VIP)
Target hours (24/48/72)
Ambient profile (mild / hot)
Payload mass (kg)
Quick rules
EPS + 48 h + mild: start at ~3 kg total; split between dry ice cubes and dry ice pack.
VIP + 72 h + hot: start at ~2.5–3 kg total; favor a mixed layout with extra side bricks.
Add 25–30% if any handoff might slip a day.
Pass/fail checklist
Venting path visible
Net dry ice mass recorded
No direct cube‑to‑vial contact
Brick count matches SOP image
Summary and recommendations
Key takeaways
Dry ice cubes give fast pull‑down and long hold when massed.
A dry ice pack offers cleaner handling and repeatable brick counts.
Hybrid layouts often win: cube bed + side packs.
Right‑size by heat load, then add a 20–30% buffer.
Document net mass and venting; train for consistency.
Next steps (CTA)
Choose your primary format per lane: cubes for deep freeze, packs for repeatability.
Build a 24–72 h sizing table for your top three shippers.
Run two micro‑trials this week and lock the best SOP.
Need help? Request a free pack‑out review from Tempk and get a lane‑specific calculator and SOP graphic.
About Tempk
We build reliable cold‑chain packaging that balances hold time, handling, and cost. Our team designs SOPs that cut packing errors while keeping your product in range. We offer validated shippers, dry ice pack formats, and training support. Customers report reduced re‑icing events and fewer temperature excursions after adopting our mixed dry ice cubes plus pack layouts.
Dry Ice Wrap Dry Ice Packs: Shipping Frozen Goods
Dry Ice Wrap Dry Ice Packs: How to Ship Frozen Goods
You can keep products safely frozen with dry ice wrap dry ice packs when you plan heat load and hold time, not just the label. This guide shows you how to size, pack, and ship with confidence. Expect clear steps, simple math, and 2025-ready compliance to cut claim rates and protect margins.
How dry ice wrap dry ice packs work and when they outperform gel packs
How to calculate quantity with a simple, field‑ready method
How to pack for 24, 48, and 72+ hours with fewer temperature spikes
Which regulations apply to dry ice wrap dry ice packs by air and ground
How costs compare vs gel and phase‑change materials (PCM)
2025 trends shaping dry ice packaging and greener options
Practical checklists, a decision tool, and a real case you can emulate
What is “dry ice wrap dry ice packs,” and when should you use it?
Short answer: Dry ice wrap dry ice packs combine a reflective or insulating wrap around your frozen payload with solid CO₂ packs that sublimate at −78.5 °C. Use this method when you need rock‑solid frozen hold times, tight presentation, and vented packaging for safety. It is ideal for ice cream, meat, seafood, frozen desserts, and certain lab samples. Expect stronger pull‑down and longer hold vs gel packs in the same box volume.
More detail: Think of the wrap as a warm‑coat for your product and the packs as the cold engine. The wrap reduces radiant and convective heat gain; the CO₂ packs absorb heat as they turn from solid to gas. That phase change is powerful and predictable. When ambient temps swing or routes run long, dry ice wrap dry ice packs keep center‑of‑mass colder than gel packs alone. You still need ventilation for the gas, and you should always place packs above the product so cold sinks through. This setup shines in direct‑to‑consumer frozen food, specialty desserts, and weekend‑risk shipments.
How cold, how long, and what affects results?
Key factors: payload size, insulation R‑value, ambient temperature profile, pack placement, and ventilation. A simple rule for planning: colder ambients and thicker walls reduce CO₂ burn rate; hot ambients and big voids increase it. For most small‑parcel boxes, dry ice wrap dry ice packs maintain frozen state for 24–72 hours when sized correctly and vents are kept open. Always test your route with a simple data logger before scaling.
| Hold‑Time Planner | Ambient band (°C) | Suggested dry ice kg per 10 L void per 24 h | Meaning for you |
|---|---|---|---|
| Mild route | 10–20 | 0.8–1.0 | Standard spring/fall shipments need less CO₂ |
| Warm route | 20–30 | 1.0–1.4 | Add buffer for afternoon peaks and depot dwell |
| Hot route | 30–40 | 1.4–1.9 | Use more CO₂, better insulation, or reduce box size |
Practical tips and advice
Top‑loading pays: Place dry ice wrap dry ice packs above the payload so cold sinks downward.
Vent, don’t seal: Puncture or crack the lid vent. Never use airtight containers for CO₂.
Shrink the void: Fill empty space with light inserts so the packs “see” less air.
Wrap the product, not the box: The wrap should hug the payload; then add packs and insulation.
Test once, copy many: Run one data‑logger test per lane, then repeat the packing recipe.
Real‑world case: A dessert brand shipping pints across three zones replaced gel with dry ice wrap dry ice packs and added top‑loading. With the same box, claim rate fell from 7.8% to 1.6% in July heat. Average product temp at delivery stayed below −12 °C for 60 hours.
How much dry ice wrap dry ice packs do you need for 24–72 hours?
Short answer: Aim for 1.0–1.4 kg of dry ice per 10 L of total internal volume per 24 hours in typical warm routes. For mild routes, start at ~0.8 kg; for hot routes, 1.4–1.9 kg. This field rule gets you close when you do not have a full heat‑balance model.
Planner method you can use today:
Measure your shipper’s internal length × width × height to get total liters.
Estimate ambient: mild, warm, or hot.
Choose a rate from the table above.
Multiply rate × (liters/10) × days.
Round up by 10–20% if you expect delays or door‑to‑door weekend holds.
Example: 20 L box, warm route, 48 hours → 1.2 kg × (20/10) × 2 = 4.8 kg. Round to 5.4–5.8 kg for buffer. This quantity pairs well with dry ice wrap dry ice packs arranged in a top layer with vented lid.
Field calculator you can copy
Pro tip: If your payload must stay rock‑hard (e.g., −18 °C ice cream), add a small vapor barrier around the wrap. It slows frost and keeps cartons clean when dry ice wrap dry ice packs sublimate.
How do you pack with dry ice wrap dry ice packs step by step?
Short answer: Shrink the void, wrap the payload, top‑load CO₂, and vent the lid. Label net CO₂ weight and “UN 1845 Dry Ice.” Use gloves, and never seal gas inside.
Step‑by‑step packing SOP:
Pre‑stage the box with a bottom pad and corner inserts to reduce convective currents.
Build the wrapped core: Place product in its dry ice wrap dry ice packs sleeve. Remove excess air.
Add side insulation so the core fits snugly; avoid large air channels.
Top‑load dry ice above the wrapped core; break large blocks into chunks for even flow.
Add a vented lid or crack a corner to release CO₂ gas.
Mark the package: “Dry Ice (UN 1845), net ___ kg.” Include sender/recipient and emergency phone.
Weigh the box with a scale and record net CO₂ for compliance and replenishment planning.
Final check: Shake gently. If anything shifts, add dunnage. The colder the route, the tighter the pack.
Layout that reduces “hot spots”
Put dry ice wrap dry ice packs on top, then thin pads on the sides.
Keep at least 1 cm clearance from outer walls to avoid sweating and cardboard softening.
For fragile desserts, add a thin corrugated shelf below the CO₂ layer to spread pressure.
Use a bright “Vent Before Opening” sticker to reduce unboxing risk in receiving areas.
Dry ice wrap dry ice packs vs gel packs vs PCM: what should you choose?
Short answer: If it must stay frozen, dry ice wrap dry ice packs win on hold time per liter. Gel packs shine for refrigerated lanes (2–8 °C). Modern PCM at −10 to −21 °C can bridge shoulder seasons but costs more per cycle.
Decision cues you can use:
Shipments that must remain below −10 °C → favor dry ice wrap dry ice packs.
Temperatures between −5 °C and +8 °C → hybrid with gel/PCM; reduce CO₂ to avoid overshoot.
Highly regulated pharma lanes → verify label requirements before picking CO₂.
| Option | Typical temp band | Box efficiency | Cost per shipment | Best for |
|---|---|---|---|---|
| Dry ice wrap dry ice packs | ≤ −10 °C to −78.5 °C | High (strong per‑liter cooling) | Medium–High | Ice cream, meat, seafood, lab specimens |
| Gel packs | +2 to +8 °C or 0 to −2 °C | Medium | Low–Medium | Meal kits, chilled desserts |
| PCM (−10 to −21 °C) | Frozen but not ultra‑cold | Medium | High | Shoulder seasons, lanes with CO₂ restrictions |
What regulations apply to dry ice wrap dry ice packs shipments?
Short answer: Dry ice is classified as UN 1845, Class 9. You must label the package, state the net weight of dry ice in kilograms, and provide ventilation. Air shipments follow airline and IATA rules; ground shipments follow local transport rules (e.g., DOT in the U.S.). Always check carrier‑specific limits.
Essentials you should follow every time:
Marking: “Dry Ice (UN 1845)” + net weight in kg + shipper/consignee.
Venting: Never seal CO₂ in an airtight container; use vented lids or relief holes.
Documentation: Air waybills must reflect dry ice presence; some carriers require a phone contact.
Packaging: Use materials that tolerate −78.5 °C and allow gas release.
Training: Personnel handling dry ice wrap dry ice packs need basic hazard awareness.
Safety reminder: Use thermal gloves. Avoid vehicle trunks and small unventilated rooms. CO₂ gas is heavier than air and can displace oxygen.
Operations playbook: last‑mile and scale with dry ice wrap dry ice packs
Short answer: Standardize your “recipe,” then lock it into your WMS/TMS so packers, labels, and replenishment all agree. Measure, adjust, and repeat per lane.
Simple playbook:
Recipe cards: For each SKU and zone, define liters, route band, and dry ice wrap dry ice packs kilograms.
Kitting: Pre‑bundle wraps and CO₂ packs by lane (e.g., “Warm‑48h kit”).
Data logging: Spot‑log 1 in 20 boxes; rotate skews during hot months.
Depot discipline: Stage boxes under shade; avoid open docks for more than 10 minutes.
Exceptions: If a scan predicts weekend dwell, auto‑upgrade the recipe by +15% CO₂ or route to faster service.
2025 trends in dry ice wrap dry ice packs
Trend snapshot: In 2025, more brands aim for curbside‑recyclable liners and lower CO₂ footprints. Expect lighter boxes with higher R‑value per millimeter, better vented‑lid designs, and smarter replenishment powered by route forecasts. Dry ice wrap dry ice packs remain the frozen benchmark, while hybrid PCM strategies grow for shoulder seasons and CO₂‑restricted lanes.
What’s new this year
Fiber‑based wraps with reflective films: Greener materials without losing radiant shielding.
Bluetooth mini‑loggers under $20: Easy route tests before committing to a recipe.
Route‑aware kitting: Auto‑selects “warm” vs “hot” kits on the fly inside the pack app.
Market insight: Customers reward reliable frozen arrivals more than ultra‑low shipping fees. Brands that stabilize product temps and cut damages grow repeat orders. In frozen e‑commerce, a one‑point drop in claims can pay for stronger dry ice wrap dry ice packs recipes across the board.
Frequently Asked Questions
Q1: How long do dry ice wrap dry ice packs keep items frozen?
Sizing drives results. For warm routes, plan 1.0–1.4 kg per 10 L per 24 hours. Vent the lid and top‑load the packs to avoid early warm‑ups.
Q2: How many packs should I use in a small 15 L shipper?
For a 48‑hour warm route, start near 3.5–4.0 kg total, split across several smaller packs for even sublimation and fewer hot spots.
Q3: Can I ship by air with dry ice wrap dry ice packs?
Yes. Label “Dry Ice (UN 1845)” and net kg, provide ventilation, and follow airline rules. Some carriers set per‑package limits and documentation steps.
Q4: Will dry ice affect food quality or packaging?
Dry ice is food‑safe when handled correctly, but it can make cardboard brittle. Wrap the payload and keep packs from direct carton contact.
Q5: How do I dispose of leftover dry ice safely?
Let it sublimate in a well‑ventilated area away from children and pets. Never put it in a sink, drain, or sealed container.
Summary and recommendations
Key takeaways: Use dry ice wrap dry ice packs when the product must stay frozen. Shrink void space, top‑load CO₂, and vent the lid. Size CO₂ with the simple liters‑based rule and add 10–20% buffer for delays. Label UN 1845, record net kilograms, and train your team on safe handling.
Next steps: Pick one challenging route. Run a data‑logger test with your current recipe, then with dry ice wrap dry ice packs following the SOP here. Compare hold time and claims. If you ship weekly, standardize kit sizes by lane and season. Need a faster path? Use the decision tool below and contact our team for a tailored recipe.
Interactive elements for engagement
Quick decision tool: is dry ice right for this shipment?
Product target: Must it stay ≤ −10 °C?
Yes → Use dry ice wrap dry ice packs.
No → Consider gel or PCM.
Route band: Is your route warm (20–30 °C) or hot (30–40 °C)?
Warm → Start at 1.2 kg per 10 L per 24 h.
Hot → Start at 1.6 kg per 10 L per 24 h.
Hold time: 24, 48, or 72 h?
Multiply your base by 1×, 2×, or 3× and add 15% buffer.
Self‑check: will my box survive July?
Box internal liters measured and recorded
Dry ice wrap dry ice packs recipe printed on a card
Vented lid confirmed and labeled
Net CO₂ weight in kg on the box
One data logger inside per 20 boxes (rotating)
About Tempk
Tempk builds cold‑chain packaging and planning tools for brands that ship frozen and chilled products. We focus on practical SOPs and simple sizing rules that teams can apply under pressure. Our kits pair insulation, dry ice wrap dry ice packs, and easy labeling. You get repeatable results and fewer warm deliveries.
Call to action: Want a lane‑specific recipe? Share your box liters, route band, and target hold time. We’ll return a right‑sized dry ice wrap dry ice packs plan you can test this week.
Next Day Dry Ice Pack Guide: Safe, Fast Shipping
Next Day Dry Ice Pack: How Do You Ship Frozen Goods?
A next day dry ice pack keeps your frozen items solid through the fastest leg of your cold chain. You need the right box, the right dose, and a plan for safe venting. Dry ice sits at −78.5 °C and buys you a 24–36 hour window when sized well. In this guide, you will learn simple steps that work in the real world, not just in a lab.
How much next day dry ice pack you actually need for typical weights
Which packaging choices extend hold time with related long‑tail keywords
How to comply with carrier and safety rules without slowing fulfillment
Ways to cut cost and emissions using hybrid packouts and route planning
What is a next day dry ice pack and when should you use it?
Direct answer
A next day dry ice pack is a shipper and dry ice load sized to hold a frozen state for one calendar day, from pickup to delivery. Use it when products must arrive hard‑frozen and shipping lanes can deliver in under 36 hours. It suits frozen meals, premium meats, and time‑critical biotech items. Typical packs use ventilated outer boxes and rigid foam or vacuum panels.
Expanded explanation
You choose a next day dry ice pack when speed beats buffer time. One day lanes lower risk and cost. The pack relies on sublimation: solid CO₂ turns to gas, absorbing heat like a sponge. You get steady cold without water mess. It shines for last‑mile air or regional ground with predictable cutoffs. Add a small data logger if you need proof. For fragile desserts or lab samples, line the inner walls and place dry ice above, below, and around the payload to create even cold.
How much dry ice for next day delivery?
Details
Start with a simple rule of thumb: more surface area means more heat gain. Denser payloads hold cold better. For a next day dry ice pack, many teams begin at 15–25% of payload weight in dry ice, then test. Increase the dose for hotter lanes, peak season, or porch dwell time. Decrease when you upgrade insulation or reduce voids.
| Packout Type | Payload Weight | Dry Ice Load (start) | What It Means For You |
|---|---|---|---|
| Frozen entrées shipper | 1–2 kg | 1–2 kg | Keeps a solid freeze overnight; compact box reduces shipping zone costs |
| Premium proteins shipper | ~5 kg | 4–5 kg | Balances hold time with porch buffer; good for warm climates |
| Research samples shipper | ~10 kg | 8–10 kg | Extra margin for handoffs, delays, or tarmac heat |
| Dense desserts shipper | 3–4 kg | 2–3 kg | High sugar/fat density slows thaw; you can use less dry ice |
| Hybrid PCM + dry ice | 4–6 kg | 1–2 kg + PCM | PCMs blunt heat spikes; dry ice maintains freeze core |
Practical tips and quick wins
Tarmac risk: Load extra dry ice in summer. Aircraft holds can run warm during turns.
Top‑loading: Keep some dry ice above the payload. Cold gas falls and blankets the product.
Tight voids: Fill gaps with liners or crumpled kraft. Less air equals less heat.
Porch buffer: Add 1–2 kg extra for delivery windows that slip past noon.
Data check: Toss in a basic logger. One run pays for itself by cutting guesswork.
Real‑world case: A regional meal brand switched to a 6‑liter foam shipper, moved dry ice above and below product, and trimmed failed deliveries by two‑thirds during a July heat wave while reducing complaints on texture.
Which packaging for a next day dry ice pack works best?
Direct answer
Choose thick insulation, a ventilated outer carton, and a leak‑proof liner for the next day dry ice pack. For most SKUs, a 25–38 mm rigid foam box or a hybrid vacuum panel system works. Use inner bags to prevent freezer burn and odor transfer. Label for carbon dioxide, solid, and ensure vent paths are not blocked.
Expanded explanation
Box size matters. Oversized boxes invite heat. Right‑size the cube so dry ice touches or wraps the payload. If you can upgrade insulation by one step, you often cut dry ice by 10–20% in the same lane. Vacuum insulated panels (VIP) save weight at a cost premium. Use them for high‑value or temperature‑sensitive items. Add a corrugated outer for crush strength and to hold the required UN1845 markings.
Insulation thickness cheat‑sheet for next day lanes
Details
Use this chart as a starting point. Test your own lanes and seasonality.
| Climate / Lane | Insulation | Add‑Ons | What It Means For You |
|---|---|---|---|
| Mild spring, overnight air | 25 mm EPS | Poly liner | Lowest cost path for light foods |
| Hot summer, cross‑country | 38 mm EPS or 25 mm VIP | Reflective pouch | Cuts dry ice load and porch risk |
| Extreme heat or porch dwell >4 h | 25 mm VIP + 12 mm EPS overwrap | Gel‑liner to stop frost | Highest protection, lower mass |
| Cold winter lanes | 25 mm EPS | Minimal extras | Reduce dry ice to avoid over‑hardening sensitive items |
“Fit the box” technique for next day dry ice pack
Measure the product stack height without headspace.
Pick the smallest inner cube that allows top and bottom dry ice layers.
Keep wall clearance to 10–15 mm per side when using pellets.
Use a rigid sleeve or dividers to stop shifting in transit.
How do you comply with rules for a next day dry ice pack?
Direct answer
Mark shipments as “Carbon dioxide, solid” with proper UN1845 labels, provide ventilation, and record net dry ice weight. Never seal vents. Use carriers’ instructions for air transport, and ensure staff wear gloves and eye protection when handling dry ice.
Expanded explanation
Dry ice releases CO₂ gas. You must allow it to vent so pressure does not build. Carriers require visible labels and a clear net weight of dry ice on the package. For aircraft, follow the current packing instructions for CO₂, solid, including limits per package and per compartment. On the warehouse floor, store dry ice in open, cool spaces, not in sealed rooms. Train teams on frostbite risk and safe disposal.
Simple shipping checklist (copy/paste)
Box is vented, not airtight
UN1845 and “Carbon dioxide, solid” label applied
Net dry ice weight written clearly on exterior
Gloves and eye protection available at packout
No glass bottles or sealed containers that can burst
Courier booked on overnight service with early dropoff
Porch dwell buffer added to dose in peak season
How do you size a next day dry ice pack with a calculator?
Direct answer
Estimate heat load from the box and your lane, then pick a dry ice dose that covers 24–36 hours with a small buffer. You can model this with a simple formula that considers surface area, insulation value, and ambient conditions.
Expanded explanation
Think of heat trying to sneak through your box. Insulation slows it. Your job is to buy enough cooling power to cancel that heat for a day. Dry ice absorbs a lot of heat as it sublimates. The math can get complex, but a practical model gets you within 10–20% fast. Test a few packouts and tune the dose.
Sizing example you can adapt
Foam shipper external area: 0.35 m²
U‑value estimate: 0.7 W/m²·K
ΔT: 30 K (hot day vs frozen interior)
Time: 30 h (pickup to delivery + buffer)
Q ≈ 0.7 × 0.35 × 30 × (30 h × 3600 s) ÷ 1000 ≈ 793 kJ
Dry ice ≈ 793 / 571 ≈ 1.4 kg → round to 2 kg for buffer
Tip: Log one box per lane for a week. You will find 10–15% savings by tuning dose to the hottest part of the route.
How do you pack a next day dry ice pack step‑by‑step?
Direct answer
Pre‑chill, layer dry ice around the payload, seal liners, and leave clear vents. Label, weigh, and hand to the carrier on an early truck.
Expanded explanation
Cold starts cold. Freeze products hard. Pre‑chill the shipper if possible. Add a thin bottom layer of dry ice. Place the product in the center. Surround with pellets or slabs. Add a top layer. Close the inner liner. Tape the outer carton loosely over vent holes. Write the net dry ice weight, then apply the hazard label.
Packout flow for the floor
Pre‑chill products and shippers
Bottom dry ice layer
Payload + side fill
Top dry ice layer
Inner liner closed, not vacuum tight
Apply labels and record net weight
Stage for the first outbound truck
Cut cost and emissions with a next day dry ice pack
Direct answer
Reduce cube, upgrade insulation only where it pays back, and try hybrid PCM + dry ice to lower CO₂ use. Consolidate orders and choose early deliveries to slash porch risk without extra ice.
Expanded explanation
Transport cost is a cube and weight game. Smaller boxes save on every lane. A modest insulation upgrade often cuts ice by more than the added box cost. Phase‑change materials (PCMs) soak up short spikes near 0 °C. In a frozen application, they can stabilize edges while dry ice handles the heavy lifting. Shave grams from tape, labels, and void fill. Every gram matters over thousands of boxes.
Quick ROI levers
Right‑sizing: Move to the next smaller cube; target <15% headspace
Insulation swap: 25 mm EPS → 25 mm VIP on hot lanes only
Hybrid core: Add PCM tiles near door‑facing sides
Route shift: Use morning delivery windows where available
Order batching: Combine two weekly orders into one larger box
Quality control for a next day dry ice pack
Direct answer
Use “golden sample” boxes, simple loggers, and pass/fail charts. Keep it visual and fast so packers do it every time.
Expanded explanation
Create one master packout per SKU and lane. Photograph the steps. Tape those photos above the station. Require a quick sticker for net ice weight. Pull one box per pallet for a data logger. Build a three‑color chart: pass, watch, fail. Keep the feedback loop short so the team adjusts dose the same day.
Station checklist
Golden sample photo sheet posted
Net dry ice sticker filled in
Logger serial numbers recorded
Random open‑box inspection each hour
Exceptions escalated to shipping lead
Risk management for a next day dry ice pack
Direct answer
Plan for delays, porch time, and hot handoffs. Add buffers only where they matter.
Expanded explanation
Most failures happen at the edges: missed pickups, last‑mile delays, and porch sits. Buffer around those edges. Drop off earlier. Add 1–2 kg ice only for desert or heat‑wave lanes. Put a friendly “freeze on arrival” card in the box. Include a phone number for issues. Small touches reduce refunds.
“What could go wrong?” map
Missed pickup: Shift packout to earlier dock slot
Porch sit: Add SMS alerts to customers
Tarmac bake: Extra top layer in summer only
Wrong box used: Color‑code cartons by SKU
2025 trends in next day dry ice pack solutions
Trend overview
In 2025, the next day dry ice pack is getting smarter and lighter. Expect wider use of low‑mass VIP panels, drop‑in IoT loggers with QR‑based sharing, and hybrid PCM cores that reduce CO₂ consumption. Carriers roll out greener lanes and carbon dashboards. Retailers push reusable totes on short routes. The winners test often and keep playbooks live.
What’s new at a glance
Hybrid cooling kits: PCM tiles paired with modest dry ice dose to smooth spikes
Edge analytics: Tiny loggers with phone‑scan graphs for instant proof of cold chain
Slimmer VIPs: Affordable panels that fit standard corrugate without custom tooling
Market insights
E‑grocery and DTC proteins keep driving frozen volume on overnight lanes. Brands lean on regional fulfillment to shorten routes and cut dose. Customers reward “pack light” efforts, especially when boxes open cleanly. Expect more porch‑safe packaging and delivery window controls to reduce surprises and refunds.
Frequently asked questions
Q1: How long will a next day dry ice pack keep items frozen?
Most setups hold 24–36 hours when sized and vented well. Add buffer for hot seasons or long porches. Log the first runs and trim or add ice from there.
Q2: Can I use gel packs instead of a next day dry ice pack?
Gel packs keep items cold, not hard‑frozen. Use them for chilled foods. For frozen goods, stick with a next day dry ice pack or a hybrid with both.
Q3: How should I dispose of remaining dry ice?
Let it sublimate in a ventilated area, away from people and pets. Never put dry ice in a sink, sealed bin, or walk‑in cooler.
Q4: Is a next day dry ice pack allowed by all carriers?
Yes, with proper labels, weight markings, and vents. Some carriers limit dry ice mass per package or per compartment. Check current rules before peak season.
Q5: What size pellets or slabs should I pick?
Pellets fill gaps and cool fast. Slabs last longer and resist tarmac heat. Many teams use a slab on top and pellets around the sides.
Q6: Will a next day dry ice pack damage packaging?
It can if materials are brittle or the box is airtight. Use vent paths and liners, and avoid thin plastics that crack when cold.
Q7: Can I ship glass bottles with a next day dry ice pack?
Avoid sealed glass that can build pressure. If you must, use pressure‑rated caps, sleeves, and vents, and follow carrier guidance.
Q8: How do I prevent freezer burn inside the next day dry ice pack?
Wrap products in moisture‑safe film, remove headspace in inner bags, and keep air movement down with tight void fill.
Summary and recommendations
Key takeaways
A next day dry ice pack protects frozen products across a one‑day lane when you right‑size the cube, layer ice above and below, and leave vents clear. Upgrade insulation only where it pays back. Use a simple model and a data logger to tune the dose. Label everything and train your team.
Action plan
Map your hottest lanes and porch windows.
Build two test packouts per SKU.
Log five boxes, then adjust dose by 10–20%.
Add hybrid PCM where porch time is common.
Roll out a golden sample and QC chart.
CTA: Need a ready‑to‑ship kit? Talk to our team about standard and custom next day dry ice pack solutions.
About Tempk
Who we are
We are a cold‑chain solutions company focused on simple, tested answers for frozen and chilled shipping. Our kits combine right‑sized boxes, reliable insulation, and easy labels. We back them with playbooks and fast support. Customers use fewer materials and see fewer returns.
What to do next
Reach out for a lane review and a quick packout test. We will size a next day dry ice pack that fits your product and your budget.
Nearby Store Dry Ice Packs: Choose & Use Today

Nearby Store Dry Ice Packs: How Do You Pick the Right Ones?
Introduction
If you need nearby store dry ice packs fast, this guide helps you choose the right size, stay safe during transport, and keep goods at target temperatures. You’ll get a simple sizing method, a safety checklist, and 2025 buying tips that fit your timeline and budget. Use the tools below to pick the ideal format for food, lab samples, camping, or emergency cooling without guesswork.
Which retailers carry nearby store dry ice packs and what to ask at the counter
How many nearby store dry ice packs you need for your cooler duration
How to handle nearby store dry ice packs safely in cars and small spaces
When to pick pellets, blocks, or hybrid nearby store dry ice packs
How nearby store dry ice packs compare to gel packs and reusable ice bricks
2025 price drivers and availability for nearby store dry ice packs
Where can you buy nearby store dry ice packs today?
Direct answer
Most shoppers find nearby store dry ice packs at large grocers, party and beverage outlets, selected pharmacies, and hardware stores. Ask customer service for availability, formats (pellets vs. blocks), and bag sizes. Many locations store packs in back-room coolers for safety. Bring insulated gloves or a towel for handling, and confirm pickup rules (some stores limit quantities for safety or require an ID check).
Expanded explanation
From your perspective, speed matters: you want nearby store dry ice packs you can grab within minutes. Call ahead and ask two questions: “Do you have bagged dry ice packs or loose pellets?” and “What sizes are available?” For road trips or last-mile deliveries, a single stop that sells both packs and foam coolers can save time. If a grocer is out, nearby party stores that sell kegs or CO₂ cartridges often stock nearby store dry ice packs as well. During holidays and heat waves, supply tightens—arrive early and consider two smaller bags rather than one large block to improve surface contact in your cooler.
Which size of nearby store dry ice packs should you choose?
Details
When your load is small and time is short, pellets give more contact area and quicker pull-down; blocks last longer. For fragile items (e.g., berries or vaccine kits), place a cardboard or towel buffer between nearby store dry ice packs and the product to prevent freeze damage. For airline or parcel rules, check container venting requirements; never use an airtight cooler with dry ice.
| Pack Type & Use | Typical Format | Hold-Time Behavior | What It Means For You |
|---|---|---|---|
| Pellets/“rice” for fast cooling | Small granules | Faster initial cooling, shorter total duration | Best when you must chill quickly before a short drive |
| Medium “brick” packs | Wrapped packs | Balanced surface contact and duration | Good all-round choice for day trips |
| Solid block | 5–10 lb block | Slower start, longest duration | Choose for overnight or multi-day hold times |
Practical tips and suggestions
Quick grocery pickup: Ask for “bagged dry ice” or “dry ice packs” at customer service; many stores keep bags behind the counter.
For long drives: Use a foam or hard cooler with a small vent gap; place nearby store dry ice packs on top so cold air sinks.
For fragile foods: Add a corrugated layer to avoid contact freezing; check every 60–90 minutes.
Real case: A weekend caterer used 10 lb of pellet-style nearby store dry ice packs in a 45‑quart cooler for a 6‑hour highway delivery. With a cardboard divider and periodic venting, desserts arrived fully set with no ice crystal damage.
How do you transport nearby store dry ice packs safely?
Direct answer
Ventilation is non‑negotiable when moving nearby store dry ice packs. Carbon dioxide gas displaces oxygen; crack car windows and avoid sealed trunks. Wear insulated gloves, never store packs in airtight containers, and keep them away from kids and pets. Place packs in the cooler last, leave a vent gap, and secure the cooler to prevent shifting.
Expanded explanation
Think of dry ice as a slow‑release CO₂ source. In small cars or vans, fresh air flow reduces risk and keeps you comfortable. A slightly ajar window and a vented cooler prevent pressure build‑up. If you smell no odor, that’s normal—CO₂ is odorless; rely on good ventilation, not smell. With nearby store dry ice packs, your “safe setup” is simple: a vented lid, a buffer layer over food, and a driving plan that avoids cabin heat spikes. If you stop for more than 10 minutes, recheck ventilation and cooler vents.
Safe handling and PPE for nearby store dry ice packs
Details
Insulated gloves or a thick towel protect against cold burns. Eye protection helps when breaking blocks into smaller pieces. Avoid placing nearby store dry ice packs directly on metal car floors; use cardboard to reduce condensation and prevent sticking. Keep packs upright in the cooler, and don’t tape lids shut—gas needs a way out.
| Safety Step | Why It Matters | Simple How-To | Benefit to You |
|---|---|---|---|
| Vent the vehicle | CO₂ displaces oxygen | Crack windows 2–3 cm | Reduces headache, keeps you alert |
| Vent the cooler | Gas pressure builds | Loosen latch or use a vented lid | Prevents deformation or lid pop |
| Use hand protection | Frostbite risk | Insulated gloves or folded towel | Safe loading and rearranging |
Practical tips and suggestions
During long stops: Move the cooler to a shaded, ventilated spot and keep the lid vented.
At home: Let nearby store dry ice packs sublimate in a secure, ventilated area out of reach of children and pets.
In elevators or closets: Avoid use—choose open, airy spaces instead.
Real case: A mobile lab driver adjusted vents and used a foam cooler with a 3 mm gap while hauling nearby store dry ice packs for four hours. CO₂ readings stayed in the safe range, and the cooler lid never bulged.
Do nearby store dry ice packs keep food, vaccines, or samples cold enough?
Direct answer
Yes—when sized correctly, nearby store dry ice packs can keep contents well below freezing, even at 0–5°C or colder for hours to days. The key is matching pack mass to cooler size, ambient temperature, and target hold time, plus using a buffer layer to prevent direct freeze damage on sensitive goods.
Expanded explanation
Food wants consistency; lab samples often need very cold conditions. Pellets and small packs provide fast pull‑down for a quick grocery run; blocks carry you overnight. To protect produce and delicate items, place paper, cardboard, or a towel on top of nearby store dry ice packs. For sub‑zero targets, more pack mass helps. For cheese or chocolate, a mixed strategy—one small pack near a thin divider—often avoids surface cracking.
Estimate hold time vs. ambient temperature
Details
As a rule of thumb, start with 5–10 lb of nearby store dry ice packs for a 35–50 quart cooler for a full day, then adjust by climate and how often you open the lid. Hotter days, larger coolers, and frequent lid openings require more mass. Use pellets for fast chill, blocks for duration, or a hybrid.
| Use Case | Ambient Range | Starting Pack Mass | What It Means For You |
|---|---|---|---|
| Day trip frozen foods | 20–28°C | 5 lb in 35–45 qt | Frozen to the end of the day |
| Overnight camping | 18–25°C | 8–12 lb in 45–60 qt | Frozen through breakfast |
| Multi‑stop delivery | 25–32°C | 10–15 lb in 50–70 qt | Buffer for frequent lid opens |
Practical tips and suggestions
For mixed loads: Keep raw meats below a divider and nearby store dry ice packs above the divider.
For lab kits: Pre‑chill the cooler 10–15 minutes with a handful of pellets before loading.
For produce: Use a breathable buffer to avoid contact freezing.
Real case: A chocolatier paired one 5 lb block with a towel buffer and two small pellet bags. After six hours of city deliveries, bonbons stayed glossy with no bloom.
How do nearby store dry ice packs compare to gel packs and reusable ice?
Direct answer
Nearby store dry ice packs deliver lower temperatures and longer hold time per pound versus gel packs, but they require venting and gloves. Gel packs are safer for above‑freezing targets, while reusables are convenient for frequent, short trips. Choose dry ice when you need genuine frozen conditions or rapid pull‑down.
Expanded explanation
Think of cooling like tool selection: dry ice is a power tool for freezing; gels and reusables are hand tools for chill. If your product shouldn’t freeze, gels shine. If you must keep items rock-solid or reach below −18°C quickly, nearby store dry ice packs win. You can even combine them: a small dry ice pack for fast pull‑down plus gel packs to smooth temperature swings at the product surface.
When not to use nearby store dry ice packs
Details
Skip dry ice for items harmed by deep cold (leafy greens, some meds), in unventilated spaces, or where regulations require specific refrigerants. If you only need 1–2 hours at fridge temps, gel packs are simpler and still effective.
| Cooling Option | Target Temperature | Pros | Your Takeaway |
|---|---|---|---|
| Nearby store dry ice packs | Sub‑zero to deep freeze | Fast pull‑down, long duration | Best for frozen goods and dry shipments |
| Gel packs | 0–8°C | Safe for delicate items | Ideal for chilled but not frozen |
| Reusable bricks | 0–10°C | No purchase each trip | Great for routine short runs |
Practical tips and suggestions
Hybrid loads: Use one small bag of nearby store dry ice packs to start, then rely on gels to avoid over‑freezing.
For medication: Check label storage ranges; if it says “do not freeze,” choose gels.
For flowers: Avoid dry ice; use chilled water packs instead.
Real case: A meal‑prep service cut spoilage by combining two 2 lb nearby store dry ice packs with four gel packs and a corrugated divider, keeping entrées firm without frost.
What size and quantity of nearby store dry ice packs do you need?
Direct answer
A quick planner works: cooler size + ambient heat + hold time + how often you open the lid. Start with 0.2–0.3 lb of nearby store dry ice packs per quart of cooler volume for a full day in moderate weather, then adjust up for heat or frequent access.
Expanded explanation
You want enough mass to outlast heat leaks. The rules below prioritize simplicity and speed over engineering detail. For larger coolers, use at least one block plus pellets to fill voids. For frequent openings, add 25–50% more nearby store dry ice packs to stay safe.
“Dry Ice Pack Picker” — quick interactive checklist
Copy this checklist into a note and mark your choices:
Cooler size: <35 qt / 35–50 qt / 50–70 qt / >70 qt
Hold time target: 6 h / 12 h / 24 h / 36+ h
Ambient forecast: cool (<22°C) / warm (22–28°C) / hot (>28°C)
Lid openings per hour: 0–1 / 2–4 / 5+
Load type: robust frozen / delicate frozen / chilled only
Recommended starting mass:
35–50 qt, 24 h, warm weather, 2–4 openings/hr → 8–12 lb of nearby store dry ice packs
50–70 qt, 24 h, hot weather, 5+ openings/hr → 15–20 lb of nearby store dry ice packs
Add 25% for delicate goods (use extra buffering)
Simple estimation helper (pseudocode)
Practical tips and suggestions
Fill voids: Pack items tight; air gaps waste cold.
Layering: Product at bottom, buffer, then nearby store dry ice packs on top.
Checkpoints: Plan lid checks every 2–3 hours to adjust buffers.
Real case: A fishing crew used the pseudocode for a 60 qt cooler in hot weather with frequent access. The tool suggested ~18 lb; they used 16 lb plus a towel buffer and returned with firm fillets and no melting.
How much do nearby store dry ice packs cost in 2025, and what affects price?
Direct answer
Expect prices to vary by region, season, and format. You’ll often see per‑pound pricing with discounts for larger bags or multi‑packs. Blocks may carry a small premium for longer hold time; pellets and small packs trade a bit of duration for faster cooling and lower per‑stop cost.
Expanded explanation
In 2025, local CO₂ supply and energy costs remain the biggest drivers. Heat waves, long weekends, and event seasons can tighten stock for nearby store dry ice packs. If you’re price‑sensitive, call two stores, ask for “current bag size and price,” and ask if they’ll hold packs at the counter for same‑day pickup. Buying a tad more mass than you think you need often costs less than an emergency second trip.
Price drivers you can manage
Details
You can’t control regional CO₂ capture or deliveries, but you can plan. Shop earlier in the day, use a right‑sized cooler, and reduce lid openings. For regular routes, keep a simple log of how many nearby store dry ice packs you used at what temperatures to fine‑tune future buys.
| Driver | What Changes | Your Move | Practical Benefit |
|---|---|---|---|
| Season/holidays | Demand spikes | Buy early or reserve | Better availability |
| Format | Block vs pellets | Match to duration | Avoid overbuying |
| Store type | Grocer vs party/hardware | Call ahead | Fewer wasted trips |
Practical tips and suggestions
Ask for “back stock”: Many stores keep nearby store dry ice packs behind the counter.
Reserve on the phone: Some retailers will hold a labeled bag for pickup.
Track your usage: Keep a quick log per trip; optimize next time.
Real case: A photographer learned that a party store near the venue restocked every morning. Calling ahead secured two block packs during a citywide heat wave.
Sustainability and disposal: how do you handle nearby store dry ice packs responsibly?
Direct answer
Let nearby store dry ice packs sublimate in a well‑ventilated area, out of reach of children and pets. Do not dump dry ice in sinks, toilets, or storm drains; rapid freezing can crack surfaces and create hazards.
Expanded explanation
Responsible handling is simple. Place the remaining packs on a cardboard tray in an airy space and allow them to disappear naturally. Keep them away from enclosed rooms and never cap them in sealed containers. For regular users, consider re‑usable dividers and right‑sized coolers to reduce total dry ice mass needed per trip.
Small, practical sustainability wins
Details
Right‑sizing reduces waste. Logs help you buy only what you need. A reusable divider protects products so you can use fewer nearby store dry ice packs without risking freeze damage.
| Action | Easy Step | Outcome | Meaning for You |
|---|---|---|---|
| Buy right-sized bags | Use mass estimator | Fewer leftovers | Lower costs, less waste |
| Reuse buffers | Keep towels/cardboard | Better control | Less product damage |
| Air-dry disposal | Ventilated space | Safe sublimation | No plumbing damage |
Practical tips and suggestions
Post-trip routine: Put leftover nearby store dry ice packs in a ventilated shed corner to sublimate.
No sealed containers: Gas needs an exit path—always.
Child and pet safety: Sublimation area must be off-limits.
Real case: After a two‑day festival, a vendor placed leftover packs on a metal tray in a fenced, breezy area. By morning, they were gone with no mess.
2025 trends for nearby store dry ice packs
Trend overview
In 2025, retailers have broadened point‑of‑sale signage and back‑room storage protocols for nearby store dry ice packs, especially during heat events. More stores offer pre‑bagged pellet options for fast pickup, and service counters are increasingly trained to advise on basic handling. On the cooler side, lighter lids with built‑in vents make safe transport simpler for everyday drivers.
Latest developments at a glance
Hybrid packing: Combining small pellet bags with a single block pack improves both pull‑down and duration.
Smarter coolers: Vented‑lid and latch‑gap designs reduce pressure build‑up risks when using nearby store dry ice packs.
Front‑of‑store guidance: More retailers use quick “how to load” cards at pickup points.
Market insights
Demand for nearby store dry ice packs spikes in urban heat waves and during summer events, while shoulder seasons see steadier supply. Consumers favor convenience—pre‑bagged sizes and curbside pickup—over custom cutting. For small businesses, route logs and simple estimators are becoming standard practice to right‑size orders and avoid returns or secondary runs.
Frequently Asked Questions
Q1: How long will nearby store dry ice packs last in a 45‑quart cooler?
Typically a full day with 8–10 lb in moderate weather, longer with blocks and fewer lid openings. Pre‑chill if possible and use a buffer to protect delicate items.
Q2: Can I use nearby store dry ice packs for medications that say “do not freeze”?
No. Choose gel packs aimed at 2–8°C. Dry ice risks freezing; it’s better for frozen goods and deep‑cold targets.
Q3: Are nearby store dry ice packs safe in a sedan trunk?
Avoid sealed spaces. Keep the cooler in a ventilated cabin with a cracked window or use a vented pass‑through. Never block the cooler vent.
Q4: Pellets or blocks—what should I buy as a first‑time user?
Start with pellets or small packs for control and speed. Add a small block if you need overnight hold times.
Q5: How do I prevent freezer burn when using nearby store dry ice packs?
Add a barrier: towel, cardboard, or a purpose‑made divider. Keep sensitive foods below the divider and packs above.
Q6: What if the store is out of nearby store dry ice packs?
Try party supply, beverage, or hardware stores. Call ahead; many keep bags behind the counter and will hold them for pickup.
Q7: Will nearby store dry ice packs crack my cooler?
Use a vented lid or slight latch gap. Pressure rises in sealed containers; venting prevents deformation or cracks.
Q8: Can I fly with nearby store dry ice packs?
Airline rules vary by route and container venting. Check current carrier policies and label the package if required.
Summary and recommendations
Key points
Use nearby store dry ice packs when you need fast pull‑down and true frozen conditions. Size packs to cooler volume, climate, access frequency, and duration. Vent vehicles and coolers, protect products with simple buffers, and plan disposal in a ventilated area.
Action plan
Pick your format (pellets for speed, blocks for duration). 2) Use the quick estimator to set a starting mass. 3) Layer product, buffer, then nearby store dry ice packs. 4) Vent during transport. 5) Log what worked to refine your next trip. Need a tailored plan? Contact Tempk for a quick sizing consult.
About Tempk
We are a cold chain solutions team focused on practical field results. Our guidance blends operational simplicity with data‑driven heuristics. We design tools and checklists that help you choose and use nearby store dry ice packs efficiently, with two concrete advantages: quick mass estimators you can apply on the spot, and packaging setups that reduce waste without risking product quality.
Call to action: Speak with Tempk for sizing help or an audit of your cooler workflow.
Industrial Dry Ice Packs: 2025 Selection Guide

Industrial Dry Ice Packs: How to Choose in 2025?
Updated October 2025. If you move frozen goods at scale, industrial dry ice packs give deep‑cold capacity without meltwater. You get stable temperatures because carbon dioxide sublimates at −78.5 °C and absorbs large heat as it turns to gas. In this guide, you’ll specify pack formats, size by heat load, and lock in safe, auditable SOPs. You’ll leave with templates and tools you can train in minutes.
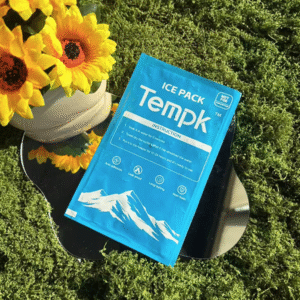
Right‑sizing industrial dry ice packs with a practical, five‑input method
Pack‑out templates for pallets, insulated totes, and ULDs with long‑tail keywords
Safety and compliance steps for UN1845 labeling and large‑room ventilation
Cost, labor, and OEE levers to lower total cost per delivered unit
When to switch to PCM or gel, and when to run hybrid layouts
What are industrial dry ice packs and where do they outperform?
Short answer: Industrial dry ice packs are vented, pre‑formed modules that hold dry ice “snow” or slabs in durable wraps. They spread cold evenly, fit standardized layouts, and scale from totes to pallets. You get quick training, cleaner lines, and fewer cold‑spot claims across long routes.
Explanation you can use: Think of loose pellets as sand, blocks as bricks, and industrial dry ice packs as predictable tiles. Tiles contour to product stacks and maintain an even cold face, which helps with ice cream texture, biologic integrity, and seafood glaze retention. In high‑throughput hubs, tiles cut packing variability and speed audits. They also reduce dust and mess compared with loose fill, especially when you reuse totes and sleeves.
Industrial dry ice pack formats for different lines
Details: You’ll see three main formats on industrial lines: flexible tiles, rigid slabs, and sleeve wraps. Flexible tiles fill corners in totes. Rigid slabs anchor long holds in pallet shippers. Sleeve wraps create a continuous “curtain” that shields warm walls. Match format to your lane, not to habit.
| Format | Handling | Best Use | What it means for you |
|---|---|---|---|
| Flexible tiles | Fast placement; conform to voids | Totes, parcel, ULD corners | Even coverage and quick SOPs |
| Rigid slabs | Fewer pieces; long duration | Pallet shippers, reefer gap‑bridges | Fewer touches; long lanes |
| Sleeve wraps | Continuous side “curtain” | Tall stacks; hot walls | Fewer hot spots; cleaner labels |
Practical tips and advice
Totes: Pre‑build tile kits for each SKU family to hit repeatable placement every shift.
Pallet shippers: Use slabs at the base and tiles as side curtains to block radiant heat.
ULDs: Keep a vent path near the lid and avoid taping over designed vents.
Real case: A seafood exporter standardized sleeve wraps as side curtains plus two slab layers in pallet shippers. Temperature spreads tightened, and rejected loads fell through summer peaks.
How to size industrial dry ice packs for pallets and totes?
Short answer: Start from heat load, not guesswork. Industrial dry ice packs remove heat as CO₂ gas leaves. Estimate hourly heat leak, multiply by route hours, and divide by sublimation energy. Add 10–30% buffer for door openings, staging, and delays.
Why it works: A shipper is a leaky thermos. Leakage depends on area, insulation, ambient, and openings. By treating your pack‑out like a steady heat leak with small disturbances, you get a conservative mass that holds frozen even on hot docks. Then you validate with a lane test and trim excess.
A five‑input sizing method for industrial dry ice packs
Use this practical method. It’s conservative and fits most totes and pallet shippers.
Example: A pallet shipper with A≈3.2 m² and R≈0.5 at 35 °C for 60 h:
Q≈(3.2/0.5)×55≈352 W → m≈(352×60×3.6)/571≈133 kg. Add 15% buffer → ~153 kg total, split as 60% slabs, 40% industrial dry ice packs for side curtains and lid.
| Variable | Typical range | How to estimate | Impact on you |
|---|---|---|---|
| R (EPS 40 mm) | 0.4–0.6 | From spec sheet | Sets baseline mass |
| R (PUR 40–60 mm) | 0.8–1.5 | Supplier or lab test | Cuts CO₂ requirement |
| R (VIP insert) | 2.0–3.0 | Premium liners | Shrinks shipper size |
| A (pallet shipper) | 2.8–3.8 m² | Measure outer box | Higher A → higher mass |
| Buffer% | 10–30% | New lanes → higher | Insurance for delays |
Practical tips and advice
Door openings: Add 5–10% extra industrial dry ice packs if dock doors cycle often.
Hot walls: Double the side curtain on sun‑facing trailer sides for summer lanes.
ULD weight: Balance slab placement to protect center of gravity and handling safety.
Real case: A biologics 3PL added a 10% lid top‑up kit of industrial dry ice packs for a hub prone to ramp delays. Excursions dropped significantly across two months.
Are industrial dry ice packs compliant and safe at scale?
Short answer: Yes—when you vent, label, and train. Industrial dry ice packs must be used with a vent path, UN1845 “Carbon dioxide, solid” marking, and trained staff. Never trap CO₂ in a sealed container; pressure can build.
What to remember: CO₂ displaces oxygen. Use ventilated rooms and vehicles. Apply net mass labels and keep safety data sheets accessible. For air, follow carrier rules for dry ice as a refrigerant. For ground, follow site and regional dangerous goods guidance. Keep loggers and acceptance checks in your SOP.
Industrial dry ice packs compliance checklist
Make this part of your pre‑ship routine.
| Topic | What to do | Where it belongs | Why it matters |
|---|---|---|---|
| Venting | Use vented lids or gaps; never tape vents closed | Shipper design & SOP | Prevents bulging |
| UN1845 label | Mark “Carbon dioxide, solid” + net mass | Exterior panels | Speeds acceptance |
| Documentation | Note dry ice on transport docs when required | Shipment file | Avoids holds |
| PPE & training | Gloves/eye protection; DG awareness | HR/LMS + floor signs | Fewer injuries |
| Storage | Ventilated staging; no sealed rooms | Warehouse plan | Safer CO₂ levels |
Practical tips and advice
Shift handoffs: Place a “Contains Dry Ice” tag on all totes left mid‑shift.
Fleet rules: For small vans, crack windows and avoid stacking vents against walls.
Return cycle: Stage a bin for spent industrial dry ice packs to sublimate safely.
Real case: After adding vent maps and refreshing DG training, a plant reported zero CO₂ alarm events for a full quarter while increasing outbound volume.
Pack‑out templates: industrial dry ice packs for pharma and food
Short answer: Template the layout, then scale. Industrial dry ice packs shine when you use standardized placements that anyone can repeat under pressure. Pallet, tote, and ULD layouts differ, but the logic is the same: bottom slab, side curtains, top lid layer, and a vent path.
How it helps: Templates reduce cognitive load, cut pack time, and stabilize temperature profiles. You standardize small details—like where the logger goes and which wall gets doubled—so results remain consistent across teams and shifts.
Standardized pack‑outs you can copy
Templates (paste into your SOP):
| Use case | Bottom | Sides | Top | Benefit |
|---|---|---|---|---|
| Long lanes | 2 slabs | Double curtain | Double tiles | Fewer hot spots |
| Short lanes | Dense tiles | Single curtain | Single tiles | Faster pack time |
| Heat waves | 2 slabs | Sleeve wraps | Double tiles | Better buffer |
Practical tips and advice
Seafood: Add a moisture barrier between film and cartons; keep industrial dry ice packs outside primary food wrap.
Ice cream: Spacer board below lid tiles prevents “frost ring” on pints.
Biologics: If freeze‑sensitive, place a thin −21 °C PCM panel against the payload.
Real case: A dessert brand adopted Template P1 with a PCM buffer on products. Texture complaints dropped sharply while hold time extended on hot routes.
When should you use PCM or gel instead of industrial dry ice packs?
Short answer: If you must hold +2 to +8 °C or protect freeze‑sensitive goods, use gel or PCM. Industrial dry ice packs excel at −20 °C and colder. Use hybrids when you need frozen capacity and gentle protection together.
Why hybrids work: PCM “sets the thermostat,” and industrial dry ice packs supply the raw cooling power. The PCM shields delicate items from direct contact while the dry ice handles door openings and long docks.
Hybrid designs with industrial dry ice packs
Starter recipes you can scale:
| Goal | Near product | Outer layer | Outcome |
|---|---|---|---|
| Freeze‑sensitive biologics | PCM −21 °C slab | Industrial dry ice packs | Avoids cold shock |
| Mixed frozen/chilled | Gel +5 °C zone | Industrial dry ice packs zone | Two temps, one shipper |
| Long lane, minimal CO₂ | VIP liner | Slabs + tiles | Smaller shipper, less CO₂ |
Practical tips and advice
Chilled only: Skip dry ice entirely; gel or PCM is safer and simpler.
Mixed loads: Separate with cardboard baffles so zones do not fight each other.
Weight limits: VIP liners often reduce required industrial dry ice packs enough to meet air thresholds.
Real case: A CRO layered −21 °C PCM against vials with industrial dry ice packs outside. The route held range while avoiding over‑freezing during ramp holds.
2025 trends: industrial dry ice packs and automation
Trend overview: Plants want lighter freight, faster training, and cleaner floors. Industrial dry ice packs now come in dust‑reduced wraps, stronger seams, and sizes that match common totes and pallet shippers. Expect greater use of VIP inserts on premium lanes and more wireless loggers. Data‑driven validation replaces guesswork, and standard tile kits reduce pack‑time variance.
Latest advances at a glance
Dust‑reduced wraps: Cleaner prep tables and fewer blocked scanners.
Modular tile kits: Pre‑counted bags matching specific SKUs and lanes.
Sensor workflows: Wireless loggers validate hold time without opening lids.
Market insight: Frozen e‑commerce and pharma trials keep growing. Standardized industrial dry ice packs reduce touch time and help new teams hit spec quickly. VIP liners plus predictable tiles often shrink the shipper one size, cutting freight while maintaining hold time. Plants measure cost per successful delivery, not material cost alone.
Frequently Asked Questions
Q1: How long do industrial dry ice packs last on a pallet?
Hold time depends on insulation, ambient heat, and openings. With PUR or VIP liners, industrial dry ice packs plus slabs often support 48–96 hours. Always lane‑test and add buffer.
Q2: Can I fly with industrial dry ice packs in a ULD?
Yes, when you mark UN1845, show net mass, and keep vents clear. Follow carrier rules for dry ice used as a refrigerant and confirm quantity limits before tender.
Q3: Will industrial dry ice packs damage packaging?
Direct contact can over‑freeze delicate items. Use a liner, spacer board, or thin PCM near the product, then surround with industrial dry ice packs.
Q4: Are industrial dry ice packs food‑contact safe?
Most wraps are not designed for direct contact. Keep packs outside primary packaging unless they are rated food‑contact safe. When unsure, add a barrier film.
Q5: How should we store industrial dry ice packs at the plant?
Use insulated, ventilated bins away from enclosed offices. Rotate stock first‑in, first‑out. Post a one‑page SOP, and keep gloves and eye protection at the station.
Q6: How do we reduce the amount of dry ice used?
Increase insulation R‑value, shrink voids, and double the side curtain on hot walls. These steps usually reduce industrial dry ice packs mass while keeping hold time.
Q7: Do industrial dry ice packs help during short power outages?
Yes. Load tiles near the top shelf of a freezer and keep doors closed. Cold air sinks, stabilizing temperature long enough to ride out short outages.
Q8: Can we reuse industrial dry ice packs?
Dry ice sublimates to gas, so the cold source is single‑use. Reuse the shipper and liners; replenish with new industrial dry ice packs for each cycle.
Q9: What data should we capture during validation?
Start/end temps, peak temp, logger placement, mass of industrial dry ice packs, ambient profile, and open‑door events. Keep graphs with SOPs for audits.
Summary and recommendations
Key takeaways: Use industrial dry ice packs when you need frozen reliability, clean handling, and repeatable layouts. Size by heat load, not guesses. Vent and label for safety and acceptance. Upgrade insulation or use PCM buffers for sensitive goods. Standardize pack‑outs and validate with loggers before scaling.
Action plan:
Pick insulation class (EPS/PUR/VIP) for your hottest lane.
Run the five‑input calculation, then add 10–30% buffer.
Choose a template (P1/T2/U3) and train with a one‑page SOP.
Lane‑test with loggers for a week, then lock the mass and placements.
Roll out kits and monitor claims, pack time, and delivered cost.
Engagement tools you can deploy today
Three‑Question Selector:
Is the target ≤ −20 °C? If yes, start with industrial dry ice packs.
Lane >48 h or warehouse >30 °C? Add slabs and consider VIP liners.
Freeze‑sensitive payloads? Place a thin PCM near product and tiles outside.
Self‑check rubric (score 0–5 each): Correct mass, ventilation path, insulation class, logger placement, DG labeling. Score ≥20 → ready for scale.
Sizing snippet you can paste into your SOP:
About Tempk
Tempk designs practical cold‑chain systems for plants, exporters, and 3PLs. We integrate industrial dry ice packs, premium liners, and data validation to reduce variability and speed training. Customers see steadier temperatures, fewer claims, and faster pack lines measured by OEE.
Call to action: Contact Tempk for a route‑specific design and a two‑week pilot with templates, kits, and logger analysis.
Refrigerated Dry Ice Pack Sheet: Buyer’s Guide 2025
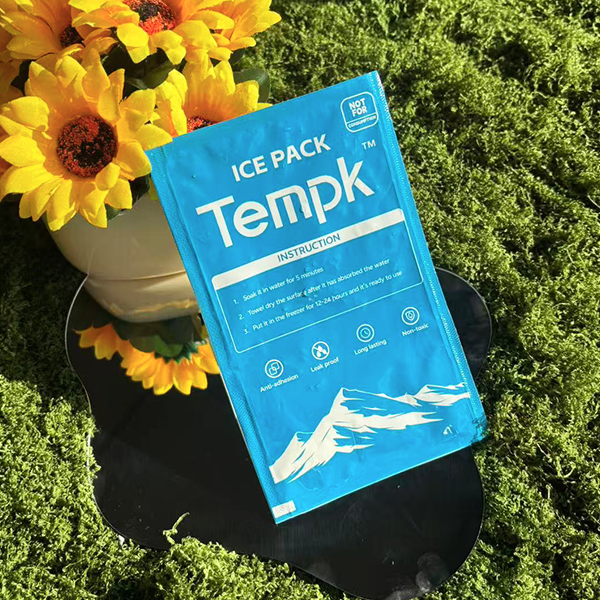
Refrigerated Dry Ice Pack Sheet: How Do You Choose?
If you ship frozen or sub‑zero goods, a refrigerated dry ice pack sheet is the most predictable way to hold −78.5°C for 24–96 hours. In this guide, you’ll size the right mass, select better wraps, meet UN 1845 rules, and validate performance. I’ll also cover 2025 trends so your refrigerated dry ice pack sheet delivers fewer excursions, lower costs, and easier audits.
What exactly makes a refrigerated dry ice pack sheet high‑performance for your lanes?
How do you size a refrigerated dry ice pack sheet for 24–96 hours with minimal waste?
Which safety steps, labels, and SOPs apply to a refrigerated dry ice pack sheet?
How to compare suppliers, validate results, and reduce total landed cost
When to blend a refrigerated dry ice pack sheet with PCM or gels
What is a refrigerated dry ice pack sheet, and why now?
A refrigerated dry ice pack sheet is a vapor‑permeable sleeve or matrix containing dry ice pellets or mini‑blocks, engineered for safe venting and clean handling. It delivers consistent cold, resists tearing, and fits a variety of coolers and shippers. The design prevents dust, controls CO₂ release, and reduces housekeeping.
In plain terms, you get frozen performance that feels as easy as using a gel pack sheet. You drop it in, close the lid, and trust the clock. A refrigerated dry ice pack sheet is portable, stackable, and labeled for quick audits. Reliability matters more in 2025 as lanes tighten and carriers compress sort windows. Predictability lowers reships and defends your margin during peak season.
How does construction affect a refrigerated dry ice pack sheet?
Look for dense pellets, uniform fill, reinforced seams, and breathable film. Blocks extend hold time; pellets fill voids and speed pull‑down. Hybrid layouts combine both behaviors. The “sheet” format keeps pellets in place, so packouts are repeatable across shifts.
| Construction Feature | Typical Benefit | Typical Trade‑off | What it means for you |
|---|---|---|---|
| Dense pellets (3–16 mm) | Fast pull‑down, better void fill | Slightly faster sublimation | Fewer warm spots in mixed loads |
| Mini‑blocks in sheet cells | Longer hold time | Less flexible fit | Better for long or delayed lanes |
| Reinforced seams | Fewer tears and leaks | Slight cost premium | Cleaner operations, fewer reworks |
| Vapor‑permeable film | Safe CO₂ venting | Needs intact wrap | Safer storage and transit |
Field note: A coastal seafood brand swapped loose pellets for a refrigerated dry ice pack sheet with reinforced seams. Cleaning time dropped, labels stayed legible, and claims fell during summer.
How do you size a refrigerated dry ice pack sheet for 24–96 hours?
Start with lane hours, shipper class, payload mass, and starting temperature. Convert total heat gain into dry ice mass, then translate mass into the number of sheets. Overfilling increases cost and risk; underfilling drives excursions and chargebacks. Your refrigerated dry ice pack sheet vendor should provide lane‑specific tables and seasonal adders.
Short version: plan for the route you actually run plus a realistic delay. If your product loads warm, include a pull‑down adder or pre‑condition it. When you upgrade insulation, reduce sheet count instead of letting “free cold” evaporate.
Quick estimator for a refrigerated dry ice pack sheet
Planning ranges (adapt to your SKUs)
| Target Hold Time | Basic Shipper | Premium Shipper | Ultra Shipper | What this means |
|---|---|---|---|---|
| 24 hours | 3–4 lb (1–2 sheets) | 2–3 lb (1–2 sheets) | 2 lb (1 sheet) | Better insulation reduces mass |
| 48 hours | 6–8 lb (3–4 sheets) | 5–6 lb (2–3 sheets) | 4–5 lb (2–3 sheets) | Add 10% during summer |
| 72 hours | 10–12 lb (5–6 sheets) | 8–10 lb (4–5 sheets) | 7–8 lb (3–4 sheets) | Mix blocks with pellet cells |
| 96 hours | 14–18 lb (7–9 sheets) | 12–15 lb (6–7 sheets) | 10–13 lb (5–6 sheets) | Validate with loggers first |
Pro tip: Replace one pellet‑only refrigerated dry ice pack sheet with a mini‑block sheet for lanes prone to courier delays. You’ll keep hold time without adding much weight.
Which materials help a refrigerated dry ice pack sheet last longer?
Material choice is your biggest lever after insulation. Sheets using food‑grade or pharma‑grade CO₂ improve cleanliness. Tight pellet size distribution ensures consistent packing. Breathable films manage CO₂ safely while resisting abrasion. Semi‑rigid cells keep media in place even when the shipper gets jostled.
Pellets, mini‑blocks, and hybrids—what should you choose?
Pellet‑dominant sheets: best for uneven payloads and fast pull‑down.
Mini‑block sheets: best for long lanes; fewer surfaces exposed to heat.
Hybrid sheets: a pellet core with rigid edges; balanced performance and clean handling.
| Sheet Type | Best For | Watch‑outs | Practical Benefit |
|---|---|---|---|
| Pellet sheet | Mixed shapes, rapid cool‑down | Slightly faster loss | Fills gaps and reduces hot spots |
| Mini‑block sheet | 72–96 hour lanes | Less flexible fit | Long, predictable hold time |
| Hybrid sheet | Busy operations | Small cost premium | Clean handling plus strong cold |
Reality check: If operators vary placement, use a refrigerated dry ice pack sheet with printed “THIS SIDE UP” and seam reinforcement. You get fewer tears and faster training for new staff.
Safety and compliance for a refrigerated dry ice pack sheet (UN 1845)
Dry ice is UN 1845, a Class 9 dangerous good, so labeling and venting matter. A refrigerated dry ice pack sheet should arrive with clear guidance on net mass, vent paths, PPE, and disposal. Air shipments require carrier‑specific limits. Ground shipments still need ventilation and training.
Keep SDS on file. Never seal a dry ice packout in a fully airtight container. Train handlers on cryogenic gloves and eye protection. Keep sheets off wet floors to avoid sticking and tearing. Use orientation arrows and photos in your SOP to reduce mistakes on busy shifts.
Compliance checklist (copy/paste into your SOP)
UN 1845 mark plus net dry ice mass where required
Class 9 label as applicable and package venting paths
Photo‑based SOP for refrigerated dry ice pack sheet placement
PPE: cryogenic gloves and eye protection at every station
SDS access and annual training records for audits
| Requirement | Air Shipment | Ground Shipment | Why it matters |
|---|---|---|---|
| UN 1845 + net mass | Always | Often | Faster inspections and fewer holds |
| Venting | Always | Always | Prevents pressure build‑up |
| Driver instructions | Carrier‑specific | Recommended | Safer delivery, fewer claims |
| Training & SDS | Yes | Yes | E‑E‑A‑T, worker safety, compliance |
Validation SOP for a refrigerated dry ice pack sheet
Validation proves your packout works before scale. Run pilots in summer and winter on the longest lane. Include a planned delay. Place the data logger near the payload’s warmest point. Lock the SOP only after the refrigerated dry ice pack sheet passes without manual re‑icing.
A lean validation blueprint
Define success: temperature band, hours, and allowed spike time.
Build SOP: step‑by‑step photos showing sheet placement and orientation.
Run tests: normal lane plus a 12–24 hour delay scenario.
Analyze: mean, min, max, and time over threshold.
Roll out: train, audit quarterly, and update seasonally.
Actual outcome: After switching to a refrigerated dry ice pack sheet with mini‑blocks, a diagnostics network cut average dry ice mass from 12 lb to 8 lb and reported zero excursions across 40 pilot shipments.
Hybrid packouts: refrigerated dry ice pack sheet + PCM or gel
Blend when your product can tolerate higher setpoints or when seasons swing. A refrigerated dry ice pack sheet maintains deep‑frozen conditions; PCM or gel smooths the curve and cushions fragile goods. During shoulder seasons, a thin PCM lid above the sheet can reduce total CO₂ while preserving margin.
Combining media without surprises
Keep payload off direct contact using a corrugate tray when frost is a risk.
Place a PCM lid to buffer openings and protect labels from condensation.
Validate both components together; mixed systems behave differently.
| Hybrid Setup | Frozen SKUs | Chilled SKUs | Your take‑away |
|---|---|---|---|
| Mini‑block sheet + PCM lid | Excellent | Overkill | Long hold + shock protection |
| Pellet sheet + gel packs | Not for frozen | Ideal | Shoulder‑season savings |
| Pellet‑base + mini‑block topper | Excellent | N/A | Faster pull‑down with longer hold |
Cost and ROI: how a refrigerated dry ice pack sheet pays back
Predictable cold lowers re‑icing, claims, and courier surcharges. Unit price can be misleading; failures are expensive. A clean refrigerated dry ice pack sheet reduces dust, protects labels, and speeds packing. Add a low‑cost data logger and you can end disputes with facts.
Levers you can control this quarter
Right‑size mass: Avoid “just add more” habits that waste 20–30%.
Upgrade insulation: Better R‑value cuts sheet count by one or two.
Consolidate SKUs: Two or three refrigerated dry ice pack sheet sizes cover most orders.
Standardize SOPs: QR or photo steps raise first‑shift and night‑shift consistency.
Instrument lanes: Even basic loggers reduce claims and speed approvals.
| Cost Component | What you pay | Sheet impact | Practical result |
|---|---|---|---|
| Dry ice mass | Per pound | Less with Premium/Ultra | Fewer courier surcharges |
| Packaging labor | Per order | Faster with sheet format | Shorter cycle time |
| Housekeeping | Per shift | Less dust and debris | Cleaner stations |
| Claims | Per failure | Fewer excursions | Defend revenue and CX |
Supplier scorecard for refrigerated dry ice pack sheet vendors
Ask for data, not adjectives. Credible partners publish CO₂ purity, pellet size distribution, seam durability, and permeability. They provide lane modeling, validation support, and regional hubs to ship fresher sheets with less transit loss. SKUs should stay consistent season to season so your SOP doesn’t drift.
Copy this scorecard
| Criterion | Acceptable | Best‑in‑Class | Why you care |
|---|---|---|---|
| CO₂ purity | Food‑grade | Pharma‑grade | Clean payload environment |
| Pellet variance | ±3 mm | ±2 mm | Consistent packouts |
| Seam strength | Single stitch | Reinforced seams | Fewer tears |
| Permeability | Meets vent spec | Tested across temps | Safer storage |
| Hubs & lead time | 1–2 hubs | 3+ hubs | Fresher refrigerated dry ice pack sheet |
Sourcing moves that work: Request three lane‑matched validations from the last 12 months. Confirm next‑day availability in peak season. Map SKUs to SOP steps so new staff can follow without guesswork.
Field use: refrigerated dry ice pack sheet for travel and labs
Outside parcel networks, openings and ambient swings are bigger risks. For camping, catering, or field labs, treat a refrigerated dry ice pack sheet like a small stove: vented, handled with gloves, and never inside sealed tents or cars. Consider one spare sheet as a deliberate buffer.
Field‑ready guidance
Use latching coolers with gasketed lids and a small vent crack.
Add a cardboard tray between sheet and food to avoid freezer burn.
Pack in layers: base mini‑block sheet, payload, pellet topper.
Expect shorter life in hot or windy conditions; plan an extra sheet.
| Scenario | Tip | Why it helps | Real‑world impact |
|---|---|---|---|
| Road trip | Vent the cooler slightly | Prevents pressure | Safer handling |
| Multi‑day hike | Block base + pellet topper | Long hold + fit | Fewer resupplies |
| Field lab | Logger inside cooler | Data for notes | Repeatable setup |
2025 trends in refrigerated dry ice pack sheet solutions
In 2025, operations lean toward hybrid sheets with reinforced seams, compact SKUs, and simple QR SOPs. Regional hub networks reduce mass variability, so teams can trim buffers without raising risk. Recyclable liners are replacing EPS in moderate lanes, and small, disposable data loggers are becoming default.
Latest developments at a glance
Hybrid cells: Pellets inside semi‑rigid cells resist abrasion and extend hold time.
QR playbooks: Scannable steps standardize refrigerated dry ice pack sheet placement.
Greener liners: Lighter shippers lower courier fees and waste without sacrificing performance.
Market insight: Many shippers cover 80% of orders with just two refrigerated dry ice pack sheet sizes plus seasonal adders. This reduces training time and picking errors while keeping claims low.
FAQ: refrigerated dry ice pack sheet
How cold is a refrigerated dry ice pack sheet, and how long will it last?
It targets −78.5°C and typically holds for 24–96 hours depending on shipper class, sheet mass, and ambient heat. Add 10–20% in summer.
Can I combine a refrigerated dry ice pack sheet with PCM or gel?
Yes. Use the sheet for frozen control and PCM or gel to cushion and smooth openings. Validate both together.
Do I need special labels for a refrigerated dry ice pack sheet?
Air shipments usually require UN 1845 and net mass with clear venting. Ground shipments still need ventilation and training.
How many sheets do I need for 48 hours?
A premium shipper often needs 5–6 lb total, or two to three refrigerated dry ice pack sheet units. Round up to your SKUs.
Is a refrigerated dry ice pack sheet safe in cars or tents?
Only with ventilation. Never seal in confined spaces. Use gloves and keep the cooler cracked for airflow.
Can a refrigerated dry ice pack sheet ship internationally?
Yes, but expect carrier rules, customs delays, and longer lanes. Validate your longest route and add buffer mass.
How should I dispose of a refrigerated dry ice pack sheet after delivery?
Let remaining dry ice sublimate in a ventilated area, then recycle packaging if possible. Avoid drains and sealed bins.
Summary and recommendations
A refrigerated dry ice pack sheet delivers predictable sub‑zero control, safer handling, and lower total cost when matched to your lanes. Size by hours and insulation, not guesswork. Validate in summer and winter with data loggers. Standardize SKUs, reinforce training with photo SOPs, and use hybrid sheets where lanes are variable.
Next steps:
Map your top three lanes and worst‑case hours.
Pilot two packouts using a refrigerated dry ice pack sheet with different shipper classes.
Validate with loggers, lock the SOP, and review quarterly.
CTA: Need help sizing and validating your sheet setup? Ask Tempk for a no‑cost lane model and pilot plan.
About Tempk
We design practical cold chain systems around the refrigerated dry ice pack sheet, premium insulation, and simple SOPs. Our team supports lane modeling, seasonal validation, and regional fulfillment to keep sheets fresh and predictable. Customers report fewer excursions and faster approvals after standardizing on our sheet‑based pack families.
Ready to improve reliability? Request a lane assessment and pilot schedule with Tempk.
Camping Dry Ice Pack Sheet: 2025 Field Guide
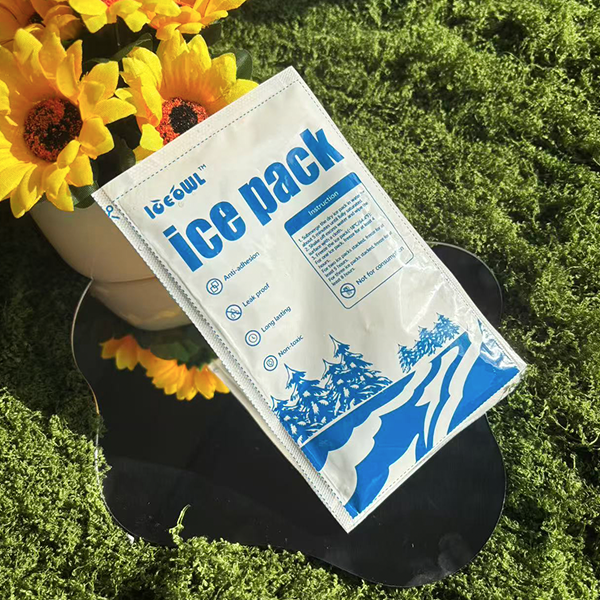
Camping Dry Ice Pack Sheet: Which One Should You Use?
You came to choose a camping dry ice pack sheet that keeps food safe and drinks cold without the chaos of loose pellets. This guide shows how to size sheets for 24–72 hours, pack your cooler correctly, and avoid CO₂ hazards at camp. You’ll get simple rules of thumb, tables you can use, and a quick calculator for your cooler volume.
Which camping dry ice pack sheet format fits day trips vs long weekends?
How many sheets do you need for 24, 48, and 72 hours?
How do you pack a cooler so corners don’t turn lukewarm at noon?
What safety rules matter when using dry ice outdoors?
What is a camping dry ice pack sheet and how does it work?
Short answer: A camping dry ice pack sheet is a flexible panel that slows dry ice loss, spreads cold more evenly, and protects food from direct contact. It lines the cooler walls, creates a “cold perimeter,” and vents CO₂ safely.
Why it helps: Loose pellets flash off fast in warm air. Blocks leave hot corners. A camping dry ice pack sheet offers stable release with fewer hot spots. It also reduces lid-open penalties because the perimeter recovers quicker after you grab items.
How does a camping dry ice pack sheet manage sublimation?
Dry ice cools by sublimating—going straight from solid to gas. A camping dry ice pack sheet adds a thin insulative barrier that cuts airflow over the dry ice, reducing rapid loss. Micro-vents let CO₂ escape so the cooler doesn’t swell. Think of it as a breathable jacket: slows heat in, lets gas out.
| Mechanism | What happens | Why it matters | For you |
|---|---|---|---|
| Convection control | Less warm air touches dry ice | Slower sublimation | Longer hold with less ice |
| Radiant buffering | Reflective outer face reduces heat gain | Cooler walls stay colder | Fewer warm corners |
| Contact control | Sheet separates payload from ice | No freezer burn | Safer milk, greens, meat |
Practical wins you’ll notice
Even cooling: The wall-lined camping dry ice pack sheet keeps corners closer to center temperature.
Cleaner pack-outs: No pellets stuck to cans, no messy shards.
Faster training: One-page SOP with three photos is enough for the whole group.
Trail story: A family on a 48‑hour summer trip lined a 45‑qt cooler with a reflective camping dry ice pack sheet and added a thin pellet pad on top. Lunch meat stayed firm through two hot afternoons, and they used about 15% less dry ice than last year.
How many camping dry ice pack sheet panels do you need?
Short answer: Use a simple rule, then adjust for heat and how often you open the lid.
Baseline rule: For typical summer camping (daytime 20–30 °C), plan ~1.0 kg of dry ice per 10 L of cooler space per 24 hours. A full perimeter of camping dry ice pack sheet often reduces required mass by 10–20% because it slows losses and protects edges.
Five-step sizing you can reuse:
Find your cooler’s usable volume in liters.
Pick your target: 24, 48, or 72 hours.
Baseline dry ice mass = Volume/10 × Days × 1.0 kg.
Apply sheet efficiency (subtract 10–20% if you fully wall-line).
Convert to sheet count using per-sheet weight (e.g., 0.75 kg each). Add a thin pellet top layer if daytime peaks exceed 30 °C or you open the lid a lot.
Two-minute calculator (paste into your trip notes)
| Cooler (internal L) | Hours | Baseline (kg) | With sheet (−15%) | Open-lid factor (+10%) | If sheet = 0.75 kg | You’ll pack |
|---|---|---|---|---|---|---|
| 28 L day cooler | 24 | 2.8 | 2.38 | 2.62 | 3.49 | 3–4 sheets |
| 45 L weekend | 48 | 9.0 | 7.65 | 8.42 | 11.23 | 11–12 sheets |
| 60 L group trip | 72 | 18.0 | 15.30 | 16.83 | 22.44 | 22–23 sheets |
These are starting points. If nights drop under 15 °C, you can trim by ~5–10%. If days push past 35 °C, add 10–15%.
Use‑case quick picks
Day hikes with a small cooler: 2–3 camping dry ice pack sheet panels, no pellets, pre-chill beverages.
Two‑night family trip: Wall-line with sheets, add a thin pellet pad on top, keep milk in the center.
Three‑night basecamp: Full perimeter, reflective lid liner, pellets on top, daily “cold swap” of dinner to the center.
Which camping dry ice pack sheet materials last longest?
Short answer: Choose a durable outer film with a thin, closed‑cell core and micro‑venting. If you camp in hot sun, use reflective facing.
Material guide you can trust:
Outer film: Tough PE or co‑extruded films resist cracking at low temps and rough handling.
Insulative core: Thin closed‑cell foam reduces airflow without adding bulk.
Micro‑vents: CO₂ escapes steadily, so the cooler doesn’t swell or force a gap.
Edge binding: Reinforced edges prevent fray and keep fibers out of food.
Vacuum‑sealed vs quilted vs reflective
Vacuum‑sealed: Smooth, wipeable, and low lint—great near open produce or dairy.
Quilted/stitched: Bends well around corners, ideal for tight coolers.
Reflective‑faced: Cuts radiant heat; helpful on tailgates or open campsites.
| Format | Durability | Thermal steadiness | Flex around corners | Best for |
|---|---|---|---|---|
| Vacuum‑sealed camping dry ice pack sheet | High | High | Medium | Clean pack-outs, dairy-heavy coolers |
| Quilted/stitched camping dry ice pack sheet | Medium‑High | Medium‑High | High | E‑comm coolers, mixed shapes |
| Reflective‑faced camping dry ice pack sheet | Medium | High in sun | Medium | Hot, sunny camps and tailgates |
Field test tip
Bring a spare panel. If someone over‑packs the top with cans, slide one camping dry ice pack sheet between the payload and lid to buffer radiant heat during lunch.
How to pack a cooler with a camping dry ice pack sheet?
Short answer: Build a cold perimeter, shield food from direct contact, and keep a vent path for CO₂.
Standard camping pack‑out:
Pre‑chill the cooler in a cool room or with a sacrificial ice bag.
Line all four walls with a camping dry ice pack sheet.
Add a corrugated spacer or +5 °C PCM panel between the liner and food.
Place raw meat lowest, dairy in the center, drinks on the sides.
Add a thin pellet pad or a fifth sheet on top for long days.
Close the lid and check that the gasket is not fully airtight—CO₂ must vent.
Camping dry ice pack sheet for car‑camping vs backpacking
Backpacking with dry ice is uncommon due to weight and venting risks in soft packs. For car‑camping, a rigid cooler plus camping dry ice pack sheet is simple and safe when you keep the box outside the tent and crack the drain for gas escape.
| Scenario | Cooler type | Sheet setup | For you |
|---|---|---|---|
| Car‑camping weekend | 45–55 L rigid | Wall‑line + top pad | Stable temps with simple SOP |
| Hot tailgate | 60 L rigid, reflective lid liner | Reflective sheets + pellet top | Fewer warm sodas at 2–4 PM |
| Fishing day trip | 28–35 L rigid | Two side sheets + bottom pad | Cleaner fillet storage |
Do’s and don’ts at camp
Do keep the cooler in shade and raise it off hot truck beds.
Do pre‑chill drinks the night before.
Don’t store dry ice in a sealed tent or car.
Don’t place fresh greens directly on a camping dry ice pack sheet—use a spacer.
Camp example: Two couples used a 60‑L cooler, reflective camping dry ice pack sheet, and a top pellet pad. They opened the lid hourly at a lakeside camp. Milk stayed cold and lettuce crisp after 50 hours in 30 °C afternoons.
Is a camping dry ice pack sheet safe and compliant outdoors?
Short answer: Respect CO₂ gas, protect skin, and keep ventilation. The camping dry ice pack sheet helps by separating food from direct contact and by reducing rapid sublimation.
Safety checklist you can print:
Ventilation: Never store the cooler in a closed tent or trunk overnight.
PPE: Use insulated gloves when handling the camping dry ice pack sheet or pellets.
Contact: Keep a spacer between sheet and fresh produce.
Kids & pets: Keep them away during pack‑out and unloading.
Disposal: Let the remainder sublimate outside, away from curious hands.
Common mistakes (and fixes)
| Mistake | Why it hurts | Fast fix | Your benefit |
|---|---|---|---|
| Sealing the lid airtight | CO₂ pressure + warmer temps | Leave a micro‑vent path | Safer, steadier temps |
| Sheet only on lid | Warm corners remain | Wall‑line with camping dry ice pack sheet | Even cooling |
| Pellets buried under food | Food freezes or blocks gas | Pellets on top or bottom pad | Controlled cooling |
| Overfilling | Wasted mass, slower packing | Use the calculator and round up one sheet | Saves money and time |
How to reduce cost and waste with a camping dry ice pack sheet?
Short answer: Better placement beats more dry ice. A camping dry ice pack sheet reduces overfill and food waste by stabilizing corner temps.
Savings sources:
Right‑sized fill: Typically 10–20% less dry ice with full wall‑lining.
Fewer throw‑aways: Eggs, greens, and dairy survive the afternoon rush.
Reusable: Many sheets handle multiple weekend trips if wiped and dried.
Fast ROI check
| Metric | Pellets only | With camping dry ice pack sheet | Meaning |
|---|---|---|---|
| Dry ice mass for 48 h, 45 L | ~9.0 kg | ~7.5–8.4 kg | 10–20% reduction |
| Warm-corner incidents | Higher | Lower | Less food waste |
| Cleanup time | Longer | Shorter | Fewer shards, less water |
2025 trends in camping dry ice pack sheet designs
Trend overview: In 2025, camping dry ice pack sheet makers focus on reflective skins for radiant control, cleaner films that wipe fast, and micro‑vent patterns that keep CO₂ flowing without swelling. Fold‑line modular panels let one size fit multiple cooler models.
Latest advances at a glance
Reflective outer facings: Lower heat gain on open sites.
Sensor pockets: Slide in a compact logger to check temps on test trips.
Fold lines & snaps: Resize one camping dry ice pack sheet for 28–60 L coolers.
Low‑lint surfaces: Better for produce and dairy.
Hybrid packs (sheet + PCM): Smooth 2–8 °C for sensitive foods.
Market insight: Car‑campers choose predictability over the cheapest per‑kg price. Clear instructions plus a reliable camping dry ice pack sheet beat a mystery bag of pellets every time.
Camping dry ice pack sheet—interactive self‑assessment
Answer three quick questions to pick your starting setup.
How hot will afternoons get?
Under 25 °C → Efficiency factor 0.9
25–32 °C → Efficiency factor 0.85
Over 32 °C → Efficiency factor 0.8
How often will you open the lid?
Few times/day → Opening factor 1.0
Hourly or more → 1.1
What’s your cooler volume?
Check spec sheet, subtract 10–20% for baskets.
Multiply the factors using the calculator above to estimate sheet count.
Camping dry ice pack sheet FAQs
Q1: Can I place food directly against a camping dry ice pack sheet?
Use a corrugated spacer or a +5 °C PCM pad. The camping dry ice pack sheet cools best when it breathes and your food avoids cold shock.
Q2: Is a camping dry ice pack sheet better than block dry ice?
Often yes for mixed loads. Blocks make cold zones but leave warm corners. A camping dry ice pack sheet evens things out.
Q3: How do I store a sheet between trips?
Wipe, dry fully, and hang flat. Avoid sharp folds. Your camping dry ice pack sheet should last multiple weekends.
Q4: Will a sheet make my cooler lid pop open?
Not when it’s micro‑vented and you leave a vent path. Never hermetically seal around dry ice.
Q5: Can I sleep with the cooler in the tent?
No. CO₂ is heavier than air. Keep the camping dry ice pack sheet and cooler outside or in a ventilated area.
Q6: What if I only camp one day?
Two to three camping dry ice pack sheet panels often cover a 28–35 L cooler with minimal pellets.
Summary and next steps
Key points: A camping dry ice pack sheet builds a cold perimeter, keeps corners cold, and reduces overfill. Start with 1.0 kg per 10 L per day, subtract 10–20% for full wall‑lining, then adjust for heat and lid‑open habits. Use a spacer for produce and dairy, keep ventilation, and test once before a big trip.
Action plan:
Measure cooler volume and pick trip hours.
Run the calculator and round up one camping dry ice pack sheet for safety.
Wall‑line, add a spacer, then finish with a top pad or pellets.
After the trip, note what lasted longest and update your SOP for next time.
About Tempk
We design practical cold‑chain gear for food, pharma, and outdoor use. Our camping dry ice pack sheet line focuses on predictable cooling, cleanable surfaces, and clear one‑page SOPs. Two advantages you’ll notice: reinforced edges that resist fray and reflective options that fight midday heat.
Ready for a tailored setup? Share your cooler size, trip hours, and expected highs—our team will return a right‑sized camping dry ice pack sheet configuration and a printable pack‑out sheet.
UK Dry Ice Packs: 2025 Sizing, Safety & Compliance
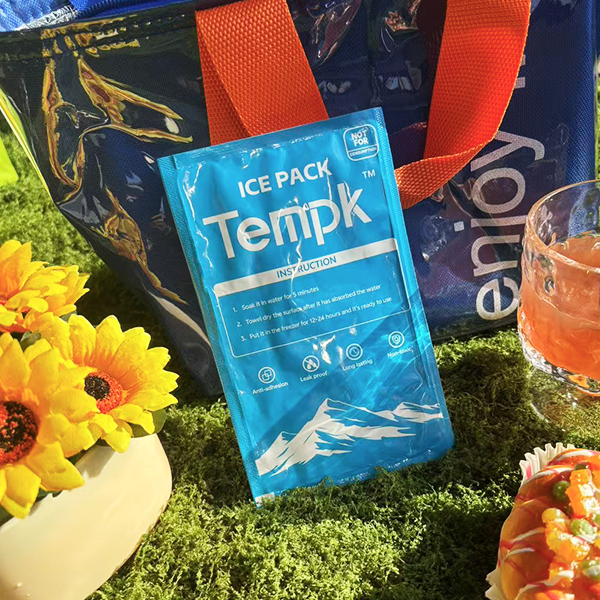
UK Dry Ice Packs: How to Ship Frozen Goods Safely?
You want frozen products to arrive rock‑solid without expensive over‑packing. UK dry ice packs keep goods below –18 °C for long lanes when gel or standard PCM can’t cope. In this 2025 guide, you’ll get right‑sizing rules, IATA/ADR labeling, carrier do’s and don’ts, and field‑tested pack‑outs that lower cost and risk on UK routes.
How do UK dry ice packs work and when are they the right choice for frozen shipping in the UK?
How many kilograms of dry ice hold for 24–96 hours on typical UK lanes and seasons?
How to pack and label UK dry ice packs to meet IATA PI 954 and ADR requirements?
Should you choose UK dry ice packs or –21 °C PCM or gel packs for different payloads?
What 2025 trends affect sourcing, safety, and sustainability of UK dry ice packs?
What are UK dry ice packs and when should you use them?
Dry ice is solid carbon dioxide (UN 1845), class 9, at –78.5 °C; it cools as it sublimates to gas. That ultra‑low temperature gives UK dry ice packs unmatched “cold headroom” for ice cream, biologics, and specialty foods over 48–96‑hour lanes or during heat spikes. It’s ideal when you must maintain deep‑frozen stability or recover quickly from depot dwell.
Why it matters: Each kilogram of dry ice absorbs substantial heat as it turns to CO₂ gas, so small masses deliver big protection. Because CO₂ gas is heavier than air, you must vent packages and storage areas to avoid oxygen displacement risks.
How do UK dry ice packs differ from gel or –21 °C PCM?
“Extra cold” in practice means deeper temperature capability and higher cooling capacity. Gel holds around 0 °C and suits chilled. –21 °C PCM stabilizes frozen but struggles with long hot dwell. UK dry ice packs run at –78.5 °C, offering faster pull‑down and better recovery from short heat spikes, if you respect venting and labeling rules.
| Cooling Source | Typical Temp Band | What to expect | What it means for you |
|---|---|---|---|
| UK dry ice packs (UN 1845) | –78.5 °C | Deep‑freeze control; gas needs venting | Best for frozen, 48–96 h; label Class 9 |
| –21 °C PCM | ~–21 °C plateau | Stable but less “recovery power” | Good for stable 24–72 h lanes |
| Gel packs | 0 °C to –5 °C | Chilled only | Not for deep‑frozen payloads |
Practical tips you can use today
Top‑load placement: Put UK dry ice packs above the payload; CO₂ gas sinks and bathes goods in cold air.
Create gas paths: Never seal gas‑tight; a small vent or “breathing” lid prevents pressure build‑up.
Protect people: Use insulated gloves and eye protection; avoid confined, unventilated rooms.
Real‑world example: A UK dessert brand moved to top‑loaded UK dry ice packs with a vented lid and reduced summer failures from 6.5% to under 1% while trimming coolant by ~15% after logger validation.
How to size UK dry ice packs for 24–96 hours?
Start with heat load, then convert to kilograms of dry ice. A field rule for mid‑size EPS (12–24 L) is 2–3 kg for ~24 h, 4–6 kg for ~48 h, and 6–9 kg for ~72 h—always validate with loggers and your lane profile. Better insulation (2″ EPS or VIP) cuts mass substantially. The goal is right‑sizing, not oversizing.
A simple 5‑step sizing method (you can copy)
Estimate heat leak (Q̇): U‑value × surface area × ΔT.
Multiply by time: Q=Q˙×tQ = Q̇ \times t (kJ).
Add product pull‑down: If starting above target.
Add 20–30% safety margin: For depot dwell or weekend hold.
Divide by 571 kJ/kg: First‑pass kilograms of UK dry ice packs.
| Lane Duration | EPS 1.5″ wall | EPS 2.0″ wall | VIP shipper | What it means |
|---|---|---|---|---|
| 24 h | 2–3 kg | 1.5–2.5 kg | 1–2 kg | Start lean; validate with two loggers |
| 48 h | 4–6 kg | 3–5 kg | 2–4 kg | Add buffer in summer |
| 72 h | 6–9 kg | 5–7 kg | 3–6 kg | Consider side runners |
| 96 h | 8–12 kg | 7–10 kg | 5–8 kg | Move to VIP + hybrid PCM |
“UK dry ice packs” quick‑calc you can adapt
Pro tip: Logger curves reveal when dry ice is gone—the temperature slope steepens. If that happens long before delivery, increase mass or upgrade insulation, not both.
How to pack and label UK dry ice packs to comply?
Follow IATA Packing Instruction 954 (air) and ADR (road), mark UN 1845 “Carbon dioxide, solid (Dry ice)”, and display net dry ice mass in kg with a Class 9 label. Packages must allow CO₂ to escape to prevent pressure build‑up; never use airtight containers.
Document updates for 2025: The IATA DGR 66th Edition addendum (April 30, 2025) re‑emphasizes aircraft‑type limits for UN 1845 and the requirement to indicate the net dry ice weight. Keep your ops manual aligned with the current addendum and carrier variations.
UK carrier reality check (parcel networks)
Royal Mail/Post Office: Consumer parcels cannot use dry ice for food; the guidance explicitly says “Don’t use dry ice or frozen water.” Businesses should also verify restricted goods lists before attempting DG shipments.
Express integrators (FedEx/UPS): Dry ice is accepted as dangerous goods with PI 954 rules; contracts or DG approvals may be required.
DPD/road networks: Policies vary by country and service; dry ice as a coolant is possible under DG frameworks, but check operator guidance and ADR obligations.
Government overview: If you transport dangerous goods by road, follow official packing and labeling rules and ensure driver/company compliance.
Important nuance: A shipper’s declaration is generally not required for packages containing only UN 1845 used as a refrigerant for non‑dangerous goods, but you must still apply PI 954 markings/labels and net mass. Confirm carrier‑specific variations.
Vented packaging and labeling for UK dry ice packs
Do this every time:
Use packaging designed to vent CO₂ gas.
Mark “UN 1845”, “Dry Ice” or “Carbon dioxide, solid”, and the net kg of dry ice.
Affix the Class 9 hazard label in the correct format and position.
| Requirement | Why it matters | How to do it | For you |
|---|---|---|---|
| Venting | Prevents pressure build‑up | “Breathing” lid or vent holes | Safety & compliance |
| UN 1845 + net kg | Carrier acceptance | Print net mass legibly in kg | Faster induction |
| Class 9 label | DG identification | Use correct size & orientation | Avoid refusals |
UK dry ice packs vs –21 °C PCM vs gel: which wins your lane?
Match cold source to your temperature target and lane volatility. For deep‑frozen products and unpredictable dwell, UK dry ice packs deliver the best protection. For stable 24–48 h frozen lanes, –21 °C PCM can work and simplifies handling. Gel is ideal for chilled (0–5 °C) and not for deep freeze.
Total cost and risk trade‑offs
UK dry ice packs: Highest “cold headroom,” needs PPE, venting, labeling; economical for high‑value frozen goods.
–21 °C PCM: Great for stability and reusability; add a small top‑load of dry ice for summer heat spikes.
Gel: Cheapest pack‑out, but only for chilled.
| Option | Materials cost | Handling | Best use | What it means |
|---|---|---|---|---|
| UK dry ice packs | Medium | DG labeling & PPE | Frozen, 48–96 h | Lowest spoilage risk |
| –21 °C PCM | Medium‑High | Simple | Frozen, 24–72 h | Stable temps |
| Gel packs | Low | Simple | Chilled, 12–48 h | Not deep‑freeze |
Safety basics for UK dry ice packs (people and places)
Risks: Asphyxiation in poorly ventilated spaces, cold burns/frostbite, pressure build‑up in sealed containers. UK health and safety bodies and UK suppliers emphasize ventilation, PPE, and training as the core controls.
Practical controls:
Work in well‑ventilated rooms; monitor CO₂ where necessary.
Wear insulated gloves and eye protection; use tongs or scoops.
Store UK dry ice packs in insulated, non‑airtight containers; never in sealed car boots.
Train staff; keep SOPs simple and visual.
Note for air passengers (not cargo): UK CAA guidance limits personal baggage to ≤2.5 kg of dry ice per person when used to pack perishables, subject to airline approval. This is separate from cargo rules under PI 954.
Building a compliant pack‑out with UK dry ice packs
Use a top‑load, side‑runner design with a corrugate barrier and vent path. This pattern improves cold wash over the payload and reduces shifting.
Step‑by‑step pack‑out (repeatable SOP)
PPE & staging: Gloves, goggles, tongs, kraft wrap.
Box prep: Insert liner, tape seams, leave a vent gap.
Load product: Pre‑frozen items in a snug inner carton.
Add coolant: Top‑load UK dry ice packs; add side runners if space allows.
Void fill: Kraft paper; avoid blocking vents.
Seal & label: Vented lid; apply UN 1845, net kg, and Class 9; add orientation arrows.
Handoff: Record net kg and box ID in WMS for traceability.
Pack‑out QA signals to watch
| Logger signal | What you see | Likely cause | What to change |
|---|---|---|---|
| Early plateau end | Temp rises after 12–18 h | Too little dry ice | Add 20–30% mass |
| Saw‑tooth swings | ±5–10 °C oscillation | Loose pack‑out | Fill voids; add side runners |
| Gradual warm trend | ~0.5–1 °C/h rise | Insulation leak | Upgrade to 2″ EPS or VIP |
Sustainability and cost: can UK dry ice packs be greener?
Yes—right‑size the mass, upgrade insulation, and reduce failures. VIP or thicker EPS cuts required kilograms, lowering emissions from production and sublimation. Pair –21 °C PCM on the sides with a small top‑load of UK dry ice packs for recovery, not base load.
Disposal and storage: Ventilate rooms and vehicles; never dispose of dry ice in sinks or sealed bins. UK safety guidance highlights CO₂ displacement hazards and recommends well‑ventilated areas for use and disposal.
Three fast wins
Improve R‑value before adding mass: Insulation upgrades often save 20–40% dry ice.
Lane‑specific standards: Different UK lanes need different net kg; avoid one‑size‑fits‑all.
Post‑delivery guidance: A one‑page insert for recipients reduces incidents and support calls.
2025 trends in UK dry ice packs and frozen logistics
Regulatory clarity and data‑driven right‑sizing are the big shifts in 2025. The IATA DGR 66th Edition addendum (April 2025) underscores aircraft‑type limits and net‑mass indications for UN 1845, while carriers refresh acceptance checklists. UK frozen retail remains resilient, with trade press and market trackers reporting ongoing value growth and category innovation.
Latest developments at a glance
Updated acceptance checklists: Standardized PI 954 checks reduce induction errors and rejections.
Carrier policy transparency: FedEx/UPS UK refresh “how to ship dry ice” pages; contracts may be required.
Category momentum: UK frozen continues to attract shoppers seeking value and convenience, supporting more small‑batch frozen D2C offers.
Market insight: Despite price pressures, frozen convenience stays attractive in UK baskets, keeping demand steady for UK dry ice packs to protect high‑value frozen goods in e‑commerce and B2B lanes.
Image references (illustrative)
Interactive checklist: are your UK dry ice packs ready?
Score 0–2 for each item (0 = no, 1 = partly, 2 = yes). Add your points.
Lane profile validated with loggers in the past 90 days
Insulation verified (≥2″ EPS or VIP for ≥72 h lanes)
UK dry ice packs top‑loaded with side runners and barrier sheet
Vented lid; Class 9 label; UN 1845 + net kg marked
SOP card for receivers; PPE available at pack‑out
Results:
8–10 points: Good to ship frozen confidently.
5–7 points: Adjust mass or insulation and re‑test.
0–4 points: Pilot two pack‑outs before going live.
UK dry ice packs: FAQs
Can I send food with UK dry ice packs via Royal Mail?
No. Royal Mail guidance for sending food says don’t use dry ice or frozen water in parcels. Use DG‑capable couriers instead.
What must appear on the label for UK dry ice packs by air?
Display “UN 1845”, the words “Dry Ice” or “Carbon dioxide, solid”, the net weight in kg, and a Class 9 hazard label; the packaging must vent gas.
Do I need a shipper’s declaration if I only use UK dry ice packs?
Generally no—when dry ice cools non‑dangerous goods, a declaration isn’t required, but PI 954 markings still apply and operator variations may exist.
Are there special contracts for integrators?
Yes. UPS notes that dry‑ice shipments may require an ISC or DG contract; FedEx UK provides dry‑ice instructions and training requirements.
What about road transport requirements in the UK?
ADR applies to dangerous goods by road; ensure proper packaging, marking, and driver/company compliance.
Is dry ice safe to handle?
With ventilation, gloves, and eye protection, yes. Risks include asphyxiation and cold burns; follow UK safety guidance.
Summary & next steps for UK dry ice packs
Key takeaways: UK dry ice packs deliver the deepest freeze margin for UK lanes, but compliance matters. Right‑size by calculating heat load, then validate with loggers. Pack top‑load with vent paths, mark UN 1845 with net kg, and apply Class 9. For stability and sustainability, combine VIP or –21 °C PCM with a smaller dry‑ice top‑load.
Action plan: Pilot two pack‑outs with different UK dry ice packs masses and log both; upgrade insulation before adding kilograms; publish a one‑page SOP; confirm 2025 PI 954/ADR requirements with your carriers; review results in 30 days and lock lane standards.
About Tempk
We are a UK‑focused cold chain team delivering validated pack‑outs, compliant labeling, and lane‑specific sizing for UK dry ice packs. Our solutions include VIP/EPS shippers, –21 °C PCM, SOP templates, and training that reduce failures and total cost. We pair field testing with simple tools so your shipments arrive frozen—and stay that way.
CTA: Request a free frozen‑lane audit and get a tailored UK dry ice packs sizing sheet for your network.
Gel Dry Ice Packs: Safer, Longer, Greener
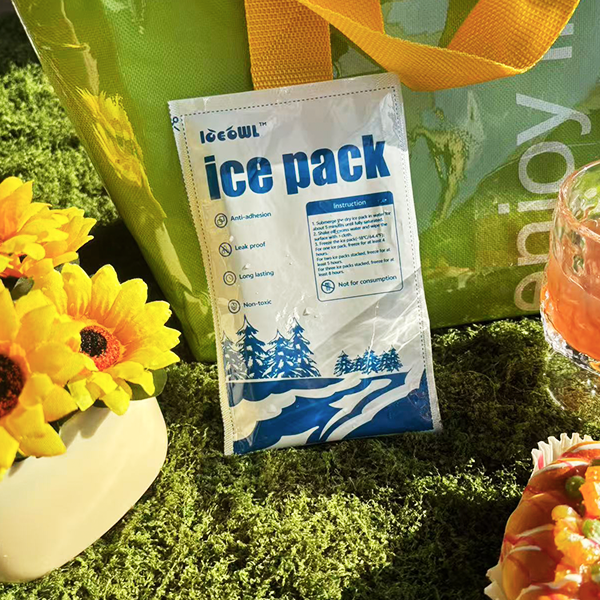
If you need deep-cold reliability without the waste, gel dry ice packs give you long hold times with simpler handling. You get fewer excursions, cleaner paperwork, and easier returns. The goal is practical performance: right-size coolant load, prevent freezing risks, and meet 2025 packaging rules with reusable shells and PFAS-free films.
How gel dry ice packs extend hold time while reducing coolant mass on −20 °C and −80 °C lanes.
When gel dry ice packs beat loose pellets for safety, handling, and pack-out repeatability.
How to size gel dry ice packs for 24–120 hours using simple heat-load math and SOP checklists.
Where gel dry ice packs fit against PCMs for +2 °C to +8 °C shipments and mixed networks.
How to build a reuse loop with gel dry ice packs that lowers cost and waste.
What are gel dry ice packs and why do they matter?
Direct answer: Gel dry ice packs encapsulate dry ice within a permeable gel matrix or engineered pouch that controls sublimation and contact. They deliver deep-freeze performance with fewer hot spots, safer handling, and more repeatable pack-outs than loose pellets. You avoid direct pellet-to-vial contact while maintaining −78.5 °C capability.
Explanation: Think of loose pellets like marbles that roll and create contact points. Gel dry ice packs act like cushions that spread the cold. They enable consistent loading patterns, reduce “cold shock,” and simplify training. For teams scaling across hubs, repeatable pack-outs with gel dry ice packs shorten onboarding and cut variance in real lanes.
How gel dry ice packs compare to pellets and slabs
Deeper detail: Loose pellets cool fast but shift during transit. Slabs cool evenly but can be bulky and hard to fit around odd shapes. Gel dry ice packs sit between the two: better contact control than pellets, more flexible than slabs, and easier to handle in small workspaces. They also streamline documentation, because weight per pack is standardized.
| Use Case | Pellets | Slabs | Gel Dry Ice Packs | What it means for you |
|---|---|---|---|---|
| Shape conformity | High but unstable | Low | Medium-High | Gel dry ice packs contour without rolling; fewer re-packs. |
| Pack-out speed | Medium | Low | High | Standardized units cut training time and errors. |
| Contact risk | Higher | Low-Medium | Low | Fewer freeze spots on sensitive payloads. |
| Vented safety | Requires checks | Requires checks | Built-in flow paths | Easier SOP for CO₂ venting. |
| Count/weight control | Messy | Simple | Very simple | Each pack has known net weight. |
Practical tips you can apply now
Standardize on three sizes of gel dry ice packs to cover 24 h, 72 h, and 120 h profiles.
Pre-cool packs and the liner; you’ll reduce initial load by ~5–10% in stable lanes.
Keep a 1.25× safety factor for long customs dwell or summer tarmac.
For fragile biologics, place a thin buffer pad between payload and gel dry ice packs.
Case snapshot: A specialty foods exporter moved from pellets to gel dry ice packs for multi-stop routes. The team cut pack-out time by a third, improved net-weight accuracy, and reduced re-shipments in summer peaks.
How to size gel dry ice packs for your lane?
Direct answer: Calculate heat load, then match the sublimation energy of gel dry ice packs to your duration profile. Right-sized gel dry ice packs beat “just add more” because mass inflates cost, EPR fees, and emissions without extending time proportionally.
Explanation: Estimate heat gain through your shipper (UA), add payload buffering, and multiply by hours and average ΔT. Dry ice sublimation provides ≈571 kJ/kg. Convert total heat load into required kilograms, then divide by pack size to get the count. Round up to whole packs for consistent SOPs.
Copy-ready calculator block (use in your SOP)
Pack-out checklist for gel dry ice packs
Inspect vent holes and lid gaps; never seal CO₂ in a tight liner.
Pre-condition shipper, payload, and gel dry ice packs for 30–60 minutes in a cool room.
Load packs evenly around the payload; avoid direct contact with fragile containers.
Mark outer carton with “UN1845” and net dry-ice weight; record on the waybill.
Photograph final arrangement for training and claims support.
| Sizing Input | Typical Value | Why it matters | For you |
|---|---|---|---|
| UA (W/°C) | 2–8 (mid-size shipper) | Defines heat leak | Lower UA = fewer gel dry ice packs needed. |
| Average ΔT (°C) | 20–40 | Drives load | Hotter lanes require more coolant. |
| Safety factor | 1.15–1.30 | Dwell unknowns | Use 1.25 for international air. |
| Pack net kg | 0.5–2.0 | Standardized unit | Simplifies count and labeling. |
Field-ready validation steps
Run a 48–72 h chamber test using your worst-case ambient profile.
Log internal temps at 1–5 min intervals at pack-out, mid-lane, and end.
Review film integrity after thaw; confirm no gel residue on payload.
Adjust gel dry ice packs count by ±1 pack based on margin to spec.
Gel dry ice packs vs PCMs: what should you choose?
Direct answer: Use gel dry ice packs for −80 °C and −20 °C lanes or when you must protect against prolonged hot dwell. Choose PCMs for +2 °C to +8 °C vaccines or foods that must not freeze. Gel dry ice packs are excellent when you need deep-cold and simple documents.
Explanation: PCMs hold a precise setpoint and are reusable. But deep-cold products and long lanes still favor gel dry ice packs because of energy density and global availability. Some networks blend both: PCM legs domestically, gel dry ice packs for international segments.
Your quick decision guide
Target ≤ −20 °C for 48–120 h? Choose gel dry ice packs with a fiber shipper.
Target +2 °C to +8 °C? Choose bio-based PCMs; avoid dry-ice contact.
Uncertain last-mile dwell? Combine PCMs with a small buffer of gel dry ice packs.
Fragile vials? Add a spacer pad between payload and gel dry ice packs.
| Criterion | Gel Dry Ice Packs | PCMs | What to do |
|---|---|---|---|
| Deep-cold (≤ −20 °C) | Best | Weak | Use gel packs; standardize counts. |
| Fridge range (+2 °C to +8 °C) | Risk of freezing | Best | Use PCMs; avoid dry ice. |
| Docs & labeling | UN1845 & venting | Fewer labels | Pick gel for deep-cold; PCMs for fridge. |
| Reuse potential | Medium-High | High | Reuse both; track cycles. |
Safety and compliance: get it right every time
Direct answer: Gel dry ice packs must vent CO₂, carry UN1845 marks, and list net dry-ice weight on the waybill. Use mono-material films and recycled-content shells to align with 2025 packaging rules. Keep PFAS-free materials on file for audits.
Explanation: The controlled form of gel dry ice packs helps with safe handling and predictable sublimation. But safety still depends on venting, placement, and documentation. Train every pack-out operator with the same steps, images, and sign-offs.
Compliance snapshot you can share internally
| Topic | What it means | Your action |
|---|---|---|
| UN1845 labeling | Declare “Carbon dioxide, solid” and net kg | Pre-print labels; record on waybill |
| Venting | CO₂ must escape safely | Keep lid gaps/vents unobstructed |
| Packaging rules (2025) | Lighter, recyclable, PFAS-free | Choose mono-material films and fiber shells |
| Operator variation | Airlines differ | Check the flight’s specific instructions |
Documentation block (paste into SOP)
Can gel dry ice packs reduce cost and emissions?
Direct answer: Yes—if you right-size the load and reuse the outer kit. Gel dry ice packs reduce product loss and re-shipments, which is where much of the footprint hides. Standardized pack counts also cut training time and errors.
Explanation: Dry ice often comes from captured CO₂ streams; the system impact depends on energy for capture, compression, and pelletizing. The fastest wins are operational: fewer excursions, lighter shippers, and higher return rates. Gel dry ice packs help on all three by being modular, countable, and easy to stage.
Metrics that prove “eco-friendly”
Excursions (%): Each percentage point avoided saves replacement cost and emissions.
Coolant kg per delivery: Lower mass with the same duration shows good sizing.
Pack-out time (min): Shorter time, fewer mistakes, higher throughput.
Return rate (%): More cycles per shipper = lower per-use footprint.
Building a reuse loop around gel dry ice packs
Direct answer: Design your program for 5–20 cycles per shell and liner. Gel dry ice packs support reuse because units are sealed, neat, and easy to inspect after thaw.
Explanation: Start with one region to learn returns. Use scannable codes, prepaid labels, and reminders 24–48 h after delivery. Track cycle counts and retire kits proactively. Engineer the liner to collapse flat, and specify films that survive condensation without delaminating.
Reuse math you can run today
Tips that raise cycle counts
Keep sizes simple: small, medium, large.
Add a “no-ice return” line in the instructions.
Offer a reusable-kit discount to B2B accounts.
Track damage codes to find weak points in gel dry ice packs handling.
Lane design: how to tailor gel dry ice packs by sector
Direct answer: Map temperature targets, dwell risks, and handling limits by sector. Then assign standard gel dry ice packs counts to each lane. Keep one spare pack in SOPs for summer or congested hubs.
Explanation: Food, clinical, and biotech lanes differ in acceptable temperature bands and labeling strictness. Use the same playbook structure but maintain sector-specific notes. That keeps training universal while respecting constraints.
Sector snapshots
Biotech & labs: Use gel dry ice packs for frozen enzymes, reagents, and cell lines. Add a buffer pad and strict UN1845 procedures.
Gourmet foods & D2C: Use gel dry ice packs for −20 °C pastries or ice cream. Design porch-dwell protection with extra top-layer packs.
Clinical trials: Standardize photo verification of pack-out, including gel dry ice packs placement and seals.
Seafood exports: Pre-cool kits at staging. For multi-stop routes, secure gel dry ice packs in corners to prevent drift.
| Sector | Risk | SOP tweak | Benefit |
|---|---|---|---|
| Biotech | Freeze shock on fragile vials | Spacer pad + even load | Fewer micro-cracks, higher yield |
| D2C | Porch dwell in heat | +1 top pack in summer | Lower melt-out claims |
| Clinical | Audit intensity | Photos + weight log | Faster QMS reviews |
| Seafood | Route changes | Corner-anchored packs | Better cold retention on detours |
2025 developments and trends shaping gel dry ice packs
Trend overview: Packaging rules favor lighter, recyclable, PFAS-free designs and transparent labeling. Training standardization becomes a cost lever. Reusable programs scale as carriers and customers normalize returns. Gel dry ice packs benefit from this shift because they simplify counting, staging, and documentation while maintaining deep-cold capacity.
Latest progress at a glance
Standardized units: Fixed-weight gel dry ice packs reduce miscounts and speed audits.
Better films: PFAS-free, mono-material films withstand condensation and cold flexing.
Right-sizing tools: Simple heat-load calculators integrate with WMS, assigning pack counts per order.
Regional hubs: Pre-cool rooms and shelf-ready gel dry ice packs improve throughput and lane stability.
Market insight: Heavier, mixed-material shippers face higher fees. The winners standardize on fewer sizes, use mono-materials, and push reuse. PCMs keep growing for fridge lanes, but gel dry ice packs remain the go-to for deep-cold and long dwell.
Common questions (FAQs)
Q1: Can gel dry ice packs touch my product directly?
Yes, but use a thin spacer for fragile vials or delicate packaging. This reduces local cold shock while keeping hold time strong.
Q2: How many gel dry ice packs do I need for 72 hours?
Run the calculator with your UA and ΔT. Many mid-size shippers need 3–6 standardized packs, plus one safety pack in hot months.
Q3: Are gel dry ice packs reusable?
The outer kit is; the dry ice itself sublimates. You can reuse the shell and liner for 5–20 cycles if films remain intact and clean.
Q4: What about airline rules?
Mark UN1845 and net dry-ice weight, verify venting, and follow any operator notes. Gel dry ice packs make the weight step easier.
Q5: Do gel dry ice packs work with data loggers?
Yes. Place the probe near the payload core, away from direct pack contact, for a true payload reading.
Q6: Will gel dry ice packs freeze +2 °C to +8 °C products?
If they’re inside the same cavity, yes. Use PCMs for fridge ranges to avoid freezing risk.
Q7: How do I avoid condensation damage after thaw?
Specify films with good cold-crack resistance, and allow a brief acclimation before opening.
Summary and recommendations
Key points: Gel dry ice packs provide deep-cold performance with safer handling, easier counts, and stable pack-outs. Right-sizing beats overloading. Use PCMs for fridge ranges, and use gel dry ice packs for −20 °C or −80 °C lanes. Design for reuse, mono-materials, and PFAS-free films to align with 2025 expectations.
Next steps: 1) Map lanes and seasonal ΔT. 2) Run the calculator and set standard counts of gel dry ice packs per lane. 3) Validate with a 48–72 h test. 4) Roll a reuse pilot with three kit sizes. 5) Train teams using the SOP blocks and photos.
About Tempk
We design and validate cold-chain systems that balance durability and sustainability. Our team right-sizes gel dry ice packs per lane, reduces coolant mass, and raises reuse cycles with practical SOPs. Expect fewer excursions, faster pack-outs, and simpler audits across complex routes.
Call to action: Ready to model your lanes and standardize gel dry ice packs? Request a 30-minute assessment to compare two candidate designs on duration, cost, and emissions.