


Shipping with Dry Ice Packs: A Complete Guide for 2025
Shipping with Dry Ice Packs: A Complete Guide for 2025
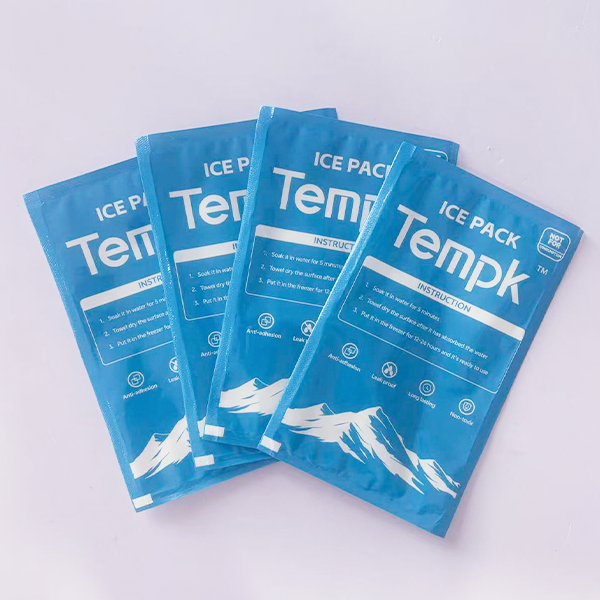
Dry Ice Packs for Shipping: A 2025 Guide for Effective Cold Chain Management
Shipping temperature-sensitive products such as seafood, pharmaceuticals, and perishable goods requires precise temperature control to prevent spoilage. In 2025, dry ice packs have emerged as a top choice for ensuring that goods remain at optimal temperatures throughout transit. In this guide, we will walk you through how to effectively use dry ice packs for shipping, including best practices, regulatory compliance, and cost-saving strategies to optimize your cold chain logistics.

What are dry ice packs and how do they work in shipping?
How do dry ice packs maintain the right temperature during transit?
What are the benefits of dry ice packs over other cooling methods?
Best practices for packaging and shipping with dry ice
How to ensure compliance with safety and regulatory requirements
What Are Dry Ice Packs, and How Do They Work for Shipping?
Dry ice packs are blocks or pellets of solidified carbon dioxide (CO₂) used to maintain extremely low temperatures during shipping. Unlike regular ice, which melts into liquid, dry ice sublimates (turns from solid directly to gas), making it ideal for preserving the freshness and safety of sensitive items like vaccines, seafood, and pharmaceuticals.
At a temperature of -109.3°F (-78.5°C), dry ice helps prevent spoilage and degradation of products that need to stay frozen for extended periods. Unlike traditional ice, which is prone to melting and leaving moisture, dry ice’s sublimation ensures that there is no liquid residue, reducing the risk of water damage to goods.
Key Uses of Dry Ice in Shipping
Pharmaceuticals: Dry ice is essential for transporting temperature-sensitive medications and vaccines, where maintaining a consistent cold temperature is critical.
Food Products: Seafood, meats, dairy, and other perishable foods often require dry ice to ensure freshness during long shipments.
Specialty Goods: Biological samples, chemicals, and other temperature-sensitive items also rely on dry ice for safe transit.
How Do Dry Ice Packs Maintain Optimal Temperatures During Transit?
Dry ice packs provide superior cooling by absorbing heat as they sublime into gas, keeping the temperature inside the container lower than that of traditional ice or gel packs. Their ability to maintain an ultra-low temperature for extended periods makes them ideal for long-distance shipping and sensitive products.
How Dry Ice Keeps Shipments Frozen:
Cold Duration: Dry ice can keep shipments cold for up to 48-72 hours, depending on the amount used and external conditions. This makes it ideal for long shipping routes.
Temperature Consistency: Unlike regular ice, dry ice sublimates slowly, ensuring a more consistent and reliable cooling effect throughout the journey.
| Cooling Method | Duration | Temperature Maintained | Best for |
|---|---|---|---|
| Dry Ice | 48-72 hours | -78.5°C | Long shipments, pharmaceuticals, seafood |
| Gel Packs | 12-24 hours | 0°C | Shorter shipments, less sensitive items |
| Regular Ice | 6-12 hours | 0°C | Less sensitive goods |
What Are the Key Benefits of Using Dry Ice Packs Over Other Cooling Methods?
Using dry ice packs offers several distinct advantages when compared to traditional ice or gel packs. Here’s why dry ice is often the preferred choice for temperature-sensitive shipments:
Key Benefits of Dry Ice Packs
Longer Cooling Duration: Dry ice lasts much longer than regular ice, remaining frozen for up to 72 hours. This extended cooling duration makes it ideal for long-distance shipments.
No Melting Water: Unlike regular ice, dry ice sublimates directly into gas, eliminating the risk of moisture contamination, which can be problematic for certain products.
Superior Cooling Power: Dry ice keeps items at much colder temperatures, often as low as -109.3°F (-78.5°C), which is crucial for products like frozen seafood or medical supplies that need to remain deep frozen.
Best Practices for Packing and Shipping with Dry Ice
To ensure that your shipments stay cold and compliant with safety regulations, follow these best practices when using dry ice in your packaging:
1. Choose the Right Packaging
Use insulated packaging materials to help maintain the temperature of the shipment for as long as possible. Expanded polystyrene (EPS) and polyurethane (PUR) are commonly used for 24-72 hour transit times. For longer shipments, consider using vacuum-insulated panels (VIP) to reduce dry ice consumption and shipping weight.
2. Use the Correct Amount of Dry Ice
The quantity of dry ice needed will depend on several factors:
Shipment Duration: Longer shipments require more dry ice.
Insulation Quality: Better insulation reduces sublimation rates and keeps the product cooler for a longer period.
Ambient Temperature: Hotter environments will cause dry ice to sublimate faster, so additional dry ice may be needed during the summer months.
A general guideline is to use 5-10 pounds of dry ice per 24-hour shipment. However, always adjust quantities based on specific conditions and requirements.
3. Ensure Proper Ventilation
Since dry ice sublimates into gas, it is crucial to ensure that the packaging allows CO₂ to escape to avoid a buildup of pressure, which could lead to an explosion. Never use airtight containers when shipping with dry ice. Proper ventilation is essential to prevent hazardous situations.
4. Monitor Temperature During Transit
For critical shipments such as pharmaceuticals or seafood, use temperature monitoring devices such as data loggers or IoT sensors. These devices help track the temperature of the shipment in real-time, ensuring the products remain within the required temperature range.
Compliance and Safety Regulations for Dry Ice Shipping
Handling and shipping dry ice requires compliance with various regulations. Dry ice is classified as a hazardous material under UN 1845, and shipments must adhere to specific labeling, packaging, and documentation requirements.
Key Regulations to Follow:
Labeling: All packages containing dry ice must be marked with the “Dry Ice/Carbon Dioxide, solid” label and include the net weight of the dry ice in kilograms.
Packaging: Dry ice must be shipped in vented containers to allow gas to escape. Non-vented containers can create dangerous pressure buildup.
Documentation: Depending on the contents, a Shipper’s Declaration or Air Waybill is required to provide information on the dry ice used in the shipment.
Alternatives to Dry Ice: Gel Packs and Other Cooling Methods
While dry ice is excellent for keeping items frozen, gel packs are an effective alternative for shipments that require chilled, not frozen, temperatures. Gel packs are reusable, less expensive than dry ice, and generally safer for short-distance shipments. They are particularly beneficial for live shellfish, which must remain chilled but not frozen.
When to Use Gel Packs:
Live Shellfish: Prevents freezing, which could harm shellfish.
Short-Distance Shipments: Ideal for local deliveries where freezing is unnecessary.
Cost-Effective: Gel packs are generally less expensive than dry ice and can be reused.
Environmental and Safety Considerations
Dry ice is a hazardous material and must be handled with care. Always use gloves and goggles when handling dry ice to prevent frostbite, and ensure that dry ice is stored in well-ventilated areas to avoid dangerous CO₂ buildup.
Safe Handling Tips:
Store dry ice in a well-ventilated area to allow the gas to sublimate safely.
Never dispose of dry ice in a confined space such as sinks or toilets as the rapid gas release could cause damage.
Conclusion
Dry ice packs remain a cornerstone of temperature-controlled shipping, particularly for sensitive products like seafood, pharmaceuticals, and other perishables. By following best practices for packing, ensuring regulatory compliance, and using the right amount of dry ice, you can improve the efficiency and safety of your cold chain logistics in 2025.
For more information on optimizing your shipping practices or assistance with dry ice logistics, contact [Your Company] today for expert guidance.
How to Use Dry Ice Cooler Packs & Pack Sheets for Cold Chain Shipping
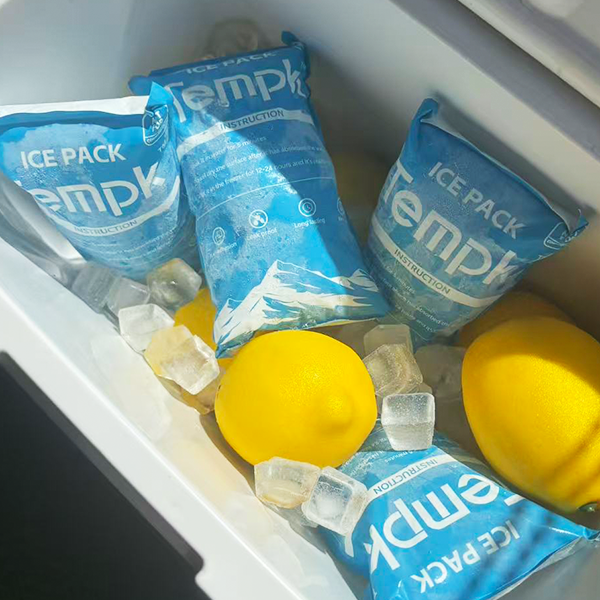
How to Use Dry Ice Cooler Packs & Pack Sheets for Cold Chain Shipping?
Shipping perishable goods requires effective temperature control. In 2025, dry ice cooler packs and pack sheets have become vital tools for ensuring goods remain at optimal temperatures during transport. These tools, used in pharmaceuticals, seafood, and other temperature-sensitive industries, offer reliable cooling, flexibility, and cost savings. In this guide, you will learn how to choose the right dry ice product, calculate sizes, follow safety regulations, and stay updated with industry trends.

What are dry ice cooler packs and dry ice pack sheets, and how do they work?
How do you size and use dry ice pack sheets correctly?
What are the safety and compliance rules for 2025?
How much do dry ice pack sheets cost, and how can you find the best deals?
What are the latest trends and innovations in dry ice cooling for 2025?
What Are Dry Ice Cooler Packs and Dry Ice Pack Sheets, and How Do They Work?
Dry ice cooler packs and pack sheets are specialized solutions designed to maintain low temperatures in transit. Dry ice cooler packs are pre-packaged units filled with solid carbon dioxide, which sublimates into gas at temperatures as low as -78.5°C (-109.3°F). This sublimation process absorbs heat and helps keep items frozen. Dry ice pack sheets are flexible, polymer-based sheets that are filled with dry ice, offering a lightweight solution for smaller or more flexible shipments.
Both of these cooling agents are ideal for shipping sensitive items that need constant cooling, such as vaccines, seafood, or pharmaceuticals. By understanding how they work, businesses can improve shipping efficiency and reduce the risk of spoilage during transport.
How Dry Ice Cooler Packs and Pack Sheets Maintain Temperature During Transit
Dry ice maintains sub-zero temperatures by absorbing heat from its surroundings as it sublimates into carbon dioxide gas. This process helps cool the air inside the shipping container, ensuring that products remain at a controlled temperature. For longer shipments, dry ice packs are often used, as they can maintain their cooling effect for up to 48 hours, depending on the quantity used and external temperature conditions. On the other hand, dry ice pack sheets are better suited for shorter trips, providing an effective cooling solution for 12 to 24 hours.
Temperature Control Methods in Cold Chain Shipping
| Temperature Control Method | Timeframe | Effectiveness | Application |
|---|---|---|---|
| Dry Ice Packs | 24-48 hours | High | Ideal for long-distance shipments requiring freezing temperatures |
| Dry Ice Pack Sheets | 12-24 hours | Moderate | Perfect for short shipments or less temperature-sensitive goods |
| Gel Packs | Varies | Moderate | Suitable for smaller shipments or goods that do not require freezing |
Dry Ice in Action: Real-Life Applications
Pharmaceutical Scenario: A pharmaceutical company shipping vaccines can rely on dry ice packs to ensure that the cold chain is never broken, preventing spoilage and degradation of sensitive medical products.
Seafood Distributor: A seafood distributor using dry ice pack sheets can maintain the quality of fresh fish during an overnight shipment, ensuring products are frozen until delivery, thus avoiding spoilage.
Real-Life Case: A Seattle-based seafood distributor experienced a 20% increase in customer satisfaction after transitioning to dry ice cooler packs, reducing returns caused by temperature-related spoilage.
What Are the Benefits of Using Dry Ice in Cold Chain Shipping?
Using dry ice for cold chain logistics offers numerous advantages:
1. Extended Shipping Durations
Dry ice’s extreme cold (-78.5°C / -109.3°F) ensures that products remain frozen for long durations, making it ideal for items like seafood, pharmaceuticals, and medical samples that need to stay below freezing temperatures during extended shipments.
2. Non-Toxic and Safe for Use
Dry ice is a non-toxic refrigerant, ensuring it is safe for use across various industries, including food and pharmaceuticals. It is also environmentally friendly, as it sublimates into gas, leaving no waste behind.
3. Cost-Effective
By reducing spoilage-related losses, dry ice can significantly lower overall shipping costs. In addition, reusable dry ice packs and sheets can further reduce expenses over time.
| Advantages | Description | Practical Applications |
|---|---|---|
| Extended Shelf Life | Maintains freezing temperatures, preserving quality | Ideal for perishable foods and pharmaceutical products |
| Non-Toxic & Safe | Safe for shipping temperature-sensitive products | Perfect for pharmaceuticals and food industries |
| Cost-Effective | Reduces spoilage and product waste | Lowers overall shipping costs |
Safety and Compliance in 2025 for Dry Ice Shipping
Dry ice shipping comes with specific regulations to ensure safety. For instance, the IATA PI 954 guidelines set weight limits for dry ice in air cargo and outline the necessary venting and labeling requirements. These include ensuring that dry ice packages are properly labeled with “Dry Ice” or “Carbon Dioxide, Solid” and the corresponding UN1845 code.
Key Compliance and Handling Guidelines
Proper Venting: Never seal dry ice in an airtight container to prevent pressure buildup. Ensure proper ventilation for all dry ice shipments.
Handling with Care: Always wear insulated gloves and eye protection when handling dry ice to prevent frostbite and exposure to carbon dioxide gas.
Weight and Labeling: Adhere to weight restrictions and labeling requirements, particularly for air transport, where dry ice quantities are strictly regulated.
2025 Trends and Developments in Dry Ice Cooling for Cold Chain Logistics
The cold chain logistics industry is evolving rapidly. By 2025, sustainability, innovation, and technological advancements are set to redefine how businesses manage their shipping operations.
Sustainable Dry Ice Production
Sustainability is becoming a central focus for the cold chain industry. The production of dry ice is becoming more sustainable, with efforts to reduce energy consumption and carbon emissions. Companies are also exploring bio-based CO2 sources, which further reduce the environmental impact of dry ice production.
Smart Packaging and IoT Monitoring
Advancements in smart packaging are allowing real-time monitoring of temperature-sensitive shipments, ensuring that products are always kept within the required conditions. The integration of IoT technology into cold chain systems enhances operational transparency and reliability, giving businesses more control over the shipping process.
FAQ
Q: How long can dry ice keep items frozen?
A: Dry ice can typically maintain frozen temperatures for up to 48 hours, depending on the amount of dry ice used, the insulation, and environmental conditions.
Q: Is dry ice safe to use for shipping food?
A: Yes, dry ice is safe for food shipping as long as proper handling, packaging, and ventilation procedures are followed.
Q: Can dry ice be reused?
A: Many dry ice packs and sheets are designed for multiple uses, offering a cost-effective solution for recurring shipments.
Conclusion
Dry ice cooler packs and pack sheets are indispensable in ensuring the safe and efficient transport of temperature-sensitive goods. Whether you’re shipping food, pharmaceuticals, or medical samples, these tools offer reliability, cost savings, and compliance with industry regulations. By choosing the right dry ice solution and following best practices, businesses can enhance their cold chain logistics and improve customer satisfaction.
Next Steps
Evaluate Your Shipping Needs: Determine whether dry ice packs or sheets are most suitable for your shipment based on duration and temperature requirements.
Consider Sustainable Options: Explore reusable dry ice options and eco-friendly packaging to further reduce your environmental impact.
Train Your Team: Ensure that your team is fully trained in the safe handling and packaging of dry ice, including compliance with all safety regulations.
About Tempk
At Tempk, we specialize in providing innovative cold chain solutions tailored to your specific shipping needs. Our products, including dry ice cooler packs, are designed to ensure the safe and efficient transport of perishable goods. Let us help you optimize your cold chain operations and reduce costs.
For professional advice on improving your cold chain logistics, contact us today!
How Do Dry Ice Packs Improve Fish Shipping and Cold Chain Logistics?
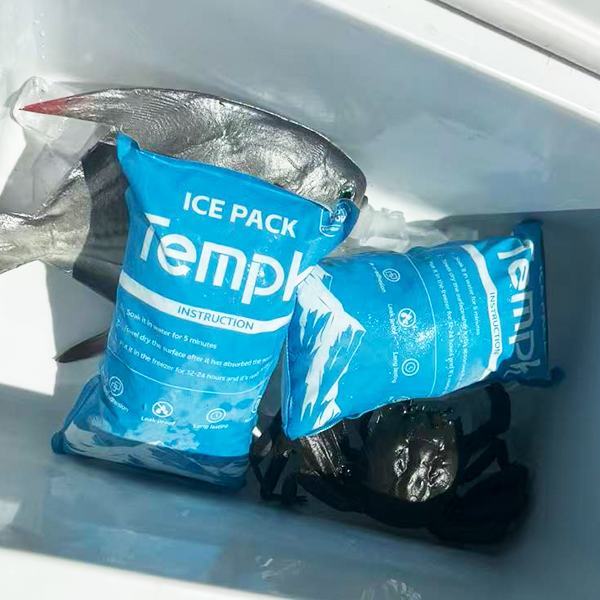
How Do Dry Ice Packs Improve Fish Shipping and Cold Chain Logistics?
Shipping seafood requires precise management to maintain quality and ensure the product reaches consumers at its freshest state. Dry ice packs have become a critical component in fish shipping, as they help preserve temperature-sensitive products by providing a reliable, efficient cooling solution. In this article, we explore the vital role that dry ice packs play in the cold chain logistics of seafood, highlighting their benefits, how they maintain cold temperatures during transit, and best practices for their use.
What are dry ice packs for fish shipping and how do they work?
How do dry ice packs maintain cold temperatures during transit?
What are the benefits of using dry ice in seafood cold chain logistics?
How can businesses implement dry ice packs effectively for fish shipping?
What Are Dry Ice Packs for Fish Shipping and How Do They Work?
Dry ice packs are a form of solid carbon dioxide that sublimate directly from a solid state to a gas, creating an intensely cold environment. These packs are crucial for shipping temperature-sensitive goods, such as fish, to maintain the required low temperatures during transit. Sublimating at a temperature of -78.5°C (-109.3°F), dry ice ensures that seafood remains frozen, preserving freshness and preventing spoilage.
As dry ice sublimates, it absorbs heat from its surroundings, cooling the enclosed space, which helps maintain the desired temperature for longer durations. This process makes dry ice an excellent choice for seafood shipments, especially for long-distance or overnight deliveries.
How Do Dry Ice Packs Maintain Cold Temperatures During Transit?
The key function of dry ice packs during transit is to keep the temperature consistently low. As the dry ice sublimates, it creates a cold gas that absorbs heat from the environment inside the shipping container. Research has shown that using dry ice can lower the temperature by up to 30°F (16.7°C), which is essential for maintaining the quality of seafood.
By placing dry ice strategically within insulated containers, shippers can keep seafood at the desired temperature throughout the shipping process. This is particularly critical when shipping seafood over extended distances or in warmer climates.
Temperature Control Methods:
| Method | Timeframe | Effectiveness | Practical Application |
|---|---|---|---|
| Dry Ice | 24-48 hrs | Highly Effective | Ideal for overnight seafood shipping |
| Gel Packs | Varies | Moderate | Suitable for short shipments |
| Ice Packs | Varies | Low to Moderate | Best for sturdier seafood types |
Dry Ice Packs in Action: Real-Life Examples
For example, a seafood distributor shipping fresh salmon across the U.S. can rely on dry ice to ensure that the fish stays frozen throughout the journey, arriving at the destination in prime condition. Similarly, during peak demand periods, a restaurant supplier can use dry ice to keep live shellfish alive and fresh during transport.
A case study from a Seattle-based seafood supplier shows that by transitioning to dry ice packs, they experienced a 15% increase in customer satisfaction due to enhanced product quality upon delivery.
What Are the Benefits of Using Dry Ice in Seafood Cold Chain Logistics?
Dry ice offers several advantages for the seafood cold chain logistics process, making it an ideal solution for shipping fish and other temperature-sensitive products.
Key Benefits:
Extended Shelf Life: Dry ice helps keep seafood frozen for up to 48 hours, providing more flexibility in shipping durations without compromising quality.
Cost Efficiency: By reducing spoilage and waste, dry ice packs minimize operational costs and help businesses save on product loss, contributing to overall profitability.
Non-toxic and Safe: Unlike other refrigerants, dry ice is non-toxic and safe when handled properly. Its use eliminates the need for potentially hazardous chemicals in the shipping process.
Sustainability: Dry ice is produced from recycled CO₂, making it an environmentally friendly option compared to other cooling methods.
Additional Advantages
Prevents Bacterial Growth: Keeping seafood at the right temperature during shipping ensures that bacteria cannot thrive, preserving the quality of the fish.
Prevents Freezer Burn: By controlling the temperature and preventing excess moisture, dry ice helps avoid freezer burn, maintaining the fish’s texture and taste.
FAQs About Using Dry Ice in Seafood Shipping
Q: How long can dry ice keep seafood frozen?
A: Dry ice can keep seafood frozen for 24-48 hours, depending on the quantity used and the conditions during transit.
Q: Are there any regulations for shipping seafood with dry ice?
A: Yes, shipments using dry ice must adhere to the Department of Transportation’s (DOT) regulations on packaging and labeling.
Trends and Developments for 2025 in Cold Chain Logistics
The cold chain logistics industry is rapidly advancing, with a growing emphasis on sustainability and technological innovation. In 2025, companies are likely to focus on eco-friendly dry ice production methods and improved real-time tracking for sensitive shipments through IoT technology.
Latest Developments in Dry Ice Technology
Sustainable Production: Manufacturers are working on developing more sustainable dry ice production methods to reduce carbon footprints.
IoT Integration: Real-time temperature monitoring using IoT technology will become more widespread, ensuring accurate tracking of sensitive shipments.
Market Insights
The seafood industry is experiencing increasing demand for fresh and sustainably sourced products. Companies that adopt efficient cold chain logistics solutions, such as dry ice, will be better equipped to meet this demand and maintain high product quality during transit.
Common Questions Answered
Q1: What types of companies benefit from using dry ice for shipping seafood?
A: Seafood wholesalers, retailers, and restaurants benefit from using dry ice to keep seafood fresh during transport.
Q2: Is it safe to handle dry ice?
A: Dry ice is safe to handle when proper precautions are taken. It should be handled with gloves, and care should be taken to ensure it is not enclosed in airtight spaces.
Conclusion and Recommendations
In conclusion, dry ice packs are an essential tool in cold chain logistics, particularly in the seafood industry. They ensure that seafood products arrive fresh and undamaged by maintaining optimal temperatures throughout the transit process. By integrating dry ice into your logistics operations, you can significantly improve product quality and reduce costs.
Next Steps
Businesses in the seafood industry should consider incorporating dry ice into their cold chain solutions. Begin by training staff on safe handling procedures, upgrading shipping containers, and using real-time temperature monitoring to track shipments.
About Tempk
At Tempk, we specialize in innovative cold chain solutions for the seafood industry. Our packaging systems are designed to keep products fresh while promoting sustainability. Contact us today to learn more about how our dry ice solutions can optimize your logistics operations!
How Do Dry Ice Packs Ensure Safe Vaccine Transport? | Cold Chain Solutions
Ensuring the efficacy of vaccines during transport is critical, as even slight temperature fluctuations can compromise their effectiveness. Dry ice packs are an essential tool in the cold chain logistics of temperature-sensitive vaccines. These packs ensure that vaccines remain within the required temperature range throughout transit, preserving their potency and safety. In this article, we will explore the role of dry ice packs in vaccine transport, their benefits, and the best practices for using them in 2025.
What are dry ice packs, and how do they work for vaccine transport?
What are the benefits of using dry ice over other cooling methods for vaccine shipping?
How do businesses ensure safety and compliance when using dry ice packs in vaccine transport?
What are the latest trends and innovations in dry ice usage for cold chain logistics?
What Are Dry Ice Packs, and How Do They Work for Vaccine Transport?
Dry ice is the solid form of carbon dioxide, and it sublimates directly from a solid to a gas at a temperature of -78.5°C (-109.3°F). This unique property allows dry ice packs to maintain extremely low temperatures, which is crucial for transporting vaccines that require storage at ultra-low temperatures. Unlike conventional ice, which melts and can cause water contamination, dry ice does not leave any residue, making it ideal for maintaining the cold chain during vaccine transport.
When placed in insulated containers, dry ice absorbs heat from the surrounding environment, creating a consistent and cold atmosphere to protect temperature-sensitive vaccines. The slow sublimation process ensures that vaccines remain within the critical temperature range for extended periods, whether during domestic or international shipments.
How Do Dry Ice Packs Maintain Consistent Temperature During Transport?
Dry ice sublimates slowly, releasing cold gas that absorbs heat from the surrounding air. This process maintains a steady temperature environment, making it highly effective for keeping vaccines below freezing. Depending on the amount of dry ice used, temperatures can be maintained for up to 72 hours or more.
| Temperature Control Method | Timeframe | Effectiveness | Practical Application |
|---|---|---|---|
| Dry Ice | 24-72 hours | Highly Effective | Long-haul vaccine transport |
| Gel Packs | 12-24 hours | Moderate | Short-distance shipments |
| Ice Packs | Varies | Low to Moderate | Suitable for non-temperature-sensitive products |
Real-Life Examples of Dry Ice Packs in Vaccine Transport
Scenario 1: A healthcare provider uses dry ice to transport vaccines to rural areas, ensuring that the vaccines remain viable even with limited access to refrigeration.
Scenario 2: An international logistics company specializing in pharmaceutical shipments uses dry ice to maintain the cold chain for global vaccine distribution.
Real-Life Case: A logistics provider in Europe successfully transported COVID-19 vaccines using dry ice packs, ensuring that vaccines remained within the required temperature range throughout the long international journey, with a 100% success rate in preserving their efficacy.
What Are the Benefits of Using Dry Ice for Vaccine Shipping?
Key Benefits
Effective Long-Term Cooling: Dry ice can maintain ultra-low temperatures for an extended period, which is essential for vaccines that require freezing conditions, such as mRNA vaccines.
Non-Toxic and Safe: Unlike gel packs, dry ice does not leave any liquid residue that could damage vaccines or packaging. It sublimates directly into gas, reducing the risk of contamination.
Versatile Shipping: Dry ice is adaptable for small-scale and large-scale shipments, and the amount used can be adjusted depending on the specific needs of the vaccine.
Additional Advantages
Cost-Efficiency: Although the initial cost may be higher than some cooling methods, the use of dry ice can reduce losses due to spoilage, leading to long-term savings.
Reduced Spoilage and Losses: By maintaining consistent temperatures, dry ice helps to ensure that vaccines reach their destination without compromising quality.
Safety Considerations When Handling Dry Ice
Handling dry ice requires careful attention due to its extremely cold temperature and the risk of CO₂ buildup. The following safety precautions should be observed when using dry ice for vaccine transport:
Ventilation: Ensure that all containers are vented to release CO₂ gas to prevent pressure buildup that could cause rupture.
Protective Gear: Personnel should wear insulated gloves and safety goggles when handling dry ice to prevent frostbite and eye injury.
Proper Storage: Dry ice should never be stored in an airtight container. Always store it in a well-ventilated area.
How Dry Ice Packs Compare to Other Cooling Methods
Dry ice is the best solution for vaccines requiring deep-freeze conditions, such as mRNA vaccines. However, for vaccines that only need refrigeration (2-8°C), gel packs or phase change materials (PCMs) are suitable alternatives. Here’s a quick comparison:
| Cooling Method | Temperature Range | Cooling Duration | Regulatory Considerations |
|---|---|---|---|
| Dry Ice | -78.5°C | Up to 72 hours | Classified as hazardous material; requires IATA and CFR compliance |
| Gel Packs | 2-8°C | Up to 24 hours | No special hazardous classification |
| PCMs | 2-8°C, -20°C, or custom ranges | Varies based on PCM type | Can be used for non-ultracold vaccines |
Latest Trends and Innovations in Dry Ice Usage for Vaccine Transport
Sustainable Dry Ice Production
In 2025, dry ice production is becoming more sustainable, with innovations like carbon capture methods helping to reduce environmental impacts. Companies are exploring more eco-friendly production methods to meet the increasing demand for cold chain logistics.
Real-Time Temperature Monitoring
With the growing importance of precise temperature control, real-time monitoring technology has become a critical part of vaccine transport. IoT-enabled sensors are now being used to continuously track the temperature of vaccine shipments, ensuring that they stay within the required range.
Frequently Asked Questions About Dry Ice and Vaccine Transport
Q: How long do dry ice packs last for vaccine transport?
A: Dry ice packs typically maintain their cooling power for 24-72 hours, depending on the quantity of dry ice and the quality of insulation used.
Q: Is dry ice safe to handle?
A: While dry ice is safe with proper precautions, it must be handled with care. Always use gloves and ensure that storage areas are well-ventilated to prevent CO₂ buildup.
Conclusion and Recommendations
In summary, dry ice packs are essential for transporting vaccines that require ultra-low temperatures. Their ability to maintain consistent and cold temperatures for extended periods makes them indispensable in the cold chain logistics industry. Businesses involved in vaccine transport should invest in dry ice solutions to reduce spoilage, ensure compliance with regulations, and improve the reliability of their shipping processes.
Next Steps
To optimize your vaccine transport processes, start by evaluating your current cold chain logistics. Consider working with a logistics provider that specializes in dry ice and other cold chain solutions to ensure the safe and effective delivery of vaccines.
About Tempk
Tempk is a leading provider of advanced cold chain solutions, specializing in dry ice packs and insulated shipping containers for the transportation of pharmaceuticals and biologics. We are committed to providing safe, efficient, and environmentally responsible solutions that help businesses meet their cold chain logistics needs.
Contact us today for expert advice on optimizing your vaccine transport logistics!
How to Ship Meat with Dry Ice: 2025 Cold Chain Best Practices

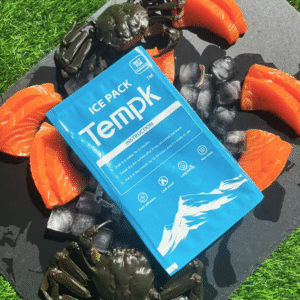
The Ultimate Guide to Dry Ice Pack Sheets for Safe and Efficient Shipping
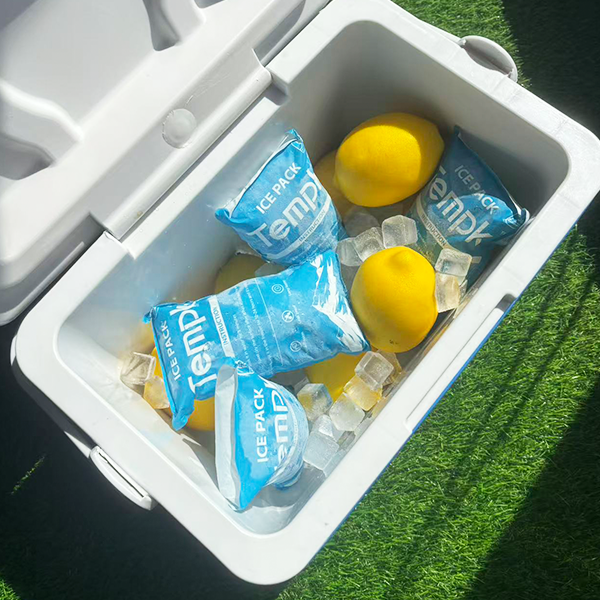
The Ultimate Guide to Dry Ice Pack Sheets for Shipping
Shipping perishable goods such as food, pharmaceuticals, and biological samples requires maintaining a consistent low temperature. Dry ice, the solid form of carbon dioxide (CO₂), is a preferred refrigerant because it sublimates directly from solid to gas, ensuring ultra-low temperatures without leaving residue. Dry ice pack sheets, a more manageable form of dry ice, are an effective solution to keep sensitive products at the right temperature during transit. In this guide, we will explore how dry ice pack sheets work, their benefits, and how to choose the best one for your shipping needs.
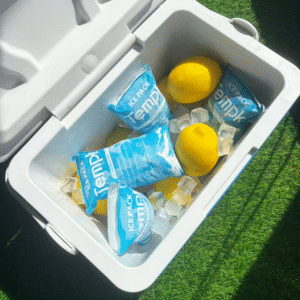
What are dry ice pack sheets, and how do they work for shipping?
How do dry ice pack sheets improve the shipping process?
What are the key benefits of using dry ice for shipping?
How to choose the right dry ice pack sheets for your products?
What Are Dry Ice Pack Sheets, and How Do They Work for Shipping?
Dry ice pack sheets are flexible, reusable sheets filled with superabsorbent polymer cells that contain frozen water. These sheets sublimate when hydrated, providing extended cooling for temperature-sensitive products. Unlike regular ice, dry ice sublimes directly from solid to gas at a temperature of -78.5°C (-109.3°F), making it ideal for perishable goods like pharmaceuticals, seafood, and vaccines. Dry ice pack sheets are used for maintaining the desired temperature during shipping, ensuring products arrive undamaged and fresh.
Dry ice pack sheets are especially valuable in industries requiring strict temperature control, such as pharmaceuticals, where certain medications must be stored at sub-zero temperatures. By placing these sheets in insulated shipping boxes, companies can ensure their products stay at the optimal temperature for longer periods.
How Do Dry Ice Pack Sheets Improve the Shipping Process?
Dry ice pack sheets significantly improve the shipping process by offering the following advantages:
Efficient Temperature Control: These sheets maintain a consistent low temperature, ensuring the goods remain within the necessary temperature range.
Longer Transit Times: Due to the slow sublimation of dry ice, these sheets can keep products frozen or chilled for extended periods, making them ideal for multi-day shipments.
Cost-Effectiveness: Dry ice is more efficient than traditional ice packs. It offers better insulation, which can reduce overall shipping costs by maintaining temperature for longer durations.
| Cooling Method | Duration | Cooling Efficiency | Best Use |
|---|---|---|---|
| Dry Ice Pack Sheets | 18-24 hours | High | Pharmaceuticals, seafood, vaccines |
| Gel Packs | 6-12 hours | Moderate | Food, pharmaceuticals (less sensitive) |
| Ice Packs | Varies | Low | Short-duration shipments, sturdier products |
Key Benefits of Using Dry Ice for Shipping
Dry ice is widely used in shipping due to its numerous advantages:
Non-toxic and Safe for Handling: When handled properly, dry ice is safe for shipping. It doesn’t leave behind any water residue, making it ideal for perishable items such as food and pharmaceuticals.
Eco-Friendly: Unlike regular ice, dry ice doesn’t create any water waste, reducing its environmental impact.
Preserves Product Integrity: Dry ice maintains the necessary temperature throughout transit, reducing the risk of spoilage and damage to sensitive goods.
How to Choose the Right Dry Ice Pack Sheets for Your Products
Selecting the right dry ice pack sheets depends on several factors:
Product Type: Certain products, such as vaccines and biologics, require a much colder environment than others like fresh produce. Ensure the dry ice pack sheets provide the necessary cooling capacity.
Shipping Duration: For longer shipments, you may need more dry ice to ensure the temperature remains stable throughout the journey.
Environmental Conditions: External temperature and humidity can impact how quickly dry ice sublimates. It’s important to consider these factors when choosing the correct amount and type of dry ice pack sheets.
How Dry Ice Pack Sheets Compare to Gel Packs
Dry ice pack sheets and gel packs are both popular choices for temperature-controlled shipping, but they work differently:
Dry Ice Pack Sheets: Provide ultra-cold temperatures and maintain a consistent freezing environment. They are ideal for shipping products like vaccines, seafood, and other sensitive goods that need to stay frozen.
Gel Packs: Typically offer cooling in the 0°C to 2°C range, making them better suited for products that don’t require extreme cold, like dairy or chocolate.
| Cooling Method | Typical Temperature Range | Best For |
|---|---|---|
| Dry Ice Pack Sheets | ~ -78.5°C | Frozen goods, sensitive pharmaceuticals |
| Gel Packs | 0°C to 2°C | Refrigerated foods, less temperature-sensitive products |
Latest Trends in Dry Ice Shipping for 2025
The dry ice shipping industry continues to evolve, especially with advancements in sustainability and technology. Some emerging trends include:
Sustainable Packaging: As eco-consciousness increases, more companies are integrating recyclable and reusable materials with dry ice for a greener shipping solution.
Smart Temperature Monitoring: IoT-based sensors are now being widely used to provide real-time tracking of temperature and humidity levels, improving the visibility and reliability of shipments.
Automation in Cold Chain Logistics: The use of AI and automated systems to monitor and adjust shipments will become more prevalent, streamlining operations and improving efficiency.
Frequently Asked Questions (FAQs)
Q: How long does dry ice last when shipping frozen food?
A: Dry ice can last 18-24 hours, depending on the amount used and the shipping conditions. For longer shipments, additional dry ice or insulation may be necessary.
Q: Is dry ice the same as regular ice?
A: No, dry ice is solid carbon dioxide and sublimates at -78.5°C, while regular ice melts into water at 0°C.
Conclusion: Why Dry Ice Pack Sheets Are Essential for Shipping
Dry ice pack sheets are an essential tool for ensuring temperature-sensitive shipments stay fresh and undamaged during transit. They offer a reliable, cost-effective solution for cold chain logistics, especially in industries such as pharmaceuticals, seafood, and vaccines. By selecting the right type and size, following best practices, and complying with regulations, businesses can enhance their shipping efficiency and reduce spoilage.
About Tempk
At Tempk, we specialize in advanced cold chain solutions, offering a variety of dry ice packaging options to suit the specific needs of businesses. Our products ensure reliable temperature control while prioritizing sustainability. With decades of experience in the industry, we help businesses optimize their shipping processes to ensure perishable goods arrive in perfect condition.
Contact us today to discuss your cold chain logistics needs and how our solutions can enhance your shipping process!
Cooler Dry Ice Pack: 2025 Guide, Trends & Safety Tips
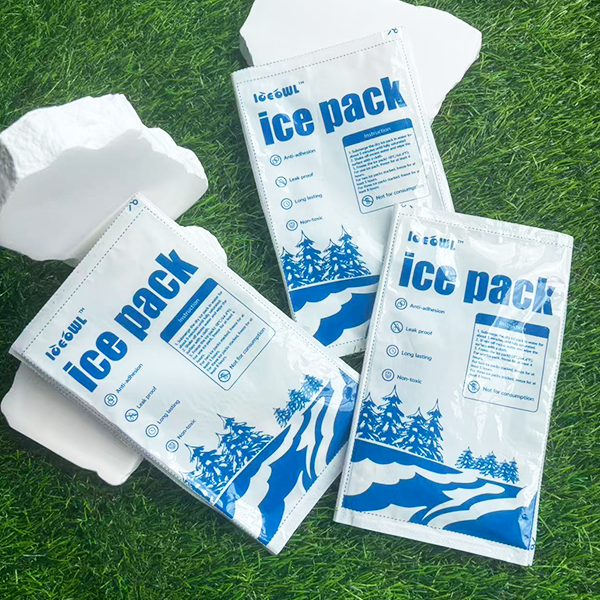
Cooler Dry Ice Pack: 2025 Ultimate Guide to Safety, Trends & Cost Savings
Whether you’re shipping vaccines or sending seafood across the country, maintaining a stable temperature is critical. A cooler dry ice pack offers ultra‑cold, moisture‑free cooling while gel packs provide reusable, moderate cold. In 2025 the stakes are higher: air freight allows only 2.5 kg of dry ice on passenger planes, and advanced gel packs now hold −12 °C to −18 °C for up to 48 hours. This guide helps you make informed choices, avoid hazards and optimize costs.
Understand what a cooler dry ice pack is and how it differs from gel‑based alternatives, including temperature ranges and safety requirements.
Learn safe packing, handling and storage techniques, from calculating the right amount of dry ice to venting containers properly.
Compare gel ice packs, phase‑change materials (PCMs) and dry ice to identify the best solution for your products and budget.
Explore emerging trends in 2025, such as hybrid packages, CO₂‑capture production and smart sensors for real‑time monitoring.
Discover cost‑saving and compliance strategies, including reusable containers, efficient insulation and upcoming Food Safety Modernization Act deadlines.
What Is a Cooler Dry Ice Pack and How Does It Work?
A cooler dry ice pack is a cooling method that uses solid carbon dioxide (CO₂) inside an insulated container to keep contents at ultra‑low temperatures. Dry ice sublimates directly into gas at −78.5 °C, leaving no liquid residue. Gel‑based “dry ice” packs are different; they contain phase‑change materials that freeze at lower temperatures and remain dry as they thaw. Understanding these differences is key to choosing the right solution for your shipment.
Understanding the Science Behind Dry Ice and Gel Packs
Dry ice is made by compressing and cooling CO₂ until it becomes a solid. Unlike regular ice, it turns directly into gas (sublimation) without melting, providing consistent cold and preventing moisture damage. Gel packs, often called “dry ice packs” but actually filled with super‑cooled gel or PCM, freeze at temperatures around −20 °C to −30 °C. New gel sheets developed in 2025 hold −12 °C to −18 °C for up to 48 hours and can be reused over 30 cycles with less than 10 % capacity loss. The key takeaway is that dry ice packs offer extreme cold for frozen goods, while gel packs provide moderate cold for refrigerated items and are more sustainable.
| Cooling Solution | Typical Temperature Range | Duration & Reusability | What It Means for You |
|---|---|---|---|
| Dry ice pack (solid CO₂) | Ultra‑cold (< −70 °C) | Lasts 18–24 hours per 2.5 kg; single use; regulated as hazardous material | Ideal for frozen vaccines, biological samples and meats; requires gloves and vented containers. |
| Gel ice pack / PCM pack | 2 °C–8 °C (refrigeration) and –12 °C– –18 °C for advanced sheets | Holds cold up to 48 hours; reusable over 30 cycles; non‑hazardous | Best for fresh food, pharmaceuticals and meal kits; reduces waste and long‑term costs. |
| Hybrid pack (dry ice + PCM) | Combines < –70 °C and 2–8 °C zones | Extends cooling duration while reducing CO₂ usage | Useful when shipping mixed products requiring both deep freeze and refrigeration. |
Practical Tips and Advice
Know your product’s needs: Frozen goods like ice cream or biological samples require the ultra‑low temperatures of dry ice. Refrigerated goods such as fresh produce, vaccines or e‑commerce groceries fit better with gel packs or PCM.
Plan the transit time: Dry ice typically lasts 18–24 hours per 2.5 kg in an insulated cooler. Gel packs can maintain 2–8 °C for up to 48 hours.
Check regulations: Dry ice shipments are classified as hazardous and must be labeled “UN 1845” with the net weight specified. Gel packs usually avoid hazardous labelingshipmercury.com.
Consider safety gear: Always handle dry ice with cryogenic gloves and goggles to prevent frostbitetempcontrolpack.com. Gel packs require no special equipment.

How to Use a Cooler Dry Ice Pack Safely for Shipping and Storage
Proper packing and storage ensure that your cooler dry ice pack performs optimally without endangering handlers or products. Dry ice is considered a hazardous material; compliance and planning are paramount.
Packaging Best Practices
Use insulated containers: Choose thick foam or vacuum insulated panels (VIPs) to slow sublimation and maintain temperaturetempcontrolpack.com. VIPs are up to five times more efficient than polystyrene panelsshipmercury.com.
Vent the container: Ensure the cooler has ventilation holes to allow CO₂ gas to escapetempcontrolpack.com. Sealing a dry ice container can cause pressure build‑up and explosions.
Calculate the right amount of dry ice: As a rule of thumb, use about 2.5 kg of dry ice per 24 hours of shippingtempcontrolpack.com. For longer transit times, multiply accordingly.
Cushion your items: Secure products with bubble wrap or padded inserts to prevent damage during transittempcontrolpack.com.
Label properly: Mark packages with “Dry Ice” and the UN 1845 number, and declare the net weighttempcontrolpack.com.
Avoid sealed storage: Never store dry ice in airtight containers or refrigerators. Use a ventilated cooler and keep it in an outdoor shed or garagetempcontrolpack.com.
Calculating Dry Ice Requirements and Handling Precautions
Estimate weight: Determine how long your shipment will be in transit and multiply the hours by roughly 0.1 kg per hour of dry ice. Example: a 48‑hour shipment requires about 5 kg of dry ice.
Transfer leftover dry ice: After unpacking a shipment, salvage any remaining dry ice using tongs and place it in a vented coolertempcontrolpack.com. Store the cooler in a ventilated area away from heat sourcestempcontrolpack.com.
Plan quick reuse: Dry ice sublimates at around 5–10 pounds per day; use any leftover within two to three daystempcontrolpack.com.
Wear protective gear: Use insulated gloves and goggles when handling dry icetempcontrolpack.com, as direct contact can cause severe frostbite.
Keep dry ice separate: Do not store dry ice with other chemicals or in sealed areas; separate it from flammable materialstempcontrolpack.com.
| Packaging Element | Purpose | Your Benefit |
|---|---|---|
| Insulated cooler/VIP panels | Reduce thermal loss and slow sublimationshipmercury.com | Keeps goods cold longer and reduces dry ice consumption, saving money |
| Vent holes or loose lid | Allow CO₂ gas to escapetempcontrolpack.com | Prevents pressure buildup and potential explosions |
| Clear labeling (UN 1845) | Complies with IATA and DOT regulationstempcontrolpack.com | Avoids fines and ensures carriers handle the package correctly |
| Padded inserts and void fill | Protects fragile items and maintains temperaturetempcontrolpack.com | Reduces risk of damage and temperature fluctuations |
Safe Storage Tips
Store in insulated, ventilated containers: Transfer leftover dry ice into a foam or thick plastic cooler with a loosely fitting lidtempcontrolpack.com.
Location matters: Keep the cooler in a garage or outdoor shed to prevent CO₂ accumulation indoorstempcontrolpack.com.
Monitor sublimation: Check the remaining dry ice each day. Use within a few days to maximize coolingtempcontrolpack.com.
Donate unused dry ice: If you have excess dry ice you won’t use, consider donating it to a local lab or restauranttempcontrolpack.com.
Don’t refreeze dry ice: Once it has sublimated fully, you cannot reconstitute it. Save only solid piecestempcontrolpack.com.
How to Prepare Gel Ice Pack Sheets
New dry ice pack sheets introduced in 2025 require preparation. To maximize performance:
Hydrate the sheet: Submerge the sheet in cold water for 3–5 minutes to allow the cells to absorb watertempcontrolpack.com.
Freeze flat: Lay the hydrated sheets flat in a freezer at ≤–25 °C and freeze for at least 10 hourstempcontrolpack.com.
Pre‑chill your shipper: Cool your shipping container before loading to extend cooling timetempcontrolpack.com.
Pack strategically: Wrap fragile items and position the sheets around the product for maximum coveragetempcontrolpack.com.
Add monitoring: Include an NFC or Bluetooth temperature logger to track conditions in real timetempcontrolpack.com.
By following these steps, you ensure that both dry ice and gel pack solutions deliver consistent performance without compromising safety.
Comparing Gel‑Based Dry Ice Packs and Traditional Dry Ice: Pros and Cons in 2025
Choosing between gel ice packs and dry ice depends on temperature requirements, shipment duration, safety and cost. Gel packs are gaining popularity due to their reusability and lower environmental impacttempcontrolpack.com, while dry ice remains indispensable for deep‑frozen goodstempcontrolpack.com.
Advantages and Disadvantages of Gel vs Dry Ice Solutions
Advantages of Gel Ice Packs
Safer handling: Gel packs are non‑toxic and require no special safety equipment, reducing the risk of frostbitetempcontrolpack.com.
Eco‑friendly and reusable: Many gel packs are biodegradable and can be refrozen dozens of times, cutting waste and hazardous materials feestempcontrolpack.com.
Cost‑effective over time: Reusability can lower packaging costs by up to 75 % compared to single‑use dry icetempcontrolpack.com.
Versatility: Gel packs suit food, pharmaceutical and e‑commerce shipmentstempcontrolpack.com.
Disadvantages of Gel Ice Packs
Limited temperature range: They cannot reach the extreme temperatures needed for frozen goodstempcontrolpack.com.
Shorter duration: Gel packs may thaw faster in hot climates or long transitstempcontrolpack.com.
Advantages of Dry Ice
Ultra‑low temperatures: Dry ice provides sub –70 °C conditions, ideal for biological samples and frozen foodstempcontrolpack.com.
Long‑lasting: With proper insulation, dry ice can maintain low temperatures for extended periods, sometimes up to 72 hourstempcontrolpack.com.
Disadvantages of Dry Ice
Handling risks: Without gloves and ventilation, dry ice can cause frostbite and CO₂ builduptempcontrolpack.com.
One‑time use and high cost: Dry ice must be replenished for each shipment and incurs hazardous materials feestempcontrolpack.com.
Environmental impact: Sublimation releases CO₂ into the atmospheretempcontrolpack.com.
| Feature | Gel Ice Packs | Dry Ice | What It Means for You |
|---|---|---|---|
| Temperature range | –20 °C to –30 °C (advanced PCM sheets hold –12 °C to –18 °C)tempcontrolpack.com | < –70 °Ctempcontrolpack.com | Choose gel for refrigeration; dry ice for deep‑freeze. |
| Handling safety | No special precautions; non‑toxictempcontrolpack.com | Requires gloves, goggles and ventilationtempcontrolpack.com | Gel packs are safer for staff and end‑users. |
| Environmental impact | Biodegradable and reusabletempcontrolpack.com | CO₂ emissions upon sublimationtempcontrolpack.com | Gel packs align with sustainability goals. |
| Cost | Lower long‑term cost; reduce packaging expenses by up to 75 %tempcontrolpack.com | High recurring cost; single‑usetempcontrolpack.com | Gel packs save money over multiple shipments. |
| Regulatory requirements | Generally non‑hazardousshipmercury.com | Must display UN 1845, hazard class and weighttempcontrolpack.com | Gel packs simplify compliance. |
Practical Scenarios and Solutions
Shipping fresh seafood (moderate cold): Choose gel ice packs or PCM containers. They keep seafood at 2–8 °C without freezing, preserving texture and flavor. Use insulated containers and avoid overpacking to reduce weight.
Transporting vaccines (refrigerated): Use PCM packs engineered to maintain 2–8 °Cshipmercury.com. They provide stable temperatures and simplify regulatory compliance compared with dry ice.
Sending frozen food (deep freeze): Dry ice is necessary for maintaining –20 °C or lower. Pair dry ice with VIP insulation to extend duration and reduce the amount neededshipmercury.com.
Mixed shipments (freeze and chill): Consider hybrid solutions combining dry ice and PCM. This strategy reduces CO₂ usage while keeping different zones at the required temperaturestempcontrolpack.com.
Real‑world case: A biotech firm switched from gel packs to PCM containers for 2–8 °C payloads and achieved a 40 % cost reduction after 10 shipmentsshipmercury.com. Another gene therapy company used validated dry‑ice shippers for ultra‑cold materials and cleared customs without HAZMAT issuesshipmercury.com.
Innovative Trends and Future Developments for Cooler Dry Ice Packs in 2025
Cold chain logistics is evolving quickly. Several innovations are reshaping how cooler dry ice packs and alternatives are made, used and tracked.
Sustainable Dry Ice Production and CO₂ Capture
Many suppliers now capture CO₂ from industrial processes like ammonia synthesis to produce dry icetempcontrolpack.com. This reduces the product’s carbon footprint and supports circular carbon use. As sustainability regulations tighten, demand for low‑emission dry ice is expected to grow.
Hybrid and Smart Packaging Solutions
Hybrid packaging combines dry ice and PCMs. These pack‑outs use a small amount of dry ice with reusable PCM panels to extend cooling duration and minimize CO₂ consumptiontempcontrolpack.com. Smart packaging integrates temperature sensors and QR codes that provide real‑time monitoringtempcontrolpack.com. Devices like Artyc’s Medstow 5 L cooler use battery‑powered compressor cooling and onboard sensors to eliminate dry ice altogetherblog.gettransport.com. Paired with telematics platforms like Catena, these trackers deliver live data on temperature, location and shocksblog.gettransport.com.
Eco‑Friendly Gel Ice Packs and PCMs
Gel packs now incorporate biodegradable materials and phase‑change substances that are safer for the environmenttempcontrolpack.com. Manufacturers are developing recyclable packaging for dry ice as well. Market projections suggest that the cold‑chain logistics market is growing by roughly 10 % annually, driven by demand for sustainable solutionstempcontrolpack.com.
Battery‑Powered Alternatives to Dry Ice
New battery‑powered refrigeration devices are gaining traction. For example, the Medstow 5 L cooler replaces dry ice with programmable temperature settings, on‑board sensors and GPSblog.gettransport.com. Founders argue that dry ice is becoming “cumbersome” and that real‑time visibility improves reliabilityblog.gettransport.com. Although initial costs are higher, these devices promise lower operating expenses, zero hazardous materials, and constant temperature control.
Market Insights and Growth Trends
According to industry reports, the temperature‑controlled packaging market is expected to rise from US$ 11.3 billion in 2020 to US$ 16.8 billion by 2025shipmercury.com. The gel ice pack market is also expanding, with advanced products offering longer cooling durations and better reusability. Disposable gel packs and PCMs are gradually replacing traditional ice across the meal‑kit and pharmaceutical sectors.
Optimising Costs and Compliance in Cold Chain Logistics: Strategies for 2025
Reducing expenses and meeting regulations are top priorities for shippers. Here are key strategies drawn from industry experts.
Select Efficient Packaging Materials
Vacuum insulated panels (VIPs): VIPs can be up to five times more efficient than traditional polystyrene or polyurethane panelsshipmercury.com. Although they cost more initially, they reduce container size and improve temperature stability, resulting in long‑term savings.
Reduce empty space: Minimize voids inside packages to lower dimensional weight costs and maintain temperature stabilityshipmercury.com.
Hybrid materials: Combine VIP with polyurethane panels to increase efficiency by 2.5×shipmercury.com.
Adopt Smart Monitoring Devices
IoT sensors offer real‑time data on temperature, humidity and locationshipmercury.com. With the Food Safety Modernization Act’s compliance deadline approaching in January 2026shipmercury.com, adopting these tools is no longer optional. Cloud‑based analytics help detect trends and prevent equipment failuresshipmercury.com.
Switch to Reusable Containers and PCMs
Reusable containers like Credo™ cubes reduce waste and deliver 3–4× cost efficiency compared with single‑use shippersshipmercury.com. PCMs offer stable, reusable temperature control without hazardous materials restrictionsshipmercury.com.
Plan Maintenance and Lifecycle Management
Regularly inspect and maintain coolers, sensors and packaging to avoid breakdowns and product spoilageshipmercury.com. Rotate gel pack inventories to ensure each pack goes through full freeze–thaw cyclestempcontrolpack.com.
Leverage Data for Logistics Optimization
Use analytics from sensors to optimize routes, reduce fuel consumption and anticipate delaysshipmercury.com. Integrated tracking platforms (e.g., Surfact’s “Emma” sensor with Catena telematics) close data gaps across the supply chainblog.gettransport.com.
By combining efficient materials, smart monitoring and maintenance, you can reduce shipping costs while keeping products safe and compliant.
2025 Trends & Market Insights for Cooler Dry Ice Pack Solutions
The cold‑chain industry in 2025 is characterized by rapid growth, innovation and sustainability efforts.
Growth in temperature‑controlled packaging: Market size is projected to reach US$ 16.8 billion by 2025, up from US$ 11.3 billion in 2020shipmercury.com. This growth is driven by e‑commerce, meal‑kit services and biologics.
Reusable and hybrid solutions: Reusable gel packs and hybrid packages are reducing waste and hazardous materials feestempcontrolpack.com. PCMs are gaining traction due to superior thermal stability and ease of complianceshipmercury.com.
Smart monitoring adoption: The rise of real‑time sensors and telematics partnerships shows that visibility is becoming a standard expectationblog.gettransport.com.
Regulatory focus: The Food Safety Modernization Act’s upcoming enforcement means shippers must adopt validated packaging and data‑logger systemsshipmercury.com.
Sustainability: CO₂‑capture dry ice production and biodegradable gel packs reflect a broader shift toward circular economy practicestempcontrolpack.com.
These trends underscore the importance of selecting solutions that balance performance, cost and environmental impact.
Frequently Asked Questions
Q1: Are cooler dry ice packs safe for air travel? – Yes, but there are strict regulations. Packages must be labeled with “UN 1845,” the dry ice weight and a Class 9 hazard labeltempcontrolpack.com. Passenger flights limit each package to 2.5 kg of dry ice; cargo flights allow up to 200 kgtempcontrolpack.com. Always use vented containers and gloves during packing.
Q2: How long does a cooler dry ice pack last? – A typical dry ice pack provides cooling for 18–24 hours per 2.5 kg in a well‑insulated coolertempcontrolpack.com. Gel packs can maintain a 2–8 °C temperature for up to 48 hourstempcontrolpack.com. Duration varies based on insulation and ambient temperature.
Q3: Can I reuse dry ice packs? – You can reuse dry ice only if solid CO₂ remains after the first shipmenttempcontrolpack.com. Transfer leftover dry ice into a ventilated cooler and use it within two to three daystempcontrolpack.com. Gel packs and PCM packs are fully reusable and can last over 30 cycles with minimal capacity losstempcontrolpack.com.
Q4: What’s the difference between a cooler dry ice pack and a gel ice pack? – A cooler dry ice pack uses solid CO₂ to provide ultra‑cold temperatures (–78.5 °C) and is classified as hazardoustempcontrolpack.com. Gel ice packs contain a refrigerant gel or PCM that freezes at –20 °C to –30 °C and can be reusedtempcontrolpack.com. Gel packs are safer to handle and better for moderate temperatures.
Q5: How can I reduce shipping costs for cold chain goods? – Opt for efficient insulation like VIPs, reduce empty space, switch to reusable containers and adopt smart monitoring devicesshipmercury.com. Combining PCM packs with small amounts of dry ice in hybrid packaging can lower both cost and environmental impacttempcontrolpack.com.
Summary and Recommendations
Maintaining product integrity in the cold chain requires understanding your cooling options. Cooler dry ice packs deliver ultra‑cold temperatures but come with safety and regulatory requirementstempcontrolpack.com. Gel ice packs and PCM solutions provide moderate cold, are reusable and reduce wastetempcontrolpack.com. Hybrid packaging and smart sensors are emerging as the future, combining efficiency with sustainabilitytempcontrolpack.com. To optimize your operations:
Assess your temperature range: Use dry ice for frozen goods and gel/PCM packs for refrigerated goods.
Invest in high‑efficiency insulation: VIP panels reduce dry ice consumption and lower shipping costsshipmercury.com.
Adopt smart monitoring: Implement IoT sensors to track temperature, humidity and location in real timeshipmercury.com.
Plan for regulatory compliance: Label dry ice shipments correctly, train staff and consider non‑hazardous alternatives when possibletempcontrolpack.com.
Explore hybrid and battery‑powered solutions: Combine dry ice and PCMs or invest in battery‑powered coolers for longer journeysblog.gettransport.com.
By taking these steps you’ll protect your products, meet regulations and save money.
About Tempk
Tempk is a leading provider of cold chain packaging solutions, offering high‑quality cooler dry ice packs, gel ice packs, PCM containers and insulated shipping products. Our mission is to help businesses deliver temperature‑sensitive goods safely and efficiently. We invest in sustainable materials and smart technology, and our products comply with international safety standards. With decades of cold chain expertise, we’re here to support your logistical needs, whether you ship pharmaceuticals, food or industrial goods.
Ready to optimize your cold chain? Contact us to learn more about selecting the right cooler dry ice pack, integrating smart sensors or designing a hybrid packaging solution tailored to your shipment.
Fish Box Dry Ice Packs for Seafood Shipping – Ensure Freshness and Compliance
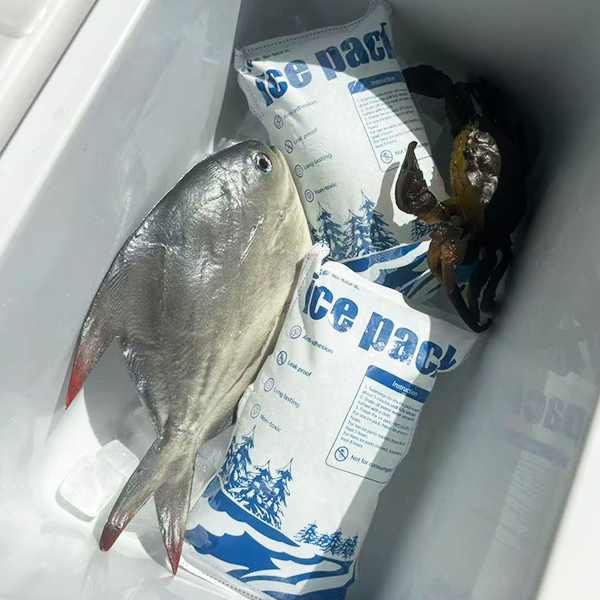
Shipping seafood, particularly fish, requires precision in temperature control to maintain freshness and prevent spoilage. Fish box dry ice packs are an effective solution for this challenge, offering low temperatures that ensure optimal conditions during transportation. This article delves into the importance of dry ice in the cold chain industry, focusing on its role in seafood shipping, the benefits it offers, and how to utilize it effectively in your operations.
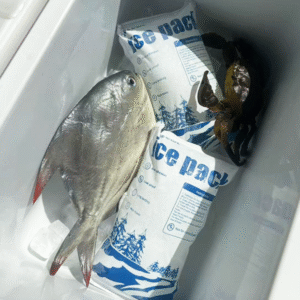
What are fish box dry ice packs and how do they work?
Why is temperature control essential in seafood shipping?
How do dry ice packs compare to traditional cooling methods?
What are the advantages of using dry ice for seafood transport?
What are the latest trends in dry ice usage for seafood shipping in 2025?
What Are Fish Box Dry Ice Packs and How Do They Work?
Fish box dry ice packs are insulated containers that utilize dry ice (solid carbon dioxide) to maintain sub-zero temperatures. Dry ice sublimates directly from solid to gas, without passing through a liquid phase, making it an excellent choice for preserving the quality of seafood during transit. Unlike traditional ice, dry ice does not leave behind water, making it ideal for moisture-sensitive products like fish.
How Dry Ice Packs Work:
Low Temperature Maintenance: Dry ice maintains temperatures below -78.5°C (-109.3°F), ideal for seafood shipping.
Sublimation Process: As dry ice sublimates, it converts to gas, preventing water accumulation and ensuring a dry environment.
Extended Shipping Durations: Dry ice lasts longer than traditional ice, making it ideal for extended shipping distances.
Why Is Temperature Control Crucial in Seafood Shipping?
Seafood is highly perishable, and temperature fluctuations can quickly lead to spoilage. Keeping seafood at the correct temperature throughout the shipping process ensures it remains safe for consumption while preserving its flavor and texture. Research shows that bacteria multiply rapidly when seafood exceeds 40°F (4°C), which can compromise product safety and quality.
Fish box dry ice packs help maintain a steady, sub-zero environment, minimizing the risks associated with temperature fluctuations and ensuring seafood arrives at its destination in optimal condition.
How Do Fish Box Dry Ice Packs Compare to Traditional Cooling Methods?
Fish Box Dry Ice Packs vs. Gel Packs
| Cooling Method | Temperature Range | Duration | Best For |
|---|---|---|---|
| Dry Ice | -78.5°C (-109.3°F) | Up to 144 hours | Long-distance seafood shipping |
| Gel Packs | 2°C to 8°C | 12-24 hours | Short-term or less sensitive shipments |
Dry ice provides sustained cooling for longer durations, which is essential for longer trips or remote shipping routes. In contrast, gel packs are best suited for short-distance shipping as they cannot provide the low temperatures necessary for seafood preservation over extended periods.
Fish Box Dry Ice Packs vs. Ice Packs
| Cooling Method | Temperature Range | Issue |
|---|---|---|
| Dry Ice | -78.5°C (-109.3°F) | No water or moisture |
| Ice Packs | 0°C to -2°C | Meltwater contamination risk |
Ice packs can introduce moisture into the packaging as they melt, posing a contamination risk for seafood. Dry ice avoids this issue by sublimating directly into gas, leaving the environment dry and preventing water damage to the product.
Advantages of Using Fish Box Dry Ice Packs for Seafood Transport
1. Maintaining Freshness Over Long Distances
With their ability to maintain ultra-cold temperatures, dry ice packs are capable of ensuring that delicate seafood, like fish fillets or shellfish, remains fresh even during multi-day or international shipments.
2. Cost-Effectiveness in the Long Run
Although dry ice packs might have a higher initial cost than traditional cooling methods, they are more cost-effective over time. Their longer lifespan and superior cooling capacity reduce the need for frequent replacements, leading to savings on transport expenses.
3. Minimizing the Risk of Contamination
By keeping the shipping environment dry, fish box dry ice packs reduce the chances of bacterial contamination that could spoil seafood, making them a safer option for perishable goods.
2025 Trends in Fish Box Dry Ice Packs and Seafood Shipping
As the cold chain industry evolves, so do the methods of temperature control and packaging. In 2025, sustainability and efficiency are key trends driving the development of dry ice packaging.
Latest Advances:
Eco-Friendly Dry Ice Alternatives: Companies are now exploring biodegradable dry ice solutions to reduce environmental impact while ensuring effective cooling.
Automated Temperature Monitoring: Real-time monitoring systems are becoming standard, providing companies with continuous updates on the temperature and condition of the shipment.
Improved Shipping Logistics: With advancements in logistics, shipping times are being reduced, making dry ice even more reliable for longer journeys.
Why Fish Box Dry Ice Packs Are Essential for Sustainable Seafood Shipping
As the demand for sustainable packaging increases, fish box dry ice packs are playing an essential role in addressing both environmental concerns and temperature control needs. These packs not only provide reliable cooling for seafood but also offer eco-friendly alternatives, such as biodegradable materials, to align with global sustainability goals.
FAQ
Q1: How long will fish box dry ice packs keep seafood cold during shipping?
Fish box dry ice packs typically last 48-72 hours, depending on the weight and amount of dry ice used, making them ideal for most seafood shipments.
Q2: Can I reuse fish box dry ice packs for multiple shipments?
While the dry ice itself cannot be reused after sublimation, the fish box container can be reused, making it an eco-friendly option for repeat shipments.
Q3: Are fish box dry ice packs safe for international shipping?
Yes, fish box dry ice packs are widely used for international shipments, particularly for perishables like seafood, and they comply with international shipping regulations.
Conclusion
In conclusion, fish box dry ice packs are indispensable in the cold chain logistics industry, especially when it comes to shipping temperature-sensitive goods like seafood. Their ability to maintain ultra-low temperatures for extended periods makes them the go-to solution for ensuring freshness and minimizing spoilage. As advancements in technology and sustainability continue, fish box dry ice packs will remain a key player in ensuring safe and efficient seafood shipping.
Next Steps:
If you are involved in the seafood shipping business, now is the time to switch to fish box dry ice packs. Contact your dry ice supplier to explore the most effective cooling solutions for your shipments.
About Tempk
At Tempk, we specialize in providing cutting-edge cold chain solutions, including fish box dry ice packs for seafood shipping. We prioritize sustainability while ensuring that your products reach their destination fresh, safe, and on time.
Contact us today for professional advice on optimizing your cold chain logistics!
Dry Ice Packs for Seafood Shipping: A Complete Guide for 2025

Dry Ice Packs for Seafood Shipping: A Complete Guide for 2025
Shipping seafood requires precise temperature control to maintain freshness and prevent spoilage. Dry ice packs are a vital tool in ensuring that seafood remains frozen during long transit periods. This comprehensive guide delves into how dry ice works, the best practices for packing seafood, and the regulatory requirements for shipping with dry ice. Whether you’re a seafood distributor or just starting, this guide will equip you with the knowledge to ship your products safely and efficiently.
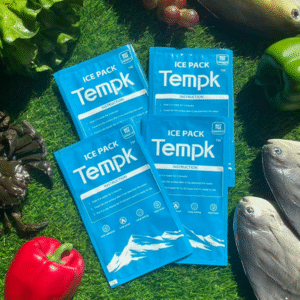
How do dry ice packs preserve seafood during shipping?
What is the recommended amount of dry ice for seafood shipments?
What are the best practices for packing seafood using dry ice?
How does dry ice compare to other cooling methods like gel packs?
What are the latest trends in seafood shipping for 2025?
How Do Dry Ice Packs Preserve Seafood During Shipping?
Dry ice packs are the ideal solution for maintaining sub-zero temperatures during seafood transport, preventing thawing and preserving product quality. Dry ice sublimates directly from solid to gas at -78.5°C (-109.3°F), providing an efficient cooling method without any water residue. This feature is particularly beneficial in preventing soggy or contaminated packaging, which is often a risk with traditional ice.
Seafood, being highly perishable, is extremely sensitive to temperature fluctuations. When exposed to temperatures higher than freezing, seafood can deteriorate rapidly, affecting texture, taste, and safety. Dry ice ensures that seafood remains in a frozen state for an extended period, maintaining its optimal freshness until it reaches the destination.
Key Benefits of Dry Ice for Seafood Shipping
Longer Cooling Duration: Dry ice keeps seafood frozen for up to 72 hours, depending on the package size and insulation used.
No Water Residue: Unlike traditional ice, dry ice sublimates into gas, ensuring no water buildup that could spoil the seafood.
Superior Cold Temperatures: At -78.5°C (-109.3°F), dry ice offers much colder temperatures compared to regular ice (0°C or 32°F), making it ideal for frozen seafood.
| Cooling Method | Temperature | Duration | Ideal for |
|---|---|---|---|
| Dry Ice | -78.5°C (-109.3°F) | 24-72 hours | Frozen seafood, long transit |
| Gel Packs | 0-8°C (32-46°F) | Varies | Short-distance shipments |
| Ice Packs | 0°C (32°F) | Varies | Less temperature-sensitive items |
What is the Recommended Amount of Dry Ice for Seafood Shipments?
When shipping seafood, the right amount of dry ice ensures that the products remain frozen throughout the journey. The amount of dry ice you need depends on several factors:
Shipment Duration: Longer shipments require more dry ice to maintain low temperatures.
Ambient Temperature: If the shipping route involves high ambient temperatures, additional dry ice may be necessary.
Package Size and Insulation: High-quality insulated containers reduce sublimation rates and preserve the cold temperature longer.
How Much Dry Ice to Use?
As a general rule, use 5-10 pounds of dry ice per 24 hours of transit for every 15 quarts of cooler space. This can vary based on external factors like temperature and the quality of insulation. For longer shipments or hotter routes, it’s essential to adjust the amount of dry ice accordingly.
Dry Ice Sizing Calculator for Seafood Shipping:
Use the following formula to determine the amount of dry ice required:
For example, shipping 20 lbs of seafood for 48 hours with an average insulation cooler (box efficiency = 1.2) would require:
Best Practices for Packing Seafood with Dry Ice
Proper packing ensures that your seafood stays frozen while also protecting it from damage during transit. Here are the key best practices:
Use Insulated Containers: Insulated containers help maintain the cold temperature for longer, especially when used with dry ice.
Separate Seafood and Dry Ice: To avoid freezer burn, keep seafood separate from direct contact with dry ice using moisture-resistant bags.
Layer Dry Ice Properly: Place dry ice at the top of the container, as cold air sinks. This method, known as the “cold dome,” ensures that the seafood stays at the right temperature.
Ensure Proper Ventilation: Since dry ice sublimates into gas, it’s essential that the container is vented to allow gas to escape, preventing dangerous pressure build-up.
Safety and Regulatory Considerations for Using Dry Ice
Since dry ice is classified as a hazardous material (UN 1845), shipping with dry ice requires compliance with several safety regulations:
Proper Labeling: Mark packages with “Carbon Dioxide, Solid” and include the UN 1845 label.
Handling Precautions: Always use gloves and goggles when handling dry ice to avoid frostbite.
Ventilation: Ensure that the container is not airtight, as this can cause dangerous pressure accumulation.
2025 Trends in Seafood Shipping
The seafood shipping industry continues to evolve, with sustainability and efficiency taking center stage in 2025. Emerging technologies and new shipping solutions are improving the way seafood is transported, with a focus on reducing environmental impact and enhancing cold chain visibility.
Sustainable Dry Ice Production: Biodegradable dry ice packs and carbon capture technologies are gaining traction to reduce emissions.
Advanced Temperature Monitoring: Real-time tracking systems, including Bluetooth and BLE sensors, are helping businesses monitor temperature conditions throughout the shipping process.
Hybrid Cooling Solutions: Combining dry ice with phase change materials (PCM) or gel packs is becoming more common for temperature control over longer durations.
Frequently Asked Questions
Q: How long can dry ice keep seafood frozen?
A: Dry ice can maintain frozen conditions for up to 72 hours, depending on factors like insulation, the amount of dry ice used, and the shipment’s duration.
Q: Can dry ice be used for overnight seafood shipments?
A: Yes, dry ice is ideal for overnight shipments as it provides rapid cooling and ensures that seafood remains at the correct temperature for quick deliveries.
Q: Is dry ice safe for live seafood?
A: No. Dry ice is too cold for live seafood, and can kill delicate items like lobsters or oysters. Gel packs or PCM should be used instead for live shipments.
Conclusion and Recommendations
Using dry ice packs for seafood shipping is the best way to ensure your products arrive frozen and fresh, maintaining their quality during transit. By adhering to best practices for packing, handling, and regulatory compliance, you can ensure safe and efficient shipping. As the industry evolves, staying updated on the latest trends and innovations will help you remain competitive in the market.
Next Steps:
Evaluate your shipping requirements and calculate the necessary dry ice for your shipments.
Use high-quality insulated containers and ensure proper ventilation.
Stay informed on 2025 trends like eco-friendly dry ice production and smart monitoring solutions.
About Tempk
Tempk is a leading provider of dry ice solutions for cold chain logistics. We specialize in offering high-quality dry ice and advanced packaging systems tailored to the seafood industry. Our solutions are designed for efficiency, safety, and sustainability, ensuring your products arrive fresh and on time.
Contact us today for expert advice on dry ice solutions for seafood shipping.
Shipping Container Dry Ice Ice Pack: How They Ensure Safe Temperature Control
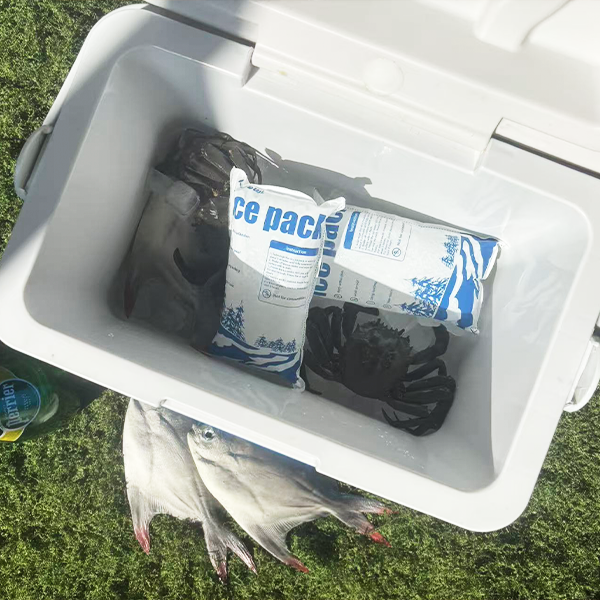
Shipping Container Dry Ice Ice Pack: How Do They Ensure Safe Temperature Control During Transit?
In the cold chain logistics industry, ensuring that temperature-sensitive goods remain within a specified range is crucial. Shipping container dry ice ice packs are pivotal in maintaining the integrity of perishable products during transit. These ice packs offer an effective and cost-efficient solution, particularly for long-distance shipments, ensuring that perishable items like pharmaceuticals, food, and biological samples arrive safely. In this article, we will explore how shipping container dry ice ice packs work, their benefits, best practices for use, and how they help solve common challenges in cold chain shipping.
What are Shipping Container Dry Ice Ice Packs and How Do They Work?
Dry ice, which is the solid form of carbon dioxide (CO2), has a sublimation point of -78.5°C (-109.3°F). When placed inside a shipping container, dry ice ice packs provide continuous cooling by absorbing heat as it sublimates from solid to gas. This cooling process keeps the interior of the shipping container at a consistently low temperature, making it ideal for temperature-sensitive shipments. Unlike conventional ice packs that melt into water, dry ice sublimates directly into gas, eliminating any risk of water leakage that could potentially damage goods.
Dry ice ice packs offer a more efficient cooling solution than traditional methods, making them especially useful for shipping frozen food, pharmaceuticals, and biological samples, which need to maintain specific temperatures during transit.
Why are Dry Ice Ice Packs Vital for Temperature Control During Transit?
Dry ice ice packs are essential for controlling the temperature of perishable goods during transport. Their ultra-low temperature capabilities keep shipments at sub-zero temperatures, which is crucial for products that need to stay frozen or chilled to maintain their quality.
Efficient Cooling: Dry ice can maintain very low temperatures for extended periods, far longer than traditional ice or gel packs. This efficiency reduces the need for frequent replenishment during long shipments.
No Water Damage: Since dry ice sublimates directly into gas, it eliminates the risk of water leakage, a common issue with conventional ice, which can damage sensitive products and packaging.
Compact and Easy to Handle: Dry ice ice packs are easy to handle and can be precisely placed inside shipping containers to ensure an even distribution of cold, ensuring that every item stays within its optimal temperature range.
Best Practices for Using Shipping Container Dry Ice Ice Packs
To maximize the effectiveness of dry ice ice packs in your shipments, it’s important to follow a few best practices:
1. Proper Insulation
The shipping container must be adequately insulated to retain the cold air generated by the dry ice. Insulation reduces the rate at which the dry ice sublimates, ensuring that the temperature inside the container remains stable for the duration of the transit. Materials like Styrofoam, polyurethane foam, and vacuum-insulated panels are commonly used to line shipping containers.
2. Avoid Overloading Dry Ice
Shipping regulations typically limit the amount of dry ice that can be used in a single shipment. Exceeding these limits can result in dangerous conditions during transit, especially in confined spaces. Ensure that the amount of dry ice used aligns with regulatory guidelines, typically not exceeding 5.5 pounds per package for air shipments.
3. Labeling and Ventilation
Proper labeling and ventilation are essential for safety when shipping dry ice. Containers must be clearly marked with “Dry Ice” or “Carbon Dioxide, Solid” and include the UN1845 identifier. It is crucial to ensure that the container is well-ventilated to allow the CO2 gas to escape as the dry ice sublimates, preventing pressure buildup that could lead to accidents.
| Shipping Use Case | Ideal Temperature Range | Common Products | Dry Ice Requirements |
|---|---|---|---|
| Pharmaceutical Shipping | -10°C to -20°C | Vaccines, Insulin | 5-10 lbs of dry ice |
| Food Shipping | -18°C or lower | Frozen Meals, Seafood | 8-12 lbs of dry ice |
| Biological Samples | -20°C or lower | DNA, Blood Samples | 6-10 lbs of dry ice |
Challenges When Using Dry Ice in Shipping and Their Solutions
Using dry ice in shipping containers is not without its challenges. However, with the right preparation, these challenges can be effectively managed.
1. Dry Ice Sublimation Rate
Dry ice sublimates at a specific rate, typically 3 to 8 pounds per day depending on factors like insulation and ambient temperature. To counteract this, use appropriate container insulation and monitor the sublimation process. This ensures the dry ice remains effective throughout the journey, even on longer shipments.
2. Safety Concerns with CO2 Gas
The primary safety concern with dry ice is the CO2 gas that is released during sublimation. Excess CO2 can displace oxygen in the air, posing asphyxiation risks. Ensuring proper ventilation in the shipping container is key to avoiding these dangers.
3. Compliance with Shipping Regulations
Different carriers and countries have varying regulations regarding the shipment of dry ice. Adherence to these regulations is essential to avoid delays or fines. For example, the International Air Transport Association (IATA) has specific guidelines for dry ice shipping that must be followed.
How Dry Ice and Gel Packs Work Together to Ensure Safe Transport
Combining dry ice and gel packs is an effective way to maintain different temperature zones within the same shipping container. Dry ice is ideal for extremely cold temperatures, while gel packs maintain a moderate cooling range. This hybrid cooling system allows businesses to ship products that require different temperature conditions in one shipment. For example, you can place gel packs near temperature-sensitive food items, while dry ice can be positioned near frozen items.
Key Benefits of Hybrid Cooling
Extended Cooling Duration: The combination of dry ice and gel packs extends the overall cooling period, which is crucial for long-haul shipments.
Cost-Effective: Using gel packs in conjunction with dry ice reduces the total amount of dry ice required, which cuts down on costs and reduces environmental impact.
Enhanced Safety: Gel packs are safer to handle, and using both cooling agents reduces the risk of frostbite associated with handling dry ice.
Trends in Dry Ice Shipping for 2025
The cold chain logistics industry continues to evolve with advancements that enhance the efficiency and sustainability of dry ice shipping methods. Some of the latest innovations include:
Smart Packaging Technology
Shipping containers are now being equipped with smart sensors that monitor temperature fluctuations in real-time. These sensors provide immediate alerts if the temperature rises above acceptable limits, allowing for swift corrective action.
Sustainability Initiatives
As sustainability becomes a greater focus, companies are seeking ways to reduce the environmental impact of dry ice shipping. This includes using eco-friendly packaging materials and exploring sustainable methods of dry ice production.
Automation in Logistics
Automation is revolutionizing cold chain logistics, reducing human error and increasing efficiency. Automated systems help in the handling, transportation, and tracking of dry ice shipments, making the overall process more streamlined.
Common FAQs About Dry Ice Shipping
Q1: How long does dry ice last in a shipping container?
Dry ice typically lasts between 24 and 72 hours, depending on the insulation quality and the amount used.
Q2: Can I use dry ice for shipping food?
Yes, dry ice is commonly used for shipping frozen foods, especially those that require temperatures lower than -18°C, such as seafood and frozen meals.
Q3: Is dry ice safe to handle?
Dry ice is safe to handle with proper precautions. Always wear gloves to prevent frostbite and ensure that the shipping container has proper ventilation to release the CO2 gas safely.
Summary and Recommendations
In conclusion, shipping container dry ice ice packs are an essential tool for cold chain logistics, ensuring that temperature-sensitive goods remain within the desired temperature range throughout transit. By following the best practices for packaging, handling, and safety, businesses can enhance their shipping processes and ensure the integrity of their products.
Next Steps
Review your shipping processes: Ensure that dry ice is suitable for your products and meets all temperature requirements.
Train your team: Ensure that your team is well-versed in the safe handling and regulations associated with dry ice.
Stay updated on industry trends: Keep up with the latest trends in cold chain logistics, such as smart packaging and sustainability efforts.
About Tempk
At Tempk, we specialize in providing cold chain solutions tailored to your shipping needs. With a focus on innovation and quality, our products ensure optimal freshness and safety for your temperature-sensitive products. Contact us today to learn how we can help improve your shipping operations with our cutting-edge dry ice solutions.