


How to Use Medical Supply Dry Ice Pack Sheets for Safe and Efficient Shipping
How to Use Medical Supply Dry Ice Pack Sheets for Safe and Efficient Shipping
How to Use Medical Supply Dry Ice Pack Sheets for Safe and Efficient Shipping
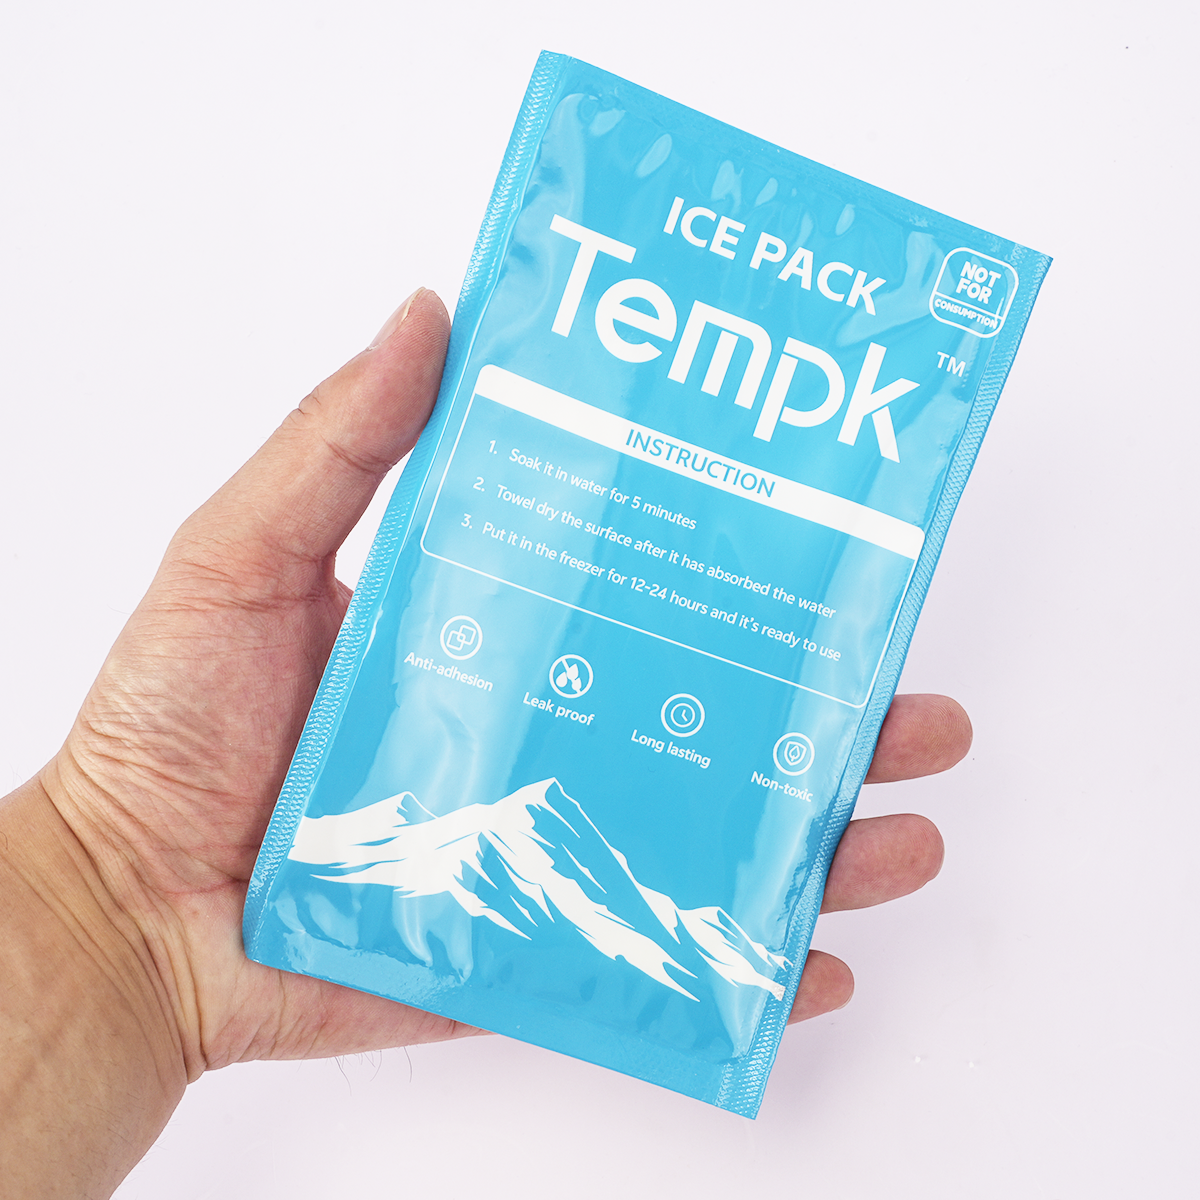
Shipping medical supplies requires meticulous planning and precise temperature control to ensure the products arrive at their destination in optimal condition. Medical supply dry ice pack sheets offer an effective solution for maintaining sub-zero temperatures during transit. These specialized sheets provide cooling solutions that prevent temperature fluctuations, a critical factor for maintaining the integrity of vaccines, blood samples, pharmaceuticals, and other temperature-sensitive medical products.
What are medical supply dry ice pack sheets and why are they important for shipping?
How do dry ice pack sheets ensure the safety and integrity of medical supplies during transport?
What are the best practices for using dry ice pack sheets?
How can businesses optimize their shipping and logistics with dry ice solutions?
What Are Medical Supply Dry Ice Pack Sheets and Why Are They Important?
Medical supply dry ice pack sheets are a type of cooling agent designed to keep medical products at a low, consistent temperature. These sheets consist of compressed dry ice in a flexible, thin sheet form that is easy to handle. Medical dry ice pack sheets are used for shipping sensitive medical products such as vaccines, blood samples, and pharmaceutical products, all of which require strict temperature control.
Why Are They Vital for Medical Shipping?
Temperature-sensitive products, such as vaccines and biologics, require precise temperature regulation. Dry ice pack sheets prevent temperature fluctuations, ensuring that these products remain within the required temperature range during transit. Their ability to keep shipments frozen for extended periods makes them indispensable for medical shipping.
Key Features of Dry Ice Pack Sheets
| Feature | Description | Impact on Medical Shipping |
|---|---|---|
| Temperature Control | Keeps items at temperatures as low as -78.5°C (-109.3°F). | Maintains sub-zero conditions, ideal for sensitive products. |
| Flexibility | Thin, flexible sheets for easy handling. | Conforms to irregular shapes, ensuring maximum surface contact. |
| No Residual Moisture | Sublimates into gas, leaving no moisture behind. | Prevents product damage and moisture-related issues. |
How Do Dry Ice Pack Sheets Work?
Dry ice is solid carbon dioxide (CO₂), which sublimates directly into gas at -78.5°C (-109.3°F). When used in dry ice pack sheets, this property helps maintain a low temperature without introducing any moisture. These sheets are wrapped around medical supplies, ensuring they remain frozen, thus preventing degradation and spoilage during transit.
Key Benefits:
Effective Temperature Control: Dry ice pack sheets are ideal for keeping items at the right temperature throughout the shipping process.
Longer Duration: Dry ice lasts much longer than regular ice, providing cooling during longer transit times.
No Water Damage: Unlike regular ice, which can melt and create moisture, dry ice sublimates into gas, keeping the shipment dry.
Best Practices for Using Dry Ice Pack Sheets in Medical Supply Shipping
To ensure safe and efficient transport of medical supplies, it is essential to follow the best practices for using dry ice pack sheets. Here are key recommendations:
Proper Packaging and Insulation
Using insulated containers, such as Styrofoam boxes or insulated shipping bags, is essential. These containers prevent heat from entering, ensuring that the dry ice remains effective throughout transit.
Calculate the Correct Amount of Dry Ice
It’s crucial to calculate the correct amount of dry ice depending on the shipment size, the type of medical product, and the expected transit time. For example, 5.5 lbs (2.5 kg) of dry ice per 24-hour period is a typical recommendation for most shipments. Be sure to follow specific carrier guidelines for your shipment.
Ensure Proper Ventilation
Since dry ice sublimates into CO₂, proper ventilation is necessary to avoid pressure buildup inside the container. Containers should have ventilation holes to allow gas to escape safely.
Label the Shipment Correctly
All shipments containing dry ice must be labeled with “Dry Ice” and “UN1845” to alert handlers to potential hazards. This ensures that the shipment is handled appropriately throughout the shipping process.
Monitor Temperature Throughout Transit
Temperature monitoring devices, such as temperature loggers, should be used to track the conditions of the shipment. These devices provide a layer of assurance that the temperature is within the required range for the entire duration of the shipment.
How Dry Ice Pack Sheets Enhance Medical Supply Shipping Efficiency
Dry ice pack sheets contribute to medical supply shipping efficiency in several ways:
1. Improved Product Integrity
By maintaining a consistent low temperature, dry ice ensures that sensitive medical supplies, such as vaccines and biologics, are not compromised during transport. This improves the likelihood that the products will remain effective upon delivery.
2. Reduced Risk of Spoilage
By keeping products at the correct temperature, dry ice pack sheets reduce the risk of spoilage. This helps maintain product integrity and reduces waste.
3. Faster Shipping Times
Dry ice facilitates expedited shipping services, such as next-day or expedited delivery, without compromising the safety or efficacy of the products. This is particularly crucial for time-sensitive shipments like vaccines or clinical trial samples.
2025 Trends in Medical Supply Dry Ice Shipping
As the cold chain logistics industry evolves, several trends are shaping the future of medical supply dry ice shipping:
Smart Packaging Technologies
Innovative smart packaging solutions now include real-time temperature sensors, allowing businesses to monitor shipments and receive alerts if temperatures deviate from the required range. This enhances traceability and prevents product damage.
Sustainability in Cold Chain Logistics
Sustainability is increasingly becoming a focus in cold chain shipping. Companies are exploring ways to reduce CO₂ emissions and make dry ice shipping more eco-friendly, such as using biodegradable packaging or sustainable dry ice production practices.
Automation in Logistics
The adoption of automation in shipping processes helps streamline handling and reduces processing time, making dry ice and other temperature-sensitive shipping materials more efficient.
Common Questions About Medical Supply Dry Ice Pack Sheets
Q1: How do I calculate the right amount of dry ice for medical supply shipping?
The right amount of dry ice depends on the size of the shipment and the shipping duration. Typically, 5.5 lbs (2.5 kg) per 24 hours is recommended, but this may vary based on specific requirements.
Q2: Is it safe to ship medical supplies with dry ice?
Yes, it is safe, as long as proper handling and ventilation guidelines are followed. Proper packaging and labeling are critical to ensuring safety during shipping.
Summary and Recommendations
In summary, dry ice pack sheets are essential for safely shipping temperature-sensitive medical supplies. They provide consistent cooling, prevent spoilage, and reduce waste. To ensure efficient shipping, always follow best practices for packaging, calculate the correct dry ice amount, and monitor temperatures throughout transit. Embracing these methods will improve the efficiency and reliability of your medical supply shipments.
Next Steps for Your Business
Review Your Cold Chain Practices: Ensure that dry ice solutions are integrated effectively into your shipping processes.
Invest in Smart Packaging: Implement temperature-monitoring systems to track conditions during transport.
Train Your Team: Ensure all staff members are knowledgeable about the proper handling and use of dry ice pack sheets.
About Tempk
Tempk specializes in providing advanced cold chain solutions, including dry ice pack sheets, for the medical industry. With our expertise in logistics and temperature control, we ensure your medical supplies reach their destination safely and efficiently.
Contact us today to learn more about how our dry ice shipping solutions can benefit your medical supply chain.
Dry Ice Pack Sheets for Next-Day Shipping: Ensure Safe Delivery
For businesses handling temperature-sensitive products, dry ice pack sheets are a vital component in ensuring goods arrive fresh and undamaged, particularly for next-day shipping. Whether shipping food, pharmaceuticals, or biological samples, dry ice pack sheets are a reliable solution for maintaining the required temperature over extended periods. This article will cover how dry ice sheets enhance next-day shipping, their advantages, best practices for efficient use, and important regulatory considerations.
The key benefits of using dry ice in shipping perishable goods.
Best practices for using dry ice pack sheets effectively.
Regulatory considerations for shipping with dry ice.
Why Are Dry Ice Pack Sheets Ideal for Next-Day Shipping?
Dry ice, the solid form of carbon dioxide (CO₂), sublimates at a temperature of -78.5°C (-109.3°F). This property makes dry ice perfect for shipping perishable items that require consistent cooling during transit. Dry ice pack sheets offer an efficient and convenient solution for keeping products at the right temperature, especially for next-day delivery, where quick and reliable cooling is essential.
Using dry ice pack sheets helps preserve perishable goods by maintaining them frozen or refrigerated during shipping, even over long distances. With rising consumer demand for fresh, fast deliveries, dry ice is becoming an indispensable tool for businesses offering next-day shipping of temperature-sensitive goods.
How Do Dry Ice Pack Sheets Work for Next-Day Shipping?
Dry ice pack sheets work by absorbing heat as they transition from solid CO₂ to gas. This sublimation process allows the dry ice to keep items cold without the need for traditional refrigeration units. For next-day shipping, the ability of dry ice to stay cold for extended periods ensures that your products arrive on time and at the correct temperature, preventing spoilage and maintaining product integrity.
Key Benefits of Using Dry Ice for Next-Day Shipping
Efficient Cooling: Dry ice ensures that products stay at the correct temperature for longer periods, which is critical for perishable goods. With proper insulation, it can last through the entire shipping duration, even with expedited services like next-day shipping.
Cost-Effective: Using dry ice helps avoid the need for expensive refrigerated trucks or specialized cooling devices. Businesses save on shipping costs while ensuring that temperature-sensitive goods reach their destination safely.
Versatility: Dry ice pack sheets can be used for various types of shipments, ranging from food and beverages to medical supplies and biological samples. Their ability to maintain low temperatures makes them versatile across industries requiring reliable cold chain solutions.
Best Practices for Using Dry Ice Pack Sheets in Next-Day Shipping
How Much Dry Ice Should You Use?
The right amount of dry ice is essential for maintaining the required temperatures during transit. Typically, 5-10 pounds of dry ice are used for standard shipments. The exact quantity will depend on factors such as the shipping duration, the type of product being shipped, and the insulation used in the package. For next-day deliveries, you’ll want to ensure that the dry ice lasts long enough to maintain the product temperature throughout transit.
Pro tip: Always consult with your shipping carrier about dry ice weight limits, as there are regulations governing the maximum amount of dry ice allowed per package.
Packaging Tips for Dry Ice Pack Sheets
To maximize the effectiveness of dry ice pack sheets, follow these best practices for packaging:
Use Insulated Containers: Insulated containers slow down the sublimation rate of dry ice, helping it last longer and maintain the correct temperature.
Double-Bagging: Place dry ice inside a breathable bag to prevent direct contact with the product.
Seal Containers Properly: Ensure that containers are airtight to prevent CO₂ gas leakage but still have proper ventilation to allow for the safe release of CO₂ gas.
Ventilation is Key
When using dry ice, it’s essential to ensure proper ventilation. As dry ice sublimates, it releases carbon dioxide gas, which can create pressure inside sealed containers. To prevent ruptures or delays, use containers that allow CO₂ gas to escape safely.
Regulatory Considerations for Shipping with Dry Ice
Shipping with dry ice requires compliance with various regulations, such as those set by transportation authorities. Shipments containing more than 5.5 pounds of dry ice require specific packaging guidelines and labeling.
Key regulatory guidelines include:
Weight limits: Shipments containing dry ice may not exceed 5.5 pounds without meeting additional guidelines.
Proper labeling: Packages must be clearly marked with “Dry Ice” and “UN 1845.”
Shipping documents: Some shipments may require a dangerous goods declaration, depending on the amount of dry ice.
Benefits of Dry Ice vs. Other Cooling Methods
When compared to other cooling methods, dry ice offers superior cooling due to its extremely low temperatures and longer duration. While gel packs and ice packs are commonly used for refrigerated shipments, dry ice is the preferred choice for next-day deliveries requiring freezing temperatures.
| Cooling Method | Temperature Range | Cooling Duration | Best Use Case |
|---|---|---|---|
| Dry Ice | -78.5°C (-109.3°F) | 24-72 hours | Frozen food, biological samples |
| Gel Packs | -5°C to 5°C | 12-24 hours | Refrigerated items, short-duration shipping |
| Ice Packs | 0°C to -5°C | 6-12 hours | Short-term deliveries, grocery items |
How to Pack Food for Dry Ice Shipping
When shipping food, it’s essential to pack it properly with dry ice to ensure it stays at the required temperature. Here’s how to do it:
Use Sturdy, Insulated Boxes: Ensure the boxes are robust enough to withstand handling and maintain a consistent temperature.
Layer the Dry Ice: Place dry ice on the bottom or around the product to ensure even cooling.
Seal the Box with Ventilation: Ensure the box has ventilation holes to avoid pressure buildup from the sublimating CO₂ gas.
Trends in Dry Ice Shipping for 2025
As we move into 2025, several trends are shaping the future of cold chain logistics and dry ice shipping. Notable innovations include:
Smart Packaging Solutions: New technologies, such as real-time temperature monitoring, are becoming more common, ensuring that shipments stay within safe temperature ranges throughout transit.
Sustainability in Packaging: Companies are moving towards sustainable packaging options, reducing the environmental impact of shipping.
Integrated Cold Chain Solutions: Partnerships between logistics providers and tech companies are increasing efficiency and reducing costs.
Common FAQs about Dry Ice Pack Sheets for Next-Day Shipping
What are the best practices for shipping food with dry ice?
The best practices include using insulated packaging, properly layering dry ice around the food, and ensuring the box is ventilated to prevent gas buildup. Always check with your carrier for dry ice regulations.
Can dry ice keep my food frozen for the entire next-day shipping period?
Yes, if you use the right amount of dry ice and pack it in an insulated container, dry ice will keep your food frozen for the duration of next-day shipping, ensuring product quality.
Conclusion and Recommendations
Dry ice pack sheets are an essential tool for businesses offering next-day shipping for perishable goods. By following best practices for dry ice usage and staying compliant with shipping regulations, you can ensure that your products reach their destination safely and in optimal condition.
Next Steps for Your Business
Review your dry ice shipping strategy: Ensure you’re using the correct amount of dry ice and appropriate insulation.
Partner with specialized logistics providers: Work with carriers who understand the requirements for dry ice shipments to ensure safe and efficient delivery.
Stay up-to-date with regulations: Regularly check for updates to regulations regarding dry ice shipping to avoid delays or penalties.
About Tempk
At Tempk, we specialize in providing innovative cold chain solutions for businesses in industries that require temperature-sensitive shipments. Our dry ice pack sheets and insulated boxes are designed for easy training, repeatable packouts, and regulatory compliance. With our expertise, we help ensure the safe and efficient transport of goods, including those shipped with dry ice.
Consult with us today to learn how dry ice can improve your next-day shipping logistics.
How to Effectively Use Dry Ice Shipping Bags for Safe Deliveries

Shipping temperature-sensitive products, like frozen foods, pharmaceuticals, and biological samples, requires reliable cooling solutions. Dry ice shipping bags provide an effective way to keep goods cold throughout transit. This guide covers how to use dry ice shipping bags safely, best practices, and the benefits for businesses involved in cold chain logistics.

What are dry ice shipping bags, and how do they work?
How can you properly pack dry ice for shipping?
What are the best practices for using dry ice bags for deliveries?
How can businesses benefit from dry ice shipping bags?
What Are Dry Ice Shipping Bags and How Do They Work?
Dry ice shipping bags are durable containers designed to transport dry ice safely, ensuring that products remain frozen during transit. These bags are typically made from materials like polyethylene and kraft paper, offering insulation and preventing premature sublimation of the dry ice.
Key Benefits of Dry Ice:
Sublimates at -78.5°C (-109.3°F), providing excellent cooling for perishable goods.
No water residue—dry ice sublimates into gas, unlike regular ice that leaves moisture behind.
Effective for longer shipments, maintaining the low temperature without compromise.
Why Use Dry Ice Shipping Bags for Deliveries?
Using dry ice bags provides an efficient and secure method for transporting temperature-sensitive goods:
Efficient Cooling: Dry ice offers a longer cooling period than traditional ice, making it ideal for long-distance shipments.
No Water Residue: Dry ice sublimates into gas, preventing moisture damage to goods.
Regulated Temperature: Ensures consistent cooling, crucial for sensitive products like food and pharmaceuticals.
Best Practices for Using Dry Ice Shipping Bags
To ensure safe and efficient shipping, follow these best practices:
Choose the Right Bag: Select a dry ice bag with adequate insulation to slow sublimation. Multi-layer bags are ideal for longer transit durations.
Pre-cool Your Shipping Container: Pre-cool the shipping container to maintain a stable temperature.
Pack Efficiently: Place dry ice at the bottom and the products on top. Cold air from sublimation will flow over the items, ensuring proper cooling.
How to Properly Pack Dry Ice for Shipping
Use the Correct Amount: For 24-hour shipments, use 5-10 lbs of dry ice per 10 lbs of perishable goods.
Ensure Ventilation: Proper ventilation prevents dangerous CO₂ build-up, which can happen when dry ice sublimates in an airtight container.
Seal the Bag Securely: Make sure the dry ice bag is tightly sealed to reduce gas loss during transit.
| Packaging Type | Insulation Type | Best Use | Duration |
|---|---|---|---|
| Dry Ice Shipping Bag | Multi-layered plastic | Short-distance | 12-24 hours |
| Thermal Insulated Bag | Foam or vacuum-sealed | Long-distance | 24-72 hours |
| Polyethylene Shipping Bag | Durable plastic | Direct contact | 12-48 hours |
Common Mistakes to Avoid When Shipping with Dry Ice
Incorrect Labeling: Always mark the package with “Dry Ice” and the net weight of the dry ice.
Too Much Dry Ice: Overpacking leads to excessive sublimation, potentially compromising the product.
Failure to Check Regulations: Adhere to specific carrier regulations, including the 5.5 lbs per package limit without special arrangements.
How to Maximize the Benefits of Dry Ice Shipping Bags
Enhance Product Quality
By using dry ice, you ensure that perishable products remain at the required temperature, reducing spoilage risks. Whether shipping frozen foods, biologics, or pharmaceuticals, dry ice guarantees product integrity.
Expand Service Offerings
Dry ice bags enable businesses to offer reliable cold chain logistics, providing the capacity to ship a wide range of temperature-sensitive products.
Improve Customer Satisfaction
Today’s consumers demand high-quality products delivered in perfect condition. By using dry ice shipping bags, businesses can enhance customer loyalty by guaranteeing that their goods remain cold.
Protect the Environment
As sustainability becomes more critical, eco-friendly dry ice shipping bags made from recyclable materials offer a more sustainable alternative to traditional packaging.
2025 Trends in Dry Ice Shipping Bags
Recent innovations in dry ice shipping bags are making cold chain logistics more efficient and sustainable:
Smart Packaging: Temperature sensors integrated into dry ice bags provide real-time monitoring of shipping conditions.
Sustainable Materials: Manufacturers are developing biodegradable dry ice bags, reducing environmental impact.
Improved Sublimation Control: Advances in insulation materials help regulate the sublimation rate, increasing efficiency.
Market Insights
The growing e-commerce and pharmaceutical markets are driving demand for dry ice shipping bags, particularly in the food, pharma, and biotech industries, which require precise temperature control during transit.
Frequently Asked Questions
Q1: How much dry ice should I use in my shipment?
For a 24-hour shipment, use 5-10 lbs of dry ice per 10 lbs of perishable goods. For longer shipments, adjust according to the duration and insulation quality.
Q2: Can I reuse dry ice shipping bags?
Yes, dry ice bags can be reused if made from durable materials. Be sure to inspect and clean them thoroughly before reuse.
Q3: What is the maximum dry ice weight per package?
Air transport regulations limit dry ice to 200 kg per package. For consumer shipments, typical shipments use 5-10 lbs per 24 hours.
Summary and Recommendations
Using dry ice shipping bags is essential for businesses looking to maintain product quality and ensure customer satisfaction in cold chain logistics. Follow proper packing and best practices to guarantee safe delivery.
Action Plan
Evaluate Your Needs: Determine if dry ice is the right solution for your cold chain needs.
Implement Best Practices: Review your packaging, shipping, and labeling processes to ensure they comply with industry standards.
Stay Updated on Trends: Monitor the latest advancements in cold chain logistics to optimize your shipping processes.
About Tempk
Tempk offers specialized cold chain solutions for shipping temperature-sensitive goods. With a focus on sustainability, innovation, and reliability, our services ensure safe and efficient delivery of perishable products.
Contact us today for expert advice on optimizing your dry ice shipping processes.
Shipping Kit Dry Ice Pack – Essential for Safe Cold Chain Logistics (2025 Guide)
Shipping Kit Dry Ice Pack – Essential for Safe and Efficient Cold Chain Logistics
Introduction
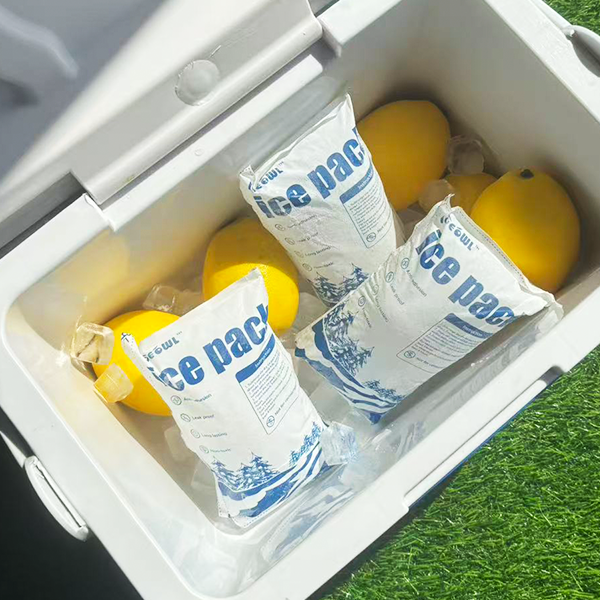
When shipping perishable goods, maintaining the integrity of the cold chain is essential to ensure freshness. A shipping kit dry ice pack is a critical solution for businesses needing to ship temperature-sensitive items like food, pharmaceuticals, or biological samples. This guide will explain why dry ice packs are indispensable, how to choose the right one for your needs, and the best practices for ensuring safe and compliant cold chain shipping.
What is a shipping kit dry ice pack and how does it work?
Why is it crucial for cold chain shipping?
How to choose the right dry ice pack for your shipping kit?
Best practices for handling and shipping with dry ice packs
2025 trends in dry ice shipping and innovations
What is a Shipping Kit Dry Ice Pack and How Does It Work?
A shipping kit dry ice pack is a cooling solution designed for shipping perishable items at a consistently low temperature. Dry ice, the solid form of carbon dioxide (CO2), sublimates at -78.5°C (-109.3°F), absorbing heat from its surroundings. This process helps maintain the contents of the shipping kit at the required low temperatures throughout the transit period, ensuring product safety and freshness.
Why is Dry Ice Effective for Shipping?
Unlike traditional ice packs that melt and release water, dry ice sublimates directly into gas, eliminating any risk of water leakage. This makes it ideal for items that could be damaged by moisture, such as electronics, pharmaceuticals, and food. Dry ice is also effective for long shipments, providing consistent cooling over extended periods.
Why is a Shipping Kit Dry Ice Pack Crucial for Cold Chain Shipping?
For perishable goods like meat, seafood, pharmaceuticals, or vaccines, maintaining consistent cold temperatures is paramount. Temperature fluctuations can lead to spoilage, loss of potency, or damage to fragile items. Dry ice packs provide several advantages in these situations:
Consistent Low Temperature: Dry ice keeps shipments frozen or at the required temperature for an extended time, preventing bacterial growth and spoilage.
No Meltwater: Since dry ice sublimates into gas, there is no water residue that could damage the contents.
Longer Cooling Duration: Dry ice packs are ideal for long shipments, including international shipping, offering sustained cooling for up to 72 hours.
How to Choose the Right Dry Ice Pack for Your Shipping Kit?
Selecting the right dry ice pack involves several factors. Consider these key points to optimize your cold chain logistics:
1. Shipping Duration
For short shipments (under 24 hours), a small dry ice pack (5 lbs) will suffice.
For longer shipments (over 48 hours), opt for larger packs or additional dry ice to ensure consistent cooling.
2. Temperature Requirements
Products that require freezing temperatures (such as meat and vaccines) need more dry ice to maintain their quality throughout the shipment.
Refrigerated products can often be shipped using gel packs or phase change materials (PCMs), but dry ice is still preferred for frozen items.
3. Shipment Size
Larger shipments or bulk goods need more dry ice. Ensure the dry ice pack size matches the size of the shipment.
4. Packaging Type
Ensure the shipping container is insulated and vented to allow the CO2 gas to escape safely during sublimation.
5. Shipping Regulations
Shipping dry ice is subject to regulations that limit its weight per package (typically 5.5 lbs on passenger aircraft). Always check your carrier’s rules.
Dry Ice Pack Types
| Pack Type | Weight | Cooling Duration | Ideal for | Key Benefits |
|---|---|---|---|---|
| Standard Dry Ice Pack | 5 lbs | 24 hours | Short shipments | Easy handling, ideal for overnight shipping |
| Heavy-Duty Dry Ice Pack | 10 lbs | 48-72 hours | Long transit, large shipments | Longer cooling duration, large shipment compatibility |
| Eco-friendly Dry Ice Pack | 5 lbs | 24 hours | Sensitive products | Sustainable packaging, environmentally friendly |
Best Practices for Shipping with Dry Ice Packs
1. Proper Packaging and Insulation
Always use insulated containers to maintain low temperatures. Dry ice should be in direct contact with the products to ensure consistent cooling.
2. Correct Placement of Dry Ice
Place dry ice at the bottom of the box to prevent direct contact with sensitive items. Ensure air circulation to avoid rapid sublimation.
3. Handling and Safety Guidelines
Wear gloves when handling dry ice to prevent frostbite.
Ensure proper labeling of the package, as dry ice is considered hazardous material.
4. Ventilation is Key
Dry ice releases CO2 gas, so your packaging must allow for ventilation to avoid dangerous pressure buildup.
2025 Trends in Dry Ice Shipping
The Evolution of Dry Ice Shipping Technology
In 2025, cold chain logistics continue to innovate with technologies such as smart packaging, real-time temperature tracking, and eco-friendly materials. These trends improve shipment monitoring and reduce environmental impact.
Latest Developments
Smart Sensors and Data Loggers: Real-time temperature and CO2 monitoring ensures the integrity of the cold chain, enhancing reliability.
Sustainability: With increasing demand for eco-friendly practices, innovations like recyclable packaging and biodegradable materials are being integrated into dry ice shipping kits.
Automation: Automated packing and shipping systems are improving efficiency and reducing human error in the cold chain logistics process.
FAQs About Shipping Kit Dry Ice Packs
Q1: How much dry ice do I need for a 24-hour shipment?
For a 24-hour shipment, approximately 5 lbs of dry ice is typically sufficient, depending on shipment size and temperature needs.
Q2: Is dry ice safe for shipping food products?
Yes, dry ice is safe for shipping food products, as long as the packaging is insulated and vented properly.
Q3: Can I ship dry ice internationally?
Yes, but international shipments require adherence to regulations, including proper labeling and weight limits.
Conclusion and Recommendations
Dry ice packs are essential for ensuring the safe transportation of temperature-sensitive products. By selecting the right dry ice pack and following best practices, you can optimize your cold chain shipping and minimize spoilage. Ensure compliance with regulations and stay informed about the latest trends in shipping technologies to enhance your logistics operations.
Next Steps for Your Business
Review your cold chain practices and integrate dry ice into your shipping kits.
Consult with professionals to ensure regulatory compliance.
Explore sustainable and smart packaging options to improve operational efficiency.
About Tempk
At Tempk, we provide cutting-edge cold chain solutions for businesses that require reliable shipping of temperature-sensitive products. Our dry ice packs and insulated shipping kits are designed to meet industry regulations, ensuring product safety and reducing waste. Contact us today for expert advice on optimizing your shipping solutions.
Dry Ice Packs Next Day Delivery: Safely Ship Perishables in 24 Hours
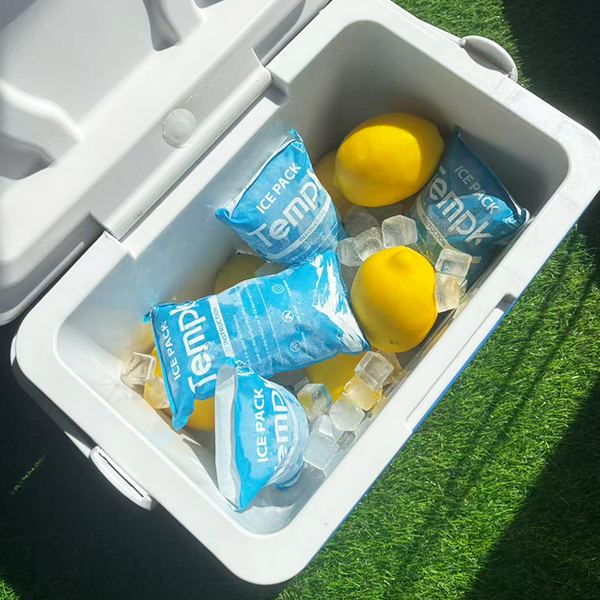
Shipping perishable items requires precise temperature control. Dry ice packs next day delivery is one of the best solutions to ensure your products reach their destination safely and on time. Whether you’re shipping frozen food, medical supplies, or other temperature-sensitive products, understanding the role of dry ice is essential for optimizing your shipping operations.

What is dry ice packs next day delivery, and why is it crucial for temperature-sensitive shipments?
How do dry ice packs maintain product integrity during shipping?
What are the best practices for using dry ice in next day shipping?
How can businesses manage costs while ensuring the safe delivery of their goods?
What Is Dry Ice Packs Next Day Delivery?
Dry ice packs next day delivery refers to using dry ice as a cooling agent for shipping perishable products with a guaranteed delivery time of 24 hours. Dry ice, or solid carbon dioxide, sublimates at a temperature of -78.5°C (-109.3°F), maintaining extremely low temperatures and ensuring that your products remain frozen throughout the shipping process.
Why Choose Dry Ice for Next Day Delivery?
Efficient Cooling: Dry ice keeps your products at sub-zero temperatures for extended periods.
Reliable Delivery: Ensures that products arrive on time and in optimal condition.
Safety: Properly handled dry ice is safe for shipping food, pharmaceuticals, and biological samples.
The Science Behind Dry Ice in Shipping
Unlike traditional ice, which melts and becomes water, dry ice sublimates directly from solid to gas, absorbing heat in the process. This feature is critical for temperature-sensitive shipments, as it doesn’t introduce moisture into the packaging. Next day delivery using dry ice ensures that your items remain frozen and intact.
| Feature | Description | Practical Significance |
|---|---|---|
| Sublimation | Directly turns from solid to gas | Maintains cold without moisture or melting issues |
| Non-toxic | Made from carbon dioxide | Safe for food and biological shipments |
| High effectiveness | Keeps goods frozen for up to 24 hours | Ideal for next day or long-distance shipping |
Best Practices for Using Dry Ice in Next Day Shipping
Step 1: Proper Sizing of Dry Ice Packs
Choosing the right amount of dry ice is crucial for maintaining optimal temperature conditions. To calculate the required amount, consider:
Shipping duration: How long will the package be in transit?
Package size: Larger shipments need more dry ice.
External conditions: Hotter climates will cause dry ice to sublimate faster.
For smaller packages, use 5-10 pounds of dry ice, and adjust based on specific needs.
Step 2: Use Insulated Packaging
Insulated containers made of materials like Styrofoam or vacuum-sealed bags are essential for slowing down the sublimation of dry ice, ensuring your products remain frozen during transit. For next day shipping, proper insulation is essential.
Step 3: Monitor Shipment Temperature
Using temperature-sensitive shipping tools helps track the internal temperature of the shipment. Many services now offer real-time tracking, allowing you to monitor the effectiveness of dry ice during transit and ensure that products remain within the necessary temperature range.
How to Manage Costs with Dry Ice Packs Next Day Delivery
Shipping with dry ice can be more expensive than traditional methods, but the benefits outweigh the costs in terms of reducing spoilage and ensuring customer satisfaction. Here are some tips to manage shipping costs:
Optimize package size: Use only the amount of dry ice necessary to ensure safe delivery, minimizing costs without compromising quality.
Choose reliable shipping providers: Work with logistics companies specializing in temperature-controlled deliveries to avoid delays and extra fees.
Consolidate shipments: Bundle shipments to reduce overall shipping costs.
FAQ: Frequently Asked Questions
Q1: How long does dry ice last during next day shipping?
Dry ice typically lasts 18-24 hours, depending on package size, external temperatures, and insulation. For next day delivery, this timeframe is generally sufficient.
Q2: Can dry ice be used to ship food?
Yes, dry ice is commonly used for shipping frozen food, ensuring it remains at the proper temperature during transport.
2025 Trends in Dry Ice Shipping
As we approach 2025, innovations in dry ice shipping are transforming the logistics industry. Advancements like smart packaging technologies and real-time temperature monitoring systems are becoming commonplace, allowing businesses to guarantee the safety of their products during transit.
Latest Developments
Smart Packaging: This revolutionizes how businesses send temperature-sensitive items by integrating sensors that track temperature fluctuations.
Eco-friendly Alternatives: The industry is moving toward more sustainable practices, including the use of bio-based CO2 production and hybrid cooling solutions.
Conclusion
To summarize, dry ice packs next day delivery is essential for businesses shipping temperature-sensitive goods. By choosing the right amount of dry ice, using proper packaging, and following best practices, you can ensure the safe and timely delivery of perishable items.
Next Steps for Your Business
Review your shipping practices: Ensure that dry ice is integrated effectively into your shipping processes.
Train your staff: Proper training is crucial to mitigate risks and improve product handling.
Explore partnerships: Work with logistics providers that specialize in cold chain shipping for optimal results.
About Tempk
At Tempk, we specialize in providing cold chain logistics solutions tailored to your needs. With a focus on innovation and quality, our services ensure the safe and efficient delivery of temperature-sensitive products. Let us help streamline your shipping operations.
Consult with Tempk today to optimize your dry ice shipping strategy!
How to Choose the Right Dry Ice Packs Cooler for Shipping in 2025

How to Choose the Right Dry Ice Packs Cooler for Your Shipping Needs?
Shipping temperature-sensitive goods requires the right cooling method to ensure their safe arrival. Dry ice packs coolers are among the best solutions for maintaining low temperatures during transit. In this article, we’ll help you understand how to select the best cooler for your dry ice packs, along with best practices for ensuring your products stay cold and safe.
What is a dry ice packs cooler and how does it work?
How do you choose the right dry ice cooler for shipping?
What are the benefits of using dry ice for temperature-sensitive shipments?
How can you optimize the use of dry ice in shipping to ensure freshness?
What is a Dry Ice Packs Cooler?
A dry ice packs cooler is a specially designed container used to keep dry ice at the required temperature for an extended period. These coolers are insulated to prevent heat from entering, ensuring that dry ice remains solid and effective during transit. Dry ice, a solid form of CO₂, sublimates at a temperature of -78.5°C (-109.3°F), and when placed in a cooler, it absorbs heat from its surroundings, keeping the contents inside frozen or chilled.
Dry ice packs coolers allow businesses to ship temperature-sensitive items like food, pharmaceuticals, and biological samples with confidence.
How Does a Dry Ice Cooler Help with Shipping?
A dry ice cooler helps control the temperature inside the shipping container, creating a barrier to heat and preventing temperature fluctuations that could affect product quality. This is essential for industries like food and pharmaceuticals, where product quality and preservation are of utmost importance. Using the right cooler ensures your products remain in optimal condition until they reach their destination.
How to Choose the Right Dry Ice Packs Cooler?
Choosing the best dry ice packs cooler depends on several factors, including the type of products you’re shipping, the duration of the journey, and the size of your shipment. Below are some key factors to consider when selecting the right cooler:
1. Insulation Quality
The insulation in a dry ice cooler is crucial for maintaining temperature. Look for coolers made with high-performance insulation, such as expanded polystyrene or polyurethane, which offer superior thermal resistance. These materials help keep dry ice solid for longer periods.
2. Size and Capacity
Select a cooler that fits the volume of your shipment. Larger shipments will require a bigger cooler, but ensure that the dry ice is placed in a way that maximizes its cooling efficiency. The cooler should also allow space for proper ventilation to let CO₂ gas escape as the dry ice sublimates.
3. Durability
Shipping often involves rough handling, so ensure that the cooler is durable. Choose a cooler with a strong exterior and reinforced corners, which will withstand the rigors of transportation without compromising the integrity of the contents inside.
Best Practices for Using Dry Ice in Shipping
Using dry ice for shipping requires proper care and handling. Here are some best practices to ensure effective cooling and safe transport of your goods:
1. Proper Packaging
Always use insulated packaging when shipping with dry ice. The packaging should be tightly sealed but allow for ventilation to let CO₂ gas escape. If the packaging traps the gas, it could lead to pressure build-up, which can cause safety issues.
2. Use the Correct Amount of Dry Ice
Too much dry ice can result in excessive CO₂ buildup, while too little may not keep items cold for the required duration. Generally, use 5.5 pounds of dry ice per package for most shipments. This may vary depending on your shipment’s specific needs.
3. Correctly Label Packages
When shipping with dry ice, it’s mandatory to label the packages clearly. Ensure that packages containing dry ice are properly marked, indicating they contain dry ice. This is a regulatory requirement and ensures handlers are aware of potential hazards during transit.
What Are the Benefits of Using Dry Ice for Shipping?
1. Enhanced Product Quality
By maintaining consistent low temperatures, dry ice helps preserve the quality of perishable goods during transit. For instance, frozen items remain frozen, and pharmaceuticals are kept at the necessary cold temperatures, reducing the risk of spoilage or degradation.
2. Versatility
Dry ice is suitable for a wide range of industries, from food delivery to medical supply shipping. Its ability to maintain low temperatures over long distances makes it ideal for industries where product quality is essential.
3. Customer Satisfaction
Speed and reliability are critical in logistics. When businesses offer next-day shipping with dry ice, they provide timely and reliable delivery, which increases customer satisfaction and enhances brand reputation.
How Does the Size of Dry Ice Packs Cooler Impact Your Shipping?
Optimal Cooler Size for Different Needs
The size of the cooler directly impacts both the cooling duration and transportation efficiency. Choose a cooler size based on the specific needs of your shipment.
| Cooler Size | Ideal For | Recommended Dry Ice Quantity | Use Case |
|---|---|---|---|
| Small (10L-20L) | Small shipments (e.g., frozen meals) | 2-3 lbs | Short transit, smaller packages |
| Medium (20L-50L) | Medium shipments (e.g., biological samples) | 5-10 lbs | Medium-duration shipments |
| Large (50L+) | Large shipments (e.g., bulk food) | 10+ lbs | Long transit, bulk packaging |
Key Takeaways:
Ensure the cooler has enough capacity for both your dry ice and the items being shipped.
The cooler size will determine the duration of cooling and transportation efficiency.
2025 Trends in Dry Ice Cooler Technology
As the demand for efficient and reliable cold chain solutions continues to grow, dry ice coolers are evolving with new technologies.
Emerging Technologies:
Smart Packaging: The use of real-time temperature monitoring technologies is becoming more common, providing businesses with instant data on the condition of their shipments.
Sustainability Initiatives: The rise of eco-friendly coolers that are both insulated and recyclable is transforming the dry ice cooler industry.
Thermal Imaging: Advanced coolers with built-in thermal imaging ensure better monitoring of temperature fluctuations during transit.
Common Questions About Dry Ice Cooler Shipping
Q1: How much dry ice should I use for shipping?
For most shipments, use around 5.5 pounds of dry ice per package. Adjust based on the shipment size and duration.
Q2: Can I use dry ice for shipping without special packaging?
No, it’s crucial to use proper insulated packaging to prevent the dry ice from sublimating too quickly and to allow CO₂ gas to escape safely.
Summary and Recommendations
To ensure safe and efficient shipping, choosing the right dry ice packs cooler is crucial. Consider the size, insulation, and packaging requirements to maintain the cold chain throughout the journey. Keep up with the latest technologies and best practices to ensure the freshness and safety of your temperature-sensitive shipments.
Next Steps for Your Business:
Review shipping practices: Optimize cooler and dry ice usage for more efficient shipping.
Explore innovations: Consider smart coolers with real-time monitoring for added control.
Ensure compliance: Proper labeling and CO₂ handling protocols are crucial for safe shipping.
About Tempk
At Tempk, we specialize in cold chain logistics solutions, including dry ice cooler shipping. Our products ensure that your shipments arrive safely and efficiently, preserving product quality throughout the entire process.
Consult with us for expert advice on optimizing your dry ice shipping strategy.
Dry Ice Pack Sheets vs Dry Ice Bricks for Shipping: Which is Best for Your Business in 2025?
Dry Ice Pack Sheets vs Dry Ice Bricks: Which Should You Choose for Shipping?
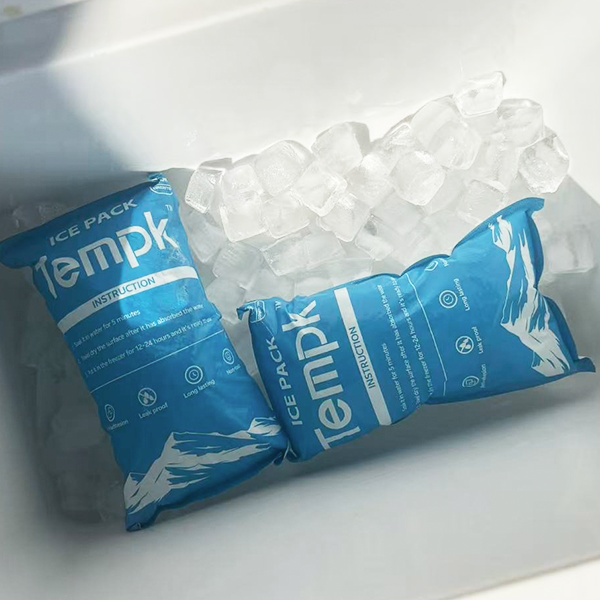
Shipping temperature-sensitive products requires careful consideration of cooling methods, especially when using dry ice. Understanding the key differences between dry ice pack sheets and dry ice bricks is crucial for businesses that rely on these products for maintaining the integrity of their goods during transit. This article delves into the characteristics, advantages, and challenges of each cooling solution, helping you choose the best one based on your specific shipping needs.
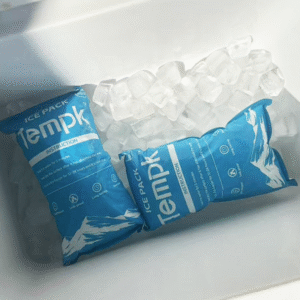
Understand the key differences between dry ice pack sheets and dry ice bricks, including their cooling efficiency and temperature maintenance.
Learn best practices for packaging and shipping with dry ice, following 2025 regulations and guidelines.
Make informed decisions about which dry ice solution suits your industry, whether you’re shipping food, pharmaceuticals, or lab samples.
What Are Dry Ice Pack Sheets and Dry Ice Bricks?
Dry ice comes in two primary forms: dry ice pack sheets and dry ice bricks. Both are designed to maintain low temperatures, but they offer different benefits depending on the nature of the shipment.
Dry Ice Pack Sheets
Dry ice pack sheets are flexible, thin sheets of dry ice that are often gel-based. These sheets are ideal for smaller, space-efficient shipments that require controlled cooling but not freezing temperatures. These are commonly used for food, pharmaceuticals, and medical devices that need to stay between 2°C and 8°C.
Dry Ice Bricks
On the other hand, dry ice bricks are solid blocks of carbon dioxide. They sublimate more slowly and maintain a consistent, ultra-low temperature of -78.5°C. These are perfect for long-duration shipments or items that require deep-freezing, such as frozen foods, vaccines, and biologics.
Benefits of Dry Ice:
1. Efficient Cooling
Dry ice absorbs heat and maintains a stable, cold environment. Whether in sheet or block form, it’s designed to preserve temperature-sensitive goods during transit.
2. No Liquid Residue
Unlike traditional ice, dry ice doesn’t melt into water. This means there’s no mess, making it a preferred option for shipping items like meat, seafood, and pharmaceuticals.
3. Cost-Effective
While dry ice might seem more expensive at first glance, its ability to maintain temperature over long periods helps businesses avoid costly product spoilage.
Why Choose Dry Ice Bricks or Pack Sheets?
For Long Shipments: Dry Ice Bricks
Dry ice bricks offer longer cooling durations due to their slower sublimation rate. They’re ideal for long-haul shipments, particularly when frozen products need to be kept at consistently low temperatures for up to 5 days.
Temperature Range: −78.5°C
Cooling Duration: 72–120 hours
Applications: Vaccines, biologics, frozen food
For Shorter, Space-Sensitive Shipments: Dry Ice Pack Sheets
Dry ice pack sheets are often more flexible and cost-effective. They’re perfect for smaller shipments or those requiring chilled temperatures without reaching freezing.
Temperature Range: 2°C to 8°C
Cooling Duration: 24–48 hours
Applications: Pharmaceuticals, fresh food, cosmetics
A Side-by-Side Comparison
| Cooling Solution | Temperature Range | Cooling Duration | Use Case |
|---|---|---|---|
| Dry Ice Pack Sheets (Gel) | 2°C to 8°C | 24–48 hours | Pharmaceuticals, chilled food, meal kits |
| Dry Ice Bricks (Solid CO₂) | −78.5°C | 72–120 hours | Frozen food, biologics, vaccines |
Which Is Better for Your Shipment?
Choosing between dry ice pack sheets and dry ice bricks depends on several factors:
Shipment Duration: For longer shipments, dry ice bricks are the better option. They provide extended cooling, making them perfect for multi-day shipments.
Size of Shipment: Dry ice pack sheets are ideal for compact shipments where space is a concern.
Budget: Dry ice pack sheets are more cost-effective compared to bricks, making them a good choice for smaller, less time-sensitive shipments.
Best Practices for Safe and Efficient Dry Ice Shipping
Proper packaging and handling are critical when shipping with dry ice. Here are some essential best practices to ensure your dry ice performs optimally:
1. Packaging Guidelines
Use Insulated Containers: Always pack dry ice in well-insulated boxes to reduce heat transfer and prolong cooling.
Ensure Ventilation: Dry ice sublimates into carbon dioxide gas, which can cause pressure buildup if trapped inside an airtight container. Always leave vents open or use vented packaging to allow the gas to escape safely.
2. Labeling and Documentation
Proper Hazard Labels: Dry ice is classified as a hazardous material by the UN. Use the correct labeling, including the “Carbon Dioxide, Solid” label and UN1845 number.
Shipping Paperwork: Ensure that the shipping documents accurately reflect the quantity of dry ice and include the appropriate handling instructions.
3. Weight and Quantity Guidelines
Shipping Limits: The maximum amount of dry ice per shipment is generally 5.5 pounds (2.5 kg), with additional paperwork required for larger shipments.
Calculate Dry Ice Needs: For short-duration shipments, plan on using 0.5× the product weight in dry ice. For longer shipments, increase the amount based on the cooling duration.
2025 Trends in Dry Ice Shipping
As we look toward 2025, the dry ice shipping industry is evolving to meet increasing demand for sustainability and technology integration:
Sustainable Packaging
Many companies are investing in reusable dry ice packs and eco-friendly packaging solutions to reduce their carbon footprint. This trend aligns with the growing focus on environmental responsibility.
Smart Sensors for Real-Time Monitoring
Advancements in smart packaging allow for real-time temperature monitoring, ensuring that temperature-sensitive goods remain within the desired range during transit.
Closed-Loop Recycling Systems
Some companies have adopted closed-loop dry ice recycling systems, allowing dry ice to be reused multiple times, reducing waste and cutting costs.
Frequently Asked Questions
Q1: How do I calculate the amount of dry ice for my shipment?
For 24-hour shipments, use 0.5× the product weight in dry ice. For 48-hour shipments, match the weight of dry ice to the product weight.
Q2: Can dry ice be used for international shipments?
Yes, but make sure to comply with international regulations and ensure proper documentation for each country.
Q3: How long can dry ice maintain a cold temperature?
Dry ice bricks can maintain ultra-low temperatures for up to 120 hours, while dry ice pack sheets can last 24-48 hours depending on conditions.
Conclusion: Choosing the Right Dry Ice Solution
Selecting the appropriate dry ice solution—dry ice pack sheets or dry ice bricks—depends on your product’s temperature requirements, shipping duration, and budget. By following the best practices outlined in this article and staying informed about the latest trends in dry ice shipping, you can ensure the safe and efficient transport of your temperature-sensitive products.
Next Steps for Your Business:
Review your shipping protocols to determine which dry ice solution fits your needs.
Ensure compliance with 2025 regulations regarding packaging, labeling, and documentation.
Partner with logistics experts to optimize your cold chain and reduce spoilage risks.
About Tempk
Tempk specializes in providing cutting-edge cold chain solutions tailored to your shipping needs. From dry ice products to advanced logistics systems, we ensure your temperature-sensitive goods reach their destination safely and efficiently. Contact us today for a consultation on optimizing your cold chain solutions.
Dry Ice Pack Sheets for Food Shipping: Benefits & Best Practices
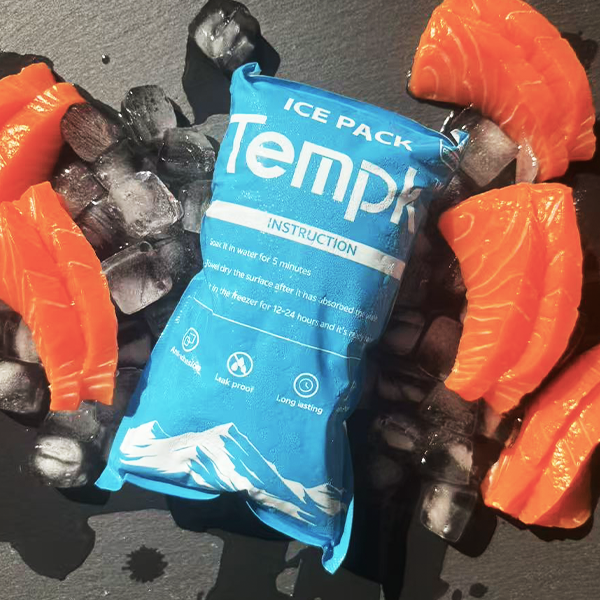
Shipping perishable food items requires effective temperature control to maintain freshness and safety. Dry ice pack sheets have emerged as a preferred solution due to their efficiency and convenience. These sheets, when properly utilized, can significantly extend the shelf life of products during transit. In this guide, we will delve into the mechanics of dry ice pack sheets, when to choose them over other cooling methods, and provide you with actionable tips for effective food shipping.
What are dry ice pack sheets for food, and how do they work?
When should you choose dry ice pack sheets instead of gel packs or CO₂ dry ice?
How can you safely pack food for shipping using dry ice pack sheets?
What are the benefits and limitations of dry ice pack sheets?
What sustainability trends and technologies are shaping cold chain logistics in 2025?
What Are Dry Ice Pack Sheets for Food, and How Do They Work?
Dry ice pack sheets are a modern solution to maintaining the freshness of temperature-sensitive products, especially food. They are made from superabsorbent polymers that absorb large amounts of water and freeze into ice, offering a practical and efficient cooling method during shipping. Unlike traditional dry ice, which can be dangerous to handle due to its extreme cold, these sheets offer a safe alternative by creating a consistent, near-freezing temperature. When activated, they can maintain the desired cold environment for up to 24 hours, ensuring that your products remain fresh and safe until they reach their destination.
How Do Dry Ice Pack Sheets Keep Your Food Cold?
These sheets function by absorbing heat from the environment and gradually releasing cold energy as they sublimate. Unlike water ice that melts and creates a mess, dry ice sheets sublimate directly from solid to gas, leaving no liquid residue behind. This process keeps your packaging dry and prevents spoilage caused by water accumulation. They are particularly beneficial for shipping frozen items such as meats, seafood, dairy products, and even baked goods.
Benefits of Using Dry Ice Pack Sheets for Food Shipping
Superior Temperature Maintenance: Dry ice pack sheets maintain cold temperatures up to -21°C, which is crucial for products requiring consistent freezing during transit, such as ice cream, frozen meats, and seafood.
Extended Shelf Life: Due to their long-lasting cooling effect, these sheets reduce the need for frequent replenishing of cooling agents, making them cost-effective for long-distance shipments.
Clean and Dry Packaging: Since dry ice sublimes directly into gas, there is no risk of liquid damaging the products, packaging, or the surrounding environment, unlike traditional ice packs.
Reusability: Many dry ice pack sheets can be reused multiple times. This not only provides economic benefits but also helps in reducing environmental waste.
Best Practices for Using Dry Ice Pack Sheets in Food Shipping
To ensure the effectiveness and safety of your dry ice pack sheets, follow these best practices:
Proper Activation: Soak the sheets in water for the recommended duration, typically 5-15 minutes, then freeze them before use. This ensures the sheets are fully hydrated, maximizing their cooling power.
Appropriate Storage: Store activated dry ice pack sheets in a deep freezer set to the lowest temperature to maintain their effectiveness for subsequent use.
Safe Handling: Dry ice pack sheets should be handled with care. Always wear gloves to avoid frostbite. Moreover, ensure that the shipping containers are well-ventilated to allow the sublimation of carbon dioxide gas.
Correct Placement in Shipping Containers: For optimal cooling, place the dry ice pack sheets at the top of the products in the shipping container. Since cold air sinks, placing the sheets at the top ensures that the coldest air surrounds the food, preserving its freshness during transit.
Comparison: Dry Ice Pack Sheets vs. Traditional Ice Packs
| Feature | Dry Ice Pack Sheets | Traditional Ice Packs |
|---|---|---|
| Temperature Range | Up to -21°C | Around 0°C |
| Duration of Cooling | Longer | Shorter |
| Residue Upon Melting | None | Water |
| Reusability | Yes | Limited |
| Handling Safety | Requires precautions | Generally safe |
Real-World Applications
E-commerce Food Deliveries: Online food sales, particularly frozen meals, benefit from dry ice pack sheets to maintain the product’s frozen state upon delivery.
Catering Services: For events requiring the transportation of perishable food, dry ice pack sheets offer a reliable and safe cooling solution, ensuring quality until serving.
Pharmaceutical Shipments: Beyond food, dry ice pack sheets are also crucial in shipping temperature-sensitive pharmaceuticals, ensuring efficacy upon delivery.
Sustainability Trends and Technologies Shaping Cold Chain Logistics in 2025
As sustainability becomes a greater concern in the logistics sector, dry ice pack sheets are aligning with emerging eco-friendly trends. Companies are moving toward recyclable, reusable packaging materials to reduce waste. Additionally, the development of smart packaging technologies that monitor temperatures in real-time is driving innovation in food shipping, ensuring both safety and sustainability.
Latest Trends
Smart Packaging: Sensors integrated into dry ice pack sheets and shipping boxes allow businesses to track temperatures throughout the transit process, ensuring products remain at optimal temperatures.
Eco-Friendly Alternatives: As more businesses adopt environmentally conscious practices, the shift toward recyclable, biodegradable packaging materials is evident. Dry ice pack sheets are part of this trend, offering a more sustainable alternative to traditional ice.
How to Pack Food Safely with Dry Ice Pack Sheets
Effective packaging is crucial to prevent spoilage and ensure food safety during transit. Follow these guidelines for optimal results:
Freeze the Product First: Always ensure that the food is frozen before packing. Starting with frozen items maximizes the retention of the cold.
Prepare the Sheet: Soak the dry ice pack sheet in water, wipe off excess moisture, and freeze until solid before use.
Line the Container: Place the frozen sheet along the sides and bottom of the insulated container to maximize contact with the product. If using CO₂ dry ice, separate it from the food using a divider or place it on top.
Ventilation is Key: Ensure the shipping container is not sealed airtight. Both CO₂ dry ice and hydrated sheets need proper ventilation to avoid pressure buildup.
Frequently Asked Questions (FAQ)
Q1: How long do dry ice pack sheets last for food shipping?
Dry ice pack sheets maintain cold temperatures for up to 24 hours in an insulated container, but their duration can be extended when combined with other coolants or used in multiple layers.
Q2: Can dry ice pack sheets be reused?
Yes, dry ice pack sheets are reusable after thawing and freezing again, making them a cost-effective and sustainable option for repeated use.
Q3: Are dry ice pack sheets safe for food?
Yes, dry ice pack sheets are food-safe, non-toxic, and provide a clean, dry environment for shipping perishable food items.
Conclusion
In conclusion, dry ice pack sheets are a valuable tool for food shipping. They offer extended cooling durations, maintain optimal temperatures, and provide a clean, dry solution for perishable goods. By following best practices for activation, handling, and storage, businesses can ensure that their products arrive fresh and safe, ultimately enhancing customer satisfaction and reducing waste. As 2025 approaches, the cold chain industry will continue to innovate with sustainability in mind, and dry ice pack sheets will play a significant role in shaping the future of food logistics.
About Tempk
At Tempk, we specialize in providing high-quality cold chain solutions, including dry ice pack sheets, to businesses in the food and pharmaceutical industries. Our products are designed to meet the highest standards of safety and performance, ensuring that your shipments maintain optimal temperatures throughout transit.
Call to Action: Ready to enhance your frozen shipping? Contact Tempk for a consultation on dry ice pack sheets and sustainable cold chain packaging. Let us help you design a package that keeps your products safe, compliant, and eco-friendly.
Dry Ice Pack Sheets for Food Delivery: Safe & Efficient Shipping Solution

Dry Ice Pack Sheets for Food Delivery: Ensuring Safe and Efficient Shipping
Ensuring the safe and timely delivery of perishable foods is critical in today’s fast-paced world. Dry ice pack sheets offer an efficient, eco-friendly solution to keep food frozen during transport. These flexible, reusable cooling mats provide the ideal temperature control for items like frozen meals, ice cream, and other sensitive food products. In this article, we’ll explore why dry ice is essential, how it works, and the best practices for its use in food delivery.

Why dry ice pack sheets are crucial for food delivery.
How dry ice sheets maintain optimal cooling for perishable items.
Best practices to follow when using dry ice for food shipping.
The benefits of using dry ice for food logistics and customer satisfaction.
Why Are Dry Ice Pack Sheets Essential for Food Delivery?
Dry ice pack sheets are integral to the cold chain logistics used in food delivery. Dry ice, or solid CO₂, sublimates at temperatures as low as -78.5°C (-109.3°F), keeping food frozen during long transit times. These sheets ensure your products remain at the required temperature, preventing spoilage and maintaining the quality of frozen items such as meats, seafood, and ice cream.
By using dry ice, businesses can meet the rising consumer demand for fresh, frozen goods delivered safely across long distances. The sheets help businesses keep their products at ideal temperatures, which is crucial for customer satisfaction and repeat orders.
How Do Dry Ice Pack Sheets Work in Food Delivery?
Dry ice pack sheets operate through the sublimation process, where solid CO₂ turns into gas without becoming liquid. As the dry ice sublimates, it absorbs heat from the surrounding environment, maintaining a low temperature for hours. This method is far more effective than traditional cooling methods, such as gel packs, which cannot reach the same low temperatures.
For food delivery, dry ice sheets maintain food safety and reduce the risks of bacterial growth by keeping items frozen for extended periods. Whether you are shipping fresh or frozen products, these sheets ensure that your food arrives in optimal condition.
Best Practices for Using Dry Ice Pack Sheets in Food Delivery
Using dry ice effectively requires careful planning and adherence to safety guidelines:
Use Proper Insulated Packaging: Always pair dry ice sheets with high-quality insulated containers to extend the cooling period and prevent rapid sublimation.
Follow Weight Guidelines: Ensure that the quantity of dry ice used in each shipment does not exceed the regulatory limit of 5.5 pounds without specialized packaging and safety measures.
Ensure Ventilation: Dry ice releases carbon dioxide gas as it sublimates. Use packaging with proper ventilation to prevent dangerous gas build-up.
Monitor Sublimation Rates: Adjust the amount of dry ice depending on the shipment’s duration and ambient temperature to prevent temperature fluctuations.
The Benefits of Dry Ice Pack Sheets for Food Delivery
1. Maintain Product Integrity
By maintaining a stable, low temperature, dry ice ensures that your frozen goods, such as meat and ice cream, stay frozen and retain their flavor, texture, and nutritional value during transportation.
2. Faster Shipping and Reduced Costs
Dry ice enables quicker delivery times without the need for additional refrigeration or expedited shipping. This translates into savings for businesses while ensuring product quality is never compromised.
3. Increased Customer Satisfaction
Consumers appreciate receiving their food at the right temperature, ensuring it meets expectations in terms of quality and freshness. This reliability fosters customer loyalty and promotes repeat business.
Dry Ice Pack Sheets vs. Gel Packs: Which Is Better for Food Delivery?
| Cooling Method | Temperature Range | Duration of Cooling | Best Used For |
|---|---|---|---|
| Dry Ice | -78.5°C (-109.3°F) | 48–72 hours | Frozen foods, biological samples |
| Gel Packs | 2°C–8°C (35°F–46°F) | 6–24 hours | Chilled goods, fresh produce |
| Ice Packs | 0°C–-5°C (32°F–23°F) | 6–24 hours | Short-term deliveries |
Dry ice is superior for items that need subzero temperatures, especially when shipping frozen goods for longer distances. On the other hand, gel packs are more appropriate for short-term shipments of chilled items.
2025 Trends in Dry Ice Shipping for Food Delivery
As we approach 2025, advancements in smart packaging and sustainability will continue to transform cold chain logistics. Smart packaging with IoT sensors will allow real-time tracking of temperature and humidity, providing a proactive approach to maintaining product integrity.
Latest Innovations in Dry Ice Shipping:
Smart Packaging: Real-time temperature monitoring for more reliable deliveries.
Eco-Friendly Alternatives: Reduced environmental impact by using bioethanol-derived CO₂.
Collaborations with Logistics Providers: Specialized services for perishable goods are becoming more common, ensuring safer deliveries.
Common FAQs about Dry Ice in Food Delivery
Q1: Can dry ice pack sheets be used for both frozen and chilled items?
Yes, dry ice pack sheets are highly versatile and can maintain both frozen and chilled temperatures, depending on the specific needs of your products.
Q2: How long do dry ice pack sheets last in transit?
On average, dry ice pack sheets can keep products frozen for 18–24 hours, but with proper insulation, cooling can last up to 72 hours.
Conclusion
Dry ice pack sheets are an essential component in ensuring the safe, efficient, and sustainable delivery of frozen and perishable goods. By following best practices and utilizing the latest trends in cold chain logistics, businesses can maintain customer satisfaction and reduce operational costs.
Next Steps for Your Business:
Evaluate Your Packaging: Ensure you’re using the correct amount of dry ice and the best insulated containers for your shipments.
Stay Compliant: Familiarize yourself with the latest regulations to avoid penalties.
Partner with Experts: Collaborate with specialized logistics providers to enhance the efficiency and reliability of your food delivery operations.
About Tempk
Tempk is a leading provider of cold chain solutions, specializing in dry ice pack sheets and high-performance packaging. We help businesses in the food delivery sector maintain product integrity while reducing environmental impact. With our innovative products and expertise, Tempk is your trusted partner for all temperature-sensitive shipping needs.
How to Use Dry Ice for Coolers and Ensure Safe Shipping
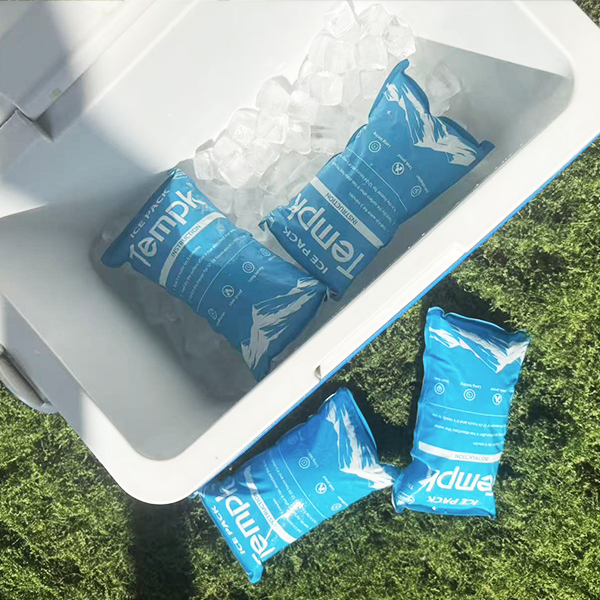
How to Use Dry Ice for Coolers and Ensure Safe Shipping: A Comprehensive Guide
Dry ice is a powerful cooling solution that plays a crucial role in cold chain logistics. It ensures the safe transport of perishable goods, ranging from frozen foods to pharmaceuticals. Understanding how to handle dry ice effectively is essential for anyone shipping temperature-sensitive items. This guide will walk you through the best practices for using dry ice in coolers, ensuring safe, efficient shipping, and maintaining product integrity.
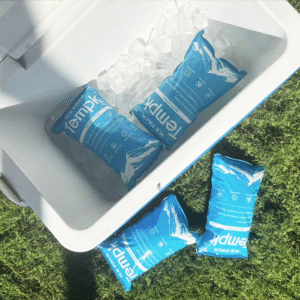
What dry ice is and how it works for coolers.
The best practices for using dry ice in coolers.
How to safely ship products with dry ice.
Common mistakes to avoid when using dry ice for shipping.
What Is Dry Ice and How Does It Work for Coolers?
Dry ice is the solid form of carbon dioxide (CO2), which sublimates directly from a solid to a gas at -78.5°C (-109.3°F). This sublimation process makes it an ideal cooling agent, as it maintains a very cold environment without the mess of water residue left by regular ice.
Key Takeaways:
Dry ice absorbs heat from its surroundings, maintaining a very cold environment.
It’s perfect for shipping temperature-sensitive goods like frozen foods, vaccines, and biological samples.
Dry ice can keep items frozen or at low temperatures for extended periods, making it indispensable for long-distance shipping.
Why Use Dry Ice for Coolers in Shipping?
Dry ice is preferred over regular ice for several reasons:
1. Longer Cooling Time:
Dry ice maintains lower temperatures for much longer, often up to 24-48 hours, depending on the quantity used and the cooler’s insulation. Unlike water ice, which melts and loses cooling power quickly, dry ice continues to absorb heat without turning into a liquid.
2. No Water Residue:
Regular ice melts into water, potentially compromising the packaging and causing items to become soggy. Dry ice sublimates into a gas, leaving no water behind. This makes it particularly useful for shipping food, pharmaceuticals, and other sensitive goods.
3. Efficiency for Long-Distance Shipping:
For international or overnight shipments, dry ice ensures your goods remain within the required temperature range, eliminating the risk of thawing or spoilage during transit.
Best Practices for Using Dry Ice in Coolers
1. Ensure Proper Ventilation:
When using dry ice, it’s essential to ventilate the cooler or shipping box. Dry ice sublimates into carbon dioxide gas, which can displace oxygen in an enclosed space, posing significant health risks, including suffocation. Always ensure your cooler has vents to release the gas safely.
2. Choose the Right Packaging:
Select insulated coolers or boxes specifically designed to handle the extreme cold of dry ice. To further protect your items, consider double-boxing, especially for long-distance shipments, to minimize temperature fluctuations.
3. Use Correct Quantities:
The amount of dry ice required depends on the shipment’s duration and the goods being shipped. As a general rule, use around 5-10 pounds of dry ice for most shipments. For longer transit times, increase the amount accordingly.
Key Safety Considerations for Dry Ice Shipping
1. Handling with Care:
Dry ice can cause severe burns, so always wear insulated gloves when handling it. Direct contact with skin can lead to frostbite.
2. Transportation Regulations:
Shipping with dry ice is regulated by law. Ensure you’re aware of the weight limits (usually 5.5 lbs per package), as well as the need for proper labeling. Packages containing dry ice must be clearly marked with the appropriate hazardous materials labels to ensure safety.
3. Labeling and Documentation:
Correct labeling is essential for dry ice shipments. Ensure that your package includes labels such as “Dry Ice” and the weight of the dry ice used. This ensures that handlers are aware of the potential risks and can take appropriate precautions.
How to Ensure Safe Shipping with Dry Ice
Selecting the Right Cooler
Choosing the correct cooler is crucial for maintaining the efficiency of dry ice during shipping:
Styrofoam Coolers: Ideal for short-distance shipments, these coolers provide decent insulation but may not be sufficient for long-distance shipping.
Thermal Insulated Boxes: These boxes are designed for cold chain shipping, providing higher insulation levels and extended cold retention. They’re perfect for long-distance shipments.
Pre-cooling Your Cooler: Before adding dry ice, it’s beneficial to cool the container using gel packs or by freezing it overnight. This extra step helps maintain a consistent cold temperature for longer periods.
Ventilation Is Key
Proper ventilation is critical when using dry ice. As dry ice sublimates, it turns into carbon dioxide gas. Without proper ventilation, the pressure inside the cooler can build up, leading to dangerous situations, including the possibility of the container bursting. Ensure that the cooler or box has vents to allow the gas to escape.
Calculate the Amount of Dry Ice
The amount of dry ice needed varies depending on the size of the cooler and the duration of the shipment. A general rule of thumb is:
For 24-hour shipments: Use approximately 5 pounds of dry ice for every 5-10 pounds of perishable goods.
For longer shipments: Add 1-2 pounds of dry ice for every additional 24 hours of transit.
Use the Correct Packaging Materials
When packing dry ice in coolers, use the appropriate materials to avoid mishaps:
Polyethylene Bags: These bags are ideal for containing the dry ice while allowing it to sublimate.
Insulated Packaging: Ensure that your packaging materials—such as foam or double-walled cardboard boxes—are designed to contain the dry ice and reduce its escape, helping to maintain the cold longer.
Packaging Type and Duration
| Packaging Type | Insulation Type | Ideal For | Expected Duration |
|---|---|---|---|
| Styrofoam Cooler | Expanded polystyrene | Short-distance | 12-24 hours |
| Thermal Insulated Box | Foam or vacuum-sealed | Long-distance | 24-72 hours |
| Polyethylene Bag | Flexible plastic | Direct contact | 12-48 hours |
Avoid Common Mistakes When Shipping with Dry Ice
1. Not Labeling Correctly:
Always ensure that your package has the necessary labeling, including “Dry Ice” and the weight of the dry ice used. Incorrect labeling can lead to delays or mishandling.
2. Exceeding Shipping Limits:
Different carriers have different rules regarding dry ice weight limits, typically 5.5 lbs. Always check the regulations for your specific carrier before shipping.
3. Using Incorrect Insulation:
Using poor-quality insulation or a non-ventilated container can lead to the dry ice sublimating before your shipment arrives. This will result in the goods arriving warm and potentially spoiled.
2025 Trends in Dry Ice Shipping for Coolers
The cold chain logistics industry continues to evolve, with a focus on improving safety, efficiency, and sustainability. New trends are emerging that promise to revolutionize how dry ice is used in shipping:
Latest Developments in Dry Ice Shipping
Smart Packaging: Emerging smart packaging technologies now allow real-time monitoring of temperature and humidity, enabling businesses to track shipments more effectively.
Sustainable Alternatives: As the demand for eco-friendly solutions increases, there is growing interest in sustainable alternatives to dry ice, such as hybrid cooling packs.
Regulatory Changes: Shipping regulations are tightening, and more countries are adopting stringent environmental and safety laws for dry ice transportation.
Consumer and Market Insights
With the rise of e-commerce and the increasing demand for fast, reliable shipping, the use of dry ice for cooling and shipping remains essential. As businesses prioritize fast, reliable delivery, dry ice continues to be one of the most reliable methods for preserving temperature-sensitive items.
Frequently Asked Questions (FAQs)
Q1: What is the maximum amount of dry ice I can ship?
The general limit for dry ice is 5.5 lbs per package, but it varies by carrier. Always check the specific regulations of the shipping company you’re using.
Q2: How do I dispose of dry ice?
Allow the dry ice to sublimate in a well-ventilated area. Never dispose of it in an enclosed space, as the gas can be hazardous.
Conclusion and Recommendations
To successfully use dry ice for coolers and ensure safe shipping, it is vital to follow best practices such as selecting the right cooler, using appropriate packaging, and adhering to shipping regulations. Proper ventilation, labeling, and safety precautions will help ensure your shipment arrives in optimal condition.
Next Steps for Your Business
Review Your Shipping Process: Ensure that dry ice is integrated effectively into your shipping processes.
Optimize for Efficiency: Implement the latest advancements in cold chain logistics to improve safety and reduce costs.
Partner with Experts: Work with logistics providers who specialize in cold chain and dry ice shipping to ensure the best possible results.
About Tempk
At Tempk, we specialize in providing cold chain solutions tailored to your shipping needs. With a focus on quality, safety, and sustainability, our products are designed to help you achieve optimal freshness and safety for your temperature-sensitive products.
Consult with us for expert advice on dry ice shipping and optimizing your cold chain logistics.