


Dry Ice Pack Sheets for Meat: 2025 Guide to Safe Shipping & Quality
Dry Ice Pack Sheets for Meat: 2025 Guide to Safe Shipping & Quality

Dry Ice Pack Sheets for Meat: The Ultimate Guide to Safe and Efficient Cold Chain Shipping
Shipping perishable products like meat requires more than just basic cooling methods. To guarantee freshness, safety, and quality—especially for long-distance shipments—dry ice pack sheets for meat provide the most reliable solution. This guide explores how dry ice sheets work, why they are superior to other cooling methods, and best practices for ensuring optimal meat shipping conditions.
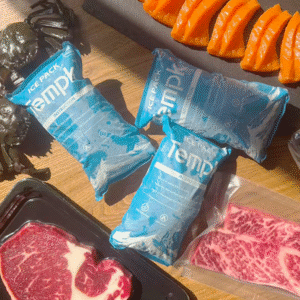
What are dry ice pack sheets and how do they work for meat shipping?
Why are dry ice pack sheets essential for the meat cold chain?
How to select the right dry ice pack sheet for your meat shipments?
Best practices for handling dry ice in cold chain logistics.
Answers to frequently asked questions about using dry ice for meat shipping.
What are Dry Ice Pack Sheets and How Do They Work for Meat Shipping?
Dry ice pack sheets are flexible, quilted sheets filled with dry ice (solid carbon dioxide). These sheets sublimate at -78.5°C (-109.3°F), releasing cold CO₂ gas, which absorbs heat and maintains an ultra-low temperature environment around meat products during transit. Unlike traditional ice, which melts into water, dry ice’s sublimation process means no liquid is left behind, preventing soggy packaging and reducing contamination risks.
When properly applied, these dry ice pack sheets are crucial for maintaining the required temperature to preserve meat quality, prevent bacterial growth, and avoid spoilage.
Key Benefits of Dry Ice for Meat Shipping:
Long-Lasting Cold: Dry ice can keep meat frozen for longer periods, up to 72 hours, making it ideal for long-haul shipments.
No Water Mess: Since dry ice sublimates directly from solid to gas, there’s no risk of water damaging the packaging or cross-contaminating the product.
Precise Temperature Control: Dry ice can maintain temperatures as low as -20°F (-29°C), which is necessary for keeping meat frozen and safe during transit.
Why are Dry Ice Pack Sheets Essential for Meat Shipping?
Meat is a highly perishable product, and maintaining the cold chain during shipping is crucial to prevent spoilage. Dry ice pack sheets are specifically designed to ensure that meat remains at the correct temperature, preserving texture, flavor, and nutritional value.
How Dry Ice Protects Meat:
Prevents Bacterial Growth: Dry ice maintains the temperature needed to inhibit bacterial growth, which thrives at higher temperatures.
Preserves Texture and Quality: The ultra-cold temperatures from dry ice prevent ice crystals from forming, which helps maintain the meat’s texture and flavor.
Reliability Over Long Distances: Whether you’re shipping frozen or chilled meat, dry ice ensures that your shipment stays within the safe temperature range, even for international shipments.
How to Choose the Right Dry Ice Pack Sheet for Meat Shipping?
Selecting the proper dry ice pack sheet is critical for ensuring that your meat arrives at the desired temperature. Consider the following factors:
Key Factors in Choosing the Right Dry Ice Sheet:
Size of Shipment: Larger shipments may require multiple dry ice sheets or a larger pack to maintain the required low temperatures.
Duration of Transit: The longer the transit, the more dry ice you’ll need. Choose sheets designed for extended shipping times to avoid thawing.
Type of Meat: Different meats require different temperatures. For example, frozen cuts of meat need colder temperatures than chilled meat.
Packaging Requirements: Ensure that your packaging allows for proper insulation and ventilation. Dry ice sheets should be placed in well-sealed, insulated boxes with ventilation holes to release CO2 gas and prevent pressure buildup.
Types of Dry Ice Pack Sheets for Meat Shipping:
| Type of Dry Ice Sheet | Weight per Sheet | Cooling Duration | Best for | Benefits |
|---|---|---|---|---|
| Standard Dry Ice Sheets | 5 lbs | 24-48 hours | Frozen meat cuts | Easy handling, ideal for short transit times. |
| Premium Dry Ice Sheets | 10 lbs | 48-72 hours | Chilled meat, large quantities | Longer cooling duration, better for large shipments. |
| Eco-Friendly Dry Ice Sheets | 5 lbs | 24 hours | All types of meat | Sustainable packaging, reduces environmental impact. |
Best Practices for Using Dry Ice Pack Sheets in Meat Shipping
To maximize the effectiveness of dry ice in maintaining a safe cold chain for meat shipping, adhere to these best practices:
1. Proper Packaging:
Use insulated packaging that allows air circulation. It’s essential to use containers such as Styrofoam coolers or thermal liners to keep the temperature inside constant.
2. Correct Placement of Dry Ice:
Ensure that the dry ice sheets are placed around the meat, not in direct contact with it, to prevent frostbite. Packaging should also ensure even distribution of cold air.
3. Follow Regulations:
Comply with legal regulations, including proper labeling (“Contains Dry Ice”) and the weight limits for dry ice (typically 5.5 lbs per package). Ensure ventilation in the package to prevent dangerous pressure buildup.
4. Monitor Temperature:
Consider using temperature monitoring tools to track the cooling process in real-time. Many cold chain logistics companies are now integrating temperature sensors into their shipping containers to ensure that the meat stays within the required temperature range.
FAQ: Using Dry Ice for Shipping Meat
Q1: Can I use dry ice for shipping meat over long distances?
Yes, dry ice is perfect for long-distance shipments as it provides consistent cooling, keeping meat frozen or chilled depending on the type of product.
Q2: How much dry ice do I need to ship meat?
The amount depends on the duration of shipping and the type of meat. Generally, 5-10 lbs per sheet is recommended for 24-48 hours of shipping.
Q3: Is dry ice safe for meat shipping?
Yes, dry ice is safe as long as proper safety measures are followed, such as using ventilation holes and labeling the package correctly.
2025 Trends in Dry Ice Shipping for Meat
The cold chain logistics industry continues to evolve with new trends and technologies. Innovations are enhancing the efficiency and sustainability of dry ice shipping, making it a crucial tool for meat shipping in 2025.
Latest Developments:
Smart Packaging Solutions: New packaging designs now include temperature sensors that allow real-time monitoring, ensuring meat stays within the optimal temperature range during transit.
Sustainability Trends: The demand for eco-friendly packaging is increasing. Companies are turning to recyclable and sustainable dry ice alternatives to minimize environmental impact.
Global Regulations: As more countries regulate the use of dry ice, it’s crucial to stay up-to-date with international guidelines and ensure compliance when shipping across borders.
Conclusion and Recommendations
In conclusion, dry ice pack sheets are an invaluable tool for maintaining the cold chain during meat shipping. They offer several benefits over traditional ice, including longer-lasting cold, no water mess, and the ability to preserve meat quality over long distances. By selecting the right dry ice sheet, following best practices, and staying informed about the latest trends, you can ensure safe, efficient meat shipping operations that meet industry standards.
Action Steps for Your Business:
Review your shipping practices and ensure your packaging meets cold chain requirements.
Consult with cold chain experts to select the right dry ice sheets for your shipments.
Optimize delivery times to ensure minimal exposure to temperature fluctuations during shipping.
About Tempk
At Tempk, we specialize in providing cold chain solutions designed to maintain the integrity of your perishable products during shipping. Our dry ice pack sheets for meat are crafted for maximum efficiency, ensuring that your products arrive in perfect condition. Contact us today to discuss how we can support your meat shipping needs.
Dry Ice Pack Next Day Shipping: Best Practices for Safe and Efficient Delivery
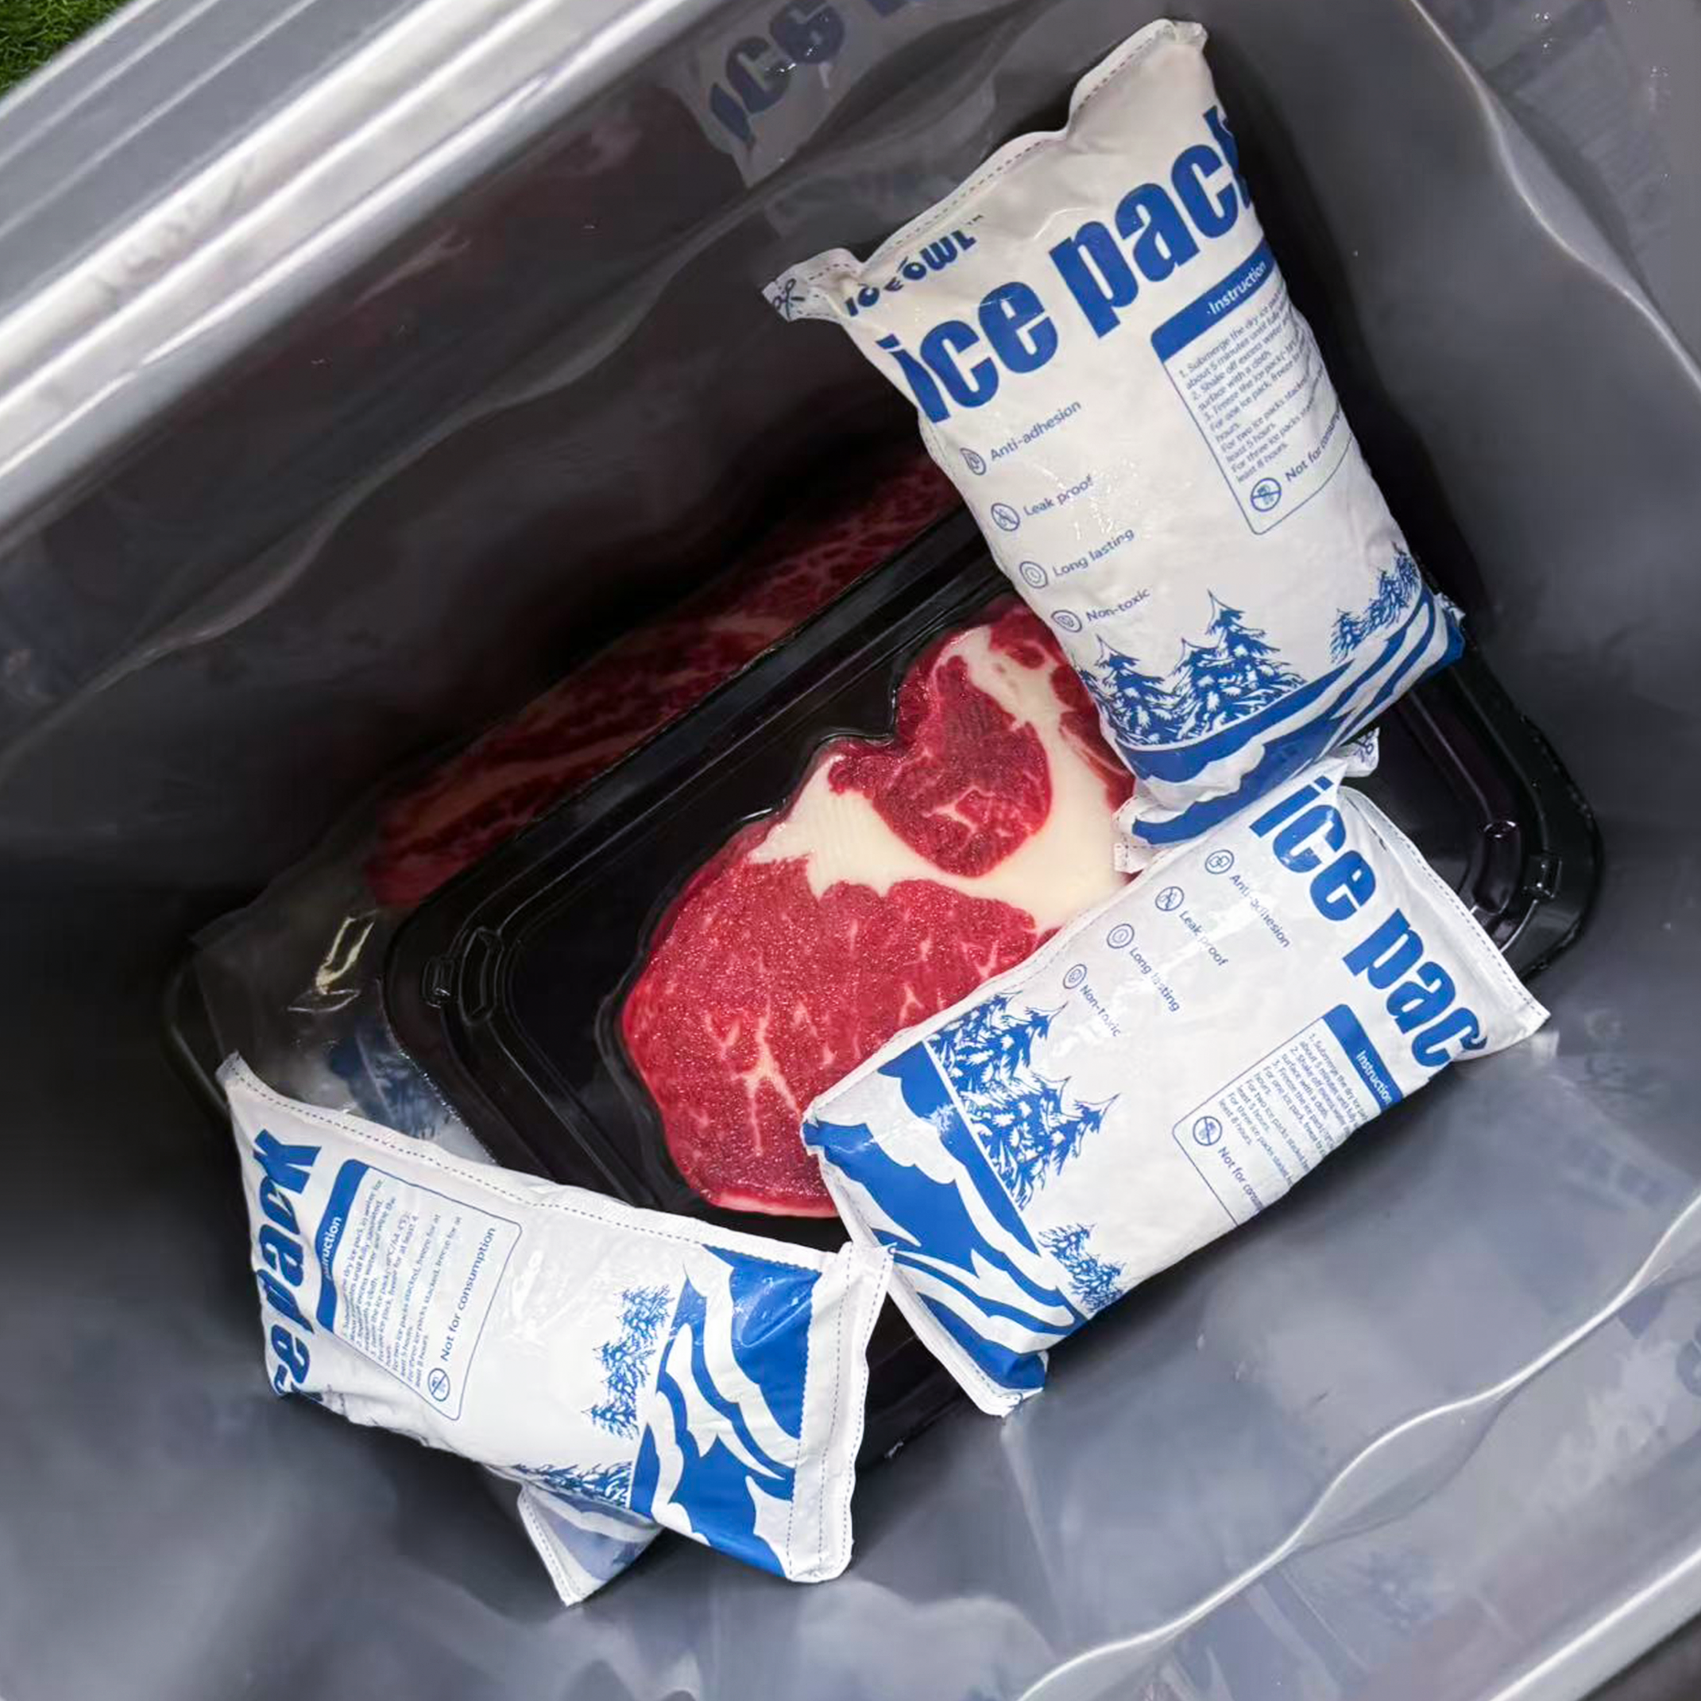
Dry Ice Pack Next Day Shipping: Best Practices and Key Considerations
Shipping perishable goods requires precision, especially when time is of the essence. Dry ice pack next day shipping is a crucial solution to ensure that products, such as food, pharmaceuticals, and biological samples, maintain their integrity during transport. The ability to ship items with dry ice for next-day delivery offers numerous benefits, but it requires proper planning, the right packaging, and strict adherence to safety regulations. In this article, we will guide you through the essential aspects of dry ice pack next day shipping, helping you maximize the efficiency and safety of your shipments.
What is Dry Ice Pack Next Day Shipping?
Dry ice pack next day shipping involves using dry ice—solid carbon dioxide—as a cooling agent to ship perishable products within a 24-hour period. Dry ice sublimates at -78.5°C (-109.3°F), making it an excellent choice for maintaining low temperatures. Unlike traditional ice or gel packs, dry ice doesn’t melt; instead, it transitions directly from a solid to a gas, ensuring that no moisture is introduced to your shipment.
Key Benefits of Dry Ice for Next Day Shipping
Efficiency: Dry ice maintains subzero temperatures for an extended period, which is crucial for shipping sensitive goods such as frozen food or medical supplies.
Reliability: Dry ice has been used in the shipping industry for decades and is a proven solution for the safe transport of temperature-sensitive items.
Safety: Properly used, dry ice ensures that perishable goods remain at the correct temperature during transit, reducing the risk of spoilage or degradation.
The Science Behind Dry Ice and Its Role in Shipping
Dry ice functions differently from regular ice in that it doesn’t melt. Instead, it sublimates—meaning it turns from solid to gas without going through a liquid phase. This sublimation process absorbs heat from the surrounding environment, thereby maintaining a cool temperature for a prolonged period. This makes dry ice a more efficient and cleaner cooling solution for shipping compared to traditional ice or gel packs, which can leave behind moisture that could damage goods.
How Dry Ice Affects Perishable Goods
Temperature Control: The constant sublimation of dry ice maintains low temperatures, which is essential for preserving the freshness of perishable items such as frozen foods, pharmaceuticals, and biological samples.
No Residue: Since dry ice sublimates into gas, it doesn’t leave behind any liquid that could cause damage to your goods or packaging.
Best Practices for Dry Ice Pack Next Day Shipping
1. Proper Sizing and Amount of Dry Ice
One of the most critical factors in ensuring the success of dry ice pack next day shipping is the right amount of dry ice. The quantity of dry ice needed depends on various factors, including the weight of the goods, the duration of the shipment, and the external temperature. For most shipments, you will need about 5 to 10 pounds (2.27 to 4.54 kg) of dry ice per 24-hour period.
Factors to Consider:
Package Size: For smaller shipments, use around 5 pounds of dry ice. Larger shipments may require up to 10 pounds or more.
Duration: For longer journeys, consider using more dry ice or adding extra layers of insulation to prolong the sublimation process.
2. Choose the Right Packaging
The packaging used for dry ice shipping plays a critical role in maintaining the integrity of the shipment. The container must be well-insulated to prevent dry ice from sublimating too quickly and to ensure that the cold temperatures are retained throughout the transit period.
Common packaging options include:
Insulated Boxes: Suitable for most standard shipments, providing a good balance of insulation and cost-effectiveness.
Vacuum-Sealed Bags: Ideal for smaller or highly sensitive shipments, where maintaining temperature control is paramount.
Styrofoam Coolers: Cost-effective and efficient for small-to-medium-sized shipments, widely used for both food and pharmaceutical products.
3. Ensure Ventilation
Since dry ice sublimates into carbon dioxide gas, it is essential that the packaging allows for the release of gas to prevent pressure buildup. Failing to properly ventilate the shipping container could result in dangerous pressure buildup, potentially leading to the package bursting. Make sure your shipping containers have vented lids or other mechanisms that allow CO2 gas to escape safely.
Safety Considerations for Dry Ice Shipping
Handling dry ice requires caution, as improper handling can result in injuries such as frostbite or asphyxiation. Here are some key safety practices:
Protective Gear: Always wear insulated gloves when handling dry ice to avoid frostbite.
Proper Ventilation: Ensure that the shipping container is ventilated properly to avoid the risk of CO2 buildup, which can lead to asphyxiation.
Correct Labeling: All dry ice shipments must be properly labeled with “Dry Ice, UN1845” and the net weight of the dry ice. This is necessary to inform handlers and ensure safety throughout the shipping process.
Choosing the Right Shipping Containers
Different types of containers offer varying levels of insulation and are suited for specific shipping needs. Here’s a breakdown of popular choices:
| Container Type | Key Features | Best For |
|---|---|---|
| Insulated Boxes | Thick insulation, durable materials | Standard shipments |
| Vacuum-Sealed Bags | Highly efficient, sealed to prevent moisture entry | Small, highly sensitive goods |
| Styrofoam Coolers | Lightweight, cost-effective | Medium-sized shipments |
| Hybrid Coolers with PCMs | Combines dry ice with phase-change materials | Extended cooling duration |
Packing Techniques for Maximum Efficiency
Layer Dry Ice Properly: Always place dry ice on top of the items you’re shipping, as cold air sinks.
Pre-Chill the Packaging: To reduce the initial sublimation rate, pre-chill your container before packing the items.
Fill Empty Spaces: Use insulation materials such as kraft paper or foam peanuts to fill any voids in the packaging. This minimizes air gaps and helps maintain the temperature for longer.
Frequently Asked Questions (FAQ)
Q1: How long does dry ice last during next-day shipping?
Dry ice typically lasts 18-24 hours, depending on the quantity used, packaging, and external temperature. This time frame is sufficient for most next-day shipments.
Q2: Can dry ice be used for shipping food?
Yes, dry ice is commonly used for shipping frozen food. Its ability to maintain low temperatures makes it ideal for preserving the quality and safety of perishable food items.
Q3: What happens if dry ice sublimates too quickly?
If dry ice sublimates too quickly, the goods inside the package may not stay cold for the required duration. This is why it’s essential to choose the right packaging and amount of dry ice to match the shipping time.
Conclusion and Recommendations
Dry ice pack next day shipping is a vital component in the cold chain logistics industry, ensuring that perishable goods remain safe and fresh during transit. By selecting the correct packaging, calculating the right amount of dry ice, and following safety guidelines, businesses can ensure that their products reach their destinations in optimal condition.
To maximize efficiency, consider the following steps:
Calculate Dry Ice Needs: Use online calculators to determine the exact amount of dry ice required.
Choose the Right Packaging: Select insulated containers that are designed for dry ice shipping.
Follow Carrier Guidelines: Always check with your carrier to ensure compliance with their regulations.
With the right practices in place, dry ice shipping can be a reliable and efficient way to handle perishable goods.
About Tempk
Tempk is an industry leader in cold chain logistics solutions, offering innovative packaging and shipping options tailored to businesses in need of temperature-sensitive transport. With a focus on quality, efficiency, and sustainability, Tempk helps businesses ensure their products are shipped safely and efficiently.
Contact Tempk today to learn more about optimizing your cold chain shipping strategy with dry ice solutions.
Dry Ice Packs and Bricks Shipping: Keep Your Goods Cold and Safe with Efficient Cold Chain Logistics
Shipping temperature-sensitive products such as food, pharmaceuticals, and medical supplies requires precise temperature control. Dry ice, both in the form of packs and bricks, has become one of the most reliable methods for ensuring that goods remain cold throughout transit. In this comprehensive guide, we will explore how dry ice works, its benefits for shipping, and how to effectively implement it in your cold chain logistics.
What Are Dry Ice Packs and Dry Ice Bricks, and Why Are They Important?
Dry ice is the solid form of carbon dioxide (CO₂) and has an extremely low temperature of -78.5°C (-109.3°F). Unlike regular ice, which melts and leaves behind water, dry ice sublimates directly from a solid to a gas, leaving no residue. This unique property makes it ideal for shipping perishable goods, as it ensures no water damage while maintaining ultra-low temperatures.
Dry Ice Packs
These are pre-formed sheets or pouches that contain dry ice and are commonly used for short to medium-duration shipments. They offer flexibility and are easy to handle, making them ideal for smaller shipments.
Dry Ice Bricks
Dry ice bricks are solid blocks of dry ice, providing a longer sublimation period due to their larger mass and lower surface area. These are best for longer shipments, as they maintain cold temperatures for extended periods, making them ideal for bulk shipments or items that require prolonged cooling.
Benefits of Using Dry Ice for Shipping
1. Long-Lasting Cooling Power
Dry ice is incredibly effective at maintaining low temperatures for extended periods, much longer than regular ice. This is especially crucial for long-distance shipments or for products that need to be kept frozen for several days.
2. No Water Residue
One of the most significant advantages of dry ice is that it does not leave any liquid residue. As it sublimates, it turns directly into gas, ensuring that the goods being transported remain unaffected by water damage.
3. Ideal for Frozen Goods
Dry ice is perfect for shipping products like frozen foods, pharmaceuticals, and biological samples. It can keep these items at ultra-low temperatures, preventing spoilage and maintaining their integrity.
4. Lightweight Yet Efficient
Dry ice is denser than regular ice, providing more cooling power per unit weight. This helps reduce shipping costs, as less material is needed to achieve the same cooling effect.
How to Safely Handle Dry Ice During Shipping
Handling dry ice safely is critical for both the safety of those involved in shipping and the products being transported. Below are some essential safety tips for using dry ice in your logistics operations:
1. Protective Gear
Always wear protective gloves and eye protection when handling dry ice. This prevents frostbite and damage to the skin due to its extreme cold temperature.
2. Ventilation is Key
Dry ice releases carbon dioxide gas as it sublimates. Therefore, it’s crucial to ensure that your storage areas and shipping containers are well-ventilated to prevent dangerous CO₂ buildup, which could lead to suffocation.
3. Proper Storage
Dry ice should be stored in a well-ventilated area away from heat sources. It should never be stored in a completely sealed container, as the buildup of pressure could cause an explosion.
Best Practices for Shipping with Dry Ice
1. Choose the Right Packaging
High-quality insulated containers, such as Styrofoam boxes or vacuum-insulated panels, should be used to protect the shipment and prolong the sublimation process of dry ice. Ensure the container allows for the safe release of CO₂ gas to avoid pressure buildup.
2. Calculate the Correct Amount of Dry Ice
When using dry ice for shipping, it’s essential to calculate the correct amount to ensure that the cooling duration is sufficient for the entire journey. You can use the following formula to help calculate the dry ice mass required:
mass (kg)=(Thold hours24)×SR (kg per 24 hours)×(1+buffer)\text{mass (kg)} = \left(\frac{T_{\text{hold hours}}}{24}\right) \times \text{SR (kg per 24 hours)} \times (1 + \text{buffer})
Where:
T_hold_hours is the required hold time.
SR is the sublimation rate.
Buffer accounts for unexpected delays or deviations in the route.
3. Label and Document Properly
Ensure that your shipment is correctly labeled with “Dry Ice” or “Carbon Dioxide, Solid,” and include the appropriate UN1845 identifier. Also, provide a Shipper’s Declaration for Dangerous Goods if necessary.
Comparing Dry Ice Packs vs. Dry Ice Bricks
| Feature | Dry Ice Packs | Dry Ice Bricks |
|---|---|---|
| Cooling Duration | Moderate (12-24 hours) | Long (24-48 hours or more) |
| Best for | Short to medium-duration shipments | Long-duration or bulk shipments |
| Temperature | Ultra-low temperatures (-78.5°C) | Ultra-low temperatures (-78.5°C) |
| Ideal Use | Small shipments and sensitive items | Larger shipments or extended transit times |
| Form Factor | Flexible and easy to handle | Dense and slow sublimation |
The Latest Trends in Dry Ice Shipping for 2025
1. Eco-Friendly Alternatives
The demand for environmentally friendly shipping solutions has increased, and dry ice is no exception. Companies are exploring biodegradable materials that can replace dry ice to reduce the environmental impact.
2. Smart Shipping Solutions
In 2025, smart sensors and IoT-enabled temperature monitoring systems are revolutionizing dry ice shipping. These technologies ensure that temperature conditions remain stable throughout the entire shipping process, providing real-time data and enhanced visibility.
3. Hybrid Shipping Solutions
The rise of hybrid VIP (vacuum insulated panels) combined with phase change materials (PCM) has been a game-changer in temperature-controlled logistics. These systems extend hold time while reducing CO₂ usage, providing a more sustainable solution for dry ice shipping.
FAQs About Dry Ice Shipping
Q1: How long can dry ice keep my shipment cold?
Dry ice can maintain its cooling power for 18 to 24 hours depending on factors like the amount used, packaging quality, and external temperature conditions.
Q2: Is it safe to use dry ice for shipping food?
Yes, dry ice is safe for shipping food, as long as proper packaging is used to prevent direct contact with the product and to allow for gas release.
Q3: Can I use dry ice for shipping pharmaceuticals?
Dry ice is widely used for shipping pharmaceuticals, especially for items requiring ultra-low temperatures, such as vaccines and biologics.
Conclusion
Dry ice packs and dry ice bricks are invaluable for maintaining temperature control during shipping. By following best practices for handling, packaging, and compliance, you can ensure the safe delivery of temperature-sensitive goods. As technology advances, dry ice shipping solutions will continue to evolve, offering more efficient, sustainable, and reliable options for businesses in need of cold chain logistics.
Next Steps:
Review your current cold chain shipping methods and consider upgrading to dry ice for better temperature control.
Ensure your team is trained on the safe handling of dry ice.
Stay updated on the latest trends and innovations to keep your cold chain operations at the forefront of efficiency and sustainability.
About Tempk
Tempk is a leader in temperature-controlled logistics, providing dry ice and other cold chain packaging products. Our solutions are designed to ensure that your goods are delivered safely, maintaining their integrity throughout the journey.
For more information on our products and services, feel free to contact us or visit our website.
Dry Ice Pack Shipping Guide 2025: Safe, Efficient Cold Chain Logistics & Delivery Solutions
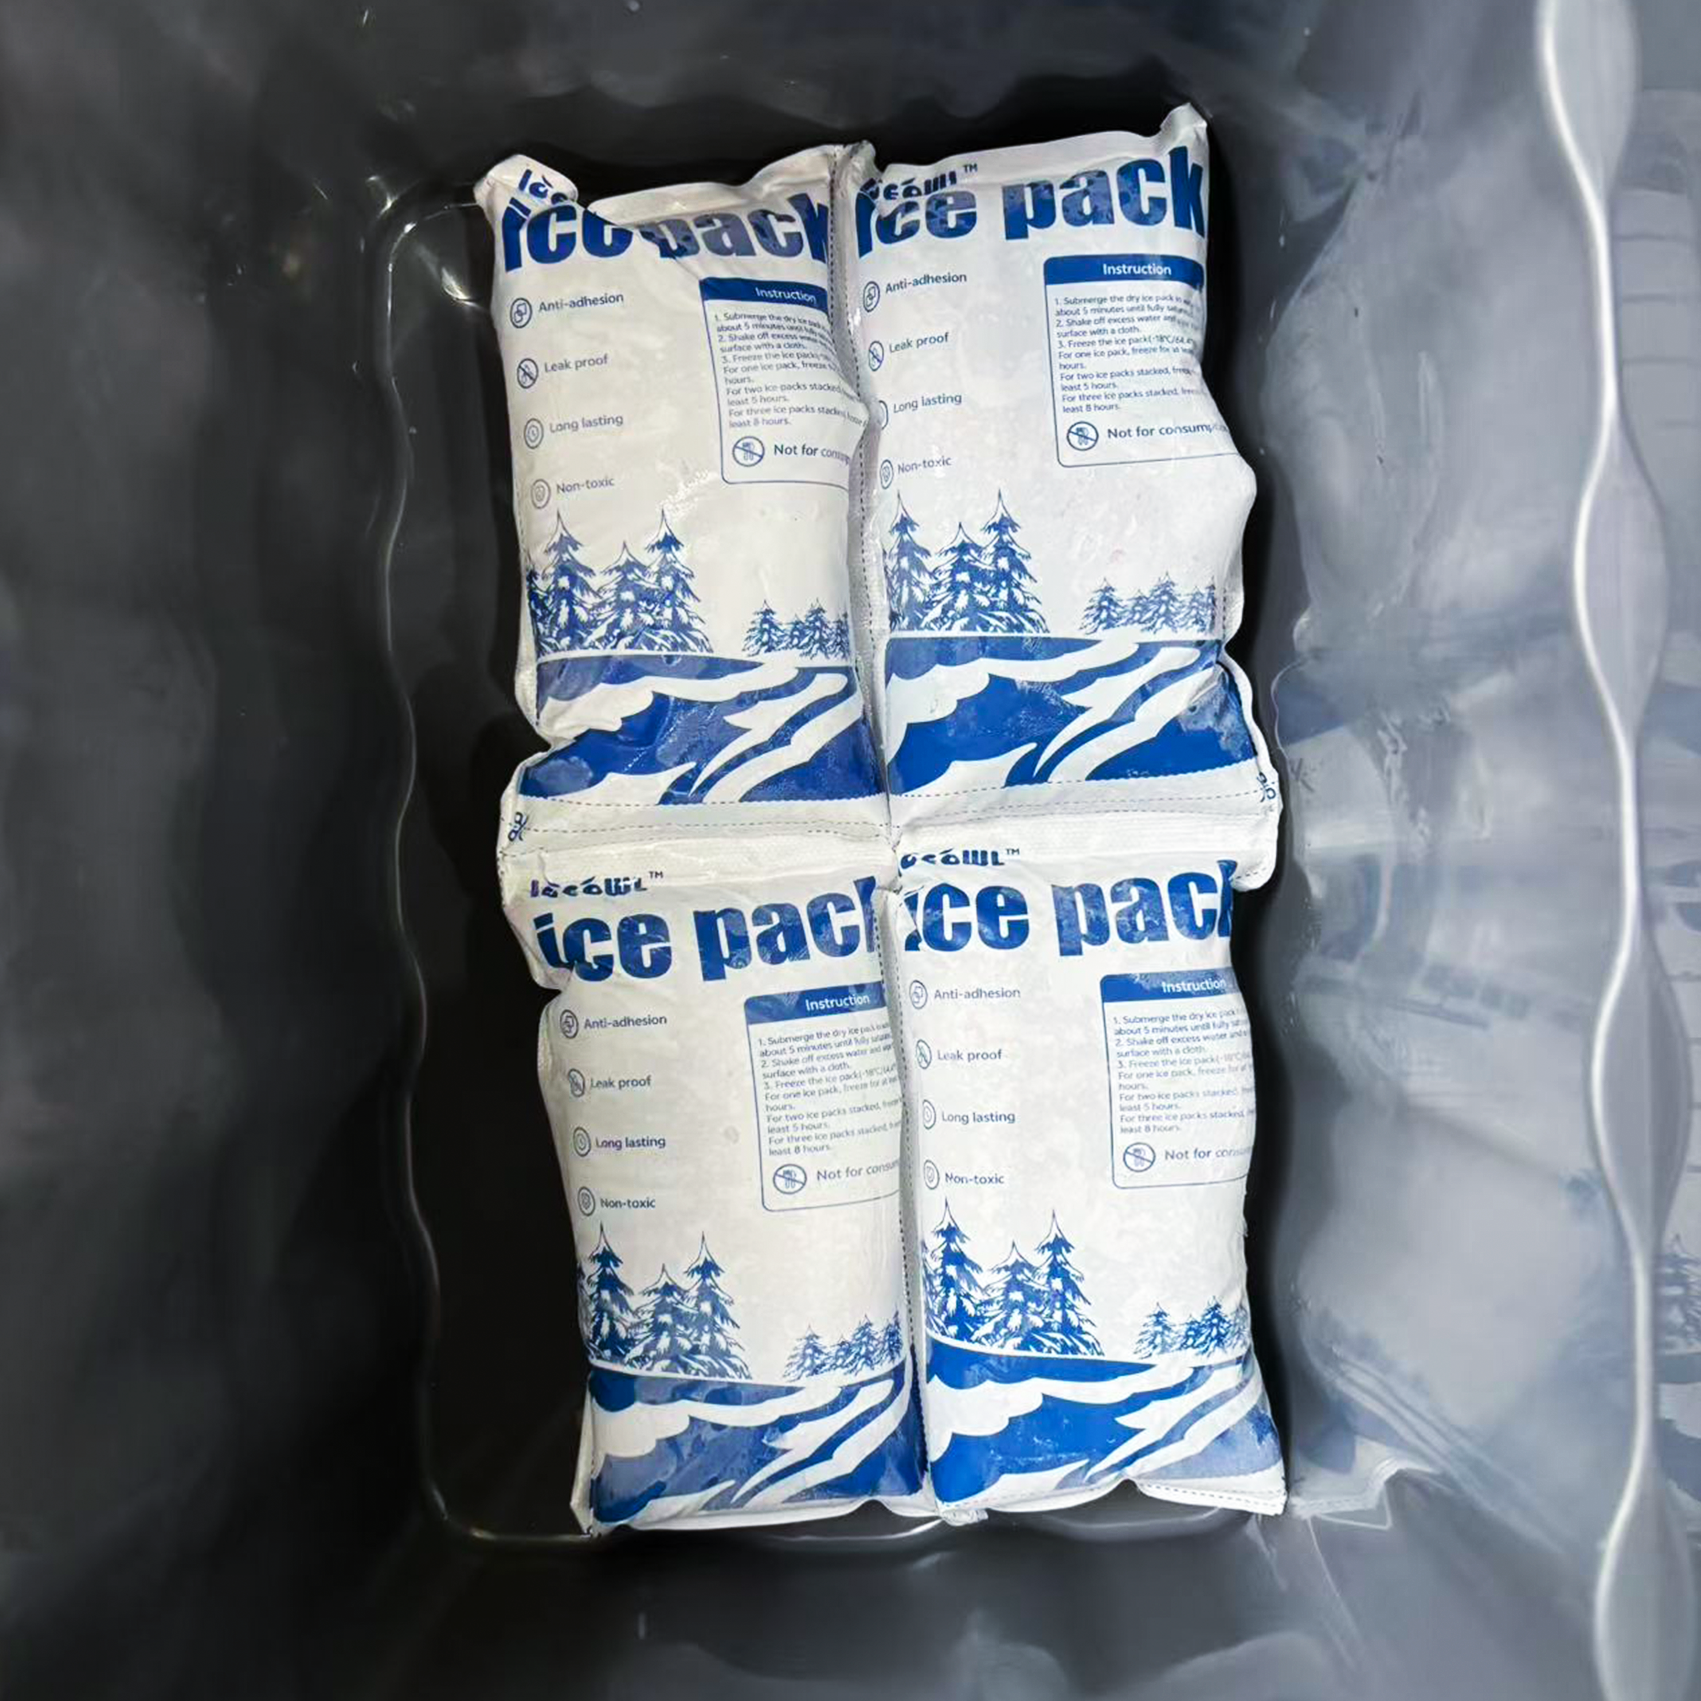
Dry Ice Pack Shipping in 2025: How to Ensure Safe and Efficient Cold Chain Logistics
Shipping temperature-sensitive goods requires careful planning, especially when using dry ice to maintain sub-zero temperatures. In this guide, we will explore how dry ice packs work, their applications in various industries, safety precautions, and how the 2025 cold chain landscape is evolving to meet modern shipping needs.
How do dry ice packs work, and why are they crucial for shipping?
What are the main uses of dry ice packs across different industries?
What safety precautions should be followed when handling dry ice?
How is dry ice delivery evolving in 2025?
How Do Dry Ice Packs Work, and Why Are They Essential for Shipping?
Dry ice packs are a form of solidified carbon dioxide (CO₂) that sublimates directly from a solid to a gas at -78.5°C (-109.3°F), making them essential for keeping goods frozen during shipping. Unlike regular ice, which melts and can cause moisture-related damage, dry ice leaves no residue, ensuring that products such as vaccines, food, and biological samples remain dry and cold during transport.
Why Dry Ice is More Efficient Than Regular Ice
Moisture-Free: Dry ice prevents moisture damage by sublimating into gas instead of melting into water.
Longer Duration: It can maintain sub-zero temperatures much longer than regular ice.
Superior Cold Retention: Dry ice maintains an extremely low temperature, which is crucial for products like vaccines and frozen food.
Main Uses of Dry Ice Packs Across Various Industries
Pharmaceutical and Medical Shipments
In the pharmaceutical industry, dry ice is indispensable for shipping temperature-sensitive items like vaccines and biologics. Many vaccines, such as those used for COVID-19, require sub-zero temperatures during transit. Dry ice ensures these products remain within the required temperature range.
Food Industry
Dry ice is also essential in the food industry. It’s used for shipping perishable goods, including frozen foods, seafood, and ice cream. The cold retention of dry ice helps maintain the freshness and prevent spoilage during long-distance transportation.
Biotechnology and Scientific Shipping
Biotech companies and research labs rely on dry ice to ship sensitive biological samples and chemicals. Dry ice helps maintain the integrity of scientific materials by providing a stable and reliable cooling solution during shipping.
Safety Considerations When Handling Dry Ice
Dry ice, while extremely effective as a cooling agent, can pose risks if mishandled. Here are the essential safety guidelines:
Use Protective Gear: Always wear insulated gloves to prevent frostbite.
Ensure Adequate Ventilation: Since dry ice sublimates into CO₂, proper ventilation is crucial to avoid suffocation in enclosed spaces.
Proper Storage and Packaging: Store dry ice in vented containers to prevent pressure buildup and avoid using airtight packaging.
Real-World Example: A logistics company encountered issues when using airtight containers for dry ice, which led to a burst during transit. Using vented packaging could have prevented this problem.
Trends in Dry Ice Delivery for 2025
Growing Demand for Eco-Friendly Solutions
Sustainability has become a key trend in logistics, with many companies exploring eco-friendly alternatives to traditional dry ice. This includes biodegradable dry ice packs and carbon capture methods that reduce the environmental footprint of shipping.
Advanced Tracking and Monitoring Systems
2025 is seeing an increased use of real-time tracking systems for dry ice shipments. These systems allow businesses to monitor the condition of their products during transit, ensuring they remain within the necessary temperature range.
Innovations in Dry Ice Shipping Containers
New developments in insulated and efficient dry ice containers are helping reduce the amount of dry ice needed for shipments, lowering both costs and environmental impact.
How Much Dry Ice Do You Really Need?
The required amount of dry ice depends on several factors, such as the weight of the product, shipping duration, and environmental conditions. A general guideline is to use 5 to 10 pounds of dry ice per 24-hour transit period. For more precise calculations, a formula is often used:
Required dry ice (lb) = Product weight (lb) × 0.6 × transit days × temperature factor.
For instance, shipping a 20-pound meal kit for two days at -20°C would require around 31 pounds of dry ice.
Packing and Shipping with Dry Ice
Proper packing ensures that dry ice works efficiently throughout the transit. Here’s how to do it:
Choose the Right Container: Use insulated boxes or coolers to maintain the low temperatures.
Prepare the Dry Ice: Ensure it’s placed in a vented container to allow for sublimation.
Pack the Product: Surround your product with dry ice to maintain consistent cooling.
Label and Seal: Secure the container and clearly label it with appropriate hazardous material markings.
Shipping Regulations
Dry ice shipments are regulated by various organizations, including the U.S. Department of Transportation (DOT) and the Federal Aviation Administration (FAA) for air transport. Be sure to follow all packaging, labeling, and documentation requirements to ensure compliance.
The Cost of Dry Ice Delivery
Shipping dry ice comes with various costs, including delivery fees and the price per pound. Here’s a summary of typical delivery services:
| Supplier Type | Price Range | Minimum Order & Fees | Best For |
|---|---|---|---|
| Local Pickup | $1.50–$3.15 | No minimum | Small quantities for personal use |
| Online Retailers | $0.60–$1.50 | Minimum 10 lb | Ecommerce shipping |
| Emergency Services | Varies | No fixed minimum | Hospitals, data centers |
| Industrial Suppliers | $2.25 per lb | Minimum 5 lbs | Laboratories, manufacturing |
Cost-Saving Strategies
Order the Right Quantity: Avoid over-ordering to minimize waste.
Compare Pickup vs. Delivery: For smaller quantities, local pickup may be cheaper.
Bulk Orders: Group orders with other businesses to receive discounted rates.
Common Questions
Q1: What is the difference between dry ice and regular ice for shipping?
Dry ice is much colder and sublimates into gas, while regular ice melts into water, which can damage products.
Q2: Can dry ice be used for international shipping?
Yes, but there are specific regulations on the amount and packaging requirements for international dry ice shipments.
Conclusion and Actionable Tips
Dry ice packs are essential for ensuring the safe transport of temperature-sensitive goods. By selecting the right form, calculating the required amount, and adhering to safety regulations, businesses can ensure safe, cost-effective, and efficient cold chain logistics.
Next Steps:
Assess Your Needs: Calculate the amount of dry ice required for your shipment.
Choose the Right Pack: Select the best dry ice format for your product.
Choose a Supplier: Compare prices and services from various suppliers.
Prioritize Safety: Follow all safety guidelines when handling dry ice.
About Tempk
Tempk specializes in custom cold chain solutions, including dry ice, gel packs, and insulated shippers. We provide expert advice, regulatory training, and delivery strategies for industries such as pharmaceuticals, food, and biotech. Contact us today to optimize your cold chain logistics.
Vaccine Transport Dry Ice Pack – Best Practices and Where to Buy
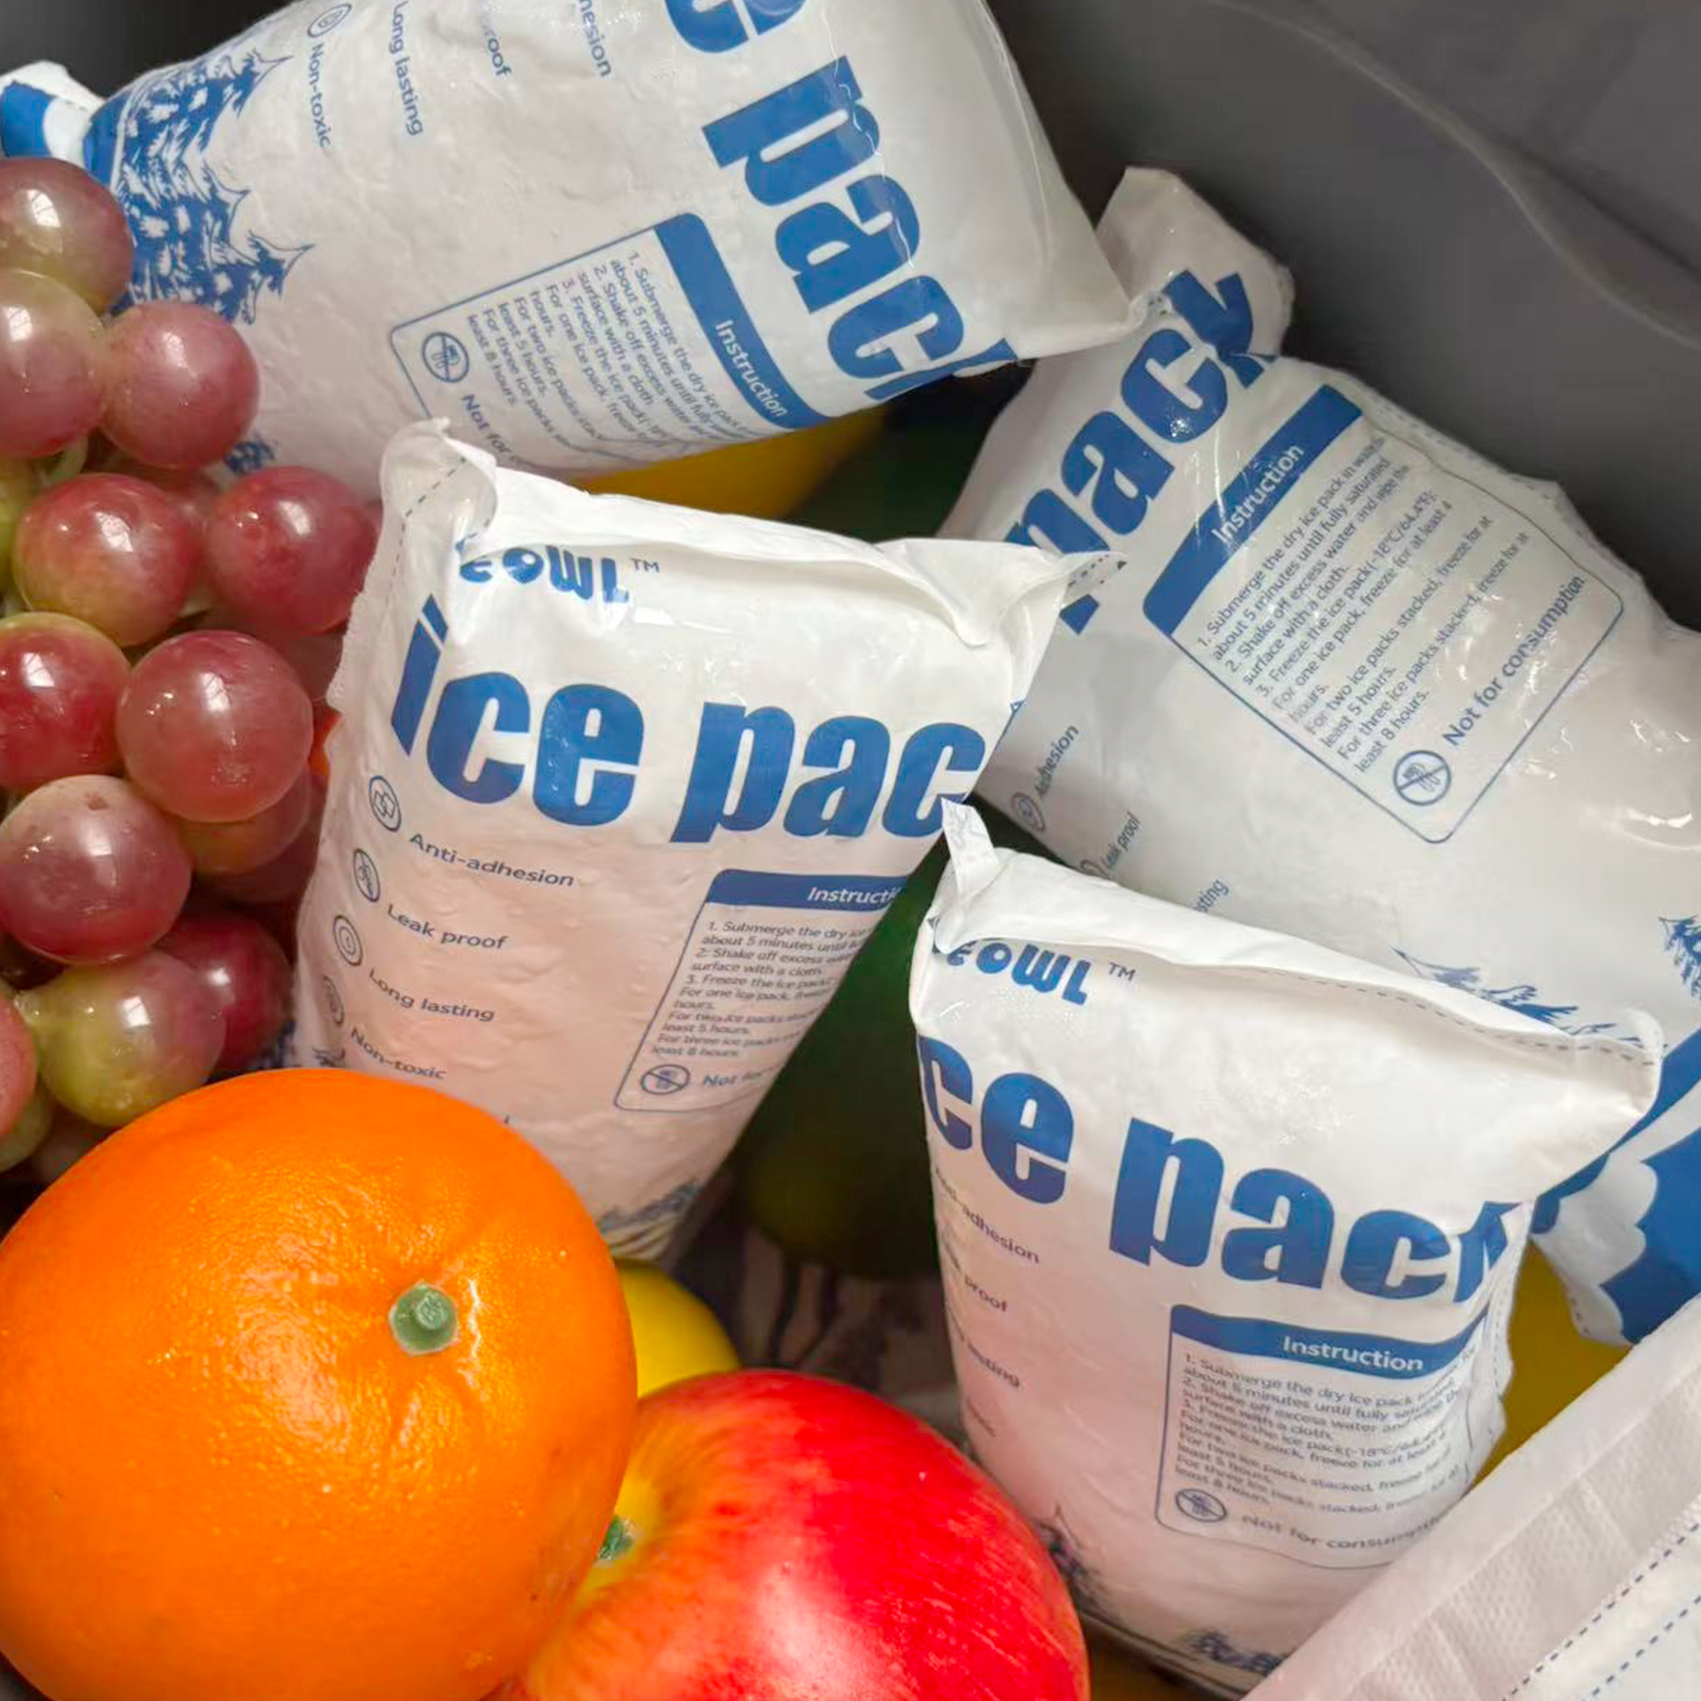
In cold chain logistics, ensuring that vaccines remain at a stable temperature during transportation is paramount. Vaccine transport dry ice packs are indispensable for maintaining ultra-low temperatures necessary for vaccines like COVID-19 and other temperature-sensitive biological products. In this guide, we will explore how to choose the right dry ice pack, the factors to consider when purchasing, and best practices for safe transport.
What is a Vaccine Transport Dry Ice Pack and Why Is It Essential?
A vaccine transport dry ice pack is a critical component in maintaining the proper temperature during vaccine shipping. Dry ice, which is solidified carbon dioxide, sublimes directly into gas without melting into liquid. This property makes it ideal for maintaining sub-zero temperatures essential for vaccine preservation.
Why is Dry Ice Necessary for Vaccine Transport?
Dry ice plays a key role in the transport of vaccines by keeping them at the required ultra-low temperatures. For vaccines like COVID-19, which need temperatures as low as -78.5°C, dry ice ensures that vaccines stay within the required temperature range throughout their journey.
Advantages of Dry Ice for Vaccine Transport
Maintains Ultra-Low Temperatures: Essential for vaccines that require sub-zero environments.
No Water Residue: Unlike regular ice, dry ice sublimates into gas, leaving no water to cause contamination.
Longer Duration of Cooling: Dry ice remains effective for longer periods, ensuring a stable temperature over long distances.
What to Consider When Buying a Vaccine Transport Dry Ice Pack?
When purchasing dry ice packs for vaccine transport, several factors must be considered to ensure you get the right product for your needs.
1. Types of Dry Ice for Vaccine Transport
There are several forms of dry ice, each with specific advantages depending on the shipment’s size and duration:
Dry Ice Sheets: These are ideal for uniform cooling and are often used in vaccine transport due to their flexibility.
Dry Ice Pellets: These small, flexible pellets are suitable for compact vaccine shipments.
Dry Ice Blocks: Larger blocks are ideal for extended shipping durations and larger containers.
2. Calculating the Correct Amount of Dry Ice
The amount of dry ice required depends on multiple factors:
Shipping Duration: Longer shipments require more dry ice to maintain stable temperatures.
Shipment Size: Larger shipments might need a combination of dry ice sheets, pellets, and blocks.
Ambient Temperature: High external temperatures might increase the amount of dry ice needed to maintain cold conditions.
3. Ensuring Safe Vaccine Transport with Dry Ice
To guarantee safe transport, follow these precautions:
Proper Packaging: Dry ice should be placed in insulated containers to minimize sublimation and temperature fluctuations during transport.
Regulatory Compliance: Ensure the packaging and shipping methods comply with local and international regulations for dry ice handling.
Temperature Monitoring: Utilize temperature monitoring devices to track and ensure the vaccines are kept at the proper temperature throughout the entire transport process.
Where to Buy a Vaccine Transport Dry Ice Pack?
You can purchase dry ice packs from several trusted sources:
1. Local Gas Suppliers
Industrial gas suppliers often sell dry ice and provide delivery services. These suppliers typically offer dry ice in various forms, including pellets, blocks, and sheets.
2. Online Retailers
Specialized cold chain logistics companies offer dry ice for sale online. Ensure to verify that the dry ice is specifically designed for medical and pharmaceutical use to maintain its effectiveness for transporting vaccines.
3. Pharmaceutical and Logistics Companies
Companies specializing in temperature-sensitive shipping solutions often provide dry ice as part of their service offerings.
What to Look for When Buying Dry Ice for Vaccine Transport
When choosing a supplier, ensure the following:
Reliability of the Supplier: Choose a supplier with a strong track record in providing dry ice for sensitive shipments like vaccines.
Delivery Time: Ensure that your supplier can deliver the dry ice on time and that it remains at the appropriate temperature during transit.
Customer Support: Look for a supplier that offers customer support, particularly for first-time dry ice users in vaccine transport.
Best Practices for Using Vaccine Transport Dry Ice Packs
Once you purchase the dry ice, follow these best practices to optimize its effectiveness:
Store Dry Ice Properly: Store dry ice in a well-ventilated area, as it sublimates into gas. Never store it in a sealed container, as the pressure can build up.
Handle with Care: Always use protective gloves when handling dry ice to prevent frostbite.
Monitor Temperature: Use temperature monitoring devices to ensure that the vaccines stay at the required temperature throughout the shipping process.
FAQ on Vaccine Transport Dry Ice Packs
Q1: How long does dry ice last in vaccine transport?
Dry ice typically lasts between 24 hours to several days, depending on the amount used and the conditions of shipping. Proper insulation will help maximize the duration.
Q2: Is dry ice safe for transporting vaccines?
Yes, dry ice is commonly used in the safe transport of vaccines and other sensitive items. However, it’s crucial to handle dry ice properly to avoid accidents.
Q3: Can I buy dry ice packs online?
Yes, many online platforms and cold chain providers offer dry ice for sale and can deliver it to your location.
2025 Trends in Vaccine Transport and Cold Chain Logistics
The Latest Developments in Cold Chain Logistics
The cold chain logistics industry is rapidly evolving. In 2025, key trends focus on improving the sustainability of dry ice production and integrating advanced temperature monitoring technologies for more reliable vaccine transport.
Advanced Monitoring Technology
Real-time temperature tracking systems are becoming more sophisticated, ensuring that vaccines remain within their required temperature ranges during transit.
Sustainability in Dry Ice Production
With increasing environmental concerns, the industry is shifting towards more eco-friendly dry ice production methods, reducing carbon emissions associated with its production.
Market Insights
The demand for reliable cold chain logistics solutions is expected to grow as more vaccines require transportation globally. Companies are focusing on enhancing efficiency and reducing the environmental impact of vaccine distribution.
Conclusion and Recommendations
In conclusion, selecting the right vaccine transport dry ice pack is crucial for maintaining the integrity of vaccines during transport. Choose reliable suppliers, ensure proper packaging, and monitor temperatures throughout the shipping process.
Actionable Next Steps:
Find a Reliable Supplier: Research and contact local or online dry ice suppliers.
Check Compliance: Ensure that your transport methods adhere to all regulatory standards for vaccine shipments.
Monitor Temperature: Use tracking systems to ensure the vaccines stay at the correct temperature throughout transit.
About Tempk
At Tempk, we specialize in providing high-quality dry ice solutions for vaccine transport and cold chain logistics. With years of experience and a commitment to sustainability, we ensure your vaccine shipments arrive safely and efficiently.
Dry Ice Packs for Shipping: Best Practices & Compliance in 2025
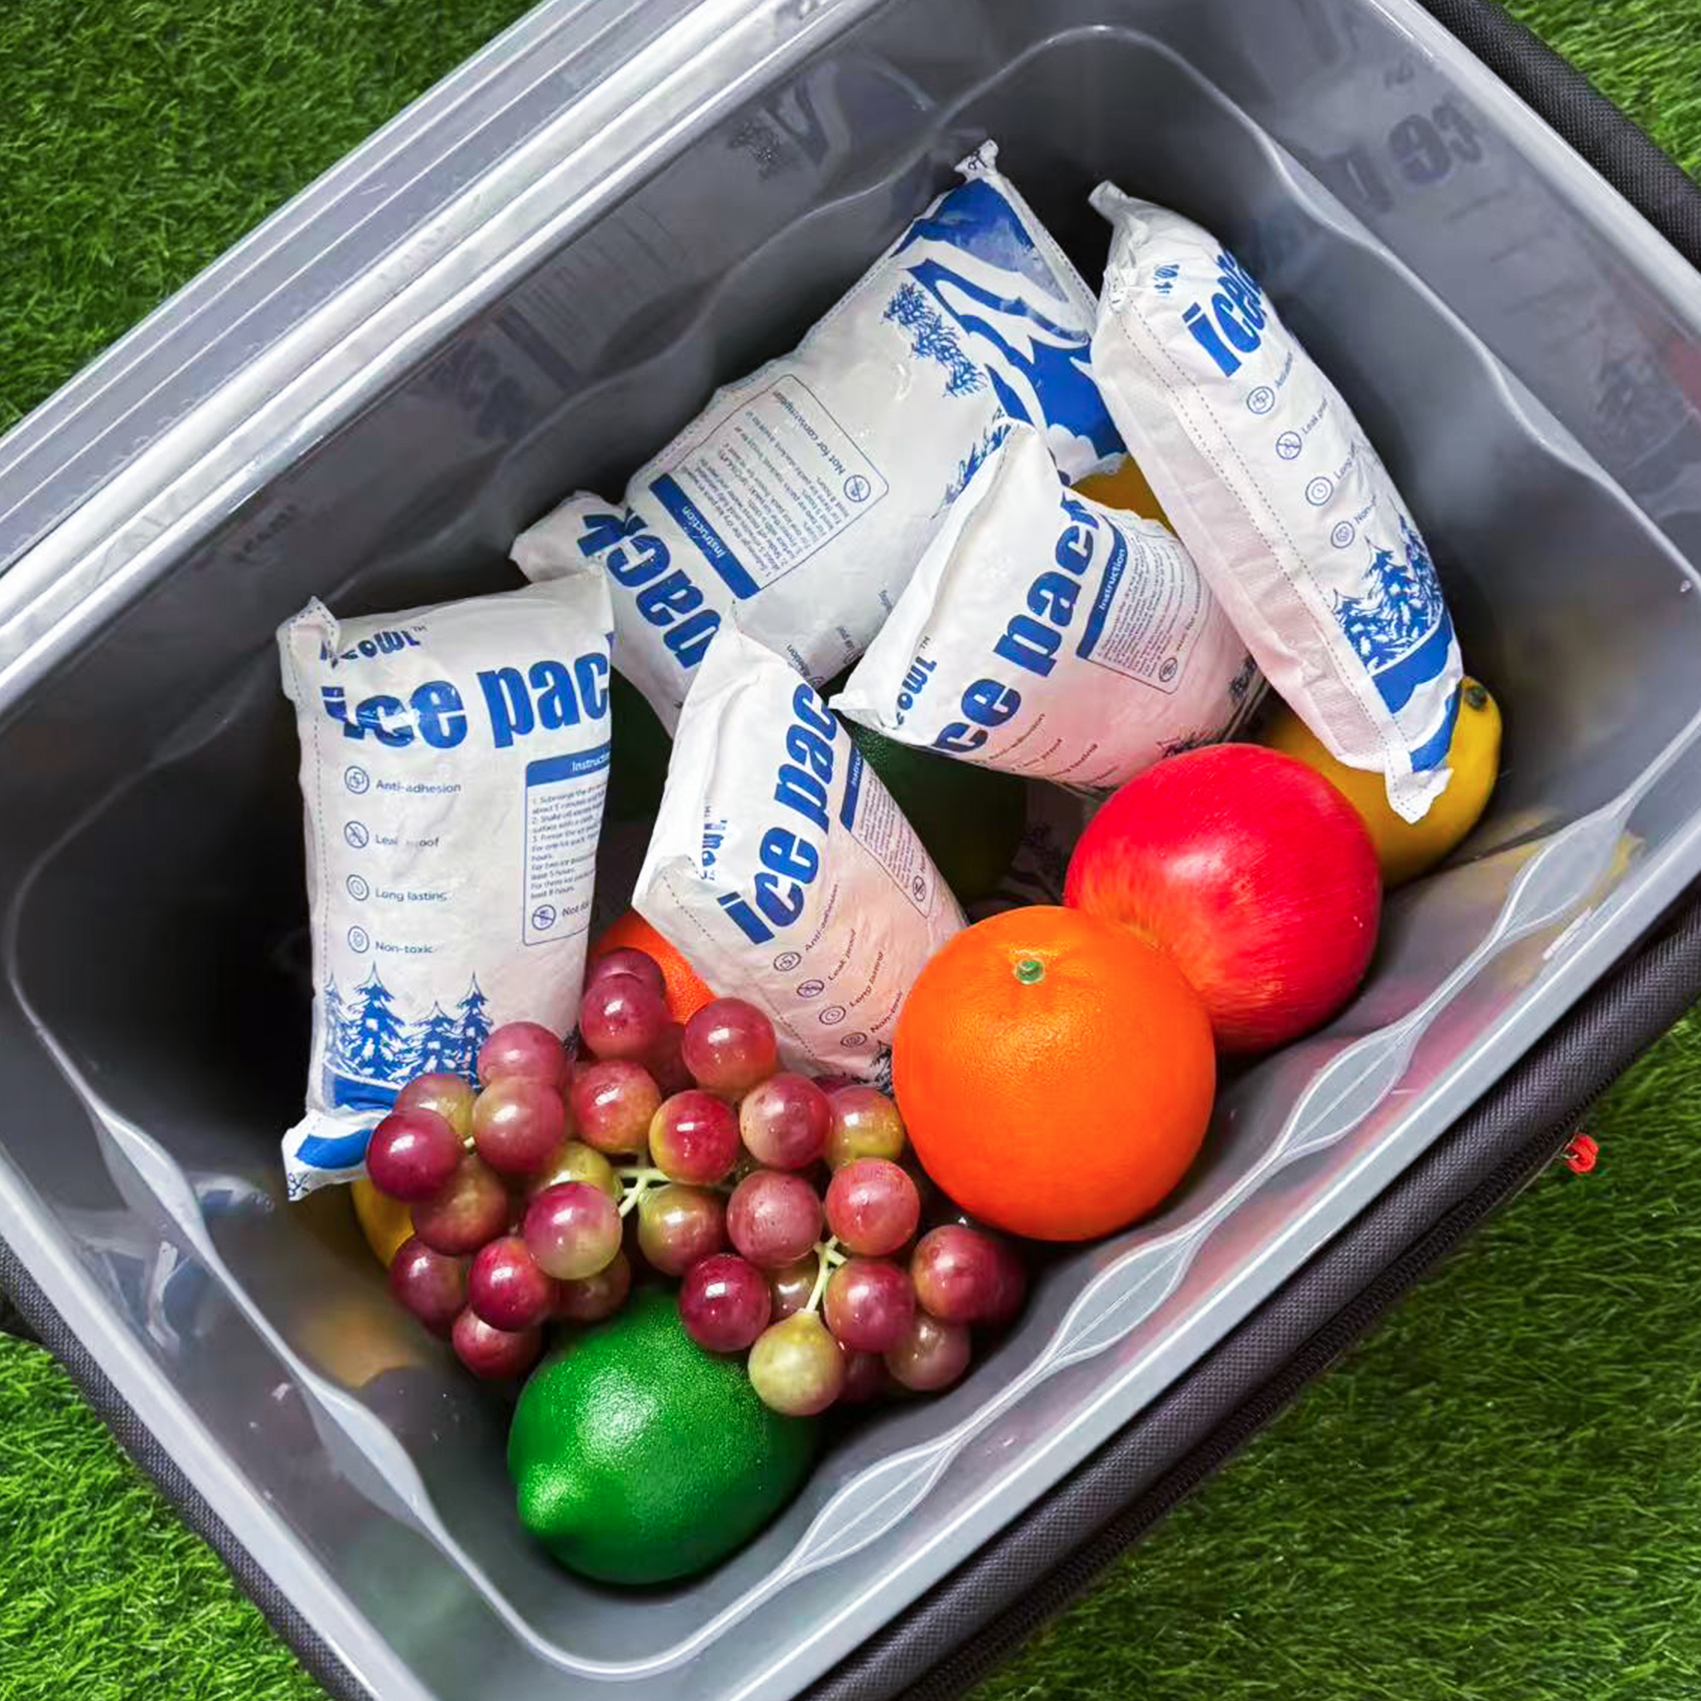
When shipping perishable goods, maintaining a stable temperature is critical to ensuring product integrity. Dry ice packs, made from solid carbon dioxide (CO₂), offer a powerful solution to keep items frozen during transit. As the cold chain logistics industry evolves in 2025, understanding the latest regulations, best practices, and innovative trends in using dry ice for shipping is crucial for compliance and safety.
What Are Dry Ice Packs for Shipping?
Dry ice packs are sheets, blocks, or pellets of solid CO₂, designed to keep temperature-sensitive products at ultra-low temperatures. Unlike conventional ice, dry ice sublimates directly into gas without leaving behind any liquid residue. This feature makes it ideal for shipping items that require freezing, such as pharmaceuticals, biological samples, and certain perishable foods.
Why Use Dry Ice for Shipping?
Dry ice packs are an excellent choice for shipping due to their unique properties, providing several advantages over traditional cooling methods.
Long-Lasting Cooling Power: Dry ice sublimates at a much slower rate than regular ice, ensuring your goods remain cold for longer durations.
No Moisture Runoff: Since dry ice does not melt into water, there’s no risk of water damage to sensitive items.
Ideal for Extended Transit: For shipments lasting more than 48 hours, dry ice is often the preferred choice for keeping goods frozen.
2025 Regulations for Shipping Dry Ice
Shipping dry ice is subject to strict regulations due to its classification as a hazardous material. In 2025, the following key regulations must be adhered to when shipping dry ice:
UN Number: Packages containing dry ice must be clearly labeled with the UN number “1845.”
Class 9 Hazard Label: A Class 9 hazardous materials label must be affixed to the package.
Weight Declaration: The net weight of dry ice in kilograms must be marked on the package.
Venting Requirements: Packaging must allow CO₂ gas to escape to avoid pressure buildup during sublimation.
For air transport, the International Air Transport Association (IATA) limits the amount of dry ice per package to 2.5 kg on passenger aircraft and up to 200 kg on cargo flights.
Best Practices for Using Dry Ice Packs in Shipping
To ensure the safe and efficient use of dry ice for shipping, follow these best practices:
1. Select Appropriate Packaging
Insulated Containers: Use insulated coolers or Styrofoam containers to maintain the desired temperature.
Vented Packaging: Ensure the container has ventilation holes to allow CO₂ gas to escape during sublimation.
Cushioning: Properly secure items inside the packaging to prevent damage during transit.
2. Calculate the Amount of Dry Ice
Determine the quantity of dry ice based on the transit duration and the perishability of the goods. A common guideline is to use 2.5 kg of dry ice for every 24 hours of shipping.
3. Label Packages Correctly
Mark the package clearly with “Dry Ice” or “Carbon Dioxide, Solid.”
Attach the UN Number (1845) and Class 9 Hazard Label.
Specify the net weight of dry ice in kilograms.
Common Mistakes to Avoid
Sealed Containers: Never use airtight containers to pack dry ice; this can cause dangerous pressure buildup.
Incorrect Labeling: Ensure all required labels are attached to avoid delays or rejections by shipping carriers.
Exceeding Weight Limits: Stick to the weight regulations to prevent violations of hazardous materials rules.
Alternatives to Dry Ice
While dry ice is effective, several alternatives may be more suitable depending on your shipment requirements:
Gel Packs: Reusable and non-hazardous, ideal for shorter transit times.
Phase Change Materials (PCMs): These materials maintain specific temperature ranges and are reusable, offering a more sustainable option.
Traditional Ice Packs: While cheaper, ice packs can leave water residue, potentially damaging goods.
Sustainability and Trends in Dry Ice Shipping
In 2025, several emerging trends are shaping the dry ice shipping industry, focused on both environmental sustainability and technological advancements.
1. Sustainable Dry Ice Production
Many suppliers are shifting toward environmentally friendly production methods by capturing CO₂ from industrial processes, such as ammonia synthesis, reducing the overall carbon footprint of dry ice.
2. Hybrid Packaging Solutions
Hybrid solutions combining dry ice and PCMs are gaining popularity. These packouts minimize CO₂ use while extending the cooling duration, making them more eco-friendly.
3. Smart Packaging and Tracking Technology
Innovations such as smart CO₂ sensors and QR-coded labels allow for real-time tracking of dry ice and product temperatures, ensuring better monitoring and compliance.
How to Store Dry Ice Packs for Shipping
Proper storage is essential to maximize the shelf life and effectiveness of dry ice packs:
Store in an Insulated Container: Use coolers or specially designed containers to slow sublimation.
Avoid Sealed Containers: Never store dry ice in airtight or sealed containers; always ensure proper ventilation.
Monitor Sublimation Rates: Keep track of the rate at which dry ice sublimates to ensure the correct temperature is maintained.
Frequently Asked Questions About Dry Ice for Shipping
Q1: How long does dry ice last during shipping?
Dry ice can last between 18 to 24 hours depending on the type of packaging and external conditions. Blocks of dry ice last longer than pellets.
Q2: Is dry ice safe to ship?
Yes, dry ice is safe for shipping when packaged according to safety guidelines, including proper ventilation and labeling.
Q3: Can dry ice be used for shipping food?
Yes, dry ice is commonly used for shipping frozen and perishable foods, as long as the necessary safety measures are followed.
Conclusion and Recommendations
Dry ice packs are a powerful tool for shipping temperature-sensitive products in 2025. By choosing the right supplier and adhering to best practices for packaging, storage, and safety, you can ensure that your products arrive at their destination in optimal condition.
Action Plan:
Determine the required temperature range for your shipment (frozen vs chilled).
Calculate the correct amount of dry ice based on shipment duration.
Verify regulatory compliance and ensure proper packaging and labeling.
Consider hybrid packaging solutions to improve sustainability and cost-efficiency.
About Tempk
Tempk is a leading provider of cold chain packaging solutions, offering high-quality dry ice and other thermal control products to ensure the safe and efficient transport of temperature-sensitive goods. We specialize in helping businesses optimize their logistics while adhering to all relevant safety and regulatory standards.
Contact Tempk today to learn more about our dry ice solutions and how we can help streamline your cold chain shipments.
Why Are Dry Ice Packs Essential for Food Shipping in 2025? | Safe and Efficient Solutions
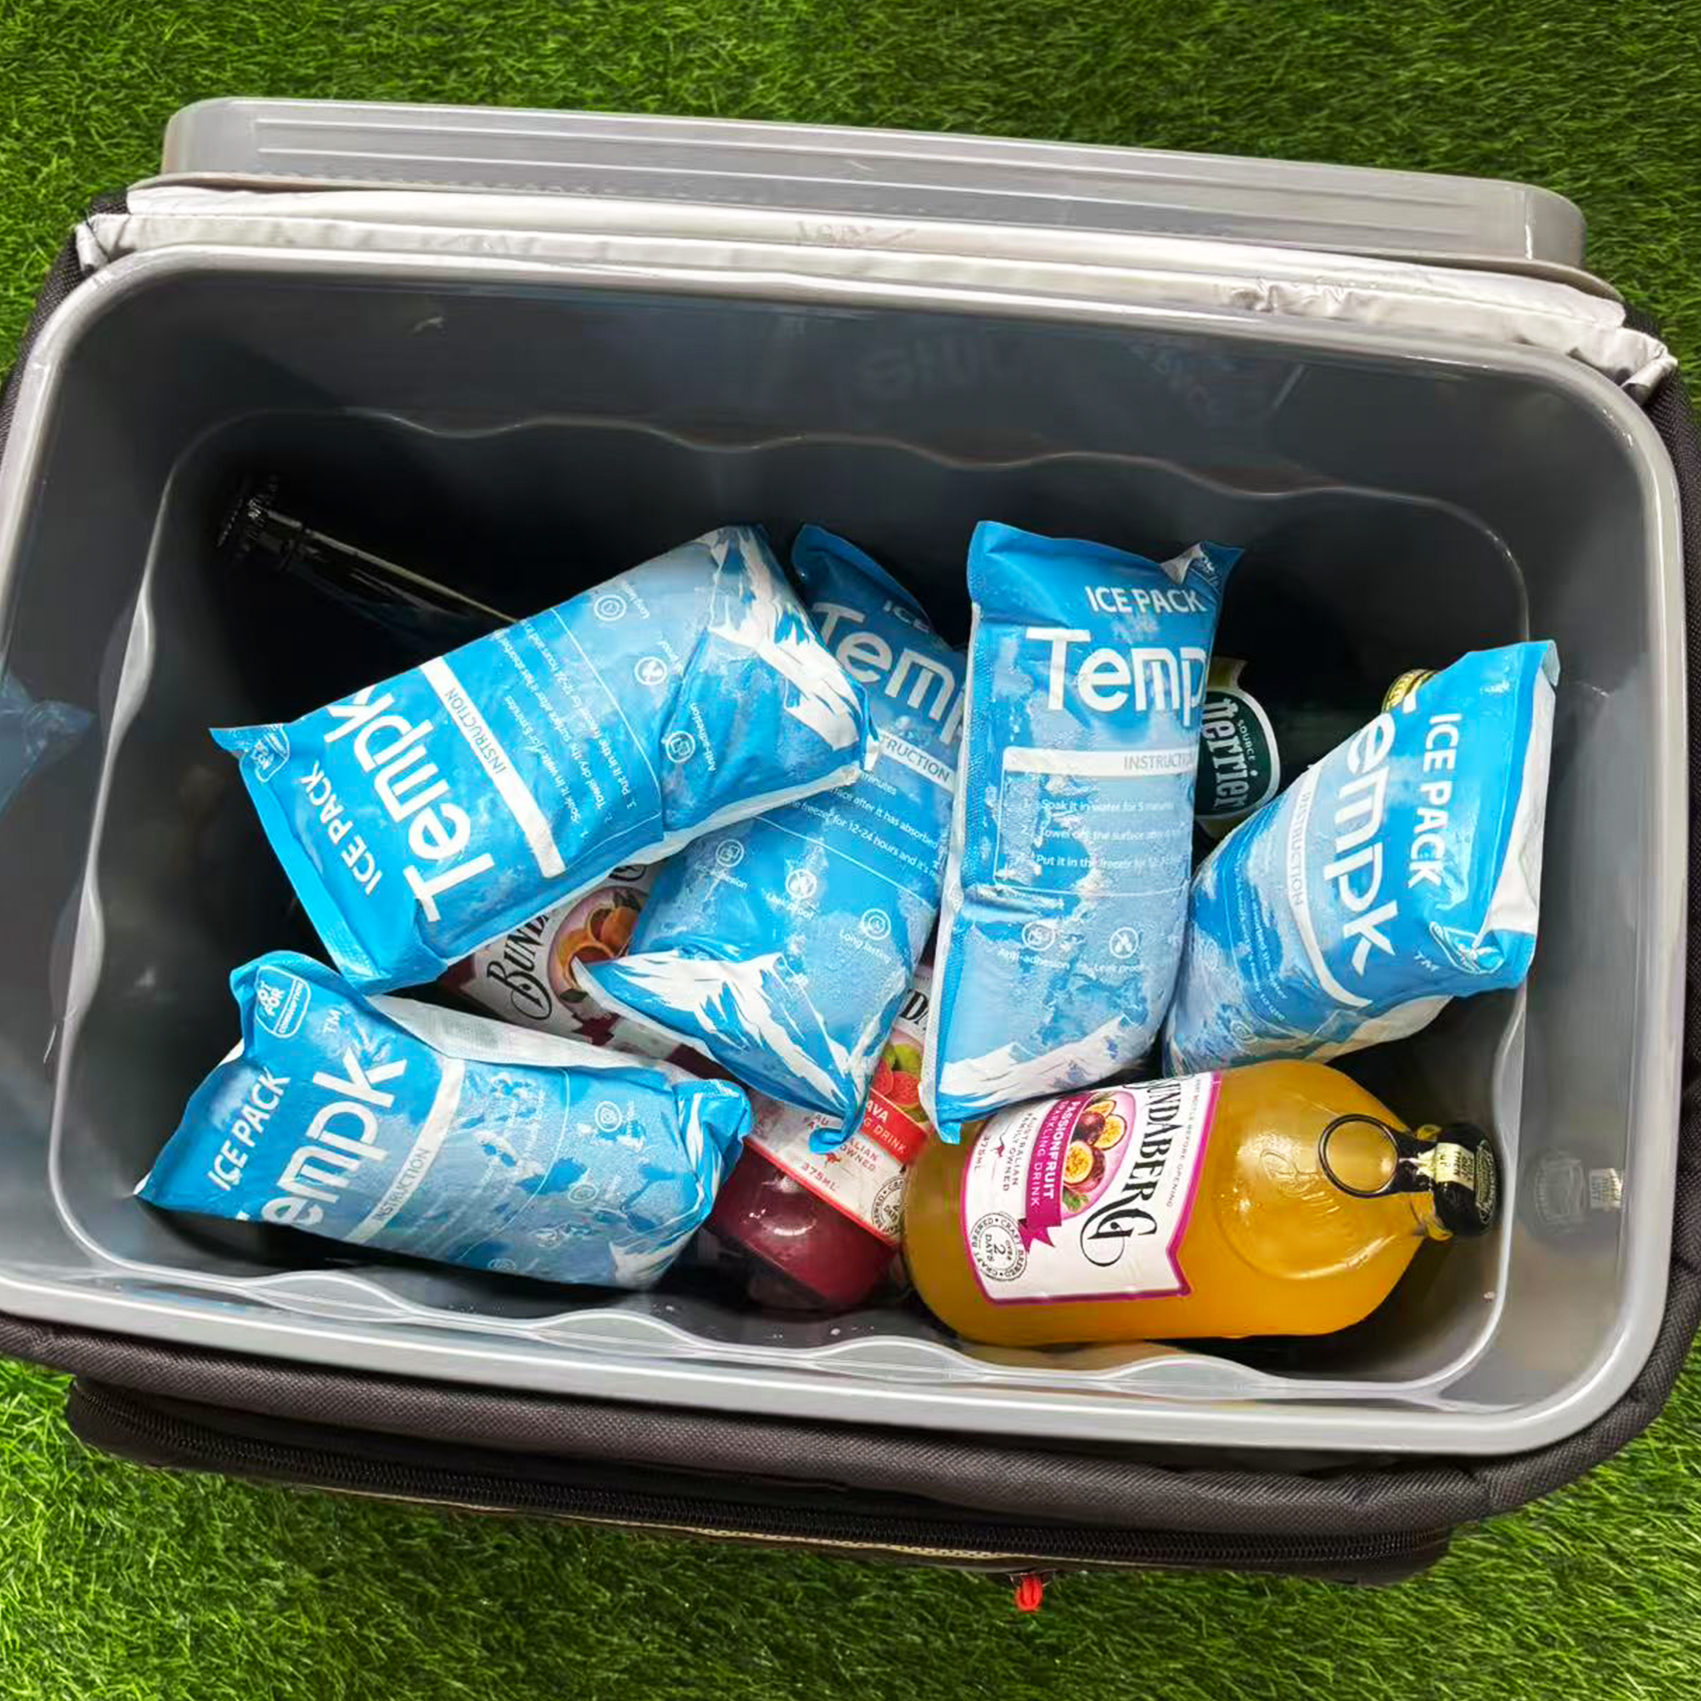
When shipping perishable food items, ensuring that they remain fresh throughout the journey is vital. Dry ice packs are increasingly being used to achieve this goal. In 2025, they remain one of the most effective ways to maintain the right temperature, ensuring both food safety and quality. In this article, we will explore why dry ice packs are crucial for food shipping, their benefits, different types available, and tips on choosing the best supplier for your needs.
Why Are Dry Ice Packs Important for Food Shipping?
Dry ice packs are solidified carbon dioxide (CO₂) that sublimate (turn directly from solid to gas) at a very low temperature of -109.3°F (-78.5°C). This makes them highly effective in keeping perishable foods frozen or chilled during shipping, without the need for water-based ice that can cause leaks and water damage.
Temperature Control for Safe Food Shipping
Maintaining the right temperature during food shipping is crucial for food safety. Dry ice packs keep food at the desired temperature for extended periods, reducing the risk of bacterial growth, spoilage, and nutrient loss. For food that requires freezing or refrigeration, such as meat, seafood, and dairy, dry ice prevents these risks by maintaining an ultra-cold environment.
Preventing bacterial growth: Keeping food at a stable, cold temperature slows bacterial growth, ensuring food safety and extending shelf life.
Long-Lasting Cooling
One of the main advantages of dry ice over traditional ice is its ability to maintain sub-zero temperatures for extended durations. Traditional ice melts into water, which can damage packaging and cause contamination. Dry ice, however, sublimes without leaving any residue, making it ideal for long-distance shipments.
Extended shelf life: Dry ice keeps perishable goods frozen or chilled for longer than regular ice, making it perfect for long-haul deliveries.
No Water Residue
Dry ice’s ability to sublime directly into gas instead of melting into water ensures no moisture is left behind. This eliminates the potential for leaks or water damage, which can harm the food, packaging, and even the shipping container.
Types of Dry Ice Packs for Food Shipping
There are different types of dry ice solutions tailored for specific food shipping needs:
Standard Dry Ice Packs: These are solid pieces of dry ice wrapped in insulation. Ideal for short shipments (up to 48 hours) where extreme freezing is required.
Insulated Containers with Dry Ice: These containers offer enhanced temperature control and can keep shipments cold for extended periods, perfect for long-distance shipments.
Pre-packaged Dry Ice Sheets: Customizable sheets designed to line containers and provide even temperature control across the shipment. These are great for specialized food shipments, such as delicate items like seafood or frozen meals.
Each type of dry ice solution serves a different purpose, so it’s essential to select the right one based on the specific needs of your shipment, including the type of food and duration of transit.
How Long Can Dry Ice Keep Food Cold During Shipping?
The duration for which dry ice keeps food cold depends on various factors such as the amount of dry ice used, the insulation quality of the packaging, and external temperature conditions. Generally:
Short Shipments (1-3 days): Standard dry ice packs can keep food frozen for up to 48 hours, making them suitable for short-distance or expedited deliveries.
Longer Shipments (3-7 days): For longer shipments, insulated boxes with larger amounts of dry ice are necessary to maintain the required temperature.
Some suppliers also provide temperature monitoring services to ensure that food remains at the correct temperature throughout transit.
Benefits of Using Dry Ice Packs for Food Shipping
1. Extended Cooling Power
Dry ice packs last significantly longer than regular ice, maintaining sub-zero temperatures for longer, which is essential for shipping frozen goods over long distances.
2. Non-Melting
Unlike regular ice, which turns into water and can cause leaks or damage, dry ice sublimates and leaves no liquid behind. This ensures your food is safe and dry during transport.
3. Safe and Non-Toxic
Dry ice is a safe, non-toxic material, but it must be handled properly to avoid mishaps. Correct storage and ventilation are key to ensuring safety during shipping.
How to Choose the Best Dry Ice Supplier for Food Shipping in 2025
When selecting a supplier for dry ice packs, consider the following factors:
Quality and Compliance: Ensure the supplier meets industry standards for food safety and dry ice handling.
Packaging Options: Choose a supplier offering customized solutions for various types of food and different shipping durations.
Experience and Reputation: Opt for a supplier with a proven track record in handling perishable goods and providing reliable delivery services.
Sustainability: With increased awareness of environmental issues, some suppliers focus on eco-friendly practices, such as using sustainable packaging and carbon offset initiatives.
Dry Ice vs. Regular Ice: Which Is Better for Food Shipping?
Dry Ice is typically better for shipping frozen foods or long-distance shipments due to its extended cooling power and non-melting properties. Regular Ice, however, is better suited for shorter shipments or situations where food only needs to be kept cool rather than frozen.
| Feature | Dry Ice | Regular Ice |
|---|---|---|
| Best For | Long-distance, frozen food shipments | Shorter shipments, cooling rather than freezing |
| Cooling Duration | Up to 7 days | A few hours |
| Water Residue | None (sublimates into gas) | Can melt into water |
How to Safely Handle Dry Ice During Food Shipping
Dry ice is extremely cold and must be handled with care. Here are some important safety tips:
Proper Ventilation: Ensure containers are vented to allow the carbon dioxide gas to escape and prevent pressure buildup.
Protective Gear: Always use gloves or tongs when handling dry ice to avoid frostbite.
Storage: Store dry ice in well-ventilated areas, away from heat sources, to avoid rapid sublimation.
Common Mistakes to Avoid When Shipping Food with Dry Ice
Incorrect Amount of Dry Ice: Using too little dry ice can cause the food to thaw, while too much can lead to unnecessary costs and may cause sublimation issues.
Poor Insulation: Insufficient insulation causes dry ice to lose cooling power quickly. Always use high-quality insulation materials.
Ignoring Regulations: Dry ice is classified as a hazardous material, so it’s essential to comply with shipping regulations and guidelines to avoid fines or delays.
Conclusion
In 2025, dry ice packs remain one of the best solutions for shipping food safely. By selecting the right dry ice pack for your needs, ensuring proper handling, and choosing a reliable supplier, you can guarantee that your food shipments will arrive fresh, safe, and on time. Keep in mind the different types of dry ice packs available, and follow the recommended practices for optimal food preservation.
Dry Ice Pack Food Delivery: How to Ensure Safe and Efficient Transport
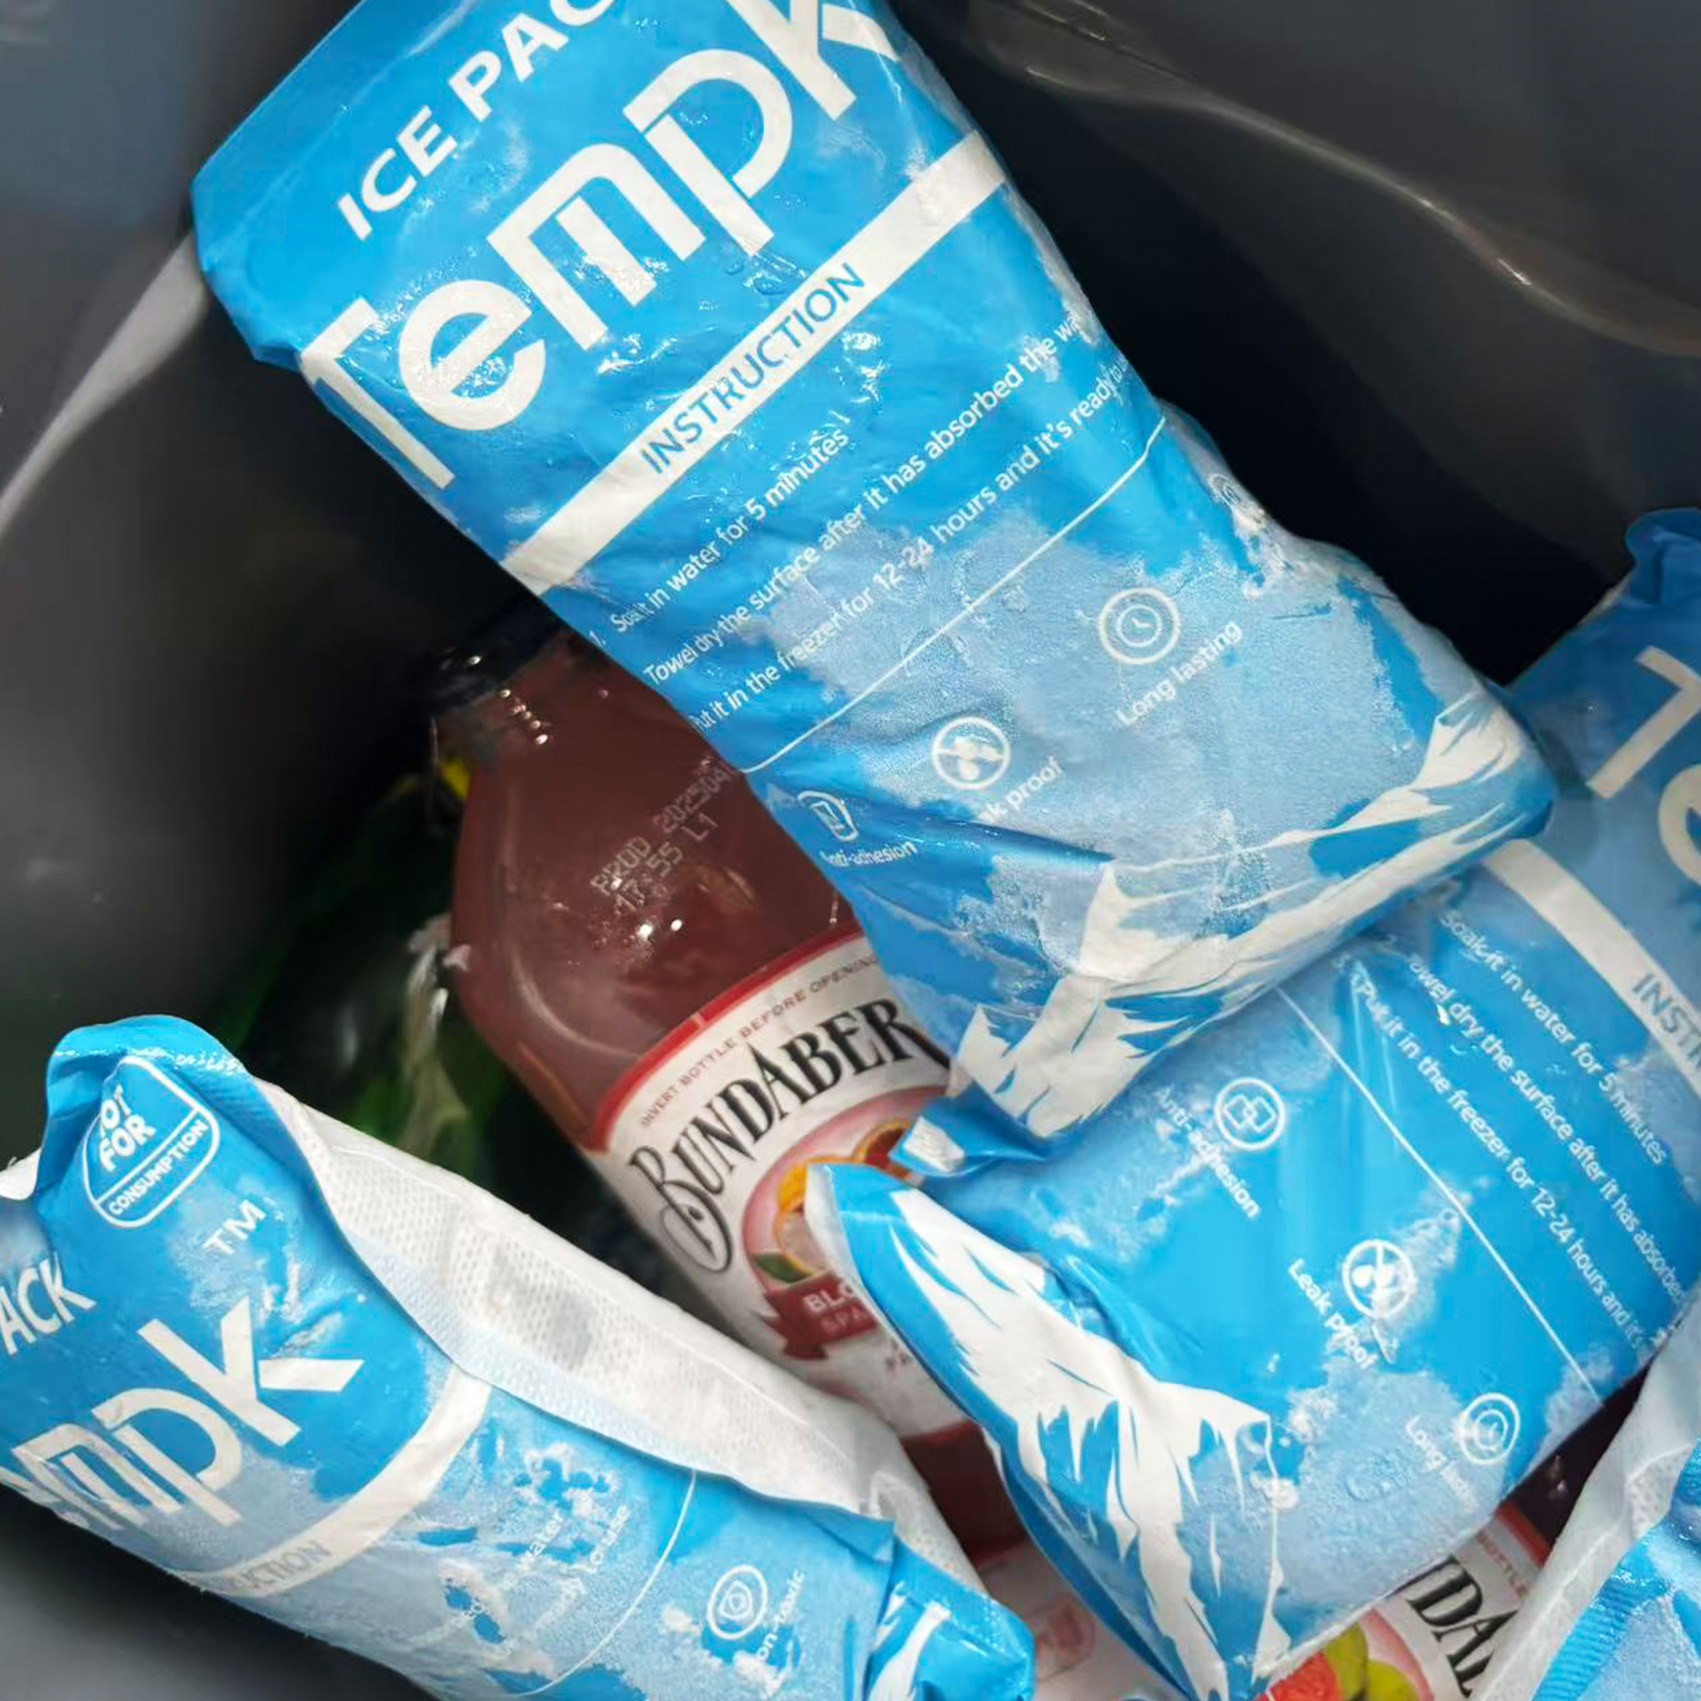
Dry Ice Pack Food Delivery: How to Ensure Safe and Efficient Transport
When it comes to ensuring food arrives fresh and safe, especially for perishable items, dry ice packs have become a popular solution for cold chain logistics. This article dives into how dry ice packs work for food delivery and the best practices to ensure a smooth process. Whether you’re in food delivery or simply curious about the logistics, this guide is for you.
What Are Dry Ice Packs, and How Do They Help in Food Delivery?
Dry ice packs are solid carbon dioxide (CO₂) that sublimate directly from a solid to a gas at a temperature of -109.3°F (-78.5°C). Unlike traditional ice, dry ice doesn’t melt into water, making it ideal for food delivery, where moisture can be harmful to some products. Dry ice packs maintain extremely low temperatures, making them suitable for keeping food frozen for extended periods.
They are commonly used in transporting frozen or temperature-sensitive foods, such as meat, seafood, ice cream, and pharmaceutical products. These packs not only prevent spoilage but also reduce the risk of bacterial growth by maintaining a low temperature throughout the delivery process.
How Do Dry Ice Packs Work for Food Delivery?
Dry ice packs function by maintaining a consistent low temperature throughout transit. They work by absorbing heat as they sublimate from a solid to a gas, which helps maintain the required temperature for food preservation. In the food delivery industry, this feature is especially important when shipping perishable goods over long distances.
When using dry ice, it’s essential to consider the amount of dry ice required based on the duration of the delivery and the specific temperature needs of the food. The right quantity ensures that the food remains frozen and safe until it reaches its destination.
What Are the Best Practices for Using Dry Ice in Food Delivery?
Effective use of dry ice in food delivery requires careful planning and attention to several factors, such as safety and proper packaging. Below are some essential best practices for using dry ice in food delivery:
1. Proper Packaging for Dry Ice
Using the correct packaging is crucial to ensure safety and efficiency in the delivery process. Food should be sealed in insulated boxes or containers to prevent heat from reaching the food. The packaging should be durable enough to handle the extreme cold temperatures that dry ice produces.
Additionally, it’s important to have vented packaging. Dry ice sublimates into carbon dioxide gas, and if the gas cannot escape, pressure can build up, causing the container to explode.
2. Correct Storage and Handling of Dry Ice
When handling dry ice, always use insulated gloves to avoid frostbite, as the material is extremely cold. It should be stored in well-ventilated areas to allow gas to dissipate safely. Never store dry ice in airtight containers, as the buildup of carbon dioxide gas could cause pressure to build, leading to dangerous situations.
3. Calculating the Right Amount of Dry Ice
The amount of dry ice required depends on the size of the shipment, the duration of transit, and the type of food being transported. A general rule of thumb is that 5 to 10 pounds of dry ice can keep the contents cool for one day in a properly insulated container. However, perishable goods like seafood may need more dry ice to remain frozen throughout the delivery process.
4. Timing the Delivery for Freshness
Since dry ice sublimates over time, it’s essential to time the delivery carefully to ensure that the food remains at the right temperature upon arrival. Delivery windows should be as short as possible, and tracking the condition of the shipment during transit can help optimize the process.
How Does Dry Ice Compare to Traditional Ice in Food Delivery?
Traditional ice is made from frozen water, and as it melts, it creates water, which can dilute the contents of the delivery package. In contrast, dry ice does not melt into water, making it ideal for shipping certain foods that should not come into contact with moisture. Dry ice is far superior when it comes to long-distance and international food shipping, as it maintains a constant temperature for longer periods.
| Feature | Dry Ice | Traditional Ice |
|---|---|---|
| Temperature | -78.5°C (-109.3°F) | 0°C (32°F) |
| Water Generation | No | Yes |
| Best Use | Long-distance transport | Shorter-term storage |
| Safety Precautions | Requires ventilation, gloves | Easy to handle |
Is Dry Ice Safe for Food Delivery?
Yes, dry ice is safe for food delivery when handled properly. The main safety concern with dry ice is its sublimation into carbon dioxide gas, which can be hazardous in poorly ventilated areas. Proper packaging, ventilation, and careful handling can mitigate these risks.
How Do You Ensure Proper Temperature Control in Dry Ice Food Delivery?
Ensuring that the food remains at the correct temperature throughout transit requires proper preparation and understanding of how dry ice works. Here are some tips to ensure temperature control is maintained:
1. Use the Right Insulation
Insulated packaging plays a vital role in temperature retention during delivery. Materials like styrofoam or vacuum-insulated panels can help to reduce heat transfer and keep the contents colder for longer.
2. Monitor Shipment Temperature
Tracking the temperature of the shipment is crucial, especially for longer deliveries. Temperature sensors that alert you to changes in the shipping environment can help you respond quickly if temperatures rise beyond safe limits.
3. Plan for Timely Delivery
By ensuring that shipments are delivered within the shortest possible timeframe, you can maximize the effectiveness of dry ice and reduce the amount needed to maintain the desired temperature.
What Are the Benefits of Dry Ice in Food Delivery?
The use of dry ice in food delivery comes with multiple benefits. Here are the key advantages:
Longer Storage Time: Dry ice can maintain extremely low temperatures for up to 24 hours or more, depending on the size of the shipment.
No Water Meltdown: Since dry ice sublimates into gas instead of water, it is ideal for moisture-sensitive foods.
Effective for Frozen Foods: Dry ice is essential for transporting frozen goods that need to stay at sub-zero temperatures.
Environmental Safety: Unlike some chemicals used in refrigeration, dry ice is not harmful to the environment, provided it is used in well-ventilated areas.
Real-World Application: Successful Food Deliveries with Dry Ice
Many food delivery services have found great success in using dry ice to transport temperature-sensitive items. For example, a national seafood distributor uses dry ice to keep fish and shellfish frozen during long-haul deliveries, ensuring that customers receive their orders in pristine condition. By investing in high-quality insulation and carefully calculating dry ice amounts, they ensure that every shipment arrives safely.
2025 Trends in Dry Ice Pack Food Delivery
Latest Trends
Sustainability: As the food delivery industry shifts towards sustainability, companies are looking for more eco-friendly ways to use dry ice, including recyclable packaging and reducing emissions during transport.
Smart Packaging: The integration of smart packaging that monitors temperature in real-time is a growing trend, offering more precise control over food safety.
Market Insights
The cold chain logistics market is rapidly growing, with dry ice emerging as the preferred solution for shipping perishable goods. As e-commerce continues to rise, the need for reliable and safe food delivery solutions will only increase, driving the demand for dry ice.
Common Questions About Dry Ice Food Delivery
Q1: How much dry ice do I need for a 24-hour food delivery?
For a 24-hour delivery, you will need about 5-10 pounds of dry ice, depending on the size of the package and insulation quality.
Q2: Can I ship perishable foods without dry ice?
Yes, but dry ice is the best way to ensure that frozen goods remain in a safe temperature range during transit.
Conclusion
Using dry ice for food delivery is a reliable and efficient way to ensure the freshness and safety of perishable items. By following best practices, calculating the correct amount of dry ice, and choosing the right packaging, you can significantly improve your food delivery operations. Be sure to stay updated with the latest trends and technologies to make the most out of your dry ice food deliveries.
Next Steps
If you’re looking to improve your food delivery process or need help with selecting the right dry ice solutions for your business, contact our experts today to get personalized advice on your logistics needs.
Shipping Supplies Dry Ice Pack: Cost-saving Tips & Safety in 2025

Shipping temperature-sensitive products requires precise planning, especially when dealing with dry ice. Whether you’re shipping frozen meals, pharmaceuticals, or high-end desserts, using dry ice packs ensures your products remain at the ideal temperature. This guide will help you choose the right dry ice pack, optimize costs, and meet 2025 safety regulations, ensuring the safe delivery of your items.
What are the essential supplies for shipping dry ice?
How do you calculate the right amount of dry ice for shipping?
What are the latest trends and eco-friendly options in dry ice shipping for 2025?
How do you ensure safety and compliance when shipping dry ice?
What Are Dry Ice Packs and Why Are They Used in Shipping?
Dry ice packs are solid carbon dioxide (CO₂) that sublimate directly from a solid to a gas at -78.5°C (-109.3°F). This unique property makes them ideal for keeping products frozen during long shipments. Unlike regular ice, dry ice doesn’t leave water behind, making it perfect for industries like pharmaceuticals, food, and biotechnology.
What Shipping Supplies Do You Need for Dry Ice Packs?
Shipping dry ice requires the right materials to maintain temperature control and ensure safety. Here’s what you need:
Outer Container: Use corrugated fiberboard, plastic, or wooden boxes rated for the weight and durability requirements.
Insulation: Expanded polystyrene (EPS), expanded polypropylene (EPP), or vacuum-insulated panels (VIP) help reduce sublimation rates.
Dry Ice: Available in pellets, blocks, or sheets. Choose based on the shipment’s duration and size.
Venting Mechanism: Ensure proper venting to allow CO₂ gas to escape and prevent pressure buildup.
How Do You Calculate the Right Amount of Dry Ice for Shipping?
To calculate the required amount of dry ice, use this formula:
Dry Ice (lbs) = Product weight (lbs) × 0.6 × Transit days × Temperature factor
For example, shipping 20 pounds of frozen seafood for 2 days might need 12-14 pounds of dry ice. Adjust based on product sensitivity and packaging.
What Are the Latest Trends in Dry Ice Shipping for 2025?
Increased Demand for Sustainable Solutions
Eco-friendly options like biodegradable reflective liners and smart sensors are becoming popular. These innovations help reduce waste and improve temperature monitoring.
Advanced Monitoring Technology
In 2025, the integration of smart sensors allows for real-time tracking of temperature and CO₂ levels during shipping, providing better control over sensitive shipments.
Emerging E-Commerce Use Cases
With the rise of e-commerce, more businesses are using dry ice to ship perishable items directly to consumers. Dry ice is now a common solution for food boxes and pharmaceutical deliveries.
How Do You Ensure Safety When Handling Dry Ice?
Dry ice can be hazardous if not handled properly. Here are essential safety tips:
Wear Protective Gear: Always use insulated gloves to avoid frostbite.
Ventilation: Always handle dry ice in well-ventilated areas to prevent CO₂ buildup.
Proper Packaging: Ensure containers allow for CO₂ venting to avoid pressure build-up.
How Do You Pack Dry Ice for Shipping?
Follow these steps to pack dry ice properly:
Choose the Right Box: Select a strong, vented outer container (like corrugated fiberboard or plastic).
Add Insulation: Insert EPS or VIP liners to trap cold and reduce sublimation.
Pack the Product: Place your items in the container and add cushioning to prevent shifting.
Add Dry Ice: Place dry ice on top of or around the product. Do not seal dry ice in airtight bags.
Seal and Label: Ensure all venting mechanisms are open and label the package with “Dry Ice/UN 1845” and the correct hazard markings.
What Are the Regulations for Shipping Dry Ice in 2025?
Shipping dry ice requires compliance with various regulations, including:
Air Cargo (IATA PI 954): Up to 200 kg per package with proper venting and labeling.
Ground Transport: No specific weight limit, but venting is required.
Passenger Baggage (TSA/FAA): 2.5 kg per passenger, with proper declaration.
Always check your carrier’s requirements to ensure compliance.
How Do You Choose the Right Dry Ice Pack for Your Needs?
For short-distance shipments, hydrate dry ice packs or pellets may suffice. For long trips, opt for dry ice blocks or reusable packs. For sensitive products, ensure the dry ice maintains the required sub-zero temperature throughout.
2025 Shipping Supplies Trends and Innovations
2025 has seen rapid innovation in the cold chain industry. Vacuum-insulated panels and hybrid coolants have gained popularity for reducing dry ice usage and improving carbon efficiency. Additionally, digital air waybills and smart sensors are becoming essential tools for real-time monitoring and improving compliance.
Key Developments
Smart Sensors: Integrated into containers to track temperature and CO₂ levels in real-time.
Eco-Friendly Packaging: Reflective liners and biodegradable materials are now being used more widely for short-distance shipments.
Automated Packing: Robotic packers are being used to streamline dry ice shipments, ensuring accuracy and reducing labor costs.
Frequently Asked Questions
Q1: How much dry ice do I need for shipping?
Use 5–10 pounds of dry ice per 24 hours of transit. Adjust based on insulation quality and shipment duration.
Q2: Can I ship dry ice with USPS?
Yes, but air shipments are limited to 5 pounds per mailpiece. Use rigid packaging and include proper labeling.
Q3: What happens if my dry ice package isn’t vented?
Improper venting can cause pressure buildup, leading to container rupture. Always ensure proper venting.
Conclusion and Recommendations
Selecting the right dry ice pack is critical for maintaining product integrity during shipping. By understanding the necessary supplies, regulations, and safety protocols, you can ensure the successful and cost-effective transport of temperature-sensitive goods. Stay ahead of the curve by embracing 2025’s trends and innovations in the cold chain industry.
Call to Action:
Ready to enhance your shipping strategy? Contact us for personalized solutions and stay updated on the latest trends in dry ice shipping. Let’s ensure your products reach their destination in perfect condition!
Pack of 12 Dry Ice Pack Sheets: Efficient Cold Chain Shipping Solution
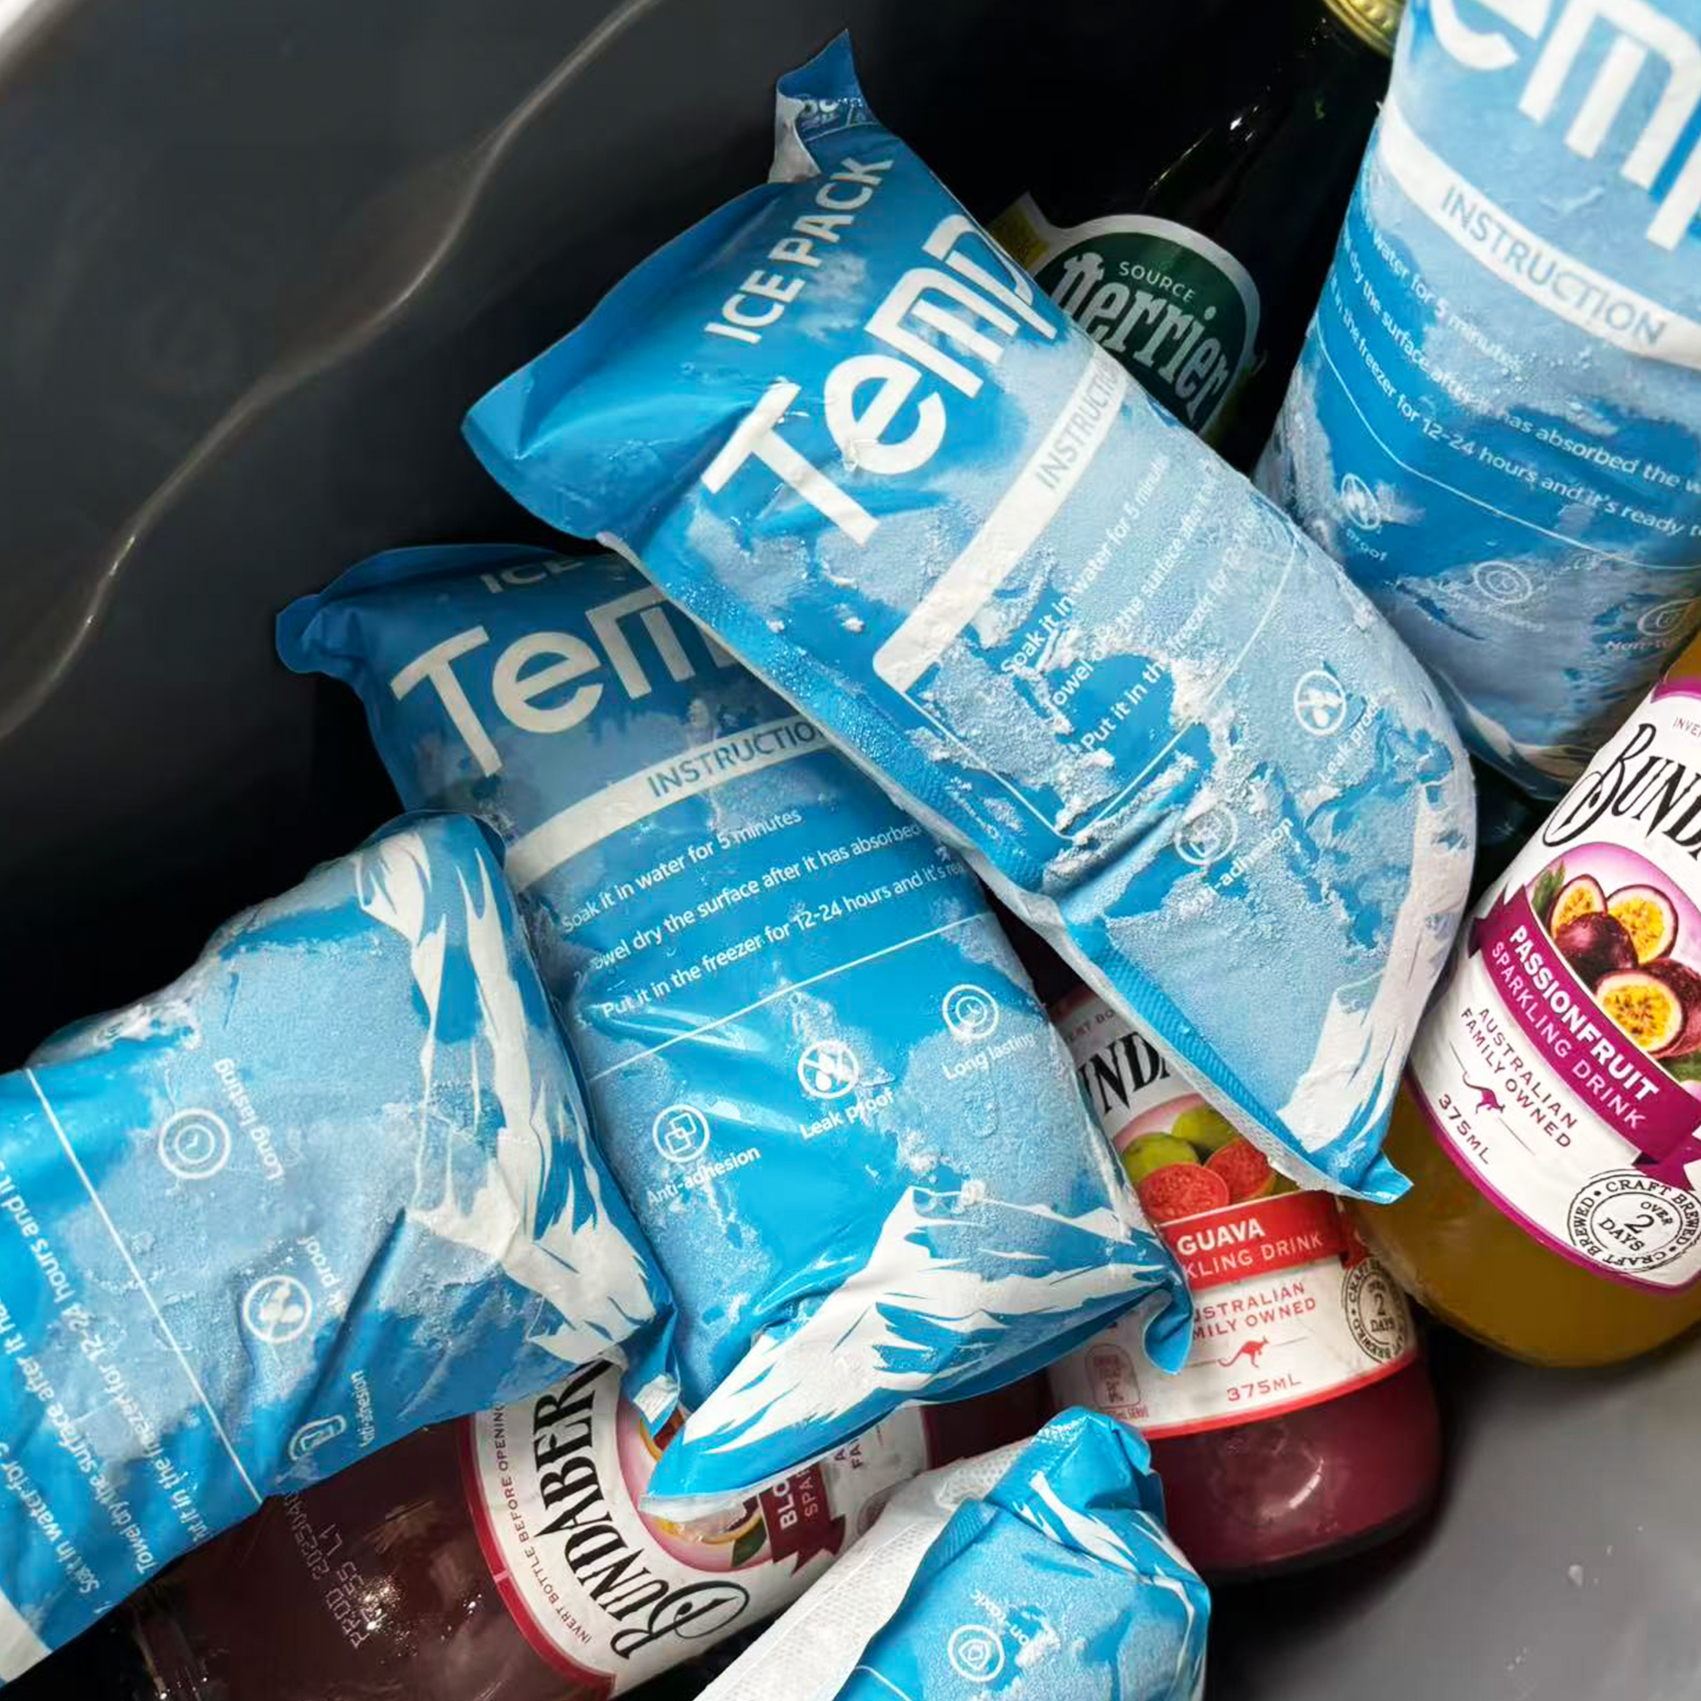
In the fast-paced world of cold chain logistics, maintaining the integrity of temperature-sensitive goods during transit is critical. A pack of 12 dry ice pack sheets is a cost-effective and reliable solution to ensure that your products stay at the required temperature. Whether you are shipping food, pharmaceuticals, or chemicals, these dry ice sheets are engineered to deliver consistent cooling for extended periods. In this guide, we will explore how dry ice pack sheets work, their benefits, and the best practices for ensuring the success of your cold chain operations.
What Are Dry Ice Pack Sheets and How Do They Work?
Dry ice pack sheets are made from polymer materials, designed to hold and release cold temperatures. These sheets typically contain a grid of cells filled with supercooled gel or phase change material (PCM), enabling them to maintain temperatures between -12°C and -18°C for extended periods. Unlike traditional ice, dry ice sublimates into carbon dioxide gas without leaving any liquid residue, making it a clean and effective solution for shipping temperature-sensitive goods.
These sheets are available in packs, such as a pack of 12, providing flexibility for different-sized shipments. Once activated, the sheets can maintain cooling for up to 48 hours, depending on factors like ambient temperature and packaging insulation.
How a Pack of 12 Dry Ice Sheets Benefits Your Cold Chain Logistics
1. Consistency and Reliability
A pack of 12 dry ice sheets ensures that your goods are uniformly cooled throughout the entire shipment process. The flexibility of the sheets allows them to be cut or positioned strategically around your products for maximum efficiency.
2. Cost-Effective and Eco-Friendly
Dry ice sheets are reusable in many cases, reducing the need for single-use cooling options like gel packs. This not only cuts down on long-term costs but also supports sustainability initiatives by minimizing waste.
3. Flexibility in Use
Dry ice sheets are versatile. They can be used for various industries, including pharmaceuticals, food, and chemicals, where maintaining specific temperature ranges is essential. The sheets’ flexibility allows them to conform to the shape of the cargo, ensuring optimal temperature control.
4. Ease of Use
Unlike bulky ice packs, dry ice sheets are lightweight and easy to handle. They do not require special refrigeration equipment and are easier to store and transport, making them an ideal choice for cold chain logistics.
How Do You Use a Pack of 12 Dry Ice Sheets?
To ensure optimal performance, it’s crucial to follow the proper handling and placement procedures when using dry ice pack sheets.
Step-by-Step Guide for Using Dry Ice Pack Sheets:
Prepare Your Shipping Container:
Begin by pre-chilling your shipping container to ensure that it is at the correct temperature before placing the goods inside. This helps maintain the cold chain for a longer duration.Distribute the Sheets Evenly:
When using a pack of 12 dry ice sheets, make sure to evenly distribute the sheets around the product. This ensures that the cold is maintained at all points of contact.Seal the Container Properly:
Seal your shipping container tightly to minimize air exchange. This helps preserve the temperature for longer, preventing any rapid sublimation of the dry ice.Monitor the Temperature:
For added assurance, consider using temperature loggers or indicators that can monitor the temperature throughout the shipping process. This helps ensure that the goods remain within the desired temperature range.
How Long Do Dry Ice Sheets Last?
The duration of cooling depends on several factors, including the temperature of the surrounding environment, the insulation quality of the container, and the size of the shipment. Typically, a pack of 12 dry ice pack sheets can maintain temperatures for 18 to 48 hours.
Factors Affecting Duration:
Environmental Temperature: Hotter climates will cause dry ice to sublimate faster, so additional insulation may be necessary.
Insulation Quality: The better insulated the container, the longer the dry ice sheets will last.
Are There Any Risks Involved?
While dry ice sheets are highly effective, there are some risks involved. It’s important to handle dry ice carefully to avoid harm.
Handling Risks:
Frostbite Prevention: Always wear gloves or use tongs to handle dry ice, as it can cause severe frostbite if it comes into contact with skin.
Ventilation: Never store dry ice in sealed containers. The CO2 gas released during sublimation can build up pressure and cause an explosion.
Reusability of Dry Ice Pack Sheets
One of the biggest advantages of using dry ice pack sheets is their reusability. If stored correctly and not exposed to high temperatures, a pack of 12 dry ice sheets can be reused multiple times. This makes them an economical and eco-friendly option for businesses with regular cold chain shipping needs.
Tips for Reusing Dry Ice Sheets:
Store dry ice sheets in a cool, dry place when not in use.
After each use, check for damage, clean the sheets if necessary, and refreeze them for future use.
Industry-Specific Applications of Dry Ice Sheets
Pharmaceutical Industry:
Dry ice pack sheets are invaluable in the pharmaceutical industry, where the correct temperature is critical for maintaining the efficacy of drugs. They are commonly used for shipping temperature-sensitive medications, including vaccines and insulin.
Food Industry:
For businesses in the food industry, dry ice sheets help preserve freshness by maintaining the required temperatures for products like seafood, meat, and frozen meals. Dry ice ensures that perishables stay at the right temperature throughout the supply chain.
Chemical Industry:
The chemical industry often requires precise temperature control during shipping. Dry ice pack sheets offer a stable, mess-free solution for transporting chemicals that need to remain at low temperatures.
FAQ: Common Questions About Dry Ice Pack Sheets
Q1: Can dry ice pack sheets be reused?
Yes, dry ice sheets can be reused if they are properly stored and not exposed to high temperatures.
Q2: How long do dry ice sheets last during shipment?
The duration varies but typically lasts between 18 to 48 hours, depending on insulation and ambient conditions.
Q3: Are dry ice sheets safe for shipping?
When handled correctly, dry ice sheets are safe. Ensure proper ventilation and protective gear to avoid risks.
Conclusion
A pack of 12 dry ice pack sheets is an essential solution for cold chain shipping in 2025. They are cost-effective, reusable, and versatile, offering consistent cooling for a wide range of industries. By understanding how to use dry ice pack sheets correctly, you can ensure that your temperature-sensitive goods are delivered in optimal condition.
Next Steps:
Assess your cold chain needs and determine if dry ice pack sheets are the right solution.
Order a pack of 12 dry ice pack sheets to start improving the reliability and efficiency of your shipping operations.