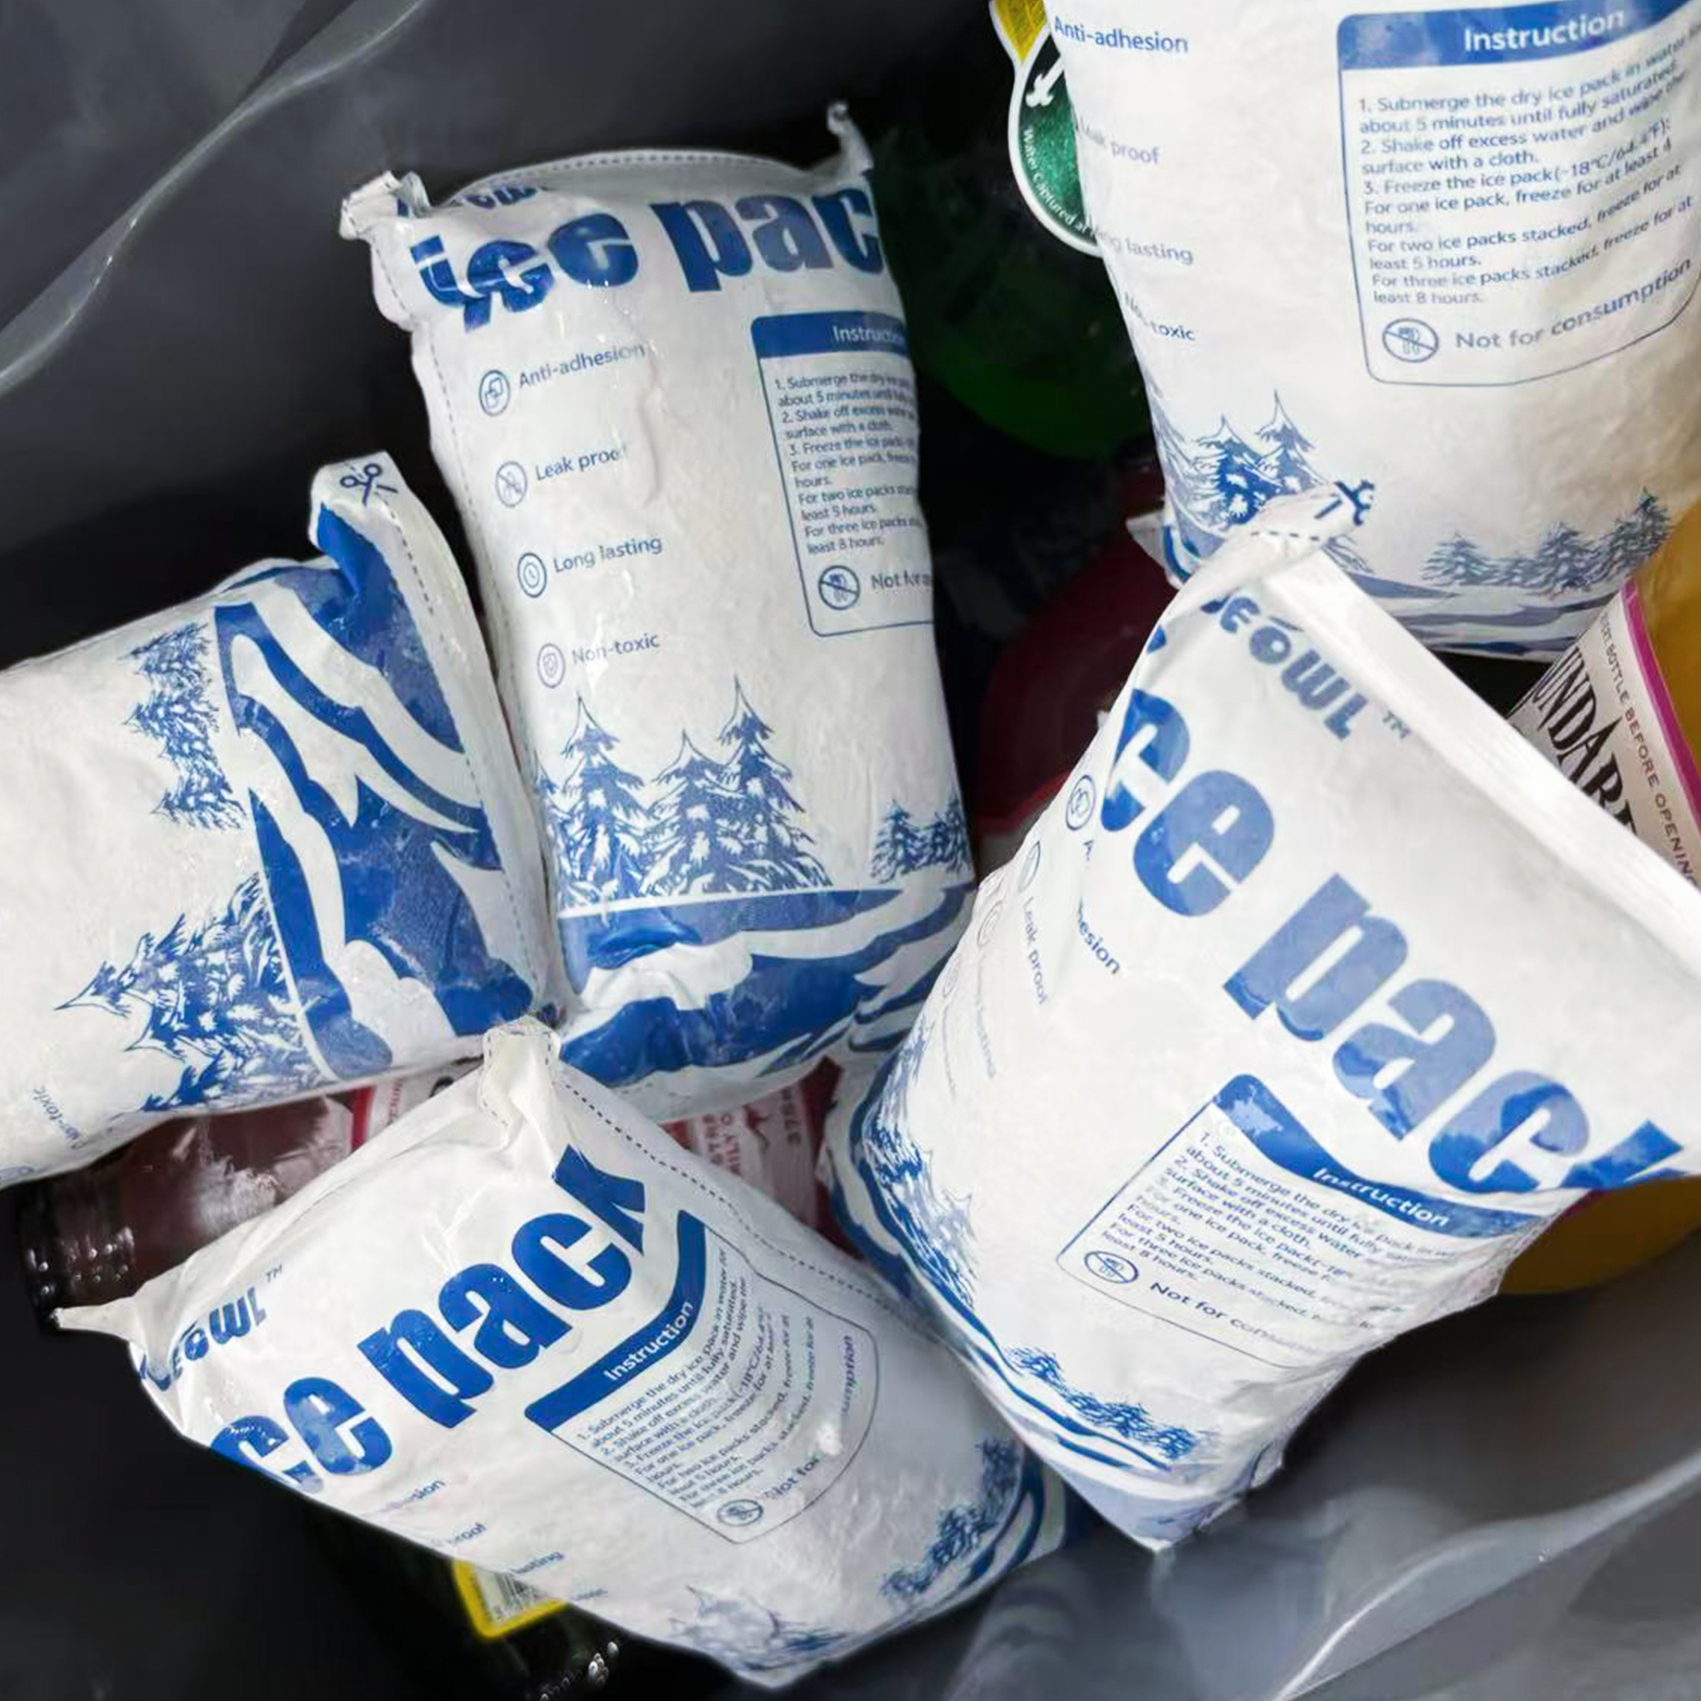
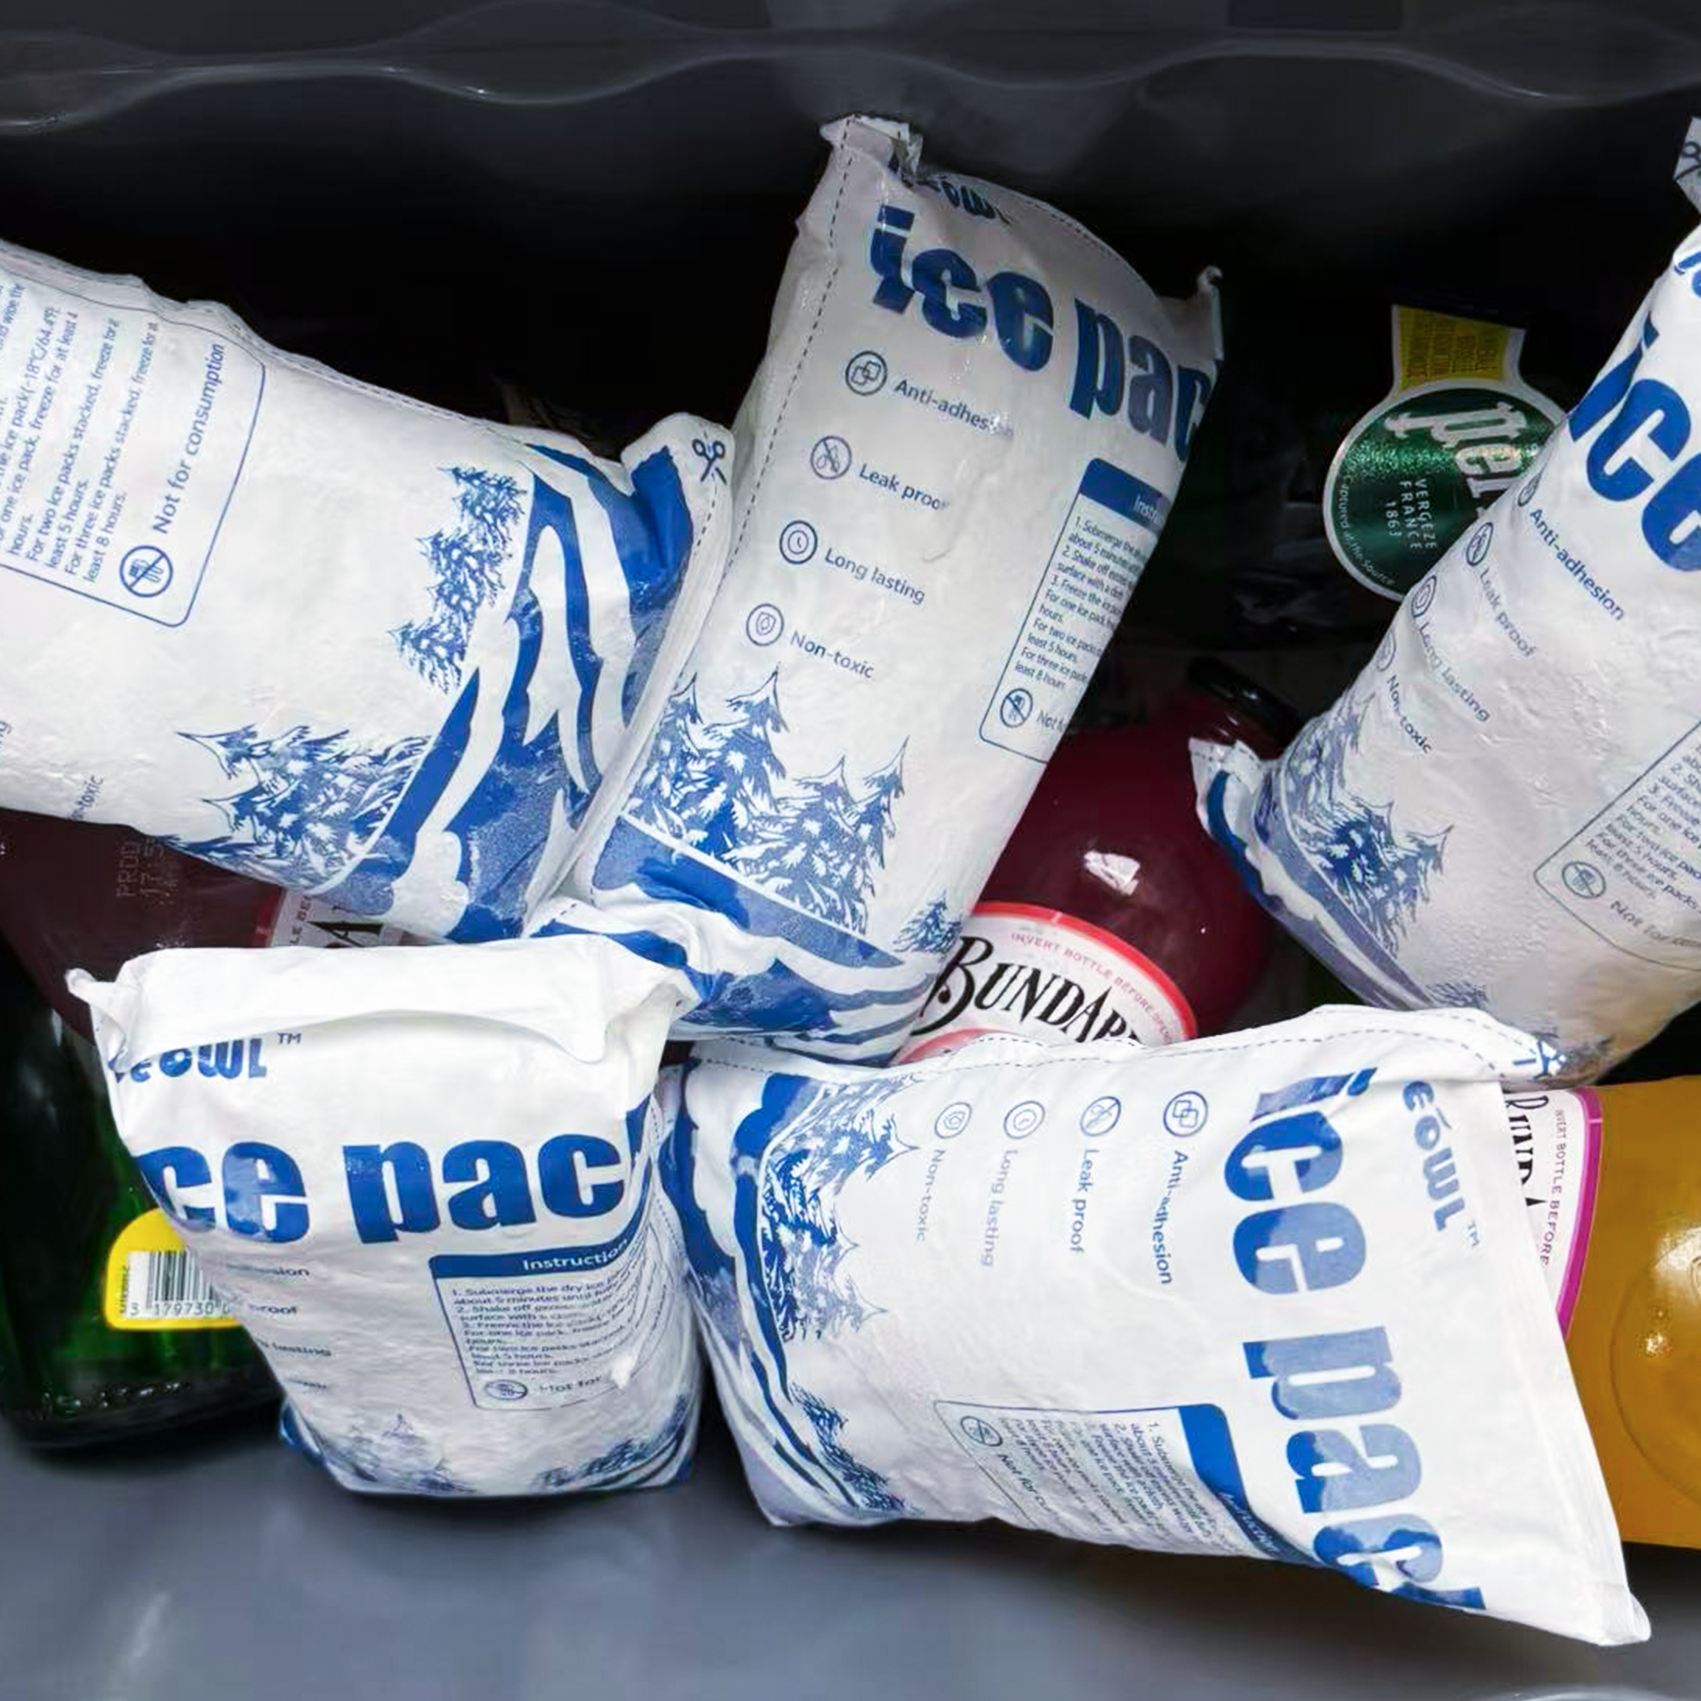
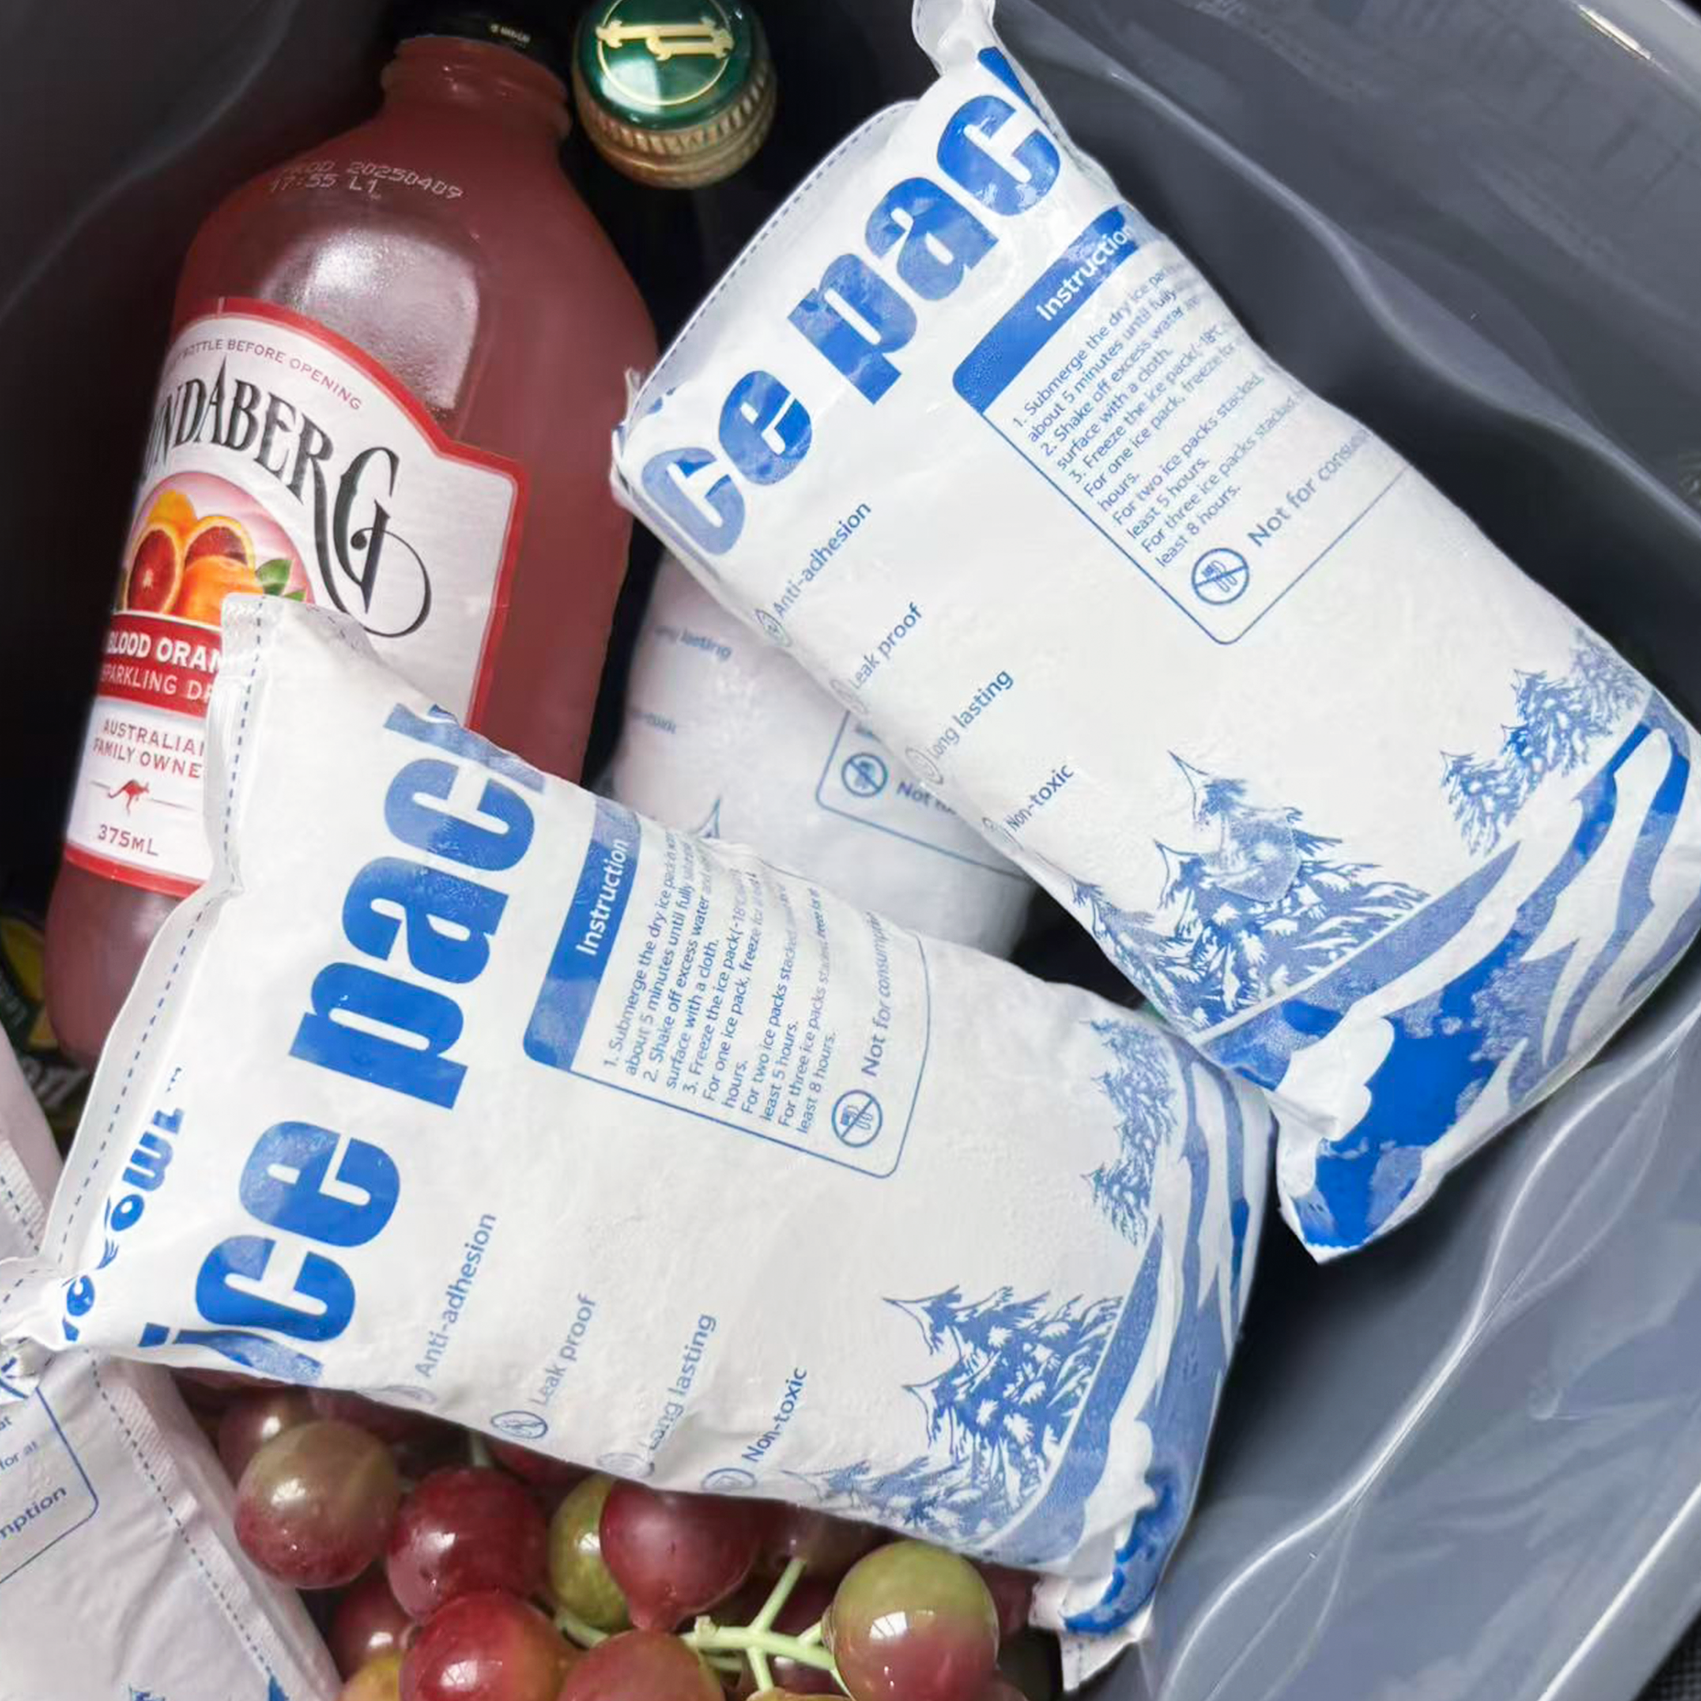
What Is the Price of Dry Ice Pack Sheets in 2025? A Complete Guide
What Is the Price of Dry Ice Pack Sheets in 2025? A Complete Guide
Dry ice pack sheets are essential for shipping temperature-sensitive products like pharmaceuticals, food, and biotech items. In 2025, their cost is influenced by several factors, including size, supplier, and shipping requirements. This guide provides the most up-to-date information on pricing and helps you make cost-effective decisions for your cold chain logistics.
How can you find the best deals on dry ice pack sheets?
What are the benefits of using dry ice pack sheets in cold chain shipping?
How can you select the right dry ice pack sheet for your needs?
What Factors Affect the Price of Dry Ice Pack Sheets?
Several factors determine the price of dry ice pack sheets. These include:
Quantity and Size: Larger quantities and heavier packs generally cost more. Bulk purchases can lead to lower per-unit costs.
Material Quality: Two-ply sheets are cheaper but less durable, while four-ply sheets offer longer-lasting cooling but at a higher price.
Shipping Speed: Expedited shipping increases costs, particularly if the dry ice needs to maintain its temperature over longer durations.
Supply and Demand: Seasonal demand or limited CO₂ supply can cause prices to fluctuate significantly. During periods of high demand (like summer months), prices may spike.
Supplier Differences: Prices vary depending on whether you’re buying locally or nationally, as well as the supplier’s reputation and additional services (e.g., customization).
Pricing Breakdown by Size and Quantity
Pack Type
Dry Ice Weight
Usage Duration
Average Cost
Practical Implications
Small Pack
~5 lbs
~24 hours
$15–$30
Ideal for overnight or short-term shipments
Medium Pack
~10 lbs
~48 hours
$40–$60
Suitable for two-day shipments of perishable goods
Large Pack
~20 lbs
~72 hours
$80–$100
Best for extended shipping or high-value items like pharmaceuticals
Bulk (per lb)
10–150 lbs
Variable
$5–$1 per lb
Most economical for large-scale shipments
How to Find the Best Deals on Dry Ice Pack Sheets in 2025?
Finding cost-effective dry ice requires some planning:
Buy in Bulk: Purchasing larger quantities can significantly reduce the per-pound cost. Bulk purchases are ideal if your business regularly ships temperature-sensitive goods.
Local vs National Suppliers: Local suppliers may offer quicker delivery times and lower shipping fees, while national suppliers may provide better bulk pricing. Compare options carefully.
Select the Right Packaging: Dry ice pack sheets are often more efficient than pellets or blocks and can save on both material and shipping costs.
Negotiate Long-Term Contracts: If your business ships frequently, long-term contracts can secure lower prices and ensure a steady supply.
Benefits of Using Dry Ice Pack Sheets in Cold Chain Shipping
Dry ice pack sheets offer a range of benefits, particularly for temperature-sensitive shipments:
Superior Cooling Efficiency: Dry ice maintains colder temperatures for longer periods compared to traditional ice, making it ideal for shipping pharmaceuticals, biologics, and perishable food items.
Cost-Effective: Despite the initial cost, dry ice pack sheets often prove more cost-effective for long-distance shipping because they require less material to achieve the same cooling effect.
Easy to Handle: Pre-packaged and flexible, dry ice pack sheets are simpler to store and deploy compared to bulk dry ice.
Did you know? Dry ice reaches temperatures as low as -109.3°F (-78.5°C), far colder than conventional ice.
How to Choose the Right Dry Ice Pack Sheet for Your Needs?
Selecting the correct dry ice pack sheet is critical to both cost and performance:
Assess the Shipment Duration: For shipments under 24 hours, a small sheet (5 lbs) suffices. For longer trips (48–72 hours), consider medium or large sheets.
Consider Product Sensitivity: Products like vaccines or biologics may require larger packs or premium insulation to maintain strict temperature control.
Check Compliance: Ensure the supplier adheres to regulations such as UN 1845 and IATA Dangerous Goods for air shipments.
What About Reusable Dry Ice Sheets?
Reusable dry ice sheets can lower long-term costs and reduce waste. These sheets typically use a gel-based refrigerant that maintains a consistent temperature without the rapid sublimation of traditional dry ice. Although they come with a higher upfront cost, their ability to be reused multiple times makes them a cost-effective and sustainable option in the long run.
Choosing Between Dry Ice, Phase Change Materials (PCMs), and Gel Packs
When choosing cooling materials, it’s important to balance cost with cooling efficiency:
Less sensitive products, such as produce or cosmetics
2025 Trends in Dry Ice Pack Sheets and Pricing
Sustainability Focus: Companies are increasingly adopting sustainable practices, such as biodegradable packaging and the use of bioethanol-derived CO₂.
Smart Packaging: Integration of IoT sensors in packaging for real-time temperature and humidity monitoring is becoming more common, offering optimized dry ice usage and reduced waste.
Automation: Improved manufacturing automation is expected to drive costs down while meeting the growing demand for dry ice products.
Frequently Asked Questions
How much does a dry ice pack sheet cost in 2025?
A 5 lb dry ice pack sheet typically costs between $15 and $30, depending on the size and supplier. Bulk purchasing can lower this cost to as little as $1 per lb.
Can dry ice pack sheets be used for all temperature-sensitive products?
Dry ice pack sheets are ideal for products that need to be kept below freezing, such as frozen food or pharmaceuticals. However, they are not suitable for items that must stay above freezing, like fresh produce.
Are there eco-friendly alternatives to dry ice?
Yes, phase change materials (PCMs) and gel packs provide stable cooling temperatures and are more affordable in the long run, making them great alternatives for less sensitive goods.
Conclusion & Recommendations
Dry ice pack sheets offer an effective and cost-efficient solution for cold chain logistics in 2025. To optimize your logistics:
Compare Suppliers: Evaluate costs, customization, and delivery times before choosing a supplier.
Test Different Sizes: Ensure you choose the right sheet size for your shipment to avoid overspending.
Explore Reusables: If your shipments are frequent, consider reusable dry ice sheets or hybrid solutions to save on long-term costs.
For personalized advice and cost modeling, contact Tempk today.
Buy Dry Ice Pack – How to Choose the Best One for Your Needs
When shipping perishable goods like food, medicines, or biological samples, choosing the right dry ice pack is crucial to maintaining a safe and cold temperature. Dry ice, a solid form of carbon dioxide, provides efficient cooling without leaving liquid residue, making it ideal for extended shipping durations. This guide will help you understand how to buy dry ice packs and ensure your shipments are safe, cost-effective, and compliant with regulations.
What Are Dry Ice Packs? Dry ice packs provide cold storage by sublimating into gas, keeping goods at extremely low temperatures without the mess of water residue.
Why Buy Dry Ice Packs? For shipping sensitive items such as vaccines, seafood, and pharmaceuticals, dry ice offers unmatched performance in temperature control.
Choosing the Right Dry Ice Pack Consider factors like duration, size, and temperature needs when purchasing dry ice to ensure the right solution for your shipment.
What Are Dry Ice Packs and Why Should You Buy Them?
Dry ice packs are made from solid carbon dioxide. Unlike regular ice, dry ice sublimates directly into gas, keeping temperatures much lower without leaving any liquid residue. This makes dry ice the best option for shipping items that require freezing or ultra-cold temperatures, such as vaccines, frozen foods, and laboratory specimens.
Why Should You Buy Dry Ice for Your Business?
In industries like pharmaceuticals, food delivery, and biotechnology, dry ice packs are a reliable, cost-effective solution for cold chain logistics. Dry ice can maintain extremely low temperatures (down to -78.5°C) for extended periods, ensuring your products remain safe and viable throughout the shipping process.
How to Choose the Right Dry Ice Pack
Choosing the right dry ice pack depends on several factors related to your shipment’s specific needs:
What Type of Dry Ice Pack Should You Buy?
Dry Ice Sheets: Ideal for larger shipments or products that require uniform cooling. These are flexible and can be cut to fit your packaging.
Dry Ice Pellets: Best for smaller shipments where flexibility is important, or for use in cooling spaces between items.
Dry Ice Blocks: Suitable for long-term shipping needs or larger shipments that require consistent cooling.
Consider Shipping Duration and Temperature
Dry ice packs typically last 1–3 days depending on the type and insulation used. If your shipment requires longer cooling times, you may need to use multiple packs or larger sizes. For short-duration shipping, a single dry ice pack can be sufficient.
Where to Buy Dry Ice Packs?
Dry ice packs can be purchased from a variety of sources:
Local Suppliers: Many industrial gas companies sell dry ice directly to businesses.
Online Retailers: Websites like Amazon, Staples, and Home Depot offer dry ice packs for both personal and commercial shipping needs.
Shipping Companies: Some logistics providers include dry ice as part of their cold chain solutions.
Ensuring Safe and Effective Shipping with Dry Ice
Proper handling and packaging are crucial when buying dry ice for shipping. Here are some essential tips to ensure your products stay safe during transit:
Proper Packaging: Always ensure dry ice is securely packaged in containers that allow gas to escape, as dry ice sublimates into gas.
Regulatory Compliance: Dry ice is classified as a hazardous material, so make sure to comply with all regulations, including proper labeling (UN 1845), packaging requirements, and weight limits.
Tracking and Monitoring: Choose suppliers who offer temperature and location tracking to ensure your dry ice maintains the proper conditions throughout the shipping process.
Dry Ice vs. Other Refrigerants: How Do They Compare?
Dry ice packs are often compared to gel packs and phase-change materials (PCMs). Here’s a quick comparison:
Feature
Dry Ice Pack
Gel Pack
PCM Pack
Temperature Range
< -70°C
0°C to 8°C
Custom (e.g., -20°C to +8°C)
Cooling Duration
1–3 days
12–48 hours
24–96 hours
Residue
No residue (sublimates to gas)
Melts to liquid
None (phase change cycles)
Reusability
Single-use
Reusable (limited)
Reusable
Hazard Classification
Class 9 hazardous (UN 1845)
Non-hazardous
Non-hazardous
What Are the Advantages of Dry Ice Packs?
Dry ice packs are unmatched when it comes to ultra-low temperatures:
Ultracold Performance: They can maintain temperatures as low as -78.5°C, ideal for frozen shipments like biologics and ice cream.
No Residue: Dry ice sublimes into gas, preventing damage to moisture-sensitive goods.
Long Duration: Depending on the size, dry ice packs can last from 1–3 days, making them perfect for short-term shipments.
Regulatory Considerations and Safety
When handling and shipping dry ice, it’s crucial to adhere to all safety and regulatory requirements:
IATA and DOT Compliance: Ensure all shipments are properly labeled and packaged as per IATA Packing Instruction (PI 954) and UN 1845 guidelines.
Proper Handling: Always wear protective gloves and handle dry ice in well-ventilated areas to avoid frostbite and asphyxiation risks from CO2 buildup.
Disposal: Let dry ice sublimate in a well-ventilated area away from people and animals.
FAQs About Buying Dry Ice Packs
Q: Where can I buy dry ice near me? You can buy dry ice from local industrial gas suppliers or online retailers like Amazon and Home Depot.
Q: How much does dry ice cost? Dry ice typically costs between $1.00 and $3.00 per pound, depending on the type and quantity.
Q: Can dry ice be reused? No, dry ice is a single-use refrigerant, as it sublimates completely during use.
Conclusion
In conclusion, buying dry ice packs for shipping is a straightforward process when you know what to look for. By considering factors like temperature requirements, duration, and regulatory compliance, you can ensure your shipments are safe, effective, and compliant. Always choose a reputable supplier, and follow safety guidelines to prevent mishaps during transit.
About Tempk
At Tempk, we specialize in providing high-quality dry ice solutions for various industries. Our dry ice packs are designed to meet stringent regulatory standards, ensuring safe and efficient shipping. Contact us today to learn more about our products and how we can help optimize your cold chain logistics.
Choosing the Best Dry Ice Packs & Supplier for Efficient Cold Chain Shipping in 2025
Choosing the Best Dry Ice Packs & Supplier for Efficient Cold Chain Shipping in 2025
When shipping temperature-sensitive goods, maintaining a consistent cold chain is critical. Dry ice packs are the most reliable solution for preserving frozen products during transit. Whether you’re shipping food, pharmaceuticals, or other perishable goods, understanding how to choose the right dry ice supplier and the best type of dry ice pack can ensure safe and efficient delivery. In this guide, we’ll cover everything from types of dry ice packs to supplier selection, pricing considerations, and safety tips.
Understand the different types of dry ice packs and their applications.
Compare dry ice packs with other cooling solutions, like gel packs and PCM.
Discover how to safely handle, store, and ship with dry ice.
Stay ahead of market trends and regulatory changes in 2025.
H2: What Are Dry Ice Packs and Why Are They Essential?
Dry ice packs are solidified carbon dioxide (CO₂) that sublimate at ultra-low temperatures, making them perfect for shipping frozen items. Unlike traditional ice, dry ice doesn’t leave any water residue, ensuring your products stay dry and properly cooled. This section breaks down the key reasons to use dry ice:
Benefits of Dry Ice Packs:
Ultra-Cold Cooling: Dry ice reaches temperatures as low as -78.5°C, ideal for products that require freezing.
No Water Residue: Unlike regular ice, dry ice sublimates into gas without leaving moisture behind, preventing water damage to goods.
Longer Cooling Duration: Dry ice lasts much longer than ice, which helps reduce the risk of temperature excursions during long shipments.
H3: How Do Dry Ice Packs Work?
Dry ice sublimates, turning directly from solid to gas without going through a liquid phase. This makes it ideal for shipping goods over long distances, where extended cooling is required. The sublimation process of dry ice ensures a constant supply of cold air without the mess of melting water. Dry ice works by absorbing heat from its surroundings, maintaining the required temperature for perishable goods, and ensuring their safety during transit.
Type of Dry Ice
Cooling Duration
Best For
Applications
Dry Ice Blocks
48-72 hours
Long-distance shipping
Pharmaceuticals, large food shipments
Dry Ice Pellets
24-48 hours
Rapid cooling
Laboratories, medical supplies
Dry Ice Sheets
12-24 hours
Small-scale, precise cooling
Perishable food packaging, sensitive items
H2: How to Choose the Right Dry Ice Supplier?
Key Considerations:
Selecting a reliable dry ice supplier is crucial to ensure that you get high-quality products and services that meet your shipping needs. Here are the key factors to keep in mind:
Product Quality: Ensure the supplier offers food-grade dry ice that meets FDA standards, with CO₂ purity of at least 99.9%.
Variety of Packaging Options: Look for suppliers that offer a range of sizes and types, such as blocks, pellets, or sheets, to match your specific needs.
Delivery and Shipping Capabilities: Choose a supplier that can provide timely delivery with insulated packaging to prevent sublimation during transport.
Customer Support and Compliance: A good supplier will help you navigate regulations, provide the necessary labels (e.g., UN1845), and offer training if needed.
Top Dry Ice Suppliers to Consider:
Linde Gas – Global supplier with a range of dry ice products, reliable delivery, and quick shipping.
Airgas – Offers dry ice in blocks, pellets, and sheets with fast delivery options.
CryoPort – Specializes in custom solutions for temperature-sensitive logistics, particularly for pharmaceuticals.
H2: How Much Do Dry Ice Packs Cost?
The price of dry ice packs can vary depending on the quantity, size, and location. On average, dry ice costs between $1 and $3 per pound. However, other factors, such as shipping fees and packaging, can add to the total cost. To reduce expenses, consider buying in bulk, establishing long-term contracts with suppliers, and optimizing your packaging to minimize waste.
Factor
Cost Impact
How to Save
Volume and Quantity
Bulk orders usually lower price per pound
Buy in bulk or negotiate long-term contracts
Shipping Distance
Longer distances increase cost
Choose regional suppliers for quicker shipping
Packaging
Special packaging increases costs
Use optimized insulation to reduce sublimation losses
H2: Dry Ice vs Gel Packs vs PCM: Which Coolant Is Right for You?
In 2025, several alternatives to dry ice are gaining popularity, including gel packs and phase-change materials (PCM). Here’s a comparison to help you decide which option best suits your needs:
Dry Ice: Ideal for ultra-cold conditions (−78.5°C), best for long-distance or international shipments. Requires special handling and is regulated as hazardous material.
Gel Packs: Best for chilled items (2°C–8°C), reusable, and non-hazardous. Good for short-term shipments but may form condensation during thawing.
Phase-Change Materials (PCM): Flexible temperature options (−21°C to −15°C), reusable up to 30 cycles, and non-regulated. Ideal for sensitive items and sustainable shipping solutions.
Coolant Type
Temperature Range
Cost
Duration
Reusability
Hazmat Regulations
Dry Ice
~−78.5°C
High
24-72 hours
Single-use
Yes
Gel Packs
0°C–8°C
Low
24-48 hours
Reusable
No
PCM
−21°C to −15°C
Moderate
Up to 48 hours
Reusable
Usually No
H2: Safety and Storage Guidelines for Dry Ice Packs
Handling and storing dry ice correctly is essential to avoid risks such as frostbite or suffocation from CO₂ gas buildup. Follow these guidelines for safe handling and storage:
Wear Protective Gear: Always use insulated gloves and tongs when handling dry ice.
Store in Ventilated Areas: Dry ice should be stored in a cooler with vents to allow the CO₂ gas to escape safely.
Avoid Contact with Products: Ensure that dry ice is properly insulated to prevent frostbite or damage to goods.
H2: Key Trends in Dry Ice and Cold Chain Logistics for 2025
As the cold chain logistics market continues to grow, several trends are shaping the industry:
Sustainable Dry Ice Production: Many suppliers are now producing dry ice from recycled CO₂, reducing their carbon footprint.
Smart Packaging: The rise of smart sensors and temperature monitoring systems enables real-time tracking of dry ice during transit.
Hybrid Solutions: Combining dry ice with gel packs or PCM is becoming a popular trend to optimize cooling efficiency while reducing CO₂ emissions.
FAQ
Q1: How long do dry ice packs last? Dry ice packs typically last 18-24 hours depending on the size and insulation. Larger blocks last longer.
Q2: Can I ship dry ice by air? Yes, dry ice can be shipped by air, but special regulations must be followed, including labeling and packaging requirements.
Conclusion
Choosing the right dry ice packs and supplier is crucial for maintaining a reliable cold chain. By understanding the different types of dry ice, considering cost factors, and adhering to safety protocols, you can optimize your shipping operations and ensure that your temperature-sensitive goods arrive in perfect condition.
Call to Action:
Ready to streamline your cold chain logistics? Contact a trusted dry ice supplier today and explore the best solutions for your business needs.
About Tempk:
Tempk is a leading provider of sustainable cold chain solutions, offering high-quality dry ice products and tailored solutions for businesses across industries. With our expertise in logistics and temperature control, we ensure the reliability and safety of your shipments.
Discount Dry Ice Pack Sheets: Your Ultimate Guide to Affordable Cold Chain Solutions
Discount Dry Ice Pack Sheets: Your Ultimate Guide to Affordable Cold Chain Solutions
When shipping temperature-sensitive products, the role of dry ice pack sheets is critical in maintaining the right environment during transit. For businesses looking to cut down on logistics costs without sacrificing reliability, discount dry ice pack sheets provide a valuable solution. In this detailed guide, we explore how these cost-effective alternatives can help you optimize your cold chain logistics in 2025.
What Are Discount Dry Ice Pack Sheets and How Do They Save You Money?
Discount dry ice pack sheets are typically made from solid carbon dioxide, designed to maintain ultra-low temperatures during transit. These flexible sheets are widely used in cold chain logistics due to their versatility and reusability. The key benefits of opting for discounted dry ice pack sheets include lower per-unit costs, reduced waste, and a smaller carbon footprint compared to traditional dry ice forms.
How Do Discount Dry Ice Pack Sheets Work?
Dry ice sublimates at temperatures of -78.5°C, providing a cooling effect that keeps perishable products at the required temperatures for hours. The sheets are flexible, allowing them to be wrapped around goods of various shapes, providing even cooling throughout the shipping process. The fact that they are reusable—when rehydrated and frozen—further drives down costs for businesses that engage in regular shipping.
Feature
Dry Ice Pack Sheets
Gel Packs
Traditional Ice Packs
Cooling Duration
24-48 hours
6-12 hours
12-24 hours
Temperature Range
-109°F to -78°F
32°F to 40°F
32°F to 50°F
Cost Efficiency
High for bulk orders
Moderate
Low
Key Benefits of Discount Dry Ice Pack Sheets
Cost-Effectiveness: Bulk purchasing of dry ice pack sheets can significantly reduce the cost per unit.
Reusability: These sheets can be frozen, reused, and maintained over multiple shipments, making them a sustainable option.
Long Cooling Duration: Dry ice sheets offer extended cooling times compared to alternatives like gel packs, ensuring your goods remain at optimal temperatures longer.
How to Choose the Right Discount Dry Ice Pack Sheet
Selecting the correct dry ice pack sheet is essential for maintaining the integrity of your shipment and ensuring that it remains within the required temperature range. Here are several factors to consider when purchasing discount dry ice pack sheets:
Size and Weight
Ensure that the dry ice pack sheets fit your shipping containers properly to avoid unnecessary space and waste.
Cooling Duration
Choose a sheet with an appropriate cooling time that aligns with the length of the shipment. Sheets designed for long transit times will be more expensive, but they offer better value over time.
Supplier Reliability
Always purchase from reputable suppliers who offer high-quality products that meet industry standards for safety and efficiency.
Safety Guidelines for Handling Dry Ice Pack Sheets
Although dry ice pack sheets are non-toxic, they require proper handling. Here are some safety tips to ensure you and your goods are protected:
Always use gloves when handling dry ice to avoid frostbite.
Ensure proper ventilation: Dry ice sublimates into carbon dioxide gas, which can cause asphyxiation in enclosed spaces.
Do not store dry ice in airtight containers, as the build-up of CO2 can cause pressure to increase and lead to dangerous ruptures.
Common Applications of Dry Ice Pack Sheets
Dry ice pack sheets have a variety of uses across different industries:
Food and Beverage: Ideal for shipping frozen or perishable foods, ensuring freshness and preventing spoilage.
Pharmaceuticals: Used for transporting temperature-sensitive drugs, vaccines, and biologics.
Biotech and Laboratory: Critical for preserving biological materials and sensitive samples that require low temperatures.
2025 Trends and Innovations in Discount Dry Ice Pack Sheets
The cold chain logistics industry is evolving in 2025 with the integration of advanced technologies and sustainability practices. Here are some trends to keep an eye on:
Eco-Friendly Solutions: Manufacturers are adopting greener processes, such as capturing CO2 during production, to reduce the environmental impact of dry ice production.
Smart Temperature Monitoring: Sensors embedded in dry ice pack sheets are now being used to monitor the cooling process in real-time, allowing businesses to optimize shipping conditions.
Automation: The use of automated packaging systems is increasing, improving efficiency and reducing human error in the cold chain.
How Do Dry Ice Pack Sheets Compare to Other Cooling Methods?
Discount dry ice pack sheets outperform gel packs and traditional ice packs in several key aspects:
Cooling Capacity: Dry ice sheets provide much colder temperatures (-78.5°C) compared to gel packs, which typically cool only to refrigerator temperatures (35-45°F).
Duration: Dry ice sheets maintain cooling for longer periods (up to 48 hours), making them ideal for long shipments, unlike gel packs which last only 6-12 hours.
Cost and Environmental Impact: Dry ice sheets may have a higher initial cost but are more eco-friendly in the long run due to their reusability.
How to Use Dry Ice Pack Sheets Effectively
To maximize the effectiveness of dry ice pack sheets, follow these guidelines:
Pre-cool the container: Before placing the dry ice pack sheets, ensure that your shipping container is pre-chilled to reduce thermal load.
Proper Layering: Place the dry ice pack sheet on the bottom of your container, followed by the product, and another sheet on top if necessary.
Monitor Internal Temperature: Use a temperature logger to keep track of the internal conditions during transit and ensure your goods stay within the safe temperature range.
Frequently Asked Questions (FAQ)
Q1: How long do dry ice pack sheets stay cold? A1: Depending on the size and insulation, dry ice pack sheets can maintain cold temperatures for 24 to 48 hours.
Q2: Can I use dry ice pack sheets for international shipping? A2: Yes, dry ice pack sheets are suitable for both domestic and international shipping, but always check the specific regulations of the destination country.
Q3: Are dry ice pack sheets safe for food and pharmaceuticals? A3: Yes, dry ice pack sheets are safe for shipping food and pharmaceuticals, as long as they are used in compliance with safety regulations.
Conclusion and Recommendations
In conclusion, discount dry ice pack sheets offer an excellent way to save on shipping costs while maintaining the required cold chain standards. By considering factors such as cooling duration, supplier reliability, and safety guidelines, you can make informed decisions that benefit your business. With sustainability trends and innovations in 2025, dry ice pack sheets continue to be a vital tool in cold chain logistics.
Call to Action: Start exploring the best deals on dry ice pack sheets today and optimize your cold chain shipping with affordable, reliable solutions.
About Tempk
Tempk is a leading provider of cold chain logistics solutions, offering high-quality dry ice pack sheets and other temperature control products. With over a decade of industry expertise, we deliver customizable solutions to meet your specific needs. Contact us today to discover how we can support your cold chain shipping requirements.
Call to Action: Get in touch with Tempk for premium cold chain solutions tailored to your business needs.
What Are the Best Suppliers for Dry Ice Packs in 2025?
What Are the Best Suppliers for Dry Ice Packs in 2025?
When it comes to cold chain logistics, choosing the right dry ice pack supplier is crucial to ensure your shipments remain at the required temperatures during transit. Dry ice packs are integral in maintaining ultra-low temperatures for items like pharmaceuticals, food, and biologics. But with so many options available, how do you choose the best dry ice pack supplier in 2025?
In this guide, we’ll explore what makes a reliable supplier, the key factors to consider, and some of the top trends in dry ice supply for 2025. Whether you’re shipping perishable goods or temperature-sensitive materials, we have the information you need to make an informed decision.
What Makes a Reliable Dry Ice Pack Supplier?
Choosing the right dry ice pack supplier involves assessing a variety of factors, from quality to delivery speed. Here’s what you should look for in a supplier:
Quality Assurance
The most reliable dry ice pack suppliers prioritize quality, ensuring their products comply with industry regulations and maintain consistency throughout the shipping process. Whether you’re shipping vaccines or frozen foods, quality control is paramount.
Delivery Options
Your supplier should offer flexible delivery options, including expedited services for urgent shipments. A reliable supplier can cater to both local and international shipping needs, ensuring timely arrivals.
Customization
Look for suppliers that offer customizable dry ice pack solutions. The best suppliers provide various sizes and types of dry ice packs to suit different shipping requirements. Customization ensures that your cooling solution fits the specific needs of your goods.
The Role of Dry Ice Packs in Cold Chain Logistics
Dry ice packs play a pivotal role in industries that require stringent temperature controls during transit. They are especially effective in keeping perishable items like medical supplies, biological materials, and temperature-sensitive foods cool for extended periods.
By using dry ice packs, suppliers offer an efficient and reliable solution for preventing temperature-related spoilage during shipping. As demand for cold chain logistics grows, selecting a supplier capable of fulfilling your needs efficiently becomes more important than ever.
How to Choose the Right Supplier for Your Needs?
Selecting a reliable dry ice pack supplier requires more than just comparing prices. Here are some critical factors to guide your decision:
Product Quality
Ensure that the supplier adheres to strict quality standards, providing dry ice packs that maintain the required temperatures throughout the shipping journey. Whether you need standard dry ice or specialized solutions, quality is key.
Delivery Flexibility
Choose a supplier with various shipping options, including the ability to offer express services when necessary. The ability to meet tight timelines can make all the difference in the success of your shipment.
Cost Considerations
While price is important, it should not be the sole deciding factor. Opt for suppliers that strike a balance between cost and quality, providing competitive prices without sacrificing performance.
Customer Support
Reliable customer support is essential, especially when it comes to handling issues that may arise during shipping. Look for suppliers with dedicated support teams that can assist you in case of delays or complications.
What Are the Different Types of Dry Ice Packs Available?
Understanding the various types of dry ice packs available is crucial for selecting the right one for your needs. Here’s a breakdown of the most common types:
Standard Dry Ice Packs
These are the most commonly used dry ice packs for everyday shipping needs. They are efficient and reliable for maintaining low temperatures for short to medium-duration shipments.
Gel Packs
Gel packs are another popular option, providing excellent insulation. They are often used for more delicate or temperature-sensitive shipments that require precise control over cooling.
Insulated Boxes
Some suppliers offer insulated boxes in addition to dry ice packs. These provide an extra layer of protection, keeping sensitive items safe during long transit times.
Each type of dry ice pack has its own strengths and limitations, so it’s important to consider your specific needs before making a choice.
Best Dry Ice Pack Suppliers in 2025
Several suppliers stand out in the dry ice pack market for their competitive prices, reliable service, and high-quality products. Some of the top suppliers to consider are:
TempPak Solutions
Known for their customizable shipping solutions, TempPak Solutions is a trusted name in the cold chain industry. They offer a wide range of dry ice packs designed for both standard and specialized shipping needs.
PolarTech Industries
PolarTech Industries provides a variety of cold chain packaging options, including dry ice packs and insulated boxes. They are known for their long-term shipping solutions and reliable service.
CryoTransport
CryoTransport specializes in temperature-sensitive shipments, particularly for pharmaceuticals and other critical materials. They offer tailored dry ice solutions to meet the specific requirements of their customers.
Trends in Dry Ice Pack Supply for 2025
As we enter 2025, the dry ice pack industry is evolving. Below are some key trends that may influence your choice of supplier:
Sustainability Efforts
With increasing environmental concerns, many suppliers are focusing on eco-friendly packaging. Companies are transitioning to biodegradable or recyclable materials for their dry ice packs, helping to reduce the environmental impact of cold chain logistics.
Technological Advancements
Advances in smart cold chain packaging are gaining traction, with temperature monitoring sensors becoming more common. These sensors provide real-time data, ensuring shipments are kept at the optimal temperature throughout the entire journey.
Customizable Solutions
In response to industry demands, more suppliers are offering tailored solutions for industries like pharmaceuticals and perishable goods. These solutions provide enhanced temperature control and longer shipping times, ensuring the safe transport of critical items.
How to Ensure Your Dry Ice Pack Stays Effective During Shipping?
Keeping your dry ice pack effective during shipping is critical to maintaining the integrity of your goods. Here are a few tips to ensure your shipment stays cold throughout its journey:
Use Proper Insulation
Pair your dry ice packs with appropriate insulation materials to prevent heat from entering the package. This helps maintain the desired temperature for longer.
Choose the Right Size
Select the right size of dry ice pack for your shipment. This ensures that the temperature remains stable for the required duration.
Monitor the Temperature
Consider using temperature monitoring devices to track the temperature of your shipment in real time. This allows you to make adjustments if necessary, ensuring the contents stay within their ideal temperature range.
Common Problems with Dry Ice Packs and How to Avoid Them
Despite their effectiveness, dry ice packs can present some challenges. Below are common issues and how to avoid them:
Sublimation
Dry ice sublimates over time, leading to a loss of cooling power. To combat this, select the correct size of dry ice pack for the expected shipment time and add extra ice if necessary.
Improper Packaging
If your dry ice pack isn’t properly sealed or packaged with enough insulation, it may lead to temperature fluctuations. Always ensure your packaging is secure and well-insulated to maintain optimal conditions.
Regulatory Issues
Shipping dry ice comes with certain regulatory requirements. Ensure you follow all rules to avoid penalties and shipping delays.
FAQ: What Is the Best Dry Ice Pack for Long-Distance Shipping?
For long-distance shipping, larger dry ice packs or insulated containers are ideal. These will maintain the temperature for the longest duration, ensuring your items arrive in optimal condition.
Trends and Innovations in Dry Ice Packing for 2025
As the cold chain logistics industry continues to evolve, several exciting trends and innovations are shaping the future of dry ice packing. These include sustainability efforts, smart packaging, and hybrid solutions that blend the benefits of different cooling methods.
Pack of 6 Dry Ice Packs – The Best Solution for Efficient Cold Chain Shipping
Pack of 6 Dry Ice Packs: How to Use Them for Efficient Cold Chain Shipping
Shipping perishable goods requires precise temperature control to ensure product integrity. A pack of 6 dry ice packs is an excellent solution for businesses needing reliable and cost-effective cold chain logistics. In this article, we’ll explore why a pack of 6 dry ice packs is beneficial, how to use them effectively, and safety measures to consider when handling them.
What is a pack of 6 dry ice packs and how does it work?
Why is it the best choice for shipping temperature-sensitive goods?
How can you use dry ice packs to optimize your cold chain logistics?
What advantages does dry ice have over other cooling methods?
How can you ensure the safe handling and cost-effective use of dry ice in shipping?
What is a Pack of 6 Dry Ice Packs and How Does It Work?
A pack of 6 dry ice packs typically consists of several sheets or blocks of frozen carbon dioxide. Unlike traditional ice, which melts into water, dry ice sublimates directly from solid to gas, maintaining a low temperature of about -78.5°C (-109.3°F). This sublimation process allows dry ice to keep goods cold for long periods without leaving any liquid residue.
Why Choose Dry Ice for Cold Chain Logistics?
Dry ice is ideal for shipping frozen foods, pharmaceuticals, and biological samples that need to remain below freezing temperatures. A pack of 6 dry ice packs is versatile and efficient for small to medium shipments, offering precise control over cooling during transportation.
Feature
Description
Practical Application
Sublimation
Changes from solid to gas without liquid
Prevents mess and water damage
Low Temperature
-78.5°C (-109.3°F)
Keeps perishable goods frozen
Lightweight
Easy to handle and transport
Reduces shipping weight and cost
Why is a Pack of 6 Dry Ice Packs Ideal for Shipping?
Dry ice packs offer significant advantages for cold chain logistics:
Reliable Temperature Control: Ensures your goods stay at the correct temperature, whether frozen or cooled.
Cost-Effective for Small Shipments: Ideal for businesses with small shipment volumes, providing cooling power without excess.
Flexibility in Handling: Smaller pack sizes are easier to handle and can be strategically placed to ensure even cooling.
How to Use a Pack of 6 Dry Ice Packs Effectively
Maximize the efficiency of your 6-pack of dry ice by following these best practices:
Determine Required Cooling Time: Calculate the expected transit time to choose the right number of packs based on the shipment’s duration.
Proper Placement: Position dry ice packs directly on top of the products for optimal cooling, as cold air sinks.
Seal Containers Properly: Ensure the container is sealed to reduce the rate at which the dry ice sublimates. Ventilation is essential, but the seal should minimize the loss of cold air.
Use Temperature Monitoring Devices: To ensure proper temperature maintenance, use temperature tracking devices to monitor conditions throughout the shipment.
Safety Measures When Handling Dry Ice
Handling dry ice safely is crucial to avoid injury. Here are some tips:
Always wear insulated gloves and safety goggles to protect from frostbite and potential eye damage.
Store in well-ventilated areas to prevent CO2 build-up, which can displace oxygen and cause asphyxiation.
Advantages of Using Dry Ice Over Other Cooling Methods
Dry ice outperforms traditional ice and other cooling methods in several key areas:
Longer Cooling Duration: Dry ice provides cooling for longer periods, lasting up to 48 hours or more, depending on the shipment.
No Liquid Residue: Unlike traditional ice, dry ice sublimates into gas, leaving no liquid behind, which could damage goods.
Efficient Packaging: Dry ice is compact and can be used more efficiently than water ice, reducing the volume needed to maintain the correct temperature.
The Cost of a Pack of 6 Dry Ice Packs
The cost of a pack of 6 dry ice packs typically ranges between $10 and $30. The price varies based on region, supplier, and shipping needs. Larger packs tend to offer more value per unit:
Pack Size
Price Range
Cost Per Unit
Ideal Use Case
Pack of 6
$10 – $30
$1.67 – $5.00
Small shipments, 1-2 days
Pack of 12
$20 – $50
$1.67 – $4.17
Medium shipments, longer transit
Pack of 24
$40 – $90
$1.67 – $3.75
Large shipments, multiple days
2025 Trends in Dry Ice Shipping Solutions
As demand for cold chain logistics grows, we are seeing significant advancements in dry ice technology:
Eco-Friendly Production: New methods for producing dry ice are more sustainable, including the use of recycled carbon dioxide.
Advanced Insulation Materials: Improved packaging technologies help dry ice last longer while reducing waste.
Real-Time Temperature Monitoring: New tracking systems provide better oversight, ensuring shipments stay within required temperature ranges.
FAQs About Using Dry Ice Packs for Shipping
Q1: How long will 6 dry ice packs keep my shipment cold? A pack of 6 dry ice packs typically keeps items cold for 18 to 24 hours, depending on insulation and the conditions during transit.
Q2: Can I use dry ice for shipping liquids? Yes, dry ice is safe for shipping liquids, but ensure containers are sealed tightly to avoid leakage.
Q3: Is dry ice safe for international shipping? Yes, dry ice can be used for international shipping, but it requires proper labeling, documentation, and compliance with carrier requirements.
Conclusion and Recommendations
In conclusion, using a pack of 6 dry ice packs is an efficient and cost-effective way to ensure the integrity of temperature-sensitive shipments. By understanding how to select, handle, and apply dry ice correctly, you can significantly reduce spoilage, save on costs, and ensure compliance with 2025 regulations.
Actionable Steps:
Calculate your shipment duration, add a buffer, and determine the number of packs needed.
Always use proper insulation, venting, and labeling to comply with regulatory standards.
Consider advanced dry ice solutions and real-time monitoring for maximum efficiency.
About Tempk
At Tempk, we specialize in providing cutting-edge cold chain logistics solutions. Our products, including dry ice packs, are designed to meet the highest standards of reliability and efficiency, ensuring your goods arrive safely, even in the most challenging conditions.
Contact us today for expert advice on how to optimize your shipping processes with our advanced dry ice solutions.
How to Find the Best Price for Dry Ice Packs | Cost-Saving Tips
Finding the best price for dry ice packs is crucial when managing cold chain shipping costs. Whether you are shipping food, pharmaceuticals, or other temperature-sensitive goods, dry ice is an essential part of the process. But costs can vary, and finding a reliable supplier with the best prices can significantly impact your logistics budget. In this article, we’ll explore how to secure the best price for dry ice, key factors that affect pricing, and strategies to reduce costs while maintaining efficiency.
How can you find the best price for dry ice packs for shipping?
What factors influence the price of dry ice in cold chain logistics?
How can you save money while ensuring the quality of your shipments?
How Can You Find the Best Price for Dry Ice Packs for Shipping?
Dry ice is indispensable for keeping goods at low temperatures during transit, but prices can fluctuate depending on several factors. Here’s how to find the best deal on dry ice packs without sacrificing quality.
Factors Influencing the Price of Dry Ice Packs
Several elements contribute to the pricing of dry ice packs:
Quantity and Volume: The price per pound or per unit decreases when buying in bulk.
Shipping Costs: Delivery fees depend on the distance, volume of dry ice, and urgency of the shipment.
Local Suppliers: Purchasing from local suppliers can reduce transportation costs and shorten delivery times.
Seasonality: Demand for dry ice can increase during certain seasons, such as summer or holiday periods, driving up prices.
Comparing Suppliers for the Best Price
To ensure you are getting a competitive rate, here are some steps you can take:
Get Quotes from Multiple Suppliers: Always compare prices from different suppliers to find the best deal.
Look for Discounts on Bulk Orders: Many suppliers offer discounts for bulk orders or long-term contracts. If your business regularly ships temperature-sensitive goods, bulk purchases can significantly lower your cost.
Check for Additional Fees: Some suppliers may charge extra fees for delivery, packaging, or handling. Be sure to factor these into your total cost.
How to Save on Dry Ice Packs While Maintaining Quality
While it’s important to find the best price for dry ice, it’s equally essential to ensure that the quality of the product remains high. Here’s how to save money while ensuring the integrity of your shipments.
Buy Dry Ice in Bulk
If your business frequently ships temperature-sensitive goods, buying dry ice in bulk can help you secure a better price per unit. Bulk purchasing reduces the overall cost of dry ice and ensures that you always have a supply on hand for your shipments.
Bulk Price Reductions: Suppliers usually offer discounted rates for large orders, which can significantly lower your overall logistics costs.
Efficient Use of Dry Ice: When buying in bulk, you can ensure you are using the right amount of dry ice per shipment, reducing waste.
Proper Storage and Handling of Dry Ice
Proper storage and handling can help you get the most out of the dry ice you purchase, ensuring that it lasts longer and remains effective for your shipping needs.
Store in Well-Ventilated Areas: Dry ice should be stored in insulated, well-ventilated areas to prevent sublimation before it’s needed.
Use Insulated Packaging: Insulating your shipments properly will keep the dry ice from sublimating too quickly, ensuring it lasts longer during transport.
Avoid Overordering
By calculating your dry ice requirements based on the size of your shipments and transit times, you can avoid overordering and paying for excess dry ice that goes unused.
What Are the Key Factors to Consider When Pricing Dry Ice Packs?
The price of dry ice packs can vary widely depending on several factors. However, it’s essential to understand the specific aspects that influence the cost for your unique logistics needs.
Dry Ice Quality
Not all dry ice is created equal. The quality of the dry ice can affect how long it lasts during transit and how effectively it keeps your goods cold. Lower-quality dry ice might sublimate too quickly, requiring you to purchase more or use higher quantities for the same cooling effect.
High-Quality Dry Ice: High-quality dry ice will sublimate more slowly, providing longer-lasting cooling power and reducing the overall cost in the long run.
Regulated Production Standards: Look for suppliers who follow strict production guidelines to ensure consistent, high-quality dry ice.
Local vs. National Suppliers
Choosing between local and national suppliers can also influence the price. Local suppliers may offer more competitive rates for short-distance deliveries, while national suppliers might have better pricing on bulk orders due to their economies of scale.
Bulk Dry Ice Purchasing: A Cost-Effective Solution
For businesses with frequent cold chain shipping needs, bulk purchasing dry ice packs can be one of the most effective ways to secure a lower price. Here’s why:
Reduced Unit Price: As mentioned earlier, purchasing dry ice in bulk reduces the price per pound, which can lead to significant savings.
Avoid Emergency Orders: When you buy in bulk, you reduce the likelihood of having to place emergency orders, which often come with higher delivery fees.
Consistent Supply: A regular bulk supply ensures that you are always prepared for your shipments without the need for last-minute purchases.
2025 Trends in Cold Chain Shipping: What You Need to Know
Increasing Demand for Dry Ice in the E-commerce Sector
As e-commerce continues to grow, the demand for dry ice in cold chain logistics is on the rise. According to recent industry reports, the use of dry ice for shipping perishable goods has increased by 25% over the past year, driven largely by online food and pharmaceutical deliveries.
What This Means for You:
More Supplier Options: Increased demand means more suppliers are entering the market, which can drive down prices.
More Sustainable Options: Innovations in dry ice production, such as eco-friendly and sustainable dry ice, are becoming more available.
FAQ: Frequently Asked Questions
Q1: How much does dry ice cost per pound?
The price of dry ice typically ranges between $1.00 and $3.00 per pound, depending on factors such as quantity, supplier, and location. It’s important to compare prices and look for bulk discounts.
Q2: How can I store dry ice to make it last longer?
Dry ice should be stored in an insulated container in a well-ventilated area. Using proper insulation can extend the life of the dry ice by slowing down the sublimation process.
Conclusion
Finding the best price for dry ice packs is essential for managing your cold chain logistics costs. By considering factors like bulk purchasing, supplier comparisons, and proper storage, you can save money while maintaining the integrity of your shipments.
Ready to optimize your cold chain shipping? Consult your dry ice supplier today to find the best rates and ensure your shipments are handled efficiently.
About Tempk
At Tempk, we specialize in providing cutting-edge cold chain logistics solutions tailored to your unique needs. Our dry ice products are designed to keep your goods in optimal condition during shipping. Partner with us for reliable, cost-effective cold chain solutions.
Pack of 12 Dry Ice Ice Packs: Improve Your Cold Chain Logistics
Shipping temperature-sensitive goods requires reliable cooling solutions. A pack of 12 dry ice ice packs offers an efficient way to maintain ultra-low temperatures during transit. In this article, we’ll explore why dry ice ice packs are essential for cold chain logistics and how they can revolutionize your shipping process.
What Are Dry Ice Ice Packs and How Do They Work?
Dry ice ice packs are made from solid carbon dioxide (CO₂), which sublimates directly from a solid to a gas. This allows dry ice to maintain a temperature of -78.5°C, far colder than regular ice, making it perfect for keeping items like food, pharmaceuticals, and biological samples frozen during transport.
Feature
Description
Practical Significance
Low Temperature
-78.5°C
Preserves frozen goods effectively
Sublimation
Solid to gas
Avoids water damage to products
Weight Efficiency
Lightweight
Reduces shipping costs and handling
Why Choose a Pack of 12 Dry Ice Ice Packs?
A pack of 12 dry ice ice packs provides the right balance of cooling power and flexibility for various shipping needs. Whether you’re shipping perishable food, pharmaceuticals, or lab samples, a pack of 12 ensures optimal cooling throughout the shipping process.
Ideal for Bulk Shipping
Using a pack of 12 allows flexibility. You can adjust the number of packs based on the size and shipping duration of your goods. For bulk shipments, it helps maintain consistent low temperatures.
Cost-Effective Solution
Dry ice ice packs are a cost-efficient way to keep goods cold. A pack of 12 is more affordable compared to traditional cooling methods, and dry ice has longer-lasting cooling power, reducing the need for frequent replacements.
How to Use a Pack of 12 Dry Ice Ice Packs for Shipping
1. Estimate the Amount You Need
For a medium-sized shipment, 12 packs are typically sufficient. Adjust the number for larger or longer-duration shipments.
2. Place the Ice Packs Correctly
Position the dry ice at the top or bottom of the container to ensure that the coldest part of the shipment stays preserved.
3. Seal the Shipment
Ensure the container is sealed properly to minimize gas escape, which helps extend the cooling duration.
Ideal Scenarios for a Pack of 12 Dry Ice Ice Packs
A pack of 12 dry ice ice packs works wonders for shipping:
Frozen Foods: Keeps meat, seafood, ice cream, and other frozen foods preserved during transit.
Pharmaceuticals: Ideal for shipping medications and vaccines that need to stay at a specific temperature.
Biological Samples: Ensures lab samples stay within the required temperature range to preserve their integrity.
Why Should You Opt for Dry Ice Ice Packs for Cold Chain Shipping?
Dry ice is widely regarded as the best solution for maintaining low temperatures during transport. Here’s why:
Reliability
Dry ice delivers consistent, predictable cooling, which is essential for temperature-sensitive shipments.
Safety
When handled properly, dry ice is non-toxic and safe for food and medical shipments. Follow basic safety guidelines to avoid accidents.
Longer Shelf Life
Compared to gel packs and regular ice, dry ice lasts longer and requires fewer replacements during transit.
How Dry Ice Ice Packs Benefit Your Business
By opting for a pack of 12 dry ice ice packs, your business can streamline logistics and reduce spoilage. Consistent, reliable cooling ensures fewer product returns and higher customer satisfaction.
FAQ: Frequently Asked Questions
Q1: How long does a pack of 12 dry ice ice packs last during shipping? A pack of 12 typically lasts between 18 to 24 hours, depending on environmental conditions and shipment size.
Q2: Can dry ice ice packs be used for food shipping? Yes, dry ice is safe for food shipping, but ensure you follow safety guidelines to avoid any risks.
2025 Cold Chain Shipping Trends and Innovations
As we approach 2025, dry ice continues to dominate cold chain shipping. Innovations are focusing on improving efficiency and reducing costs, such as automated dry ice packaging systems and real-time temperature monitoring.
Key Trends:
Enhanced Packaging: New innovations are extending dry ice’s cooling effectiveness by minimizing sublimation loss.
Sustainable Dry Ice: Manufacturers are adopting more sustainable CO₂ sourcing methods, reducing the environmental impact.
Smart Monitoring: Real-time temperature tracking is becoming standard, ensuring shipments maintain the required temperature.
Conclusion and Recommendations
Summary
A pack of 12 dry ice ice packs is an essential tool for businesses involved in cold chain logistics. These packs help preserve the integrity of perishable goods, ensuring safe and efficient transport.
Next Steps
For optimal cold chain logistics, integrate dry ice ice packs into your shipping process. Contact us to learn more about selecting the right pack size and improving your shipping efficiency.
About Tempk
At Tempk, we provide innovative cold chain solutions, ensuring your temperature-sensitive shipments are safe, secure, and efficient. With a focus on reliability and sustainability, Tempk offers dry ice products that meet the highest standards of performance.
Supplier Dry Ice Pack Sheets for Cold Chain Logistics
When it comes to shipping perishable goods, pharmaceuticals, or biological samples, ensuring that they remain within their required temperature ranges is crucial. Supplier dry ice pack sheets offer a reliable solution, providing consistent and safe cooling during transit. In this guide, we explore why these sheets are essential, how they work, and how to choose the best supplier for your cold chain logistics needs.
What are the key factors to consider when selecting a supplier for dry ice pack sheets?
How do dry ice pack sheets improve shipping efficiency?
What are the advantages of working with a professional dry ice supplier?
How to ensure the safety and compliance of your dry ice shipments?
What Are Supplier Dry Ice Pack Sheets?
Supplier dry ice pack sheets are flexible, reusable cooling solutions designed to maintain ultra-low temperatures during shipments. Unlike traditional dry ice, which sublimates into gas, these sheets utilize a solid gel refrigerant, providing consistent cooling while minimizing risks associated with carbon dioxide buildup.
Key Benefits:
Reusable Design: These sheets can be used multiple times, reducing waste and offering long-term cost savings.
Consistent Cooling: Keeps temperature-sensitive goods within their required temperature ranges throughout transit.
Environmental Impact: Opting for reusable dry ice sheets reduces your carbon footprint, contributing to sustainability.
Why is Choosing the Right Supplier Crucial for Your Cold Chain?
Selecting a reliable supplier for dry ice pack sheets is essential for ensuring timely deliveries and maintaining the integrity of your temperature-sensitive products. Here’s how a professional supplier benefits your business:
1. Improved Efficiency
A reliable supplier helps streamline your cold chain logistics by ensuring that your dry ice sheets are delivered on time and of the highest quality.
2. Cost Savings
While upfront costs may vary, a reputable supplier offers competitive pricing and discounts for bulk orders, helping you lower overall shipping expenses.
3. Enhanced Safety and Compliance
Working with a compliant supplier means your shipments are safe and adhere to industry regulations like UN 1845 and IATA Dangerous Goods Regulations.
Key Features to Look for in a Dry Ice Pack Supplier
When selecting a supplier, consider these important factors to ensure you choose the right partner for your logistics operations:
1. Temperature Range & Form
Dry ice packs come in various forms (pellets, blocks, sheets), each suited for different types of shipments. Ensure the supplier offers the appropriate form and temperature range for your products.
2. Customization & Size Options
Opt for a supplier who offers customizable dry ice sheet sizes, allowing you to choose the perfect fit for your packaging.
3. Regulatory Compliance
Ensure the supplier follows all relevant safety standards and provides the necessary documentation for air travel and hazardous material shipping.
4. Customer Support & Service
A reliable supplier should provide responsive customer support, helping you manage any issues that arise during the shipping process.
How Dry Ice Pack Sheets Work
Dry ice pack sheets are created by compressing solid carbon dioxide into flexible sheets, which provide cooling at -78.5°C. As the dry ice sublimates, it maintains consistent low temperatures, ensuring your products stay within their required temperature ranges throughout transit.
Feature
Description
Your Benefit
Temperature
-78.5°C cooling
Keeps perishable goods frozen
Safety
Non-toxic and solid refrigerant
Reduced risk of CO₂ gas buildup
Reusability
Can be used multiple times
Reduces waste and shipping costs
How to Choose the Best Supplier for Your Dry Ice Pack Sheets
1. Evaluate Product Forms and Temperature Ranges
Make sure the supplier offers the right form of dry ice (pellets, blocks, or sheets) and can meet your temperature range requirements.
2. Assess Supplier Reliability
Look for a supplier who offers fast, reliable shipping. Same-day or next-day delivery can be crucial for businesses with time-sensitive shipments.
3. Consider Long-Term Cost Benefits
While premium suppliers may have higher upfront costs, they provide superior cooling performance and longer hold times, saving you money in the long run.
2025 Trends in Dry Ice Pack Sheets
The dry ice market is evolving, driven by advancements in sustainability and technology. As demand for cold chain logistics grows, suppliers are adopting new methods to improve efficiency and reduce environmental impact.
Sustainability Practices
Eco-friendly suppliers are focusing on reducing CO₂ emissions through innovative dry ice production techniques, including CO₂ capture from bioethanol fermentation.
Smart Packaging
The integration of IoT sensors in packaging allows businesses to track temperature and humidity, providing real-time data to ensure product integrity.
Automation in Dry Ice Production
Automated systems are reducing production costs and improving efficiency, enabling suppliers to meet the growing demand for dry ice.
Frequently Asked Questions
Q1: How long do dry ice pack sheets last during shipping? Dry ice typically lasts 18-24 hours depending on the sheet thickness and shipment conditions. Proper insulation can extend its cooling duration.
Q2: Can I use dry ice for shipping food? Yes, dry ice is safe for shipping food as long as the packaging is designed to prevent leakage and ensure safety during transit.
Conclusion and Recommendations
Choosing the right supplier for dry ice pack sheets is essential to maintaining the integrity and safety of your shipments. Focus on factors such as reliability, regulatory compliance, and cost-efficiency when evaluating potential suppliers. By working with a trusted partner, you can optimize your cold chain logistics operations and enhance customer satisfaction.
Next Steps:
Compare Suppliers: Research different suppliers based on cost, delivery times, and product quality.
Order Samples: Test products from potential suppliers before committing to large orders.
Optimize Your Logistics: Choose a supplier who offers tailored solutions for your specific shipping needs.
About Tempk
At Tempk, we specialize in cold chain logistics solutions, offering premium dry ice pack sheets for various industries. Our commitment to quality and customer service ensures that your temperature-sensitive shipments remain safe and efficient.
Ready to optimize your logistics? Contact Tempk today to learn more about our dry ice solutions.
Manufacturer Dry Ice Pack: A Guide to Choosing the Best
Manufacturer Dry Ice Pack: Essential Cold Chain Solution for 2025
Ensuring the integrity of temperature-sensitive shipments is more crucial than ever in 2025. Manufacturer dry ice packs are a cornerstone in cold chain logistics, providing a reliable and efficient solution for shipping perishable goods. These packs are designed to deliver consistent cooling, ensuring products like pharmaceuticals, biological samples, and frozen foods reach their destination in optimal condition.
What are manufacturer dry ice packs and why are they essential for cold chain logistics?
How do dry ice packs maintain ultra-low temperatures?
What to look for when choosing the right dry ice pack manufacturer?
How do dry ice packs benefit different industries?
What are Manufacturer Dry Ice Packs and Why Are They Essential?
Manufacturer dry ice packs are specialized cooling agents used in the transportation of temperature-sensitive products. Unlike traditional gel packs, dry ice packs utilize solid carbon dioxide (CO₂) to maintain extremely low temperatures during transit, making them perfect for shipments requiring temperatures below freezing.
Key Features:
Ultra-low temperature maintenance: Dry ice packs can maintain temperatures as low as -78.5°C (-109.3°F), ensuring products remain frozen throughout transit.
Sublimation process: As dry ice sublimates, it turns directly from solid to gas, leaving no liquid residue, which reduces the risk of moisture damage.
Reusable options: Many manufacturers offer reusable dry ice packs, providing an eco-friendly and cost-effective solution for repeated shipments.
How Do Dry Ice Packs Work?
Dry ice is created by capturing and compressing carbon dioxide (CO₂) gas, which is then cooled to a liquid state. The liquid CO₂ rapidly expands to form dry ice snow, which is then compressed into blocks, pellets, or sheets. The packs are sealed in puncture-resistant and insulated packaging to ensure safe and effective transport.
What to Look for in a Manufacturer of Dry Ice Packs
When choosing a dry ice pack manufacturer, consider these factors to ensure high-quality, safe, and efficient products:
Product Quality and Consistency Ensure the manufacturer produces high-purity dry ice to guarantee proper cooling performance. Look for consistent sizing and weight to maintain reliable cooling during transit.
Packaging and Customization A reputable manufacturer should offer custom dry ice pack solutions to meet specific needs. This could include customized thickness, sizes, and shapes tailored to your shipping containers.
Safety and Handling Standards The manufacturer should adhere to OSHA guidelines and provide clear instructions on how to handle dry ice safely. Ensure that safety protocols are followed to avoid risks during shipment.
Regulatory Compliance Ensure the manufacturer complies with DOT and FDA regulations, depending on your industry, and provides proper hazard labeling and documentation.
Cost and Availability Consider both the cost and availability of dry ice packs. Dry ice can be expensive, but its superior cooling properties often justify the cost. Look for manufacturers with reliable supply chains to prevent delays.
Customer Support and Service A good dry ice pack manufacturer will offer 24/7 customer support to address any issues, assist with customization, and help you choose the right products for your needs.
Benefits of Using Manufacturer Dry Ice Packs
1. Enhanced Product Integrity
By maintaining ultra-low temperatures, dry ice packs ensure products like vaccines, biologics, and frozen foods retain their integrity during transit. Temperature fluctuations can significantly compromise product quality, especially in pharmaceutical and biotech industries.
2. Cost-Effectiveness
Though dry ice may cost more initially compared to traditional cooling methods, its superior cooling ability can save costs in the long run by eliminating the need for expensive expedited shipping or extra refrigeration.
3. Environmental Considerations
The sublimation process of dry ice leaves no liquid waste, unlike traditional ice packs that can leak and contaminate products. Additionally, many manufacturers now offer reusable dry ice packs, which provide an eco-friendly solution to shipping needs.
4. Versatility Across Industries
Dry ice packs are used across various industries including:
Pharmaceuticals: Ensuring safe transport of temperature-sensitive medications and vaccines.
Food and Beverage: Keeping frozen foods and perishables at optimal temperatures.
Biotechnology: Safeguarding biological samples during transportation.
E-commerce: Facilitating the delivery of perishable goods.
How to Use Manufacturer Dry Ice Packs Effectively
1. Preparation
Handling: Always wear protective gloves when handling dry ice to avoid frostbite.
Packaging: Use insulated containers to minimize sublimation loss and ensure effective cooling.
2. Transportation
Ventilation: Ensure shipping containers are properly vented to release CO₂ gas safely.
Regulations: Follow transportation regulations for dry ice, including labeling and documentation.
3. Disposal
Allow remaining dry ice to sublimate in a well-ventilated area before disposal.
Reusable dry ice packs should be properly cleaned and stored for future use.
Choosing the Right Manufacturer Dry Ice Pack
When selecting a dry ice pack manufacturer, consider:
Temperature requirements: Ensure the pack meets the required cooling temperatures for your products.
Size and configuration: Choose a pack that fits your shipping containers and cooling needs.
Regulatory compliance: Verify that the manufacturer complies with all relevant industry regulations.
Environmental impact: Opt for reusable packs to reduce waste and environmental impact.
Conclusion
Choosing the right manufacturer dry ice pack is essential for maintaining the integrity of temperature-sensitive products during shipping. By considering factors like product quality, safety standards, and cost, you can ensure that your shipments stay cold and compliant with regulations. Using dry ice packs effectively can also contribute to cost savings and environmental sustainability, while offering reliable performance for cold chain logistics.
For more information on selecting the right dry ice pack, reach out to industry leaders who specialize in cold chain solutions. Contact Tempk today to explore custom dry ice options tailored to your business needs.
About Tempk
Tempk is a pioneer in cold chain logistics and a leading manufacturer of dry ice pack solutions. We offer a range of high-quality dry ice formats and integrate IoT sensors and biodegradable materials to meet the demands of 2025 and beyond. With a global presence, we provide regional manufacturing to reduce lead times and carbon footprints.
Ready to optimize your cold chain logistics?Contact Tempk for expert guidance and custom dry ice pack solutions today.