


Pack of 48 Dry Ice Packs – The Best Solution for Cold Chain Shipping
Pack of 48 Dry Ice Packs – The Best Solution for Cold Chain Shipping

Shipping perishable goods, from pharmaceuticals to food, requires efficient temperature management. A pack of 48 dry ice packs ensures your shipments stay frozen for long durations, preserving product integrity. This article explores why bulk dry ice packs are the ultimate solution for temperature-sensitive shipping, covering advantages, usage guidelines, and industry applications.

What are the advantages of using a pack of 48 dry ice packs?
How can you calculate the right number of dry ice packs for your shipment?
What industries benefit most from bulk dry ice packs?
Key safety tips for handling dry ice safely during transport.
What Are the Advantages of Using a Pack of 48 Dry Ice Packs?
A pack of 48 dry ice packs offers several key benefits that make it a top choice for businesses and individuals involved in cold chain shipping.
1. Cost-Effective for Large Shipments
Purchasing dry ice in bulk is significantly cheaper than buying smaller quantities. A pack of 48 dry ice packs reduces the per-unit cost, making it more economical for businesses with high shipping volumes. Bulk purchasing also simplifies inventory management and ensures you’re always prepared for urgent shipments.
2. Extended Cooling Duration
Dry ice is capable of maintaining sub-zero temperatures for up to 48 hours or more, depending on shipping conditions. This makes it an ideal solution for shipments that require long-duration cooling, such as pharmaceuticals, seafood, and scientific samples.
3. Versatility Across Industries
From food and beverages to pharmaceuticals and biological samples, dry ice is indispensable for many sectors. A pack of 48 dry ice packs provides reliable cooling for various applications, ensuring that temperature-sensitive products arrive safely, regardless of transit time or distance.
4. Easy Storage and Handling
Unlike regular ice, dry ice sublimates into gas, leaving no liquid behind. This prevents water damage to goods during transport. Dry ice is compact and easy to store in insulated containers, making it the preferred choice for businesses looking to streamline their cold chain operations.
Industries That Benefit Most from a Pack of 48 Dry Ice Packs
1. Food and Beverage Industry
For perishable items like seafood, meats, and frozen foods, maintaining a proper temperature during transport is crucial. Dry ice keeps these items frozen, preserving freshness and reducing the risk of spoilage during shipping.
2. Pharmaceuticals and Medical Shipping
The pharmaceutical industry relies heavily on dry ice to transport vaccines, medicines, and biologics that require strict temperature control. A pack of 48 dry ice packs ensures that these critical shipments remain within the necessary temperature range, maintaining their efficacy upon arrival.
3. Scientific Research and Laboratories
Laboratories often need to ship biological samples or chemicals that require consistent, low temperatures. Dry ice is the best solution for maintaining the integrity of these materials during transport.
4. Event Planning and Special Effects
Dry ice is widely used in events to create dramatic fog effects. Whether it’s for a theatrical performance or a special celebration, a pack of 48 dry ice packs can help create the perfect atmosphere.
How to Safely Use a Pack of 48 Dry Ice Packs
Handling dry ice safely is crucial. Here are essential safety guidelines:
1. Wear Protective Gear
Always use insulated gloves and long sleeves when handling dry ice. Its extremely cold temperature can cause serious injuries if it comes in direct contact with your skin.
2. Ensure Proper Ventilation
Since dry ice sublimates into carbon dioxide gas, it’s important to handle it in a well-ventilated area. Never store dry ice in an airtight container, as gas buildup can cause it to explode.
3. Use Insulated Containers
To ensure the dry ice works efficiently, store it in an insulated container. This will help maintain the required temperature and prevent gas buildup, while maximizing the cooling duration.
4. Keep Away from Children and Pets
Due to its extreme cold, dry ice can be harmful to children and pets. Always store it in a secure location.
How to Choose the Right Dry Ice Pack Size for Your Needs
Selecting the appropriate amount of dry ice is essential for effective cooling.
Small Shipments:
For personal shipments, a few dry ice packs may suffice. For smaller volumes, you may opt for individual packs or smaller quantities.
Large Shipments:
For larger shipments, a pack of 48 dry ice packs is perfect. It provides enough dry ice for maintaining the required temperature over long shipping durations.
Bulk Buying:
If you’re shipping regularly, purchasing in bulk offers the best value, reducing the per-pound cost significantly.
Cost of a Pack of 48 Dry Ice Packs
The cost of dry ice varies based on the supplier and location. On average, dry ice costs between $1.50 to $3.00 per pound. Bulk purchases, such as a pack of 48 dry ice packs, can provide significant cost savings for commercial buyers. Always check with suppliers for the best rates.
Frequently Asked Questions (FAQ)
Q1: How long does a pack of 48 dry ice packs last?
Dry ice lasts around 24 to 48 hours, depending on the insulation and conditions. For a pack of 48, you can expect it to last up to 48 hours.
Q2: Can I store dry ice in my home freezer?
No, dry ice should not be stored in a regular freezer, as it may cause gas buildup and damage the freezer. Instead, store it in an insulated container with some ventilation.
Q3: Is dry ice safe for shipping food?
Yes, dry ice is safe for shipping food, especially frozen items. It maintains the necessary temperature and avoids the moisture problem that regular ice might cause.
Conclusion and Recommendation
A pack of 48 dry ice packs is a game-changer for anyone shipping temperature-sensitive goods. Whether you’re shipping food, pharmaceuticals, or scientific materials, dry ice provides a reliable, cost-effective solution for maintaining the cold chain. By following the safety guidelines and selecting the correct amount of dry ice, you can ensure your shipments arrive in optimal condition.
Ready to streamline your shipping process? Consult Tempk for personalized cold chain solutions today!
About Tempk
At Tempk, we specialize in providing sustainable and efficient cold chain logistics solutions. From dry ice to hybrid solutions, we offer a range of products designed to meet the needs of your temperature-sensitive shipments. Contact us today to optimize your cold chain operations.
Pack of 50 Dry Ice Packs for Shipping: Your Ultimate Cold Chain Solution
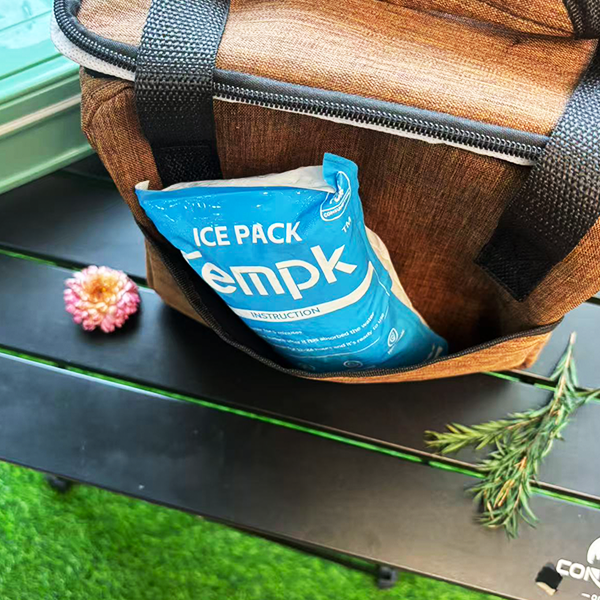
Shipping temperature-sensitive products? A pack of 50 dry ice packs is your perfect solution. This article will explain how dry ice packs work, their benefits for cold chain logistics, and why they’re essential for the safe transit of perishable goods. Let’s explore how dry ice ensures your goods remain fresh, intact, and compliant with health regulations during shipping.
How do dry ice packs work and why are they essential for cold chain logistics?
What benefits does a pack of 50 dry ice packs offer your shipping process?
What are the best practices for using dry ice in shipping?
How do you choose the right dry ice packs for different shipment sizes?
Common challenges in using dry ice and how to solve them.
What Are Dry Ice Packs and How Do They Work?
Dry ice packs are solidified carbon dioxide that maintain an ultra-low temperature of -78.5°C. These packs help keep products frozen or chilled during transit. Dry ice sublimates, changing directly from solid to gas, ensuring no residue or liquid like with traditional ice, making it an ideal choice for shipping temperature-sensitive goods.
The Science Behind Dry Ice
Dry ice sublimates at -78.5°C, making it one of the most efficient cooling agents available. It provides a long-lasting cold source without the risks associated with regular ice, such as leakage. Dry ice packs are typically used in insulated shipping containers to maintain the required temperatures throughout transit.
| Feature | Description | Practical Significance |
|---|---|---|
| Low Temperature | Maintains sub-zero temperatures | Ensures perishable goods remain frozen |
| No Residue | Sublimates into gas, leaving no liquid | Safer for perishable goods, no mess |
| Cost-Effective | Long-lasting cooling power | Ideal for long-distance shipping, reducing costs |
Why Choose a Pack of 50 Dry Ice Packs for Your Cold Chain Shipping?
A pack of 50 dry ice packs offers flexibility and scalability, making it the ideal solution for businesses involved in shipping temperature-sensitive items like pharmaceuticals, biological samples, and perishable foods. Here’s why:
1. Reliable Temperature Control
A pack of 50 dry ice packs is perfect for keeping your goods within the required temperature range, whether you’re shipping small boxes or large containers. Their ability to maintain a steady sub-zero temperature reduces the risk of spoilage during long transit times.
2. Versatility for Different Shipment Sizes
Whether you’re shipping a small batch of products or a large shipment, a pack of 50 dry ice packs can be distributed across multiple shipments. This provides cost-effective and efficient temperature control regardless of the shipment size.
3. Minimized Spoilage Risk
Spoilage is a significant concern in cold chain logistics. Dry ice’s low temperature effectively reduces the risk of spoilage, ensuring that your products, such as food or medical supplies, arrive in optimal condition.
Best Practices for Using Dry Ice in Shipping
While dry ice is an excellent solution, it’s important to follow best practices to ensure safety and effectiveness:
1. Handle Dry Ice with Care
Always wear protective gloves when handling dry ice to prevent frostbite. Additionally, ensure your shipping containers are well-ventilated as dry ice sublimates into carbon dioxide, which can be dangerous in confined spaces.
2. Choose the Right Quantity
The amount of dry ice required depends on the shipping duration and container size. For medium to large shipments, a pack of 50 dry ice packs is typically sufficient, but always calculate the specific needs based on the shipment’s conditions.
3. Proper Packaging
Use insulated packaging like Styrofoam or Mylar bags to enhance the effectiveness of dry ice. Properly secure the dry ice inside the container to avoid shifting, ensuring consistent cooling throughout transit.
How to Choose the Right Dry Ice Packs for Your Shipments?
Choosing the right dry ice packs ensures that your products stay within the correct temperature range during transit. Here’s how to make the best choice:
1. Assess Shipment Size and Temperature Needs
For smaller shipments, fewer dry ice packs may suffice. However, for larger shipments, especially those requiring long-lasting freezing, a pack of 50 dry ice packs is ideal.
2. Consider Shipping Duration
Dry ice typically lasts between 18 to 24 hours, depending on the thickness and conditions. For longer shipments, you might need more dry ice or replenishments. Make sure to plan for the entire shipping time, including any delays.
3. Environmental Considerations
Be mindful of the shipping route and environmental factors such as weather. For shipments that travel through warmer climates or longer routes, additional insulation or dry ice may be necessary to maintain the internal temperature.
Common Challenges and Solutions When Shipping with Dry Ice
Despite its effectiveness, using dry ice comes with some challenges. Here’s how to overcome them:
1. Dry Ice Sublimates Over Time
Challenge: Dry ice will eventually lose its cooling power due to sublimation.
Solution: A pack of 50 dry ice packs is suitable for shipments up to 24 hours. For longer transit times, use additional dry ice and proper insulation to extend cooling duration.
2. Safety Concerns
Challenge: Dry ice can be hazardous if not handled properly.
Solution: Always use gloves and ensure adequate ventilation in the shipping container to avoid the risk of carbon dioxide buildup.
3. Cost Considerations
Challenge: Dry ice is more expensive than regular ice or gel packs.
Solution: While dry ice may have a higher upfront cost, it is more reliable and longer-lasting, which can reduce overall costs for businesses that require consistent cooling over extended distances.
2025 Cold Chain Logistics Trends and Innovations
The cold chain logistics industry is constantly evolving. Here are the latest trends shaping the future of shipping and refrigeration:
Eco-Friendly Dry Ice
Manufacturers are working on creating more sustainable dry ice, reducing its environmental impact. In response to increased demand for eco-friendly solutions, businesses are adopting these innovations.
Advanced Insulation Technology
New materials are being developed to extend the life of dry ice during long shipments, ensuring products remain frozen without the need for excessive dry ice.
Automated Dry Ice Management
Automated systems are being introduced to manage dry ice levels, ensuring efficient temperature control and reducing the chances of mishandling during large shipments.
FAQs
Q1: How long does a pack of 50 dry ice packs last?
Dry ice can maintain its cooling effect for 18 to 24 hours, depending on conditions. For longer journeys, use more dry ice or additional insulation.
Q2: Can I use dry ice for food shipping?
Yes, dry ice is safe for shipping food items, as long as proper safety precautions are followed, and the packaging is sealed correctly.
Conclusion and Recommendations
A pack of 50 dry ice packs is a game-changer for businesses involved in cold chain logistics. By understanding how to use dry ice effectively, choosing the right amount for your shipments, and following safety guidelines, you can ensure your perishable goods stay fresh and safe throughout transit.
Next Steps:
Plan your shipments: Calculate dry ice needs based on product size and transit time.
Follow safety protocols: Always handle dry ice with care and ensure proper ventilation.
Optimize your cold chain: Use high-quality insulation to extend cooling duration.
About Tempk
At Tempk, we specialize in providing top-tier cold chain logistics solutions tailored to your business’s needs. Our products, including dry ice packs, ensure optimal temperature control and secure shipping for perishable goods.
Ready to improve your cold chain logistics? Contact Tempk today for expert advice and the best dry ice solutions!
Wholesale Dry Ice Pack Sheets
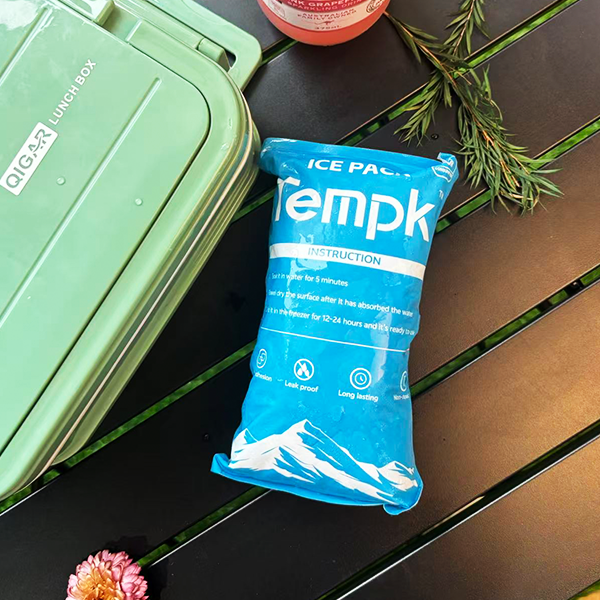
Wholesale Dry Ice Pack Sheets: Your Ultimate Cold Chain Solution
Introduction
Wholesale dry ice pack sheets are a pivotal element in maintaining the integrity of temperature-sensitive products throughout long-distance shipments. In industries such as pharmaceuticals, frozen foods, and biotech, ensuring that products remain within the correct temperature range is crucial. This article delves into the benefits, applications, and considerations of wholesale dry ice pack sheets for businesses aiming to streamline their cold chain logistics.
What are wholesale dry ice pack sheets, and how do they work?
How do dry ice sheets improve efficiency and cost-effectiveness in logistics?
What are the regulatory considerations for shipping with dry ice in 2025?
How do dry ice pack sheets contribute to sustainability goals?
What Are Wholesale Dry Ice Pack Sheets?
Wholesale dry ice pack sheets are flexible, uniform sheets filled with dry ice, offering an efficient cooling solution for cold chain logistics. These sheets are designed for bulk purchasing, making them ideal for large-scale shipments, ensuring consistent cooling throughout the shipping process.
How Do Dry Ice Pack Sheets Work?
The dry ice sublimates (transforms from solid to gas) and releases cooling energy, maintaining a temperature of -78.5°C. Wholesale dry ice sheets are arranged in rows and fit into shipping containers, providing predictable, controlled cooling.
| Feature | Description | Benefit for Your Business |
|---|---|---|
| Uniform Sheets | Consistent cooling | Predictable performance across shipments |
| Durability | Puncture-resistant packaging | Reduces risks during handling |
| Customizable Sizes | Fit to specific shipping containers | Maximizes efficiency and reduces waste |
How Do Dry Ice Sheets Improve Efficiency in Logistics?
Maximizing Efficiency and Cost-Effectiveness
Dry ice pack sheets provide businesses with a cost-effective, efficient way to keep products at the right temperature. Bulk purchasing reduces per-unit costs, while the consistency of the sheets minimizes handling errors.
Pack Configuration and Key Benefits
| Weight | Cooling Duration | Application | Key Benefit |
|---|---|---|---|
| 5 lbs | 18-24 hours | Short transport routes | Flexible for small shipments |
| 10 lbs | 24-48 hours | Regional logistics | Cost-effective for medium shipments |
| 25 lbs | 48-72 hours | Long-haul shipments | Optimal for bulk and international shipping |
Cost-Effectiveness
Bulk purchasing dry ice sheets results in discounted unit prices and a more streamlined shipping process. This can lead to substantial savings, especially for businesses with large-scale, temperature-sensitive shipping needs.
Case Example: A pharmaceutical distributor saved 22% annually on shipping costs by switching to wholesale dry ice sheets.
Practical Use Cases of Dry Ice Pack Sheets
Pharmaceuticals & Biotech
Vaccines and Biologics: Dry ice pack sheets ensure that sensitive pharmaceutical products like vaccines and insulin maintain the required low temperatures throughout transport.
Research Samples: Biotech companies use dry ice sheets to preserve the integrity of biological samples during long-haul shipments.
Food & Beverage
Frozen Foods: Dry ice pack sheets prevent thawing of frozen foods like seafood and meat during international transport.
Dairy Products: Ensures freshness during transit by maintaining the correct temperature for extended periods.
General Commercial Shipping
E-commerce: Online retailers can rely on dry ice sheets to maintain the integrity of temperature-sensitive products like chocolates and perishable goods during transit.
How to Integrate Wholesale Dry Ice Pack Sheets into Your Logistics Operations?
To seamlessly integrate wholesale dry ice pack sheets into your cold chain logistics, consider the following best practices:
Storage and Handling
Use insulated containers to store dry ice, minimizing sublimation.
Implement a FIFO (First In, First Out) system to ensure the use of the oldest stock first.
Transportation Optimization
Utilize modular systems for easier storage in shipping containers.
Use IoT-enabled temperature sensors to track the temperature of shipments in real-time, ensuring compliance with regulations.
Regulatory Considerations for 2025
2025 brings tighter regulations surrounding dry ice in commercial logistics, especially for pharmaceutical and perishable shipments. Compliance with IATA PI 954 and UN1845 ensures safe handling, proper labeling, and vented packaging for dry ice shipments.
Latest Trends in Dry Ice Packaging
2025 Innovations in Cold Chain Logistics
Sustainability: The trend toward eco-friendly packaging continues to grow, with many companies focusing on biodegradable or recyclable dry ice packaging options.
Smart Packaging: Dry ice sheets now integrate sensors for real-time temperature monitoring, improving shipment reliability.
Hybrid Solutions: Combining dry ice and PCM (phase change materials) extends cooling time for more extensive shipments.
Market Insights
The dry ice market is forecasted to grow rapidly, driven by the demand for pharmaceutical shipping, frozen food distribution, and e-commerce logistics.
Frequently Asked Questions (FAQ)
Q1: How long can dry ice pack sheets maintain cooling?
A: Depending on the size and insulation, dry ice pack sheets can maintain cooling for 24-72 hours, making them suitable for short- and long-distance shipments.
Q2: Can I use dry ice sheets for food shipments?
A: Yes, dry ice sheets are safe for food contact when used with food-grade packaging and handling precautions.
Q3: How do I comply with IATA regulations?
A: Ensure that dry ice is packed according to IATA Packing Instructions with proper labeling, venting, and documentation, and always stay within weight limits.
Conclusion and Recommendations
Wholesale dry ice pack sheets offer a reliable, cost-effective, and sustainable solution for maintaining the integrity of temperature-sensitive goods during transit. By adopting these solutions, businesses can improve efficiency, reduce shipping costs, and meet regulatory standards for safe and effective cold chain logistics.
Actionable Takeaways
Integrate dry ice pack sheets into your logistics operations to improve cost-efficiency and operational consistency.
Invest in temperature monitoring solutions to ensure compliance with new regulations.
Consider sustainable packaging solutions to reduce environmental impact and achieve long-term savings.
About Tempk
At Tempk, we specialize in providing advanced cold chain logistics solutions designed for efficiency and compliance. Our dry ice pack sheets and insulated containers ensure that your temperature-sensitive products arrive at their destination safely and on time.
Call to Action: Get in touch with Tempk today to explore how our wholesale dry ice pack sheets can optimize your cold chain logistics.
Walmart Dry Ice Packs 2025: How to Safely Ship Perishable Goods

How to Safely Ship Perishable Goods with Walmart Dry Ice Packs in 2025
Introduction:
Shipping perishable goods such as food, pharmaceuticals, or biological samples requires precise temperature control. Walmart dry ice packs provide a reliable solution for maintaining ultra-low temperatures during transit, ensuring the safety of your products. This guide explores how Walmart’s dry ice packs work, their advantages, and best practices for using them effectively in your shipping operations.

What are Walmart dry ice packs, and how do they work?
Why are Walmart’s dry ice packs the preferred choice for shipping?
How to use dry ice packs effectively for logistics operations?
What are the costs and best deals available for Walmart dry ice packs?
Best practices for safely handling and shipping with dry ice.
What Are Walmart Dry Ice Packs, and How Do They Work?
Walmart dry ice packs are made from solid carbon dioxide, with a sublimation point of -78.5°C. Unlike water or gel ice packs, which melt into water, dry ice sublimates directly from solid to gas, releasing cold air that helps keep goods frozen for extended periods.
Key Benefits of Dry Ice:
Ultra-Low Temperatures: Ideal for long-distance shipping, especially for frozen foods, pharmaceuticals, and biological samples.
No Water Residue: Dry ice leaves no liquid behind, ensuring no damage to sensitive products.
Versatility: Available in various sizes, it suits different shipping needs, from small boxes to large containers.
How Dry Ice Works:
Dry ice maintains extremely low temperatures by sublimating directly into carbon dioxide gas, which helps preserve the freshness of temperature-sensitive goods. This unique feature makes dry ice highly effective for shipping items that require consistent, low-temperature conditions.
Why Are Walmart Dry Ice Packs Preferred for Shipping?
Walmart’s dry ice packs stand out for their reliability, availability, and cost-effectiveness. Here’s why they are a top choice for businesses in the cold chain logistics industry:
Consistent Quality: Walmart ensures that all dry ice packs meet rigorous quality standards, providing consistent and reliable performance.
Wide Availability: Walmart’s extensive network makes it easy to obtain dry ice from most of its locations, ensuring that businesses can source the product conveniently.
Affordable Pricing: Walmart offers competitive pricing, especially for bulk purchases, making it a cost-effective option for businesses looking to optimize their cold chain logistics.
How to Use Walmart Dry Ice Packs Effectively
To make the most of Walmart’s dry ice packs, follow these best practices for effective use:
Step-by-Step Guide for Using Dry Ice Packs:
Choose the Right Size: Select a dry ice pack size based on the volume and duration of your shipment.
Proper Placement: Place dry ice at the top of the shipment to ensure the cold air circulates evenly throughout the package.
Seal the Package: Ensure the package is sealed securely to minimize gas escape, which can reduce the cooling efficiency.
Monitor Temperature: Use a temperature monitoring system to track the condition of your goods during transit.
What Is the Cost of Walmart Dry Ice Packs?
The cost of Walmart dry ice packs varies depending on size and quantity. Here’s a rough cost breakdown for different pack sizes:
| Pack Size | Price Range | Cost Per Unit | Best Use |
|---|---|---|---|
| Pack of 10 | $15 – $25 | $1.50 – $2.50 | Small shipments, 1-2 day transit |
| Pack of 24 | $30 – $40 | $1.25 – $1.67 | Medium shipments, 2-3 day transit |
| Pack of 50 | $50 – $75 | $1.00 – $1.50 | Bulk shipments, long-distance transport |
Tip: Walmart often offers bulk discounts, so check for special deals when buying larger quantities.
Best Practices for Handling and Shipping with Dry Ice
Handling dry ice requires extra care due to its extremely low temperature. Follow these safety tips to ensure safe usage:
Wear Protective Gloves: Always use insulated gloves when handling dry ice to prevent frostbite.
Ensure Proper Ventilation: Dry ice sublimates into carbon dioxide gas, so make sure the shipping container is well-ventilated to avoid pressure buildup.
Store Safely: Keep dry ice in an insulated cooler, away from children or pets, and ensure the container allows for gas venting.
FAQ: Frequently Asked Questions About Walmart Dry Ice Packs
Q1: How long does Walmart dry ice last during shipping?
Dry ice typically lasts between 18-24 hours, depending on the amount used and the insulation quality of the packaging.
Q2: Is it safe to ship food using dry ice?
Yes, dry ice is safe for food shipping, but ensure that the dry ice is well-contained and the package is labeled properly to avoid any risks.
Q3: Can I use Walmart dry ice packs for long-distance shipments?
Yes, Walmart dry ice packs are perfect for long-distance shipping. Just ensure that you use the right amount based on the shipment’s duration.
2025 Trends in Dry Ice Shipping Solutions
As the cold chain logistics industry evolves, dry ice solutions continue to grow, particularly with the increasing demand for temperature-sensitive shipments. In 2025, new trends in dry ice technology and sustainability are shaping the industry:
Latest Advances in Dry Ice Technology:
Improved Packaging Materials: New insulated packaging materials ensure that dry ice remains effective for longer durations.
Eco-Friendly Solutions: More suppliers are adopting renewable energy practices in dry ice production to reduce environmental impact.
Better Monitoring Systems: Enhanced temperature tracking devices are now available, making it easier to monitor the condition of shipments in real-time.
Conclusion and Recommendations
In conclusion, Walmart dry ice packs provide an efficient, cost-effective solution for maintaining frozen temperatures during transit. By following best practices for handling, packaging, and safety, you can ensure that your shipments arrive in optimal condition.
Ready to optimize your cold chain logistics? Contact Walmart for the best dry ice solutions or explore their bulk-buy offers for better savings.
About Tempk
At Tempk, we specialize in providing high-quality cold chain logistics solutions tailored to your specific needs. Our products, including advanced dry ice solutions, ensure that your perishable goods are transported safely and efficiently.
Take your cold chain logistics to the next level. Contact us today for expert advice and custom logistics solutions.
Pack of 12 Dry Ice Packs: Efficient Cold Chain Shipping for Frozen Goods
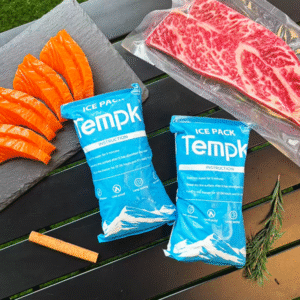
Shipping perishable items requires a robust solution to keep them at their required temperatures. A pack of 12 dry ice packs offers an efficient and reliable method for maintaining ultra-low temperatures during transit. In this guide, we will explore how dry ice works, why it is crucial for cold chain logistics, and how to use it effectively.
What are dry ice ice packs, and how do they work for shipping?
Why should you opt for a pack of 12 dry ice ice packs for your cold chain logistics?
How can you effectively use dry ice ice packs in different shipping scenarios?
What Are Dry Ice Ice Packs and How Do They Work?
Dry ice is solid carbon dioxide (CO₂) that sublimates directly from a solid to a gas, maintaining a temperature of -78.5°C (-109.3°F). This makes it an ideal solution for preserving frozen goods, pharmaceuticals, and biological samples. Unlike traditional ice, dry ice leaves no residue as it sublimates, preventing water damage to sensitive products.
The Science Behind Dry Ice
Dry ice’s sublimation process absorbs heat, keeping the surrounding environment cold. This unique characteristic allows dry ice to cool efficiently without creating moisture, making it suitable for long-distance shipments, especially in warm conditions.
| Feature | Description | Practical Significance |
|---|---|---|
| Low Temperature | Maintains temperatures as low as -78.5°C | Ideal for frozen goods like food, vaccines, and lab samples |
| Sublimation | Changes directly from solid to gas | No residual water, preventing damage and contamination |
| Lightweight | Compact and easy to handle | Reduces shipping costs and facilitates efficient packing |
Why Choose a Pack of 12 Dry Ice Ice Packs for Shipping?
A pack of 12 dry ice ice packs offers flexibility and efficiency. Whether you’re shipping large or small quantities, it provides enough cooling power for various shipment sizes. Here’s why a pack of 12 is the optimal choice:
Ideal for Bulk Shipping
A pack of 12 dry ice ice packs ensures ample cooling for larger shipments. With consistent temperature control, you can confidently ship perishable goods over long distances without worrying about temperature fluctuations.
Cost-Effective Solution
Purchasing a pack of 12 offers economies of scale. Dry ice is more affordable than other cooling methods, especially for bulk shipments. This option maximizes cost efficiency without compromising on performance.
How to Use a Pack of 12 Dry Ice Ice Packs for Shipping
1. Determine the Quantity Needed
Estimate the number of packs required based on the shipment size and duration. For a medium-sized shipment, a pack of 12 works well. Larger shipments may need additional packs.
2. Placement of Dry Ice Packs
For optimal cooling, place dry ice packs either at the top or bottom of the container, ensuring the most temperature-sensitive goods are properly cooled.
3. Seal the Shipment Properly
Ensure the shipment is well-sealed to prevent gas from escaping. This will maximize the duration of the cooling effect.
Ideal Scenarios for Using a Pack of 12 Dry Ice Ice Packs
A pack of 12 dry ice ice packs is especially effective in the following scenarios:
1. Shipping Frozen Foods
For items like meat, seafood, and ice cream, dry ice keeps them frozen for the entire shipping process, even over long distances.
2. Pharmaceutical Shipments
Medications and vaccines requiring storage at ultra-low temperatures benefit from dry ice’s long-lasting cooling power.
3. Transporting Biological Samples
Lab samples or biological materials needing a consistent low temperature are securely transported using dry ice packs.
Why Should You Opt for Dry Ice Ice Packs in Cold Chain Shipping?
Reliability
Dry ice offers predictable and consistent performance. Its ability to maintain extremely low temperatures makes it the preferred choice in cold chain logistics.
Safety
When handled correctly, dry ice is safe. It is non-toxic and poses no risks to food safety, making it ideal for food packaging.
Longer Cooling Duration
Dry ice lasts longer than traditional ice packs and gel packs, reducing the frequency of replacements during transit.
How Dry Ice Ice Packs Benefit Your Business
Using a pack of 12 dry ice ice packs helps businesses by reducing the risk of spoilage and contamination. With fewer returns and complaints, customer satisfaction increases. Businesses can ensure their temperature-sensitive products arrive safely and on time.
User Engagement
Have Questions?
For more information about the right pack sizes and usage tips, feel free to reach out to our customer service.Customer Feedback
Many companies report a reduction in temperature-related shipping issues after switching to dry ice, with improved reliability and customer satisfaction.
FAQ: Frequently Asked Questions
Q1: How long do dry ice ice packs last during shipping?
Dry ice ice packs typically last 18–24 hours, depending on shipment size and environmental conditions.
Q2: Can I use dry ice for shipping food?
Yes, dry ice is safe for food shipments, provided you follow the proper safety guidelines for handling and packaging.
2025 Cold Chain Shipping Trends and Innovations
New Trends in Dry Ice and Cold Chain Logistics
The cold chain logistics industry continues to evolve, with a strong focus on improving dry ice efficiency. Automation, better packaging technologies, and real-time temperature monitoring are helping optimize dry ice use for shipping.
Key Developments
Enhanced Packaging: New technologies are reducing dry ice loss during transit, extending its cooling power.
Smart Monitoring: Real-time temperature tracking systems are becoming more common to ensure shipments remain within temperature limits.
Sustainability: Dry ice production is becoming more sustainable, with new methods focusing on reducing environmental impact.
Market Insights
The demand for dry ice continues to rise, especially within the pharmaceutical and food sectors. As businesses increasingly ship temperature-sensitive products, dry ice remains a reliable and cost-effective solution.
Conclusion and Recommendations
Summary
A pack of 12 dry ice ice packs is a reliable and efficient way to maintain the cold chain for perishable goods. With no water residue and extended cooling durations, dry ice is ideal for keeping your products frozen during transit.
Next Steps
Consider integrating dry ice ice packs into your cold chain logistics today. Contact us to find the best pack for your shipping needs, and ensure that your perishable products stay safe and secure.
About Tempk
Tempk specializes in cold chain logistics solutions, offering products like dry ice ice packs to ensure your shipments arrive in optimal condition. Whether shipping food, pharmaceuticals, or biological samples, Tempk provides the technology and expertise to maintain your product integrity.
Call to Action: Ready to enhance your cold chain operations? Reach out to Tempk’s experts and explore how our dry ice ice packs can improve your shipping efficiency.
How to Find the Best Deal on Dry Ice Packs

When shipping temperature-sensitive goods, finding the best deal on dry ice packs is crucial for maintaining product integrity and minimizing costs. Dry ice is indispensable for keeping goods frozen or chilled during transit, but prices can vary significantly depending on the supplier, quantity, and shipping terms. This article will guide you through how to find the best deals, what factors influence prices, and how to maximize your cold chain logistics for the best possible outcomes.

How to find the best deal on dry ice packs for your shipments?
What factors should you consider when purchasing dry ice packs?
How to save on dry ice for large-scale or commercial shipments?
How Can You Find the Best Deal on Dry Ice Packs for Your Shipments?
Dry ice is essential for keeping your perishable goods at the correct temperature, but finding the right deal requires a careful balance between cost and quality. Here are some practical steps to ensure you’re getting the best value.
Why Dry Ice Packs Matter
Dry ice is a powerful cooling agent with unique properties that make it ideal for cold chain logistics. It maintains ultra-low temperatures by sublimating directly from a solid to a gas, ensuring that your products stay cold without leaving any water residue. A good deal on dry ice should not only consider price but also the quality and effectiveness of the dry ice.
| Feature | Description | Practical Impact |
|---|---|---|
| Low Temperature | Sublimates at −78.5°C, maintaining frozen goods | Essential for transporting frozen or perishable items |
| Safe and Non-Toxic | Dry ice is safe for food and pharmaceuticals | Ideal for shipping temperature-sensitive items without contamination |
| Cost-Effective for Long Distances | Long transit times require less dry ice with proper insulation | Saves money when shipping over long distances or bulk shipments |
Finding the Right Supplier for the Best Deal
When looking for the best deal on dry ice, it’s crucial to consider multiple suppliers. Here’s how you can find a reliable and cost-effective option:
Compare Prices Across Multiple Suppliers: Always compare prices per unit of dry ice, including any additional shipping or handling fees.
Evaluate Delivery Options: If you’re purchasing in bulk or need regular deliveries, seek out suppliers offering discounts on large-volume purchases or frequent shipments.
Check for Quality Guarantees: Make sure the dry ice is stored and shipped properly to avoid sublimation before it reaches you.
Bulk Purchase Discounts
For large-scale operations, purchasing dry ice in bulk is often the best way to cut costs. Many suppliers offer significant discounts on bulk purchases, making it an ideal option for businesses shipping large quantities of perishable goods.
How to Maximize the Efficiency of Dry Ice Packs for Shipping?
Dry ice can be highly effective, but only when used in the correct conditions. Here’s how to ensure you’re making the most of your purchase:
Proper Packaging for Optimal Cooling
Choose the Right Dry Ice Quantity: The amount of dry ice you need depends on the size of your shipment and the expected transit time. Make sure to calculate accurately to avoid overuse.
Insulation is Key: Pair dry ice with high-quality insulation materials to extend its cooling duration. Proper insulation ensures that the dry ice remains effective for longer periods.
Pre-cool Your Containers: Pre-cooling your containers before packing them with dry ice and perishable goods helps optimize the cooling effect.
Temperature Monitoring During Transit
For some shipments, especially those containing highly sensitive goods like pharmaceuticals, investing in a temperature monitoring system can help ensure the product stays within the required temperature range throughout transit.
What Factors Should You Consider When Purchasing Dry Ice Packs for Shipping?
Several factors can influence the cost of dry ice, so it’s important to evaluate them carefully:
Quality vs. Cost
While lower prices may be appealing, always ensure that the dry ice you’re purchasing meets the necessary quality standards. Low-quality dry ice may sublimate too quickly, leading to higher costs as more is required to maintain the desired temperature.
Shipping Time and Delivery Costs
Shipping time and delivery charges can significantly affect the total cost. Opt for local suppliers when possible to reduce shipping costs, or consider suppliers with an established logistics network that can meet tight delivery schedules.
The Benefits of Buying Dry Ice in Bulk
Lower Unit Prices: Bulk purchases come with discounted rates, reducing the overall cost per unit.
Less Frequent Ordering: Ordering in bulk means you’ll need fewer reorders, saving time and effort.
Custom Packaging: Suppliers often offer custom packaging solutions for bulk orders, making it easier to handle your specific logistics needs.
2025 Trends in Cold Chain Shipping: What You Need to Know
Rising Demand for Dry Ice
The demand for dry ice continues to rise due to increased e-commerce and the growing need for temperature-controlled shipping of perishable goods. Over the last five years, dry ice shipments have increased by more than 20%.
What This Means for You
Increased Supplier Competition: More suppliers are entering the market, which leads to better prices and more options for businesses.
Innovations in Dry Ice Technology: Advances in packaging and sustainable dry ice production methods are helping businesses reduce costs and improve efficiency.
FAQ: Frequently Asked Questions
Q1: How long does dry ice last during shipping?
A: The duration depends on the amount used and the quality of insulation. Typically, dry ice lasts between 18-24 hours, but with proper packaging, it can last longer.
Q2: Can I use dry ice for food shipping?
A: Yes, dry ice is safe for shipping food as long as it’s handled according to safety guidelines.
Conclusion
Finding the best deal on dry ice packs doesn’t have to be complicated. By comparing suppliers, purchasing in bulk, and maximizing efficiency through proper packaging and insulation, you can save money while ensuring the safe transport of your temperature-sensitive goods.
Ready to optimize your cold chain logistics? Contact your dry ice supplier today to discuss bulk purchasing options and get the best rates for your business.
About Tempk
At Tempk, we specialize in providing cutting-edge cold chain logistics solutions tailored to your specific needs. Our products, including dry ice solutions, are designed to keep your goods in perfect condition. Partner with us for reliable, cost-effective shipping solutions.
Supplier Dry Ice Pack Sheets: How to Choose the Best Supplier in 2025

How to Choose the Best Supplier for Dry Ice Pack Sheets in 2025?
Dry ice pack sheets are essential for maintaining temperature-sensitive shipments in cold chain logistics, whether for pharmaceuticals, food, or biological samples. This article will guide you on how to select the best supplier for dry ice pack sheets, ensuring cost-effectiveness, quality, and compliance with industry standards.

What makes a reliable dry ice pack sheet supplier in 2025?
How do dry ice pack sheets compare to other cooling solutions?
What key performance metrics should you consider?
What are the latest trends in dry ice pack sheet technology?
What to Look for in a Dry Ice Pack Sheet Supplier?
Selecting the right supplier for dry ice pack sheets is crucial for maintaining your cold chain integrity. Several factors must be considered, including quality, delivery reliability, cost, and compliance with industry regulations.
Reliability and Delivery Time
A dependable supplier ensures timely delivery, avoiding disruptions in the cold chain. On-time deliveries are vital, especially for businesses relying on fast shipping to maintain product quality. Make sure the supplier offers flexible delivery options such as same-day or next-day shipping, depending on your needs.
Tip: Look for customer reviews and testimonials to evaluate the supplier’s reliability.
Regulatory Compliance
The right supplier must comply with regulatory standards such as DOT and IATA for dry ice handling. Working with a compliant supplier reduces shipping risks and ensures the safe transportation of goods.
| Factor | High-quality Supplier | Low-cost Supplier | Your Benefit |
|---|---|---|---|
| Product Quality | Premium dry ice, pure and reliable | Impure, unreliable | Protects your goods, reduces risks |
| Delivery Reliability | Same or next-day shipping | Longer lead times | Ensures timely and efficient shipping |
| Regulatory Compliance | Fully compliant | Risk of non-compliance | Reduces legal and safety risks |
Cost of Dry Ice Pack Sheets
While price is important, don’t compromise quality for the lowest cost. Bulk purchasing often offers discounts, but remember that poor-quality dry ice can lead to inefficiencies. Balance cost with reliability and quality to ensure cost-effectiveness without sacrificing performance.
How Do Dry Ice Pack Sheets Work?
Dry ice pack sheets are made from compressed solid carbon dioxide and maintain temperatures of -78.5°C. They are versatile and can be used in various packaging styles, from small boxes to large containers. These sheets sublimate directly from solid to gas, keeping products cold during long transit times.
Key Benefits:
Low Temperature Preservation: Keeps products frozen for extended periods.
Non-toxic: Made from carbon dioxide, making them safe for food and pharmaceuticals.
Lightweight: Reduces shipping weight and costs.
Why Choosing the Right Supplier is Crucial for Your Business
Selecting the best supplier directly impacts your shipping efficiency, cost management, and product safety. Here are the benefits of working with a reliable supplier:
Improved Efficiency: Timely deliveries of high-quality sheets reduce shipping delays and improve logistics processes.
Cost Savings: A supplier offering competitive pricing and efficient delivery helps reduce overall expenses.
Enhanced Customer Satisfaction: Ensures that temperature-sensitive products reach their destination safely and on time, enhancing your reputation.
Customization and Sustainability
Look for suppliers offering customization options to meet specific packaging and shipping needs. Additionally, sustainability is becoming increasingly important—consider suppliers who use eco-friendly practices or offer reusable products.
Cost Considerations for Dry Ice Pack Sheets
Cost is a key factor in choosing a supplier. However, weigh the cost against benefits such as reliable performance and high-quality materials. Bulk orders typically offer savings, but it’s important to consider long-term value and efficiency.
| Supplier Type | Dry Ice Cost per Sheet | Bulk Discount Available | Ideal for |
|---|---|---|---|
| Premium Supplier | $4.00 – $6.00 | Yes | Large businesses |
| Budget Supplier | $3.00 – $5.00 | Yes | Small businesses |
Applications in Cold Chain Logistics
Pharmaceuticals and Biologics: Ensure compliance with regulatory standards and maintain product integrity.
Perishable Foods: Keep food products at the required temperatures, reducing spoilage.
Medical Research: Maintain the integrity of biological samples, ensuring accuracy and reliability in research.
Trends for 2025: What’s Next for Dry Ice Pack Sheets?
Sustainability
Sustainability is a growing trend in cold chain logistics. Suppliers are focusing on eco-friendly materials and reusable solutions to meet environmental goals.
Smart Packaging
The integration of sensors and IoT technology into dry ice packaging helps monitor temperature in real-time, ensuring products remain within safe limits.
Automation
Suppliers are adopting automation to increase production speed and reduce costs. This also improves efficiency, helping suppliers meet growing demand without sacrificing quality.
Frequently Asked Questions
Q1: How long do dry ice pack sheets last during shipping?
Dry ice pack sheets can last between 18-24 hours, depending on sheet size and insulation quality. Using proper packaging materials can extend their effectiveness.
Q2: Can dry ice pack sheets be reused?
Yes, high-quality dry ice sheets can be reused up to 30 times, with proper cleaning and freezing.
Q3: Are dry ice pack sheets safe for food shipping?
Yes, dry ice pack sheets are non-toxic and safe for shipping food, ensuring products remain within the required temperature range.
Conclusion and Recommendations
Choosing the right supplier for dry ice pack sheets is key to optimizing your cold chain logistics. Consider factors such as reliability, cost, compliance, and customer service when selecting a supplier. Quality dry ice will enhance your shipping processes and help ensure the safety of your products.
Next Steps:
Research suppliers and compare their pricing and service offerings.
Request sample products to evaluate quality before placing large orders.
Choose a supplier who meets your specific shipping needs and business goals.
About Tempk
At Tempk, we specialize in providing premium cold chain solutions, including high-quality dry ice pack sheets. Our products are designed to meet the stringent requirements of various industries, ensuring the safe and efficient transport of temperature-sensitive goods.
Ready to enhance your cold chain logistics? Contact Tempk today to learn more about our reliable dry ice solutions.
Walmart Dry Ice Pack Sheets: Essential for Cold Chain Logistics

Introduction
Walmart dry ice pack sheets are a top choice for cold chain logistics, offering reliable and efficient cooling for temperature-sensitive products. From pharmaceuticals to food, maintaining optimal temperatures is crucial during shipping. In this guide, you will learn how Walmart dry ice pack sheets can enhance your cold chain shipping process in 2025.
What are Walmart dry ice pack sheets, and how do they work?
How do Walmart dry ice pack sheets compare to other cooling methods?
What are the benefits of using Walmart dry ice pack sheets for cold chain shipping?
What Are Walmart Dry Ice Pack Sheets?
Walmart dry ice pack sheets are specially designed cooling solutions made from dry ice and polymer materials. These sheets are perfect for maintaining low temperatures during the transportation and storage of perishable goods. The design of these sheets allows for better flexibility, efficient cooling, and easy handling, ensuring temperature-sensitive items stay frozen or cool throughout their journey.
Key Features of Walmart Dry Ice Pack Sheets:
Reusable: After use, these sheets can be refrozen and reused multiple times.
Flexible: Conforms to the shape of your products for better surface contact and even cooling.
Leakproof: Prevents any mess during thawing.
Long-lasting cold: Provides extended cooling, keeping items at the required temperature for longer durations.
How Do Walmart Dry Ice Pack Sheets Work?
Walmart dry ice pack sheets use polymer-based refrigerants that absorb water and freeze, then release cold energy over time. When activated, these sheets maintain temperatures as low as -18°C (0°F), which makes them ideal for frozen goods. The activation process is straightforward:
Soak: Submerge the sheet in water for 5–15 minutes.
Freeze: Place the soaked sheet in a freezer until it solidifies.
Use: Place the frozen sheet next to your items in the shipping container.
How Does Dry Ice Compare to Gel Packs and PCM?
| Cooling Method | Starting Temp | Duration | Best For | Hazmat Label | Reusability |
|---|---|---|---|---|---|
| Dry Ice Pack Sheets | -78°C | 24–48 hours | Frozen items, mRNA vaccines | Yes | 20+ cycles |
| Phase-Change Material (PCM) | -26°C | 30 hours | Produce, insulin | No | ~30 uses |
| Gel Packs | 0°C | 24–48 hours | Fresh foods, pastries | No | ~20 uses |
Dry ice sheets provide colder temperatures and are ideal for items that need to remain frozen. In comparison, gel packs are better for less sensitive goods, while phase-change materials (PCMs) are better for moderate temperature ranges.
Benefits of Walmart Dry Ice Pack Sheets in Cold Chain Logistics
1. Long-Lasting Cooling for Extended Shipments
Walmart dry ice pack sheets ensure that your temperature-sensitive goods remain at the required temperature for long periods. Dry ice sublimates directly into gas, providing consistent cooling without leaving liquid residue. This ensures products stay dry and properly cooled during transport.
2. Cost-Effective Cooling Solution
Compared to other cooling methods, dry ice is an affordable option. Walmart dry ice pack sheets are an economical choice for businesses looking to optimize their cold chain operations without sacrificing quality.
3. Environmentally Friendly
Since dry ice is made from naturally occurring carbon dioxide, it’s an eco-friendly solution. It doesn’t contribute to water pollution, unlike regular ice, and its use aligns with sustainability efforts in many industries.
4. Flexible and Easy to Use
Walmart dry ice pack sheets come in different sizes, offering flexibility for various shipping needs. Whether you’re shipping small or large quantities, these sheets can be tailored to provide the appropriate cooling for your goods.
How to Use Walmart Dry Ice Pack Sheets in Shipping
Here’s how to effectively use Walmart dry ice pack sheets in your cold chain logistics operations:
Determine the Amount of Dry Ice Needed: A general rule is 5–10 pounds of dry ice for every 10–15 pounds of product for shipments that require cooling for up to 24 hours.
Proper Packaging: Ensure your products are well-packaged and insulated before adding the dry ice pack sheets.
Use Appropriate Shipping Containers: Choose containers designed for dry ice shipping. These should have proper ventilation to allow the gas to escape safely.
Safety Protocols: Always use protective gloves when handling dry ice and ensure safe storage and disposal practices.
Walmart Dry Ice Pack Sheets vs Other Cooling Methods
Dry Ice vs Gel Packs
Dry Ice: Maintains a much lower temperature, ideal for frozen goods, and lasts longer.
Gel Packs: Easier to handle and safer but provide a more moderate temperature range.
Dry Ice vs Phase Change Materials (PCMs)
Dry Ice: Achieves much colder temperatures, making it ideal for pharmaceuticals and biologics.
PCMs: Maintain a stable temperature but are less effective for ultra-cold needs.
Future Trends in Dry Ice Use for Cold Chain Logistics
As the cold chain logistics industry evolves, the use of dry ice is becoming more sustainable and cost-effective. Innovations in dry ice technology and its applications are making it easier for businesses to maintain temperature-sensitive goods safely.
Key Trends:
Recycled CO2 Pellets: Dry ice manufacturers are using recycled CO2, reducing emissions and environmental impact.
Graphene Aerogel Liners: Improved thermal resistance, helping to keep dry ice cold longer.
AI-Driven Logistics: Automation tools are helping companies optimize their dry ice usage and reduce waste.
Common Questions about Walmart Dry Ice Pack Sheets
Q1: How long does Walmart dry ice pack sheet last?
It lasts anywhere from 24 to 48 hours depending on the size, amount of dry ice used, and the insulation of the packaging.
Q2: Can I ship food with Walmart dry ice pack sheets?
Yes, these sheets are perfect for shipping frozen food items and other perishables.
Conclusion
Walmart dry ice pack sheets are an essential tool for businesses engaged in cold chain logistics. With their cost-effectiveness, reusability, and environmental benefits, they offer an optimal solution for maintaining cold temperatures during transport. By understanding their use and following best practices, you can ensure the safe delivery of your temperature-sensitive products.
Next Steps:
Assess your needs: Use a dry ice calculator to determine the amount required.
Order Online: Shop for Walmart’s CryoSheets to avoid handling fees.
Implement a Monitoring System: Use Bluetooth temperature loggers to ensure compliance with FSMA regulations.
About Tempk
At Tempk, we specialize in advanced cold chain logistics solutions, offering high-performance dry ice products. Our sustainable, reusable dry ice sheets help businesses reduce costs and environmental impact while ensuring product safety.
Call to Action
Ready to optimize your shipping processes? Contact Tempk for a consultation on the best cold chain solutions.
Pack of 50 Dry Ice Packs for Cold Chain Shipping: Comprehensive 2025 Guide
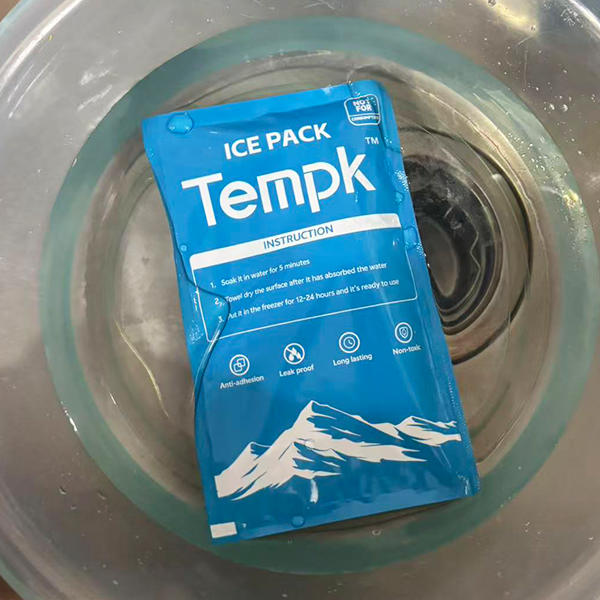
Walmart Dry Ice Packs – Your Guide for Effective Cold Chain Shipping
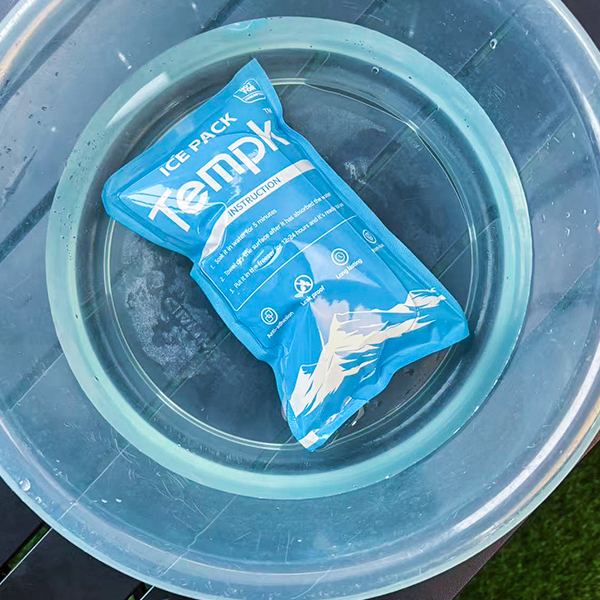
Are you looking for the best way to ship perishable goods, pharmaceuticals, or frozen foods in 2025? Walmart’s dry ice packs are a reliable solution for keeping your products at the ideal temperature during transit. In this guide, we will walk you through the benefits, uses, safety guidelines, and cost considerations of Walmart’s dry ice packs, ensuring your logistics operations stay on track.

What Are Walmart Dry Ice Packs?
Walmart dry ice packs are solid carbon dioxide used to keep goods at sub-zero temperatures during transport. Unlike regular ice, which melts and produces moisture, dry ice sublimates directly into gas, leaving no mess behind. These packs maintain a freezing temperature of -78.5°C (-109.3°F), making them ideal for shipping frozen goods that require strict temperature control.
How Do Dry Ice Packs Work?
Sublimation Process: Dry ice does not melt but instead transitions from solid to gas, ensuring there’s no water damage during transport.
Extended Cooling Duration: Dry ice can keep your products frozen for up to 48 hours without requiring replenishment.
No Water Residue: Perfect for keeping frozen foods, pharmaceuticals, and other sensitive items intact without creating mess or microbial growth.
| Cooling Solution | Duration | Temperature Control | Best For |
|---|---|---|---|
| Walmart Dry Ice Packs | 24-48 hours | -78.5°C (-109.3°F) | Frozen foods, vaccines |
| Gel Packs | 6-12 hours | 0°C to -10°C (32°F to 14°F) | Fresh perishables |
| Ice Packs | 6-12 hours | 0°C to 8°C (32°F to 46°F) | Beverages, chocolates |
Why Choose Walmart Dry Ice Packs for Cold Chain Shipping?
1. Reliability and Availability
Walmart’s vast network ensures that dry ice is easily accessible for both individuals and businesses. Whether shopping in-store or online, Walmart offers convenient options for both small and bulk purchases.
2. Affordable Pricing
Walmart provides competitive prices for dry ice packs, making it a budget-friendly solution for businesses looking to manage shipping costs.
3. Safety and Compliance
Handling and shipping with dry ice requires attention to safety. Walmart provides guidelines on proper usage, ensuring that you comply with safety regulations. Dry ice shipments often need to be labeled with “Dry Ice” and must be vented properly to prevent gas buildup.
Common Uses for Walmart Dry Ice Packs
1. Shipping Perishable Goods
Walmart dry ice packs are essential for shipping perishable items like seafood, meats, and frozen meals. Since dry ice sublimates into gas, there’s no water damage, which is crucial for maintaining the quality of perishable items.
2. Pharmaceutical Storage and Transport
Medical and pharmaceutical products, such as vaccines and insulin, require precise temperature control. Walmart’s dry ice packs maintain the necessary sub-zero temperatures, ensuring these temperature-sensitive items arrive safely at their destination.
3. Scientific and Laboratory Applications
In laboratories, dry ice is used to preserve biological samples, chemicals, and other materials that require frozen storage during transit.
4. Event Planning and Catering
Dry ice is often used in events for visual effects (e.g., fog or mist), but it also helps keep perishable food items fresh, including cakes and gourmet platters, making it perfect for event planners.
How to Use Walmart Dry Ice Packs Safely
Handling dry ice requires caution, as it is extremely cold and can cause burns. Here are the key safety tips:
Wear Gloves: Always use thick gloves or tongs to handle dry ice to avoid frostbite.
Proper Ventilation: Store dry ice in well-ventilated areas to allow gas to escape and prevent suffocation.
Avoid Direct Contact: Keep dry ice away from skin to prevent injury and ensure safety.
How Much Do Walmart Dry Ice Packs Cost?
The price of Walmart dry ice packs typically ranges from $1.50 to $3.00 per pound, depending on the size and quantity. Prices may vary based on location, but the affordability of Walmart’s options ensures that both individuals and businesses can rely on them for their cold chain logistics needs.
Alternatives to Walmart Dry Ice Packs
While Walmart offers reliable dry ice solutions, there are alternatives to consider based on your needs:
Gel Packs: Reusable and effective for short-term cooling.
Ice Packs: Suitable for less demanding cooling applications, though they may not keep goods frozen as long as dry ice.
Insulated Containers: For some uses, a combination of insulated containers and ice packs may suffice.
FAQs: Common Questions About Walmart Dry Ice Packs
Q1: How long does dry ice last during shipping?
Dry ice typically lasts 24–48 hours, depending on the size of the pack, packaging, and environmental conditions.
Q2: Can I use Walmart dry ice for shipping frozen foods?
Yes, dry ice is ideal for shipping frozen foods as it keeps them at the required temperature for extended periods.
Q3: How do I handle dry ice safely?
Always use gloves, ensure proper ventilation, and store dry ice in insulated but vented containers.
Conclusion: Why Walmart Dry Ice Packs Are Your Go-To Cold Chain Solution
Whether you’re shipping pharmaceuticals, frozen foods, or sensitive materials, Walmart’s dry ice packs provide a reliable, cost-effective, and safe solution for all your cold chain needs. With easy access, competitive pricing, and a range of sizes, Walmart ensures your products stay frozen and fresh for up to 48 hours.
About Tempk
At Tempk, we specialize in advanced cold chain logistics and packaging solutions, providing reliable tools for maintaining optimal temperatures during shipping. Whether you need dry ice or gel packs, Tempk ensures your shipments arrive safely and on time.
Contact us today to optimize your cold chain logistics and ensure your products stay fresh, every time.