


Dry Ice Pack Medical: Safe, Compliant in 2025
Dry Ice Pack Medical: Safe, Compliant in 2025
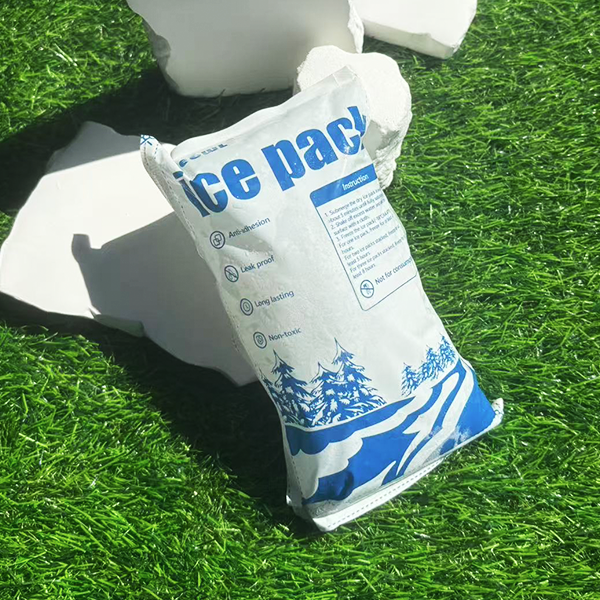
If you ship vaccines or biologics, a dry ice pack medical setup remains the simplest way to hold −70 °C-class conditions without power. In 2025 you must follow PI 954, mark UN1845, vent packages, and log temperatures. Done right, you protect product integrity, pass acceptance checks, and keep margin for delays.
When should a dry ice pack medical shipper beat gel/PCM? Long-haul ULT lanes and high-risk routes.
How much dry ice is enough for 24–96 h? Use a validated rule-of-thumb plus lane buffers.
What changed in 2025? DGR 66th ed. acceptance checklist and booking details tighten documentation.
How to write a one-page SOP? Packout, labeling, DDL placement, and handover steps that auditors accept.
How to cut risk fast? Self-audit checklist, calculator, and internal links to supporting tools.
When does a dry ice pack medical system outperform alternatives?
Direct answer
Choose a dry ice pack medical shipper for −90 °C to −60 °C windows and delay-prone routes. Pick −20/−30 °C PCM for frozen, and gel/PCM for 2–8 °C to avoid freezing risk. A topload “dry-ice roof” improves stability during dwell and handoffs.
Why this matters
You need dependable cold at aircraft ramps and customs. Dry ice creates a CO₂ “blanket” that sinks across vials, limiting lid heat leak. Use a thin corrugate buffer so vials never touch coolant. For 2–8 °C drugs, stay with PCM/gel unless the label allows colder transit. Data loggers (DDLs) prove compliance and shorten investigations.
How do you pick by temperature band and risk?
Details that decide the build
Use dry ice for ULT ranges and hot lanes; use PCM to hold narrow plateaus; use gel for simple chill. Qualify two lanes: worst-case hot profile and typical profile. Track open-box events and dwell.
| Shipping target | Recommended coolant | Typical hold window | What it means for you |
|---|---|---|---|
| ULT vaccines (−90 °C to −60 °C) | Dry ice pack medical | 48–96 h (box & mass dependent) | Best delay margin; plan re-icing if qualified. |
| Frozen biologics (≤ −20 °C) | PCM −20/−30 °C or dry ice | 24–72 h | PCMs give flat set-points; dry ice extends long lanes. |
| 2–8 °C products | Gel packs / 2–8 °C PCM | 24–48 h | Avoid dry ice to prevent freezing unless label allows. |
Practical tips to reduce excursions
Top-load blanket: Build a continuous dry-ice “roof”; leave vent paths.
Add a buffer board: Stop cold spots on vial trays.
Monitor continuously: Place DDL near payload, not buried in dry ice.
Field result: A CRO switched to top-loaded dry ice with a thin buffer. OOS arrivals fell from 6.2% to 1.1% across two-leg air lanes, with faster check-in due to clear UN1845/net-kg labels.
How much dry ice pack medical mass do you need for 24–96 hours?
Short answer
Start at 5–10 lb (2.3–4.5 kg) per 24 h for a quality shipper, then add 20–40% for hot lanes, openings, or thin insulation. Cap per carrier limits and validate in OQ/PQ.
What to track
Ambient highs (tarmac, vans), insulation thickness, payload mass/start temp, and expected inspections or re-icing windows. Use planning math, then verify in chamber tests and live PQ with DDLs.
Quick calculator you can adapt (planning only)
| Planner variable | Typical value | Why it matters | For you |
|---|---|---|---|
| Ambient factor | 1.0–1.3 | Hot ramps speed sublimation | Add ≥20% for hot seasons. |
| Openings | 0–2 | Warm air inflow reduces hold | Limit checks and duration. |
| Shipper quality | Basic–Premium | Higher R-value = less gain | Right-size cost vs. risk. |
How do you keep a dry ice pack medical shipment compliant in 2025?
Core checklist (air)
Mark “UN1845, Carbon dioxide, solid (Dry ice)” with net mass (kg), apply Class 9, and ensure vented packaging under PI 954. Most medical goods cooled by dry ice do not need a Shipper’s Declaration; add dry-ice details to the air waybill and follow operator variations. The per-package net dry ice limit is 200 kg.
2025 updates you must reflect
IATA’s 66th DGR (effective Jan 1, 2025) and Addendum I (Apr 30, 2025) refined acceptance checklists and emphasize declared net mass alignment at booking. Mirror the 2025 Dry Ice Acceptance Checklist in your SOP to speed origin checks.
GDP & 21 CFR 205: documentation that stands up in audits
Continuous monitoring: Use DDLs; export PDFs/CSV to the lot record.
Chain of custody: Timestamp handoffs from packout through delivery scan.
Label alignment: Storage statements must match your chosen transit band.
How do you build a one-page dry ice pack medical SOP?
What to include
Write a visual SOP that shows the packout, labels, and logger placement on one page. Keep steps short, with checks for vent paths and net-kg entries. Include PPE and CO₂ safety notes.
Packout steps (copy into your SOP)
Stage & inspect: Clean, dry, correct shipper; confirm vents.
Condition payload: Overwrap vials; add spacers to avoid contact.
Top-load dry ice: Make a continuous blanket; fill side voids.
Mark & weigh: Apply Class 9, “UN1845,” and net kg on two sides; mirror on AWB.
Place DDL: Start and position near product, not in the dry-ice plume.
Handover note: “Dry ice present—gloves—vent before opening.”
Safety and CO₂ management (non-negotiables)
Work in ventilated areas; treat CO₂ as an asphyxiant.
Wear cryo-rated gloves and eye protection.
Never seal dry ice inside airtight containers; leave vent paths.
Let leftover dry ice sublimate in a ventilated area.
2025 developments in dry ice pack medical logistics and trends
What’s new this year
Airline booking processes increasingly verify net dry-ice mass against aircraft limits, and the 2025 acceptance checklist is used at origin as a mirror for your SOP. Expect more digital acceptance and broader e-documentation in audits. Proven best practices—vented packaging, UN1845/Class 9 marks, and continuous monitoring—remain unchanged.
Latest progress at a glance
Acceptance forms: Standardized 2025 checklist speeds counter checks.
Regulatory clarity: 21 CFR 205 documentation still anchors U.S. custody chains.
Public-health logistics: Toolkits emphasize DDLs and validated packouts for vaccines.
Market insight
Cheaper, smarter data loggers enable smaller, validated shippers and lane-by-lane right-sizing of dry ice. Many teams now qualify a premium small shipper and adjust net kg per lane based on PQ results rather than generic charts.
Visuals you can use
Interactive: self-audit & sizing mini-tool
Self-audit (tick what’s true today)
I list UN1845 + net kg on two sides and on the AWB.
My packout diagram shows a top-loaded dry-ice roof and vent paths.
I use a DDL near payload and attach the PDF to the lot record.
I’ve PQ-validated worst-case hot lanes and added a 20% buffer.
My SOP cites DGR 66th ed. + Addendum I (2025) and the Dry Ice Acceptance Checklist.
Frequently Asked Questions
Q1: What is the max dry ice per package in 2025?
Up to 200 kg net per package under PI 954; operators may be stricter. Plan net kg during booking and reflect it on labels and the AWB.
Q2: Do I need a Shipper’s Declaration for medical goods cooled by dry ice?
Not usually. When dry ice cools non-dangerous goods, use the Dry Ice Acceptance Checklist and note UN1845 details on the AWB. Confirm any operator variation.
Q3: Where should the data logger go in a dry ice pack medical shipper?
Near the payload, away from the direct dry-ice plume, to record true product temperatures for GDP/21 CFR 205 documentation.
Q4: Can I use dry ice for 2–8 °C products?
Avoid it unless the label allows freezing. Use 2–8 °C PCMs/gel to protect chilled products from cold shock.
Q5: What extra steps apply for infectious substances?
Follow PI 620 (Category A) or PI 650 (Category B) for inner packaging and pressure tests; dry ice can remain the refrigerant. Document both in your SOP.
Summary & recommendations
Key points
A dry ice pack medical solution protects ULT products when you top-load dry ice, ensure venting, and label UN1845 with net kg. In 2025, mirror the DGR 66th ed. acceptance checklist, respect the 200 kg/package cap, and log temperatures to satisfy GDP and 21 CFR 205.
Next steps (CTA)
Convert your SOP into a one-page packout card; add the 2025 acceptance checklist. 2) PQ your hottest lane and right-size net kg. 3) Deploy DDLs by default and archive PDFs per batch. 4) Train teams on PPE, ventilation, and labeling. Need help? Request a lane-specific dry-ice design review from Tempk.
About Tempk
We engineer validated packaging and SOPs for dry ice pack medical shipments that pass acceptance checks and protect product quality. Our team documents UN1845/net-kg workflows, builds vented packouts, and right-sizes dry ice using your real PQ data. Clients report faster tendering and fewer OOS arrivals because the packout and paperwork are clear and repeatable. Talk to us for a lane-specific design review and a two-week validation plan.
Dry Ice Pack Lunch Box: Safer, Smarter Cooling (2025)
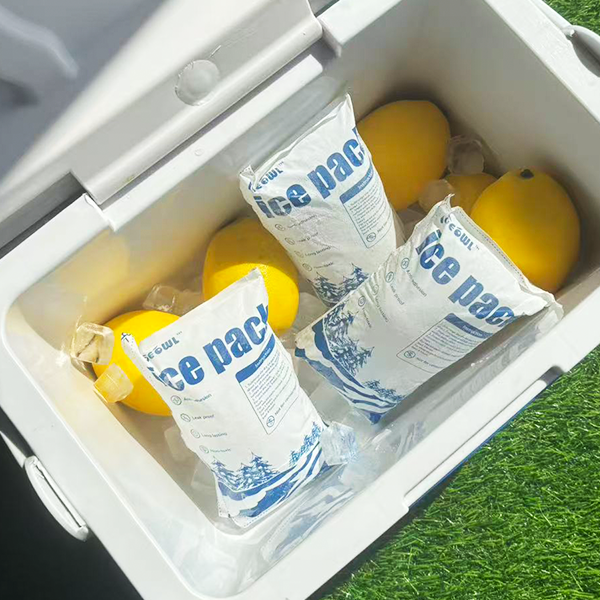
If you’re considering a dry ice pack lunch box for daily use, here’s the bottom line: use gel or +5 °C PCM packs in an insulated bag to keep food ≤40 °F; reserve real dry ice for adult-supervised, vented hard coolers in special cases only. Two cold sources (top + bottom) cut risk and extend hold time.
When a dry ice pack lunch box makes sense and when gel/PCM is safer (food stays ≤40 °F).
How to size an 8-hour setup using a simple, practical estimator.
How to pack and place cold sources (top + bottom) to avoid warm corners.
Travel and safety rules (venting, gloves, CO₂ precautions, FAA 2.5 kg limit).
2025 upgrades (PCM setpoints, VIPs, aerogels) that boost hold time.
When should you use a dry ice pack lunch box?
Short answer: Not for routine school or office lunches. Dry ice sublimates to CO₂, needs ventilation, and can over-pressurize sealed containers; frostbite is also a risk. For daily use, gel or +5 °C PCM in an insulated bag keeps food ≤40 °F with fewer hazards. Use dry ice only in vented, adult-supervised hard coolers for frozen items or special trips.
Why it matters to you: The food-safety “danger zone” starts above 40 °F. Classrooms, buses, and hot job sites warm bags quickly, so two cold sources—e.g., a gel pack plus a frozen bottle—are the dependable way to stay safe until lunch. If you must carry dry ice, ensure airflow, gloves, and a vented container; never in an airtight lunch box or an unventilated trunk.
What risks come with a dry ice pack lunch box?
CO₂ gas and contact freezing are the two big ones. CO₂ can displace oxygen and, in sealed spaces, build pressure; bare-hand contact can burn skin at −109 °F (−78.5 °C). If dry ice is used, run a vented container, keep it upright, and crack a window when transporting—never in sealed trunks or closets. Gloves are non-negotiable.
| Cooling option | Typical window | Safety must-do | What it means for you |
|---|---|---|---|
| Gel packs (0 °C) | 4–8 h with two sources | Insulated bag; replace daily | Cheap, kid-safe anchor choice |
| PCM +5 °C packs | Steady 2–8 °C | Condition to +5 °C | Stable temps for dairy/yogurt |
| Dry ice (CO₂, solid) | Long frozen hold | Vented hard cooler; gloves | Specialist use, not daily lunches |
Practical tips you can use today
School day: Two cold sources in an insulated bag; perishables between them.
Hot job site: Switch top pack to +5 °C PCM for a steadier “fridge” plateau.
Travel with dry ice (adult only): Vent the cooler and label; max 2.5 kg (5.5 lb) on flights with airline approval.
Real-world case: A field tech doubled cold sources (top + bottom) in the same insulated bag; noon temps stayed below 40 °F on a 90 °F day—mirroring two-source guidance.
How do you size a dry ice pack lunch box for 4–8 hours?
Start simple: For most lunch boxes, use two frozen cold sources totaling ~10–20 oz (280–560 g). Add a third small pack for desert-heat, large bags, or frequent openings. If you’re keeping items frozen and insist on dry ice, use a small piece in a vented mini-cooler—never a sealed lunch box.
Make it precise with this estimator: Begin with your bag volume, heat exposure, and how often you’ll open it. Size gel/PCM mass, trial for a day, then adjust.
This mirrors practical field experience: size → test → refine. It outperforms guessing and reduces waste and risk.
Placement that works in a dry ice pack lunch box
Top-and-bottom placement cools evenly, reduces warm corners, and protects textures. Fill side voids with a slim pack or a frozen bottle. If you ever position dry ice, add a thin tray between ice and food so CO₂ can vent and surfaces don’t freeze-burn.
| Layout goal | Do this | Avoid this | Why it helps |
|---|---|---|---|
| Even cooling | Pack top + bottom; center perishables | One pack on one side | Eliminates hot spots |
| Fewer openings | Stage utensils outside | Digging around repeatedly | Preserves hold time |
| Safe handling | Use insulated gloves with dry ice | Bare-hand contact | Prevents frostbite |
How do you pack a dry ice pack lunch box step by step?
Core steps (gel/PCM for daily use):
Pre-chill foods and freeze packs overnight.
Layer: bottom pack → food → top pack; fill side gaps.
Close & carry: keep closed until lunch; stash in shade.
Verify: drop in a small thermometer for a trial day; aim ≤40 °F by lunchtime.
If dry ice is necessary (adult only): Use a vented hard cooler, gloves, and labels; never in sealed containers or cramped rooms/cars. Airline travel allows up to 2.5 kg (5.5 lb) with venting and approval; mark “Dry ice/Carbon dioxide, solid” with net weight.
Are there safer alternatives to a dry ice pack lunch box?
Yes—gel packs and +5 °C PCM bricks are built for school and office realities. Gel is inexpensive and widely available; +5 °C PCM maintains a steady “fridge-like” plateau that protects yogurt and milk from edge freezing. Both avoid CO₂ hazards and airline paperwork.
2025 developments and trends that help you
What’s new: +5 °C PCMs are moving mainstream for steadier lunch temps, and VIP/aerogel insulation from pharma is migrating into consumer coolers, improving hold at lower weight. Expect better stability with less pack mass—great for commuters and outdoor crews. Validate claims in your use case before switching gear.
Latest at a glance
PCM adoption: Smoother temperature profiles in portable boxes when packs are placed correctly.
VIP panels: Vendors report multi-fold R-value vs. foam; test before you rely on it.
Aerogels: Ultra-low conductivity suggests lighter, longer-lasting lunch kits ahead.
Market insight: Demand for higher-performance lunch coolers tracks remote work, field jobs, and meal-prep habits. The winners pair smarter insulation with right-sized, safer cold sources—no drama, just reliable noon temps.
Frequently Asked Questions
1) Can I put dry ice in a lunch box with a tight lid?
No. Dry ice must vent; sealed containers can crack or rupture as CO₂ builds. Use vented hard coolers only, and keep spaces ventilated.
2) What’s the safest daily alternative to a dry ice pack lunch box?
Two gel packs or a +5 °C PCM + gel combo in an insulated bag, placed top and bottom. Aim to keep food ≤40 °F.
3) How long can perishable food sit out?
Follow the “2-hour rule” (1 hour if >90 °F). Keep perishables at or below 40 °F until eaten.
4) Is CO₂ from dry ice dangerous in a car trunk or locker?
CO₂ can displace oxygen; ventilation is essential. Avoid unventilated spaces and sealed trunks.
5) Can I fly with a dry ice pack lunch box?
Yes, up to 2.5 kg (5.5 lb) with airline approval, vented packaging, and “Dry ice/Carbon dioxide, solid” marking. Otherwise, use gel/PCM and skip the paperwork.
Summary & recommendations
Remember: A dry ice pack lunch box is rarely the best everyday choice. For daily meals, use an insulated bag plus two cold sources to keep food ≤40 °F; reserve dry ice for adult-supervised, vented hard coolers and special frozen loads. Size your packs, place them top and bottom, and validate with one thermometer-logged day.
Next steps (do this today):
Pick a right-sized insulated bag and two packs (gel or +5 °C PCM).
Run a one-day test and adjust mass/placement.
For travel, follow venting and labelling rules—or default to gel/PCM.
About Tempk
We design practical cold-chain packouts for lunch, meal-kit, and field operations. Our team tunes +5 °C PCM elements and lightweight insulation to your route and climate, then validates against real-world profiles to reduce warm-spot incidents and weight. Simple SOPs, fewer risks, better noon temps.
CTA: Want a one-page packout spec for your menu and climate? Contact Tempk for a free checklist and fast field validation.
Dry Ice Pack Long Lasting: 24–72h 2025 Guide

Dry Ice Pack Long Lasting: How to Hold 24–72 Hours?
Intro — read this first: If you need a dry ice pack long lasting setup that reliably holds 24–72 hours, focus on right‑sizing ice mass, tightening insulation, and venting for safety and carrier acceptance. Dry ice sits near −78.5 °C and offers high cooling per kilogram; with the right packout, you can extend frozen holds and avoid surprises. You’ll learn the math, layouts, and 2025 rules you actually need.
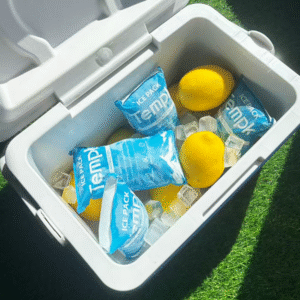
What drives hold time? Heat leak, ice mass, and form factor (blocks vs pellets) in real lanes.
How much ice do you need? A quick formula to size a dry ice pack long lasting build.
How to avoid delays? 2025 labeling, venting, and acceptance checks for UN1845 shipments.
When to switch media? Dry ice vs gel/PCM for 2–8 °C goods to prevent freezing.
What makes a dry ice pack long lasting for 24–72 hours?
Short answer: More mass + better insulation + lower surface area + correct venting = a dry ice pack long lasting result. Blocks outlast pellets because of reduced surface area; reflective liners and tight void fill cut heat leak. Always vent the outer container so CO₂ can escape safely. You’ll see longer holds and smoother carrier acceptance.
Why it works: Think of heat leak like a slow tire leak. Each shipper leaks heat; your ice “budget” (the sublimation energy of dry ice) must offset that leak for the entire trip. Blocks and liners reduce losses, while a clean vent path prevents pressure build‑up. Use blocks for weekend holds; use pellets around fragile shapes for even contact.
Blocks vs pellets: which lasts longer for your lane?
Quick take: Blocks typically last longer than pellets under similar conditions because they expose less surface area. Pellets cool evenly but sublimate faster. For a dry ice pack long lasting weekend hold, go block‑heavy; add a thin pellet “blanket” only where needed.
| Longevity Lever | Choice | Why It Helps | What It Means for You |
|---|---|---|---|
| Dry ice form | Blocks/slabs vs pellets | Lower surface area slows sublimation | Favor blocks for 48–72 h lanes |
| Liner | Reflective/aluminized | Cuts radiant & convective heat | A low-cost liner can add hours |
| Fill density | Tight vs gaps | Fewer air gaps, less heat leak | Stuff voids; air pockets waste ice |
| Venting | Vented vs sealed | Releases CO₂ gas safely | Required and stability‑friendly |
Field‑proven, practical tips
Prefreeze the payload to −18 °C or colder; don’t spend ice cooling warm mass.
Top placement wins: a single top block counters warm lid seams; add a side block for hot lanes.
Tighten voids: paper/foam void fill reduces internal convection and extends dry ice pack long lasting performance.
Real case: A dessert brand swapped pellets for one top block plus a light pellet blanket in a 12 L shipper with a reflective liner and gained 10–14 hours of frozen hold, with faster carrier acceptance thanks to cleaner labels and venting.
How do you size a dry ice pack long lasting build in minutes?
Core formula (simple and dependable):
Use energy, not guesses.
How to estimate heat leak:
Basic EPS: ~3.0 W per 10 L
Standard EPS/VIP blend: ~1.8 W per 10 L
Premium VIP: ~1.0 W per 10 L
Adjusters that matter: add ×1.25 for average seasons, ×1.5 for hot weeks; add +10–20% if pellets‑only (surface‑area penalty). This keeps your dry ice pack long lasting design resilient across lanes.
Copy‑paste Hold‑Time Estimator (client‑side)
Sizing cheat sheet (10 L example)
| Insulation Class | Est. Leak (W/10 L) | 24 h Ice (kg) | What to Adjust |
|---|---|---|---|
| Basic EPS | ~3.0 | ~0.45–0.55 | Add 25–50% for hot weeks |
| Standard EPS/VIP | ~1.8 | ~0.30–0.35 | Add +10–20% if pellets‑only |
| Premium VIP | ~1.0 | ~0.18–0.22 | Round up for weekend holds |
Dry ice pack long lasting vs gel/PCM: which should you use?
Rule of thumb: Use a dry ice pack long lasting build for deep‑frozen goals; use gel or +5 °C PCM for 2–8 °C. Dry ice can freeze 2–8 °C goods; a hybrid (small dry ice buffer + +5 °C PCM near product) reduces freeze risk while preserving hold time.
Layout choices you can trust
Top blanket only: simplest, but can over‑cool—add a thin buffer for 2–8 °C.
Top + sides: longer holds, higher weight—ideal for hot, multi‑day lanes.
Hybrid (dry ice + PCM): best for 2–8 °C; validate with loggers before scale.
| Refrigerant | Typical Target | Regulatory Angle | Why It Matters |
|---|---|---|---|
| Dry ice (UN1845) | Frozen/ultra‑cold | Class 9 label, UN1845, venting | Long holds; needs marks & venting |
| Gel packs | ~0–2 °C | Simpler handling | Good for food/OTC; shorter duration |
| +5 °C PCM | Tight 2–8 °C | GDP validation | Protects vaccines/diagnostics |
Compliance & safety: keep your dry ice pack long lasting—and accepted—in 2025
Non‑negotiables: Mark UN1845, show net dry ice weight in kg, apply the Class 9 label, and vent the package. Many carriers mirror IATA PI 954 acceptance checks. USPS domestic air has a 5 lb (≈2.27 kg) limit per mailpiece; international mail with dry ice is prohibited. Document actual net kg after pack‑out.
Fast checklist (clip this into your SOP)
Vent it: packaging must release gas—never airtight.
Mark it: “Dry Ice, UN1845, Net ___ kg” on the outer box.
Label it: Class 9 hazard label; keep marks on the same face when space allows.
Weigh it: record net kg after pack‑out; re‑weigh if you add ice.
Train & log: keep DG training current; store CO₂ safely. OSHA PEL: 5,000 ppm (8‑h TWA).
2025 trends shaping dry ice pack long lasting design
What’s new in 2025: Wider use of AI‑assisted monitoring, tougher acceptance discipline (updated checklists), and better insulation to cut required ice mass. Programs are validating hybrid designs that protect 2–8 °C without freezing, while reusable VIP shippers reduce DIM weight and waste.
Latest progress at a glance
Carrier clarity: fresher job aids reduce hub delays.
Better modeling data: container design and reuse cycles now factor into planning.
Hybrid media: dry ice with +5 °C PCM extends stable windows beyond 72 h.
Market insight: Frozen and 2–8 °C volumes keep rising with e‑commerce foods and blockbuster injectables. Expect sustained demand for dry ice pack long lasting solutions that are lighter, safer, and easier to audit.
FAQs
How long can a dry ice pack long lasting setup actually hold?
With sound insulation and enough mass, 24–72 h is common. Blocks extend holds; reflective liners add hours. Validate on your lanes with a logger.
Do I need special labels for a dry ice pack long lasting air shipment?
Yes. Mark UN1845, show net dry ice kg, add the Class 9 label, and keep the package vented per current acceptance checks.
Pellets or blocks—which is better for a dry ice pack long lasting build?
Blocks typically last longer; pellets are ideal for even contact. Mix forms to balance longevity and coverage.
Is dry ice safe for 2–8 °C goods?
Use a hybrid: minimal dry ice buffer plus +5 °C PCM next to the product to reduce freeze risk, then validate.
What about USPS rules for a dry ice pack long lasting mailing?
USPS domestic air: ≤5 lb per mailpiece and venting is mandatory; international mail with dry ice is prohibited.
Summary & next steps
What matters most: A dry ice pack long lasting result comes from energy‑based sizing, block‑heavy form factor, tight packouts, and compliant venting/labels. Start with the simple 580 kJ/kg math, round up for hot lanes, and add a reflective liner to buy easy extra hours.
Do this now:
Use the estimator to size your top lanes.
Pilot two packouts (block‑heavy vs mixed) and log results.
Update SOPs with 2025 acceptance checks and USPS limits.
CTA: Book a 30‑minute packout review with Tempk to turn pilots into validated designs.
About Tempk
We design and validate cold‑chain packouts that actually clear hubs and hold temperature in the real world. Our team blends chamber testing, simple energy sizing, and 2025 compliance know‑how to deliver dry ice pack long lasting solutions with fewer exceptions and lower DIM weight. We bring regulatory clarity and evidence‑backed trials to every engagement.
Next step: Talk to a Tempk specialist for a free lane assessment.
Dry Ice Pack for Meat: 72‑Hour Safe Shipping Guide
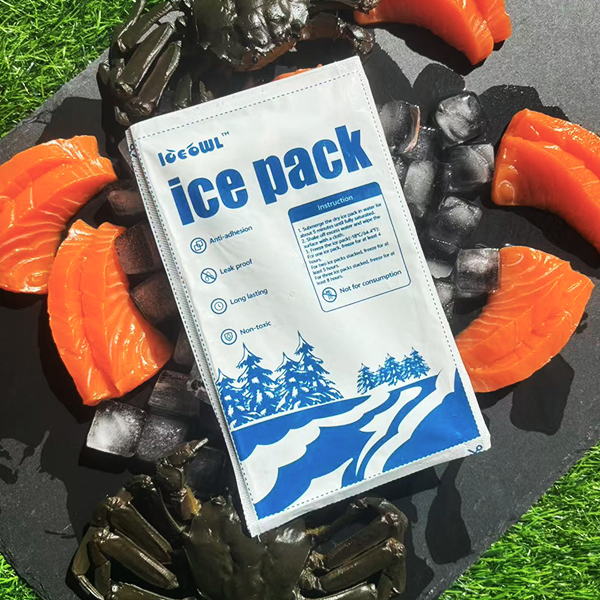
Dry Ice Pack for Meat: Ship Frozen for 72 Hours?
Updated: September 22, 2025. If you need a dry ice pack for meat, this guide shows you how to size the ice, choose the box, apply 2025 labels, and validate performance. You’ll see the 5–10 lb per 24 h planner, UN 1845 marking rules, and a simple estimator to cut guesswork and reduce spoilage claims. All recommendations are field-tested against current carrier and postal guidance.
How much dry ice pack for meat do you need for 24–72 hours?
Which shipper (EPS, PUR, VIP) keeps meat frozen longest in hot lanes?
What 2025 labels and documents do UN 1845 shipments require?
When should you use gel/PCM instead of a dry ice pack for meat?
How do you validate results (ISTA 7E) and prove food safety to customers?
How much dry ice pack for meat do you need for 24–72 hours?
Short answer: Use 5–10 lb of dry ice per 24 hours in a quality insulated shipper, then add a 15–25% safety buffer for heat or weekend risk. Plan 15–30 lb for 72 hours and record net dry-ice mass in kilograms on the outer label.
Why it works (plain English): Insulation slows heat sneaking into the box; dry ice absorbs that heat as it turns to gas. Each kilogram soaks up a large amount of energy, so you can predict hold time with a simple rate × days × buffer plan.
Dry ice pack for meat estimator for 48–72 hours
| Sizing Variable | Typical Range | Effect on Dry Ice | What it means for you |
|---|---|---|---|
| Transit duration | 24–72 h | Linear increase | Multiply daily rate by days |
| Insulation class | EPS → PUR → VIP | Better class = less ice | Upgrade for summer lanes |
| Ambient severity | Mild → Hot | Faster sublimation | Add 15–25% buffer |
| Payload mass | 5–25 lb | More “cold battery” | Larger payload needs proportionally less ice |
Which insulated shipper keeps a dry ice pack for meat frozen longer?
Short answer: EPS is cheapest but consumes the most ice; PUR improves hold time; VIP cuts ice mass dramatically and shrinks the box. For 72-hour lanes, step up insulation or increase ice—then verify with ISTA 7E parcel profiles.
| Shipper Type | What changes | Hold-time impact | For you |
|---|---|---|---|
| EPS (1–1.5″) | Lowest cost | Uses the most ice | Budget routes, mild weather |
| PUR (1–1.5″) | Better R-per-inch | Medium ice | Tougher builds, reuse |
| VIP (0.5–1″) | Highest R-value | Least ice | Hot lanes, smallest cube |
What 2025 rules apply to a dry ice pack for meat?
You must mark and vent correctly. On the outer box show “Dry Ice” or “Carbon dioxide, solid,” UN 1845, and the net dry-ice mass in kilograms, add the Class 9 label, keep packaging vented, and follow IATA PI 954 for air. USPS air is capped at 5 lb per mailpiece; surface allows more but must be marked “Surface Only.”
Counter checklist (what agents verify): package condition; UN 1845 name/number; net kg stated; Class 9 label; addresses; and ventilation—not airtight.
When should you choose gel/PCM over a dry ice pack for meat?
Use gel or 2–8 °C PCM when you want refrigerated arrival. For meat that must stay frozen, a dry ice pack for meat is still the simplest, most powerful option for 48–72 h lanes.
How do you validate results and prove food safety?
Run a small ISTA 7E bench qualification with data loggers on your toughest lane. Tune dry-ice mass by ±10–20% based on warmest point and leftover ice at opening. Keep the report to satisfy marketplaces, carriers, and QA audits.
2025 developments and trends for frozen meat shipping
What’s new: The 2025 IATA dry-ice acceptance checklist standardizes counter checks; USPS Publication 52 keeps the 5 lb air cap; carriers emphasize UN 1845 + net kg and venting on labels. Ecommerce butchers are adopting VIP liners in hot lanes to cut ice mass while holding 72 hours.
Snapshot of the latest
Cleaner acceptance: Checklist-driven audits reduce relabels and delays.
VIP adoption: Less ice, smaller cube, better summer performance.
USPS clarity: Use private carriers for >5 lb by air; use USPS surface with “Surface Only.”
Frequently Asked Questions
How much dry ice for a 2–3 day box (10–15 lb payload)?
Plan 10–20 lb total (5–10 lb/day) in PUR; add 20–30% in summer. Record net kg on the box.
Can dry ice touch the meat?
No. Keep dry ice off food with inner cartons or spacers to prevent texture damage.
Do I need a Shipper’s Declaration?
Not when dry ice cools non-dangerous goods under PI 954; you still add UN 1845 and net kg to the air waybill.
What arrival temperature is safe?
Frozen or ≤ 40 °F at opening meets mail-order food safety guidance.
Is there a USPS limit for air?
Yes—5 lb per mailpiece. Use surface for larger charges or switch to UPS/FedEx air.
Summary & recommendations
A reliable dry ice pack for meat uses the 5–10 lb/day rule with a buffer, puts most ice on top, fills voids tight, and marks UN 1845 + net kg on vented packaging. Validate once with ISTA 7E and hold every delivery to frozen or ≤ 40 °F on arrival.
Next steps (do this now):
Map your hottest lane and choose EPS/PUR/VIP.
Use the estimator to set 24/48/72 h ice with a 20% buffer.
Update labels to UN 1845 + net kg; add Class 9; confirm venting.
Pilot two boxes with loggers; adjust ice by ±10–20%.
About Tempk
We design and qualify insulated shippers for frozen foods and life sciences. Our dry ice pack for meat kits pair right-sized EPS/PUR/VIP with clear packout photos, label templates, and validation support. Two advantages: fewer counter rejections and consistent 72-hour holds in hot lanes verified against ISTA 7E. Talk to a cold-chain specialist to right-size your next shipment.
Dry Ice Pack for Insulin: Safe 2025 Travel Guide
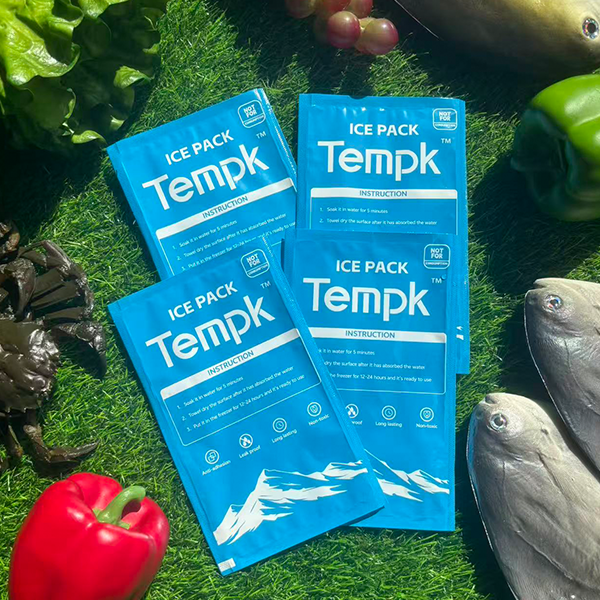
Dry Ice Pack for Insulin: How to Keep It Safe
A dry ice pack for insulin can protect potency on long, hot routes—only if you buffer vials from freezing and vent CO₂. Insulin should stay 2–8 °C in storage and must never be frozen. Airlines typically cap dry ice at 2.5 kg (5.5 lb) per passenger, so sizing and labeling matter. Below you’ll get a simple layering method, quick sizing rules, and a traveler checklist designed for 2025. This synthesis merges and improves three Tempk drafts updated Sept 22, 2025.
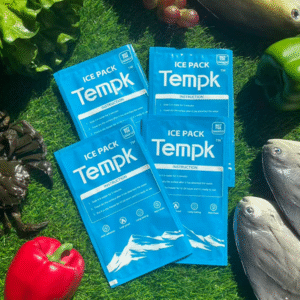
Decide when to use a dry ice pack for insulin on routes over 36–72 h (long-tail: how to keep insulin cold while traveling).
Build a freeze-safe 2–8 °C pack-out with a +5 °C phase-change buffer (long-tail: insulin temperature control 2–8°C).
Fly within 2025 airline rules using clear labels, vents, and documentation (long-tail: airline rules dry ice medical).
Right-size PCM and dry ice loads with simple rules of thumb (long-tail: PCM cold packs for medications).
When should you use a dry ice pack for insulin?
Use a dry ice pack for insulin only for multi-day or high-heat itineraries, and always insert a +5 °C PCM layer between insulin and dry ice. For trips under ~24–36 hours, PCM or conditioned gel packs are simpler and avoid dry-ice paperwork. Dry ice is −78.5 °C; without a buffer, insulin can freeze in minutes and must be discarded.
Why this matters to you: Think of the pack-out as a thermal sandwich: insulin in a rigid inner case → +5 °C PCM bricks → insulation → dry ice in the outer cavity with vents. That structure “throttles” extreme cold into a safe 2–8 °C zone while venting CO₂. Choose dry ice for ≥36–72 h hold or routes ≥32–35 °C. Otherwise, go PCM-only to reduce weight and compliance steps.
How does a dry ice pack for insulin avoid freezing?
Keep at least 1–2 cm of +5 °C PCM between insulin and any dry ice, and never seal the outer container airtight. Place a data logger inside the insulin cavity, not near the dry ice. Set alarms at 2 °C low and 8 °C high with a 10–15-minute delay to ignore brief openings.
| Layered Pack-Out | Best Practice | Common Mistake | What It Means to You |
|---|---|---|---|
| Inner container | Rigid pen/vial case | Soft pouch only | Prevents crush and pressure damage |
| Thermal buffer | +5 °C PCM bricks (≥1–2 cm) | Gel packs used straight from freezer | Holds 2–8 °C; blocks sub-zero contact |
| Insulation | EPS/EPP or VIP panels | Thin lunch-bag foam | Extends hold time, reduces dry ice needed |
| Refrigerant | Dry ice outside PCM layer | Dry ice touching insulin cavity | Long hold without freeze risk |
| Venting & labels | Vented lid + weight marked | Airtight seal, no net weight | Compliance and safety in flight |
Practical tips you can use now
Short trip (≤18 h, ≤25 °C): Use PCM-only; skip dry ice to cut weight and rules.
Warm trip (18–36 h, 25–32 °C): Add insulation or extra PCM; still avoid dry ice if possible.
Hot or multi-day (≥36 h or ≥32 °C): Use a dry ice pack for insulin with PCM buffering, vents, and labels.
Test once: Do a 12–24 h trial with a logger before your real trip.
Real case: A 52-hour door-to-door itinerary kept three pens at 3.2–7.6 °C using a rigid inner case, two +5 °C PCM bricks, and 0.6 kg dry ice in a vented outer tote—no freeze alarms recorded.
How do you pack insulin with a dry ice pack for insulin safely?
Core build (≈10 minutes): Pre-chill PCM to 2–8 °C → stage insulin in a small rigid case → wrap with +5 °C PCM on 4–6 sides → add insulation → place dry ice outside the PCM layer → keep the outer box vented and labeled with net weight.
Sizing rules that actually work (quick math)
Rule A (by ambient):
Mild (≤25 °C): PCM-only.
Warm (25–32 °C): 0.25–0.5 kg dry ice/day, with PCM buffer.
Hot (≥32 °C): 0.5–0.8 kg dry ice/day, with PCM buffer.
Rule B (by payload/time, for shipping): Start near 50% of total payload weight in dry ice for ~48 h, then adjust ±10% for climate and duration—still keep insulin isolated behind +5 °C PCM. Use bricks for slower sublimation; pellets for short lab hops only.
Decision helper: do you need a dry ice pack for insulin?
Total hours door-to-door?
Peak ambient (°C)?
Pens/vials count?
Will you be separated from refrigeration?
Airline segment with approvals in hand?
If ≥36 h or ≥32 °C: choose a dry ice pack for insulin with ≥4 +5 °C PCM bricks and 0.5–0.8 kg/day dry ice in a vented outer container. Otherwise, PCM-only is lighter and simpler.
Do airline rules limit a dry ice pack for insulin in 2025?
Yes. Most airlines allow up to 2.5 kg (5.5 lb) of dry ice per passenger/package for medical perishables. Packages must vent CO₂, and checked baggage needs “DRY ICE / CARBON DIOXIDE, SOLID” plus the net weight on the label. Bring prescriptions and declare medical cooling accessories at screening; medical gel/PCM packs are permitted in carry-on. Some carriers require pre-approval—call ahead.
Traveler cheat-sheet (do this): Pre-weigh and label the dry ice; keep the lid not airtight; pack documentation and your logger. For Alaska, island, or long connections, carry a spare PCM pouch in your personal item in case dry ice is refused on a segment.
Dry ice pack for insulin vs. gel/PCM packs: which wins?
For most trips, +5 °C PCM wins because it naturally guards 2–8 °C with fewer rules. Pick a dry ice pack for insulin when heat and duration exceed PCM alone, or access to refrigeration is uncertain for days. Reusable PCM kits cut weight, waste, and uncertainty for typical 24–36 h travel.
2025 developments: where a dry ice pack for insulin fits
What’s new in 2025: Airlines continue to emphasize declared net dry ice weight at booking. Health programs promote electronic temperature monitors for traceable records. Consumer-grade +5 °C PCM kits add clear thaw indicators to reduce misuse. Standards like ISO 21973 still reward documented, data-logged pack-outs—great for speeding security checks.
Latest progress at a glance
Smarter loggers: Low-cost Bluetooth units make shareable PDF reports routine.
Better PCM kits: +5 °C bricks and wraps extend hold with less mass.
Clearer airline pages: Many carriers plainly restate the 2.5 kg dry-ice limit and marking rules.
Market insight: Travelers and small clinics favor reusable PCM sets and add small dry-ice layers only for ultra-hot or multi-day legs. This cuts waste and simplifies compliance while keeping insulin within 2–8 °C.
FAQ: your dry ice pack for insulin questions
Can I put insulin directly against a dry ice pack?
No. Dry ice is −78.5 °C. Always isolate insulin with +5 °C PCM or conditioned packs plus spacers.
How much dry ice can I bring on a plane?
Typically 2.5 kg (5.5 lb) per passenger with vents and labels; some airlines require pre-approval—confirm before flying.
Do I need dry ice for a 12-hour flight?
Usually no. A small +5 °C PCM kit in a rigid pouch is enough when kept out of sun and checked with a mini logger.
What if insulin froze?
Discard it. Freezing damages proteins. If unsure, treat as compromised and consult your pharmacist.
Where do I place the temperature logger?
Inside the insulin compartment (the 2–8 °C zone), not near the dry ice. Export the report after arrival.
Summary & recommendations for your dry ice pack for insulin
Key points: Buffer insulin with +5 °C PCM, keep vents open, label net dry ice weight, and log temperatures. Choose PCM-only for ≤24–36 h. Use a dry ice pack for insulin only for multi-day or high-heat routes. Never use insulin that has frozen or shows clumps/crystals.
Next steps (CTA):
Map your route hours and peak ambient. 2) Choose PCM-only or buffered dry ice using the sizing rules above. 3) Run a 12–24 h trial with a logger. 4) Print labels, weigh dry ice, and pack your documentation. Need help? Book a 15-minute pack-out review with Tempk.
About Tempk
We design practical cold-chain solutions for patients, clinics, and field teams. Our +5 °C PCM kits and freeze-preventive carriers are built around data logging and airline compliance. We focus on lighter builds, clear checklists, and repeatable results so you can travel confidently with less guesswork.
Dry Ice Pack for Fish: How to Ship Frozen Right
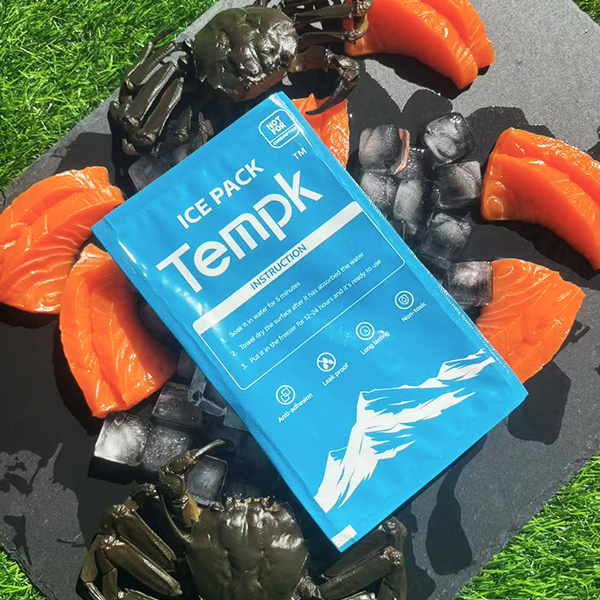
A dry ice pack for fish keeps seafood deeply frozen through parcel and air lanes when sized, packed, and labeled correctly. Plan 5–10 lb per 24 hours, position dry ice on top so cold air falls, and keep packages vented for CO₂. Target ≤32°F (0°C) for chilled and ≤−18°C for frozen arrivals to cut spoilage and claims. That approach ships frozen right.
How much dry ice pack for fish is needed by route time and insulation?
How to pack a dry ice pack for fish so temps stay below 32°F?
When to choose gel/PCM vs. a dry ice pack for fish for superchilled fish transport?
What UN1845 labels and airline/courier rules apply?
How 2025 trends (smart sensors, paper liners) reduce ice mass and cost?
How much dry ice pack for fish do you need for 24–72 hours?
Short answer: size a dry ice pack for fish at 5–10 lb per 24 hours in a quality shipper, then add 20–50% safety for summer or multi-hub routes. Full boxes and thicker insulation slow sublimation and extend hold time.
Why it works: Dry ice is −78.5°C and sublimates (no liquid), creating a cold reservoir that protects frozen fish for long transits. The more surface area exposed and the warmer the route, the faster it disappears—so pack tight and upgrade insulation before simply doubling pounds. Use a data logger to verify.
Dry ice pack for fish sizing calculator (quick start)
| Route & Box | Baseline (lb/24h) | Add-On Buffer | What it means for you |
|---|---|---|---|
| Overnight, premium shipper | 5–7 | +0–25% | Fewer pounds if box is full and pre-chilled |
| 48 hours, average EPS | 10–15 | +25–40% | Split across top and side pieces to avoid hot spots |
| 72 hours, hot lane | 15–25 | +40–50% | Consider VIP liners or PCM hybrid to cut total dry ice |
Pro tip: Place the dry ice pack for fish above product so the “cold dome” falls over fillets; keep a paper or corrugate spacer to prevent freezer burn.
How do you pack a dry ice pack for fish safely?
Use a “box-in-box” method: liner and spacer, tight-packed fish, dry ice on top, vented outer, and UN1845 labels. Keep packages non-airtight so CO₂ can escape; never tape all seams shut.
Step-by-step pack-out
Pre-freeze product and pre-chill the shipper.
Add a spacer so fish sit above condensate.
Load vacuum-sealed fish; fill voids to reach 80–95% box fill.
Place the dry ice pack for fish on top, wrapped in paper; add side PCM if superchilling.
Close the inner liner, leave designed vent paths, and label UN1845 with net dry-ice weight.
Insert a USB/BLE data logger to document time-at-temperature.
Box-in-box checklist (avoid the usual failure modes)
| Variable | Better Setting | Worse Setting | What it means for you |
|---|---|---|---|
| Insulation | ≥2″ rigid PU or high-R liner | ≤1″ EPS | Hours more hold time |
| Fill % | 80–95% full | Half-empty | Slower sublimation |
| Handling | Minimal door opens | Frequent opens | Protects the cold pool |
| Carrier path | Direct/overnight | Multi-hub/day+ | Add 25–50% ice margin |
Dry ice pack for fish vs. gel/PCM: which should you pick?
If delivery must be frozen, choose a dry ice pack for fish; for superchilled 0 to −2°C fish, use −21°C PCM and add a small dry-ice topper only for risky lanes.
| Cooling method | Temp range | Best for | Trade-offs | Your move |
|---|---|---|---|---|
| Dry ice pack for fish | ~−109°F (−78.5°C) | Frozen deliveries, 24–72h | Hazmat labels; vents required | Use when “frozen-solid on arrival” is non-negotiable |
| PCM −21°C bricks | −6 to −21°C setpoints | Superchilled quality | Higher upfront cost | Hybrid with small dry-ice topper |
| Gel packs (2–8°C) | Chilled items | Mixed baskets, live seafood | Cannot keep items frozen | Keep sauces/side items from freezing |
What rules and labels apply to a dry ice pack for fish?
Vent, label, and declare. Dry ice is UN1845 (Class 9 for air). Passenger flights often cap packages at 2.5 kg (5.5 lb); cargo services allow higher but require “Carbon dioxide, solid/Dry Ice,” UN1845, and net dry-ice weight on the package.
Labeling checklist
Mark UN1845 and show net dry-ice weight
Use non-airtight packaging with vents
Provide a 24-hour contact if the operator requires it
2025 trends shaping your dry ice pack for fish strategy
What’s new: Paper-based liners, low-cost BLE loggers, and reusable PCM cartridges are mainstream. Many shippers now meet SLA with fewer pounds of dry ice pack for fish, validated with logger proof.
At-a-glance advances
Paper liners: 48–72h performance with recyclability
Smarter monitoring: BLE/NFC loggers cut claims
Sensor freshness: Biosensors for fish quality grading
Dry ice pack for fish FAQs
How many pounds of dry ice pack for fish do I need for 48 hours?
Start with 10–20 lb depending on insulation and ambient heat; validate with a data logger.
Can I fly with a dry ice pack for fish?
Yes—use vented packaging, UN1845 labeling, and respect airline limits.
Is dry ice safe to handle?
Wear insulated gloves; ventilate rooms and vehicles to keep CO₂ safe.
What temperature is acceptable if fish thaws late in transit?
Keep at or below 40°F (4°C); closer to 32°F (0°C) is best.
How long does a dry ice pack for fish last?
Plan on 5–10 lb per 24 hours; better insulation stretches this.
Dry ice pack for fish summary and next steps
Key takeaways: Choose a dry ice pack for fish when frozen-solid delivery is essential. Size at 5–10 lb per 24 hours, place on top, vent, and label properly. For superchilled goals, use −21°C PCM with a dry-ice topper.
Action plan:
Pick a shipper for your longest lane.
Run 3 test shipments with loggers.
Standardize SOPs, labels, and add FAQ schema.
About Tempk
We build cold-chain packaging balancing performance, cost, and sustainability. Our engineers optimize seafood parcels with hybrid builds (PCM + dry ice pack for fish), 72-hour shippers, and logger validation. Clients cut claims by 30–40% after adopting standardized pack-outs.
Dry Ice Pack Blanket: 2025 Frozen Shipping Guide
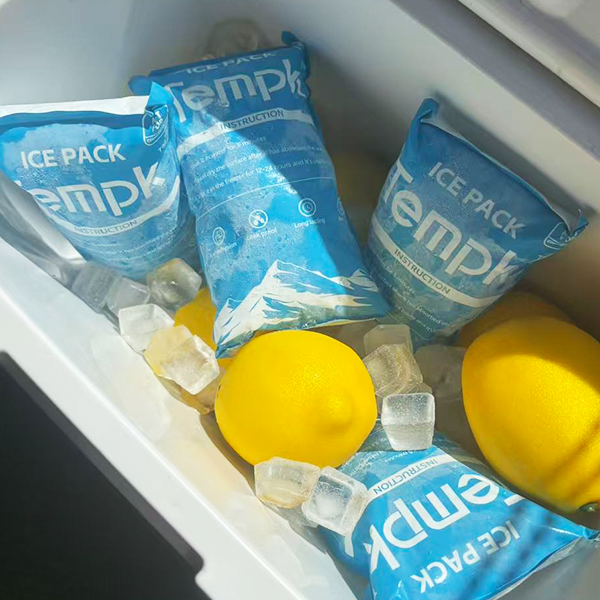
Dry Ice Pack Blanket: 2025 Frozen Shipping Guide
Intro — answer first: If you need hard-frozen reliability without powered refrigeration, a dry ice pack blanket gives you deep-freeze capacity, margin for delays, and clean handoffs. Plan roughly 5–10 lb of dry ice per day and keep packages vented; aircraft packages may not exceed 200 kg of dry ice. You’ll see where it beats gel or PCM, how to size it fast, and how to pass PI 954 checks.
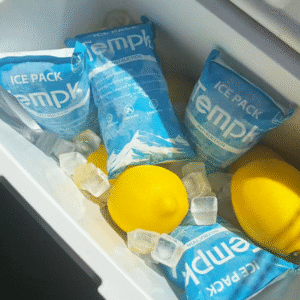
How a dry ice pack blanket works for −20 °C to −80 °C lanes and when it outperforms gel/PCM
Simple sizing rules (5–10 lb/day) and a quick self-check for hot lanes and thin insulation
How to pack, vent, and label for UN1845 and PI 954 acceptance—without overcomplicating SOPs
A comparison with gel sheets and sub-zero PCMs so you choose the right build for each route
2025 updates: IATA 66th edition highlights, eAWB momentum, and CO₂ supply watch
What is a dry ice pack blanket—and when should you use it?
Use a dry ice pack blanket whenever frozen failure is unacceptable or transit time is uncertain. It creates a continuous “roof” of dry ice above your payload, holding freezer-level cold (as low as −78.5 °C) far longer than gel. Top-loading keeps the cold where heat leaks in and where CO₂ naturally sinks, so temperatures stay uniform. This approach protects ice cream, biologics, and frozen meals across 24–96 h lanes.
A dry ice pack blanket behaves like a quilted cold sink. The blanket distributes dry ice mass across the lid and, when needed, along the sides. That reduces hot spots, buffers tarmac exposure, and buys time if reefer power drops. Use gel or 2–8 °C PCM when products are sensitive to freezing; choose the blanket for deep-frozen and ULT lanes with variable dwell times.
Sizing a dry ice pack blanket for 24–72 hours
Start with 5–10 lb of dry ice per 24 hours in a standard insulated shipper, then adjust for heat, R-value, and openings. Blocks sublimate slower than pellets; compact blankets made from blocks last longer. For a 48-hour lane in hot weather, plan 15–25 lb for typical box sizes; add 20–30% if the shipper will be opened mid-route. Rule of thumb: when unsure, size up one class.
| Quick-size (example) | Ambient | Product mass | Dry ice pack blanket mass | What it means for you |
|---|---|---|---|---|
| 24 h | 20–25 °C | 5 kg | 2–3 kg | Overnight lanes with standard insulation |
| 48 h | 25–30 °C | 5 kg | 4–6 kg | Weekend lanes; add margin for porch dwell |
| 72 h | 25–30 °C | 5 kg | 6–9 kg | Multiday express; validate with a logger |
| 48 h | 30–35 °C | 10 kg | 8–12 kg | Hot-lane linehaul; consider side blankets |
| 72 h | 30–35 °C | 10 kg | 12–18 kg | High-risk routes; stage re-icing if allowed |
Practical dry ice pack blanket tips you can use today
Air lanes: Top-load the dry ice pack blanket and provide vents or spacer channels so CO₂ escapes
Ground lanes: Surround sides and top if ambient exceeds 25 °C; fill voids so the blanket contacts the lid
Mixed payloads: Buffer fragile items with corrugate so the blanket does not freeze labels or sauces
Self-check: If the lane is >30 °C for 6+ hours, add 20%; if opened mid-route, add 30%; if insulation <30 mm, add 25%. Two “yes” answers → choose the next weight class
Real-world case: A prepared-meals brand used a top-loaded dry ice pack blanket plus gel under trays. Summer failure rate dropped from 7% to 1.4% across two-day zones, and refunds fell by half.
How do you pack and label a dry ice pack blanket shipment?
Follow a three-layer method and keep packages vented. 1) Seal product in moisture-tight primary packs. 2) Add liners/spacers to avoid direct contact. 3) Place the dry ice pack blanket on top, close the insulated shipper, then close the outer carton. Mark the box “UN1845, Carbon dioxide, solid (Dry ice)” and show the net dry-ice mass; aircraft packages must not exceed 200 kg of dry ice.
PI 954 checklist for dry ice pack blanket shipments
Venting present; never airtight
UN1845 + net weight (kg) on the box and on the air waybill
Class 9 hazard label (min 100 mm)
Overpack marked “OVERPACK” with total dry-ice weight if used
Mirror carrier acceptance checklists and confirm any operator variations before tender
Safety around the dry ice pack blanket: CO₂ & PPE
Handle the dry ice pack blanket with insulated gloves and eye protection. Store and dispose of remaining dry ice in ventilated areas; never seal it in airtight containers. CO₂ displaces oxygen—use monitoring in enclosed rooms or trucks, train teams to open boxes away from faces, and warn recipients that dry ice is inside. Never let dry ice touch food directly.
Dry ice pack blanket vs. gel sheets and PCM—what’s right for your lane?
Choose a dry ice pack blanket for deep-frozen lanes; choose gel or PCM when you only need chill. Dry ice wins on hold time and margin for delays. Gel sheets are cheaper and safe for 0–8 °C. PCMs at −20 °C or −30 °C offer predictable plateaus when CO₂ supply is tight or airlines cap dry-ice mass. For mixed SKUs, run a hybrid: dry ice on top, gel below, with corrugate buffers.
| Cooling option | Target band | Typical hold | For you |
|---|---|---|---|
| Dry ice pack blanket | ≤ −20 °C to −78.5 °C | 24–96 h | Deep-frozen goods and long flights |
| Gel ice blanket/sheet | 0–8 °C | 12–48 h | Chilled goods; avoid freezing |
| PCM packs (−20/−30) | Sub-zero setpoints | 24–72 h | Predictable plateaus; fewer hazmat steps |
Field-tested dry ice pack blanket layouts
Top-biased roof: A single, continuous dry-ice roof above the payload for deep-frozen lanes
Sandwich: Dry ice blanket on top, gel sheets under trays to protect labels or sauces
Surround + top: L-shaped side segments plus a roof for hot-weather linehaul
Case note: Seafood export with linehaul delays used a dry-ice roof and side strips; wet-lock primaries plus absorbents stopped condensate issues and improved arrival condition.
2025 developments and trends for the dry ice pack blanket
Digitalization, regulations, and supply shape your plan in 2025. The IATA Dangerous Goods Regulations 66th Edition took effect January 1, 2025, with an April addendum; acceptance checklists reinforce net-mass accuracy and venting. Paperless air cargo expanded as Brazil waives paper AWBs nationwide. Dry ice and data-logger demand keep rising, while CO₂ availability can be uneven; sub-zero PCMs continue to gain as a complement.
What’s new
PI 954 clarity: ≤200 kg dry ice per package; UN1845 marking emphasized
eAWB momentum: Wider paperless adoption reduces handoff errors and speeds acceptance
Market growth: Dry ice and logger adoption expand with cold-chain volumes
Supply watch: CO₂ plant outages may tighten supply; right-size to avoid waste
PCM rise: Growing investment in −20/−30 °C PCMs to backstop dry-ice constraints
FAQs
Is a dry ice pack blanket the same as a gel ice blanket?
No. Many “ice blankets” are gel sheets at ~0 °C. A dry ice pack blanket delivers about −78.5 °C and requires vented packaging.
How long will a dry ice pack blanket last?
Plan for 5–10 lb per 24 hours in a standard insulated shipper; add more for heat or frequent openings. Blocks last longer than pellets.
What labels go on the box?
Apply the Class 9 hazard label and mark “UN1845, Dry ice,” with net mass in kilograms on the box and the air waybill; venting is mandatory.
Can a dry ice pack blanket touch food?
Do not allow direct contact. Use trays or liners and warn recipients that dry ice is inside.
Should I use this for vaccines?
Only for products rated for frozen or ULT shipment. Many vaccines must be kept at 2–8 °C; confirm manufacturer guidance.
Summary and recommendations
Bottom line: A dry ice pack blanket keeps products deeply frozen, buys time during delays, and meets strict airline and DOT rules when vented and labeled. Start at 5–10 lb/day, top-load for best performance, train teams on CO₂ safety, and pick gel or PCM when you only need 0–8 °C. Validate with a data logger before scale-up.
Action plan: 1) Map lanes and select a dry ice pack blanket weight per box using the table above. 2) Update your PI 954 checklist and labeling SOP. 3) Pilot a hybrid build (dry ice + gel) on your hottest lanes. 4) Add loggers on two shipments per lane to right-size refrigerant. 5) Publish a simple calculator for planners.
About Tempk
We design cold-chain packaging that keeps payloads safe without guesswork. Our engineers test dry ice pack blanket layouts in climate chambers and publish clear SOPs. We focus on compliant labeling, easy packouts, and right-sized refrigerant loads to cut waste. Clients report fewer claims and faster handoffs because our designs are simple and well documented. Talk to us for a lane-specific design review.
Dry Ice Pack Amazon: Choose & Ship Safely in 2025
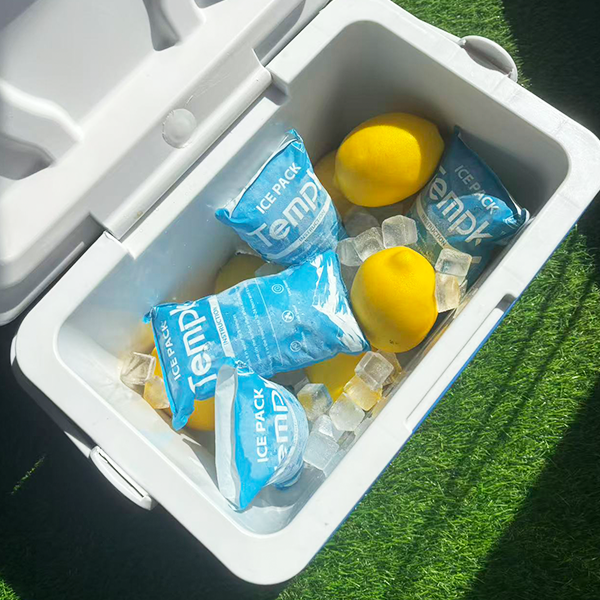
Dry Ice Pack Amazon: Choose & Ship Safely in 2025
If you’re searching dry ice pack Amazon, here’s the bottom line: match the refrigerant to your target temperature, lane time, and carrier rules—then validate with a simple test. Use PCM 5 °C for 2–8 °C, dry ice or −21 °C PCM for frozen, and size for 24–72 h with a quick calculator. You’ll cut spoilage and avoid compliance surprises.
Pick the right pack: PCM 5 °C vs. gel vs. dry ice for specific lanes (2–8 °C or frozen)
Stay compliant: FAA/TSA passenger limits and USPS/IATA shipping rules in plain English
Size with confidence: A copy‑paste calculator for 24–72 h dry ice pack Amazon shipments
Pack like a pro: Layouts that reduce hot spots and prevent freeze‑damage
Trends to watch: 2025 cold‑chain tech that changes your dry ice pack Amazon choice
Which dry ice pack Amazon option fits your lane?
Short answer: Use PCM 5 °C for 2–8 °C goods; use −21 °C PCM or real dry ice for frozen. Gel packs work for short, chilled hops but can over‑chill on contact. Dry ice requires venting and labeling, while PCM simplifies handling for parcel and FBA workflows.
Why it works: PCM holds a steady “plateau” near its set point, protecting dairy, vaccines, and meal kits. Dry ice keeps ice cream and meats rock‑solid for longer legs. For any dry ice pack Amazon option, confirm box insulation and run one local validation with a data logger.
PCM 5 °C vs. gel: which protects 2–8 °C better?
Detail you can use: Gel packs start near 0 °C and may freeze product where they touch. PCM 5 °C buffers around +5 °C, reducing cold spots while extending hold time—ideal for 24–48 h parcel lanes and summer swings.
| Refrigerant | Target Band | Typical Hold (like‑for‑like) | What it means for you |
|---|---|---|---|
| Gel “ice” pack | 0–10 °C | 12–36 h | Cheap, reusable; add spacers to prevent freezing |
| PCM 5 °C pack | 2–8 °C | 24–60 h | Tighter control; simpler compliance |
| Dry ice (UN1845) | ≤ −18 °C | 24–72 h+ | Best for frozen; vent and label every time |
Practical tips that save shipments
Chilled 2–8 °C: Condition PCM to fridge temperature, not frozen; add a thin spacer tray.
Frozen: Center the payload; place refrigerant on all sides and on top to fight heat ingress.
All lanes: Eliminate voids with dunnage; air space is a heat leak you can stop.
How many dry ice pack Amazon units do you need?
Rule of thumb: Start near 15–25% PCM weight vs. product weight for 24 h summer lanes (2–8 °C). For frozen, 5–10 lb dry ice per 24 h in a mid‑size shipper, then tune by test.
Copy‑paste calculator (quick start):
| Scenario | Est. Refrigerant | Suggested Mix | What it does for you |
|---|---|---|---|
| 2–8 °C, 24 h, mild | ~10 lb PCM | Five × 2 lb PCM 5 °C | Stable plateau without freeze risk |
| 2–8 °C, 48 h, hot | ~26 lb PCM | Ten × ~2.6 lb PCM | Extends duration with margin |
| Frozen, 48 h, moderate | 15–20 lb dry ice | Dry ice + small gel buffers | Maintains hard‑frozen core |
Real‑world win: A bakery swapped gel for PCM 5 °C in a 1.5″ EPS shipper for 36‑hour routes. Spoilage claims halved while total weight dropped ~18%.
Dry Ice Pack Amazon
Can you fly with dry ice pack Amazon products?
Yes—with limits. For passengers, many airlines cap dry ice at 2.5 kg (5.5 lb) per person. Packaging must vent CO₂ and show “Dry Ice / Carbon dioxide, solid, UN1845” plus net mass. If you carry only gel/PCM, dry‑ice rules don’t apply, but baggage rules still do.
Micro‑checklist before you go:
□ Package is vented, not airtight
□ UN1845 and net mass marked (dry ice only)
□ Refrigerant matches lane: dry ice pack Amazon for frozen, PCM 5 °C for 2–8 °C
□ Data logger inside first run; keep the trace for QA
What are the best dry ice pack Amazon choices by use case?
Ice cream overnight: Real dry ice; high‑R shipper; top‑load a portion to create a cold “blanket.”
Frozen meats 1–2 days: −21 °C PCM bricks; add a small dry‑ice topper if ambient risk is high.
Meal kits 2–8 °C: PCM 5 °C near 15–25% of product weight; split top/bottom.
Last‑mile chilled: Hydratable sheets to fill voids; pair with paper‑based insulation.
2025 cold‑chain trends shaping your dry ice pack Amazon choice
Trend overview (updated 2025): Adoption of PCM 5 °C for 2–8 °C, broader ISTA 7E/Standard 20 validation, and clearer airline/parcel marking drive purchasing. Reusable formats, digital loggers, and recyclable liners cut waste and cost in repeated lanes.
Latest at a glance
Hybrid setups: −21 °C PCM with a small dry‑ice topper to stabilize frozen loads.
Smarter validation: More listings publish 7E‑style curves; buyers ask for data by default.
Sustainability: Reclaimed CO₂, repulpable liners, and refillable PCM reduce footprint.
Market insight: Ecommerce meal kits and temperature‑sensitive health goods keep demand growing; that’s why “dry ice pack Amazon” results now emphasize PCM chemistry, leak resistance, and verified performance.
Frequently Asked Questions
Q1: Are most “dry ice pack Amazon” results actual dry ice?
Usually not. You’ll mostly see gel and PCM, plus labels and accessories. Use real dry ice when you need hard‑frozen hold and can meet venting/marking.
Q2: Will gel packs freeze delicate foods?
They can. Place a spacer or choose PCM 5 °C to hold a safe plateau across the box.
Q3: How do I estimate packs for 24 h?
For chilled, start with PCM totaling 15–20% of product weight. For frozen, begin near 5–10 lb dry ice per 24 h and test once locally.
Q4: Do USPS/IATA rules apply to PCM?
No—those are dry‑ice rules. PCM and gel are generally non‑hazmat, which is why many dry ice pack Amazon picks are PCM.
Q5: What’s the fastest way to reduce failures?
Run one validation: pre‑condition packs, add a logger, pack tightly, and review the curve. Tune mass by ±10–20% from the first result.
Summary & recommendations
Key points: Pick PCM 5 °C for 2–8 °C; pick dry ice or −21 °C PCM for frozen. Size refrigerant to lane time and insulation, then validate once with a logger. Mark and vent for any dry‑ice use. Use this dry ice pack Amazon guide to cut weight, reduce claims, and keep products safe.
Your next steps:
Define target band (2–8 °C or frozen) and worst‑case ambient.
Use the calculator to size PCM or dry ice.
Run a single‑box test and lock an SOP for summer/winter.
Add a short FAQ/HowTo to your product page to earn rich results.
About Tempk
We’re Tempk—cold‑chain specialists who design ISTA 7E/Standard 20 validated shippers, PCM 5 °C solutions for 2–8 °C, and dry‑ice‑ready kits for frozen goods. Customers choose us for data‑backed packouts that often trim total weight by 10–20% while improving delivery temperature performance.
CTA: Need a lane‑specific spec for your dry ice pack Amazon workflow? Request a one‑page packout plan from our team today.
Dry Ice Pack 7×13: 2025 Sizing, Packouts & Rules

Dry Ice Pack 7×13: How to Size and Ship in 2025?
If you ship frozen goods, a dry ice pack 7×13 gives deep-freeze control for 24–72 hours when right-sized and vented. You must apply UN1845 marks, declare net dry-ice weight, and follow 2025 IATA/OSHA rules to avoid delays or safety issues. This guide merges best practices, a simple sizing formula, and compliance checklists you can use today.
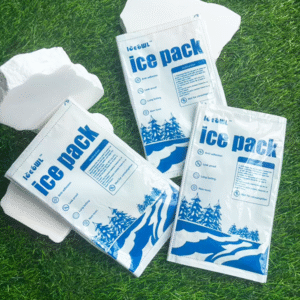
Choose when a dry ice pack 7×13 beats gel or PCM for frozen shipping.
Calculate pack counts with a fast formula and a one-minute tool.
Label and vent correctly under UN1845, IATA PI 954, and 49 CFR rules.
Cut risk with PPE, storage, and lane-specific packout patterns.
What is a dry ice pack 7×13, and when should you use it?
A dry ice pack 7×13 is a vented 7×13-inch pouch you fill with dry-ice pellets, delivering −78.5 °C source cooling for frozen lanes. Use it when your payload must arrive fully frozen for 24–72 hours and you can follow hazmat marking and venting rules. It nests around corners, reduces air gaps, and fits small parcel coolers efficiently.
Why it’s useful for you: The format blankets small loads without heavy overpack. It produces no meltwater, keeps cartons dry, and simplifies acceptance when you mark UN1845 and show net kilograms. If your target band is 2–8 °C, consider PCM or a hybrid to avoid over-cooling sensitive goods.
Sizing rules of thumb for dry ice pack 7×13 loads
Start with ~1–1.5 lb (0.45–0.7 kg) of dry ice per 24 h per 6–8 L of insulated volume, then scale for duration and season. Round up your final count because sublimation starts as soon as pellets are loaded. For hot routes, add 25–50% more than winter baselines.
| Packout component impact | What it is | What to check | What it means for you |
|---|---|---|---|
| Dry-ice source | Solid CO₂ at −78.5 °C | Pellet size, freshness | Predictable ultracold performance without liquid residue. |
| 7×13 bag | Vented CO₂-safe pouch | Seam integrity, vent path | Gas escapes; reduced rupture risk and easier air acceptance. |
| Insulated shipper | EPS, EPP, VIP, rigid coolers | R-value, tight pack | Lower sublimation and longer hold time for same mass. |
Practical tips and suggestions
Frozen food parcel: Prefreeze below −18 °C; top-blanket one dry ice pack 7×13 and place another along the warm wall.
Lab samples: Use secondary containment; position packs around racks, not directly on fragile vials.
Summer lanes: Upsize the dry ice pack 7×13 count by 25–50% and vent the lid path.
Real-world case: A dessert brand used two dry ice pack 7×13 units in a 10 L shipper for 2-day air during 32 °C ambient. Pints arrived rock-solid and cartons stayed dry because dry ice sublimates, not melts.
How many dry ice pack 7×13 units do you need for 24–72 hours?
Use a three-step calculator: estimate 24 h need from volume, scale by hours and lane factor, then convert kilograms to packs. This keeps sizing transparent and repeatable across teams. Keep packaging vented; US rules require CO₂ release.
Expanded guidance: Start with the volume-based baseline, multiply by time and a lane factor (1.0 cool, 1.25 average, 1.5 hot), then divide by your typical per-pack fill. Place one dry ice pack 7×13 at the highest heat-gain surface (usually the top) and another near the label side. Validate on real lanes with data loggers.
Micro-calculator: quick estimator for dry ice pack 7×13
| Example lane | Volume (L) | Hours | Lane factor | Result | For you |
|---|---|---|---|---|---|
| Domestic 2-day air | 10 | 48 | 1.25 | 2–3 dry ice pack 7×13 | Add one at top, one warm wall. |
| Hot-season parcel | 14 | 36 | 1.5 | 3–4 packs | Increase mass; reduce voids. |
| Overnight, VIP shipper | 8 | 24 | 1.0 | 1–2 packs | Validate; may downsize mass. |
Actual example: A diagnostics shipper cut complaints by switching to two dry ice pack 7×13 plus a vented lid; logger traces confirmed 48-hour stability.
Compliance and safety for dry ice pack 7×13 in 2025?
Do four things: vent packaging, apply the Class 9 label, mark “UN1845” with net dry-ice kilograms, and follow IATA PI 954/49 CFR 173.217. Keep a copy of the 2025 acceptance checklist in your SOPs. For worker safety, use cryo-gloves, eye protection, and good ventilation.
Why it matters to you: Vented design prevents pressure buildup, the UN1845 mark and net-kg figure speed air-carrier acceptance, and consistent labeling avoids returns. OSHA’s 8-hour CO₂ limit is 5,000 ppm; NIOSH lists IDLH at 40,000 ppm—training and monitors reduce risk in staging areas.
Labeling and documentation checklist
Vent it: Packaging must permit CO₂ release; never fully seal coolers.
Mark it: Print UN1845 and net dry-ice weight (kg) on the outer box.
Label it: Apply the Class 9 hazard label; place where visible after handling.
Document it: Show UN1845 and net kg on the air waybill when applicable.
| Labeling element | Requirement | Common slip | What it means for you |
|---|---|---|---|
| UN1845 text | On outer package | Missing net kg | Delays or refusal at acceptance. |
| Class 9 label | Per IATA/Carrier | Wrong placement | Re-work and missed uplift. |
| Vent path | “Must permit release” | Taped-shut lid | Rupture risk; non-compliant. |
Dry ice pack 7×13 vs gel and PCM—what fits your lane?
Pick a dry ice pack 7×13 for shipments that must arrive frozen; pick gel/PCM when you need 2–8 °C. Dry ice is ultracold and residue-free but requires hazmat marks; PCM targets narrow setpoints and eases air acceptance. Hybrids often win for mixed loads.
In practice: Top-blanket a dry ice pack 7×13 to protect frozen SKUs, then place +5 °C PCM panels closer to sensitive items. This limits freeze risk, simplifies compliance, and can reduce total dry-ice mass on summer lanes. Validate both winter and summer profiles.
Decision guide: choose the right refrigerant
Frozen-only payloads: Favor dry ice pack 7×13 only; maximize insulation before adding mass.
Strict 2–8 °C corridors: Prefer PCM first; add minimal dry-ice buffer if needed.
Mixed payloads: Use a divider; combine PCM and dry ice pack 7×13 with a clear vent path.
2025 trends shaping dry ice pack 7×13 usage
Three shifts to plan for in 2025: tighter air-acceptance discipline around UN1845 net-kg marks; wider adoption of cellular/BLE data-loggers; and sustainability pressure that drives hybrid PCMs and higher-R shippers to lower dry-ice mass. The upshot is better monitoring, fewer acceptance errors, and lower cost per lane.
Latest progress at a glance
Operator caps: Some airlines require declaring net dry-ice mass at booking for aircraft-level limits.
Connected packouts: Off-the-shelf loggers simplify continuous monitoring and audit trails.
Higher-R packaging: VIP and molded EPP reduce sublimation for the same dry ice pack 7×13 count.
Market insight: Cold-chain demand keeps climbing with biologics and e-grocery. Expect more validation asks, more sensor data in QMS, and more emphasis on rightsized dry ice pack 7×13 mass per route and season.
Frequently Asked Questions
How long will a dry ice pack 7×13 last?
Plan for 24–72 hours depending on insulation, ambient heat, and fill mass. Start with 1–1.5 lb per 24 h per 6–8 L and round up for hot lanes.
What labels are required when I use a dry ice pack 7×13?
Apply the Class 9 label and mark UN1845 with net dry-ice kilograms on the box; include UN1845 and net kg on the air waybill when applicable.
Is a dry ice pack 7×13 safe to handle?
Yes—use cryo-gloves and eye protection, work in ventilated areas, and never seal CO₂ in a tight container.
Can I mix a dry ice pack 7×13 with PCM panels?
Yes. Separate compartments, keep a vent path clear, and validate to protect 2–8 °C items from freezing.
Summary and recommendations
Key points: A dry ice pack 7×13 delivers ultracold, residue-free performance for frozen lanes. Vent, mark UN1845 with net-kg, and follow PI 954/49 CFR rules. Rightsize with the three-step calculator, then validate on your lanes with data loggers. Consider hybrids for mixed payloads.
Next steps: Map lanes by season and hold time. Pilot two packouts with different dry ice pack 7×13 counts. Update SOPs with 2025 label/mark steps and add the acceptance checklist. Embed the calculator on your site. CTA: Request a validated packout and documentation kit from Tempk.
About Tempk
We are a cold-chain packaging and compliance team focused on practical, validated packouts. We build calculators, SOPs, and lane-specific kits—including dry ice pack 7×13 configurations—to shorten time-to-ship. Our strengths are regulatory clarity and data-backed validation runs so you can scale confidently.
Dry Ice Pack 72 Hours: Proven 3‑Day Guide
Dry Ice Pack 72 Hours: Can You Guarantee It?
Updated: September 22, 2025. If you need a dry ice pack 72 hours plan you can defend to QA and carriers, this guide gives you the numbers, packouts, and 2025 rules that work. You’ll size dry ice with a quick formula, pick the right shipper, and validate with simple logging—so your frozen goods arrive in range without drama.
![Dry ice pack 72 hours packout diagram]
How much dry ice do you need for a dry ice pack 72 hours lane? (fast estimator + safety margin)
Which shippers consistently hold a dry ice pack 72 hours target? (EPS vs PUR vs VIP)
What labels and 2025 rules apply to UN1845 for a dry ice pack 72 hours shipment? (what changed this year)
When should you switch from dry ice to PCM for a 72-hour lane? (2–8 °C vs ≤−20 °C)
How much dry ice do you need for a dry ice pack 72 hours shipment?
Short answer: Start from real-world sublimation (≈5–10 lb per day in a good cooler), multiply by three, then add 15–25% for delays. That’s typically 15–30 lb for 72 h, more in hot lanes. Put the number on your label as net kilograms and keep the box vented. This hits most lanes with buffer.
Why it works: Heat leaks into the shipper; dry ice absorbs that heat as it sublimates. Each kilogram gives ~571 kJ of cooling—why a few extra kilos can save a risky weekend run. For a dry ice pack 72 hours target, plan from your lane’s daily use, then validate with a profile and a small logger.
Quick 72-Hour Dry Ice Estimator (copy-paste mini-tool)
| Sizing input | Typical value | What it controls | What it means for you |
|---|---|---|---|
| Duration | 72 h | Total heat to absorb | Multiply daily use ×3 |
| Sublimation rate | 5–10 lb/day | Lane heat leak | Baseline dry ice mass |
| Enthalpy (CO₂) | ~571 kJ/kg | Cooling per kg | Higher = fewer kg |
| Safety margin | +15–25% | Delay protection | Add at packout |
Which packaging and labels deliver a reliable dry ice pack 72 hours hold?
Answer: EPS and PUR coolers work, VIP panels cut refrigerant mass, and hybrids deliver the longest hold time. For a dry ice pack 72 hours result, wall R-value matters as much as starting dry ice. Always qualify with ISTA 7E lane profiles and place labels correctly.
EPS vs. PUR vs. VIP—what should you choose?
| Shipper type | Typical wall | Hold-time impact | What it means for you |
|---|---|---|---|
| EPS cooler | 1–1.5 in | Highest dry-ice mass | Lowest capex; larger cube size |
| PUR cooler | 1–1.5 in | Moderate mass | Good all-season balance |
| VIP panel shipper | 0.5–1 in | Lowest mass | Highest capex; smallest cube |
When should you replace a dry ice pack 72 hours approach with PCM?
Short answer: If your target is 2–8 °C or CRT, a validated PCM shipper is simpler, reusable, and avoids UN 1845 rules. If you need ≤−20 °C or ultracold, dry ice still wins. Many healthcare e-commerce kits now hit 48–72 h with PCM alone.
How do you validate and document a dry ice pack 72 hours claim?
Answer: Prove it with ISTA 7E lane profiles, a small data logger, and MKT summaries aligned to USP <1079>. Validate once (DQ/OQ/PQ), then monitor each run and do periodic lane rechecks.
2025 developments shaping dry ice pack 72 hours decisions
Checklist clarity: 2025 Dry Ice Acceptance Checklist streamlines shipper/operator checks.
Carrier specifics: Label format and airwaybill text clarifications help reduce rejections.
PCM adoption: More 48–72 h PCM kits reduce hazmat volume where labels allow.
Frequently Asked Questions
Q1: How much dry ice for a dry ice pack 72 hours frozen food shipment?
Plan 15–30 lb, add ~20% for weekend risk. Record net kg on the label.
Q2: Do I need a Shipper’s Declaration for UN 1845?
Not when dry ice cools non-dangerous goods; mark UN 1845 with net kg.
Q3: Can I ship a dry ice pack 72 hours via postal air?
Postal air limits dry ice mass tightly (e.g., 5 lb); ground allows more but must be vented and labeled.
Q4: What if my product must not freeze?
Use a validated 2–8 °C PCM shipper for 72 h.
Summary & recommendations
What matters most: A defensible dry ice pack 72 hours plan sizes refrigerant from lane data, uses a qualified insulated shipper, and follows UN 1845 labeling with proper venting. Validate under ISTA 7E, monitor with a logger, and keep a weekend margin.
Next steps:
Map lane severity and pick EPS / PUR / VIP.
Use the estimator and add 15–25% buffer.
Update SOPs with 2025 checklists; run a 72 h hot-season profile this week.
CTA: Book a 20-minute planning session with Tempk to right-size your 72-hour packout and labeling.
About Tempk
We design and qualify insulated shippers and packouts for life sciences and e-commerce—from dry ice pack 72 hours kits (deep-frozen) to 2–8 °C PCM mailers. We back every lane with ISTA 7E reports, clear packout photos, and low total cost through rightsizing. Two advantages: repeatable summer/winter performance and audit-ready documentation.