


Dry Ice Pack 24 Cells: 2025 Cold Shipping Guide
Dry Ice Pack 24 Cells: 2025 Cold Shipping Guide

Dry Ice Pack 24 Cells: What Works in 2025?
If you ship perishables, a dry ice pack 24 cells gives long, even cooling with fewer leaks and simpler compliance than solid dry ice. Use it to keep food and pharma in range while avoiding CO₂ hazards and extra paperwork. Expect 8–24 hours per sheet in quality insulation, then scale by lane hours, season, and product mass. This consolidated article merges and upgrades your three drafts for 2025 on‑page SEO and clarity.
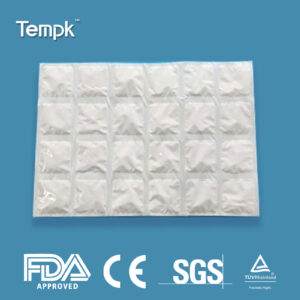
What is a dry ice pack 24 cells? Clear definition plus ideal use cases for chilled and frozen lanes.
How long do 24‑cell sheets last? Practical rules of thumb using parcel profiles.
How do you pack it safely? A 7‑step SOP you can train this week.
When to choose it vs CO₂ dry ice or gel packs? A comparison you can use in bids.
What is a dry ice pack 24 cells—and when should you use it?
Direct answer: A dry ice pack 24 cells is a reusable polymer sheet that hydrates into 24 sealed cells; it is not solid CO₂ dry ice. Use it when you need stable cold near 0 °C for 24–36 hours without Class 9 hazmat steps. It stays flexible when frozen, wraps odd shapes, and reduces voids for steadier temperatures.
Expanded explanation:
“24 cells” describes a 4×6 grid that swells during hydration. The grid spreads refrigerant across the surface, increasing contact and reducing hot spots. Unlike CO₂ dry ice at −78.5 °C, polymer sheets melt near 0 °C, which protects freeze‑sensitive goods like greens, beverages, and many biologics. For deep‑frozen or very long lanes, you may still prefer true dry ice, but for most overnight food routes, 24‑cell sheets balance safety, cost, and simplicity.
How long do 24‑cell ice sheets last in real lanes?
Details:
Start with 8–12 hours per sheet in EPS 1.5″ at room‑temp lanes. Add hours with better insulation (PUR/VIP) and full “wrap & cap” placement. Subtract time for summer heat or loose packing. Use data loggers against parcel profiles that model courier systems. In practice, two to four sheets in a tight pack‑out often cover 24–36 hours.
| Pack‑out Factor | Typical Range | Lane Effect | What this means for you |
|---|---|---|---|
| Insulation R‑value | EPS 1.5″ → VIP | +4–12 hours | Stronger walls slow heat gain |
| Contact area | Bottom‑only → 360° wrap | +25–50% hold | Surround the payload to cut hot spots |
| Ambient heat | 20–30 °C → 35+ °C | −3–8 hours | Add a sheet or upgrade insulation |
Practical tips you can use today
Pre‑condition: Chill product and shipper so the sheet cools your lane, not your box.
Wrap, don’t stack: Place one under, one around sides, one on top for 360° coverage.
Trim to fit: Cut along seams when dry or semi‑hydrated; sleeve edges to stay tidy.
Case: A meal‑kit brand replaced two gel bricks with two dry ice pack 24 cells sheets and tighter void fill. Warm‑arrival complaints fell 28% in July with no rise in freeze damage.
How to pack a dry ice pack 24 cells safely and consistently?
Direct answer: Hydrate fully, freeze flat 24–48 hours, and place sheets around—not just under—your goods. If using polymer sheets alone, hazmat labels are not required. If adding any solid dry ice, keep vent paths and mark UN 1845 with net kg.
Expanded explanation:
Safety starts with full hydration; incomplete cells underperform. Freeze flat for uniform thickness and better contact. During pack‑out, think “heat has many doors”—close them with side wraps, top caps, and tight void fill. When you combine sheets with CO₂ dry ice, switch to Class 9 practices and vent the outer box to prevent pressure build.
7‑step SOP for a dry ice pack 24 cells
Hydrate in warm water; scrunch until bubbles stop.
Drain and pat dry; avoid oversoaking.
Freeze flat at ≤ −18 °C for 24–48 hours.
Pre‑chill payload and shipper interior.
Load “wrap & cap”: bottom + sides + top contact.
Seal inner liner; keep outer ventable if CO₂ is added.
Document pack‑out; drop a logger for validation.
| Step | Why it matters | Good looks like | Your outcome |
|---|---|---|---|
| Full hydration | Max capacity | No soft cells | Longer hold |
| Flat freeze | Even contact | Uniform thickness | Fewer hot spots |
| Wrap & cap | Higher contact | 360° coverage | Smoother temps |
Dry ice pack 24 cells vs CO₂ dry ice vs gel packs—what should you choose?
Direct answer: Use a dry ice pack 24 cells for chilled or soft‑frozen goods and regulatory simplicity; use CO₂ dry ice for ultra‑cold or very long lanes; use gel bricks for short, low‑risk hops.
Expanded explanation:
Polymer sheets excel where freeze damage is risky and returns matter. True dry ice wins when you must hold ≤ −20 °C for days or expect delays. Gel bricks are cheap and familiar but offer shorter hold and less flexibility.
| Need | Best refrigerant | Why it fits | Watch‑outs |
|---|---|---|---|
| 2–8 °C biologics, produce | dry ice pack 24 cells | Melts near 0 °C; protects against over‑freezing | Pre‑chill; tight void fill |
| Ice cream, long hot lane | CO₂ dry ice | −78.5 °C deep cold; long buffer | UN 1845 labels; venting |
| Short deli kits | Gel bricks | Lowest cost; simple | Condensation; shorter hold |
| 36–48 h frozen | Hybrid: sheets + CO₂ | Sheets stabilize; dry ice extends | Weight, labels, training |
How many dry ice pack 24 cells do you need for your box?
Direct answer: Baseline one sheet per 5–8 L internal volume for ~24 h in moderate weather, then adjust for insulation, season, and porch time.
Expanded explanation:
Use this as a pre‑OQ estimator, then tune with logger data. Increase count in summer, add side wraps to boost contact area, and upgrade insulation for longer lanes.
Quick planner (copy‑paste friendly)
Example
A 20 L box, 26 h hot lane, EPS, 360 wrap → baseline 3 → +1 (H>24) +1 (hot) = 5 sheets. Validate before rollout.
2025 trends in dry ice pack 24 cells and cold‑chain packaging
Trend overview:
In 2025, teams favor dry ice pack 24 cells for reusable flexibility and clearer rules. Parcel testing under common profiles is becoming standard, while hybrid pack‑outs (sheets plus small CO₂ charges) grow in frozen D2C. Compliance checklists emphasize UN 1845 net‑weight marking and venting whenever CO₂ is used.
Latest progress at a glance
Reusable focus: 4‑ply, cut‑to‑fit designs extend life and reduce waste.
Validation culture: More shippers log every season and zone, then right‑size sheet count.
Hybrid growth: Sheets stabilize near product while a small dry‑ice slab protects headspace.
Market insight:
Direct‑to‑consumer frozen foods and meal kits are expanding. Brands that standardize seasonal pack‑outs and log results cut spoilage and shipping claims while keeping materials lean.
FAQs
Is a dry ice pack 24 cells the same as real dry ice?
No. It is a hydrated polymer sheet with 24 sealed cells. Real dry ice is solid CO₂ at −78.5 °C and requires Class 9 labels and UN 1845 net weight for air moves.
How long will a 24‑cell sheet last?
Plan 8–24 hours per sheet depending on insulation, contact area, ambient heat, and payload mass. Use two to four sheets for many 24–36 h lanes.
Can I cut a 24‑cell sheet?
Yes. Cut along seam lines when dry or partially hydrated. Sleeve exposed edges to keep the pack tidy.
Do I need hazmat labels?
Not for polymer sheets alone. If you add any CO₂ dry ice, mark UN 1845 with net kg and keep the package ventable.
What size box works best with 24‑cell sheets?
Small to medium shippers benefit most. Sheets wrap irregular items, reducing voids and improving hold time.
Summary & recommendations
Key points:
A dry ice pack 24 cells delivers reusable, flexible cold without CO₂ hazards. Start with one sheet per 5–8 L for ~24 h, use 360° wrap for steadier temps, and validate with loggers. For ultra‑cold or multi‑day lanes, add or switch to CO₂ dry ice and follow UN 1845 practices.
Next steps (action plan):
Map lane hours and porch time by zone.
Pilot two pack‑outs (winter vs summer) and log.
Standardize a 7‑step SOP and seasonal sheet counts.
If using CO₂, train on net‑kg marking and venting.
CTA: Get a lane‑specific 24‑cell pack‑out plan and a test‑ready bill of materials.
About Tempk
We design validated cold‑chain pack‑outs for food and life science brands. Our engineers build 24‑cell sheet configurations and CO₂ dry‑ice solutions, then verify them with parcel‑style testing. We operate ISO‑certified facilities with rigorous QA and provide clear SOPs your team can train quickly. Typical clients cut “soft arrival” rates by 30–60% within one season.
Ready to upgrade?
Contact our specialists for a lane audit and a print‑ready SOP you can deploy this week.
Dry Ice Pack 10 Sheets: Sizing, Use & Safety Guide (2025)

Dry Ice Pack 10 Sheets: How Do You Use It the Right Way?
If you’re looking to ship perishables or keep items cold, dry ice pack 10 sheets offer a flexible, mess-free solution. These polymer-based sheets are hydrated with water and freeze solid, providing hours of consistent cooling—ideal for chilled food, pharma, and more. In this guide, we’ll walk you through everything you need to know about sizing, activating, and safely using dry ice pack 10 sheets for the best results.
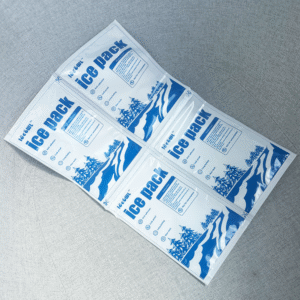
What is a Dry Ice Pack 10 Sheets Set and Why Is It Different?
Learn about the core differences between dry ice sheets and real dry ice, and why these packs are great for cold chain logistics.How Many Sheets Do You Need for 12–72 Hours?
Get practical tips on sizing, along with an easy calculator to help you choose the right number of sheets based on your needs.How Do You Activate and Freeze Dry Ice Pack 10 Sheets Correctly?
Step-by-step instructions to hydrate, freeze, and use these sheets for optimal cooling.Can You Mix with Real Dry Ice for Extra Cold?
Learn the dos and don’ts of combining dry ice pack sheets with actual dry ice to maximize cooling efficiency.What Are the Latest Trends for 2025?
Discover the latest in cold chain innovations, including greener films, smarter loggers, and hybrid cooling strategies.
What Is a Dry Ice Pack 10 Sheets Set—and Is It Really “Dry Ice”?
Direct Answer:
A dry ice pack 10 sheets set typically includes 10 polymer-based sheets that are activated with water and frozen. They are not solid CO₂ (dry ice); instead, they are hydrated gel packs that stay at a stable 0°C (32°F) when frozen. Unlike real dry ice, these packs don’t release CO₂ gas, making them safer to handle and more convenient for use.
Why It Matters to You:
The flexibility of dry ice pack sheets allows you to easily cut and fit them into coolers and containers, while also providing consistent cooling for extended periods—perfect for shipping chilled foods or pharmaceuticals. These sheets are also reusable, reducing waste and costs.
How Do Dry Ice Pack 10 Sheets Work?
In Simple Terms:
A dry ice pack sheet is made of a superabsorbent polymer (SAP) that absorbs water, turning it into a gel. Once frozen, the gel acts like a “cold battery” and provides consistent cooling as it melts. This process uses the latent heat of fusion (334 kJ/kg for water) to maintain steady temperatures for hours.
| Feature | What It Is | How It Helps You |
|---|---|---|
| Gel ice pack sheets | Water-activated polymer, refreezable | Flexible, cuts to fit, no CO₂ gas release, reuses easily |
| Real dry ice | Solid CO₂, sublimates to gas | Excellent for deepfreeze, but requires venting and safety |
| Phase Change Materials | Engineered material for stable temperature | Smooth temperature plateaus, pairs well with gel sheets |
How Many Dry Ice Pack 10 Sheets Do You Need?
Direct Answer:
Start with 1–2 sheets per 10L (≈10 qt) of cooler space per 24 hours. For longer durations (48–72 hours), increase the number of sheets and add side wraps to fill any gaps.
| Container | 24 Hours | 48 Hours | 72 Hours | Notes |
|---|---|---|---|---|
| Lunch/Meal Kit (12–20 qt) | 1–2 sheets | 3–4 sheets | 5–6 sheets | Place one sheet on top, cut pieces around sides for gaps. |
| Mid Cooler (35–45 qt) | 4–6 sheets | 8–10 sheets | 10–12 sheets | Prechill; place most sheets on top and one at the bottom. |
| Large EPS Shipper (2″ wall) | 4–6 sheets | 8–12 sheets | 12–16 sheets | Use more sheets for insulation; fill voids with strips. |
Quick Selector for Coolers & Shippers:
For 48-hour shipments in a 48-quart cooler, start with 6–8 sheets, add side wraps, and ensure proper insulation.
How Do You Activate and Freeze Dry Ice Pack 10 Sheets Safely?
Direct Answer:
To properly activate and freeze your dry ice pack 10 sheets, follow these simple steps:
Cut the Sheets: Cut the sheets to fit your container.
Soak: Immerse the sheets in clean water, following the recommended soaking time (usually 1–15 minutes, depending on the brand).
Drain & Dry: Pat the sheets dry to prevent frost buildup.
Freeze: Lay the sheets flat and freeze them for at least 6 hours (overnight is ideal).
Common Pitfalls & Fixes:
Overhydration: Hydrate until the cells are plump, but not bloated, to prevent splitting.
Exterior Frost: Towel dry the sheets before freezing to avoid frost.
Curved Freezing: Freeze the sheets flat to maintain shape and effectiveness.
Can You Combine Dry Ice Pack 10 Sheets with Real Dry Ice?
Direct Answer:
Yes, you can combine dry ice pack sheets with real dry ice for enhanced cooling. However, be aware that dry ice (CO₂) requires proper venting to avoid pressure buildup, while gel sheets do not release gas.
Safety Reminder:
Ensure that your packaging allows for CO₂ gas release, and never seal dry ice in an airtight container. Follow safety guidelines for dry ice handling, especially when shipping by air (IATA PI 954 rules).
2025 Updates for Dry Ice Pack 10 Sheets: What’s New?
The cold chain industry continues to evolve in 2025, with new trends improving both sustainability and efficiency.
Smarter Loggers: New NFC/QR tags help monitor temperature data in real-time, enhancing food safety during transit.
Greener Films: MonoPE films are becoming standard, making packaging easier to recycle.
PCM Hybrid Strategies: Phase Change Materials (PCMs) combined with dry ice pack sheets extend cooling durations and minimize the total number of sheets required.
Common FAQs About Dry Ice Pack 10 Sheets
Q1: Are Dry Ice Pack Sheets the Same as Real Dry Ice?
No, they are water-activated polymer sheets, while real dry ice is solid CO₂ that sublimates to gas.
Q2: How Long Should I Soak the Sheets?
Soak the sheets for 1–15 minutes depending on the brand. Be careful not to over-soak them.
Q3: How Long Does It Take to Freeze Dry Ice Pack 10 Sheets?
Freeze the hydrated sheets for at least 6 hours for the best results, but overnight freezing is recommended.
Conclusion & Next Steps
Dry ice pack 10 sheets provide an efficient, eco-friendly, and user-friendly solution for maintaining the cold chain during transit. With proper activation and freezing techniques, these sheets can offer reliable cooling for up to 72 hours or more.
Actionable Tips:
Assess Your Needs: Determine how many sheets you’ll need based on shipping duration and temperature requirements.
Plan Ahead: Freeze your sheets in advance for optimal results.
Test Your Setup: Conduct trial runs to ensure the cooling solution meets your specific needs.
Ready to optimize your cold shipping process? Reach out to Tempk for expert advice on custom solutions using dry ice pack 10 sheets. We can help you build the perfect cold chain package tailored to your needs.
About Tempk
At Tempk, we specialize in providing innovative cold chain solutions to businesses in the food, pharma, and outdoor industries. Our dry ice pack 10 sheets kits are designed to offer reliable, reusable, and eco-friendly cooling solutions that help reduce costs and ensure your products stay at the right temperature. With years of experience and thousands of satisfied clients, we are committed to delivering quality and efficiency for all your cold chain needs.
Dry Ice Bag Zip Seal: Safe Venting & 2025 Guide
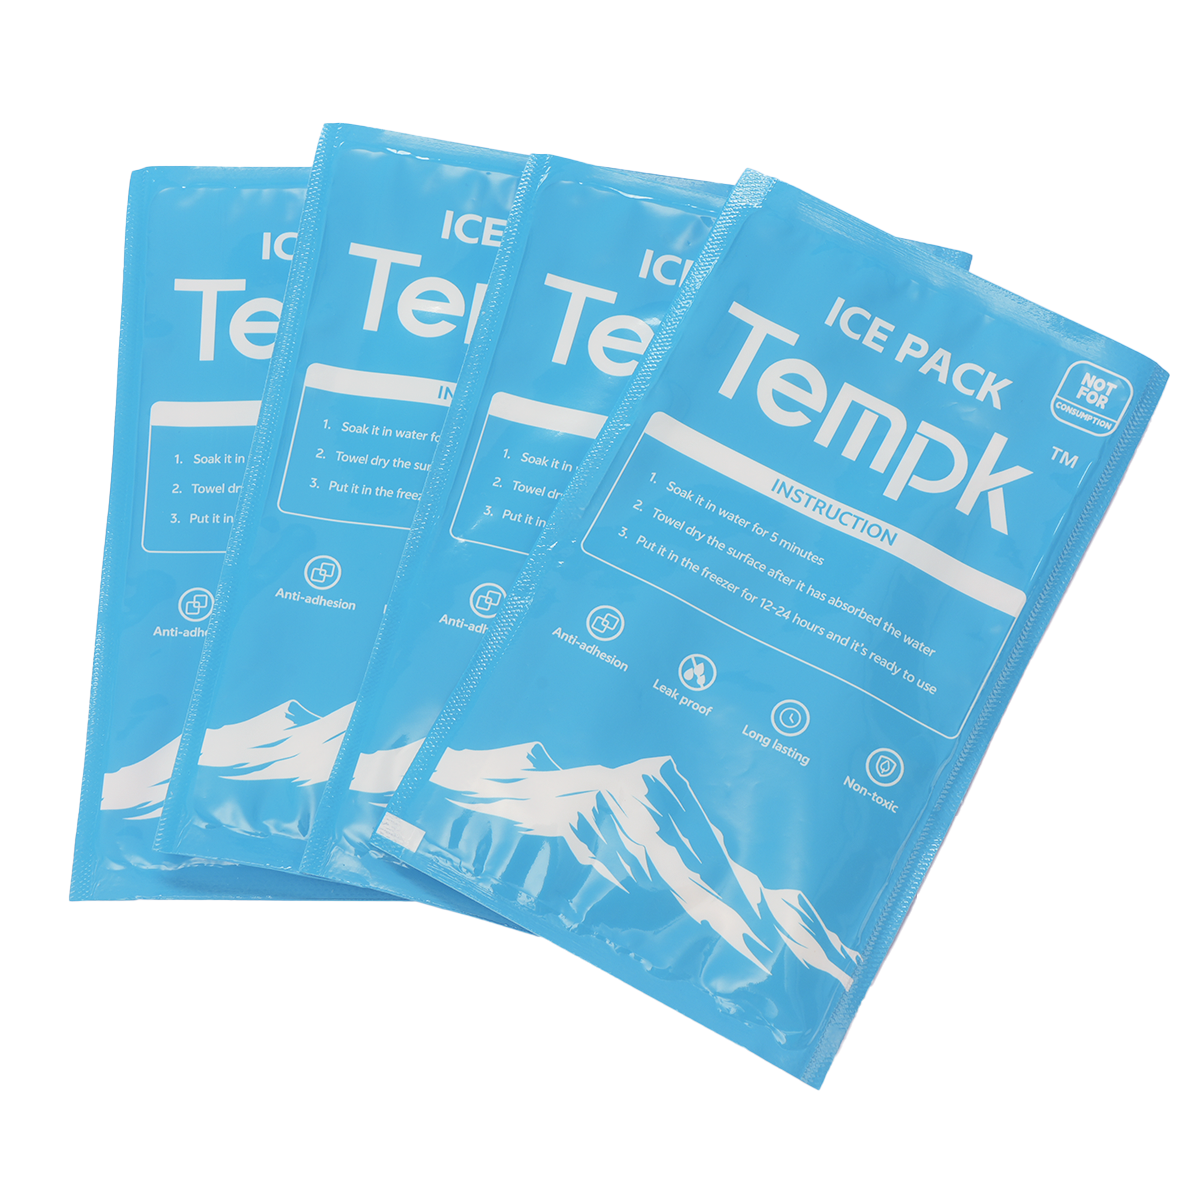
Dry Ice Bag Zip Seal: Safe Venting & 2025 Guide
A dry ice bag zip seal is safe only when vented and paired with a non-airtight outer shipper. Dry ice (solid CO₂) sublimates at −78.5 °C and gas must escape. This guide shows you exactly how to vent, size, place, and label a dry ice bag zip seal so you pass 2025 acceptance checks and stop wet cartons without burst risks.
Choose a venting method that keeps a dry ice bag zip seal clean while releasing CO₂.
Right-size dry ice for 24–72 h lanes using a quick calculator and pack it where it works best.
Apply UN1845 labels the right way with a dry ice bag zip seal and a non-airtight cooler.
Pick the best closure (dry ice bag zip seal vs heat seal vs ties) for speed, safety, and audits.
Cut wet boxes and shocks with spacers, liners, and a simple seven-step SOP.
When is a dry ice bag zip seal safe—and when not?
Core answer: It’s safe when the zipper is closed for containment and a deliberate vent path exists so CO₂ can exit. Never create an airtight system. Place the dry ice bag zip seal above the payload with spacer gaps; ensure the outer cooler also vents. This setup prevents pressure spikes, reduces frost on labels, and passes 2025 acceptance checks.
Why it works for you: Dry ice turns straight to gas. Gas needs space. A dry ice bag zip seal used as a re-closable liner keeps pellets tidy, limits odor transfer, and—when vented—prevents “balloon” failures. Top placement lets cold, heavy CO₂ bathe product evenly while escaping through the cooler’s vent path. You get cleaner unboxes, fewer burst claims, and simpler line training.
Can a dry ice bag zip seal be airtight for dry ice?
No. Airtight = unsafe. Add one controlled leak path near the top panel so gas escapes while pellets stay put. Pick one:
| Venting Method (top panel) | Setup Time | Cleanliness | Reliability | What it’s best for |
|---|---|---|---|---|
| Zipper fin-seal micronotch (2–3 mm) | Seconds | Excellent | High | Most parcel lines; easiest SOP |
| Micro-perfs (2–4 pinholes / 100 cm²) | Seconds | Very good | Med-High | Small bags; fast builds |
| Membrane vent patch | Minutes | Excellent | Very High | High-value pharma/biologics |
Pro tip: Keep the vent above the dry ice load so gas flows up and out, not through product.
Practical tips you can use today
Top, not bottom: Put the dry ice bag zip seal on top with a 10 mm spacer—never under heavy payloads.
Protect labels: Add a thin corrugate pad above fragile label stock to avoid freeze-fracture.
Don’t block vents: Don’t jam the bag into lid gaskets or over-tape foam seams. Gas must escape.
Real case: A meal-kit brand cut “wet box” complaints ~60% in July by switching to a vented dry ice bag zip seal on top, adding a moisture barrier and a 10 mm spacer—no extra dry ice, just smarter gas flow.
How do you size and place a dry ice bag zip seal for 24–72 h lanes?
Short answer: Estimate dry ice from heat load and hold time, pack ~1 kg per dry ice bag zip seal, place bags on top and side voids, and validate with a one-box test. Add 20–30% in hot lanes or long porch dwell.
Why this matters: Right-sized refrigerant and correct placement give you longer holds without product burn. Using multiple dry ice bag zip seal units spreads cold evenly and keeps cartons dry, even with multi-stop routes.
Quick rule-of-thumb calculator (paste into SOP)
| Cooler Size | Typical Heat Load (W) | Target Hold | Dry Ice (kg) | Dry ice bag zip seal setup |
|---|---|---|---|---|
| 10–15 qt parcel | 7–8 | 24 h | 1.1–1.3 | 1 × ~1 kg bag (top) |
| 20–25 qt parcel | 8–10 | 36 h | 1.8–2.2 | 2 × ~1 kg (top + side) |
| 35–45 qt parcel | 9–12 | 48 h | 2.7–3.5 | 3 × ~1 kg (spread on top) |
| 60 qt rotomolded | 10–14 | 72 h | 4.5–6.3 | 4–6 × ~1 kg (top/side) |
Good practice: Freeze product to setpoint, pre-chill the cooler, minimize headspace in each dry ice bag zip seal, and log one seasonal lane before scaling.
How do you label UN1845 with a dry ice bag zip seal so hubs accept it?
Direct answer: Mark the outer package (not the inner bag) with “Dry Ice” or “Carbon Dioxide, solid,” UN1845, net kg, and apply the Class 9 label as required. Packaging must permit the release of gas—that’s a core acceptance check in 2025.
Checklist you can post at the bench
Confirm the dry ice bag zip seal is vented; outer shipper is not airtight.
Mark UN1845 and net kilograms of dry ice on the outer box.
Apply Class 9 hazard label where required.
Keep packages in ventilated areas; wear cryo-gloves and eye protection.
Don’t tape over any designed vent paths.
Dry ice bag zip seal vs heat seal vs ties—what should you choose?
| Closure Type | Pros | Cons | Best Use |
|---|---|---|---|
| Dry ice bag zip seal (vented) | Fast, clean, re-closeable; great for pellets | Must add vent; zips can snag | Parcel lines needing speed + rework |
| Heat seal + vent notch | Strong edge; tamper-evident | Needs sealer; brittle at sharp folds | High-value pharma/biologics |
| Twist/cable tie (loose) | Ultra-quick; obvious vent path | Less tidy; wire ends | Bulk seafood, field packouts |
| Press-to-close + micro-perfs | Very clean; controlled venting | Perfs can “dust” | Confections, clinical kits |
Rule of thumb: If unsure, pick a dry ice bag zip seal plus a tiny vent notch—fast, repeatable, and audit-friendly.
2025 trends shaping dry ice bag zip seal usage
What’s new this year: Teams favor vent-assured designs, monomaterial films for easier recycling, and QR SOPs on lids for faster training. SMBs now validate with a one-box test each season and keep small loggers in every fifth parcel.
Latest progress at a glance
Laser-vented zippers: Built-in micro-breathers reduce accidental hermetic seals.
Membrane vents at scale: Factory-applied squares deliver consistent release for high-value lanes.
Default data-logging: Right-size dry ice and catch weak routes before peak heat.
Market insight: Hybrid packs—small dry ice bag zip seal on top plus PCM panels—are rising for desserts and confections. Texture holds up, cartons stay dry, and hubs report fewer returns.
FAQs
Q1: Can I fully close a dry ice bag zip seal to trap more cold?
No. Packaging with dry ice must allow CO₂ to escape. Add a micro-notch, micro-perfs, or a membrane vent on the top panel.
Q2: Where should I place the dry ice bag zip seal in the cooler?
On top of the payload with a spacer gap. CO₂ sinks, so top placement cools evenly while gas exits through the shipper’s vent path.
Q3: How much dry ice per dry ice bag zip seal for 48 h lanes?
Start near 3 kg total for a ~9 W parcel cooler (≈3 × 1 kg bags) and validate with a one-box test; add 20–30% in hot seasons.
Q4: Do I need a Shipper’s Declaration if only the refrigerant is dry ice?
Often no, but your outer package still needs UN1845, net kg, and Class 9 (where required). Train staff and follow current carrier pages.
Summary & recommendations
Bottom line: A dry ice bag zip seal is safe and efficient only when vented and paired with a vent-capable cooler. Put bags on top, right-size dry ice with the calculator, and label the outer with UN1845, net kg, and Class 9 where required. Test one box per season and fix wet-box issues with barriers and spacer gaps.
Next steps (3-point plan):
Standardize one vent method for every dry ice bag zip seal.
Pilot two shipments per lane with a logger; tune mass and placement.
Print an acceptance checklist (UN1845, net kg, Class 9) for the bench.
About Tempk
We engineer frozen-grade packaging for food and life-science brands. Our dry ice bag zip seal range pairs metallized PET barriers with wide-track zips for fast bench work. Customers report fewer melt claims and faster hub acceptance after adopting our labeling kits and SOP playbooks. We validate lanes, right-size dry ice, and help you ship cleanly and compliantly—season after season.
CTA: Ready to eliminate burst bags and wet boxes? Book a 20-minute consult and we’ll turn your current pack-out into a compliant, lab-tested spec.
Dry Ice Bag with Zip: Safe & Compliant Use 2025
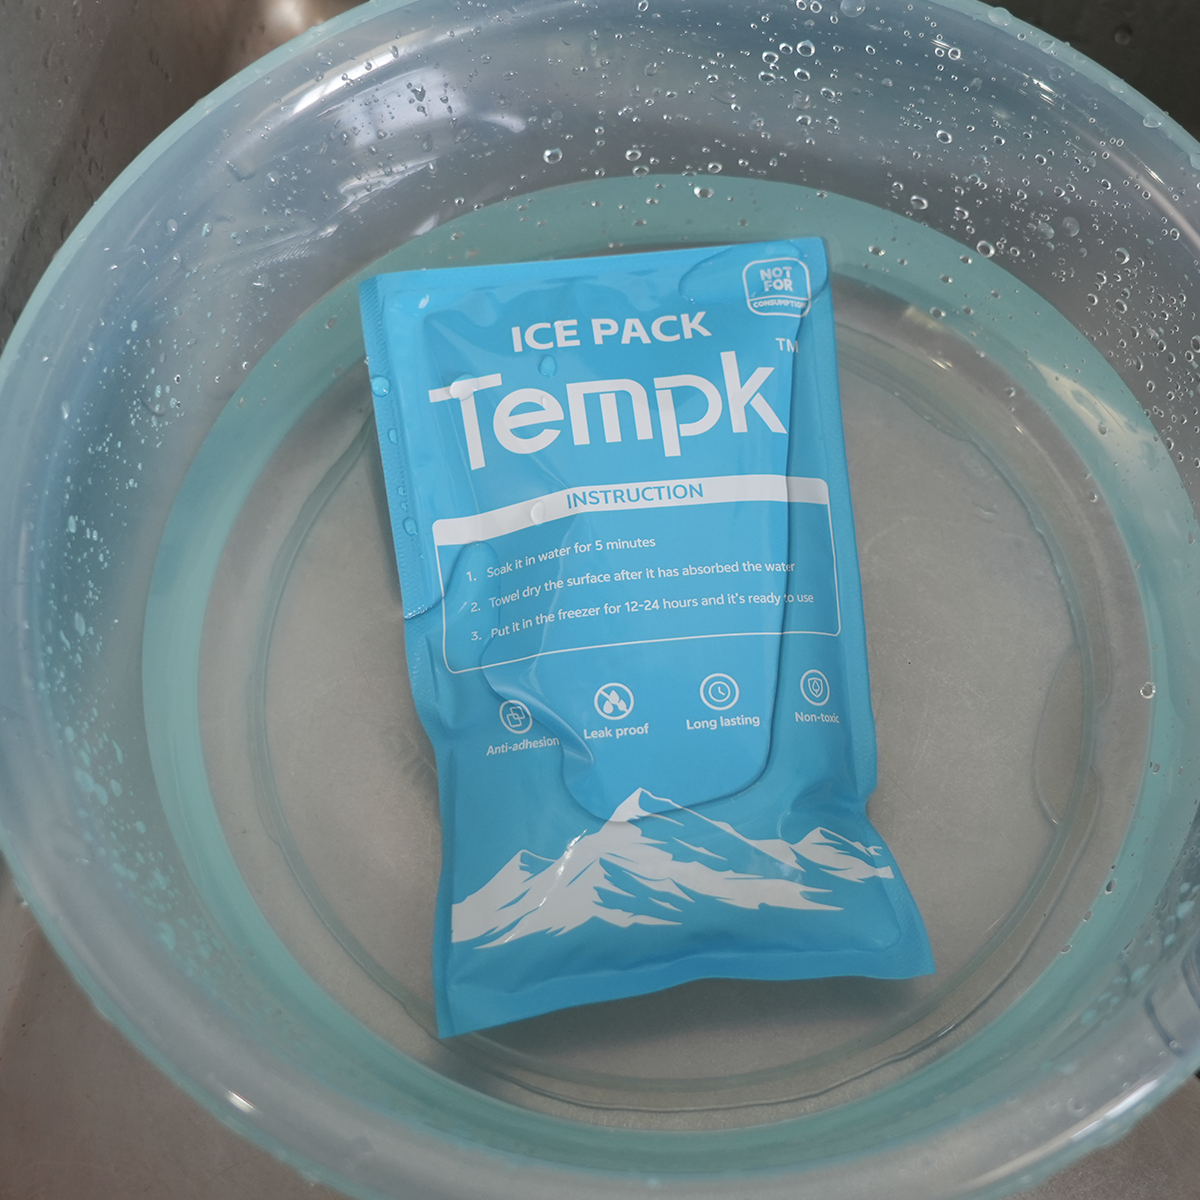
If you use a dry ice bag with zip, two rules decide safety and compliance: vent CO₂ and avoid airtight seals. Dry ice at −78.5 °C turns into gas; ~1 lb becomes ~250 L CO₂, so packages must NOT be airtight and the outer box must be marked UN1845. In 2025, carriers and IATA PI 954 continue to enforce these basics.
When is a dry ice bag with zip safe to use? (vented vs. airtight)
Which films and zipper types work at −78.5 °C? (LDPE/EVA vs. brittle PP)
How do you pack and label for UN1845 acceptance? (clear, step-by-step)
What ventilation do rooms and vehicles need? (simple rules you can apply)
What are the 2025 material and monitoring trends? (fresh, practical)
When is a dry ice bag with zip safe and compliant?
Short answer: A dry ice bag with zip is safe only if it is vented and used within a non-airtight shipper that’s labeled UN1845. Airtight zipper closures are not acceptable with dry ice because CO₂ must escape to prevent pressure build-up and rupture.
Why this matters: One pound of dry ice can release a roomful of gas over time. That gas expands, pressurizes sealed pouches, and can displace oxygen in tight spaces. A compliant setup uses a vented inner bag (micro-perfs, a nonwoven vent patch, or an engineered non-hermetic zip) placed inside an insulated but non-airtight shipper, with the outer carton marked “Dry Ice/Carbon dioxide, solid,” UN1845, and net weight.
What venting methods work best for a dry ice bag with zip?
Use engineered vents rather than ad-hoc gaps. Micro-perforations, Tyvek®-style vent patches, or documented leak-rate zippers provide predictable release while containing pellets.
| Venting Option | Where Gas Flows | What It Prevents | What It Means for You |
|---|---|---|---|
| Micro-perforated film | Into the shipper cavity | Inner-bag overpressure | Clean, invisible venting with good pellet control |
| Tyvek®/nonwoven vent patch | High-flow exit point | Sudden zipper blowout | Best for larger loads or rapid sublimation |
| Non-hermetic zipper | Along zipper track | Fully sealed bag explosions | Check the vendor’s leak-rate spec before SOP use |
Practical tips you can apply today
Treat the zipper as containment, not a seal.
Pre-plan a gas path. Create flow paths from the inner bag to lid gaps.
Mark the outside only. The outer carton carries “Dry Ice/UN1845” and net kg.
Which materials and zippers are best for a dry ice bag with zip?
Core guidance: Use LDPE/LLDPE or LDPE/EVA co-extrusions for ductility near −78.5 °C. Avoid rigid PP sliders and unmodified PP films.
Pellets or blocks inside a dry ice bag with zip?
Pellets pack tightly and reduce point loads on zippers; blocks last longer but can stress the zipper track.
| Use Case | Pellets | Small Blocks | Meaning for You |
|---|---|---|---|
| Short haul, frequent handling | Excellent | Good | Pellets conform to voids and cool fast |
| Long haul, minimal handling | Good | Excellent | Blocks sublimate slower; protect the zipper |
| Fragile primary packs | Excellent | Good | Pellets reduce hard contact points |
How do you pack and label a dry ice bag with zip step-by-step?
Prep the outer shipper. Insulated but not airtight.
Load your product. Buffer fragile items.
Fill the vented bag. Add pellets; leave headspace.
Place bag inside shipper. Add spacers for gas flow.
Close shipper (not airtight). Apply UN1845 + net kg.
Stage in ventilated areas. Avoid sealed trunks or rooms.
Copy-ready airbill line:
What ventilation do you need around a dry ice bag with zip?
Rule of thumb: Each 1 lb → ~250 L CO₂. Ensure your space can dilute that safely. Typical limits: 5,000 ppm (8-hr TWA) and 30,000 ppm (15-min STEL).
Field checklist
Vents present? Micro-perfs or patch.
Outer not airtight? No gasketed seals.
Labels complete? UN1845 + net kg.
Space safe? Ventilation and CO₂ monitor where needed.
2025 updates: where a dry ice bag with zip fits now
Trend overview: New EVA-toughened films, leak-rated zippers, and small CO₂/temperature loggers make validation easier.
Latest at a glance
Leak-rated zips: Match bag leakage to sublimation model.
Low-temp films: Reduce cracks and failures.
CO₂/Temp logging: Auditable ventilation and product protection.
FAQs
Can I fully seal a dry ice bag with zip?
No. Any container holding dry ice must vent CO₂.
Do I label the inner bag or the outer box?
Label the outer carton with UN1845 and net kg.
Pellets vs. blocks—what should I choose?
Use pellets for flexibility; blocks for duration.
Do I need special materials?
Yes. Prefer LDPE/EVA films and non-hermetic zips.
How much dry ice is enough?
5–10 lb often supports ~18–24 h with an insulated shipper.
Summary & recommendations
Key points: A dry ice bag with zip is a vented inner, not a seal. Pair with a non-airtight shipper, label UN1845 + net kg, and choose LDPE/EVA films with non-hermetic zippers.
Next steps:
Specify a vented bag.
Validate pack-outs and labeling.
Add CO₂ ventilation checks.
About Tempk
We design validated cold-chain systems—from vented dry ice bags with zip to 144-hour shippers—backed by SOP kits with label sets, net-weight logs, and CO₂ checklists.
Dry Ice Bag With Vent: 2025 Safe Shipping Guide

Dry Ice Bag With Vent: Safe, Compliant Shipping 2025
Updated: September 19, 2025 — If you ship with dry ice, a dry ice bag with vent is the simplest way to prevent pressure build-up, stay compliant (UN 1845 + net kg), and keep products frozen longer. One vented liner plus a clear gas path cuts acceptance failures and reduces CO₂ exposure risk for your team.
Why a dry ice bag with vent matters — safety and acceptance, with long-tail tips on UN 1845 labeling
How to choose, size, and close the liner — film, seams, and fold-and-clamp closure best practices
How to pack and label correctly — checklists, AWB cues, and Class 9 placement for air lanes
CO₂ safety and exposure limits — practical steps for drivers and packout rooms
2025 trends — smarter vents, standardized acceptance checklists, and lighter DIM strategies
Why does a dry ice bag with vent matter for safety and rules?
Short answer: A dry ice bag with vent lets CO₂ escape while containing pellets/blocks—preventing over-pressure and meeting 2025 acceptance checks. Without venting, gas turns your package into a balloon that can bulge or burst. Regulations require a gas-release path; carriers flag sealed liners as unsafe and noncompliant.
Deeper take (from your lane): Dry ice sublimates straight to gas. If the liner, headspace, or outer is airtight, pressure spikes—especially in air cargo where cabin pressure shifts. Modern acceptance checklists explicitly confirm venting and UN 1845 markings. Teams that swapped sealed liners for a vented liner plus perforated overwrap saw failed acceptance drop and fewer melt claims in A/B tests.
How does a dry ice bag with vent prevent bursts?
Working principle: A controlled leak path—via micro-perfs, a fold-and-clamp neck, or a membrane/valve—bleeds CO₂ into the shipper headspace and out through carton gaps. The system stays closed to chips, not hermetically sealed to gas. That’s why “no heat-sealing the neck” is a common SOP line.
| Vented design (liner) | What it is | What to check | What it means to you |
|---|---|---|---|
| Fold-and-clamp closure | Neck folded; clamp holds | Gas path still open | Fast, glove-friendly; aligns with acceptance checks |
| Band-and-fold | Elastic band low on neck | No full seal; excess film folded back | Repeatable tension; easy to audit |
| Micro-perforated film | Tiny gas bleed holes | Perfs not blocked by overwrap | Smooth release; avoid dust clogging |
Practical tips and quick wins
Leave headspace: A small gap under the lid preserves a vent path.
Perforate stretch wrap near flap vents: Don’t suffocate the outer.
Never tape over a vent seam: It’s the #1 rushed-packing error.
Real case: A DTC meal brand moved from sealed liners to a dry ice bag with vent plus perforated wrap. Acceptance holds nearly vanished, and melt claims fell by roughly a quarter in 90 days across 1,800 parcels.
How should you choose and size a dry ice bag with vent?
Short answer: Match film and seam strength to handling risk, then choose a closure that is secure but not hermetic. Common picks are 4–8 mil LDPE/LLDPE with wide double seals and a fold-and-clamp neck. If your shipper’s gasket is tight, add thin spacers to keep a gas path.
What to weigh up: Think in three blocks—film, seams, closure. Thicker film resists pellet abrasion; wide bottom/side seals survive drops. The closure must leave a leak path. Pallet/shrink? Perforate near flap vents so you don’t trap CO₂. Run a puncture-drop-vent mini-qualification before rollout.
Film & seam cheat sheet for a dry ice bag with vent
| Use case | Film (typical) | Seams | What it means for you |
|---|---|---|---|
| Parcel lanes, moderate handling | 4–6 mil | 10–20 mm heat-seals | Balanced puncture resistance |
| Heavy pellets/blocks | 6–8 mil | Double seals | Fewer seam peels in sortation |
| Tight-gasket returnables | 6–8 mil | Wide base + gussets | Add 2–3 mm spacers for headspace |
How do you pack and label with a dry ice bag with vent?
Short answer: Vent end-to-end. Load dry ice into the dry ice bag with vent, isolate the payload, close the neck without heat-sealing, maintain lid headspace, and avoid airtight overwraps. Mark the outer “Dry Ice/Carbon dioxide, solid, UN 1845” + net kg and apply Class 9.
Step-by-step SOP (copy/paste ready):
Pre-chill the insulated inner; assess lane risk (hot/humid needs margin).
Stage payload in a secondary pack with supports/separators.
Load dry ice into the dry ice bag with vent; keep away from markings.
Fold-and-clamp (or band-and-fold) the neck—do not heat-seal.
Insert liner; keep a headspace under the lid with small spacers.
Close outer; perforate wrap near top flap vents.
Label outer: UN 1845 + net kg; apply a Class 9 label.
Air waybill (AWB): “UN 1845, Dry Ice, x packages × y kg (net per package).”
Dry-ice mass estimator (quick-start)
| Transit window | Typical dry ice | Hot/humid add-on | What it means |
|---|---|---|---|
| 18–24 h | 5–8 lb | +1–2 lb | Overnight air; few handoffs |
| 36–48 h | 10–16 lb | +2–4 lb | Two-day service; summer lanes |
| 72 h | 18–24 lb | +4–6 lb | Use premium insulation only |
Do 2025 rules require venting a dry ice bag with vent?
Yes. Packaging must permit CO₂ release; sealed liners or airtight outers are not compliant. Airline acceptance checklists and carrier job aids enforce UN 1845 + net kg labeling and a visible vent path. Expect stricter station audits and clearer AWB entries in 2025.
CO₂ exposure when using a dry ice bag with vent?
Work safely: Ventilate rooms/vehicles. Practical limits often cited in guidance: 5,000 ppm (8-h) and 30,000 ppm (short-term); treat 40,000 ppm as immediately dangerous. Avoid sealed trunks or tiny storerooms packed with venting shippers. Post a one-page CO₂ safety card at pack benches.
Field tips
Unload in moving air (open dock doors, vent fans).
Stagger staging in small rooms; crack doors between loads.
Train drivers on symptoms (headache, drowsiness) and response.
2025 trends for the dry ice bag with vent
What’s new: Acceptance checklists put venting front-and-center; AWB templates reduce labeling errors; carriers highlight “not airtight” in public guidance. Many teams pair a dry ice bag with vent with lighter outers to lower DIM, and use pre-perforated wraps to keep flap vents breathing.
Latest progress at a glance
Clearer AWB examples reduce delays at tender.
Ventsafe wraps (pre-perforated) prevent blocked flaps in palletized loads.
Clamp closures replace twist-ties for repeatable, auditable vent paths.
Market insight: Frozen meal kits, seafood DTC, and labs standardize vented liners and headspace shims. Result: fewer returns, steadier temperature profiles, and faster acceptance across hubs.
Frequently Asked Questions
1) Do I really need a dry ice bag with vent for air?
Yes. The system must not be airtight and must allow gas to escape. A vented liner plus headspace is the simplest path to compliance and safety.
2) What goes on the label?
Write “Dry Ice / Carbon dioxide, solid, UN 1845” and the net mass in kg on a vertical side, then apply a Class 9 label. Follow carrier AWB examples.
3) How much dry ice should I load?
Start with 5–10 lb per 24 h for insulated parcels, then lane-test with a logger. Always add margin for hot lanes and multiple handoffs.
4) Can I heat-seal the liner for strength?
No. Heat-sealing risks a hermetic closure. Use fold-and-clamp or band-and-fold so the vent path remains open.
5) If the inner vents, does the outer need to vent too?
Yes—the whole system must permit CO₂ release: liner → headspace → outer flaps. Don’t choke vents with tight wrap.
Summary & recommendations
What matters most: A dry ice bag with vent balances containment and gas release, keeps people safe, and passes 2025 acceptance on the first try. Use fold-and-clamp closures, maintain headspace, mark UN 1845 + net kg, and ventilate rooms/vehicles. Validate with a quick puncture-drop-vent check and a two-lane logger trial before scale.
Next steps (CTA):
Standardize a dry ice bag with vent and clamp closure in your SOP.
Pre-print labels with UN 1845 and net-kg fields.
Perforate pallet/shrink near flap vents.
Run one hot-lane and one typical-lane test and review logger data with your QA lead.
About Tempk
We design, test, and document dry ice bag with vent solutions that pass acceptance on the first try. From clamp-closure liners to pre-perforated wraps and AWB/label templates, our systems balance safety, compliance, and cost—and we back them with lane testing and clear SOPs so your team can ship confidently.
Dry Ice Bag with Valve: 2025 Buyer’s & Use Guide
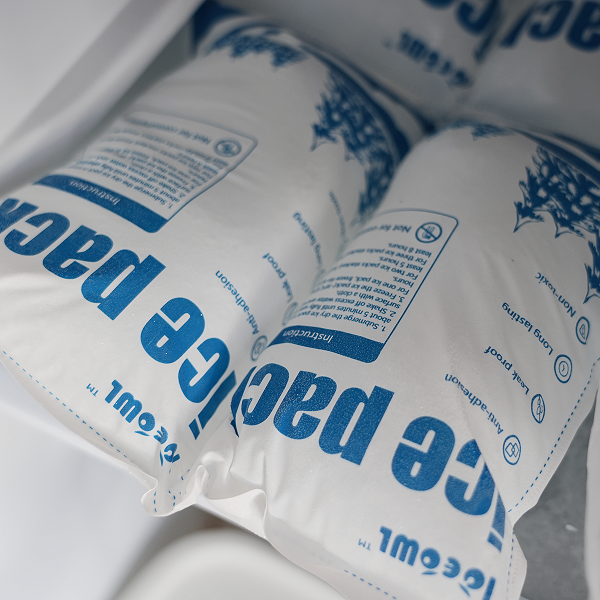
Dry Ice Bag with Valve: How to Choose, Pack, and Comply
If you ship frozen payloads, a dry ice bag with valve keeps gas venting safe while protecting your product. Within the first mile it prevents pressure build-up, supports IATA PI 954 compliance, and helps you pass 2025 carrier checks. Plan 5–10 lb dry ice per 24 h and mark UN1845 with net kg on the outer box so acceptance goes smoothly.
Sizing fast: plan ice mass for 24–72 h using a simple estimator and lane factors.
Safe pack-out: step-by-step setup so your dry ice bag with valve vents freely and passes audits.
Valve choices: one-way valve vs. ePTFE membrane and when each wins on real routes.
Regulatory must-haves: PI 954 venting, UN1845 marks, and “not airtight” rules demystified.
When not to use dry ice: 2–8 °C lanes and safer alternatives.
Which dry ice bag with valve should you choose?
Pick a bag that vents CO₂ by design, tolerates −78.5 °C, and fits your shipper so the valve is never blocked. This aligns your inner packaging with PI 954’s requirement that the package must permit gas release while staying non-airtight. Validate the bag with your specific shipper geometry and lane.
Why it matters to you: the right dry ice bag with valve controls back-diffusion of humid air (fewer clumps), reduces ballooning risk, and supports clean carrier acceptance when paired with a vent-permitted outer box and correct labels.
Valve vs. membrane—what’s best for your route?
One-way mechanical valve gives high CO₂ flow and minimal backflow; orientation matters. ePTFE membrane vents equalize pressure continuously with no moving parts and resist splash—handy in humid legs or multi-ascents. For both, confirm cold-rated materials and airflow capacity at your worst-case sublimation rate.
| Option (vent type) | How it works | Typical strength | What it means for you |
|---|---|---|---|
| One-way valve | Opens at low cracking pressure to pass gas | High CO₂ flow, low O₂/H₂O ingress | Great for high loads; keep the valve path unobstructed |
| ePTFE membrane | Microporous film equalizes pressure | No moving parts; splash resistant | Stable with vibration/altitude; verify low-temp rating |
| Perforated film | Small holes in bag | Simple, low cost | Not moisture-blocking; still requires non-airtight outer box |
Practical tips for buyers
Ask for airflow data at cold: request SCFH at −20 °C or colder.
Check film toughness: low-temp ductility avoids cracks at −80 °C.
Fit before you buy: ensure the valve faces free air volume and won’t be taped over.
Real-world win: A biotech shipping 48 h across two hubs switched to a dry ice bag with valve and increased mass from 20 lb to 24 lb. Excursions dropped to zero in six weeks, and acceptance delays disappeared once UN1845/net-kg marks were standardized.
How do you pack a dry ice bag with valve so carriers accept it?
Short answer: Keep the system vented, label correctly, and document. Mark the outer carton on two sides with “Dry Ice/Carbon dioxide, solid (UN1845)” and net kg, apply Class 9, and never make the package airtight—even with a valve inside.
Pack-out (auditor-friendly):
Pre-stage product at labeled temperature; confirm shipper vents and valve path are open.
Place logger near the payload core (not inside pellets).
Load dry ice into the dry ice bag with valve; close with a non-airtight tie so gas exits via the valve.
Layer per validation with spacers to avoid direct glass/vial contact; keep a standoff.
Close & label: UN1845 + net kg + Class 9; match airway bill; record time, lot, logger ID.
Labeling rules—made simple
Proper shipping name & UN: “Dry Ice” or “Carbon dioxide, solid”, UN1845.
Net quantity: state net kg of dry ice on the box.
Venting: package must permit release of CO₂; do not tape over valves or box vents.
How much dry ice should a dry ice bag with valve hold?
Plan 5–10 lb per 24 h in a well-insulated shipper; use the high end for hot ramps or frequent openings. For aircraft small-load planning, a ~2%/h sublimation basis is a conservative assumption. Add ~20% margin for handoffs.
| Scenario | Planned hours | Start calc (lb/24 h) | Add margin | What to pack |
|---|---|---|---|---|
| Express lane | 24 | 10 | +20% | ~12 lb |
| 48 h, 2 handoffs | 48 | 20 | +20% | ~24 lb |
| Warm tarmac, long route | 72 | 30 | +20–30% | 36–39 lb |
Safety: does a dry ice bag with valve reduce exposure risk?
It helps prevent pressure build-up, but space ventilation is still essential. Follow OSHA PEL 5,000 ppm (8-h TWA) and NIOSH STEL 30,000 ppm; train staff and consider CO₂ monitors in staging areas and vehicles.
When not to use a dry ice bag with valve—and what to use instead
If the label states 2–8 °C (not frozen), do not use dry ice. Use conditioned PCM bricks/ice packs and a validated 2–8 °C shipper per GDP/USP guidance. For vehicles or spaces with poor ventilation, consider −20 °C/−50 °C PCMs instead of dry ice.
2025 trends in dry ice bag with valve technology and practice
What’s new this year: updated small-load sublimation data helps right-size ice and airflow; ePTFE vents are tuned for recovery after liquid contact; shippers are cutting waste with CO₂-recovered sources and loggers + calculators instead of “over-icing.” Expect RFQs to ask for valve airflow at −20 °C, cracking pressure, OTR for the film, and PI 954 SOP proof.
FAQs
Is a dry ice bag with valve mandatory for air shipments?
Not strictly. PI 954 requires packages to permit CO₂ release and avoid pressure build-up; a valved bag is one compliant way when the system isn’t airtight.
How much dry ice per day should I plan?
Start with 5–10 lb per 24 h in a typical insulated shipper, then add ~20% for hot ramps or multiple handoffs.
What labels are required?
Mark “Dry Ice/Carbon dioxide, solid (UN1845)” and the net kg on two opposite sides; include the Class 9 label for air.
Does a valve remove CO₂ exposure risks?
No. It relieves pressure, but you still need ventilation to control airborne CO₂ levels.
Can I use a valved bag for 2–8 °C vaccines?
No—use PCMs and a validated 2–8 °C shipper; dry ice can freeze and damage those products.
Summary & recommendations
Bottom line: A dry ice bag with valve gives controlled venting, cleaner moisture management, and smooth acceptance—if you size ice correctly, keep the system non-airtight, and label UN1845 + net kg. Train teams on OSHA/NIOSH limits and document PI 954 compliance in your SOP.
Next steps (do-now plan):
Audit lanes & handoffs; 2) Validate a valved-bag pack-out with a logger; 3) Standardize pre-printed UN1845/net-kg labels; 4) Train quarterly on CO₂ safety; 5) Optimize mass with route data.
About Tempk
We help pharma, biotech, and food shippers move temperature-sensitive products with audited reliability. Our team designs validated pack-outs, supplies dry ice bag with valve kits rated for cold service, and builds lane-specific SOPs that pass regulatory and carrier checks. Clients cut excursions and acceptance delays while reducing dry ice waste.
CTA: Need a lane-specific pack-out and sizing table? Request a 30-minute consult and get a dry-ice mass plan, label set, and a one-page SOP your team can train in 15 minutes.
Dry Ice Bag with Handle: 2025 Buyer’s & Safety Guide
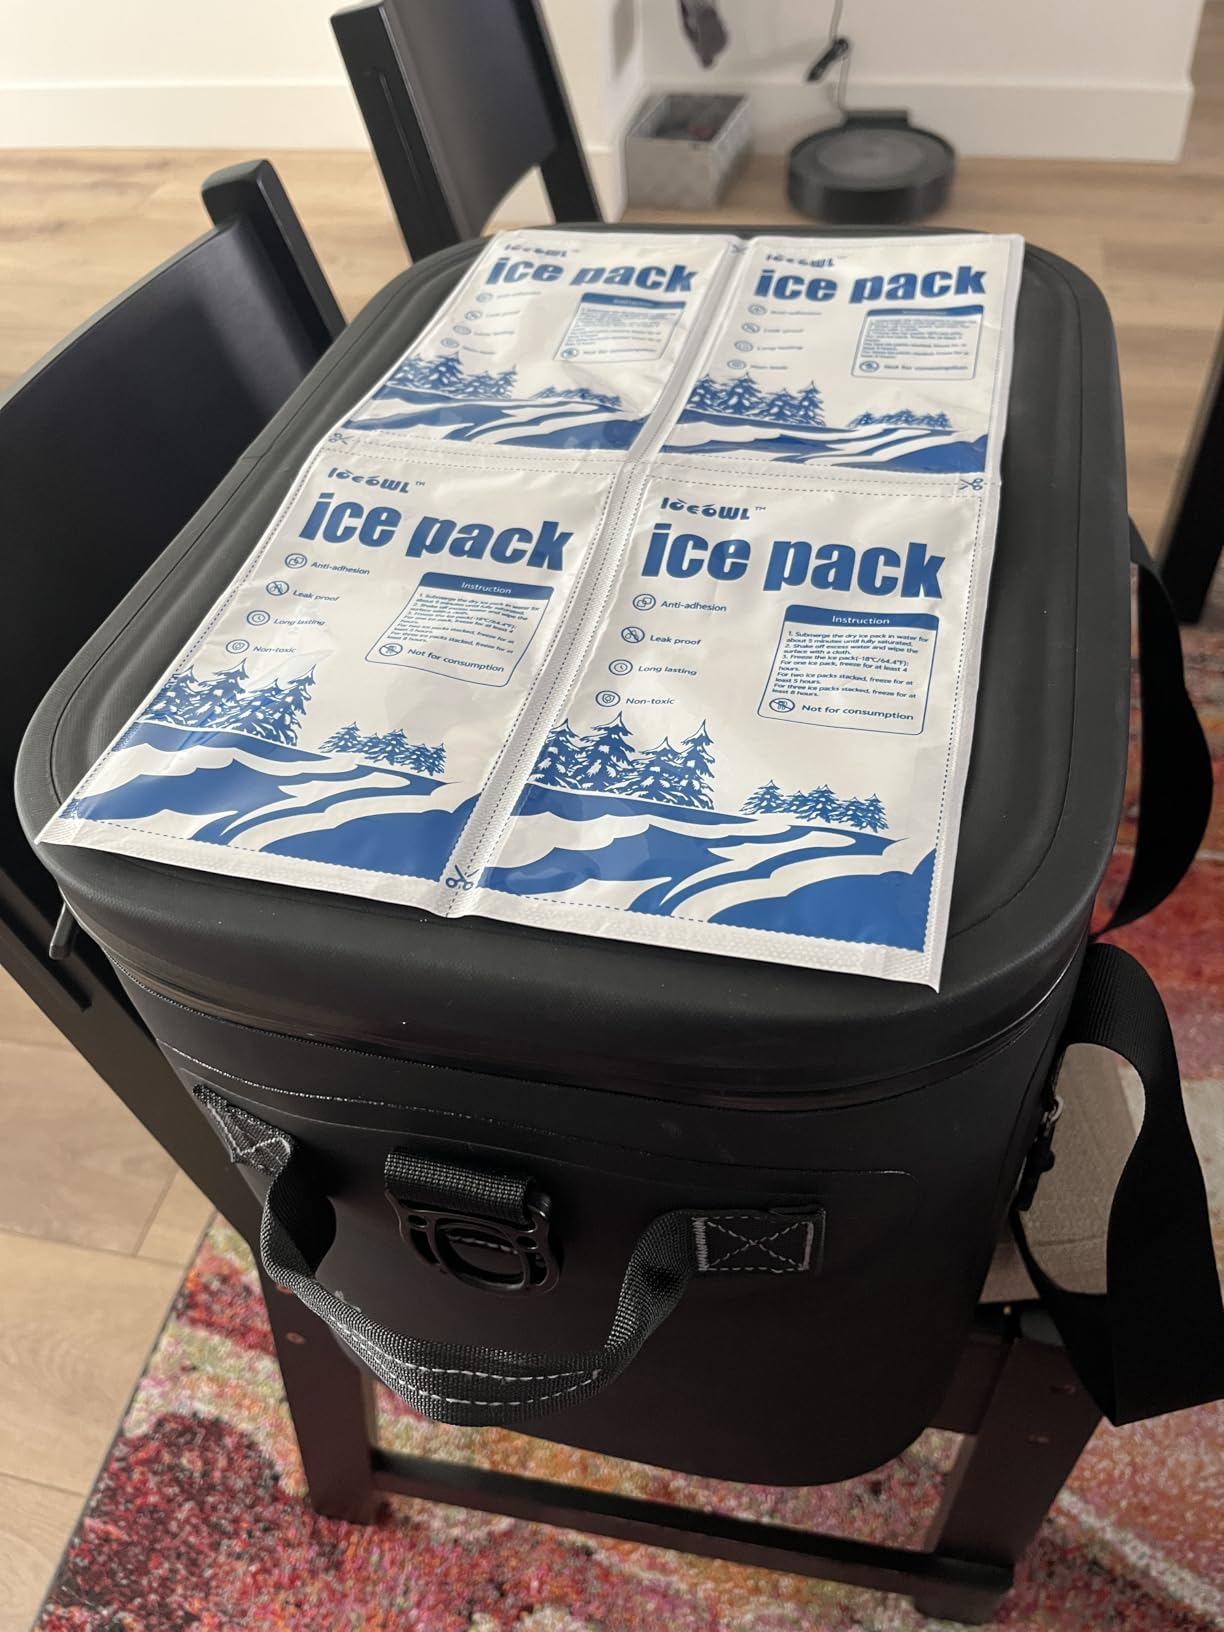
How to Choose a Dry Ice Bag with Handle in 2025
If you ship frozen food or medicines, a dry ice bag with handle is the simplest way to keep payloads ultra-cold without leaks or mess. Dry ice sits at −78.5 °C and typically consumes about 5–10 lb every 24 hours, so sizing and venting matter for safety and hold time. This guide shows you how to choose, pack, and label the bag for 12–48-hour lanes while cutting spoilage and driver effort.
What makes a dry ice bag with handle safer and colder?
How do you size a dry ice bag with handle for 12–48-hour runs?
How do you pack and label a dry ice bag with handle correctly?
Which 2025 trends matter for your operation?
What makes a dry ice bag with handle safer and colder?
A dry ice bag with handle pairs thick insulation with safe venting, letting CO₂ escape while keeping frozen temperatures stable. Handles reduce contact time with cold surfaces, preventing injury and improving ergonomics for couriers. For compliant shipping, mark packages “UN 1845” and use the Class 9 hazard label, and avoid airtight seals so gas can vent.
Why it works for you: the bag slows sublimation, spreads cold evenly, and the handle supports quick, safe transfers during multi-stop routes. For most routes, the rule of thumb is 5–10 lb of dry ice per 24 hours depending on insulation and ambient heat.
How do insulation and vents extend hold time?
Insulation (foam + reflective film) reduces heat gain, while vent gaps or valves prevent pressure build-up from CO₂ gas. That combination preserves colder air around your goods and avoids ruptures. In practice, pellets spread cooling evenly; blocks last longer but cool less uniformly.
| Size–Use Fit | Typical Dry Ice Load | Expected Duration | What it means to you |
|---|---|---|---|
| Small route (5–10 lb bag) | 5–8 lb | 12–24 h | Ideal for courier routes and ice cream drops. |
| Standard day (10–20 lb bag) | 8–15 lb | 24–48 h | Covers most regional deliveries with buffers. |
| Bulk or multi-day (20 lb+) | 15–30 lb | 48 h+ | For long lanes or hot climates with delays. |
Practical tips that cut risk and waste
Pre-chill the dry ice bag with handle for 20–30 minutes before loading.
Separate product from the ice using pads or a shelf; avoid direct contact with vials or cartons.
Carry by the handle, not the shell, to avoid frostbite and speed hand-offs.
Never make it airtight; venting prevents rupture and keeps you compliant.
Real-world snapshot: A meal-kit operator switched to handled dry ice bags and cut melt-related returns by ~90% on 200 km routes, while improving driver ergonomics at the door.
How to choose the best dry ice bag with handle in 2025?
Match capacity, insulation grade, and handle design to your lane length and load. Start with your longest route and the target arrival state (hard-frozen vs. deep-chilled). Then pick a capacity that fits your product + dry ice mass with room for airflow. Look for reinforced or padded handles, durable zippers, and water-resistant shells.
3-step sizing mini-tool (use in the field):
Transit hours × 0.25–0.4 lb = dry ice per hour buffer.
Add 20% for hot weather or frequent door-opens.
Choose the smallest dry ice bag with handle that fits that ice mass plus your payload and dividers.
How to use a dry ice bag with handle safely and legally?
Protect skin, ventilate, and label—then train your team to do it every time. Wear insulated gloves and safety glasses when loading. Pack and open in well-ventilated areas. Keep zippers slightly open or use designed vents; do not seal air-tight. Label as UN 1845, Class 9 where required and keep the bag upright in transit.
Simple SOP:
Don gloves; pre-chill the dry ice bag with handle.
Load blocks at the bottom or pellets in pouches; add a pad between ice and goods.
Stow items; close with a visible vent path.
Apply hazard marking; place in a ventilated vehicle section.
At delivery, open briefly, remove items, and let residual ice sublimate in a safe area.
Will a dry ice bag with handle pay off for food and pharma?
Yes—fewer spoilage claims, faster hand-offs, and scalable re-use make the ROI clear. Food services eliminate melted desserts and soft proteins on hot days, while labs keep vials frozen across multi-stop routes. The handle speeds stairwells, elevators, and doorways, cutting dwell time at each stop and reducing driver fatigue.
2025 cold-chain trends for the dry ice bag with handle
The big shifts this year: lighter, greener insulation; sensor-ready bags; and modular inserts that extend duration. Many teams add Bluetooth loggers and use reusable handled bags to cut foam waste. Hybrid approaches combine pellets for fast pull-down with blocks for long hold, improving results on traffic-prone urban routes.
Frequently Asked Questions
Q1. How much dry ice goes in a dry ice bag with handle for a day trip?
Plan 5–10 lb per 24 hours depending on climate and insulation; add 20% if you expect delays.
Q2. Should the dry ice touch my product?
No—use pads or a divider so cartons or vials don’t contact the ice; cold shock can damage packaging.
Q3. Do I seal the bag completely?
No. Dry ice becomes CO₂ gas. Keep a vent path and never make the package airtight; apply UN 1845 and Class 9 where required.
Q4. Pellets or blocks for my route?
Use pellets for even, fast cooling and frequent opens; blocks for fewer opens and longer legs. Many teams mix both in one dry ice bag with handle.
Summary & recommendations for your dry ice bag with handle
Pick the right size, ventilate, and train. Choose a dry ice bag with handle sized to your longest lane; budget 5–10 lb per day, and keep a vent path with required hazard marks. Pre-chill, separate goods from ice, and carry by the handle for safer, faster hand-offs.
Next steps: run a lane test this week. Log temps, weigh ice before/after, and right-size your dry ice bag with handle fleet. Need help? Book a 15-minute assessment with our packaging team.
Internal link suggestions for the dry ice bag with handle (your site)
About Tempk
Tempk designs and validates temperature-controlled packaging used by food services, labs, and healthcare providers. Our reusable handled bags, ice packs, and coolers are R&D-tested for long hold times, and our team helps you match solutions to your routes and compliance needs. Get tailored recommendations for your next lane.
Dry Ice Bags at Walmart: Safe Use, Shipping & Recycling

Dry Ice Bags at Walmart: What Should You Choose?
If you need to keep goods frozen, dry ice bags at Walmart can work—when you size, pack, and vent them correctly. This guide gives you safe-use steps, shipping rules of thumb, and sustainable options, including reusable “dry ice” packs for 2025 operations. Typical sublimation is ~5–10 lb per 24 hours in a cooler—plan accordingly.
Updated: September 2025
Pick the right bag and size for frozen transport (dry ice bag size for shipping)
Pack and label safely to avoid pressure risks (vented dry ice packaging)
Estimate refrigerant with a quick calculator (how much dry ice do I need?)
Compare options vs. reusable packs (reusable dry ice pack alternative)
Recycle packaging the right way (dry ice bag recycling 2025)
How do you choose the right dry ice bag at Walmart?
Start with vented, sturdy bags sized to your payload; place dry ice above the items and allow gas to escape. Use insulated liners for longer routes and avoid airtight seals to prevent CO₂ pressure buildup. Aim for simple, repeatable packing steps your team can follow every time.
What size dry ice bag do you actually need?
Choose capacity by transit hours and box volume. As a rule of thumb, dry ice disappears (sublimates) steadily, not suddenly—plan for margin. If you’re close to the limit, add insulation first before piling on more dry ice; it slows loss and saves cost.
| Sizing Input | Typical Range | Quick Guide | What it means for you |
|---|---|---|---|
| Transit time | 12–72 hours | Longer time = more lbs | Add 25% buffer for delays |
| Box volume | 10–60 qt | Bigger box = more loss | Fill voids to slow warming |
| Insulation | Basic → Premium | Better liner = less ice | Cheapest way to extend hold |
| Venting | Loose lid/vents | Never airtight | Eliminates pressure risk |
Practical tips you can use today
Short delivery (≤24 h): Use 5–10 lb dry ice in a lined cooler; dry ice bags at Walmart are adequate for personal and small orders.
Weekend trip (48 h): Move to a foam cooler + liner; pre-chill box, place ice on top.
Power outage: Park a block on a tray in your freezer; crack the door occasionally for ventilation.
Real-world case: A Texas bakery kept cheesecakes frozen for two-day ground by packing ~5 lb per shipment, then switched to reusable “dry ice” packs and cut consumable costs by ~22% while keeping product quality.
How do you pack and ship with dry ice safely (and compliantly)?
Use a vented cooler or lined shipper, place dry ice on top, label the outside “Dry Ice (Carbon Dioxide, Solid)” and list net weight. Train staff on glove use, ventilation, and not sealing CO₂ in airtight containers.
How much dry ice should you buy?
Use this quick estimator, then test once and standardize.
| Scenario | Transit | Estimator | For you |
|---|---|---|---|
| Meal kit (small) | 24 h | ~7 lb | One Walmart bag block may suffice |
| Cheesecake (insulated) | 36–48 h | 10–14 lb | Add liner; keep on top |
| Ice cream (premium) | 48–72 h | 14–21 lb | Upgrade insulation first |
When should you choose reusable “dry ice” packs instead?
Reusable packs eliminate CO₂ handling, labels, and last-minute restocking—ideal for frequent shipments ≤72 hours. They sustain sub-zero temps when pre-frozen, reduce hazmat steps, and can be refrozen repeatedly, lowering total cost over time.
Dry ice vs. reusable packs (what’s different?)
| Factor | Dry Ice (Retail) | Reusable “Dry Ice” Packs | Meaning for you |
|---|---|---|---|
| Temperature | Ultra-cold (−78.5 °C) | Sub-zero (e.g., −20 °C) | Packs protect delicate items |
| Duration | Scales with pounds | Fixed by pack + insulation | Add liners before more ice |
| Handling | Gloves + ventilation | Simple, non-hazmat | Faster training, fewer errors |
| Cost model | Per-shipment | Reusable asset | Lower cost over month/quarter |
How do you recycle dry ice bags and packaging in 2025?
Let residual dry ice evaporate in a ventilated area, then sort packaging: foam (EPS) to designated drop-offs if available, clean films to store bins where accepted, and non-toxic gel pack pouches to plastics recycling per local rules. Avoid drains; never seal CO₂.
Quick recycle checklist (printable)
Vent remaining dry ice outdoors until gone
Wipe condensation, dry components fully
EPS foam: check local drop-off; otherwise reuse as liner
Plastic films/liners: clean → store bin if accepted
Gel packs: confirm non-toxic → trash gel → recycle pouch if allowed
2025 trends: what’s new for cold shipments?
The 2025 playbook emphasizes safer venting, better insulation, and smarter monitoring. Teams are shifting to reusable refrigerants and biobased liners while standardizing labeling SOPs. Bluetooth temperature loggers are common for high-value loads, and dry ice bags at Walmart remain a convenient retail source for small, local or ad-hoc needs.
At a glance
Safer packaging defaults: Vented lids and CO₂ escape paths as standard work
Eco-forward kits: Less foam, more recyclable films; reuse first, recycle second
Smarter QA: Lightweight sensors verify hold time without opening boxes
FAQ
Does Walmart always carry dry ice and bags?
Availability varies by store and season. Ask customer service, bring a cooler, and handle with gloves.
How long will one bag keep food frozen?
Plan around 5–10 lb per 24 hours in a typical cooler. Insulation, fill rate, and ambient heat affect results—test once, then standardize your SOP.
Is it safe to seal dry ice inside a plastic bag?
No. Never create an airtight seal. Always provide a vent path so CO₂ can escape and pressure can’t build.
When are reusable packs better than dry ice?
For frequent shipments ≤72 hours, or for products sensitive to ultra-cold, reusable packs simplify handling, avoid hazmat steps, and often reduce total cost.
Summary & next steps
Key points: Pick vented bags sized to your lane, position dry ice on top, and label correctly. Upgrade insulation before adding more ice. Reusable packs remove hazmat friction and cut recurring spend. Recycle or reuse packaging to reduce waste.
Do this next:
Baseline test: Pack one lane, log temps, note hold time
Tune insulation: Add liners, reduce voids, retest
Right-size refrigerant: Apply the estimator; add 25% buffer
Pilot reusable packs: Compare cost and QA over 4 weeks
Standardize SOPs: Train on gloves, venting, labels; post a checklist
CTA: Need a tailored pack-out? Talk to a Tempk cold-chain specialist today.
Internal linking (recommended)
Dry Ice Shipping Best Practices
Reusable “Dry Ice” Pack Buyer’s Guide
Dry Ice Safety: Venting and Handling
Cold Shipper Cost Calculator
Packaging Sustainability Playbook
About Tempk
We design cold-chain packaging that is reliable, reusable, and regulation-ready—from insulated shippers to reusable “dry ice” packs tested for multi-day performance. Our in-house QA helps you lock in consistent hold time while reducing consumables and waste. Talk with us about the right kit for your lanes.
Next step: Consult a Tempk Specialist
Dry Ice Bag With Handle: 2025 Buyer’s & Pack‑Out Guide
How to Choose a Dry Ice Bag With Handle in 2025
If you ship frozen goods, the right dry ice bag with handle protects product, people, and profit. It must hold −78.5 °C dry ice safely, vent CO₂, and meet air/ground rules like UN1845 marking. Below is a practical, SEO‑friendly playbook to pick, pack, and label a dry ice bag with handle for reliable 24–72‑hour performance. ehs.washington.edu+1
Pick the best dry ice bag with handle for route, weight, and compliance (e.g., IATA air rules).
Build pack‑outs that keep −20 °C or below for 24–72 hours with proper venting and insulation.
Label and handle safely to minimize CO₂ buildup and frostbite risks in any dry ice bag with handle.
Balance cost and sustainability using reusable liners and return loops.
Track 2025 trends in materials, VIP shippers, and reusable systems that influence your choice.
What is a dry ice bag with handle, and which design fits your route?
Short answer: A dry ice bag with handle is a flexible, hand‑carry pouch engineered for dry ice—built to vent CO₂ gas, resist brittle cracking at cryogenic temperatures, and carry a defined load. Choose design by route time, carrier rules, and ergonomics. Typical designs include die‑cut handles, stitched straps, or reinforced loop handles rated for 8–20 kg. OSHA
Longer explanation: Think of a dry ice bag with handle as a soft‑sided “mini shipper.” Films (PE / metallized PET) slow heat gain; vents prevent pressure; and the handle spreads weight so staff can move safely. If you’re flying, IATA requires UN1845 marking and net dry ice weight; if you’re trucking or ocean‑freighting, DOT/IMDG have their own marking and stowage rules. For last‑mile, a compact insulated dry ice bag with handle reduces porch time risks and simplifies hand‑offs. IATA+1
Handle types and load ratings for a dry ice bag with handle
Stitched webbing handles carry more weight and stay flexible when cold. Die‑cut handles are compact but can bite into hands at higher loads. Loop handles allow two‑hand carry—useful for 10 kg+ dry ice plus product. Many cooler‑style bags cite 30–36″ strap lengths to improve comfort during facility moves. Match handle to load, distance, and staff PPE. Custom Earth Promos
| Handle Option (bag type) | Typical Load | Recommended Use | What it means for you |
|---|---|---|---|
| Die‑cut (punched) dry ice bag with handle | ≤8 kg | Short indoor transfers | Slim profile; cheap; tighter hand grip |
| Sewn webbing dry ice bag with handle | 8–15 kg | Route picks, dock moves | Better comfort; fewer hand hot‑spots |
| Dual loop dry ice bag with handle | 12–20 kg | Long corridors, elevator rides | Two‑hand carry, safer with PPE and stairs |
Practical tips
E‑commerce frozen boxes: Use a small dry ice bag with handle as an inner liner to reduce fog “puff” when opening.
Hospital couriers: Pick vented flap designs so CO₂ escapes during elevator trips.
Seafood exporters: Prefer loop‑handle models for two‑hand lifts over wet floors; pair with anti‑slip mats.
Real case: A lab switched to a dual‑loop dry ice bag with handle for 1.5 km campus transfers. Reported fewer hand injuries and steadier loads; CO₂ vents prevented bag ballooning in warm hallways.
How do you safely pack a dry ice bag with handle for 24–72 hours?
Core answer: Pre‑freeze product, pre‑chill packaging, add adequate dry ice, and never seal gas‑tight. Label UN1845 and net dry ice weight for air; ensure ventilation and PPE. This prevents frostbite and CO₂ buildup, two leading incident causes with any dry ice bag with handle. ehs.washington.edu+1
Why it works: Dry ice sublimates (solid → gas) and cools as it does. In a well‑insulated dry ice bag with handle, expect 5–10 lb to vanish per day. Plan quantity by route time and ambient temps; pack dry ice above product so cold gas sinks through payload. Never wrap dry ice in plastic—vent it. safety.rochester.edu+1
Pack‑out recipes for a dry ice bag with handle
Labeling & compliance:
Air (IATA): Mark “UN1845 DRY ICE (Carbon dioxide, solid)” and net weight; follow the current acceptance checklist (no Shipper’s Declaration when shipped with non‑dangerous goods, but acceptance checks are required). IATA
Ground (DOT 49 CFR 173.217): Provide required markings; ensure packaging allows CO₂ to vent. Ocean stowage has “do not stow below decks” rules for some packagings. eCFR+1
Food shipments: USDA/FSIS mail‑order guidance highlights sturdy boxes, cold sources, and safe end‑user handling. Pair your dry ice bag with handle with clear customer notes. Food Safety and Inspection Service
What size dry ice bag with handle do you need for weight and volume?
Rule of thumb: Pick a dry ice bag with handle that supports 2–3× the payload mass when you add dry ice and insulation. If the product is 3 kg and dry ice is 6 kg, size for 9–10 kg and verify handle stitching and seam strength. Use pellets for tight spaces; use blocks for slower sublimation. Dry ice sits at −109 °F; handle with insulated gloves. ehs.washington.edu
Sizing checklist—choose your dry ice bag with handle:
Duration: 24, 48, or 72 h route? Longer → thicker insulation, more headspace for gas.
Ambient: >32 °C? Consider VIP inserts around your dry ice bag with handle for stability. 360 Research Reports
Ergonomics: If >10 kg total, use dual loop handles and two‑hand carry.
Accessibility: Include a tear‑open feature so receivers don’t stab bags and puncture liners.
Material and insulation options for a dry ice bag with handle
Metallized film liner: Reflects heat; light; economical.
PE/LLDPE co‑extrusions: Tough against puncture at low temps.
VIP panels (optional): Add 20–40% runtime in hot lanes; cost more but reduce dry ice mass. 360 Research Reports
| Feature | Option A | Option B | What it means for you |
|---|---|---|---|
| Insulation | Metallized bubble | VIP insert + bubble | VIPs extend hold time; use less dry ice |
| Handle | Die‑cut | Sewn webbing | Webbing reduces hand strain at high loads |
| Vent path | Grommet flap | Perforated fold | Prevents pressure and bag ballooning |
Compliance checklist for a dry ice bag with handle (air & ground)
Essentials for any dry ice bag with handle pack‑out:
Markings: UN1845 + net dry ice weight (kg). Air operators use acceptance checklists; missing weight marks is a common rejection reason. IATA
Venting: Packaging must allow CO₂ to escape. Never seal a dry ice bag with handle in an airtight outer. Carriers warn against wrapping or fully sealing dry ice. UPS
Storage & stowage: Don’t keep dry ice in confined spaces; ensure ventilation during holding and transport. OSHA
Ground DOT: Follow 49 CFR 173.217 for transport and markings; maritime has specific warnings about below‑deck stowage. eCFR
Quick self‑audit (2 minutes):
Is the dry ice bag with handle vented? 2) Is UN1845 + net kg on the outer? 3) Is PPE available (gloves/eye protection)? 4) Is there a written handover note for the receiver?
How much dry ice should a dry ice bag with handle carry?
Planning math: In typical coolers, dry ice sublimates ~5–10 lb per 24 h. For 48 h, budget 10–20 lb depending on ambient and insulation. Blocks last longer than pellets; pellets give better contact. Always build a buffer for delays. safety.rochester.edu
Ambient matters: Hot routes (>30 °C) accelerate sublimation. Consider a VIP insert or add 20–30% extra dry ice in your dry ice bag with handle in summer. Place dry ice above product; CO₂ is heavier than air and sinks to envelop the payload. 360 Research Reports
Example calculations for a dry ice bag with handle
| Scenario | Payload | Duration | Ambient | Suggested Dry Ice | Why |
|---|---|---|---|---|---|
| Frozen desserts, urban | 3 kg | 24 h | 20 °C | 3–4 kg | Pellets; more surface for fast pull‑down |
| Seafood, 2‑leg flight | 5 kg | 48 h | 25 °C | 7–9 kg | Blocks on top; pellets around sides |
| Biomed, hot lane | 2 kg | 72 h | 32 °C | 9–10 kg | Add VIP panels around dry ice bag with handle |
Safety: PPE, ventilation, and end‑user guidance for your dry ice bag with handle
Bottom line: Dry ice can burn skin and displace oxygen. Use gloves and eye protection; ventilate rooms and vehicles; include a receiver note in every dry ice bag with handle shipment (how to let remaining dry ice evaporate safely). ehs.washington.edu+1
PPE: Use loose‑fitting cryo gloves and eye protection. Avoid sealed spaces and walk‑ins without ventilation. OSHA
Receiver notice: “Contains dry ice; do not touch with bare hands; allow to evaporate in a ventilated area; keep away from kids and pets.” (USDA/FSIS recommends cold sources and safe handling for mail‑order foods.) Food Safety and Inspection Service
Hazard status: Dry ice isn’t an OSHA “Hazardous Substance,” but it is a Dangerous Good for transport, so transport rules apply. Cornell EHS
Cost & sustainability: the business case for your dry ice bag with handle
Where cost lives: Material (bag + ice), labor (conditioning), surcharges (hazmat), and spoilage risk. Reusable liners and VIP inserts can cut dry ice mass and reduce damages. In 2025, cold‑chain packaging is growing fast; reusable ecosystems are scaling. Grand View Research+1
Market pulse:
U.S. cold chain packaging topped ~$8 B in 2024, with double‑digit growth through 2030. Grand View Research
Reusable cold‑chain packaging forecast: ~$5 B+ in 2025, nearly $9 B by 2034. Towards Packaging
VIP shipper adoption is rising to extend hold times with less dry ice. 360 Research Reports
ROI quick check: If VIPs trim 25% dry ice from a 10 kg pack‑out (2.5 kg saved per box) at $2.50/kg, you save ~$6.25 per shipment—often offsetting the bag or panel premium within a few cycles.
2025 trends shaping the dry ice bag with handle
Trend snapshot (2025): Airlines use updated acceptance checklists for dry ice. VIP panels expand into parcel flows. Reusable programs scale. Dry ice market growth continues as frozen e‑grocery and biologics rise. All impact how you spec a dry ice bag with handle. IATA+2360 Research Reports+2
Latest advances at a glance
Carrier acceptance tools: 2025 IATA checklist streamlines checks when no Shipper’s Declaration is required—reduce rejections with correct UN1845 weight marking on your dry ice bag with handle. IATA
VIP + soft‑bag hybrids: Slim VIP tiles around a dry ice bag with handle boost duration in hot lanes without extra weight. 360 Research Reports
Reusable loops: Operators add collection bins and reverse logistics for coolers and dry ice bag with handle liners to cut waste and cost. Towards Packaging
Market insight: Dry ice demand keeps rising with frozen foods, meal kits, and biopharma lanes. Analysts project global dry ice growth from ~$1.66 B in 2025 toward ~$2.7 B by 2032, validating long‑term availability planning for your dry ice bag with handle program. Fortune Business Insights
Mini decision tool: which dry ice bag with handle should you buy?
Route time? 24 h / 48 h / 72 h+
Ambient peak? <25 °C / 25–32 °C / >32 °C
Payload mass? ≤3 kg / 3–6 kg / >6 kg
Carry style? Single‑hand (short) / Two‑hand (long corridor)
Air or ground? Air → IATA weight marking required; Ground → DOT rules apply. IATA+1
Output—your starter spec:
If 48 h, 25–32 °C, 4 kg payload, air → Metallized dry ice bag with handle, sewn webbing, 6–8 kg dry ice, vented flap, VIP insert, UN1845 label with net kg.
If 24 h, <25 °C, 2 kg, ground → Die‑cut dry ice bag with handle, 3–4 kg pellets, simple vent grommet, DOT marking.
Frequently Asked Questions
Q1: How cold is a dry ice bag with handle in use?
Dry ice sits near −109 °F (−78.5 °C); the bag doesn’t set the temperature, it slows heat gain and safely vents gas. Always wear PPE and ventilate. ehs.washington.edu
Q2: Do I need special labels for a dry ice bag with handle on airplanes?
Yes. Mark UN1845 and the net dry ice weight on the outer package; use the carrier’s acceptance checklist to avoid rejections. IATA
Q3: Can I fully seal a dry ice bag with handle to trap cold?
No. Packaging must vent CO₂; never wrap or tape an airtight seal around dry ice. UPS
Q4: How much dry ice should I load into a dry ice bag with handle for 48 hours?
Plan ~10–20 lb total depending on ambient, insulation, and payload. Blocks last longer; pellets fill gaps. Add a buffer for delays. safety.rochester.edu
Q5: Is a dry ice bag with handle OK for food shipments?
Yes, if you use a sturdy container, adequate cold source, and include safe‑handling instructions for the receiver. Food Safety and Inspection Service
Q6: Where can I learn when to use gel packs instead of dry ice?
See our head‑to‑head comparison of dry ice and gel packs for use cases and pros/cons.
Dry Ice Bag vs Gel Packs
Summary & recommendations
A dry ice bag with handle must vent, insulate, and carry—safely moving gas and weight while meeting UN1845 labeling.
Size your dry ice bag with handle for 2–3× payload mass to cover dry ice and accessories.
For 24–72 h, plan 5–10 lb/day sublimation, pack dry ice above product, and build a buffer.
Use PPE, ventilate, and include a receiver note in every dry ice bag with handle shipment.
Consider VIP panels and reusable loops to cut ice mass and total cost.
Action plan:
Define route time and ambient. 2) Choose a vented dry ice bag with handle with the right handle design. 3) Build a labeled pack‑out (UN1845 + net kg). 4) Pilot‑test with a temp logger. 5) Scale with reusable assets, and review results quarterly. Need a template? Ask our team for a lane‑specific pack‑out for your dry ice bag with handle.
About Tempk
We build practical cold‑chain solutions that ship frozen and chilled products safely—bags, liners, VIP‑ready shippers, and monitoring. Our engineers optimize pack‑outs so your dry ice bag with handle uses less ice and stays compliant across carriers. We focus on measurable gains: longer hold times and fewer rejections—backed by 10+ years of route data.
Ready to reduce dry ice and improve compliance?
→ Contact Tempk for a free 15‑minute pack‑out review.
Dry Ice Bag Vented: Safe, Compliant Shipping 2025
Dry Ice Bag Vented: How to Ship Safely in 2025
A dry ice bag vented protects people and products by letting CO₂ escape while keeping the payload cold and compliant. Use a non‑hermetic closure, correct labels (UN1845, Class 9), and a tested insulated shipper to avoid pressure spikes and rejections. This guide blends packing steps, a quick calculator, FAQs, and 2025 trends so you can ship frozen goods with confidence. It consolidates and improves your three drafts into a single best‑in‑class resource.
Why must a dry ice bag vented be used? Safer CO₂ release and carrier compliance.
Does venting extend hold time? How venting affects sublimation in real shipments.
How do you pack and label in 2025? Step‑by‑step with UN1845 and Class 9.
What’s new in 2025? Smarter vents, sensors, and sustainability.
Why should every dry ice bag be vented during shipping?
Short answer: A dry ice bag vented prevents CO₂ pressure build‑up and keeps packages compliant. Dry ice turns straight from solid to gas (sublimation). In a sealed bag, gas has nowhere to go, pressure rises, and containers can rupture. Venting uses loose closures or perforations to bleed gas while the insulated outer shipper preserves cold.
More detail: Think of a soda bottle you never crack open—pressure keeps climbing. A vented dry ice bag does the opposite: it lets CO₂ out gently, protecting handlers and preventing carrier rejections. In air transport, pressure variation makes venting even more critical. Use strong LDPE/LLDPE film, leave a non‑airtight path, and ensure the outer box also isn’t hermetic. Pair venting with right‑sized dry ice and insulation for stable temperatures.
dry ice bag vented
What venting options work best for a vented dry ice bag?
Depth view: Common approaches include fold‑and‑clamp, banded/loosely zippered necks, and micro‑perforations in heavy‑duty film. Choose 4–8 mil LDPE/LLDPE for low‑temp flexibility. Avoid heat‑seals that create an airtight closure. Match bag size to ice mass to preserve airflow and let CO₂ escape without spilling pellets.
dry ice bag vented
| Venting method vs. use | How it vents | Typical materials | What it means for you |
|---|---|---|---|
| Fold‑and‑clamp neck | Small gaps at folds | 4–8 mil LDPE/LLDPE | Simple, reliable vent path; fast to train teams |
| Banded/loose zip | Gap under band/zip | Heavy‑duty poly, gusset | Good for pellets; easy to reopen/inspect |
| Micro‑perforations | Punched tiny holes | Tough film liner | Even gas bleed; minimizes pellet loss |
Practical tips and suggestions
Air shipments: Use a non‑hermetic inner bag and confirm the outer shipper has a pressure‑relief path.
Pellets vs. blocks: Blocks last longer; pellets conform better around product. Bag choice should reflect that.
Label discipline: Add UN1845 and Class 9 and net ice weight (kg) on the same panel.
Handling safety: Wear insulated gloves; ventilate packing areas.
Real‑world case: A biotech shipper switched to fold‑and‑clamp vented bags and added a 1 cm lid gap in the EPS shipper. Damaged‑package rate fell to near zero while hold time improved by several hours.
dry ice bag vented
Does a vented dry ice bag help the ice last longer?
Short answer: Yes—modestly. A dry ice bag vented lowers direct airflow over the ice, which can slow sublimation compared to ice left fully exposed. The main goal stays safety, with longevity as a bonus.
More detail: Venting creates a controlled micro‑environment: CO₂ exits, but warm air doesn’t rush in as quickly. Lifespan still depends more on insulation, outside temperature, and ice mass. Use bigger blocks for less surface area, minimize empty headspace, and place ice above goods so cold gas sinks over the payload. Expect “a few extra hours,” not dramatic gains.
dry ice bag vented
How should I pack and label in 2025 with a vented heavy‑duty dry ice bag?
Step essentials: Pre‑chill the shipper. Load dry ice into a vented heavy‑duty bag. Keep the bag non‑hermetic. Place ice above or around the product with a protective spacer. Close the cooler without sealing it airtight. Mark DRY ICE / UN1845 / Class 9 and net weight (kg); add addresses and any carrier‑required notes. Train staff on gloves and ventilation.
dry ice bag vented
| Pack step | Why it matters | Check |
|---|---|---|
| Vented inner bag | Prevents pressure spikes | No heat‑sealed neck |
| Quality insulation | Controls heat gain | EPS/EPP/VIP liner |
| Minimal headspace | Slows sublimation | Fill voids |
| Proper labels | Carrier compliance | UN1845 + Class 9 |
Quick “Dry Ice Amount” estimator (interactive concept)
Use blocks for long routes; pellets for tight packing.
Add a 20–30% buffer in summer or hot lanes.
Test once, then standardize the recipe per lane.
2025 updates and trends in dry ice bag vented shipping
Trend overview (2025): Shippers favor built‑in pressure‑relief designs, real‑time sensors for temperature/CO₂, and smarter insulation to use less ice for the same hold time. Expect more reusable shippers, recycled‑CO₂ dry ice sourcing, and clearer on‑box vent cues. These changes boost safety and shrink waste while keeping regulatory compliance front‑and‑center.
dry ice bag vented
Latest at a glance
Smart vents: One‑way relief keeps boxes safe without tape tricks.
IoT loggers: Alerts if a vent is blocked or temps drift.
Right‑sizing tools: Calculators prevent over‑icing and cut cost/emissions.
Market insight: Cold chain growth continues across biopharma, specialty foods, and direct‑to‑patient kits. The winning ops teams pair vented dry ice bags with better lane planning, validated pack‑outs, and fewer touches. Results: fewer incidents, tighter temperature excursions, and improved delivery predictability.
dry ice bag vented
FAQs
Does a dry ice bag vented meet air rules?
Yes—rules forbid airtight packages. Use a non‑hermetic inner bag and label the outer with UN1845, Class 9, and net weight (kg). Train staff to keep vents clear.
dry ice bag vented
Where should I place the ice—above or below the goods?
Above. Cold gas sinks, washing over the payload. Add a spacer so product doesn’t freeze‑burn, and keep the bag vented, not sealed.
dry ice bag vented
Blocks or pellets?
Blocks last longer; pellets pack tightly around odd shapes. Pick based on route length and product fragility.
dry ice bag vented
How do I reduce sublimation on hot lanes?
Use thicker insulation, minimize headspace, and add 20–30% extra ice. Keep the lid’s vent path unobstructed.
dry ice bag vented
Summary and recommendations
Key points: A dry ice bag vented is mandatory for safety and compliance. Pair it with non‑hermetic closures, strong insulation, correct UN1845/Class 9 labels, and trained handling. Expect modest longevity gains; rely on insulation and right‑sized ice for bigger wins.
dry ice bag vented
Next steps: Standardize a vented pack‑out per lane, validate once, and add a small buffer for seasonality. Roll out a training checklist and log mistakes. Monitor excursions and adjust the recipe quarterly. Need help? Schedule a pack‑out review with our team.
About Tempk
Who we are: We design and validate cold chain packaging that meets strict global standards. Our vented heavy‑duty dry ice bags are tested for low‑temperature flexibility and reliable gas release, supporting safer handling and fewer carrier rejections.
Call to action: Ready to optimize your pack‑out? Request a dry ice audit from Tempk, and get a lane‑specific, validated recipe you can roll out this quarter.