If you’re considering a dry ice pack lunch box for daily use, here’s the bottom line: use gel or +5 °C PCM packs in an insulated bag to keep food ≤40 °F; reserve real dry ice for adult-supervised, vented hard coolers in special cases only. Two cold sources (top + bottom) cut risk and extend hold time.
-
When a dry ice pack lunch box makes sense and when gel/PCM is safer (food stays ≤40 °F).
-
How to size an 8-hour setup using a simple, practical estimator.
-
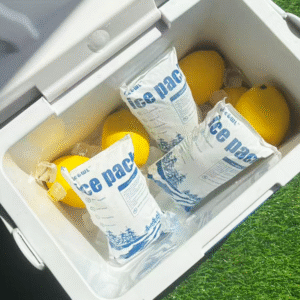
How to pack and place cold sources (top + bottom) to avoid warm corners.
-
Travel and safety rules (venting, gloves, CO₂ precautions, FAA 2.5 kg limit).
-
2025 upgrades (PCM setpoints, VIPs, aerogels) that boost hold time.
When should you use a dry ice pack lunch box?
Short answer: Not for routine school or office lunches. Dry ice sublimates to CO₂, needs ventilation, and can over-pressurize sealed containers; frostbite is also a risk. For daily use, gel or +5 °C PCM in an insulated bag keeps food ≤40 °F with fewer hazards. Use dry ice only in vented, adult-supervised hard coolers for frozen items or special trips.
Why it matters to you: The food-safety “danger zone” starts above 40 °F. Classrooms, buses, and hot job sites warm bags quickly, so two cold sources—e.g., a gel pack plus a frozen bottle—are the dependable way to stay safe until lunch. If you must carry dry ice, ensure airflow, gloves, and a vented container; never in an airtight lunch box or an unventilated trunk.
What risks come with a dry ice pack lunch box?
CO₂ gas and contact freezing are the two big ones. CO₂ can displace oxygen and, in sealed spaces, build pressure; bare-hand contact can burn skin at −109 °F (−78.5 °C). If dry ice is used, run a vented container, keep it upright, and crack a window when transporting—never in sealed trunks or closets. Gloves are non-negotiable.
| Cooling option | Typical window | Safety must-do | What it means for you |
|---|---|---|---|
| Gel packs (0 °C) | 4–8 h with two sources | Insulated bag; replace daily | Cheap, kid-safe anchor choice |
| PCM +5 °C packs | Steady 2–8 °C | Condition to +5 °C | Stable temps for dairy/yogurt |
| Dry ice (CO₂, solid) | Long frozen hold | Vented hard cooler; gloves | Specialist use, not daily lunches |
Practical tips you can use today
-
School day: Two cold sources in an insulated bag; perishables between them.
-
Hot job site: Switch top pack to +5 °C PCM for a steadier “fridge” plateau.
-
Travel with dry ice (adult only): Vent the cooler and label; max 2.5 kg (5.5 lb) on flights with airline approval.
Real-world case: A field tech doubled cold sources (top + bottom) in the same insulated bag; noon temps stayed below 40 °F on a 90 °F day—mirroring two-source guidance.
How do you size a dry ice pack lunch box for 4–8 hours?
Start simple: For most lunch boxes, use two frozen cold sources totaling ~10–20 oz (280–560 g). Add a third small pack for desert-heat, large bags, or frequent openings. If you’re keeping items frozen and insist on dry ice, use a small piece in a vented mini-cooler—never a sealed lunch box.
Make it precise with this estimator: Begin with your bag volume, heat exposure, and how often you’ll open it. Size gel/PCM mass, trial for a day, then adjust.
This mirrors practical field experience: size → test → refine. It outperforms guessing and reduces waste and risk.
Placement that works in a dry ice pack lunch box
Top-and-bottom placement cools evenly, reduces warm corners, and protects textures. Fill side voids with a slim pack or a frozen bottle. If you ever position dry ice, add a thin tray between ice and food so CO₂ can vent and surfaces don’t freeze-burn.
| Layout goal | Do this | Avoid this | Why it helps |
|---|---|---|---|
| Even cooling | Pack top + bottom; center perishables | One pack on one side | Eliminates hot spots |
| Fewer openings | Stage utensils outside | Digging around repeatedly | Preserves hold time |
| Safe handling | Use insulated gloves with dry ice | Bare-hand contact | Prevents frostbite |
How do you pack a dry ice pack lunch box step by step?
Core steps (gel/PCM for daily use):
-
Pre-chill foods and freeze packs overnight.
-
Layer: bottom pack → food → top pack; fill side gaps.
-
Close & carry: keep closed until lunch; stash in shade.
-
Verify: drop in a small thermometer for a trial day; aim ≤40 °F by lunchtime.
If dry ice is necessary (adult only): Use a vented hard cooler, gloves, and labels; never in sealed containers or cramped rooms/cars. Airline travel allows up to 2.5 kg (5.5 lb) with venting and approval; mark “Dry ice/Carbon dioxide, solid” with net weight.
Are there safer alternatives to a dry ice pack lunch box?
Yes—gel packs and +5 °C PCM bricks are built for school and office realities. Gel is inexpensive and widely available; +5 °C PCM maintains a steady “fridge-like” plateau that protects yogurt and milk from edge freezing. Both avoid CO₂ hazards and airline paperwork.
2025 developments and trends that help you
What’s new: +5 °C PCMs are moving mainstream for steadier lunch temps, and VIP/aerogel insulation from pharma is migrating into consumer coolers, improving hold at lower weight. Expect better stability with less pack mass—great for commuters and outdoor crews. Validate claims in your use case before switching gear.
Latest at a glance
-
PCM adoption: Smoother temperature profiles in portable boxes when packs are placed correctly.
-
VIP panels: Vendors report multi-fold R-value vs. foam; test before you rely on it.
-
Aerogels: Ultra-low conductivity suggests lighter, longer-lasting lunch kits ahead.
Market insight: Demand for higher-performance lunch coolers tracks remote work, field jobs, and meal-prep habits. The winners pair smarter insulation with right-sized, safer cold sources—no drama, just reliable noon temps.
Frequently Asked Questions
1) Can I put dry ice in a lunch box with a tight lid?
No. Dry ice must vent; sealed containers can crack or rupture as CO₂ builds. Use vented hard coolers only, and keep spaces ventilated.
2) What’s the safest daily alternative to a dry ice pack lunch box?
Two gel packs or a +5 °C PCM + gel combo in an insulated bag, placed top and bottom. Aim to keep food ≤40 °F.
3) How long can perishable food sit out?
Follow the “2-hour rule” (1 hour if >90 °F). Keep perishables at or below 40 °F until eaten.
4) Is CO₂ from dry ice dangerous in a car trunk or locker?
CO₂ can displace oxygen; ventilation is essential. Avoid unventilated spaces and sealed trunks.
5) Can I fly with a dry ice pack lunch box?
Yes, up to 2.5 kg (5.5 lb) with airline approval, vented packaging, and “Dry ice/Carbon dioxide, solid” marking. Otherwise, use gel/PCM and skip the paperwork.
Summary & recommendations
Remember: A dry ice pack lunch box is rarely the best everyday choice. For daily meals, use an insulated bag plus two cold sources to keep food ≤40 °F; reserve dry ice for adult-supervised, vented hard coolers and special frozen loads. Size your packs, place them top and bottom, and validate with one thermometer-logged day.
Next steps (do this today):
-
Pick a right-sized insulated bag and two packs (gel or +5 °C PCM).
-
Run a one-day test and adjust mass/placement.
-
For travel, follow venting and labelling rules—or default to gel/PCM.
About Tempk
We design practical cold-chain packouts for lunch, meal-kit, and field operations. Our team tunes +5 °C PCM elements and lightweight insulation to your route and climate, then validates against real-world profiles to reduce warm-spot incidents and weight. Simple SOPs, fewer risks, better noon temps.
CTA: Want a one-page packout spec for your menu and climate? Contact Tempk for a free checklist and fast field validation.


