How to Pack a Cooler with Dry Ice: Top or Bottom?
When packing a cooler with dry ice, the placement of the ice bag plays a crucial role in ensuring that your perishables stay at the right temperature. Whether you place the dry ice on top or bottom depends on your needs, the type of cooler, and the items you’re transporting. This guide will provide you with step-by-step instructions on how to pack a cooler with dry ice and explain the optimal placement to maximize efficiency.
-
What is the best method to pack a cooler with dry ice for maximum efficiency?
-
Should the dry ice be placed on top or at the bottom of the cooler?
-
How does dry ice work and what factors affect its cooling power?
-
How to safely handle and store dry ice in a cooler?
What Is Dry Ice and How Does It Work in a Cooler?
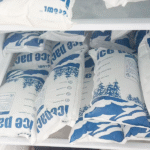
Dry ice is solid carbon dioxide (CO₂) that sublimates directly from a solid to a gas at -78.5°C (-109.3°F). Unlike regular ice, dry ice doesn’t melt into a liquid; it turns into gas, which makes it perfect for cooling without leaving behind any water. This process releases a large amount of cold energy, making dry ice much more effective for long-term cooling in a cooler.
In coolers, dry ice maintains a much lower temperature compared to regular ice. The colder environment helps preserve temperature-sensitive items like food, medical supplies, and pharmaceuticals for longer periods.
Should You Place the Dry Ice on Top or Bottom?
When packing a cooler with dry ice, the positioning of the dry ice bag—either on top or at the bottom—affects the efficiency of the cooling process. Both positions have their advantages, depending on the cooling requirements.
Dry Ice on the Bottom
Placing the dry ice at the bottom of the cooler allows cold air to sink and surround the items, ensuring that frozen goods stay cold for extended periods. This method is ideal for keeping food items frozen at the bottom of the cooler. Cold air naturally moves downward, making this method perfect for long trips or when you need to maintain freezing temperatures for an extended period. However, the contents at the top of the cooler may thaw quicker compared to the bottom layer.
Dry Ice on the Top
Placing the dry ice on top of the items in the cooler works well for rapid cooling. Since cold air falls, this method helps cool down the items faster, making it ideal for short-term trips where you want to cool everything quickly. However, it may not maintain the cold as effectively for long-term storage, especially for items at the bottom of the cooler.
How to Pack a Cooler with Dry Ice: Step-by-Step Guide
1. Prepare the Cooler
Start with a clean, dry, and well-insulated cooler. Ensure that the cooler has adequate ventilation to allow the carbon dioxide gas to escape. Some coolers have vented drain plugs specifically designed for this purpose.
2. Layer the Dry Ice
Choose whether to place the dry ice on the top or bottom of the cooler based on your needs:
-
For long-term freezing (e.g., for frozen food or medical shipments), place the dry ice at the bottom.
-
For quick cooling (e.g., for drinks or short-term trips), place the dry ice on top.
Wrap the dry ice in newspaper or other insulating materials to prevent direct contact with the items inside. Dry ice can burn through materials like plastic or paper if they come into direct contact.
3. Add the Items
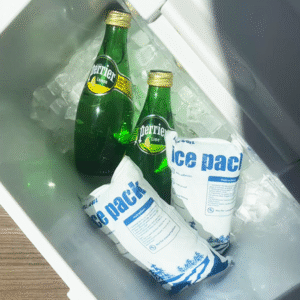
Carefully place the perishable items inside the cooler. If the items need to stay frozen, put them above the dry ice (if placed on the bottom) or below it (if placed on the top). If you’re using both dry ice and regular ice, make sure that the dry ice does not directly touch the regular ice.
4. Cover the Items
Add a layer of regular ice, gel packs, or insulation material (like foam or newspaper) to regulate the temperature. This step ensures that the cooler stays cold without over-freezing the contents.
5. Seal the Cooler
Close the cooler tightly, but don’t seal it airtight. The carbon dioxide gas must have room to escape. If the cooler has a vent, leave it open to prevent pressure buildup. Store the cooler in a cool, shaded location for optimal results.
Factors Affecting the Cooling Efficiency of Dry Ice in a Cooler
1. Insulation Quality
The effectiveness of the cooler’s insulation plays a huge role in how long the dry ice will last. Well-insulated coolers help slow down sublimation and maintain low temperatures longer. Poor insulation leads to faster sublimation of dry ice and a decrease in its cooling effectiveness.
2. Amount of Dry Ice
The more dry ice you use, the longer your cooler will stay cold. For longer trips, use more dry ice, and adjust the placement accordingly. A general guideline is to use 5-10 pounds of dry ice per 24 hours of cooling, depending on the cooler size.
3. Duration of Use
For short trips, placing the dry ice on top might be more efficient, as it cools the items quickly. For extended trips, place the dry ice at the bottom to maximize the cooling duration.
4. Type of Items
Different types of items require different cooling strategies. For frozen goods, dry ice placement is crucial for maintaining the proper temperature. For non-frozen items, ensure that the dry ice does not directly freeze them. Using extra insulation between dry ice and the contents can help maintain an optimal temperature without causing damage.
Pros and Cons of Dry Ice on Top vs. Bottom
| Position | Effectiveness | Pros | Cons |
|---|---|---|---|
| Dry Ice on Bottom | Best for long-term freezing | Keeps frozen items cold longer | Items at the top may thaw faster |
| Dry Ice on Top | Best for rapid cooling | Effective for short-term cooling | Items at the bottom may thaw quicker |
Safety Tips When Handling Dry Ice
1. Wear Insulated Gloves
Always use insulated gloves or tongs when handling dry ice to avoid frostbite or burns.
2. Ventilation Is Key
Ensure that the cooler is well-ventilated. The carbon dioxide gas produced as dry ice sublimates can displace oxygen, creating a suffocation hazard.
3. Never Seal Dry Ice in Airtight Containers
Sealing dry ice in an airtight container can lead to pressure buildup, potentially causing the container to explode. Always allow the gas to escape.
Real-Life Example
A catering company transporting frozen meals used the bottom-placement method with dry ice. They noticed that placing the dry ice at the bottom kept the meals frozen for the entire 12-hour journey, while the top-placement method resulted in some items thawing earlier than expected.
2025 Trends in Dry Ice and Cooler Technology
Latest Innovations in Cooler Technology
In 2025, coolers have become more advanced with innovations in insulation, temperature monitoring, and environmental sustainability. Features such as smart temperature sensors and better insulation materials help optimize the use of dry ice, ensuring that perishables stay at the ideal temperature for longer.
Eco-Friendly Alternatives
Eco-friendly options, such as dry-ice substitute packs and feather-based insulation, are becoming more common. These alternatives reduce the environmental impact of dry ice and provide longer-lasting cooling solutions.
Common Questions
Q1: How much dry ice should I use for a 24-hour trip?
You will need 5-10 pounds of dry ice for a standard-sized cooler for a 24-hour period. Adjust based on cooler size and external temperature.
Q2: Can I touch dry ice with bare hands?
No, dry ice is extremely cold and can cause frostbite. Always use gloves or tongs to handle it.
Q3: Is it safe to use dry ice in a plastic cooler?
Yes, but ensure the cooler is well-ventilated. Avoid using airtight plastic coolers, as the buildup of carbon dioxide gas can be dangerous.
Conclusion and Recommendations
Packing a cooler with dry ice effectively requires understanding the science of cold air and sublimation, and using proper insulation and ventilation. Whether you place the dry ice on top or bottom depends on your specific needs—bottom placement is ideal for long-term freezing, while top placement is best for rapid cooling.
Next Steps:
-
Use a high-quality cooler with good insulation.
-
Follow the packing guide to optimize cooling efficiency.
-
Explore eco-friendly alternatives like dry-ice substitute packs.
About Tempk
Tempk is a leading provider of cold chain solutions, specializing in advanced packaging and transportation methods to maintain product integrity. We offer innovative solutions for food, pharmaceutical, and logistics industries, helping businesses optimize their cooling processes.