Cold Chain Milk Chocolate Packaging That Works in 2025?
Last updated: December 18, 2025
Cold chain milk chocolate packaging works when it keeps milk chocolate stable, dry, and protected during shipping and storage. Your goal is not “as cold as possible.” Your goal is fewer temperature swings, less humidity exposure, and zero rubbing damage. Many teams aim for a comfort zone around 15–18°C in controlled areas and work hard to avoid long holds above ~20–22°C, especially in the last mile.
This article will answer for you:
How cold chain milk chocolate packaging prevents melt, softening, and bloom
What a practical milk chocolate cold chain temperature range looks like by stage
How to add a moisture barrier for chocolate packaging to stop condensation
When PCM packs for chocolate shipping beat standard gel packs
How to build last-mile milk chocolate delivery packaging for porches and lockers
How to test and validate cold chain milk chocolate packaging before you scale
What must cold chain milk chocolate packaging protect?
Cold chain milk chocolate packaging must protect four things at the same time: temperature stability, moisture control, physical protection, and odor protection. If one fails, the customer sees it fast. A tiny white haze, a dull patch, or a bent corner can look like “old stock.” That is why packaging for milk chocolate is often tougher than packaging for many other foods.
Think of your shipper as a “portable pantry.” If the pantry gets warm, humid, smelly, or shaken, milk chocolate will show it. Cold chain milk chocolate packaging prevents that by creating a small, predictable micro-environment around the product.
| Risk you’re fighting | What usually causes it | What customers notice | What it means for you |
|---|---|---|---|
| Softening / deformation | Heat soak and long dwell | Bent bars, warped shapes | Higher refunds and reships |
| Bloom (white haze) | Temperature cycling + moisture | “Looks old” appearance | Lower perceived quality |
| Condensation | Cold meets humid air | Sticky wrapper, damp box | Complaints even if taste is fine |
| Scuffs / cracks | Micro-movement in parcel networks | Dull finish, chipped corners | Premium look disappears |
| Odor pickup | Mixed freight or scented materials | “Smells like cardboard/spice” | Flavor complaints and distrust |
Practical tips you can use today
Design cold chain milk chocolate packaging for stability, not extreme cold.
Protect corners and edges first. They show damage sooner than flat surfaces.
Treat odor control as a requirement if you ship through mixed freight hubs.
Practical example: A gifting brand reduced appearance complaints by adding a sealed inner barrier and removing empty space.
What temperature and humidity should cold chain milk chocolate packaging target?
Cold chain milk chocolate packaging should be built around stable “moderately cool and dry” conditions, because swings cause more damage than steady temperatures. Milk chocolate often softens gradually before it melts. Later, when it cools again, bloom can appear. Humidity makes this worse because moisture can condense during transitions.
Instead of chasing perfect numbers everywhere, train a simple ladder that your team can follow under pressure. This reduces mistakes at staging and handoffs.
Practical targets by supply chain stage (easy to train)
| Stage | Practical temperature goal | Practical humidity goal | Why it matters |
|---|---|---|---|
| Storage (controlled) | ~15–18°C | ~45–55% RH | Best long-term stability |
| Pick & pack | ~16–20°C | keep <60% RH | Reduces condensation risk |
| Transit buffer | slow change, avoid spikes | limit moisture ingress | Prevents cycling and sweating |
| Last mile | avoid long holds >~20–22°C | avoid rain/humid exposure | Protects appearance at delivery |
“Green–Yellow–Red” decision ladder (fast SOP)
Green: stable cool and dry → ship normally
Yellow: mild warming risk → shorten exposure, protect from sun
Red: hot hold or repeated swings → hold, inspect, document
Case insight: Teams often see fewer bloom incidents after standardizing staging time limits, not after buying thicker insulation.
Which layers make cold chain milk chocolate packaging reliable?
The strongest cold chain milk chocolate packaging is a layered system: inner barrier + structure + insulation + coolant strategy + movement control. Any single layer can look “good” and still fail. A great insulated shipper fails if the chocolate rattles. A great wrap fails if humid air leaks in.
Use a “layer map” so everyone understands what each piece does. This makes training faster and results more consistent.
Layer-by-layer packaging map
| Layer | What it does | Common mistake | Better practice | Your practical gain |
|---|---|---|---|---|
| Primary wrap | protects direct contact | weak seals | consistent tight seal | cleaner presentation |
| Secondary barrier | blocks moisture and odors | loose closure | full seal, sealed corners | fewer damp boxes |
| Structure (tray/dividers) | prevents scuffs and cracks | “void fill only” | rigid trays + corner guards | premium look survives |
| Insulation | slows heat gain | too thin for lane | match to route risk | fewer softening events |
| Coolant (gel/PCM) | absorbs incoming heat | touching product | spacer + perimeter placement | fewer condensation marks |
| Void management | reduces air exchange | empty headspace | snug fit, inserts | better stability |
Practical tips and suggestions
Always separate coolant from chocolate. Direct contact can trigger sweating.
Lock products in place. “Micro-movement” causes dull scuffs over time.
Use low-odor materials if you ship with mixed freight or long dwell.
Practical example: A subscription brand improved arrival “shine” after adding a tray to stop bar-to-bar friction.
How do you prevent bloom with cold chain milk chocolate packaging?
Prevent chocolate bloom during shipping by minimizing temperature swings and moisture exposure—especially during transitions. Bloom often shows up after a warm event, when chocolate cools again later. That is why teams get confused. The “damage moment” may happen in a hub, but the “visible symptom” appears at the customer.
Treat bloom prevention as a transition management problem. Packaging supports it, but process matters too.
Bloom prevention checklist (packaging + process)
| Bloom trigger | What usually causes it | Packaging fix | Process fix |
|---|---|---|---|
| Warm–cool cycling | dwell time + later cooling | better insulation + buffering | reduce staging time |
| Condensation | humid air meets cold surfaces | sealed inner barrier | keep sealed until acclimated |
| Cold pack touch | local cold spot + moisture | spacer layer + placement rules | staff training photo |
| Overcooling | big temperature gap | right-size coolant | avoid “more packs always better” |
Practical tips you can apply now
Use “duration thinking.” A short spike is often less harmful than a long warm hold.
Standardize summer and winter pack-outs. Do not improvise per order.
Add a simple instruction card so customers do not create condensation at unboxing.
Practical example: A retailer reduced bloom returns after adding a moisture barrier and enforcing a “dock exposure <20 minutes” rule.
How should you place gel packs or PCM in cold chain milk chocolate packaging?
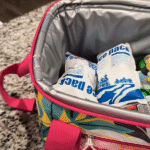
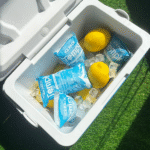
Cold packs should stabilize the environment inside cold chain milk chocolate packaging, not freeze the product. Your target is a steady “cool room in a box.” Placement matters more than pack count. Poor placement creates cold spots, moisture, and surface defects.
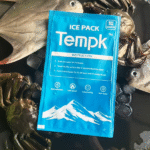
PCM packs for chocolate shipping can be useful because they buffer near a chosen temperature point. Gel packs often cool hard at the start, then fade. PCM can feel steadier on longer lanes.
Cold pack placement patterns (simple rules)
| Pack-out style | Where packs go | Best for | Watch-out | Your practical gain |
|---|---|---|---|---|
| Perimeter shell | sides (and sometimes top) | longer routes | needs snug fit | steadier cooling |
| Top buffer | top with divider | short routes | avoid direct touch | fast packing |
| Multi-zone | sides + top | hot climates | more steps | more stability |
| No coolant | none | low-risk short lanes | porch exposure risk | lowest cost |
Practical tips and suggestions
Add a thin spacer between packs and chocolate to reduce local condensation.
Avoid “too many packs.” Overcooling can increase sweating during warm-up.
Standardize one placement photo per SKU. Consistency beats cleverness.
Case insight: Several teams improved outcomes by removing one extra gel pack that was causing condensation.
Which insulation types fit cold chain milk chocolate packaging lanes?
Choose insulation for cold chain milk chocolate packaging based on route duration, ambient risk, and delivery uncertainty—not a single R-value claim. Operational fit matters. If a pack-out is slow or confusing, it will be done differently every time.
Also consider crush resistance. Milk chocolate often ships as gifts. If the shipper arrives deformed, customers assume the chocolate is “old.”
Quick insulation comparison (operations-first)
| Insulation type | Thermal strength | Operational fit | Best fit | Your practical meaning |
|---|---|---|---|---|
| EPS | strong baseline | widely used | many lanes | dependable starter |
| EPP | durable, reusable | needs reverse flow | closed-loop | lower waste long term |
| Foam shippers | strong hold | bulkier storage | longer routes | stable performance |
| VIP panels | very high | careful handling | premium long lanes | best stability per thickness |
| Paper-based systems | improving fast | design sensitive | sustainability focus | reduce plastic where viable |
Practical tips and suggestions
Start with your lane time: under 12 hours vs 36–72 hours changes everything.
Tight fit matters. Empty air warms faster than you expect.
Choose low-odor materials for milk chocolate shipping packaging.
Practical example: A chocolatier improved unboxing quality after switching to a more rigid insulation format that reduced crushed corners.
How do you stop condensation in cold chain milk chocolate packaging?
Condensation control for chocolate packaging is the “silent win.” Condensation can create sticky wrappers, damp cartons, and sugar bloom after drying. It usually happens when a cold package meets warm, humid air. That can occur at delivery, in a mailroom, or during a fast warm-up indoors.
The simplest high-impact method is a sealed inner barrier plus a clear unboxing rule.
The Seal–Wait–Open rule (customer-friendly)
Seal: keep the inner barrier sealed during transit and at arrival
Wait: let the package acclimate 60–120 minutes (longer if the temperature gap is large)
Open: open only when the pack feels closer to room conditions
| Situation | What to do | What to avoid | Why it helps you |
|---|---|---|---|
| Winter delivery to warm home | wait sealed longer | open immediately | reduces surface moisture |
| Humid summer unboxing | keep sealed in cool room | open outdoors | lowers sweating risk |
| Retail backroom handoff | stage sealed in tote | leave packs open | keeps surfaces stable |
Practical tips and suggestions
Put the warm-up instruction on top, not buried under product.
Seal corners carefully. Small gaps are where humid air sneaks in.
Avoid “cold shock” strategies that create big temperature differences.
Practical example: A gift brand reduced “wet box” tickets by adding a sealed barrier and a warm-up card.
Interactive tool: build your cold chain milk chocolate packaging stack
Use this quick selector to choose a pack-out that your team can repeat every day.
Helpful decision tools
Check the details before you choose packaging
These quick tools can help you compare route risk, sizing needs, coolant choices, and packaging details before you request a quote.
Dry Ice Calculator
Estimate dry ice needs for frozen or ultra-cold shipments before packing.
Estimate dry iceInsulation Material Drop Resistance
Review drop resistance and handling factors before choosing insulation materials.
Check resistanceInsulation Material Reference
Compare insulation material choices for different cold chain packaging needs.
Compare materialsStep 1: Transit time
A) 0–12 hours
B) 12–36 hours
C) 36–72 hours
Step 2: Peak heat risk at delivery
A) Low
B) Medium
C) High
Step 3: Humidity risk (rainy/coastal)
A) Low
B) Medium
C) High
Step 4: Presentation sensitivity
A) Standard
B) Premium gift
Stack guidance (repeatable rules)
If you choose C for time or heat → full stack: sealed barrier + rigid protection + insulation + buffered coolant + last-mile instruction card
If you choose C for humidity → add condensation control: sealed inner barrier + Seal–Wait–Open card
If presentation is premium → add anti-scuff structure: trays, dividers, corner protection
How do you protect the last mile with cold chain milk chocolate packaging?
Last-mile milk chocolate delivery packaging must survive porches, lockers, missed attempts, and sun exposure. Last mile is where time becomes unpredictable. A package can be “on time” and still sit in heat. This is why you should design for a realistic exposure budget.
Also, the shipper is part of your brand moment. Milk chocolate is often a gift. Structure and cleanliness matter as much as thermal performance.
Last-mile playbook (simple and practical)
| Last-mile scenario | Primary risk | What to add | Your practical gain |
|---|---|---|---|
| Sunny doorstep | heat spike | reflective outer + insulation | fewer softening complaints |
| Cold winter drop | condensation | sealed barrier + warm-up rule | fewer sticky wrappers |
| Locker pickup | long dwell | stronger buffering + snug fit | more predictable arrival |
| Missed attempt | repeated cycles | lane-based pack-out + monitoring sample | fewer “mystery bloom” cases |
Practical tips you can use today
Offer “cool-hour delivery” where possible. Morning beats late afternoon in hot months.
Add a clear label: “Keep out of direct sun.” It reduces porch dwell in practice.
Design unboxing flow: instruction card first, then product, then coolant layers.
Practical example: A retailer lowered negative reviews by moving the warm-up instruction card to the top layer.
How to validate cold chain milk chocolate packaging before scaling?
Validation turns cold chain milk chocolate packaging from “trial and error” into a repeatable system. You do not need a lab to start. You need a consistent method that matches your lanes. Then you change one variable at a time.
A practical validation plan has three tests: thermal hold, handling durability, and unboxing quality scoring. This protects your brand because milk chocolate is judged visually.
Simple validation plan (3 tests)
| Test | What you measure | How long | Pass example | Why it matters |
|---|---|---|---|---|
| Thermal hold | stability over route time | route duration | no prolonged warm holds | fewer softening events |
| Handling | scuffs, cracks, corner damage | 30–60 min sim | no chipped corners | protects premium look |
| Unboxing audit | gloss, smell, wrapper condition | 5–10 min | meets brand standard | reduces “looks old” claims |
10-day lane test you can run
Pick two lanes: one easy, one risky.
Lock one pack-out version (do not change multiple variables).
Run 10 shipments across different pickup times.
Capture temperature sample data (for a subset) and consistent photos.
Adjust one variable and repeat until performance is repeatable.
Self-assessment: are you ready to scale?
Give yourself 1 point for each “Yes”:
You have 2–3 standard pack-outs mapped to route risk.
Your inner barrier sealing has a visual seal check.
Your packaging includes anti-movement structure (trays/dividers).
You use Seal–Wait–Open instructions for customers.
You test in hot and cold seasons at least twice a year.
You track complaints by type: soft, scuffed, dull, odor, broken.
Score guidance:
0–2: start with sealing + structure + one lane test
3–4: add seasonal validation and clearer customer instructions
5–6: you are ready to scale and optimize cost
How do you reduce cost and waste without increasing risk?
Cost reduction in cold chain milk chocolate packaging works best when you reduce waste, not protection. The most expensive item is not the shipper. It is the reship, refund, and brand damage. Use “cost per successful delivery” as your metric.
Lane-based pack-outs are a major lever. Many teams overpack every order because they do not trust their lanes. Testing creates trust, then you can right-size.
| Cost lever | What you change | Risk if done wrong | Safer approach | Practical gain |
|---|---|---|---|---|
| Right-size the box | smaller shipper | crushing | keep rigid base | lower DIM costs |
| Lane-based pack-outs | fewer “one size fits all” | wrong assignment | simple lane chart | less overpack |
| Reusable components | inserts/totes | hygiene issues | clean-and-return SOP | lower long-term waste |
| Coolant tuning | fewer packs | warm holds | test one-pack changes | lower cost + less condensation |
Practical tips you can use today
Measure pack-out time. Slow pack-out increases warm staging exposure.
Keep the inner barrier and structure. Cut cost by right-sizing first.
Use checklists and photos. Human consistency is a hidden cost saver.
2025 trends in cold chain milk chocolate packaging
In 2025, cold chain milk chocolate packaging is moving toward lane-specific standards, simpler workflows, and better moisture control. Brands are reducing one-size-fits-all boxes and creating seasonal versions that match real ambient patterns. Sustainability expectations are rising too, so right-sizing and reuse programs are gaining momentum.
Latest progress snapshot
Modular protection: swappable trays, corner guards, and inserts
Smarter buffering: PCM packs for chocolate shipping used more on long lanes
Better moisture control: sealed inner barriers plus unboxing guidance
Cleaner operations: fewer variations, more repeatable SOPs
Market insight: Customers accept packaging changes. They do not accept dull, scuffed, or softened chocolate.
Frequently asked questions
Q1: What is the best milk chocolate cold chain temperature range for shipping?
Many teams aim for stable, moderately cool handling and avoid long warm holds above ~20–22°C. Stability matters most.
Q2: Why does bloom appear even if the chocolate never fully melts?
Bloom often follows temperature cycling. A warm event plus later cooling can trigger visible haze.
Q3: Do I always need coolant in cold chain milk chocolate packaging?
Not always. Short, low-risk lanes may rely on insulation and fast delivery. Hot or long lanes usually need buffering.
Q4: Can cold packs damage milk chocolate?
Yes, if they touch the product. Direct contact can create cold spots and condensation marks. Use spacers.
Q5: Why does my shipper arrive damp in winter?
It is often condensation during warm-up. Use a sealed inner barrier and Seal–Wait–Open instructions.
Q6: What is the fastest improvement for last-mile milk chocolate delivery packaging?
Right-size the shipper, add a sealed barrier, and put the warm-up instruction card on top.
Summary and recommendations
Cold chain milk chocolate packaging succeeds when it controls heat, humidity, movement, and odors at the same time. Start with a sealed inner barrier, add structure to stop scuffs, then choose insulation and coolant based on lane risk. Use Seal–Wait–Open to prevent condensation at delivery and unboxing. Validate with a simple lane test so your pack-outs become repeatable, not improvised.
Your next step (CTA)
Pick your top two lanes and run a 10-shipment validation with one pack-out version. Track unboxing quality, wrapper condition, and any bloom or softening. Then adjust one variable at a time until results are consistent.
About Tempk
At Tempk, we help teams build cold chain workflows that are simple to execute and easy to scale. We focus on repeatable cold chain milk chocolate packaging stacks, lane-based pack-out standards, moisture control steps, and practical validation routines your staff can follow on busy days. Our goal is fewer defects like bloom, softening, and scuffing—without overpacking every order.
Call to Action: Share your transit time, climate risk, and product format (bars, assortments, filled items). We can outline a lane-based cold chain milk chocolate packaging checklist you can implement this month.